Be sure and vote on the “What Do YOU Want to Make” poll going on right now. And just as a head’s up (and because the poll isn’t showing the results like I thought they would), the leading 3 projects right now are the Maxi Dress, the Kid’s Play Tent, and the Purse.
. . . . .
This post was written by my foodie sister Robin, who is now sharing all of her favorite recipes and kitchen tips regularly on the new “Make It and Love It – in the KITCHEN” portion of this blog. Try a few of her recipes…your belly will thank you! -Ashley
Do you have recipe that may take a little work but you keep coming back to it over and over just because it is so irresistibly good? This is one of mine. This one takes a little prep time but, boy oh boy, it is YUM-MY. This is a recipe that I adapted (since I go to work during the day) and gave it a little more oooomph. Even though the recipe looks a little involved, most of the prep can be done the night before, making this a great dish to impress your family or guests the next day.
Pssst. This completely OUTSHINES the rotisserie chicken that you get at your grocery store. Any ol’ day. The meat everywhere, even the breast, comes out moist and delicious. As in, falls right off of those bones. And those potatoes? Oh boy, I have to warn you……..you may see some fork wars going on dueling over those potatoes. They are tender, incredibly flavorful, a bit crisp around some of the edges — mmmmmmmm! Just do yourself one favor in your lifetime and give this recipe a try. You’ll never go back!
Enough chatter…..you have dinner to prepare!
Here are the items you need to gather up for this.
Shopping List – Ingredients
-Chicken-
–Butter Rub-
-Potatoes-
**This recipe does best if you begin the night before, brining the meat and mixing together the butter rub. You might be thinking that this is just your ordinary roasted chicken. But oh, it is nothing but ordinary.
Grab your kosher salt, sugar and 2 quarts of cold water. I used a large deep narrow bowl with a lid so that the chicken could fit and be completely submersed. (But covering your bowl with plastic wrap would work too.)
Mix together the sugar and salt into the water, until it is dissolved. Unwrap your chicken and make sure to remove the giblets if they are packed inside. (Sometimes the giblets minus the neck come in a sack stuffed in the cavity.) Add the chicken to the bowl of brine. Cover and store in the fridge overnight. (Our other sister April swears that an hour is enough…but overnight makes it foolproof.)
Before you hit the sack you can make the butter rub ahead of time so that you have it ready to go when you need it — and then all the flavors will have melded together.
Strip the leaves off the stalks of thyme, like you see below. Leaving the leaves on the smaller little branches.
And give it a good mince as you see here.
Sometimes when a recipe asks for unsalted butter I usually just use the salted kind because that is what I have in the fridge. Here, the reason for the unsalted butter is necessary, since the chicken it brined (which adds plenty of salt).
Mix together the butter, garlic, thyme leaves, Dijon mustard, and black pepper until well blended. Sometimes I use a hand mixer and sometimes I use my hands (yes, they smell like garlic for a bit). The smell of garlic is pretty strong so I put it in a sealed container and store it in the fridge.
Go to bed and have a good night sleep. :)
The next morning (are you awake yet?) drain the brine from the chicken and rinse the chicken well. At this point you will need kitchen sheers, paper towels, and your chicken drained.
Here comes the surgery part. You want to cut out the back bone of the chicken. It is easier to use a pair of kitchen shears for this part because a knife would be pretty hard to cut through all the bones.
Flip the chicken breast side down and find the back bone knob.
Start cutting alongside the backbone all the way to the end of the chicken.
Cut alongside the other side of the backbone so that the entire spinal column of completely off.
Now, pat your chicken dry. This will help give your roast chicken a nice crisp skin and make it easier to distribute the butter rub evenly under and over the skin. (Before touching the chicken, get a good stack of paper towels piled so that you don’t keep touching the whole paper towel roll with your hands and contaminate it with chicken juice.) Pat the outside as well as under the skin.
With the inside facing down, place your hand on the breast and smash your chicken til you hear the rib cage crack to flatten it down. This will help the chicken cook evenly. Grab the chicken leg….
…….and turn the chicken legs in toward the middle like this to help flatten it out.
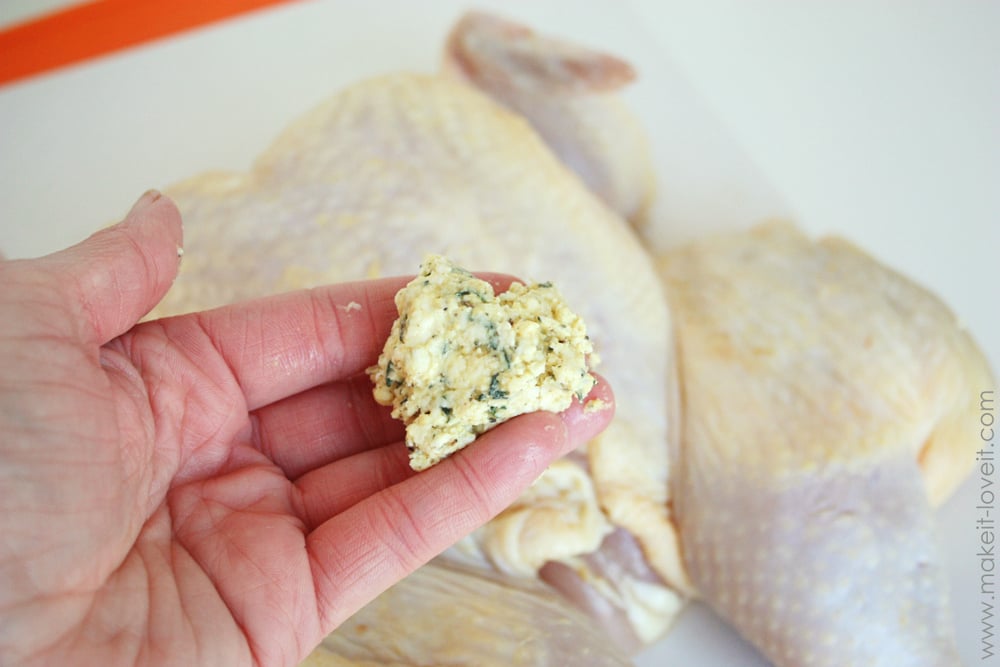
Pull out the butter rub….
……and stuff half of it underneath the skin, distributing it the best you can.
Rub the other half all over the outside of the skin like this.
Set your chicken on your broiler pan.
Now, remember when ovens came with these broiler pans and you stuck it in a cupboard and never used it? This is the first recipe I ever used my oven pan for. (If you don’t have one, they are a little tricky to find at the store. Search into the corners of the kitchen section to find them at Walmart or Target. If you don’t have one and don’t want to go buy one, a cooling rack that is oven safe over a casserole dish would work in a pinch. The importance of this setup will become apparent in just a minute.)
Store the chicken UNCOVERED in the refrigerator for 6-8 hrs to continue to dry out the skin. (This is the part where I leave for work.)
About an hour and 15 minutes before dinner time, you want to pull out the potatoes and peel them. (You don’t have to peel them if you want to keep the skin but you would want to scrub them well to get off all the dirt.)
Thinly slice your potatoes (the thickness depends on preference but I like mine pretty thin). I like to use my food processor. My slicer can be adjusted and I set it to a 2. You can also slice it with a mandoline or do it by hand (it will just take a little longer.)
Line the bottom of your broiler pan with foil like this. This will alleviate the cleanup time and ease of service. Trust me! ;)
Drizzle a bit of olive oil on the foil (1-2 Tbs) to prevent the potatoes from sticking. Dump all of your sliced potatoes over the foil and sprinkle with pepper. You really won’t need to salt the potatoes and may want to hold off the salt until serving for dinner. The juices from the brined chicken will help salt the potatoes. (Are you still with me?)
Place the top broiler pan with the chicken over the potatoes. Don’t forget to tuck in the wings. (In this picture I forgot…you’ll see why you want to tuck in the wings later.)
Place your chicken in a preheated 500 degree Fahrenheit oven. Yeah, that is not a typo, five hundred degrees is correct. The brine prevents the chicken from drying out and the high temperature cooks the chicken faster so you can consume this delicious meal sooner.
Roast for 25 minutes. It will be a speckled brown like this.
Rotate the pan 180 degrees…….
……then roast for another 25 minutes until your meat thermometer reads 160 degrees in the thickest part of the breast.
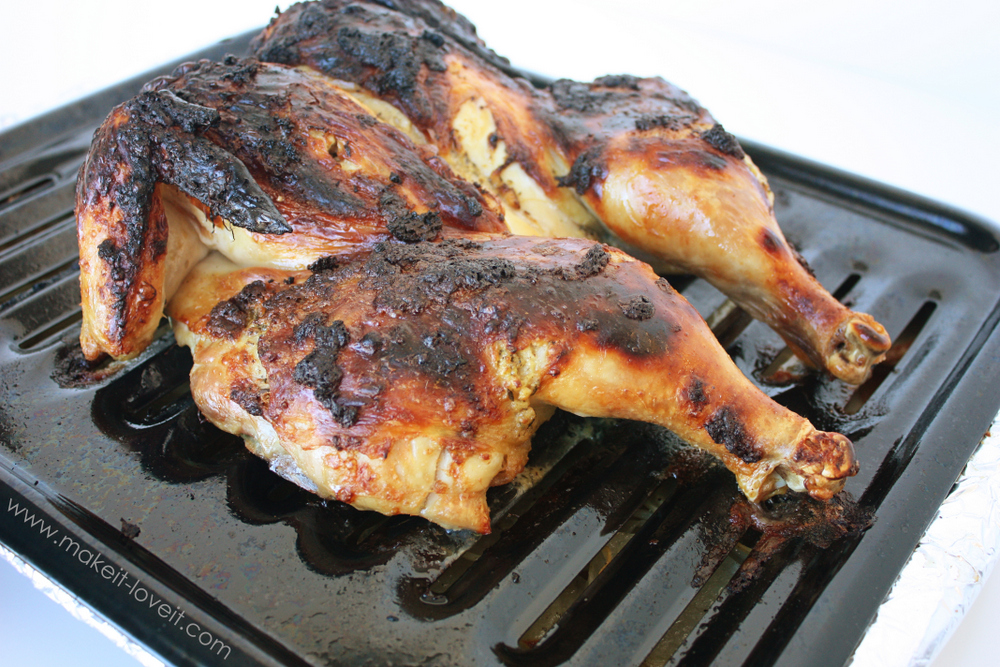
Now it is done. The dark amber colored skin is so crispy and delicious. But see those little wings? They look like carbon sticks. That is why you need to tuck them in under the armpit. (I forgot to tuck them in and they look a little more black than the rest. Not, to worry it is still yummy, tender, and juicy.) I can hardly restrain myself from putting this in my belly right away, but it’s best to let it rest for a few minutes.
Now for the hidden treasure underneath that some think is the best part of this dish. The potatoes have been sitting underneath the chicken soaking up the drippings and cooking in its’ schmaltzy yumminess.
Use a paper towel to sop up some of the excess grease as I am doing here.
And oh my goodness, another side note about these potatoes (because I’m staring at this photo and my mouth is craving them). They are SO good! I can’t describe it. You have to try this recipe at least once just to taste these heavenly potatoes.
Okay, and that’s it! Place the potatoes and chicken on a serving dish and enjoy.
-Robin
[print_this]
Dijon and Thyme Roasted Chicken and Potatoes – Recipe Card
adapted from here
Serves 6
-Chicken-
-Butter Rub-
-Potatoes-
First make the brine for the Chicken. Mix together the Kosher salt, sugar, and water in a deep large bowl until dissolved. Place the chicken (with the neck and giblets removed) in the large bowl, making sure it is completely submerged. Cover and store in the refrigerator overnight, for 8-12 hours.
Mix together the unsalted butter, garlic, thyme, Dijon mustard and pepper. Mix together thoroughly and store in an airtight container.
Drain brine from the chicken and rinse under water. Place the chicken on the counter with the breast side down. Cut through the back on either side of the backbone and discard the spinal column. Pat chicken with paper towels, even under the skin, making sure it is completely dry. Slather half the butter rub all over the outside and the rest underneath the skin until it is spread evenly. Return the chicken to the refrigerator and store uncovered for 6-8 hours.
Preheat oven to 500 degrees (F). Peel or thoroughly wash 2 ½ lbs of potatoes (4-5 medium). Slice the potatoes thin with a food processor or by hand. Line the bottom of a broiler pan with tin foil. Spread olive oil on the foil to reduce sticking. Place the sliced potatoes on the foil and add pepper and salt (optional). Place the upper broiler pan with the chicken, on top of the potatoes. Tuck the wings into the body of the chicken. Place in preheated oven for 25 minutes. Rotate pan 180 degrees and continue to roast for an additional 25 minutes or until meat thermometer reads 160 degrees (F) at the thickest part of the breast. Transfer chicken to a cutting board. Remove the broiler pan rack and soak up excess grease from potatoes using paper towels. Transfer potatoes into a serving dish. Cut Chicken into pieces and serve with potatoes. Enjoy!
[/print_this]

Hi, I’m Ashley—the DIY-enthusiast behind this crazy blog!