Home » DIY Tutorials » DIY Sewing » Gathered Pillow variation
Gathered Pillow variation
April 29, 2010 - By Ashley Johnston 31 Comments
I made some pillows to ship away to a friend, to match her little girl’s blue and green themed room.
The pillows are in the mail and I hope this doesn’t ruin the surprise (Hi Erin!) but I just had to share the fun variation.
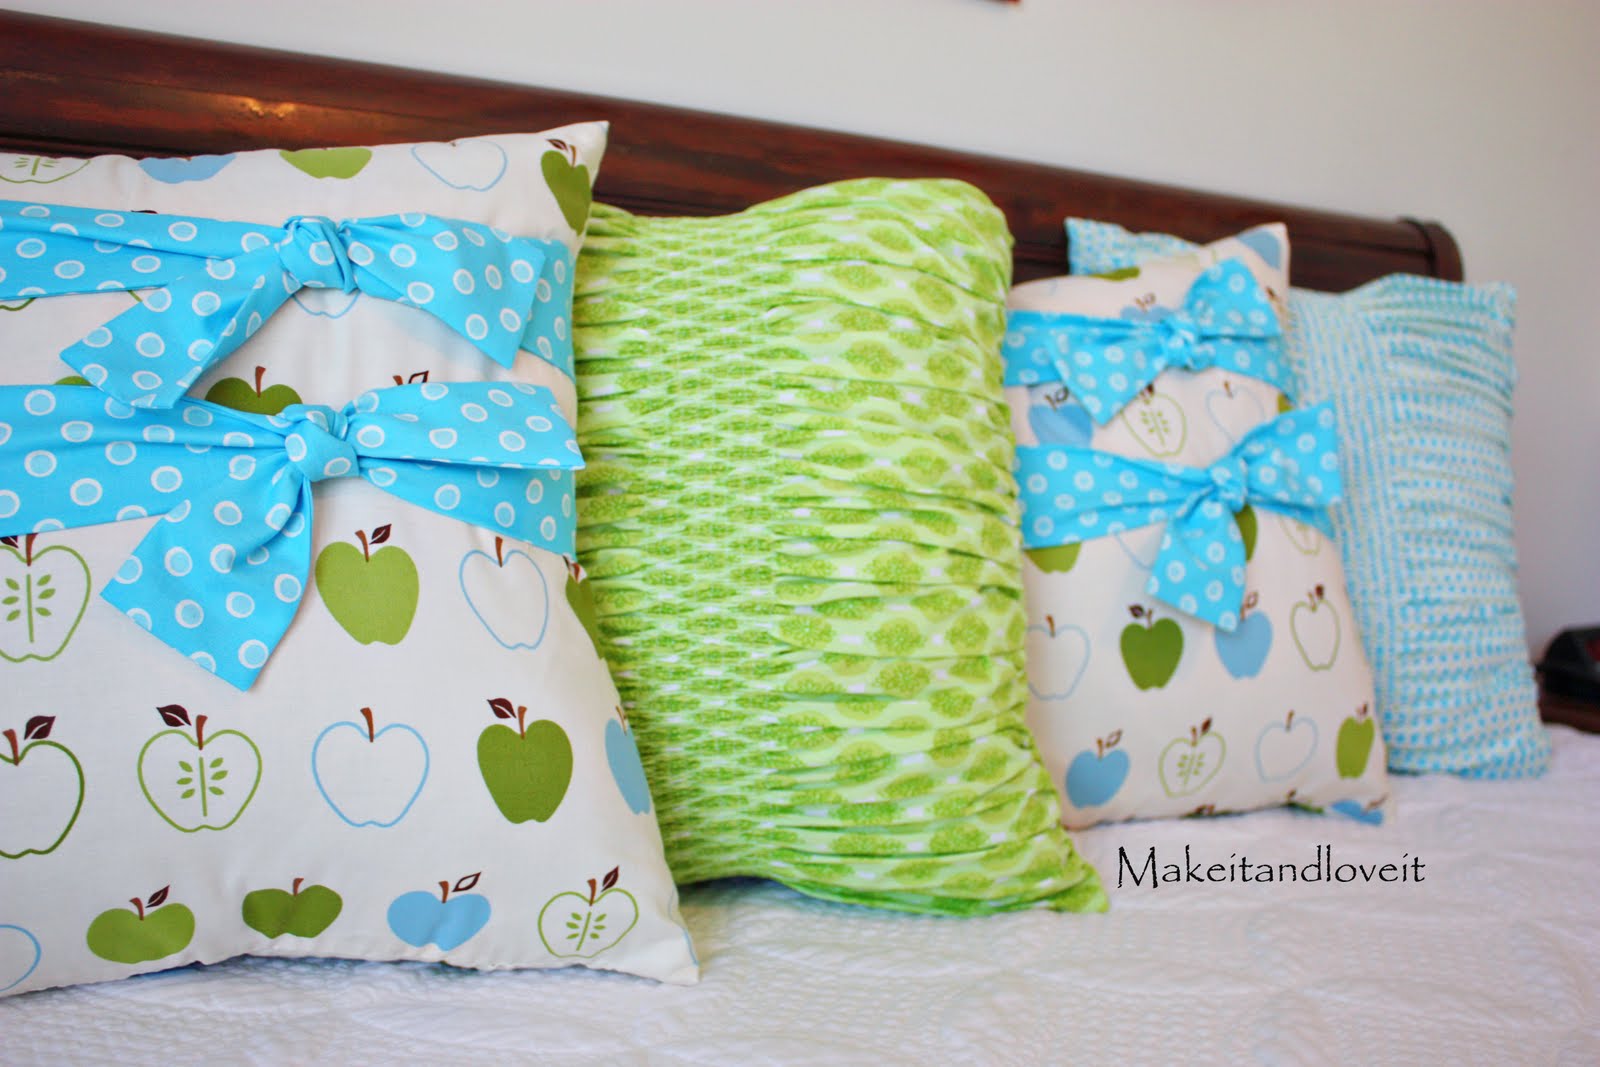
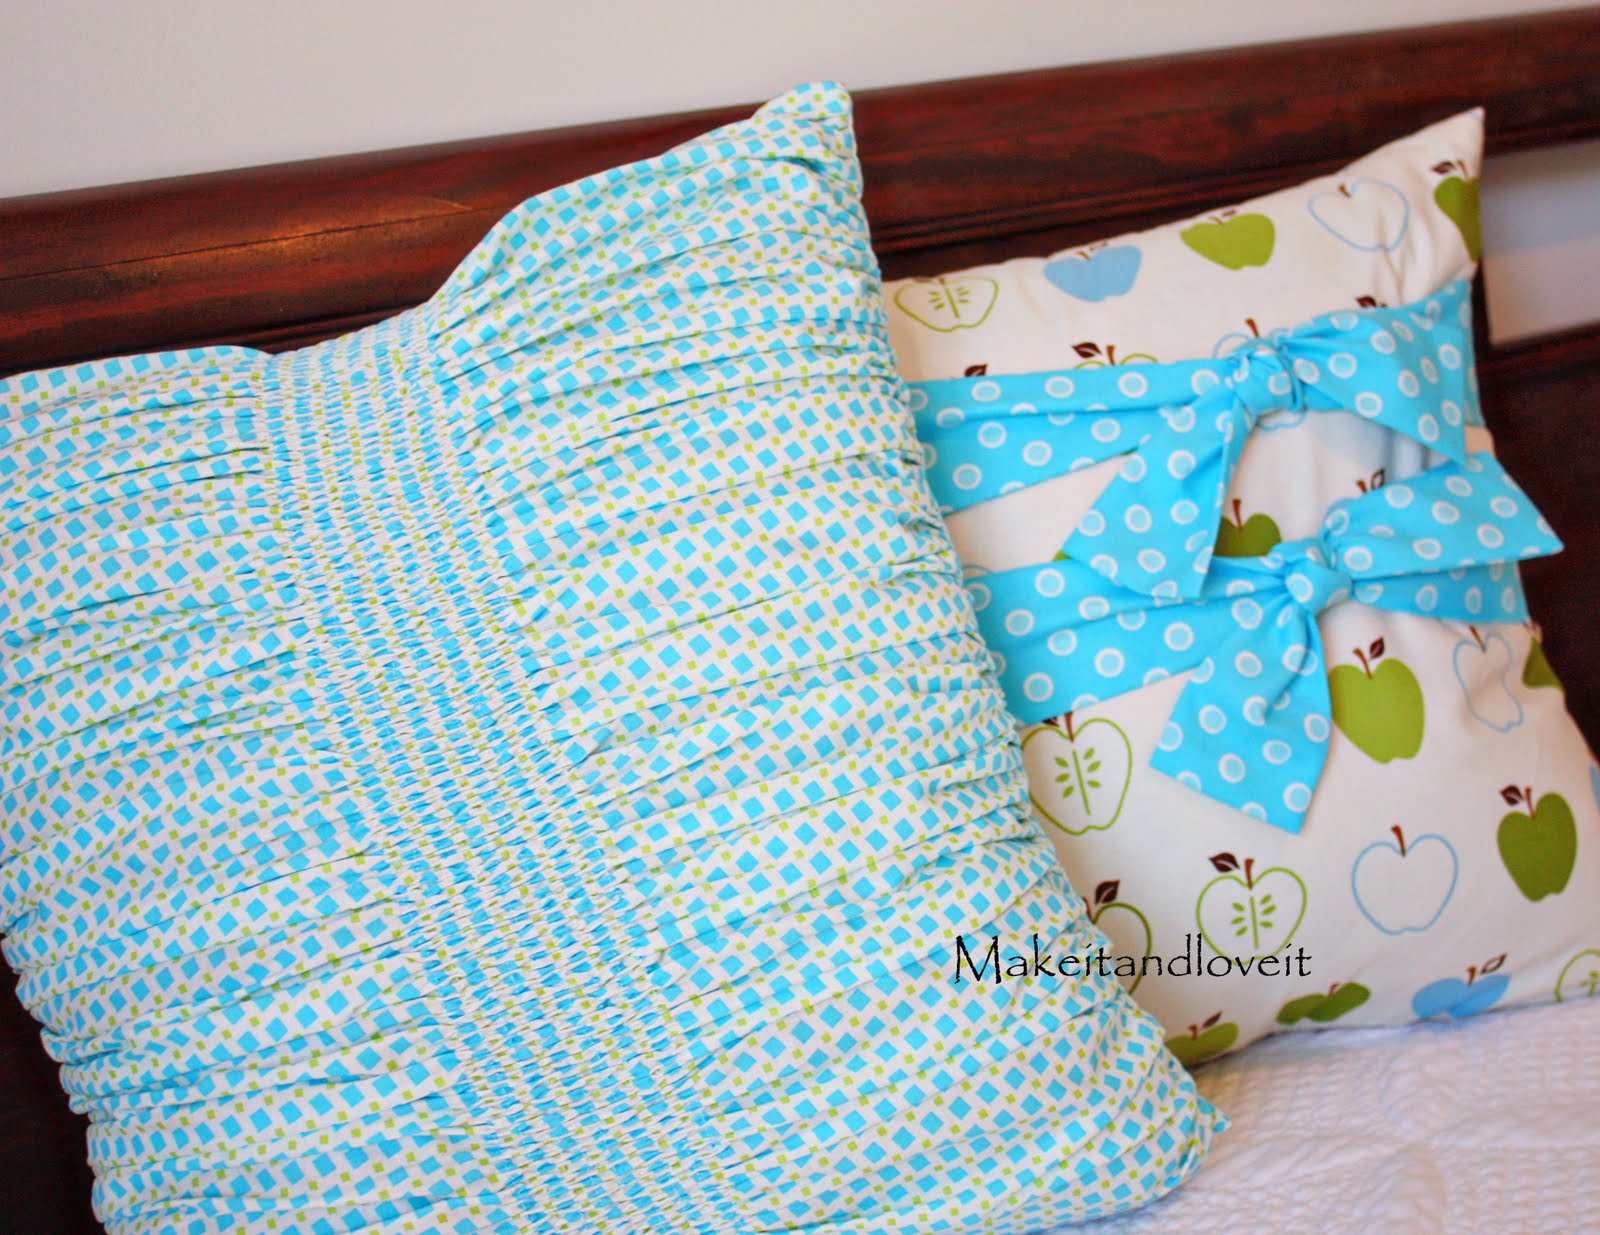
What a fun little group of cozy pillows.
Perfect for that added pop of color.
The
apple pillows are the same as the tie pillows found
here.
The
gathered green and blue pillows are a variation of the gathered pillows found
here.
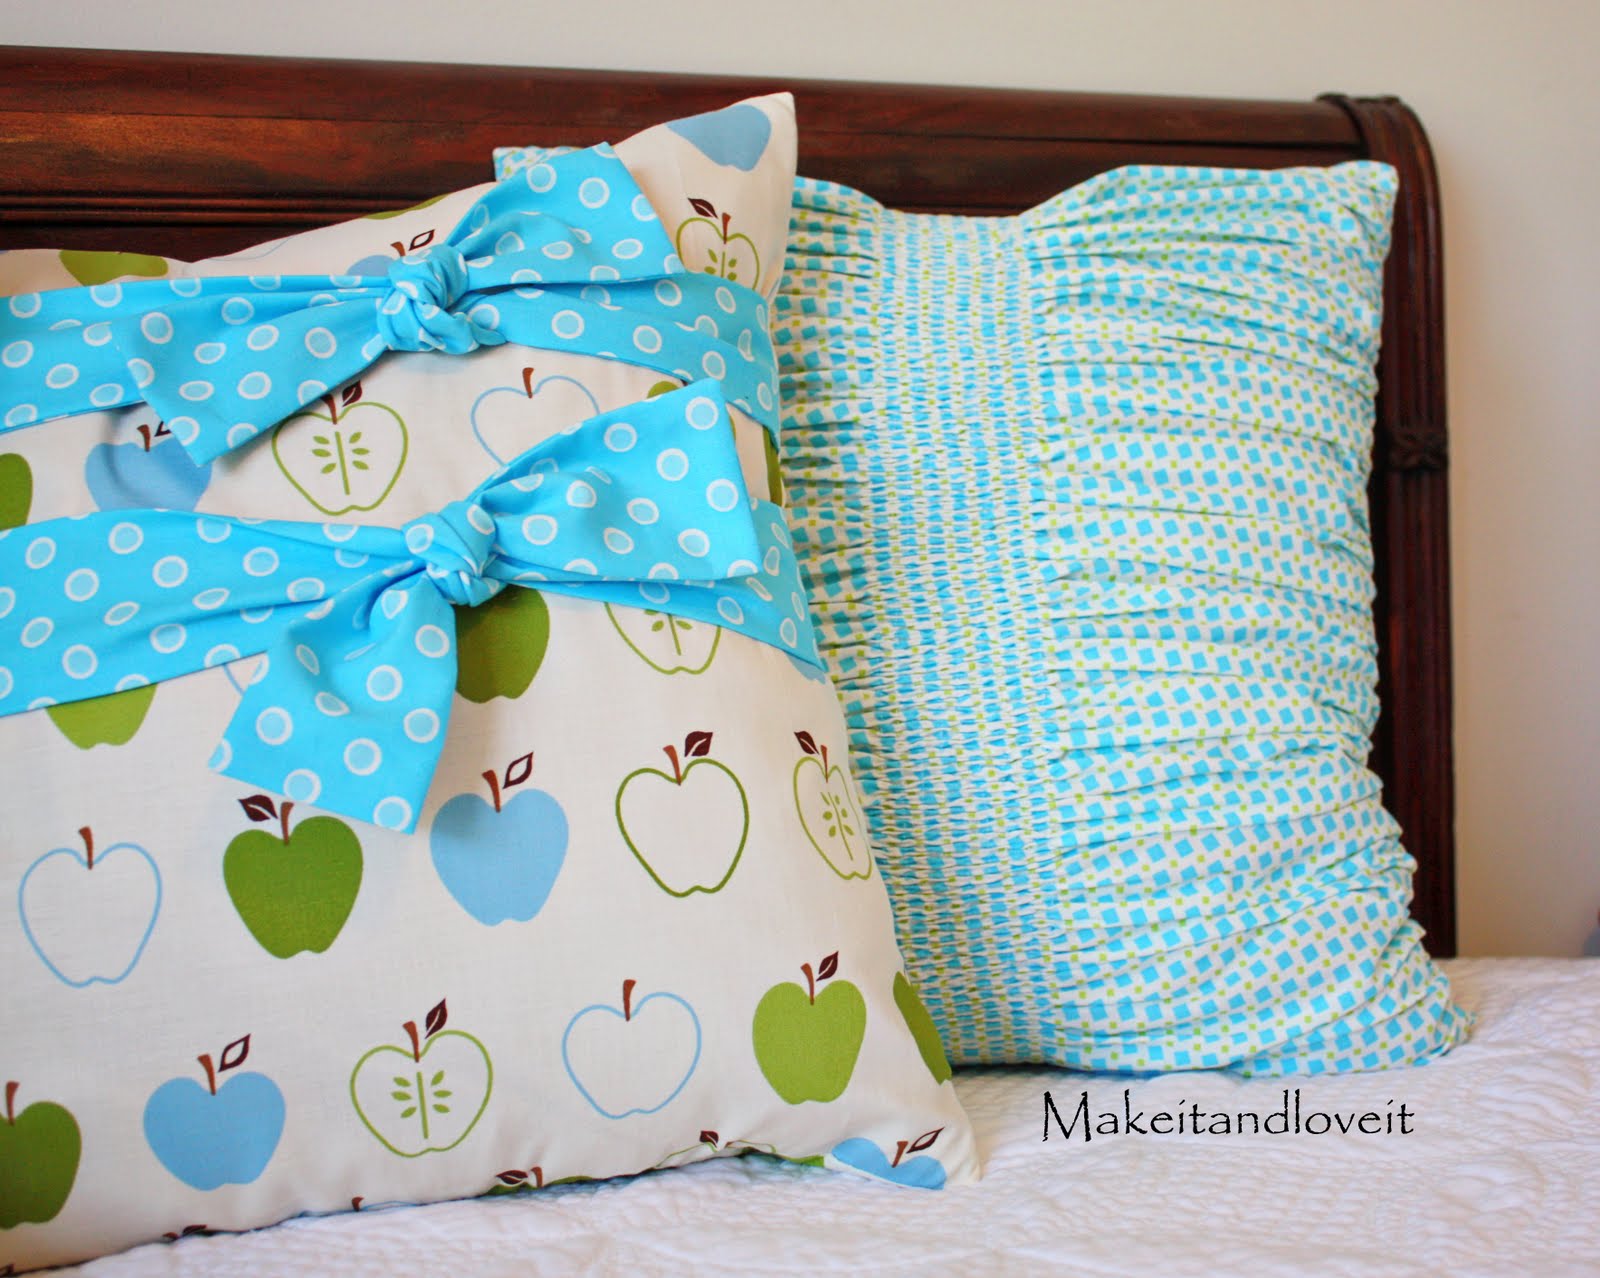
I like the added texture those gathers in the middle gave to the whole pillow.
I did change the gathered pillows a little bit from the tutorial
here. These pillows I found were 18 x 18 inches and so I cut a piece of fabric for the front piece that was 19 x 38 inches and a back piece that was 19 x 19 inches. I didn’t make it into a slip cover either…..I just sewed the two pillow pieces together (after I gathered the front piece) with right sides together, left one edge mostly open, clipped the corners, turned right side out, slid the pillow in and then hand-stitched the opening closed.
The other thing I did a little differently was that I used elastic thread and used the smocking technique like I teach in the Lily skirt pattern or the Maddy Dress pattern. Both are found in my shop
here. (The technique is explained in a lot of detail in the patterns, and gives troubleshooting tips that help if you get stuck.)
However, you can use the same basting-stitch and gather technique, just like the link to my gathered pillow tutorial above.
And with both technique’s, make 9 rows in the center of the front pillow piece that go the long length of the material and are 1/4 inch apart. Then make one basting stitch along both outer edges, 1/2 an inch from each edge. (Don’t use the elastic thread on the outer edge seam, it won’t shrink enough as one lonely little stitch to gather in enough.) Use the basting technique like shown in the above gathered pillow link or this gathering tutorial
here. Pull on your thread ends and gather/shrink down the pillow until it is the same size as your back piece. Then you’re ready to sew them together as explained above.
**Also, before placing your pillow inside, you’ll want to steam the gathers flat a little bit. They just tend to lay a little better after holding the steaming iron over top and applying light pressure.
But the whole technique turned into a lot of fun.
And I’m kind of crazy about those seams and gathers.
So give it a try.
Especially if you just want to try something a little different.
And I hope you girls enjoy their new pillows Erin.