Home » DIY Tutorials » DIY Sewing » Sewing: Clothing » Accessories » Ice Cream Cozy / Soda Can Cozy……tucked into a Gift Tote
Ice Cream Cozy / Soda Can Cozy……tucked into a Gift Tote
November 3, 2010 - By Ashley Johnston 56 Comments
.
Did you notice the winner of the Eletent giveaway? Scroll down or click here. Maybe it was you!
. . . . . . . . . . . . . . . . . . . . . . .
I have a friend that recently had surgery.
Darn surgery……..it sure rocks the schedule.
So to help ease the aches and helplessness, I delivered my favorite medication. Treats.
I know she has her pain medication, a husband to help her load the dishwasher, and 2 kiddos to fetch her a glass of water or her fuzzy slippers when she needs them. But with all of that time on the couch recuperating…….a girl needs her treats, right?
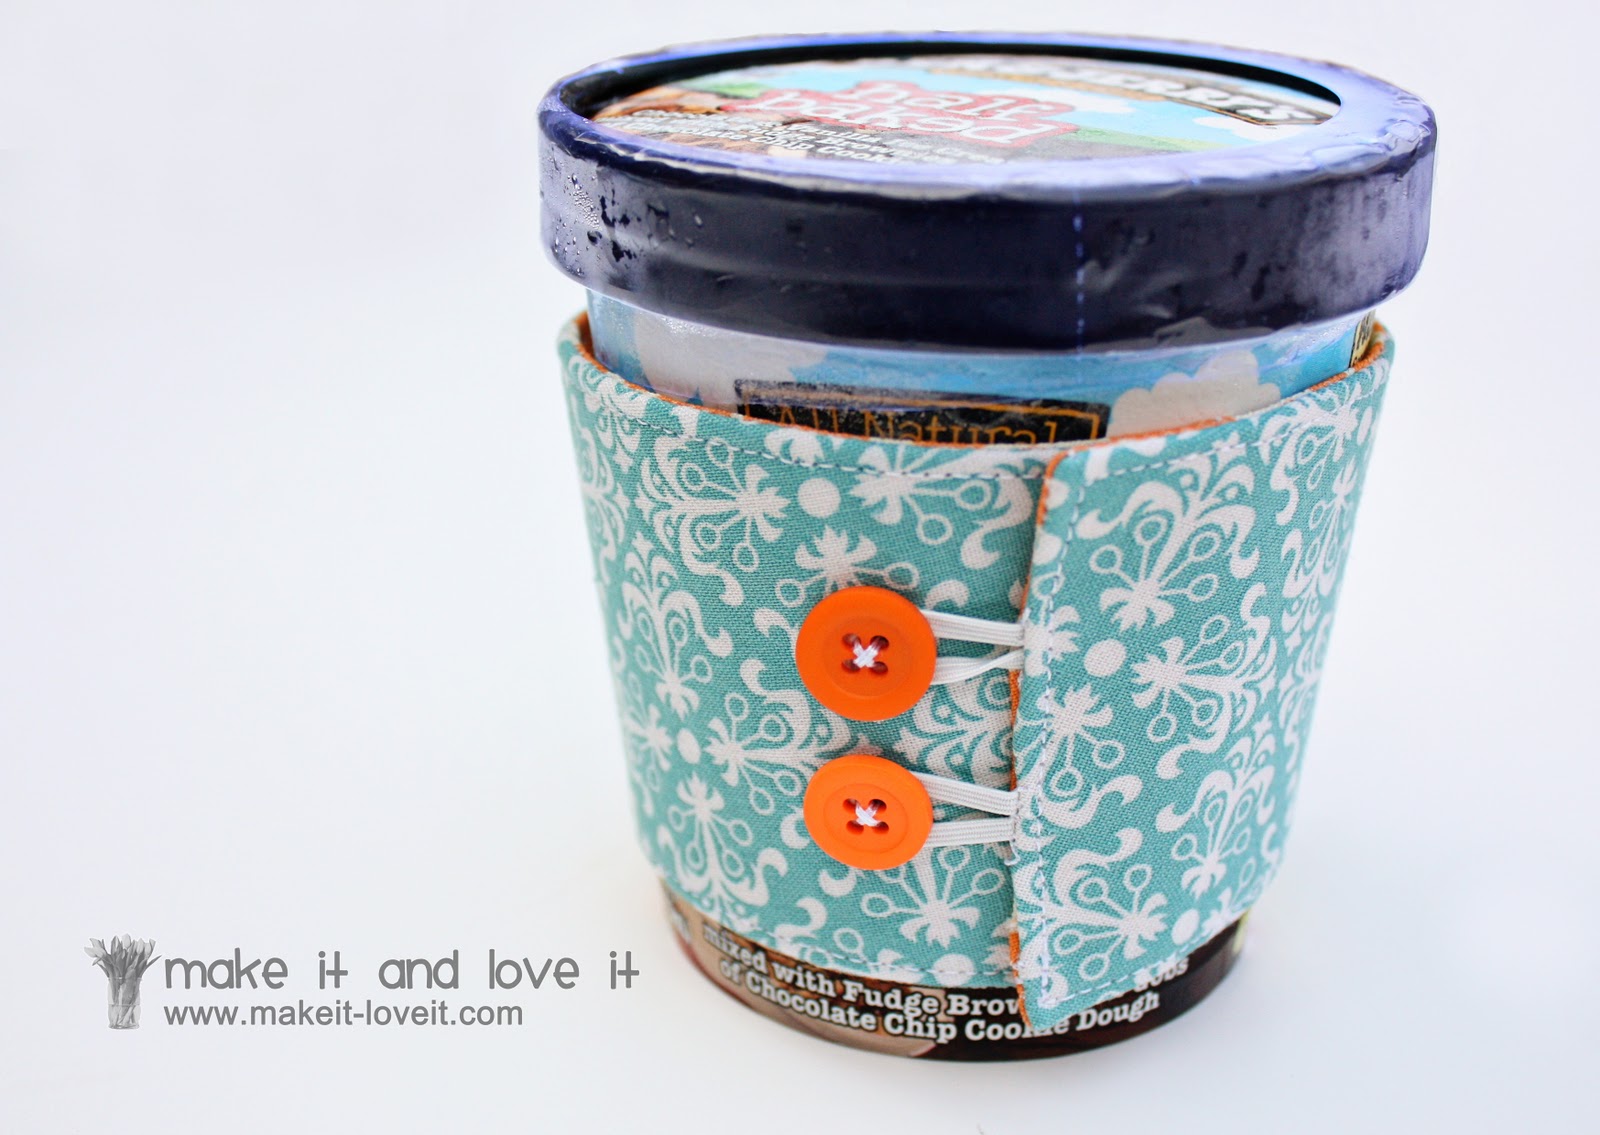
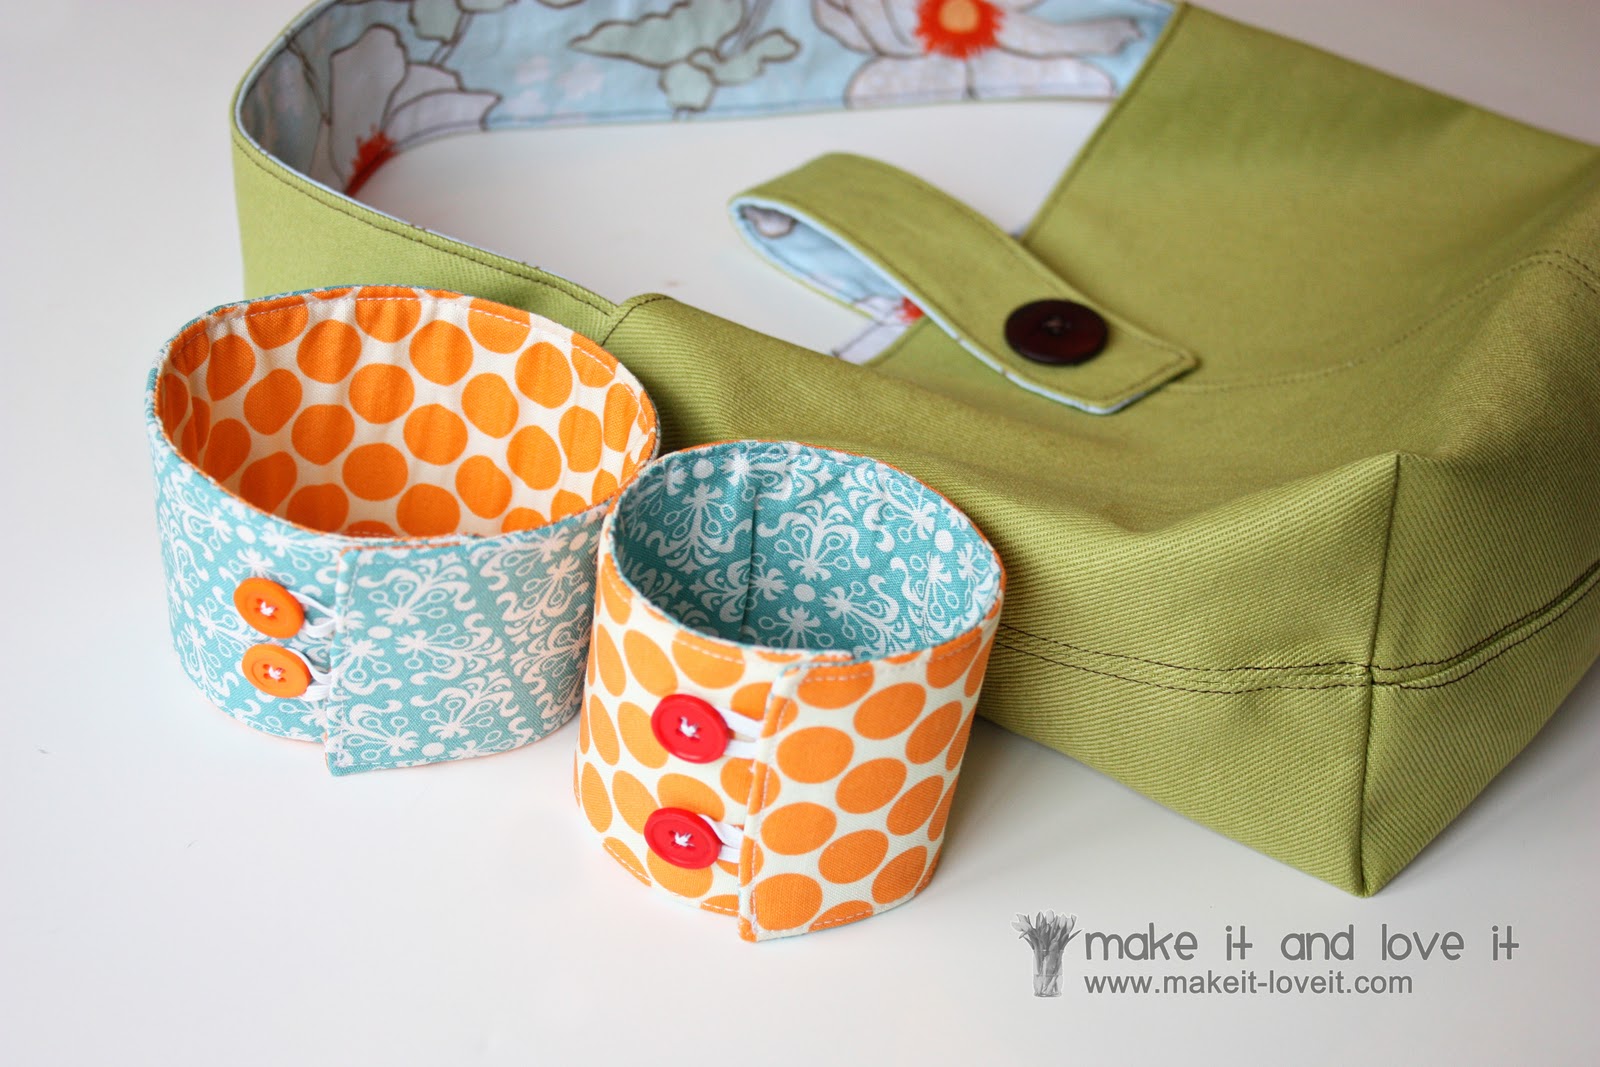
So I made two little cozies (you know, like the fabric coffee cozies that fit around a steaming cup of coffee…) to snuggle up around her favorite drink and a nice frozen pint of Ben and Jerry’s. Mmmmm……
Coffee cozies keep your hands from burning………..
………..these cozies help keep your hands from freezing. Ha.
And for those of us who like our cold treats, this is important. Right?
And everything just happens to taste better with a great little cozy wrapped around it.
Promise.
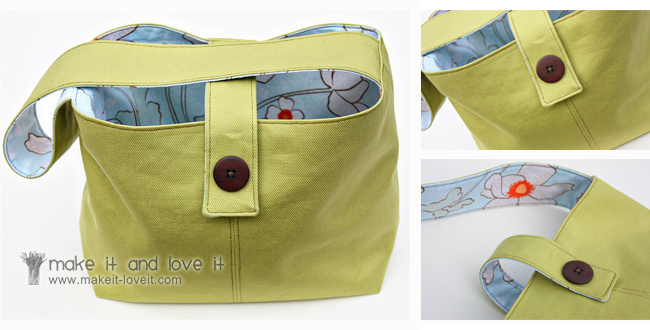
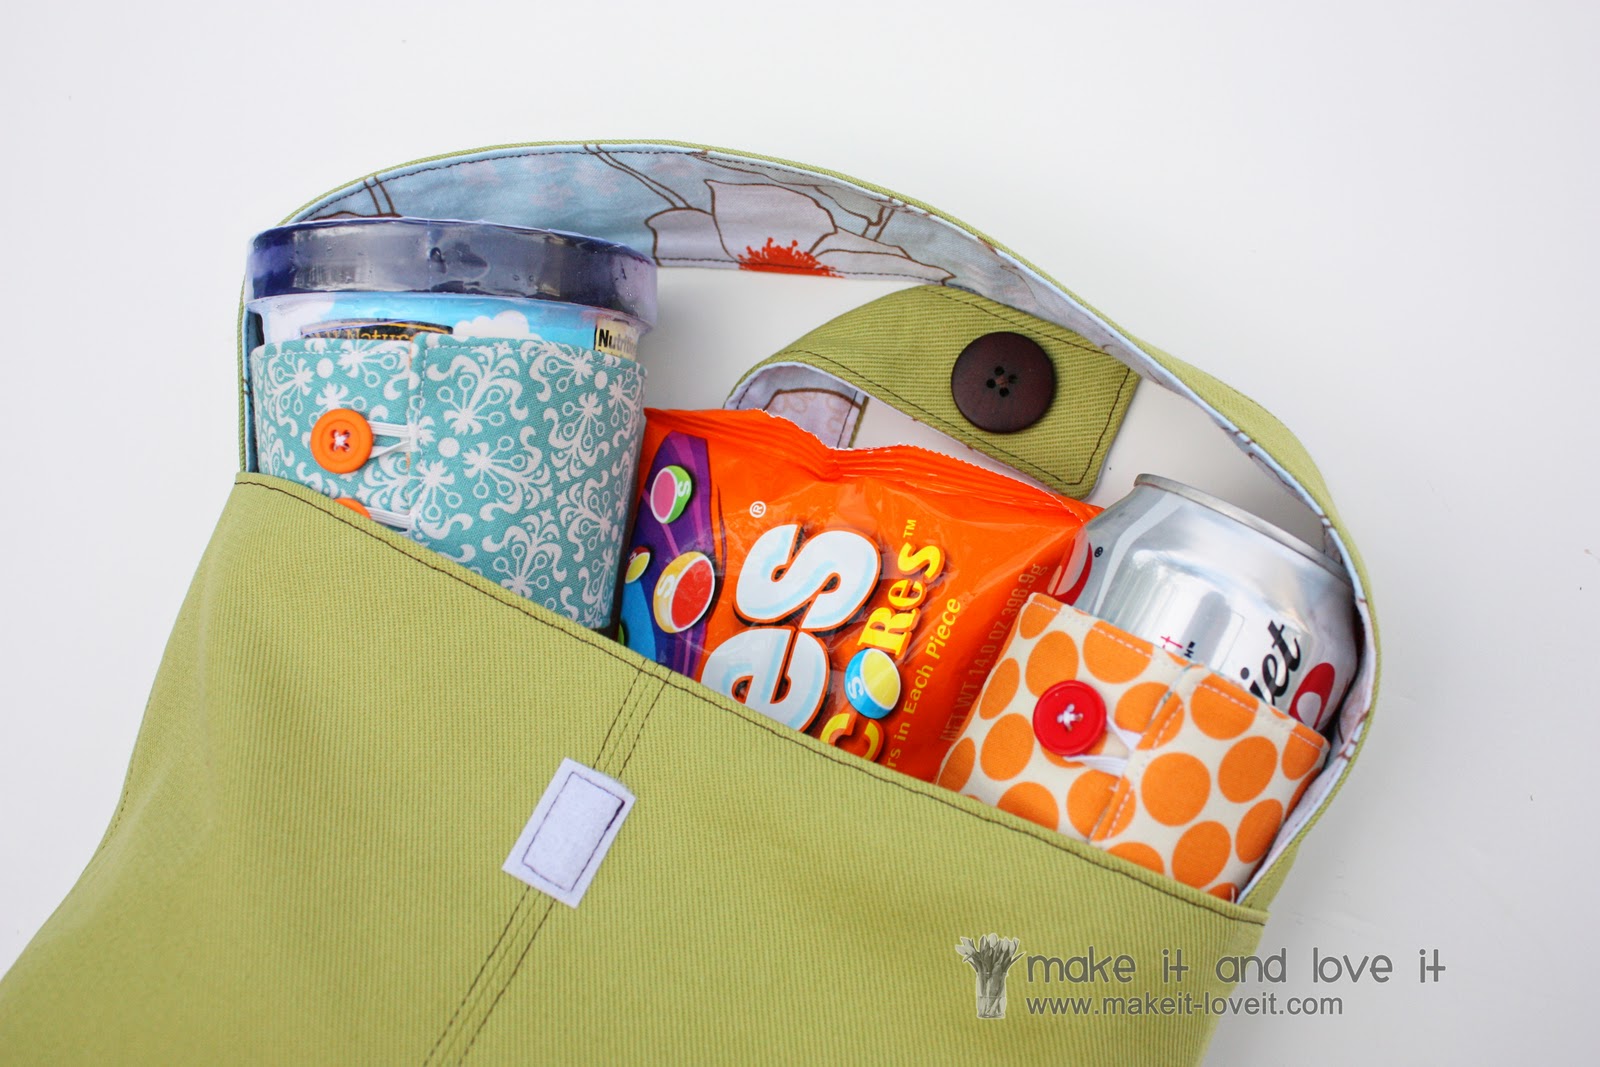
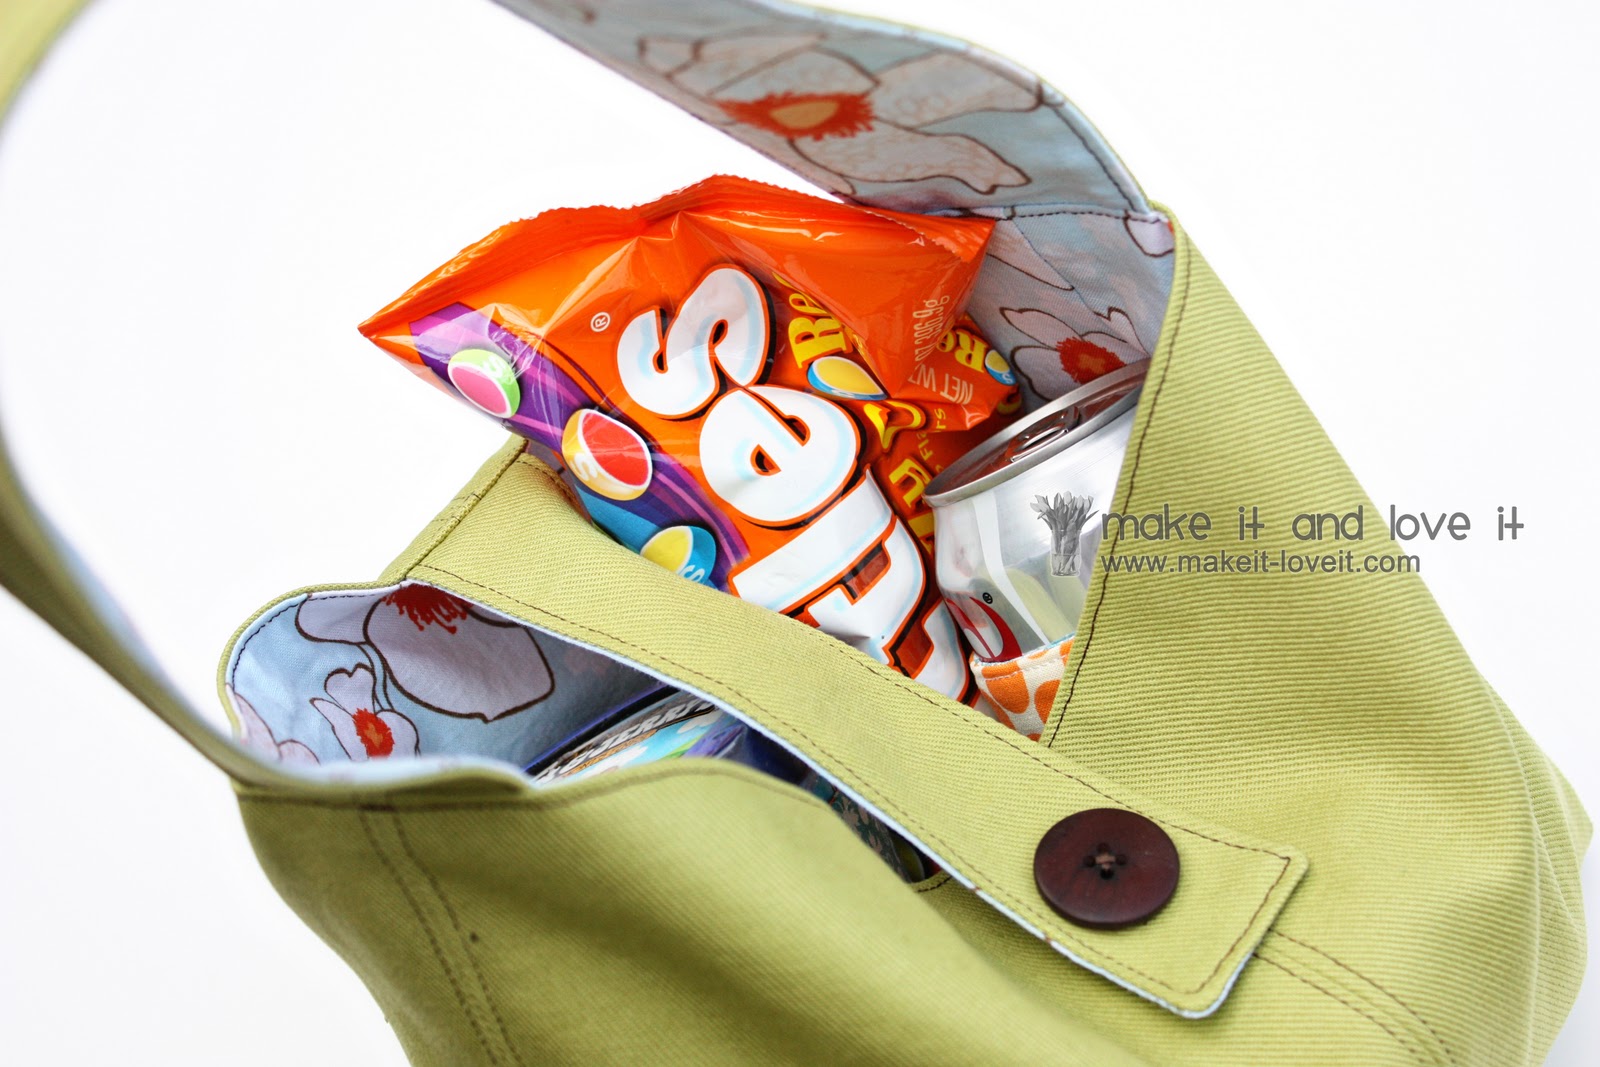
And what better way to deliver your cozies, than in a new little fabric tote.
(And who knows, that friend of yours may find some new purpose for the little bag. Cross your fingers.)
.
Perfect little project to use up scraps too. Go on, start digging through the pile.
Now slide in your cozied-up treats, add even more treats to plump up the tote, and get ready for a sweet delivery.
Hopefully it will brighten someone’s day.
……..and thrill their little taste buds.
My friend’s little run-in with the surgeon sure gave me a great excuse to just sew for fun.
So thanks for all of your hard work under the knife Amber!
And get well soon.
(Remember how my little 2 year old sort of has a crush on you? Well, he misses you.)
Interested in making your own?
Well, here’s how I made mine:
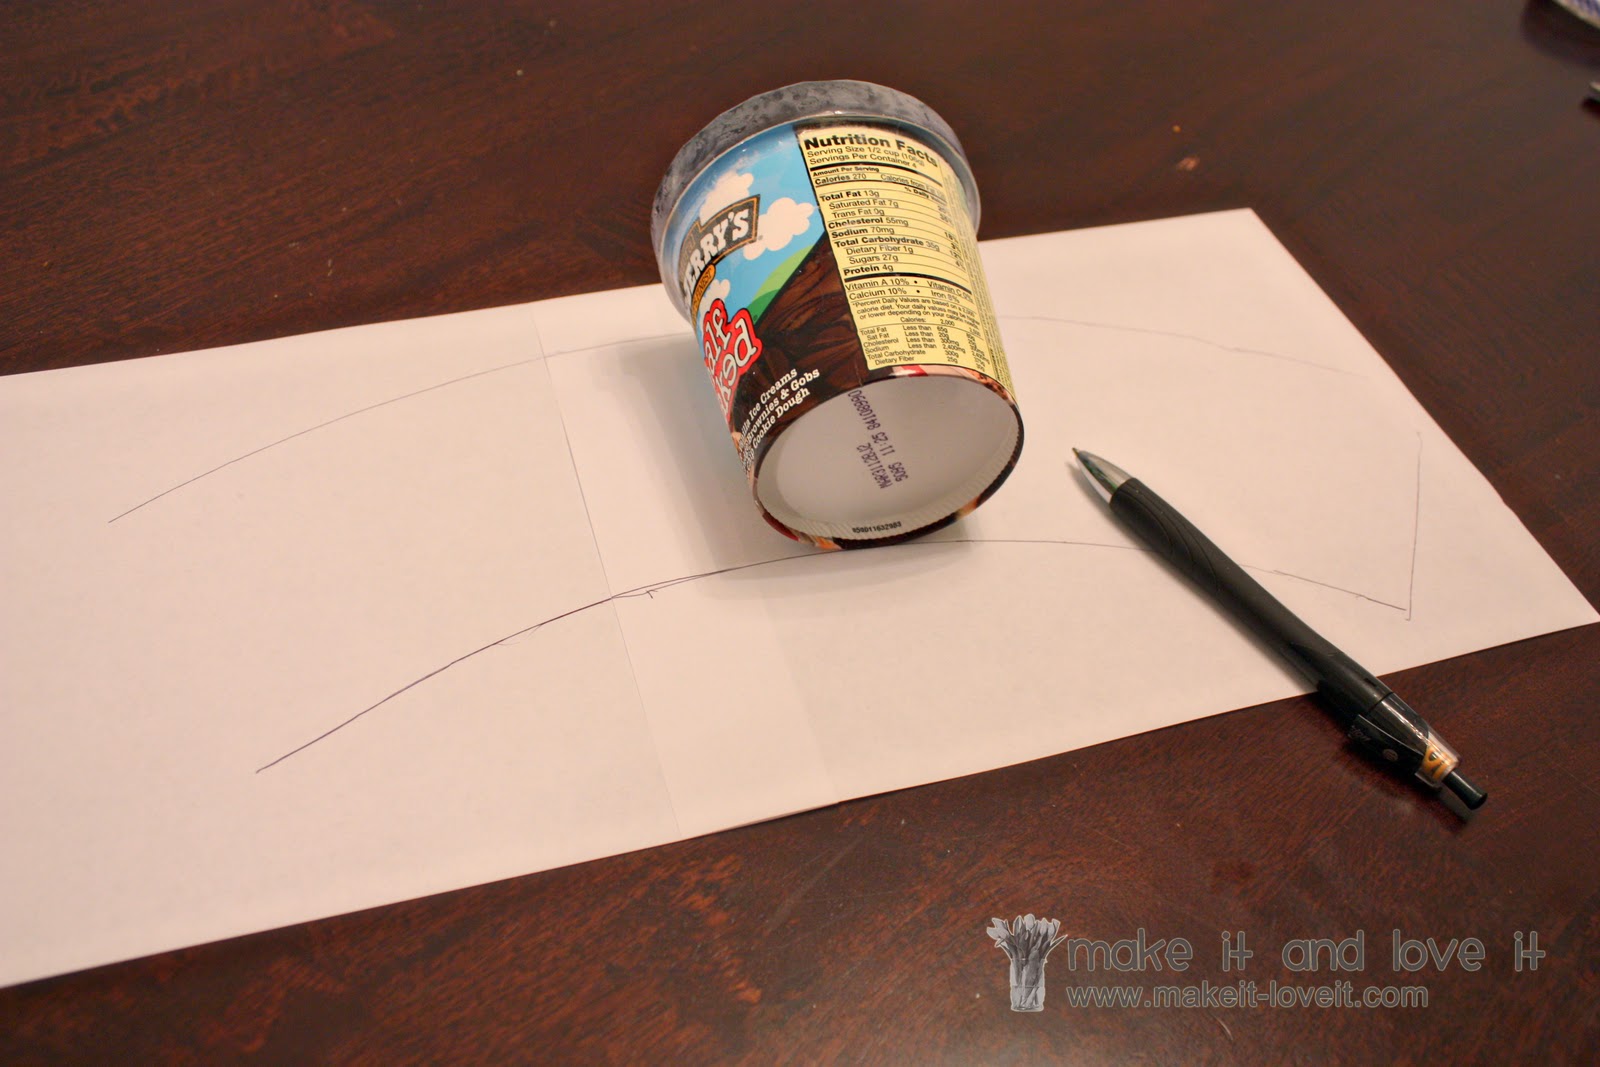
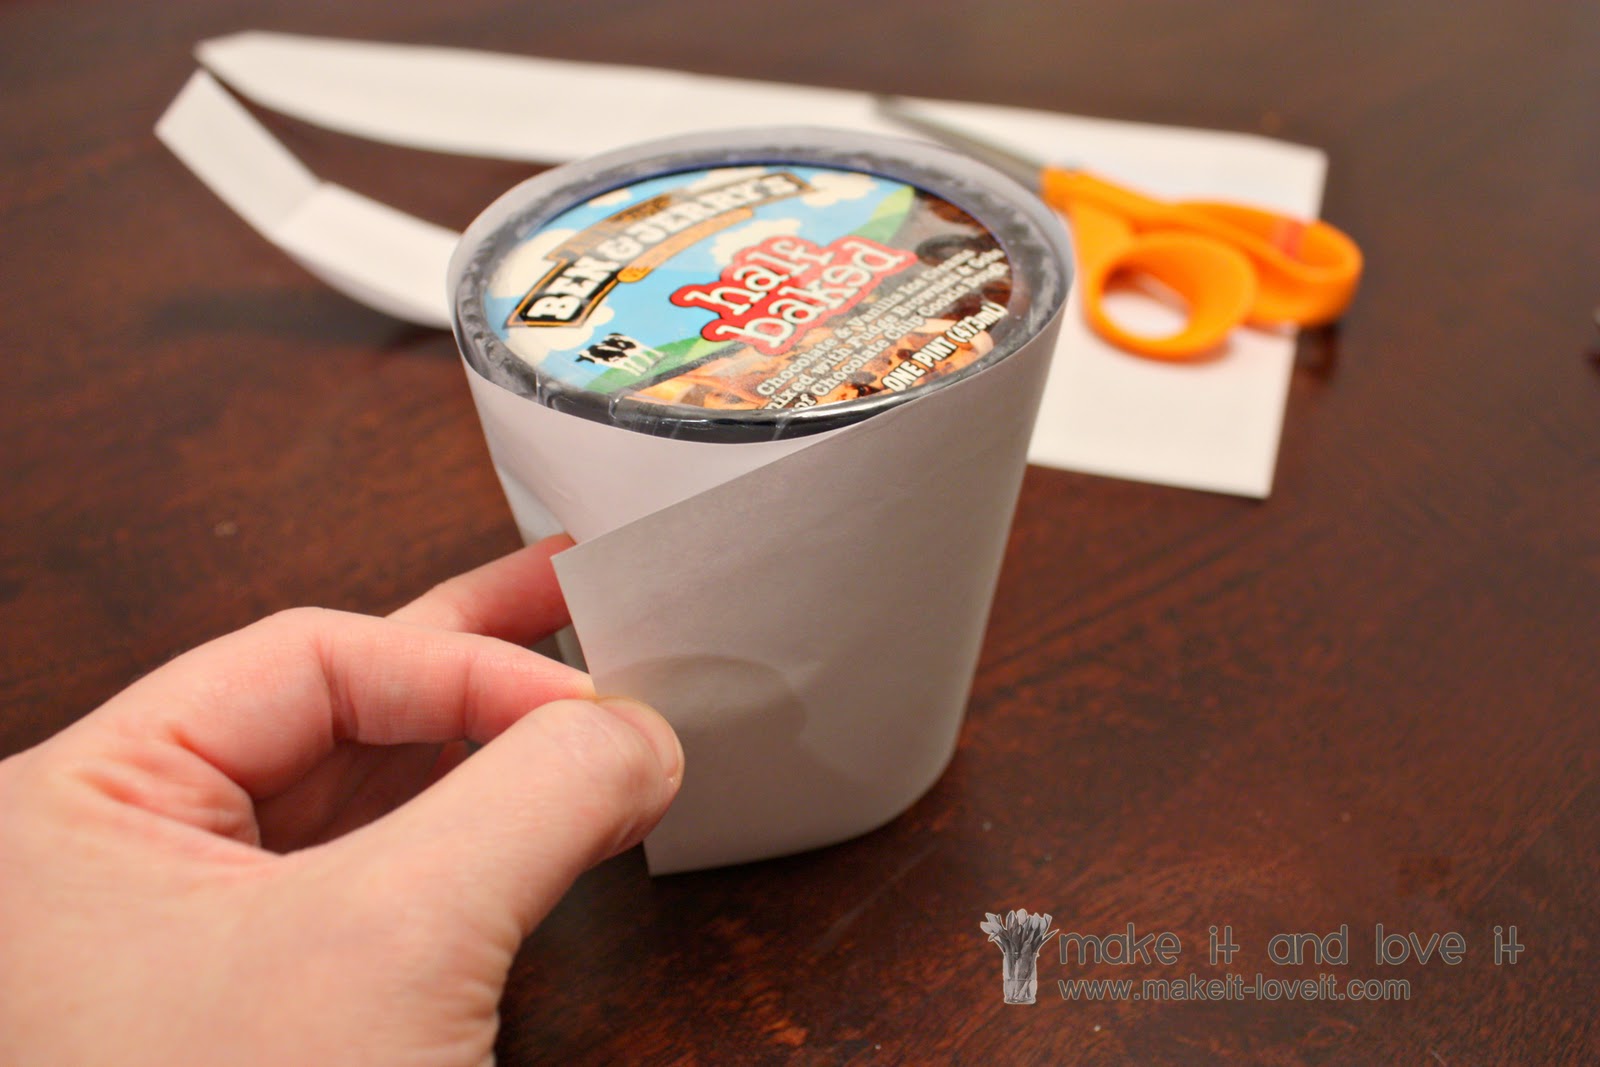
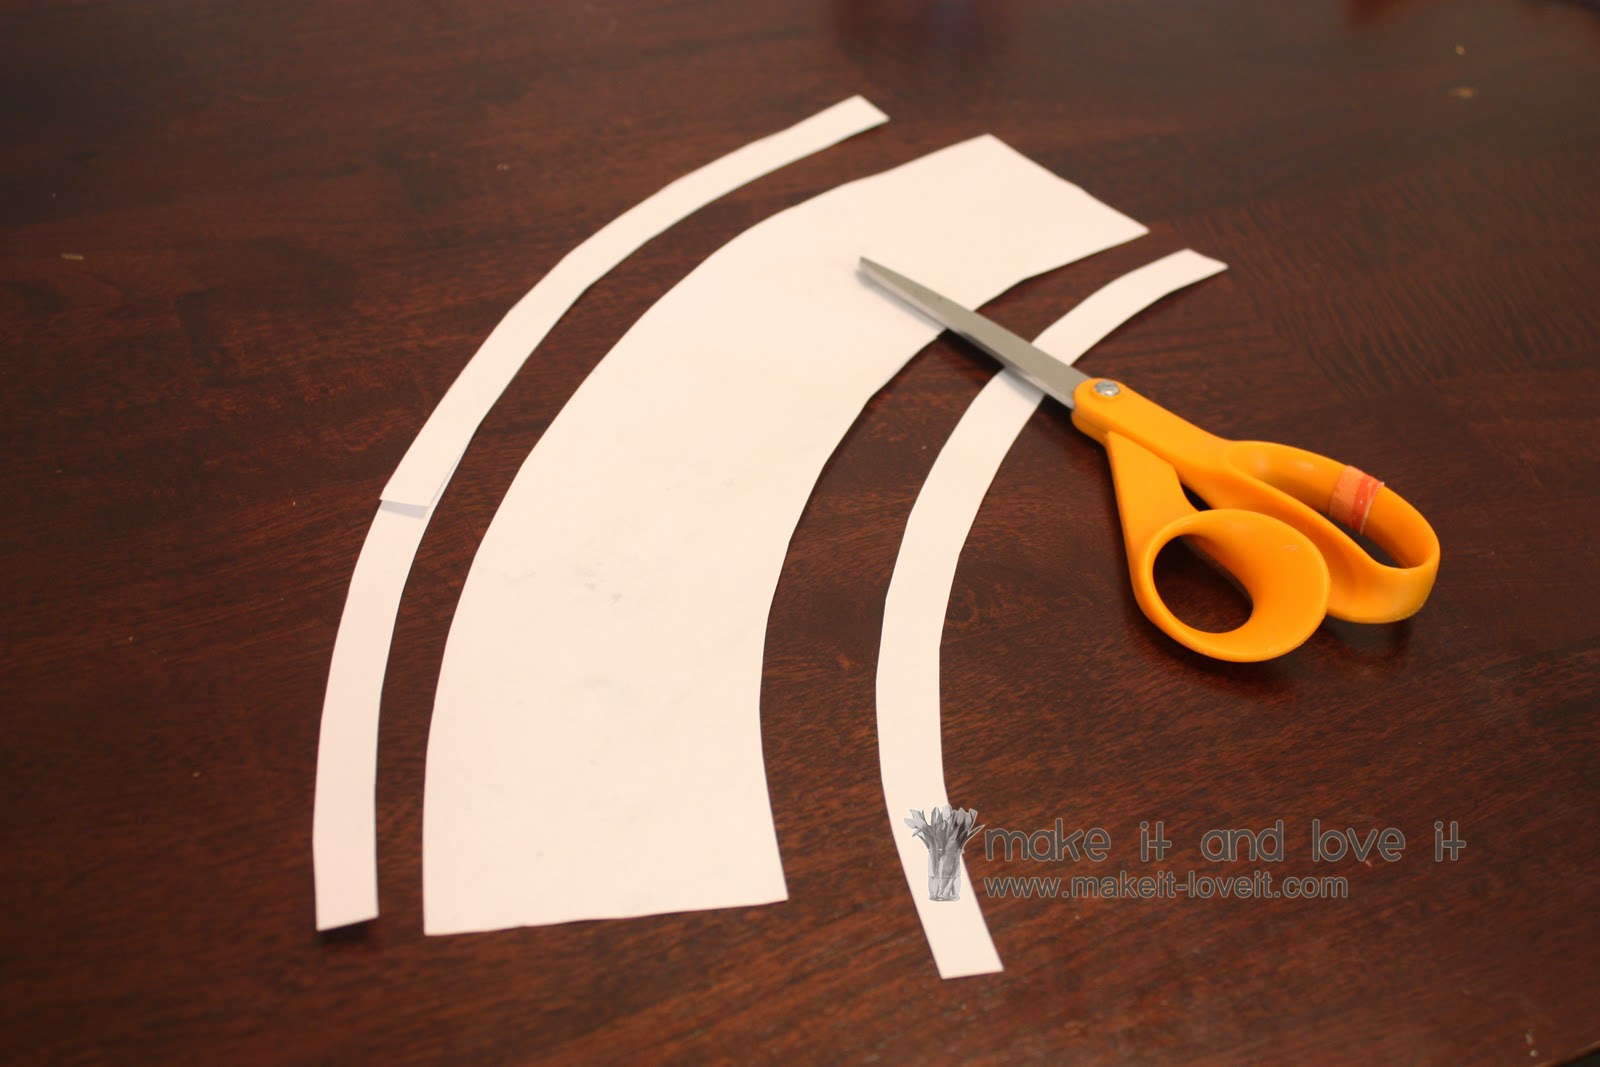
I began by rolling an ice cream pint along some paper, tracing the shape and contour of the container as it rolled. I made sure to trace enough of the shape, so that the paper would wrap all the way around the container.
Then I cut the shape out of the paper and then wrapped it around the container, making sure that it actually fit right around it.
And since the cozy doesn’t need to fit the container from top to bottom, I trimmed off some of the top and bottom of the paper pattern…..leaving enough for a seam allowance later on.
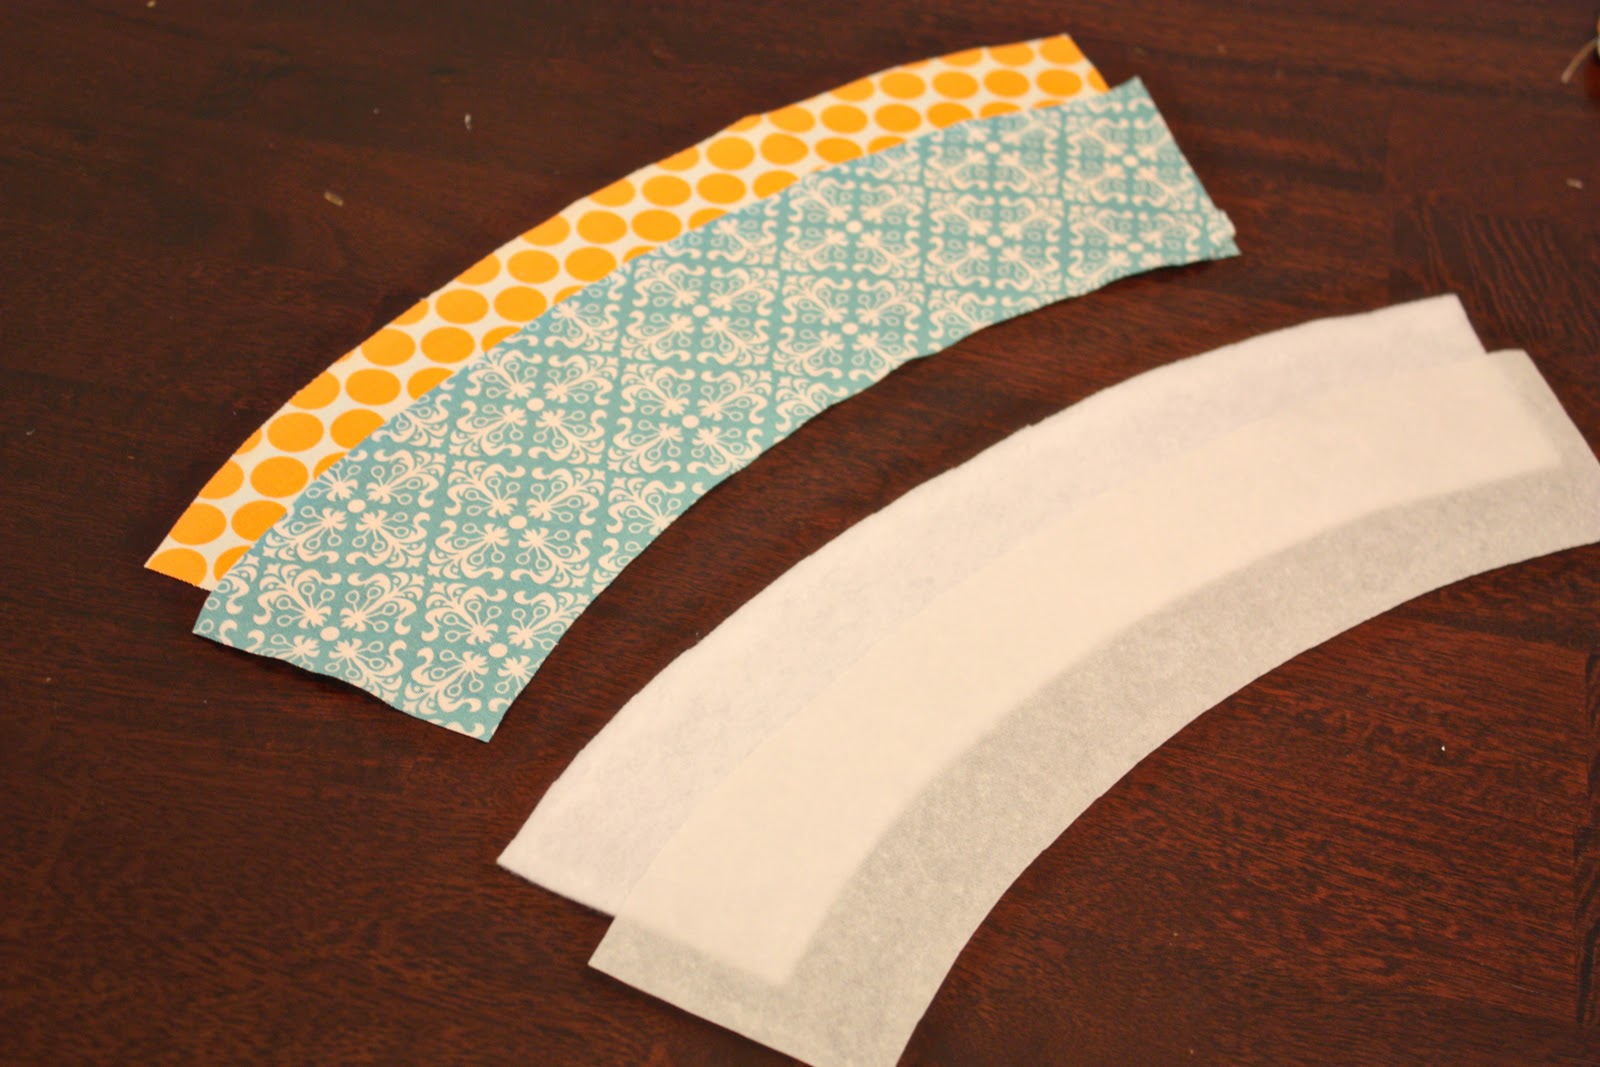
Then I cut out 2 pieces of fabric from that shape, 1 piece of felt, and 1 piece of double sided fusible web.
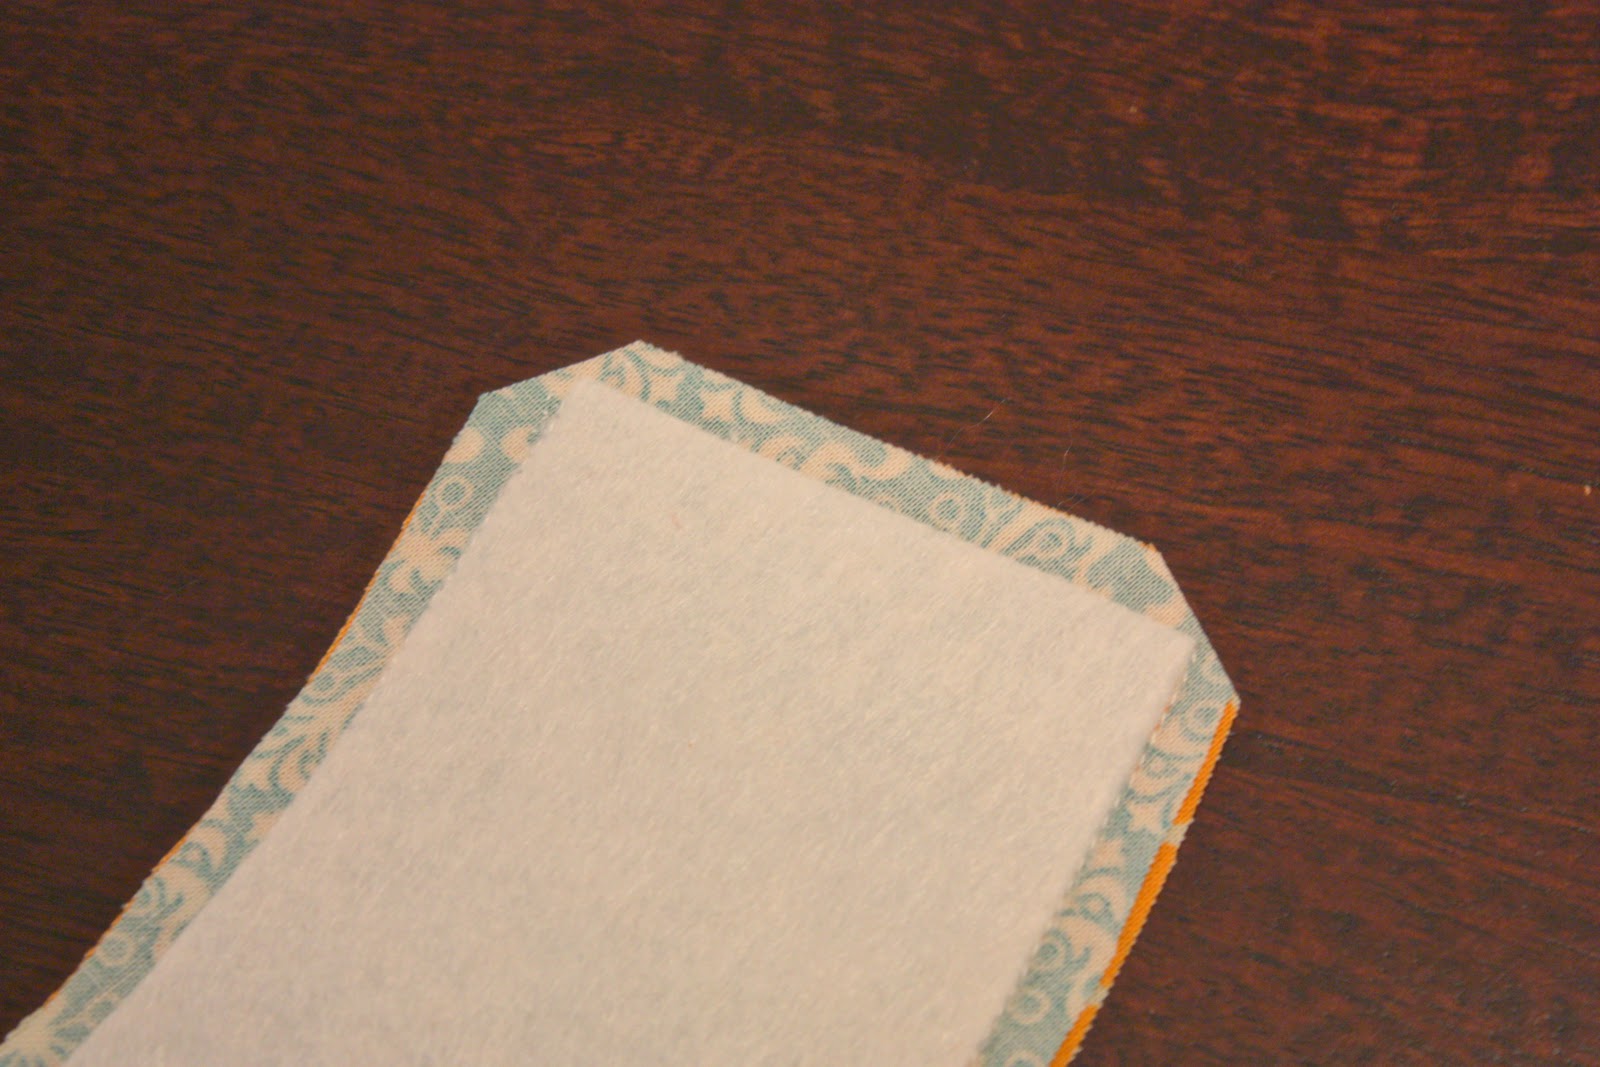
Then I placed the fusible web along the wrong side of the colored fabric that I wanted facing outward on the cozy. Then I placed the felt on top of the web and then ironed those 3 pieces together. Then I placed the other piece of fabric together with the first, with right sides together…….and sewed along the entire shape, leaving one end open.
Then I trimmed off each corner……
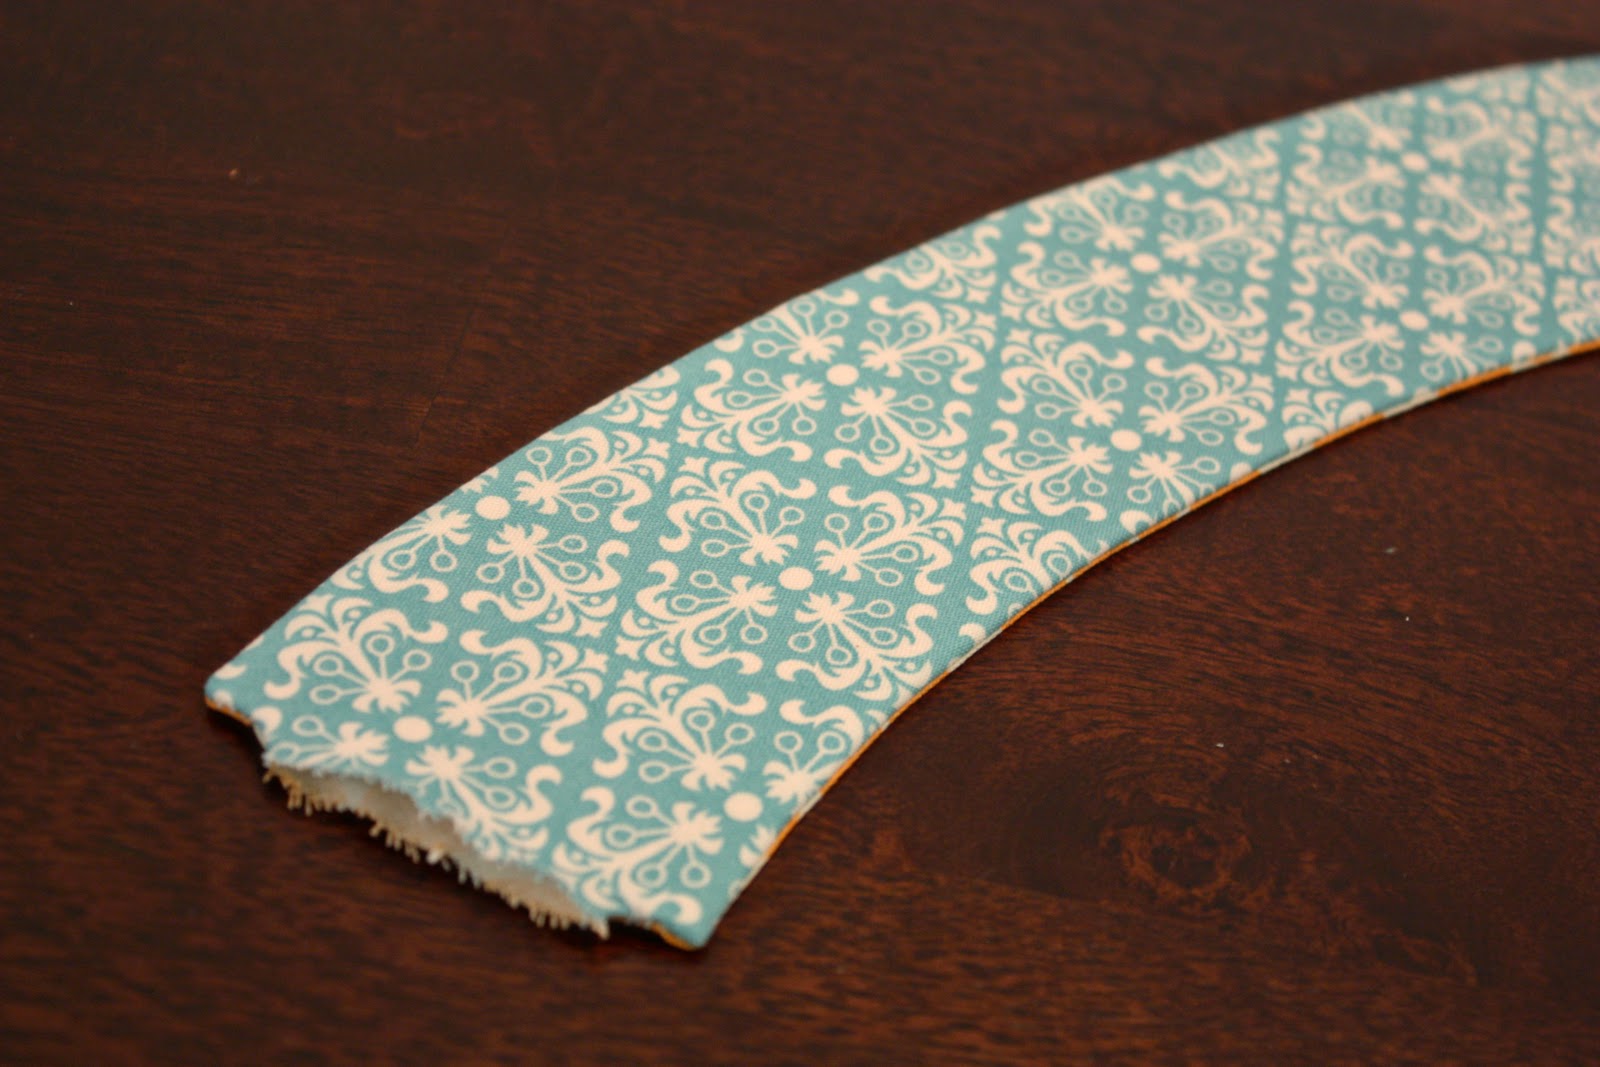
And turned the cozy right side out and ironed it flat.
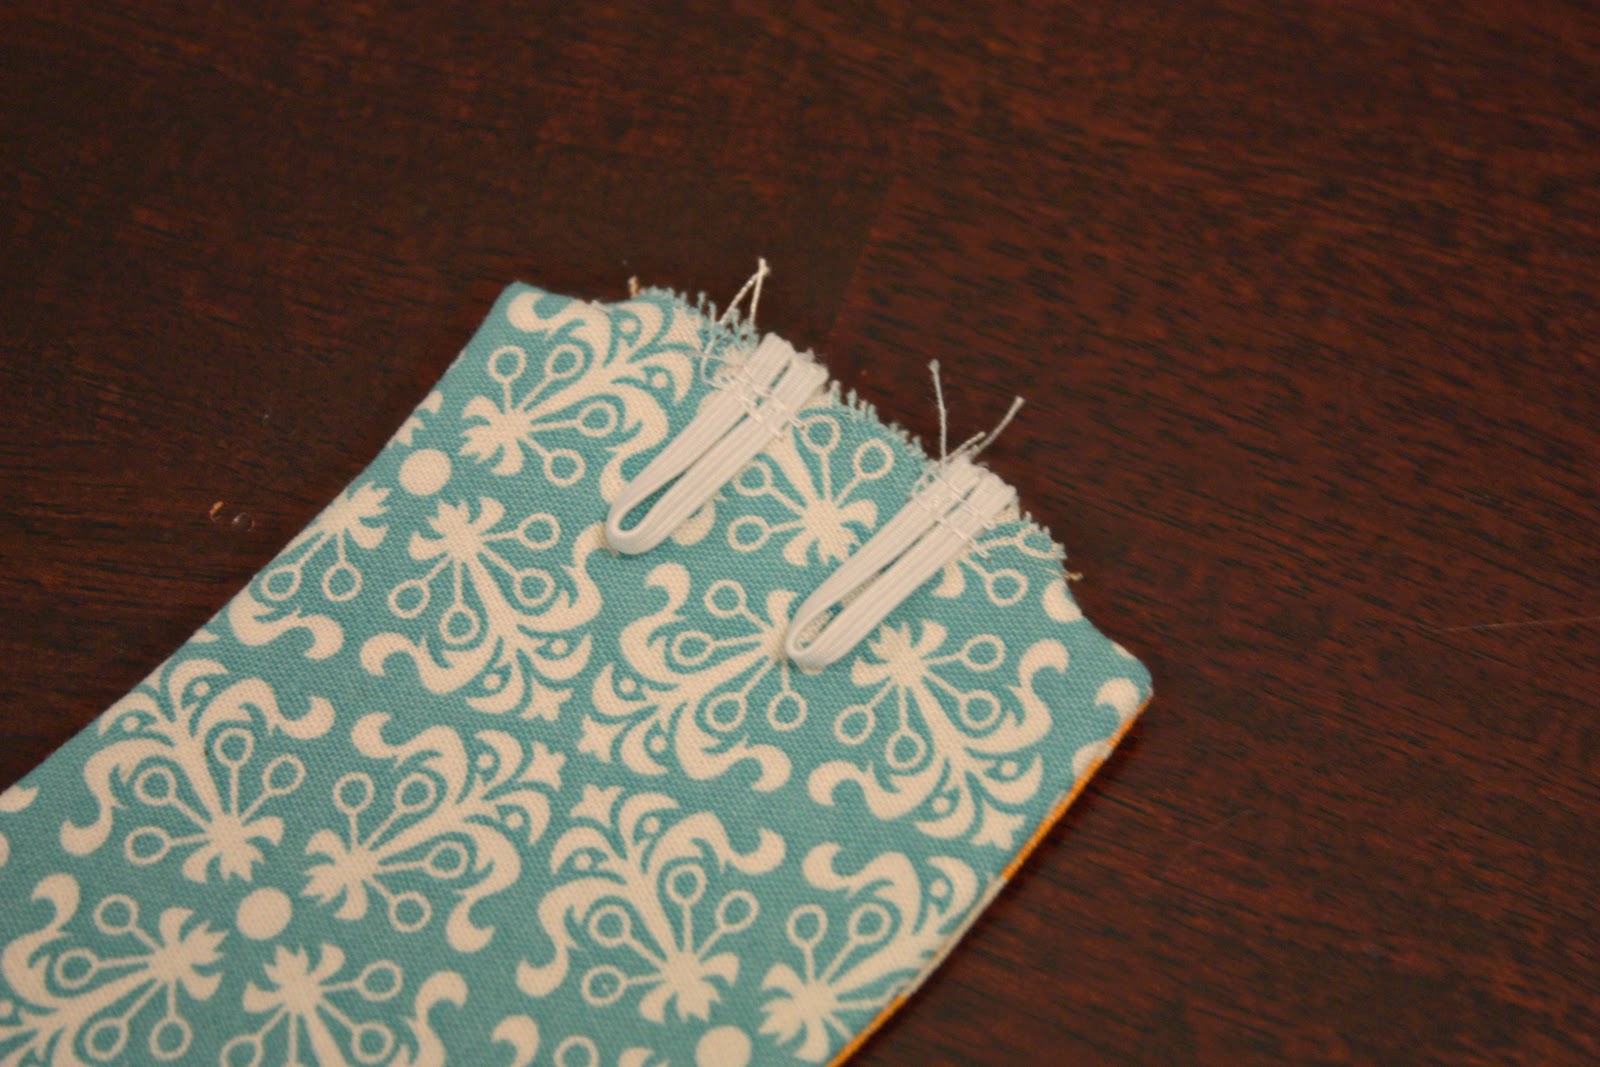
And because I forgot to attach the elastic before sewing the 2 layers together, I added the elastic pieces here. I just made 2 small loops (making sure that the button could fit through the loop) and attached the loop to the top layer of fabric only….stitching the raw ends in place.
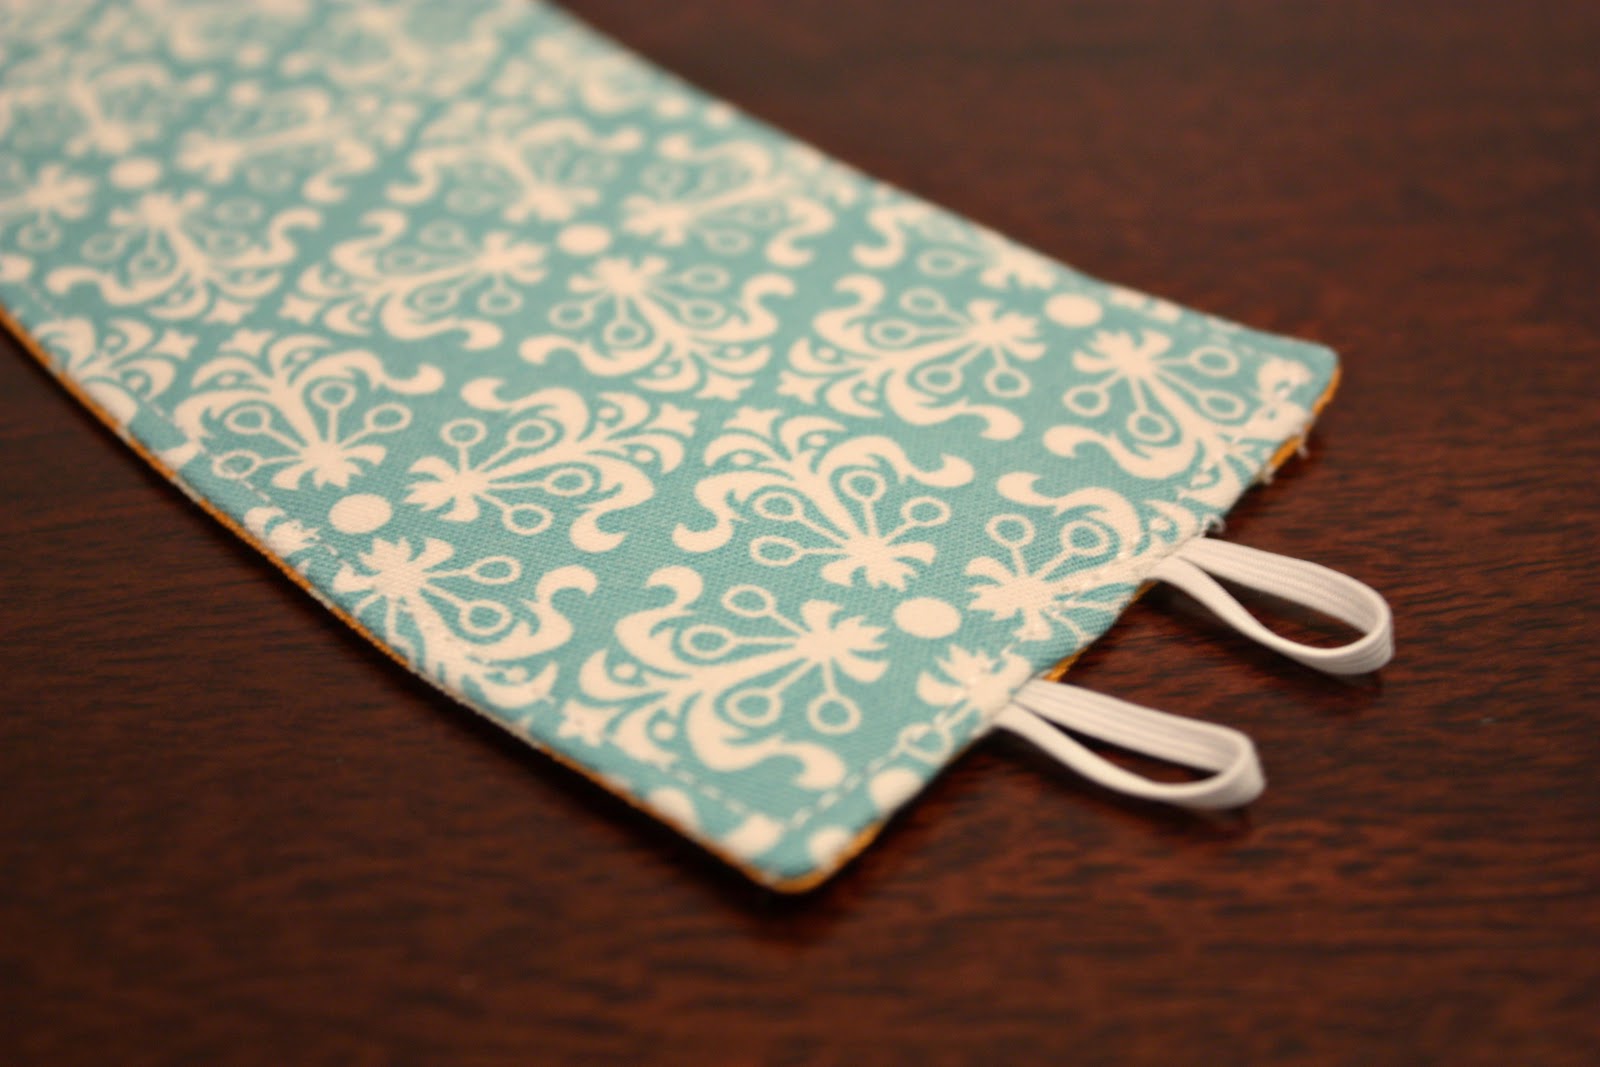
Then I turned the raw edges towards the inside of the cozy, including the raw edges of the elastic, and sewed the opening closed. And then continued sewing all the way around the entire cozy.
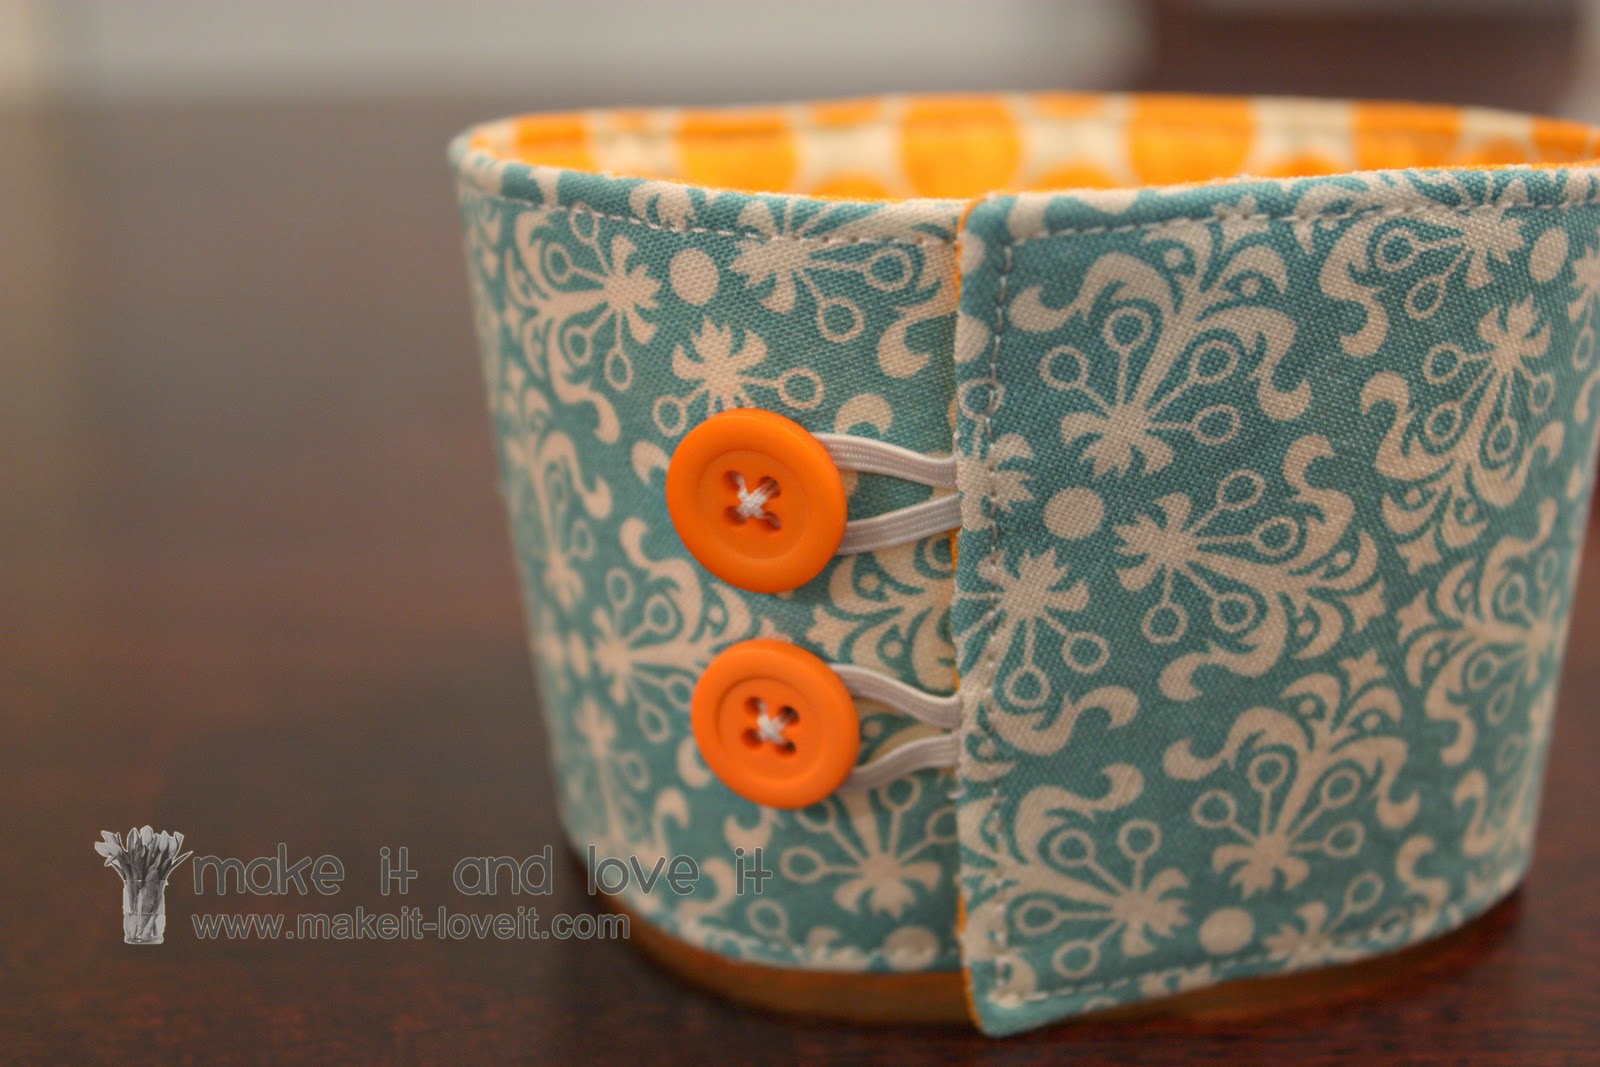
Then I fit the cozy onto to ice cream container again, marked where I needed the buttons, and hand stitched them onto the cozy.
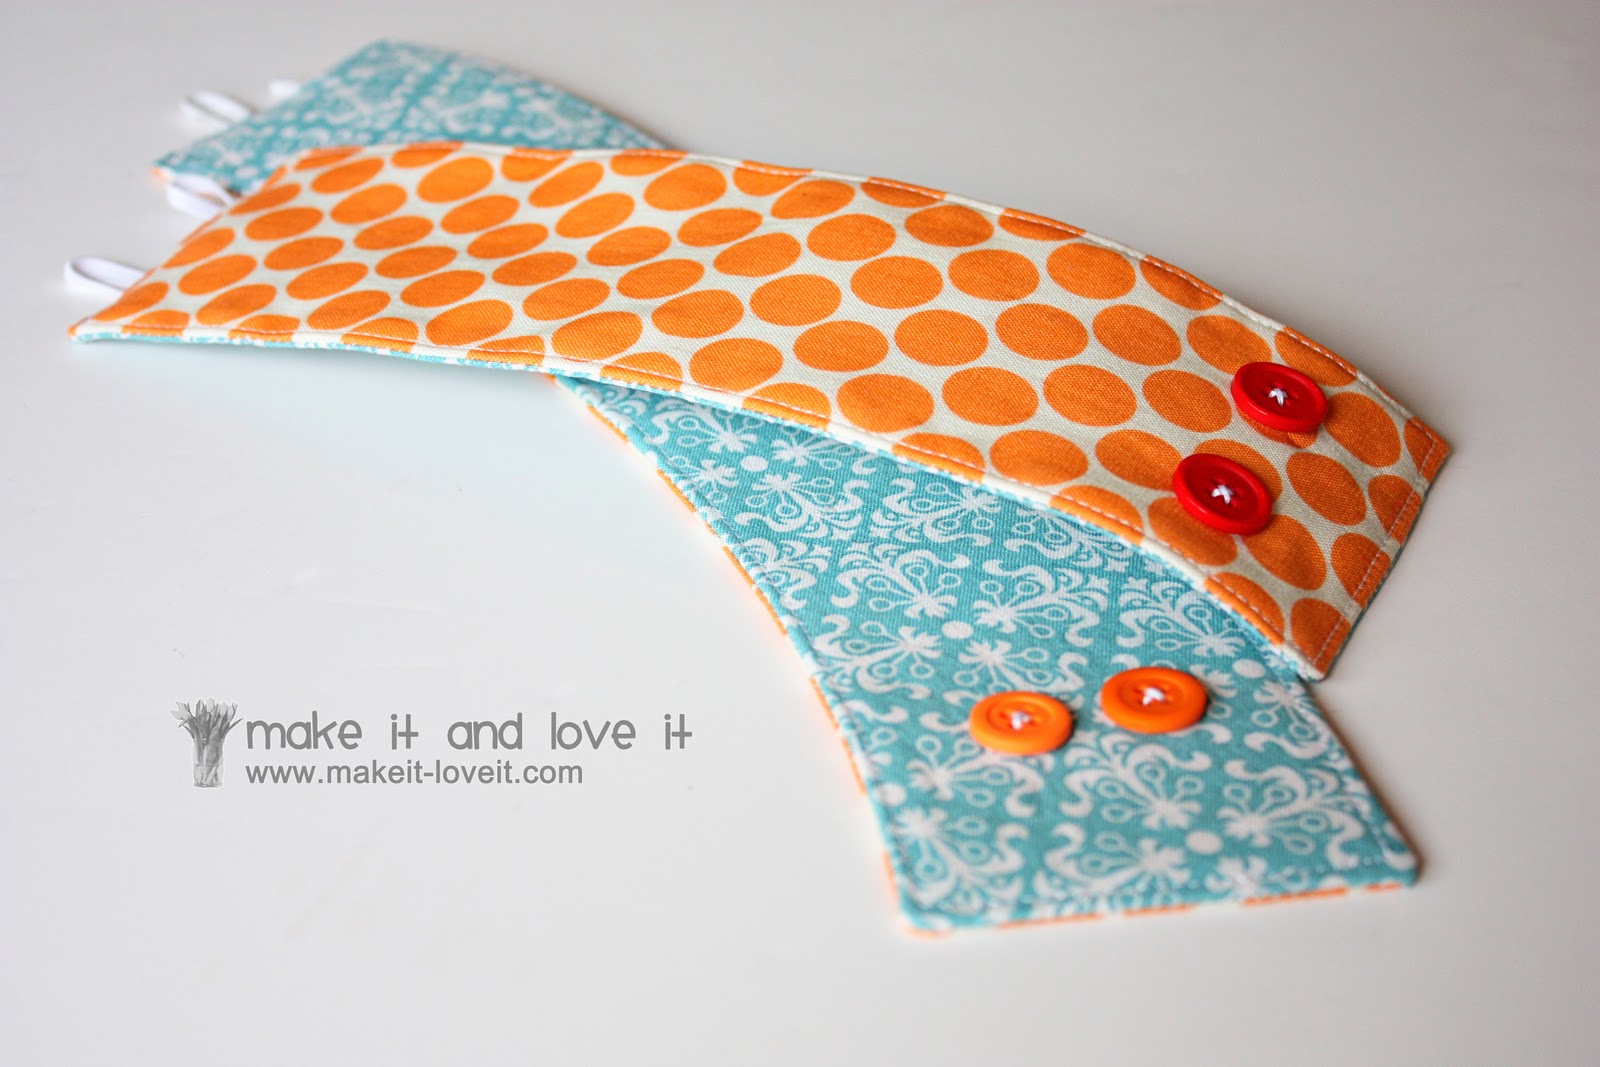
I made the cozy for the soda can the same way, but made it straight because the soda can isn’t contoured like the ice cream container is.
Next, the tote.
I basically made the tote, the same way that I made the messenger bag
here.
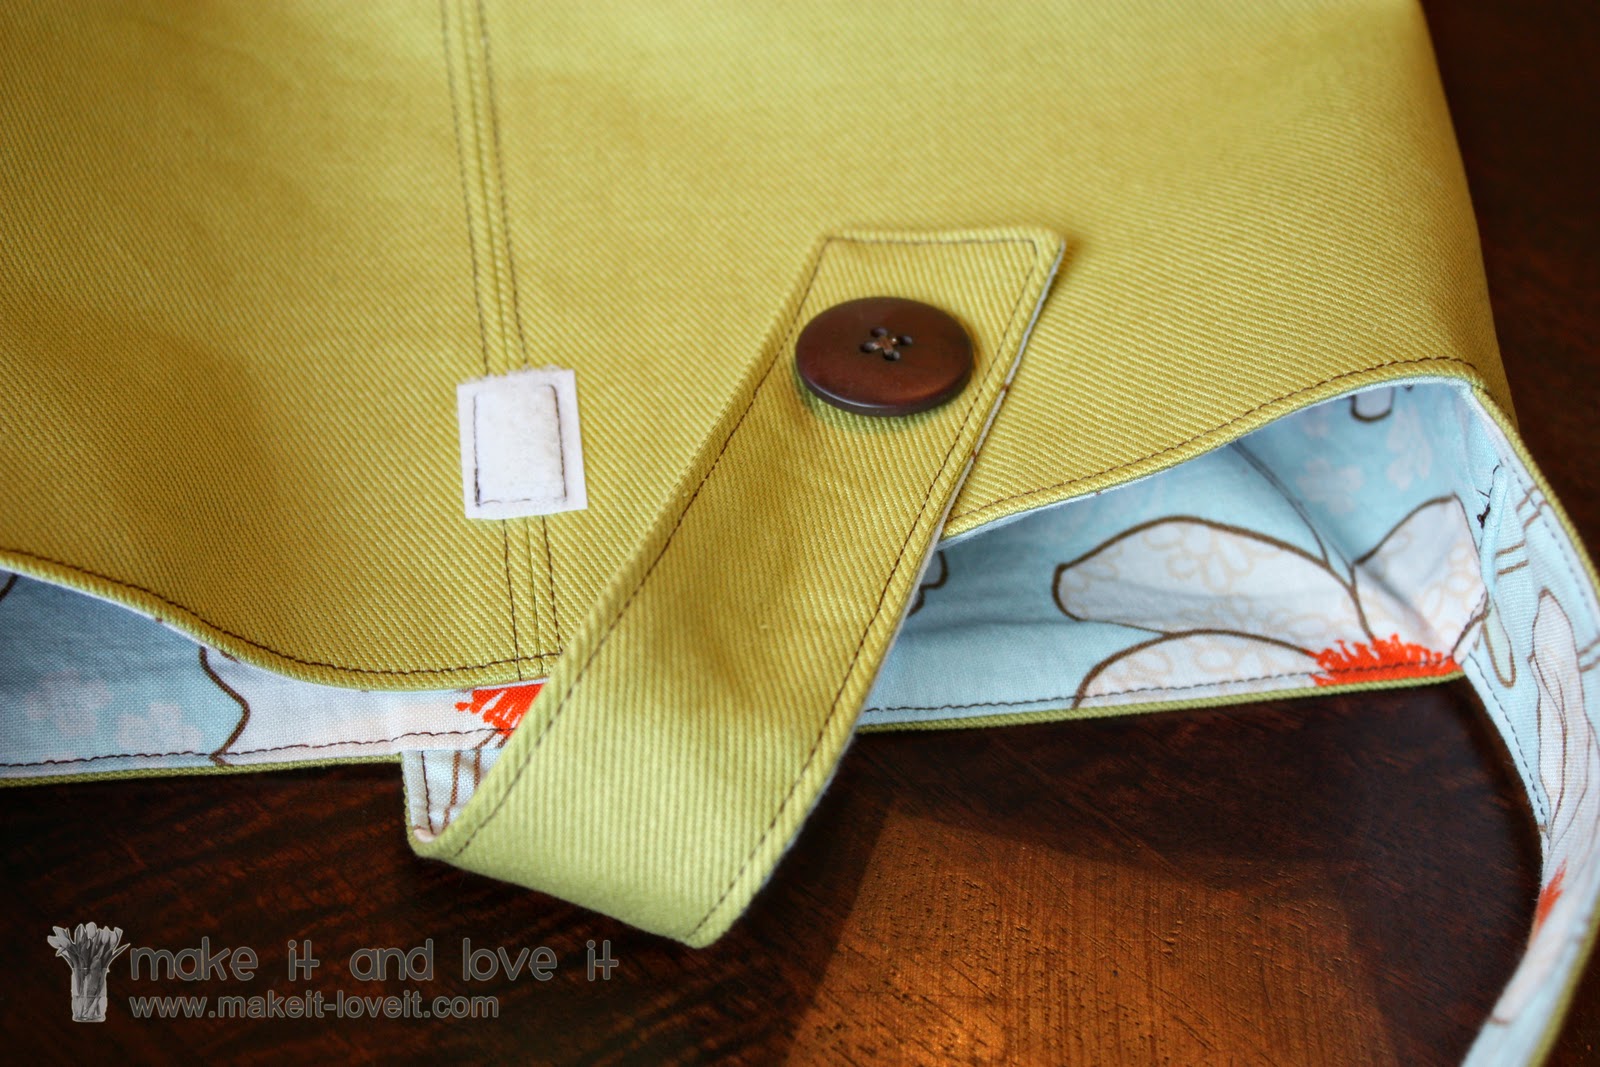
But instead of the big flap that closes the bag, I just made a little strap that slightly closes the top of the bag.
And to create the seam and stitching down the center front and back of the bag, I did the following:
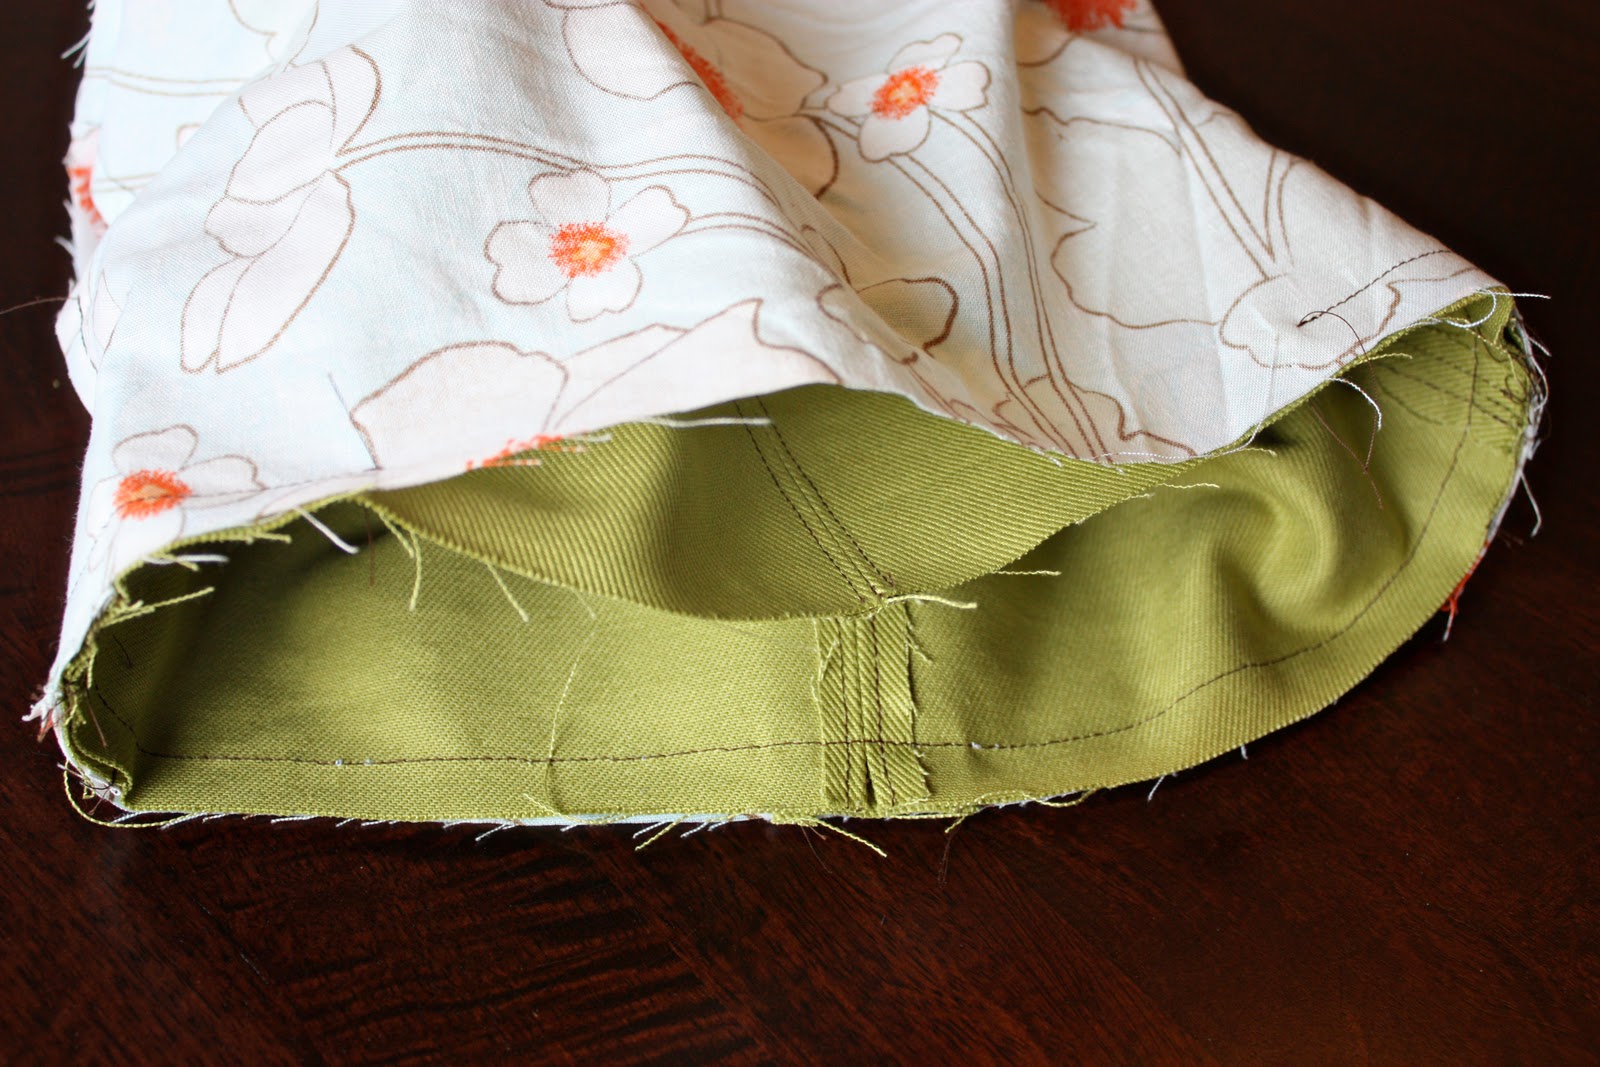
I cut my two pieces for the front and back of the bag and then cut them right down the center from top to bottom. Then I placed right sides together, and sewed the pieces back together to create a front and back piece again. They were the same size, just slightly more narrow because of the seam that you placed down the center front. Then I ironed those seams flat and open……….and then made a stitch along both sides of that seam…..creating the little seam and stitch detail that you see in the final bag pictures. Then I cut the 2 pieces of the lining material, to match this new size. (You know, I already gave the bag away, but I’m pretty sure that these two pieces for the front and back were about 10 x 14 inches. But play around with the sizing and most dimensions will work out just fine.)
Then I continued putting the bag together, just like the one
here that I mentioned before. After I sewed the bag and gave it its boxy bottom, I sewed the same stitch detail down one side, along the bottom, and up the other side.
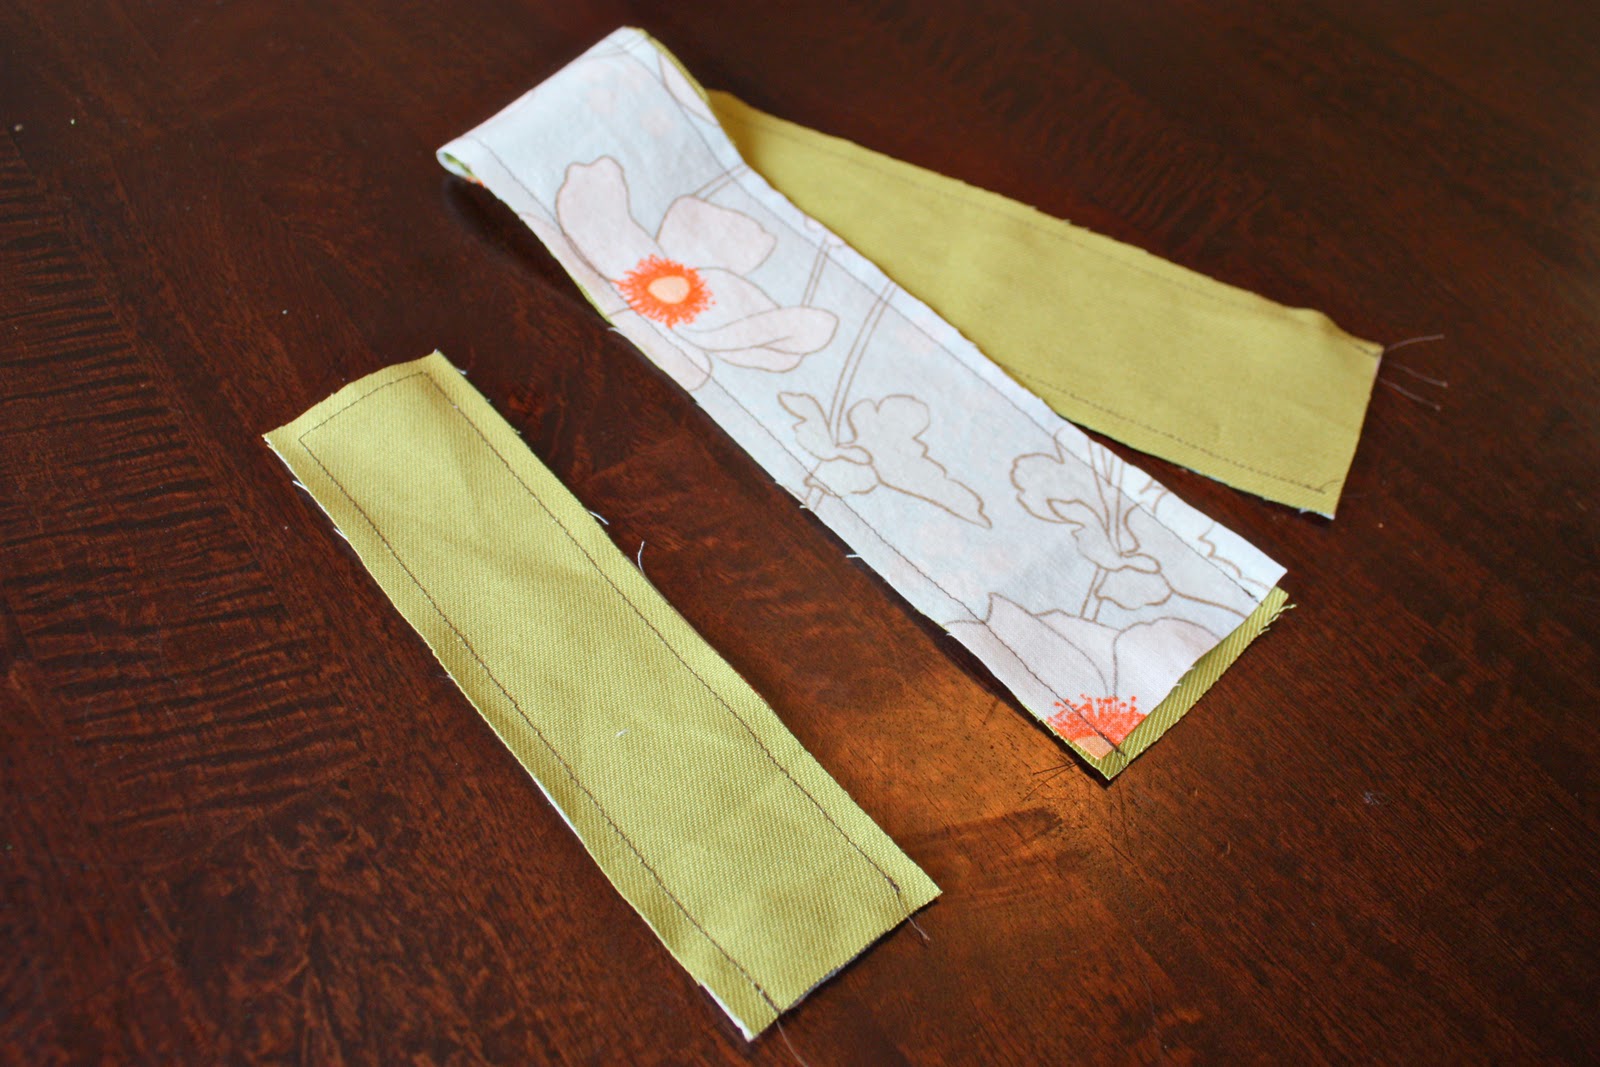
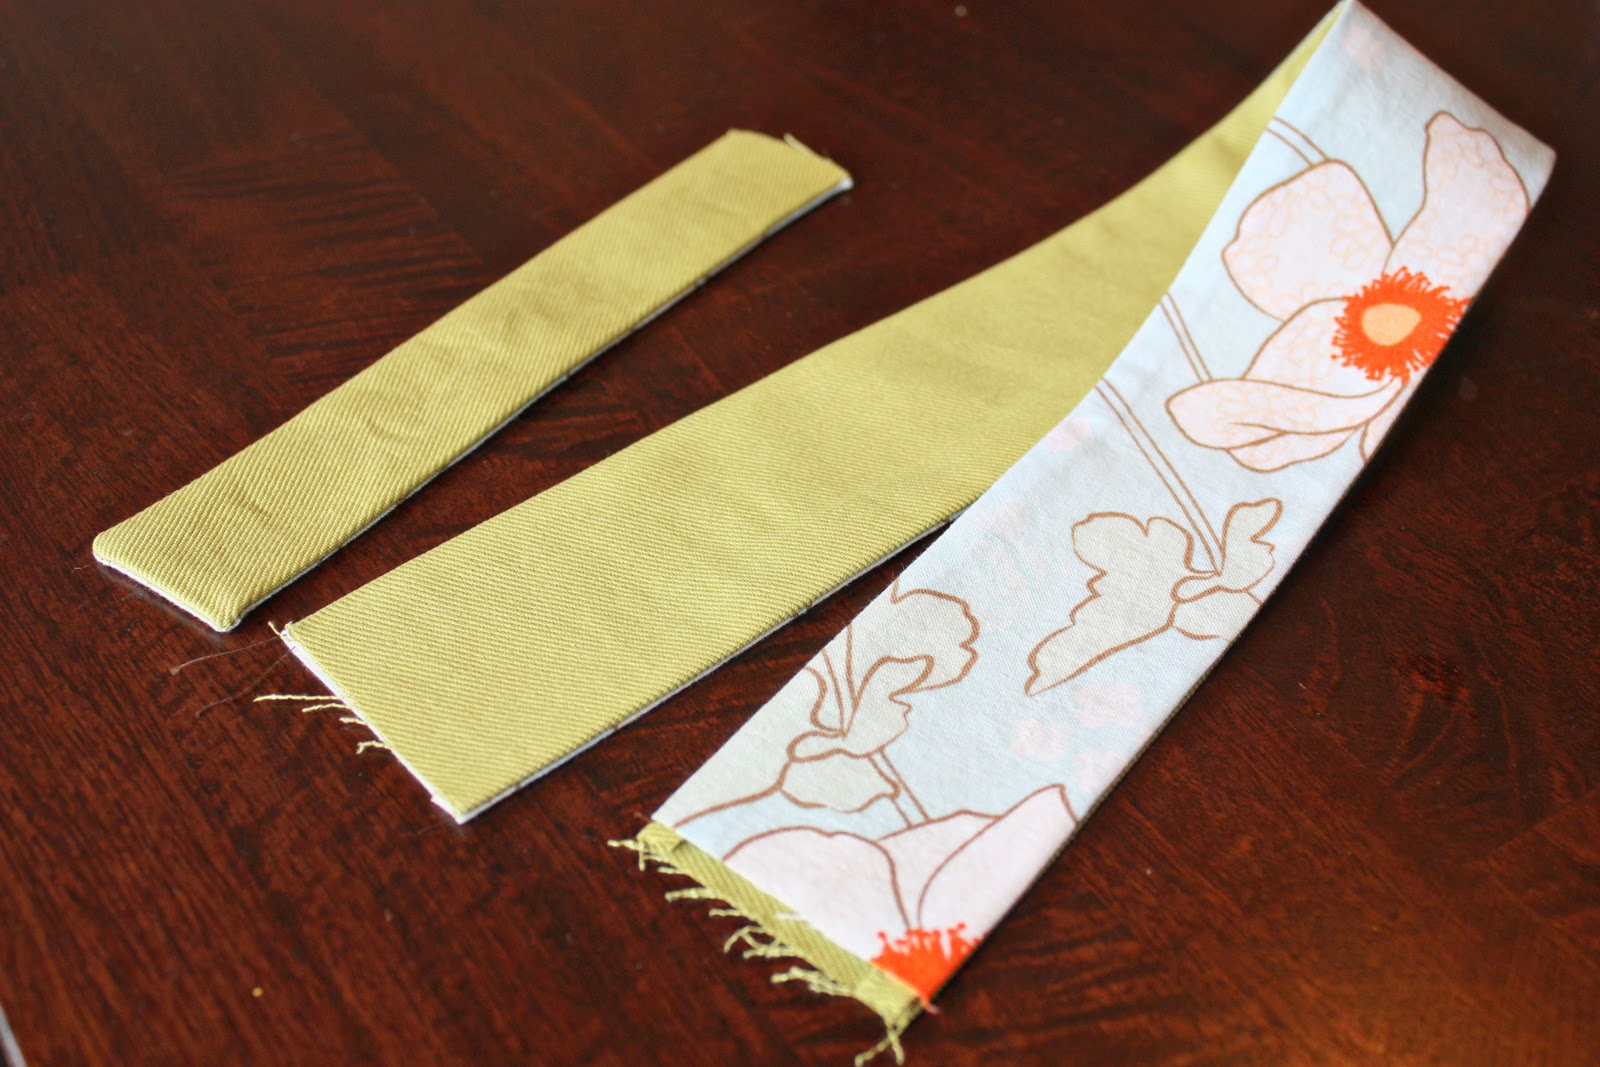
For the strap (again I’m guessing because I already gave the bag away) I cut two pieces that were about 4 x 17 inches. And then for the closure piece, I cut two pieces that were about 2.5 x 8 inches. Then I sewed the 2 strap pieces together with right sides together, along both outer long edges…..leaving both ends open. Then I sewed the two closure pieces together with right sides together, along both sides and along one end.
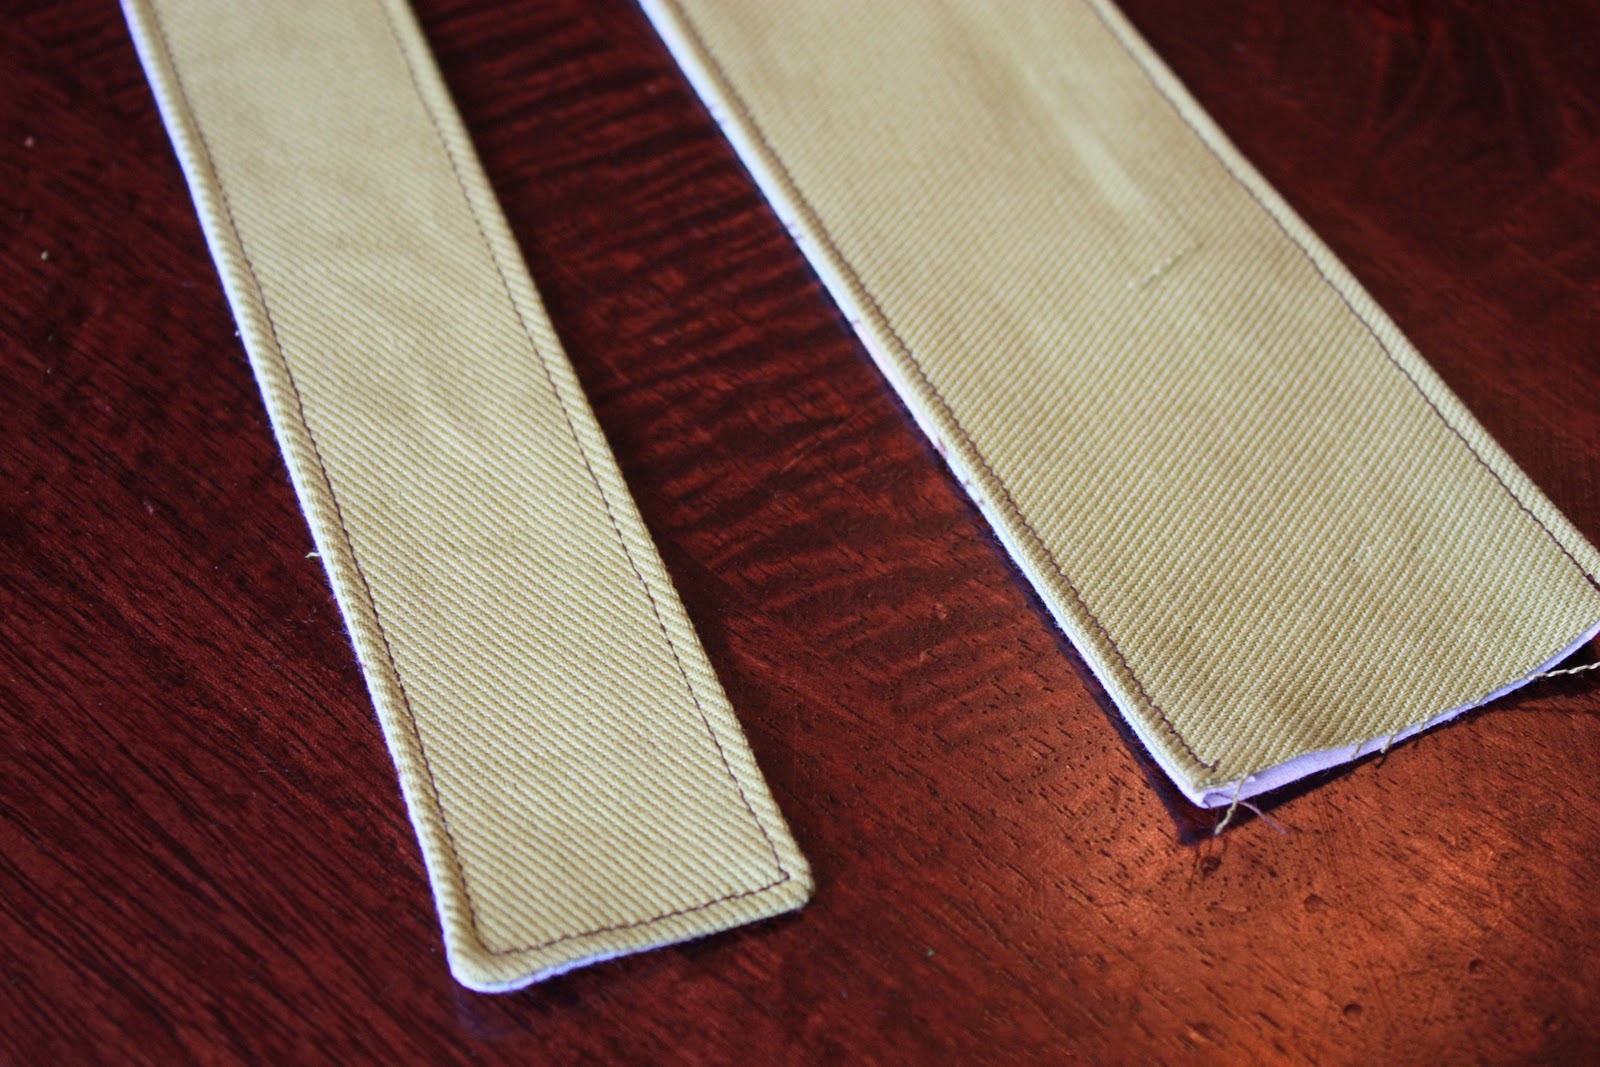
Then I trimmed the corners off of the closed end of the closure, turned both pieces right side out, and ironed them both flat.
Then I sewed along the outer edges of each piece.
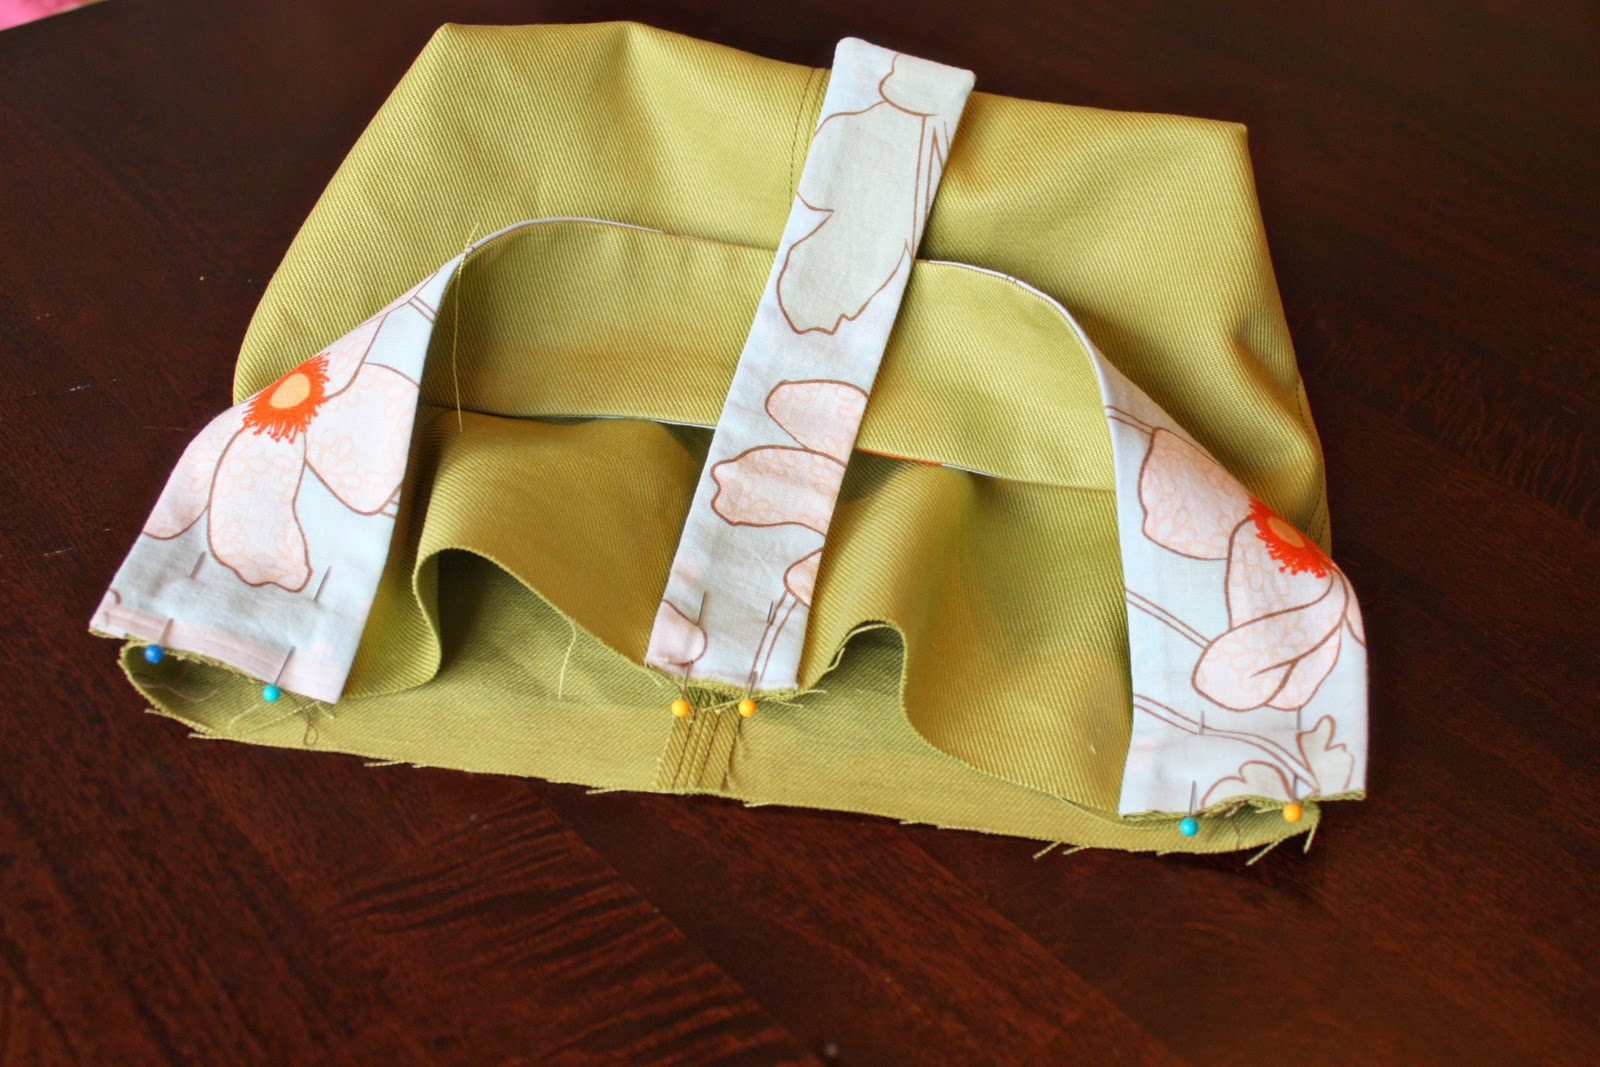
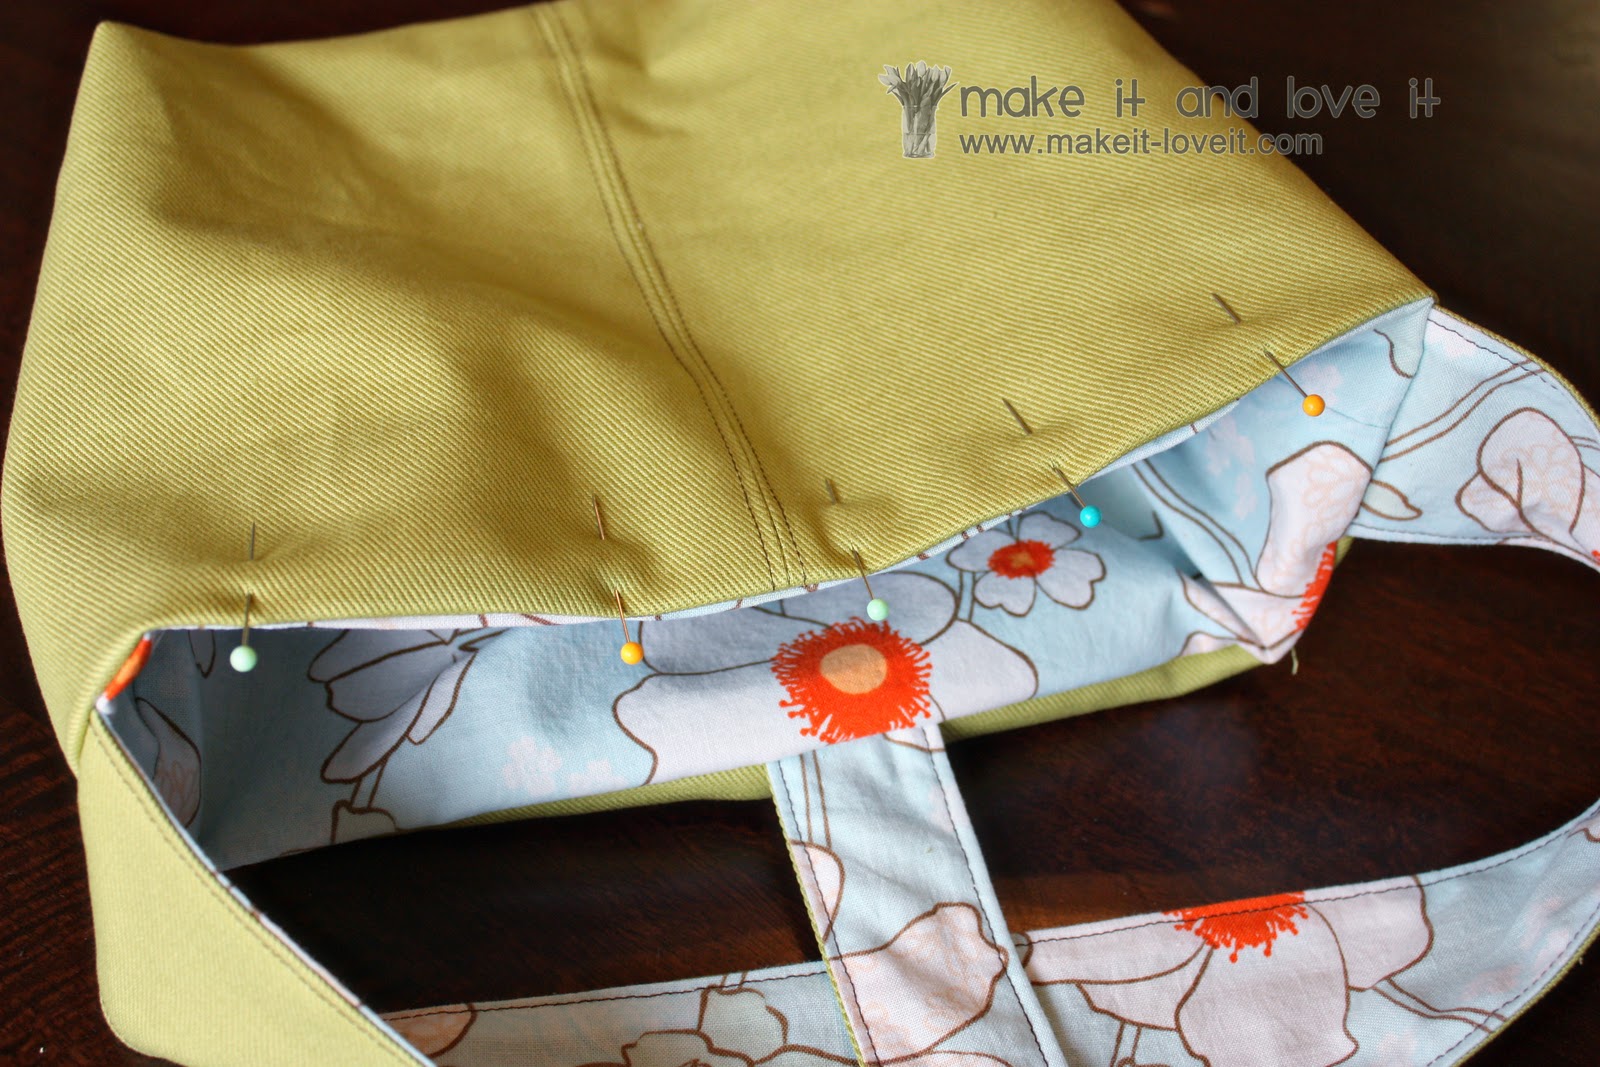
Then pin the right side of the closure to the center front of the tote and the strap ends to each side of the tote. Make sure that the raw pieces are lined up with the raw edges of the opening of the bag.
Then slide the bag inside of the lining (that you made the same way as the outer bag……remember, using the same tutorial
here). Be sure that the outer bag piece is right side out but that the lining piece is
inside out……..and then slide it in.
Match up the raw edges and pin the edges together.
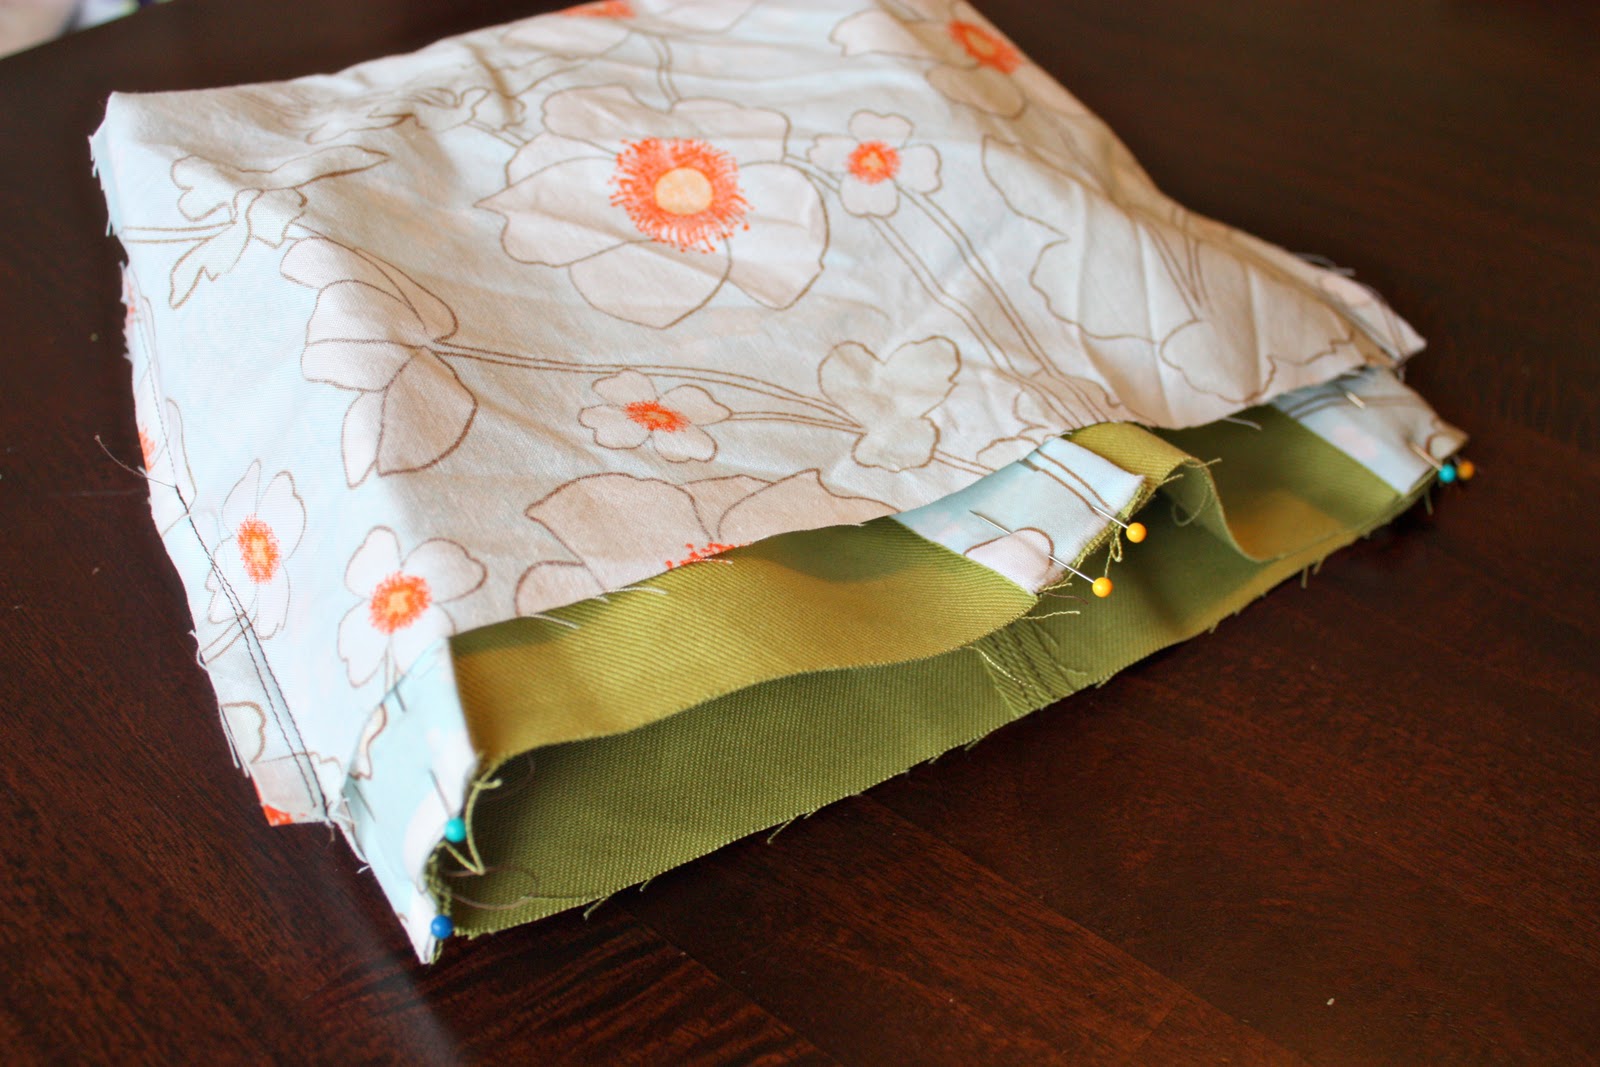
Sew all the way around the top, leaving an opening along the back of the back.
Then turn the bag right side out through that opening and fold and pin the opening closed.
Sew all the way around the top opening of the bag and then add some velcro (to the closure and bag) and a little button if desired.