So happy to have Terra back from Mama Says Sew! She has been busy on her sewing machine…..and has created a darling handmade journal, from the pages all the way to the cover! Just think, you can make the exact size journal you want in any design or color you choose! Love this!
. . . . .
Hi everyone, Terra here from mama says sew. Since school is starting soon (or has already started!), I wanted to share how to make this beautiful handmade journal. It might not look like it, but this is a project you’ll want your sewing machine for!
You can totally customize it to your own preferences. Add as many (or as few) pages as you want, and decorate it so that it’s all yours!
You can use some coordinating scrapbook paper to make the front and back fly pages extra special!
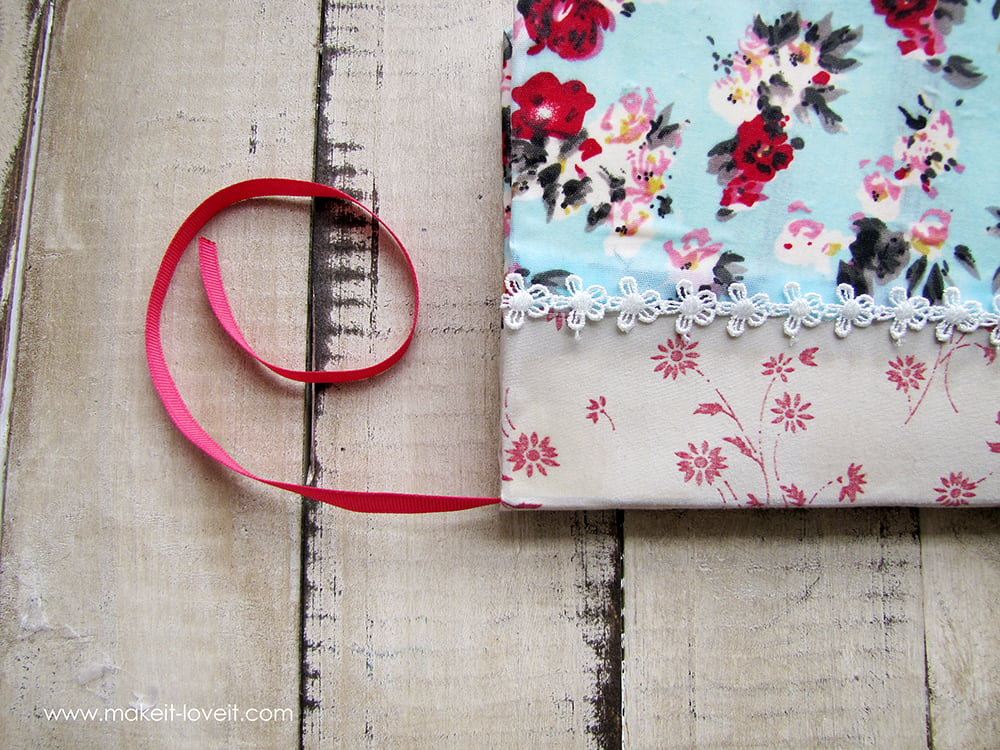
This is optional, but I’ll also show you how to add a ribbon bookmark.
You can stitch the pages together with your sewing machine to make the process go more quickly. I love how it also makes the pages slightly uneven, giving it the feel of a vintage book.
With a pretty fabric cover and lace trim and the ribbon bookmark, it’s the perfect journal for recording your thoughts (or your chemistry homework).
To make your own, you will need:
Stack 8 sheets of paper and fold in half. Open up the paper and stitch down the fold line with your sewing machine. Note: This will probably dull your needle, so use one that is about ready to be tossed anyway!
Make several more stacks of booklets. I made a total of five.
Stack your booklets on top of each other and smash them flat, then measure the thickness. This will be the thickness of your book spine.
Cut your book covers and spine out of your folder. The width of the spine will be the measurement from the last step, and the length is the length of your paper from top to bottom, plus an 1/8 inch. The covers (you need two-only one is pictured below) should be the width and length of the book, plus an 1/8 inch added each way. The extra 1/8 inch is to give a little overhang of the cover.
For the fabric cover, sew two pieces of fabric to the coordinating spine piece and press your seams open. The measurements of each piece will depend on how big your book is and how much contrast you want on the spine. Your fabric should be two inches bigger than your book all the way around. See the next step.
Lay out the book spine and covers on the fabric. The spine should be right in the center of the fabric, with the covers on either side. Note how the fabric extends beyond the cover and spine on all sides.
Use mod podge (or other glue) to attach the spine to the fabric.
Attach the covers the same way on either side of the spine. Get the fabric as smooth as you can, and make sure it doesn’t bubble. You might need to work with it a little, and keep an eye on it while it’s drying to smooth out any issues before it dries all the way. Let dry. You can also give the other side (which will be the outside of the book) a coat of mod podge to seal it. Once it’s dry, fold the top and bottom edges of the fabric over the cover and spine.
Fold the sides over and glue in place. Again make sure that their aren’t any bubbles in the fabric and it’s as smooth as you can get it.
While that is drying, fold a piece of scrapbook paper the same size as the paper you used for your book in half. Glue half of the paper to the back piece of one of your little booklets. Repeat with another booklet and another piece of scrapbook paper, this time to the front piece of a booklet.
When all the booklets are in order, they’ll look like this:
Glue a piece of ribbon along the spine. I used my glue gun for this.
If you want to add lace trim, glue it along the seam of the fabric, making sure to wrap it around to the inside, where it will be covered by the pages of your book.
Line up your booklets with the spine of the book. Make sure your scrapbook paper is at the top and bottom of this pile of booklets.
Glue all the booklets securely to the spine of the book. This takes lots of glue and can be tricky to get everything. You may have to separate the little booklets slightly to make sure to get glue on each of their spines to make sure each one of them is attached to the spine of the book.
Open up the scrapbook piece and glue the half not attached to the booklets to the inside cover of the book, again making sure that the paper is smooth and doesn’t bubble.. This will cover up all the raw edges of the fabric, and give it a cleaner look.
There you go! A beautiful handmade journal that is uniquely yours!
If you need more help putting the pages together or creating your own journal pages, there are lots of tutorials. This post has a good explanation, although I did a few things differently.
Good luck!
-Terra
Find Terra at Mama Says Sew, here Facebook page, or follow along on Instagram.

Hi, I’m Ashley—the DIY-enthusiast behind this crazy blog!