-Ashley
. . . . . .
Hello Everyone! Its Sara, from The Aqua House, and I’m so happy to be here today!
I don’t know about you, but I just love Spring! After being inside all winter, I get anxious to get outside, enjoy some fresh air, and get working in the yard! This year I thought I’d bring a little bit of the outside into my home with this Table Top Herb Garden. Plus, who doesn’t love fresh herbs to cook with or sprinkle on your favorite foods?
With this little Herb Garden sitting on your table, counter, or windowsill, fresh herbs will always be within an arm’s reach!
Not to mention that this little planter will brighten up any kitchen! And the best part…I made this little planter for under $10…with all the supplies! The secret is, that the wood is from an old pallet. So if you have an old pallet sitting around this would be a fabulous up-cycle project. (Or check the scrap wood bin at your local lumber store.)
Are you ready to make your own Table Top Herb Garden?
For this project you will need:
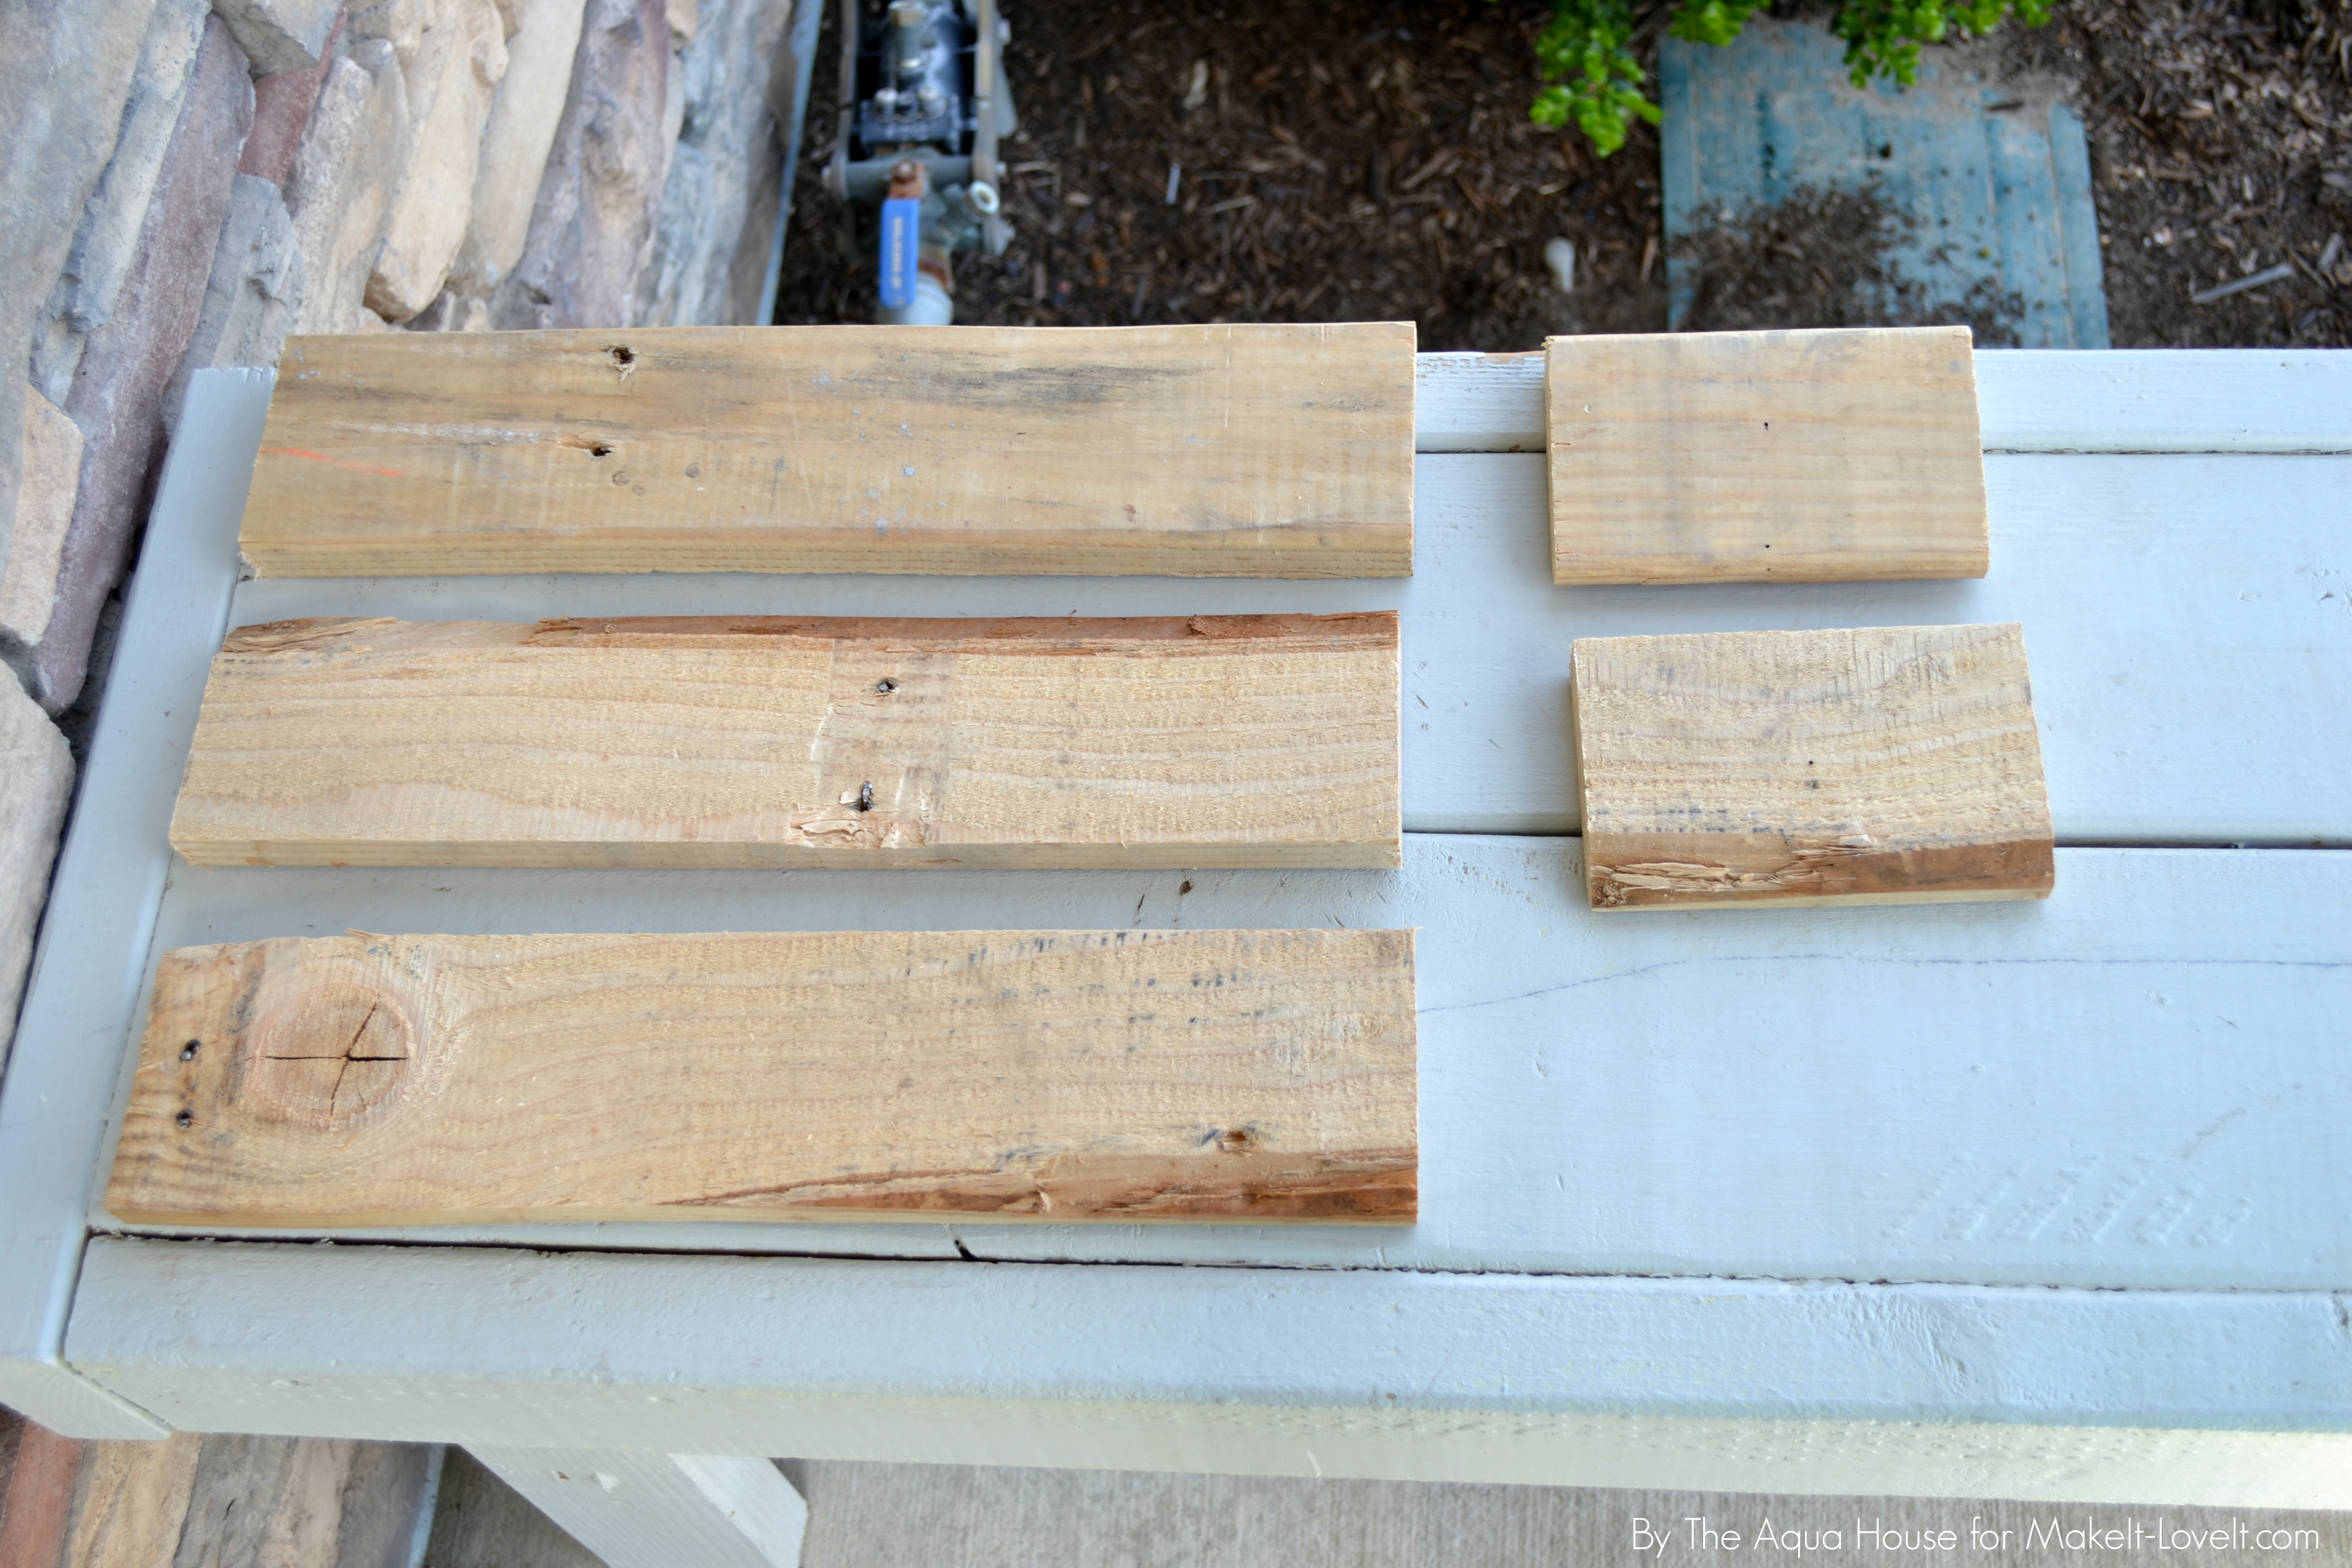
To start out, you will need to cut your pallet (or lumber) into five different pieces. You will need two 5 1/4 inch pieces (the sides where the handles attach) and three 15 inch pieces (front, back, and bottom).
To begin assembly, you will need to take one of your 5 1/4 inch pieces and attach it to one of the 15 inch pieces using a hammer and nails or a brad nailer.
Next attach another 15 inch piece to the other side of the 5 1/4 inch side piece.

Then you will grab your other 5 1/4 inch side piece and nail it onto the opposite end, creating a complete rectangle. As you can see, if you are using an old pallet, the boards may be warped and you may have to work a little bit to get your two 15 inch pieces to attach to the side.
Now we are going to flip the planter up on its side and wedge the bottom piece in. Because of the width of the Mason jars, and the uneven character of the pallet boards, there will be small gaps on either side of your bottom board. Try your best to wedge the bottom in evenly, but if you don’t get it exact, don’t worry! We are going for a rustic country look with this project. Nail through the sides of the 5 1/4 inch boards to attach the bottom.
Flip it back over and admire your little planter box!
Now it is time to paint or stain your planter.

I chose to use a chalk paint and lightly apply it so the planter had a whitewashed look.
Then its time to add on the handles. I found these cute handles at Lowe’s for only $1.38 each!
Now grab your Mason jars, fill them will potting soil, and plant some of your favorite herbs! (EDITED: Be sure to add some small rocks or pebbles in the bottom of your jars, to help with drainage.)
Then go find that perfect spot to set your herb garden.
And don’t forget to give your herbs lots of sunshine, water, and love!
Good luck!
-Sara
Check out Sara’s blog HERE, her Facebook page HERE, and her Pinterest Boards HERE.

Hi, I’m Ashley—the DIY-enthusiast behind this crazy blog!