So excited to have Sara from The Aqua House here again today, sharing her great Take-Along CHALK MAT that she made for her little guys. In the car, up to the table, outside on the grass…..such a fun portable activity to keep kiddos busy!
-Ashley
. . . . .
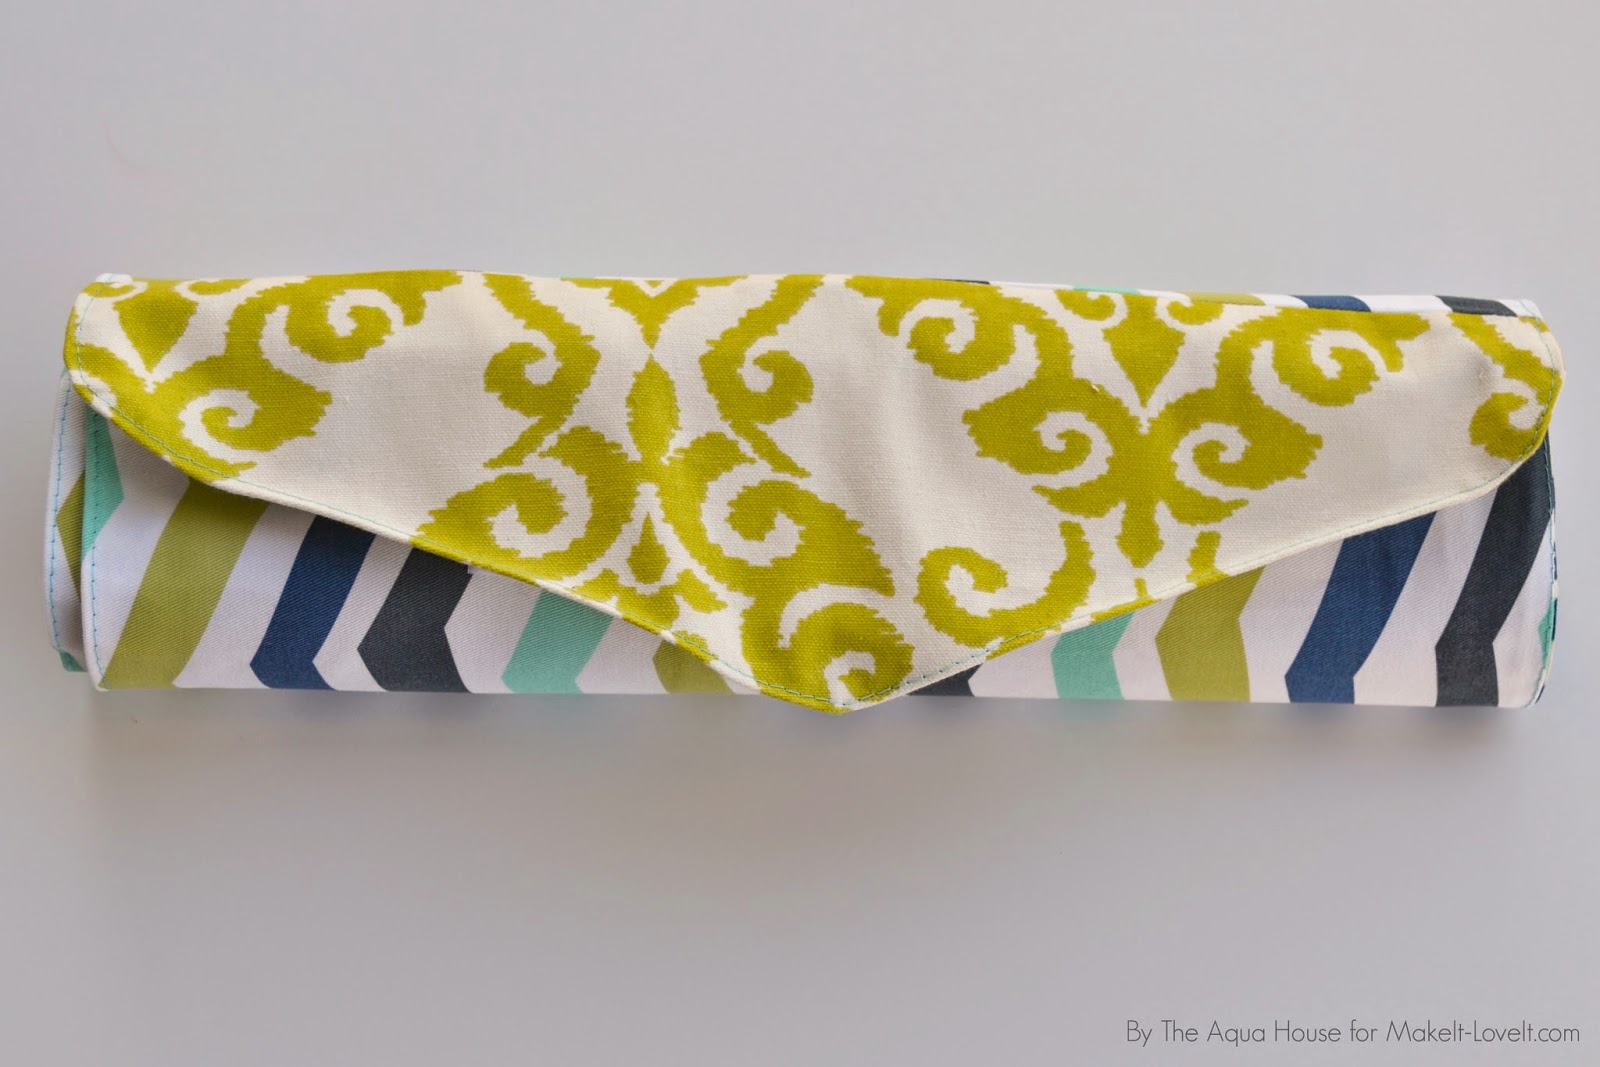
Have you seen the chalk fabric that’s been popping up in stores? I saw some at my local quilt shop and knew I needed to try it out! Yep, its fabric that you can write on with chalk. How cool is that?! Combine that with a portable Chalk Mat…..and you’ve got something really fun for the kiddos!
The best part about this mat is that everything is attached so your little one can’t accidentally drop his chalk or eraser. No more crying from the backseat that they can’t find the pieces they need!
We all know little hands are still developing fine motor skills and accidents happen. Hopefully having everything attached will take away one less stress while traveling on the road.
Your Preschooler may even snag it for some quick art time outside on the grass.
And when you’re all done, it will roll up neatly so you can tuck it away for next time.
Are you ready to make your own Take Along Chalk Mat?
For this project you will need:
**All seams are sewn at 1/4 inch.
First, lets talk about chalk fabric. When you are purchasing it, have the person cutting it roll it up for you. Mine was folded and it left big creases, which I had to iron out. Yes, you can iron it, but only on the BACK side. Do not let your iron touch the front of the fabric as it will immediately melt (I learned that the hard way when my iron accidentally bumped it). The fabric will become soft and pliable as it heats up, but as soon as it cools it will go back to being firm.
To start out, you will need to take your chalk fabric and cut a 15 inch by 12 inch rectangle. Then you will take one of your 1/4 yard fabrics and cut two 4 x 12 inch pieces, and two 1 3/4 x 21 1/2 inch pieces. These will be your border around your chalkboard. You will start by attaching your two 4 x 12 inch pieces to the shorter 12 inch ends of the chalkboard fabric, right sides together. I used my binding clips instead of pins as the chalk fabric is very thick. Sew in place.
After sewing on the sides, flip it to the back and press the seams to the outside. Then, flip back over to the front and match up the 1 3/4 x 21 1/2 inch pieces to the top and bottom of the chalkboard, with right sides together. Sew in place. Then turn over again and press all seams to the outside.
Turn your fabric to the right side and do a top stitch (4.0 stitch length) about 1/8th of an inch from the chalk fabric, all the way around. This will hold those seams in place and give the mat a finished look.
Match up one end of a 16 inch piece of elastic with one end of the eraser holder, on the BACK side. Sew together at the end.
Next, press each side of the holder in towards the back side, 1/2 inch.
Pin this piece of fabric (and attached elastic) onto the bottom left side of your chalk mat, leaving enough of a n opening for your eraser to slide underneath. Before sewing, make sure that your eraser fits! Eraser sizes vary and you may need to adjust how much of a space you leave. Sew along both sides with a top stitch. I stitched over the sides three times, making sure to line up my stitches to maintain a finished look. Also, be sure your elastic is poking up through the top of the holder.
On the right side of the mat, pin two 16-inch long pieces of elastic to the right raw edge of the mat (it doesn’t matter where…..but mine is more towards the top), about 4 inches apart. Place the 2 chalk holders (that you sewed previously) on top of each piece of elastic, top side up. Pin in place. Then place the long edge of the flap together with the edge of the mat, with right sides together. Pin in place. Sew all layers together, taking care to stitch carefully through the bulk. I suggest going over the chalk holder and elastic twice.
Press your seam flat then open. Flip your straps out and press back the seam 1/4 inch. Pin two 11 inch long pieces of elastic to them.
Flip the straps back over towards the center of the mat and using your top stitch, stitch into place. Make sure your elastics are up and out of the way. Stitch the center down to make a divider.
Now take all of your chalk elastics and wrap them around a piece of chalk. Pin as close to the chalk as you can and then sew exactly where the pin is.
Now place your front and back mat pieces together, with right sides together, and pin around all the edges. Leave about a 5-6 inch opening at one end, so you can turn the mat right side out.
Sew pieces together, then turn right side out. Press the edges of the opening towards the inside, 1/4 inch and then sew together using a top stitch. I continued my stitch all the way around the outside of the mat to finish it off.
The last thing we have to do is attach the eraser. This is where you will use your glue gun. Put a little bit of glue on top of the eraser and attach elastic. Then fold the elastic over and put a little bit of glue between the two layers of elastic.
One last thing about chalk fabric. It needs “conditioned” before use. This avoids having the very first thing that is written on it being there permanently (even if only faintly). To condition the fabric, take some plain white chalk and lay it on its side and scribble all over the mat. Then use your eraser to clean it off.
Side Note: Your toddler may still be able to pull the chalk out of the elastic. This isn’t toddler proof…you’d need super glue for that! But hopefully it will help keep everything together. Also, you can make this mat for older children, just omit the elastic. Enjoy!
–Sara
Check out Sara’s blog HERE, her Facebook page HERE, and her Pinterest Boards HERE.

Hi, I’m Ashley—the DIY-enthusiast behind this crazy blog!