So happy to have Cami from Tidbits back today, sharing some crafting and experimental fun with all of us! I remember making similar VOLCANOES as a kid……but have forgotten about it. My kids would love this…..as much as her little girls seem to be enjoying it in the pictures below. Thanks for the reminder and the excellent instructions Cami! :) -Ashley
. . . . .
I have to say, isn’t Ashley’s new little bundle just the sweetest!!!! So happy for her and her family!! You know, this week I just kept thinking to myself that I better get this post sent to her to put up so she doesn’t think she needs to come up with some crazy genius craft and leave us all wondering how she does it all, with a new baby and everything. Am I right? Enjoy that baby Ashley! (But keep the updates coming on instagram – wink).
So, I imagine you’ve heard the phrase “Oldie but Goodie”. I keep running across it lately, especially in the bloggy-blog world. Must be a new trend . . . . I mean old . . . . . or whatever.
Anyway, I bring you a project for your kiddo’s (or you I suppose), that is most definitely an “oldie but goodie”. I call it an “oldie” because I am getting old (30 this month!) and I distinctly remember doing this in my 3rd grade class. I call it a “goodie” because it must have been pretty good to remember all this time.
But in all truth, I picked an “oldie but goodie” to share because my baby has decided to not sleep through the night any more and my brain is tired and I couldn’t come up with an original idea at the moment.
Sigh.
But nonetheless, here is a fun project that will occupy the little ones during activity time for at least 3 days!! A project that will include a sensory experience, creativity, and discovery – ALL IN ONE!! A project that is sure to “BLOW UP” summer boredom.
Boy or Girl, your kid is going to LOVE this activity!!
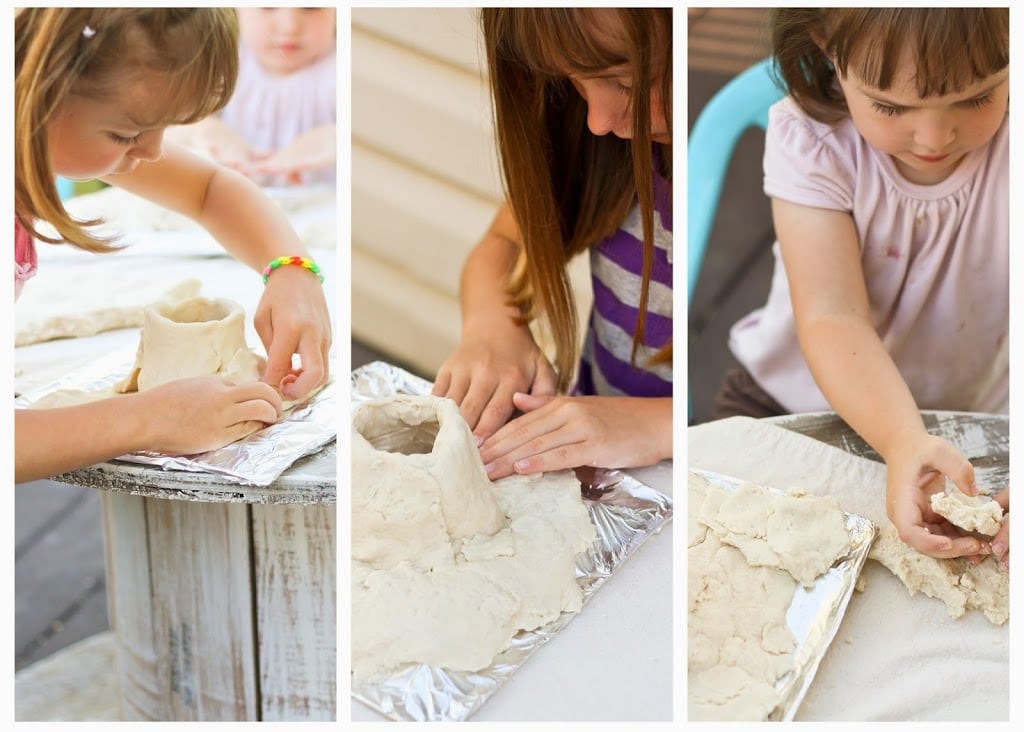
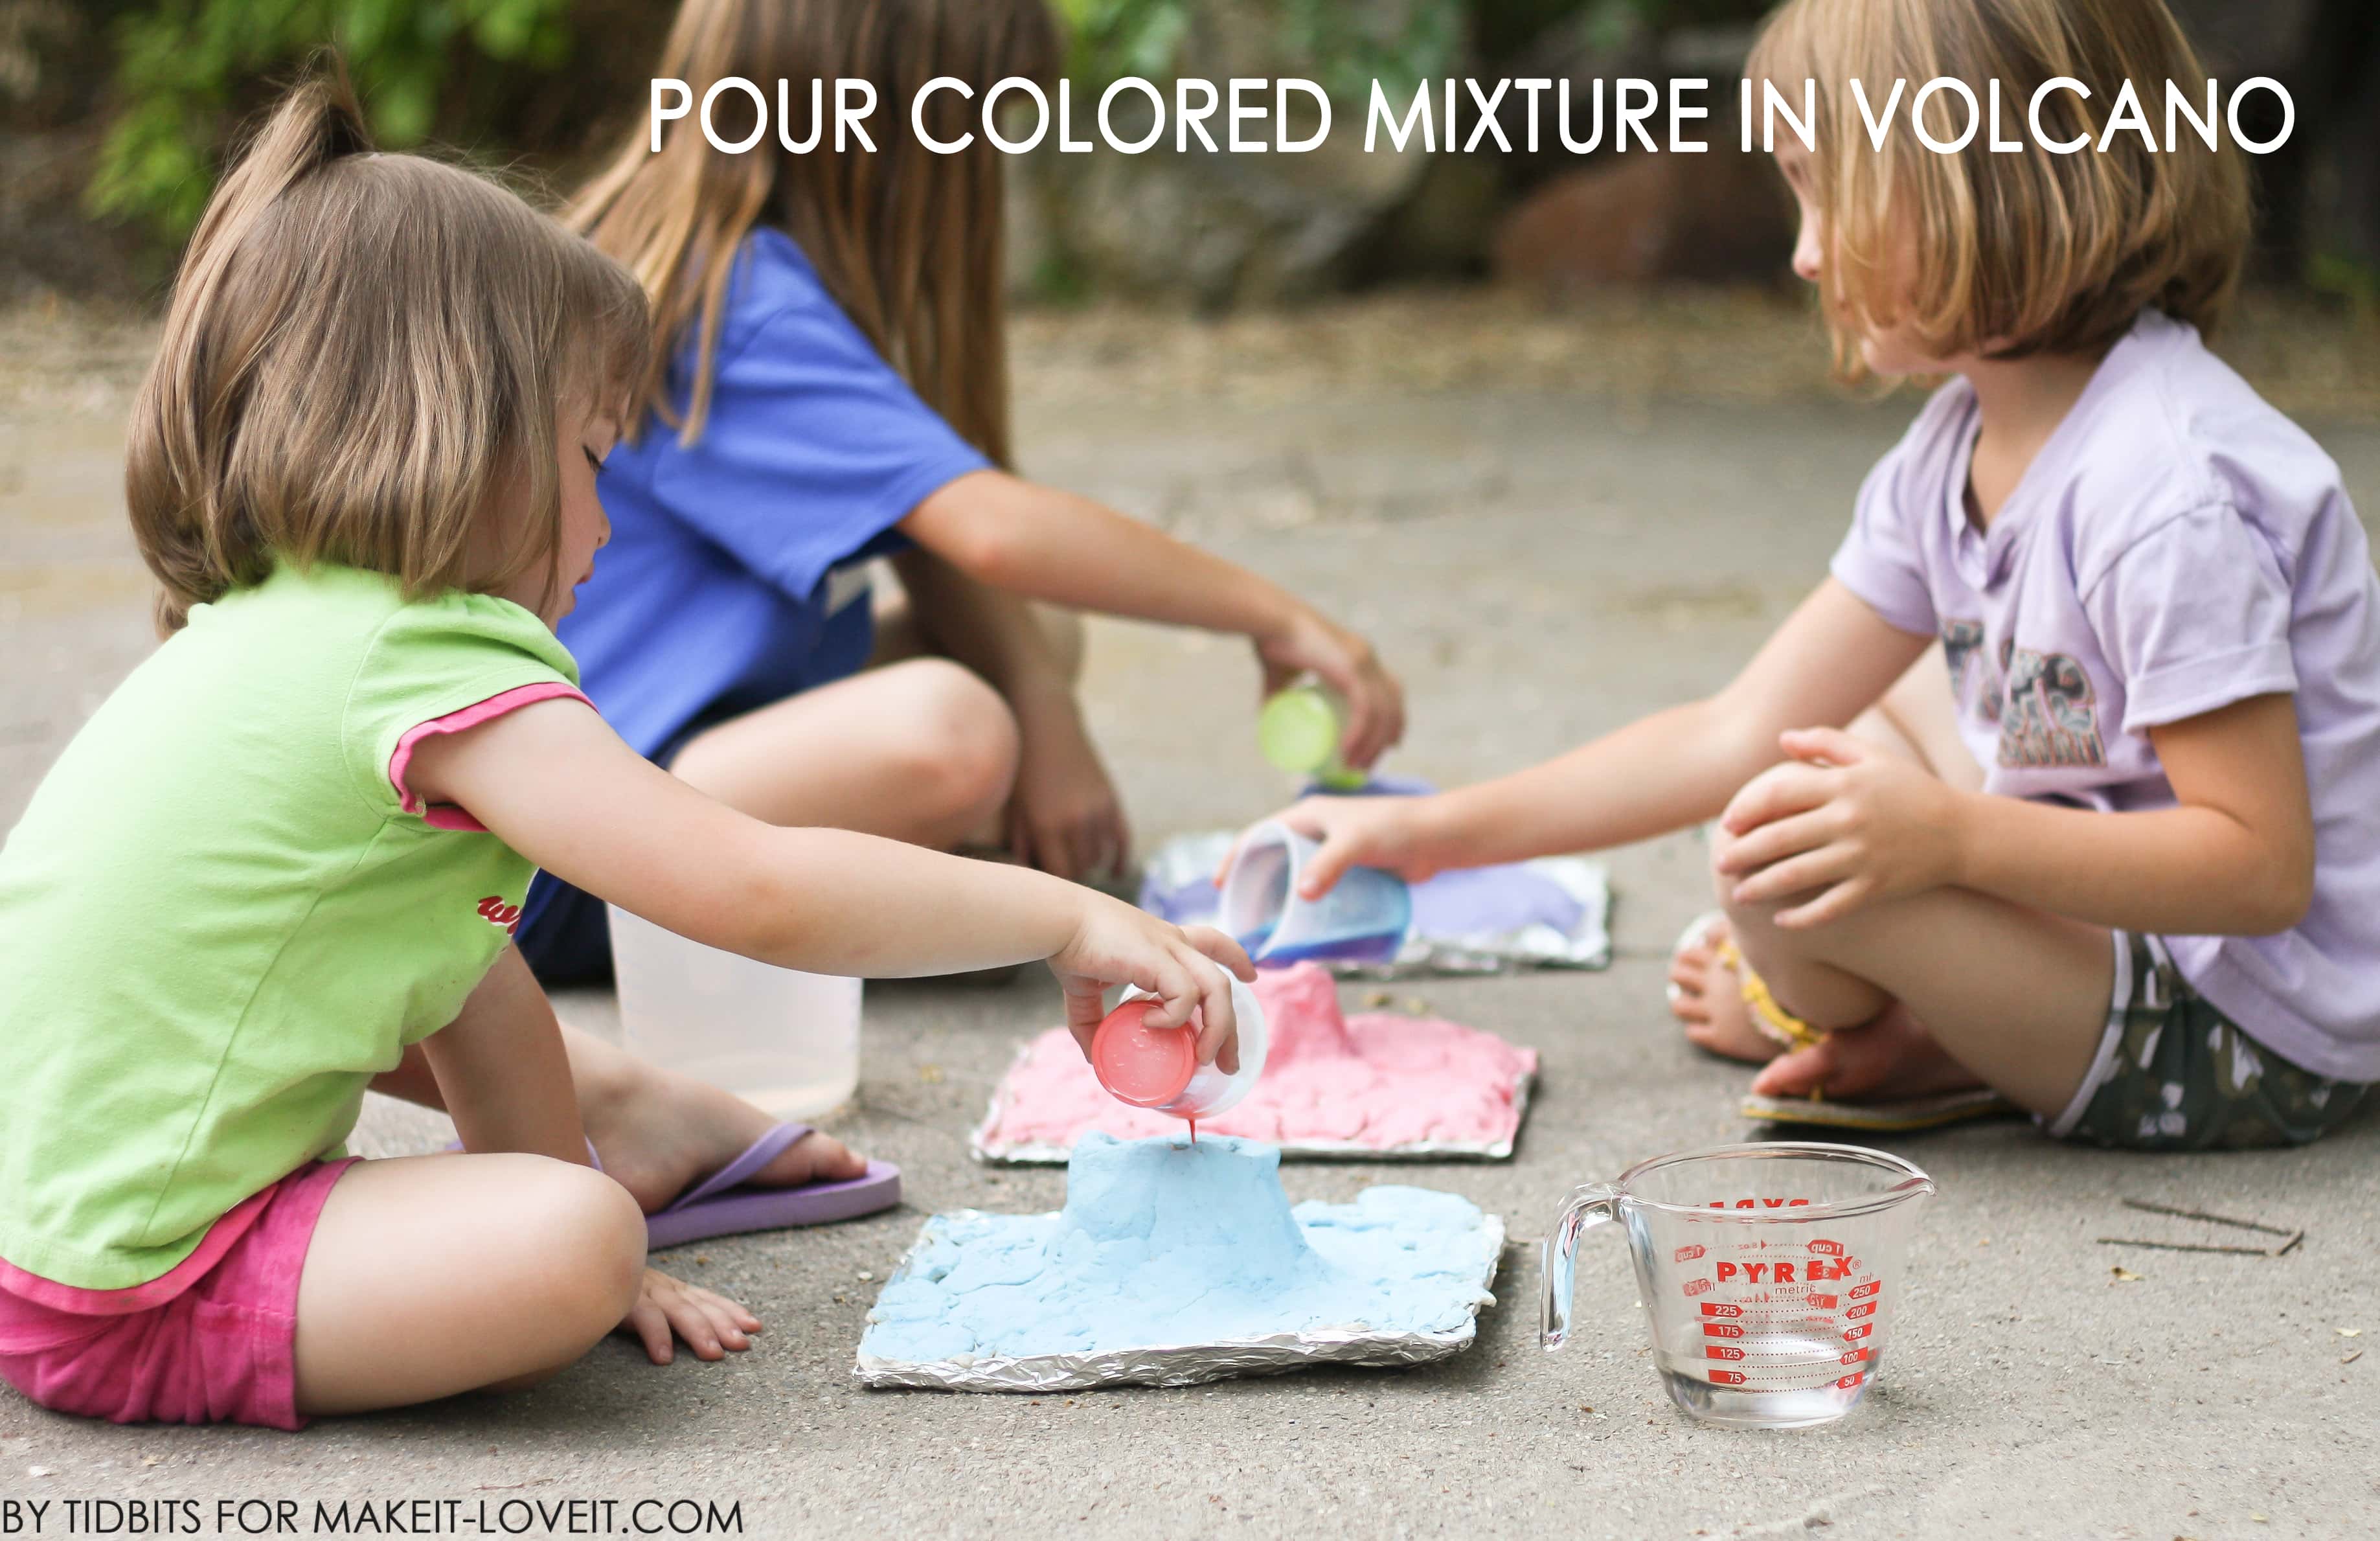
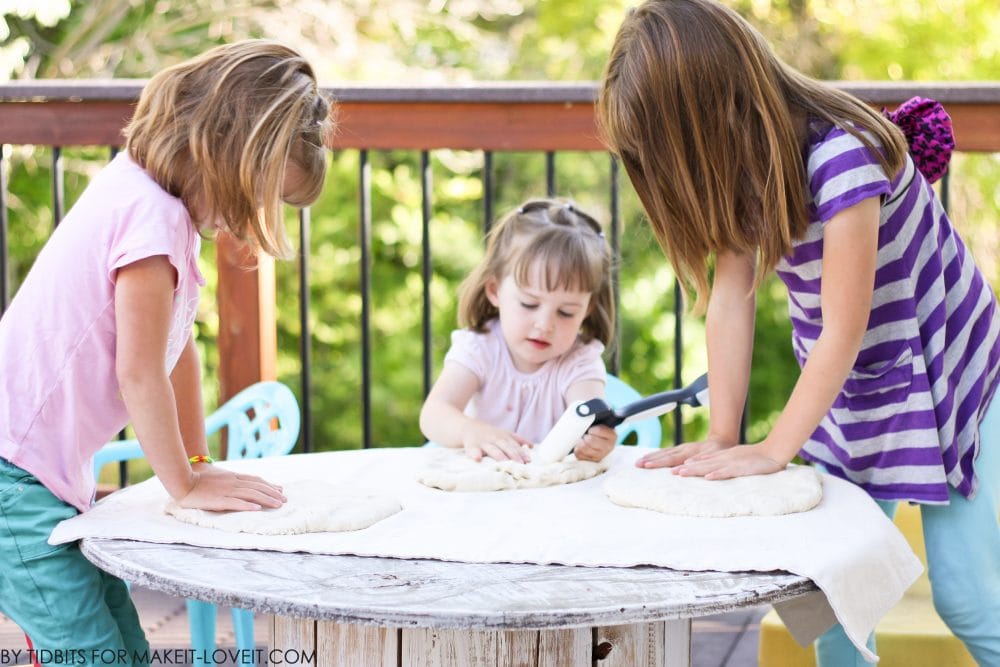
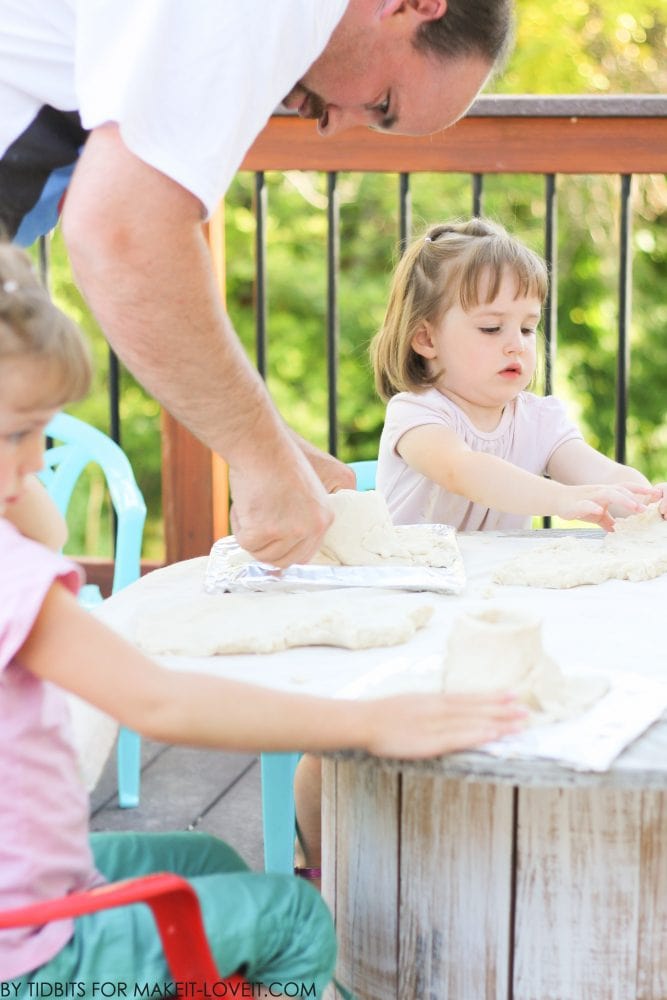
My kids range from 7 to 3 years of age, and it was all 6 hands on deck for every part of this project.
Each one could be equally involved in every step, and they all had so much fun!! Me included!!

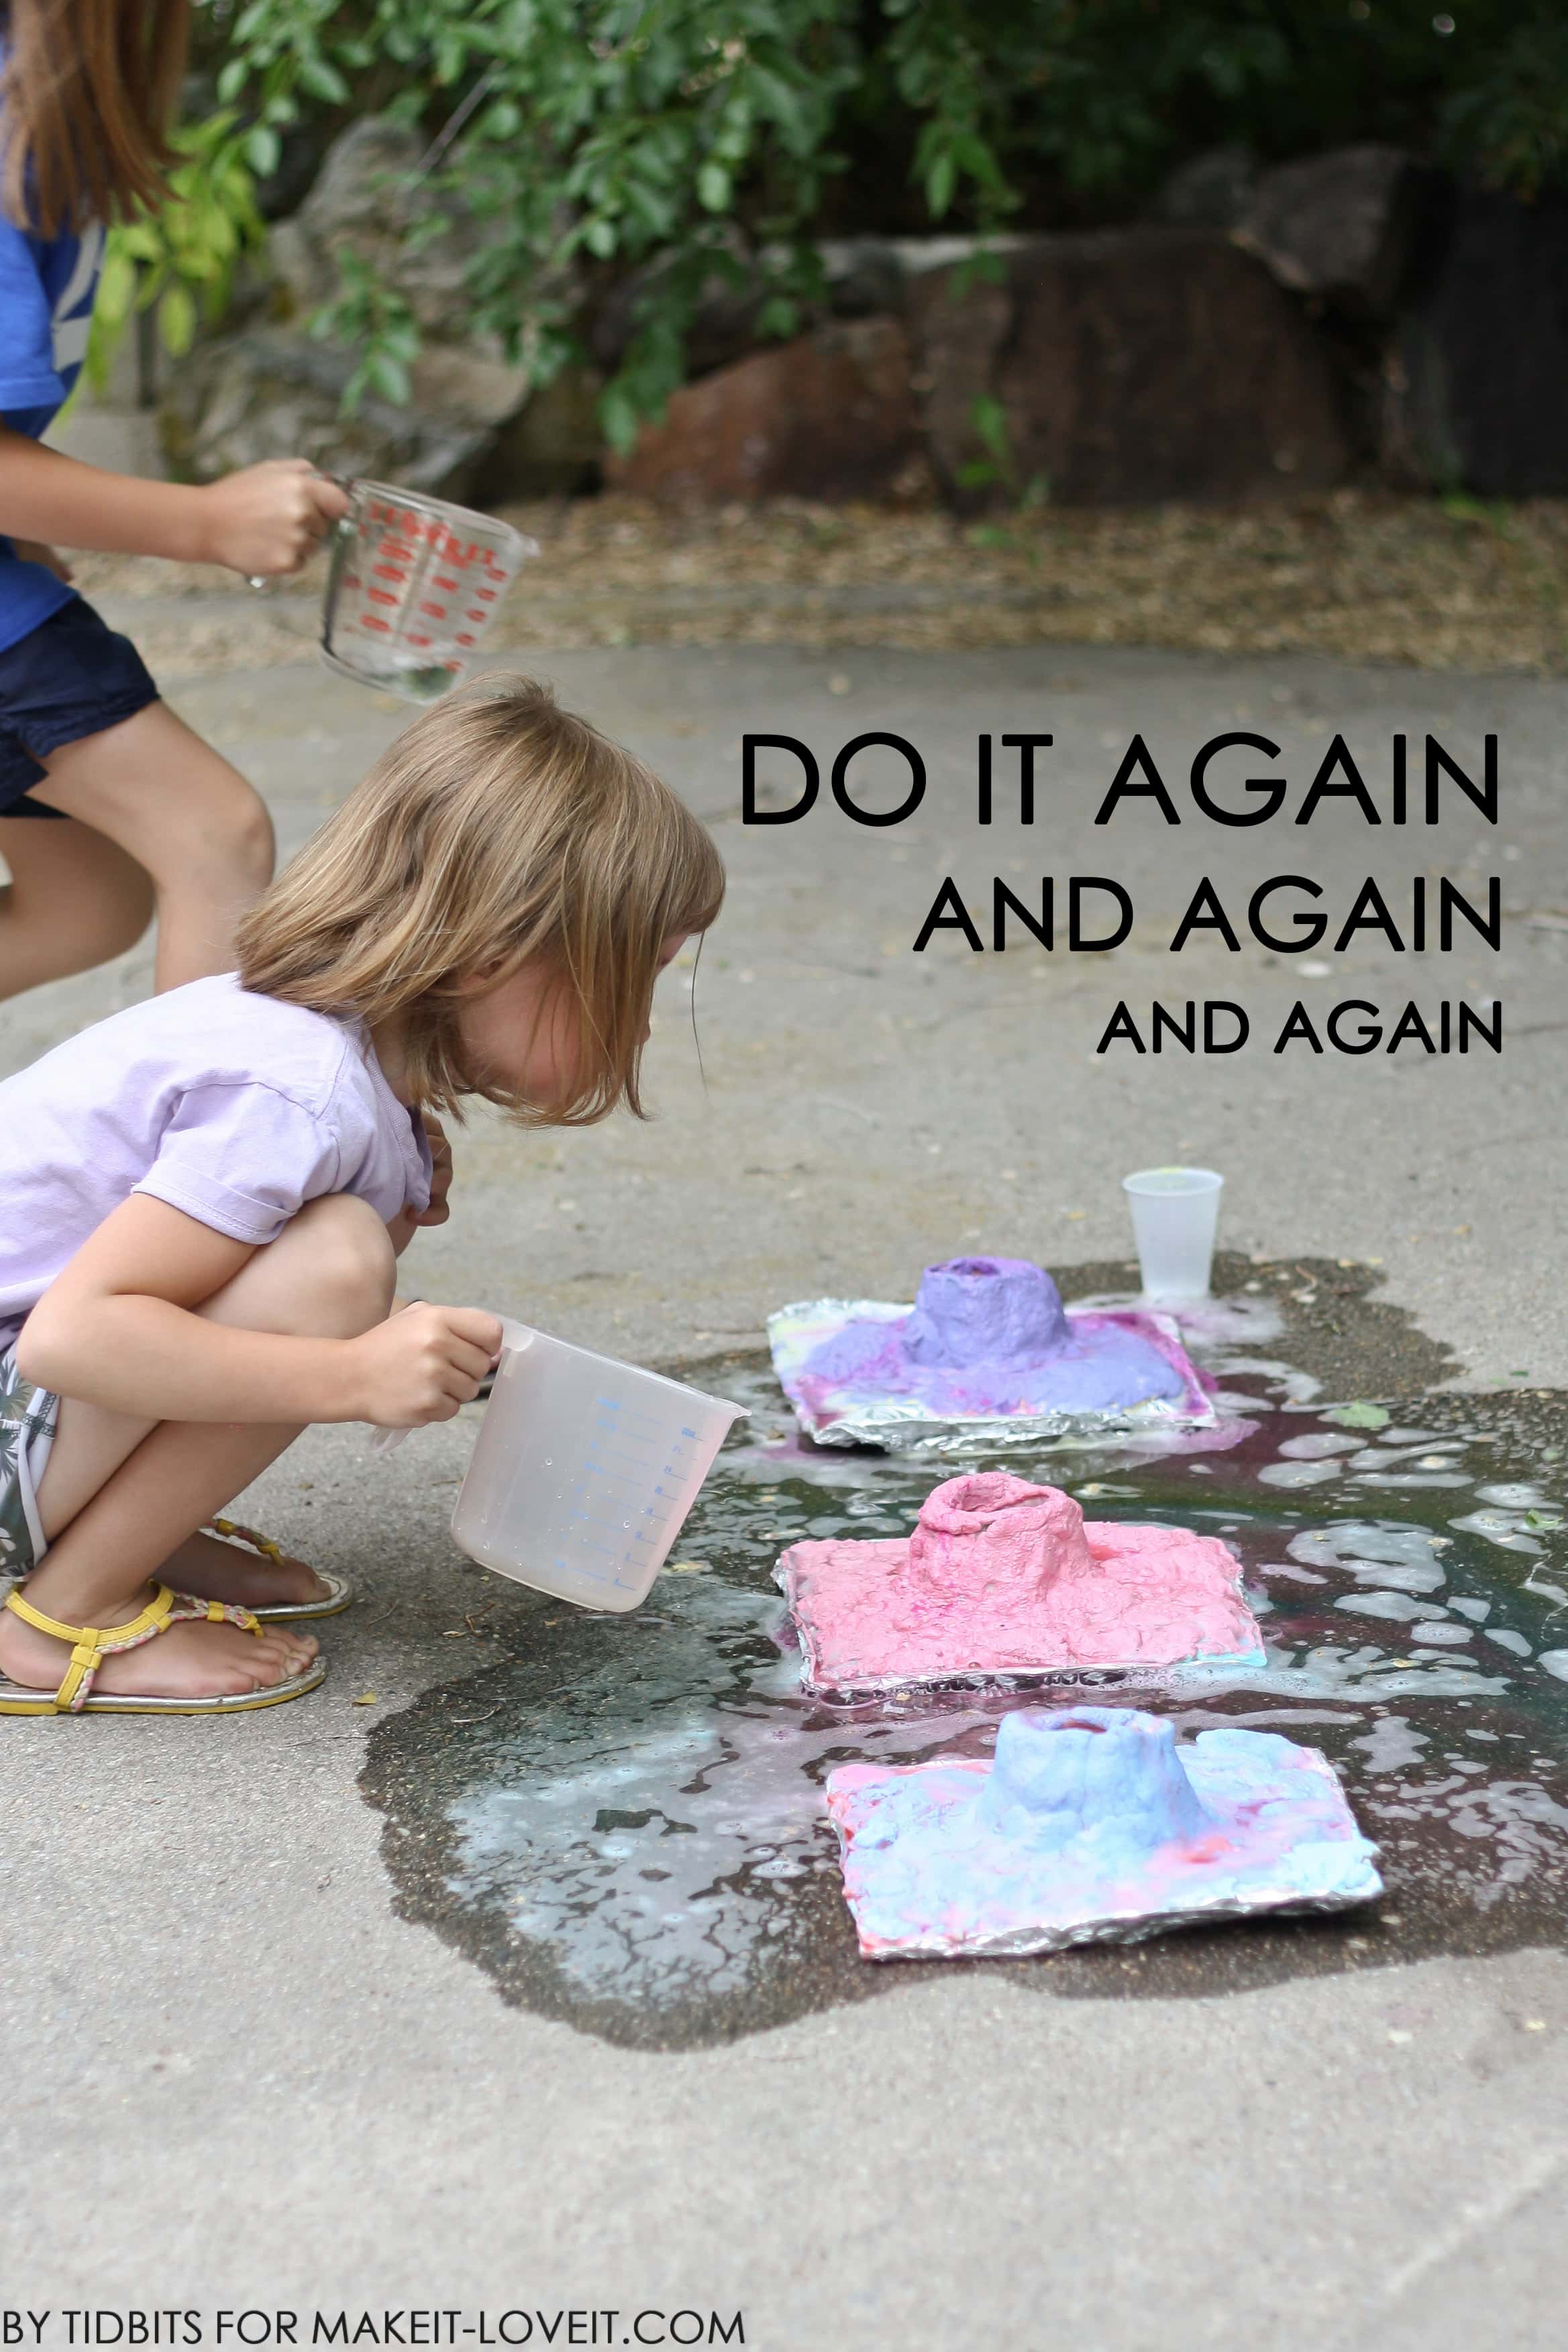
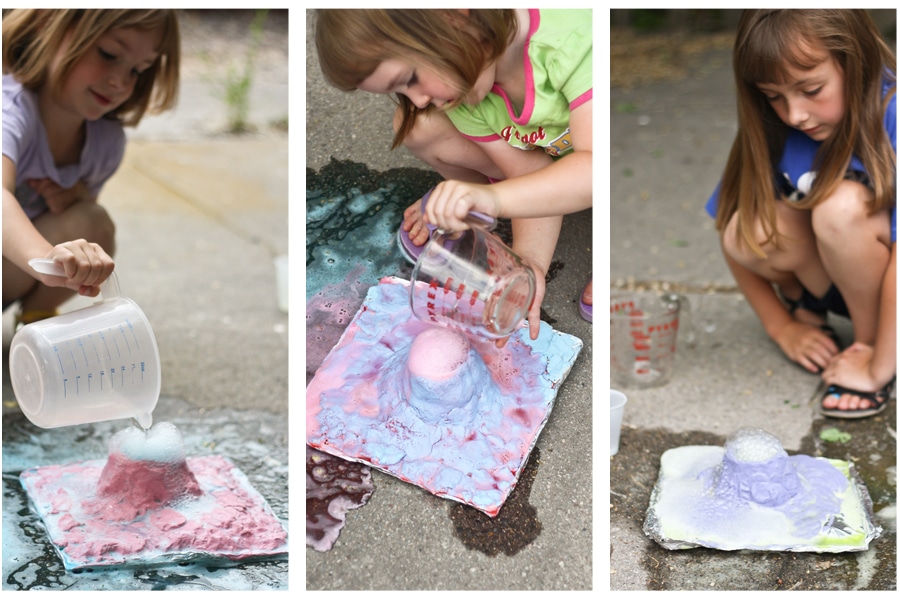
And believe me, my girls “exploded” their volcanoes again and again and again……. Pure fun!
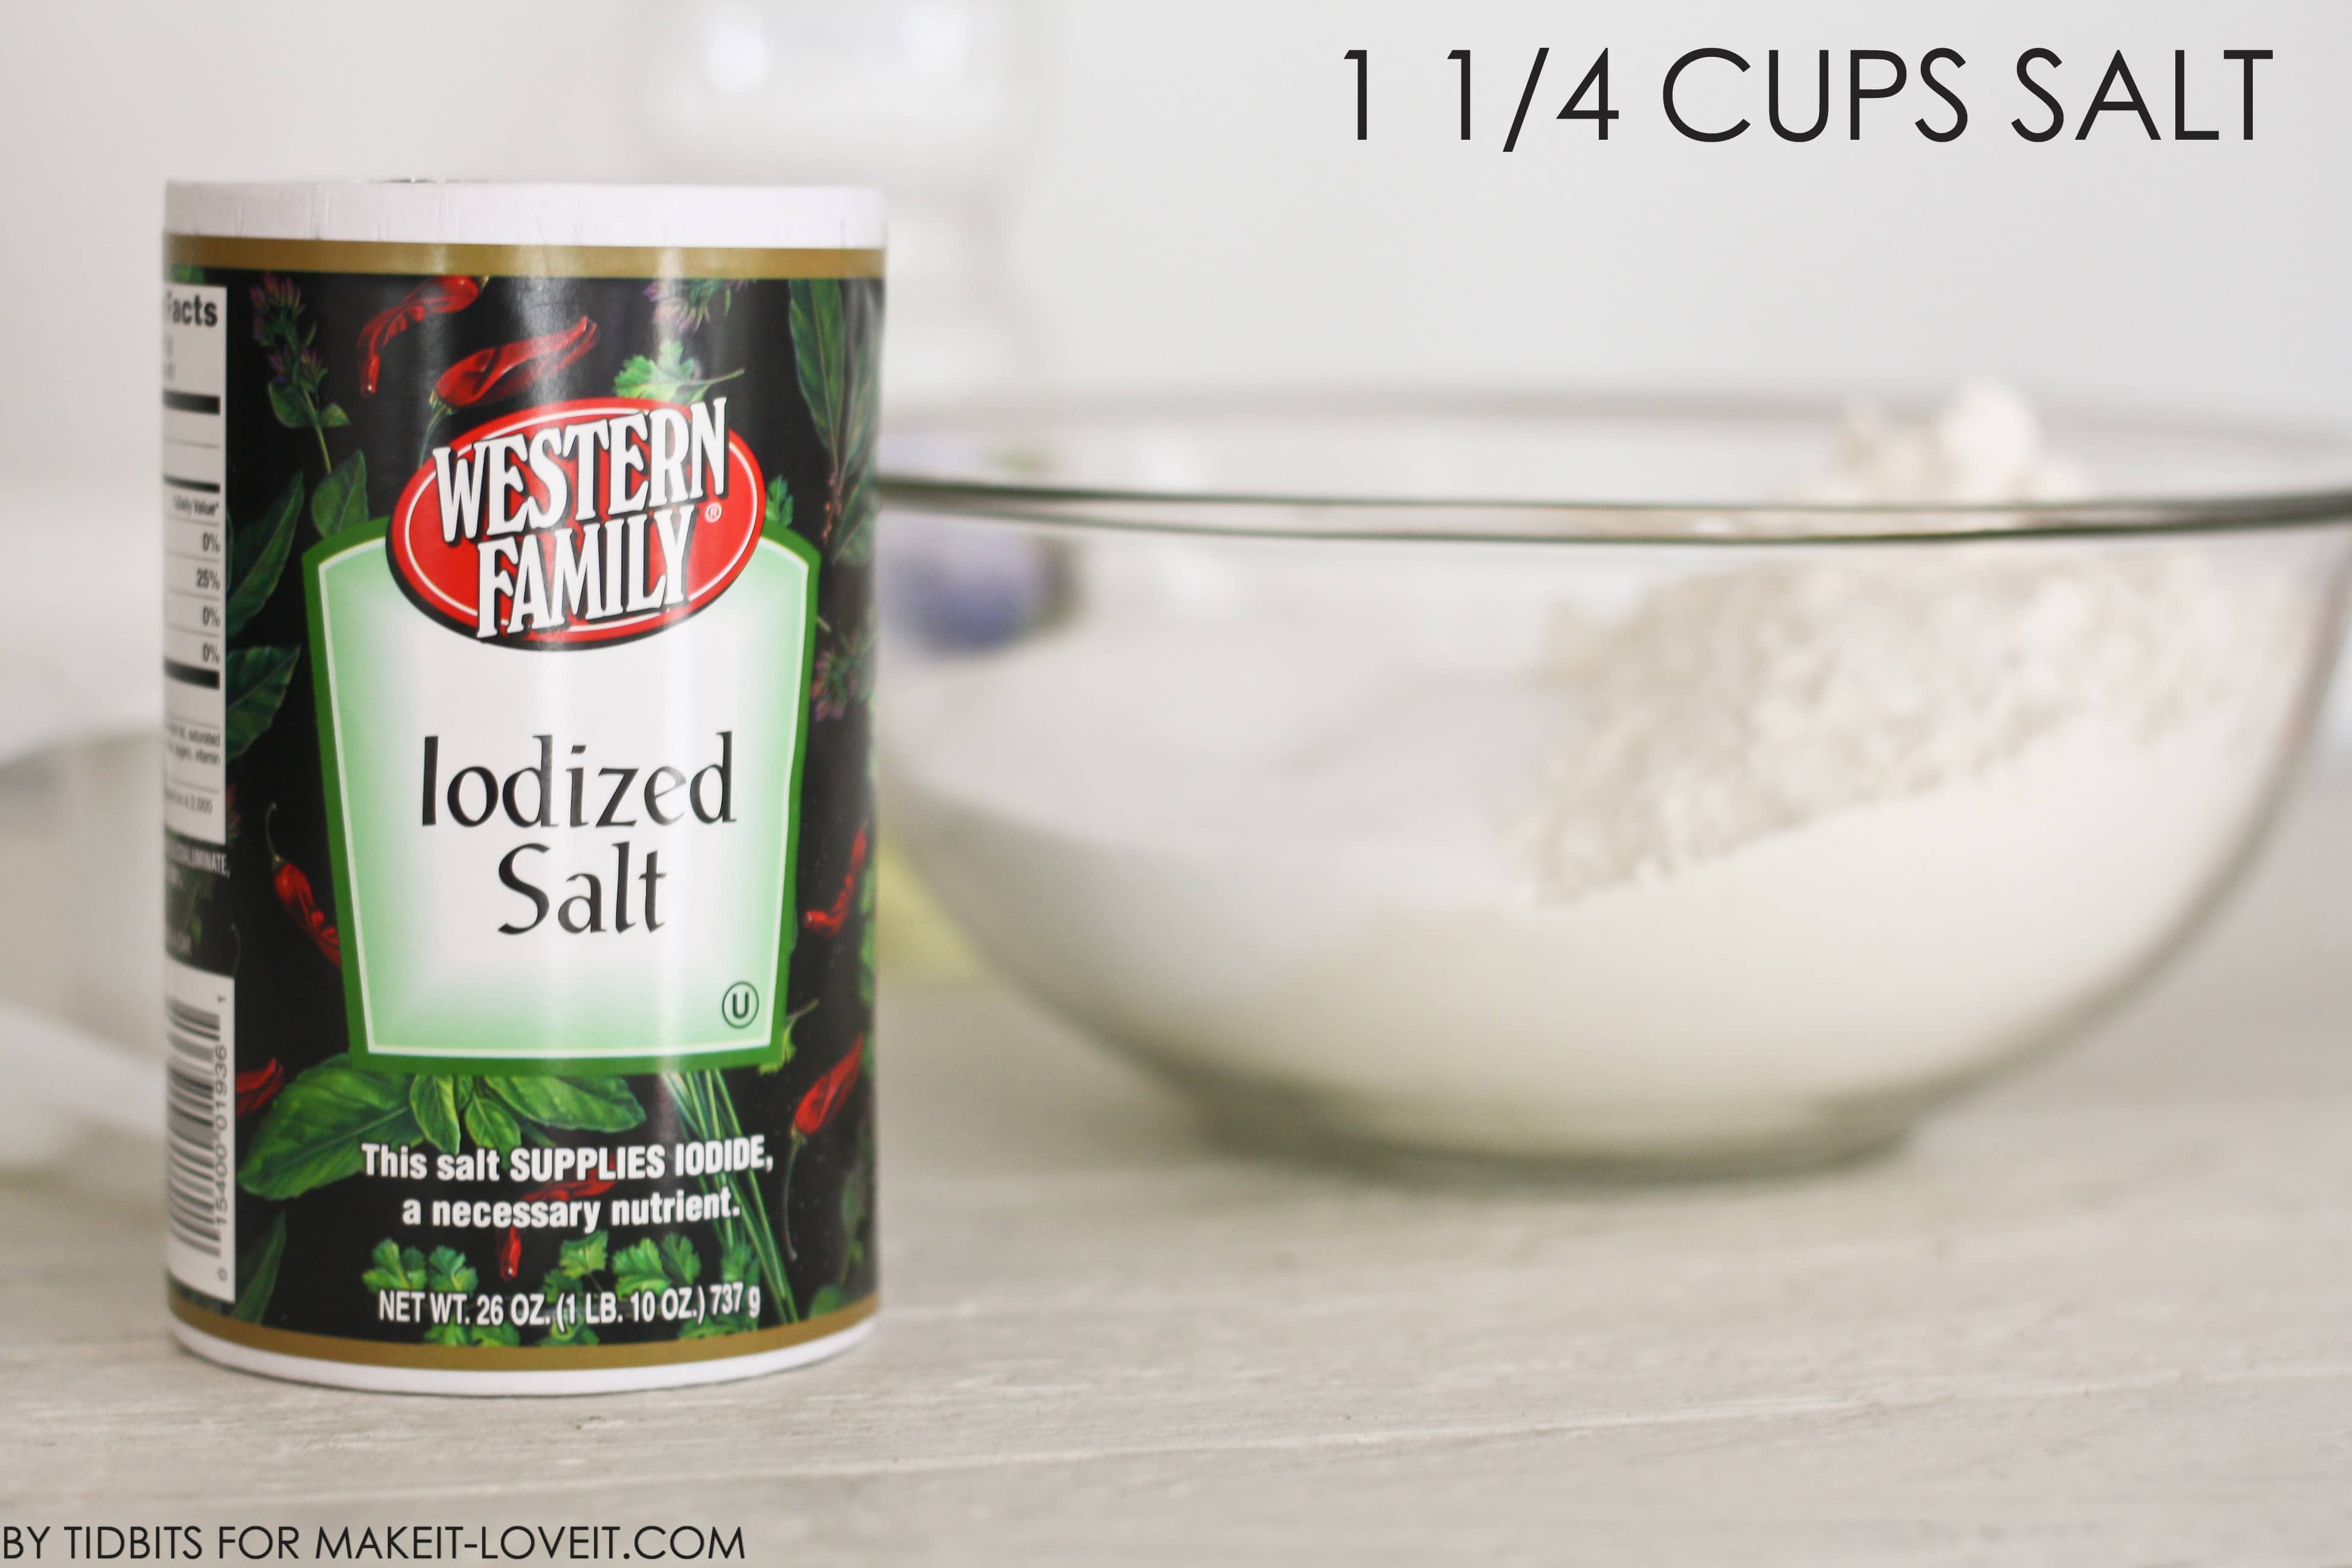
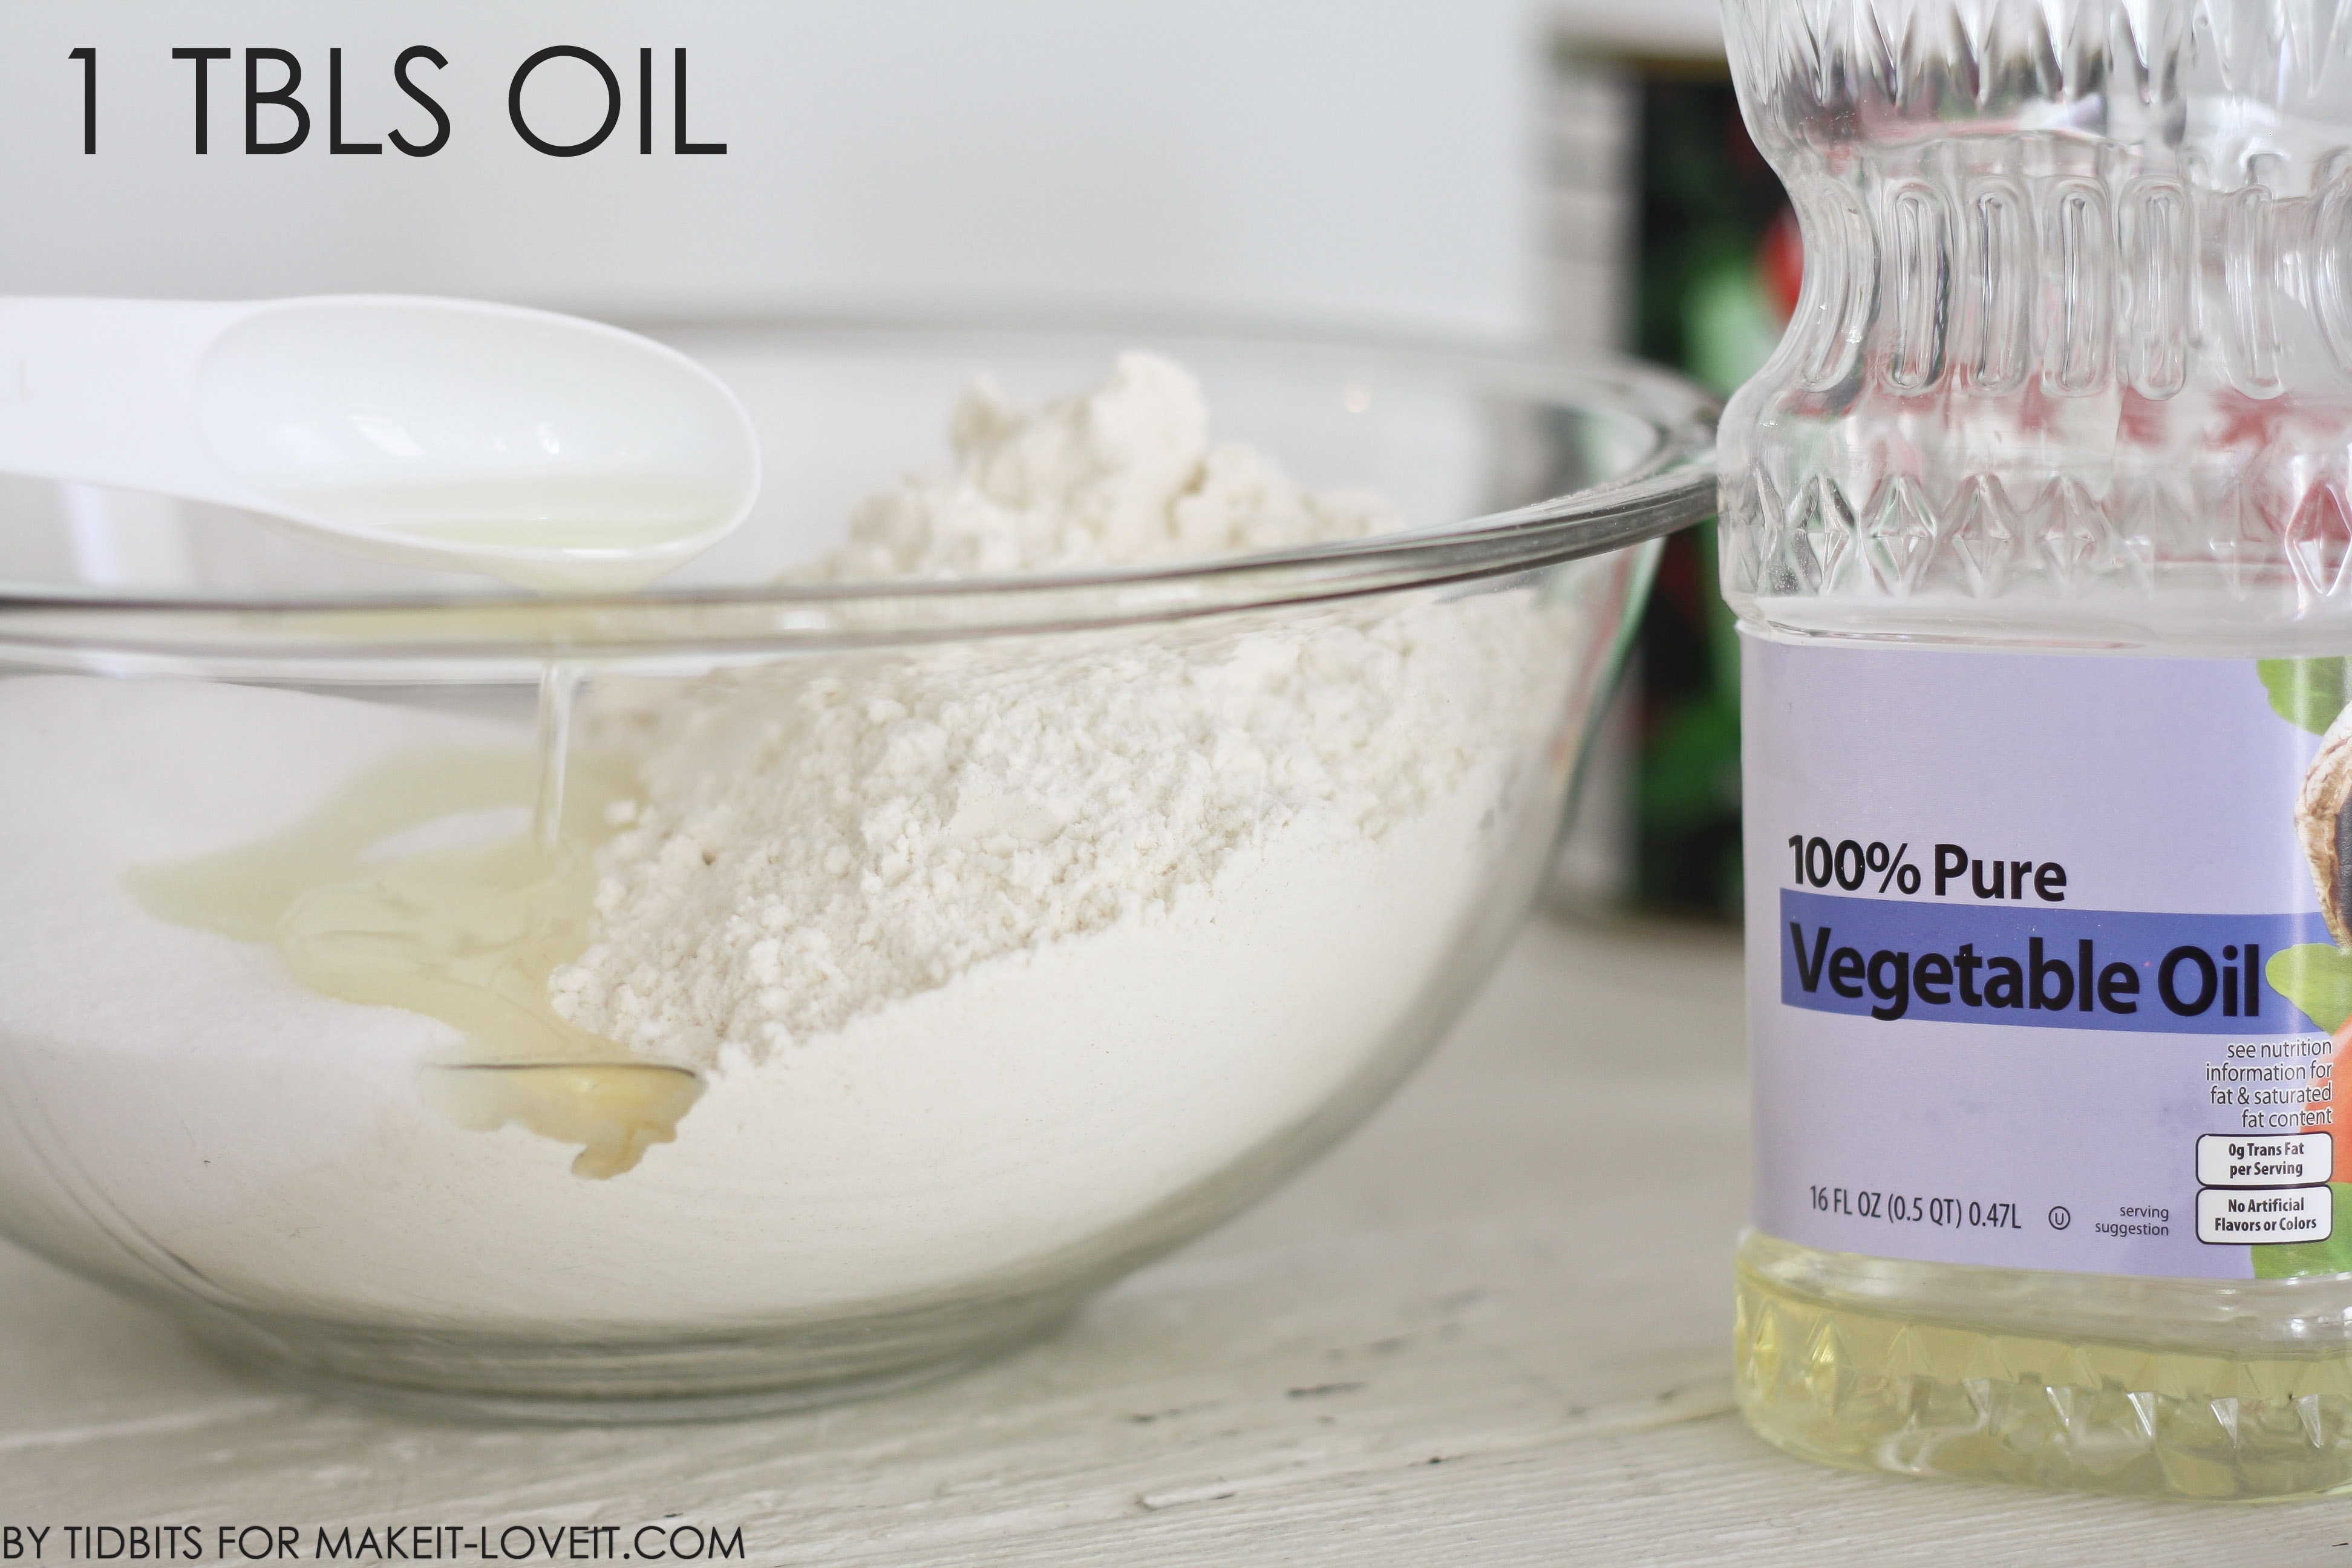
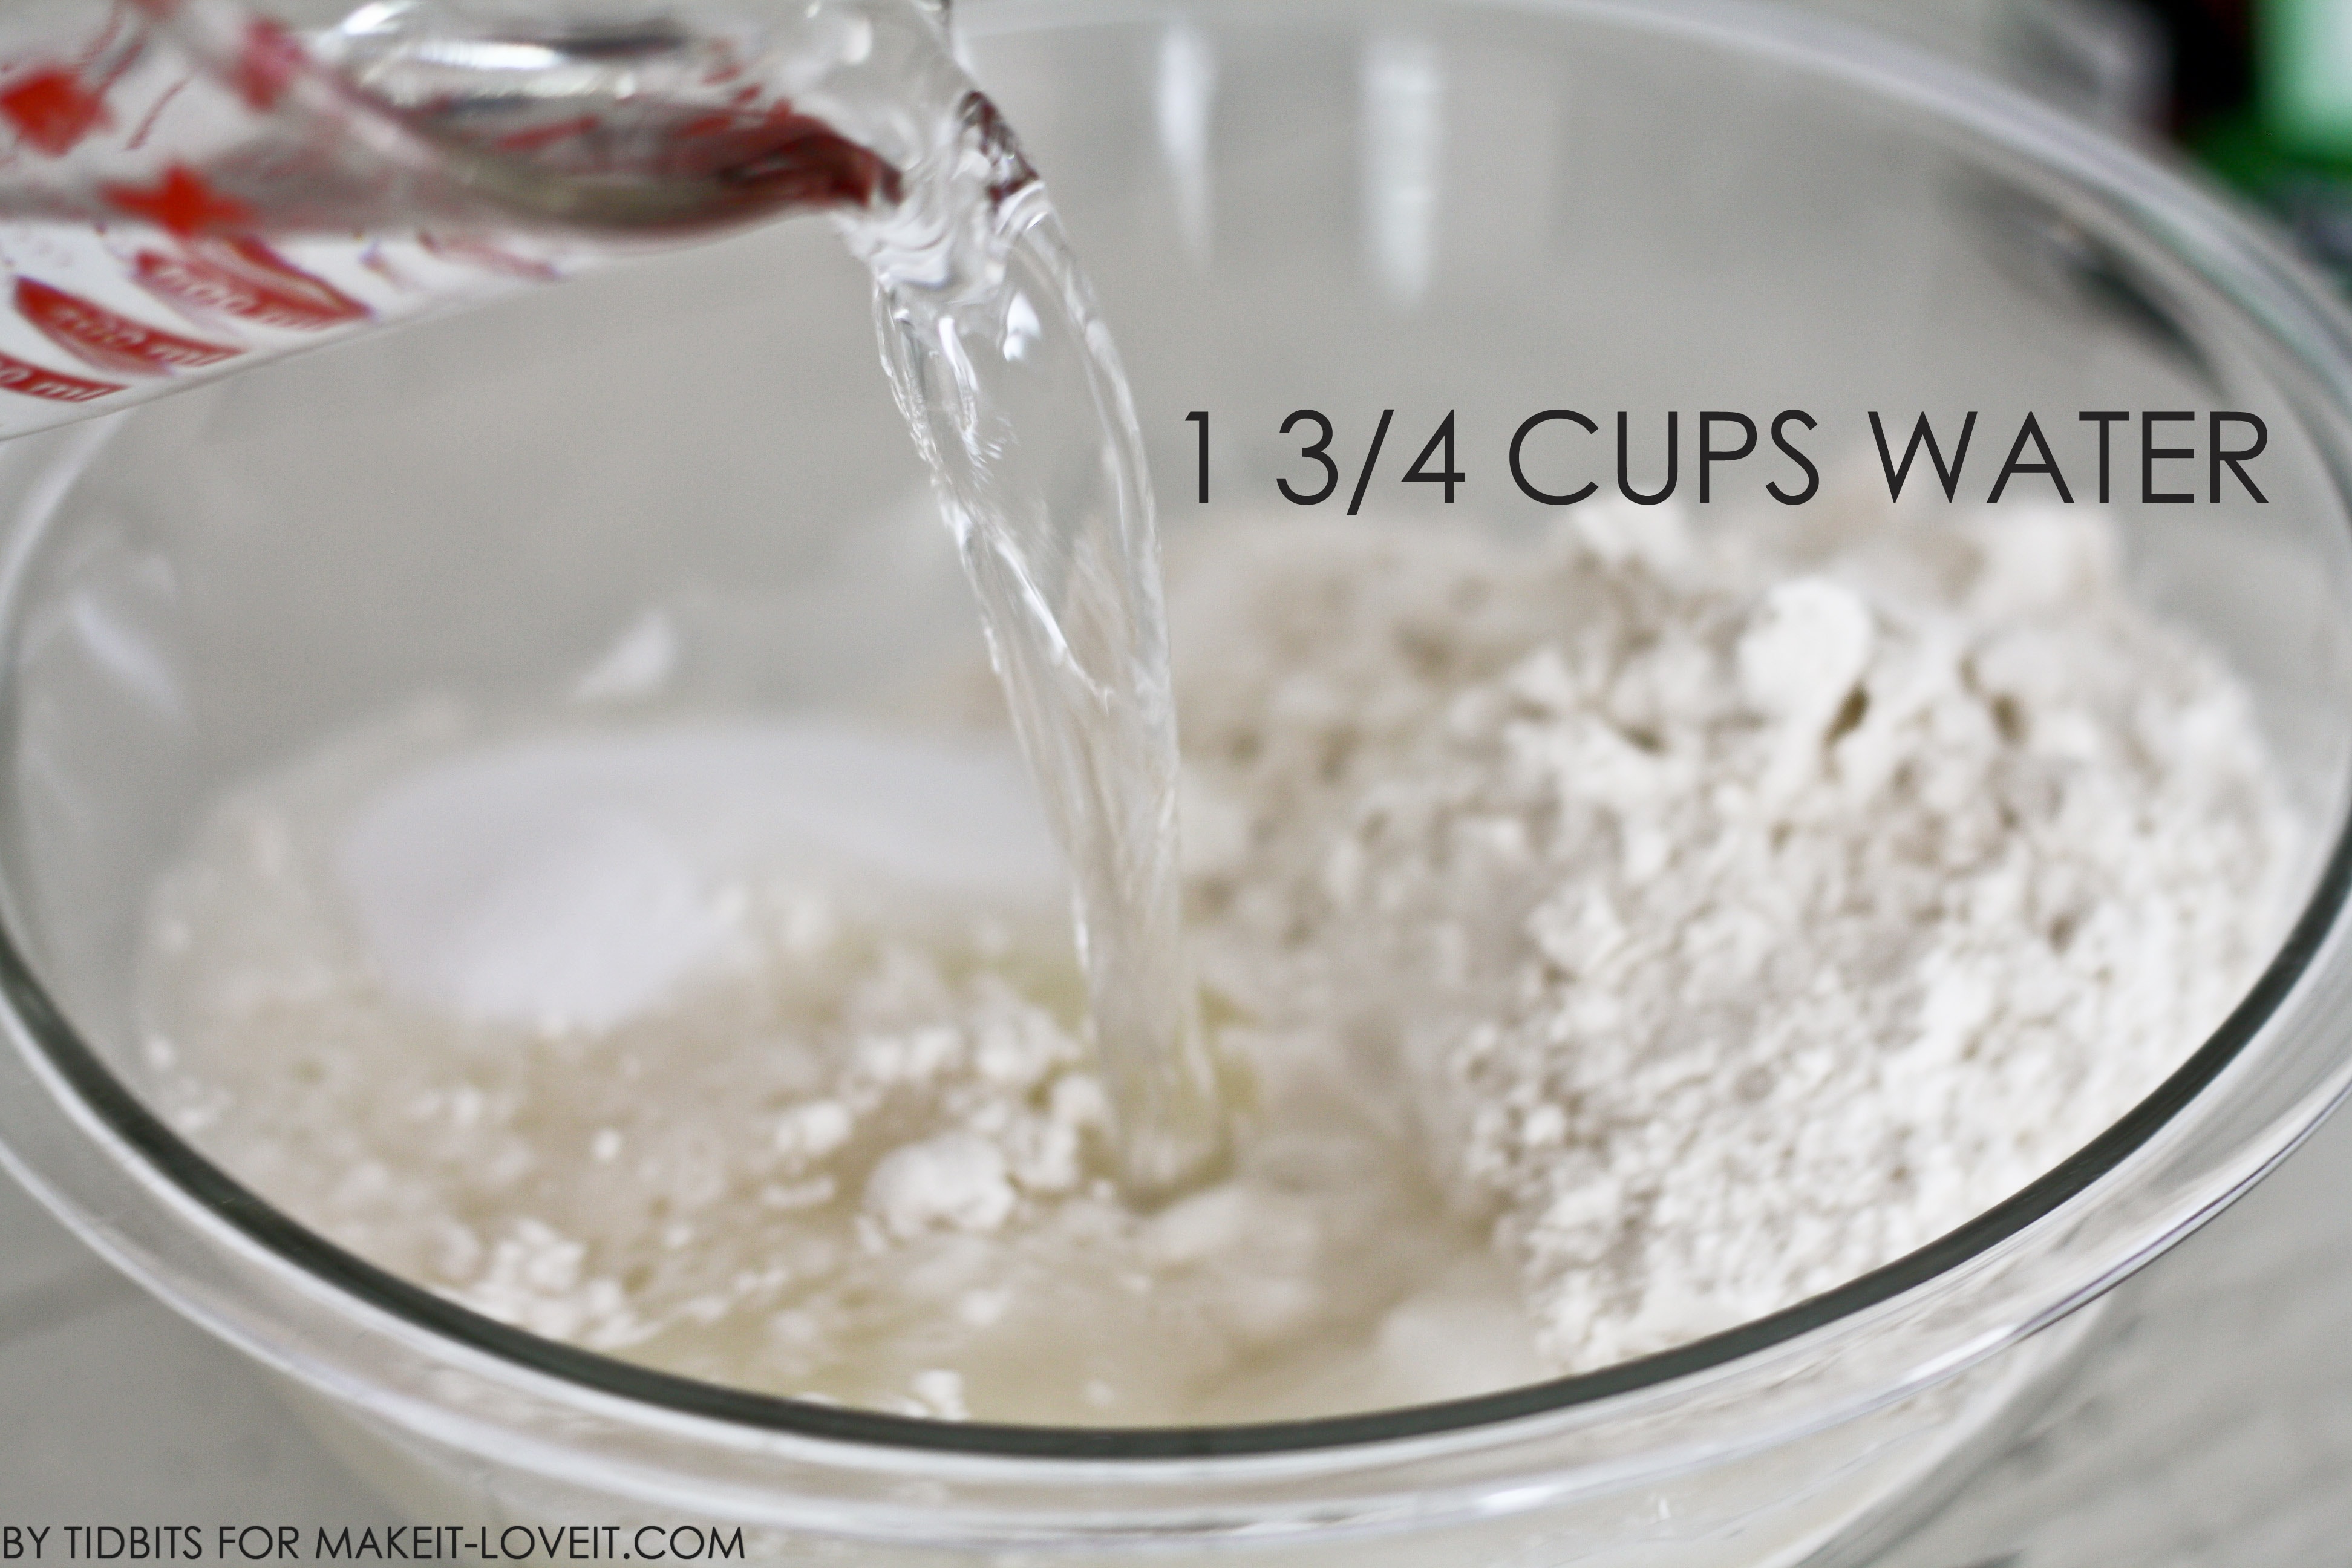
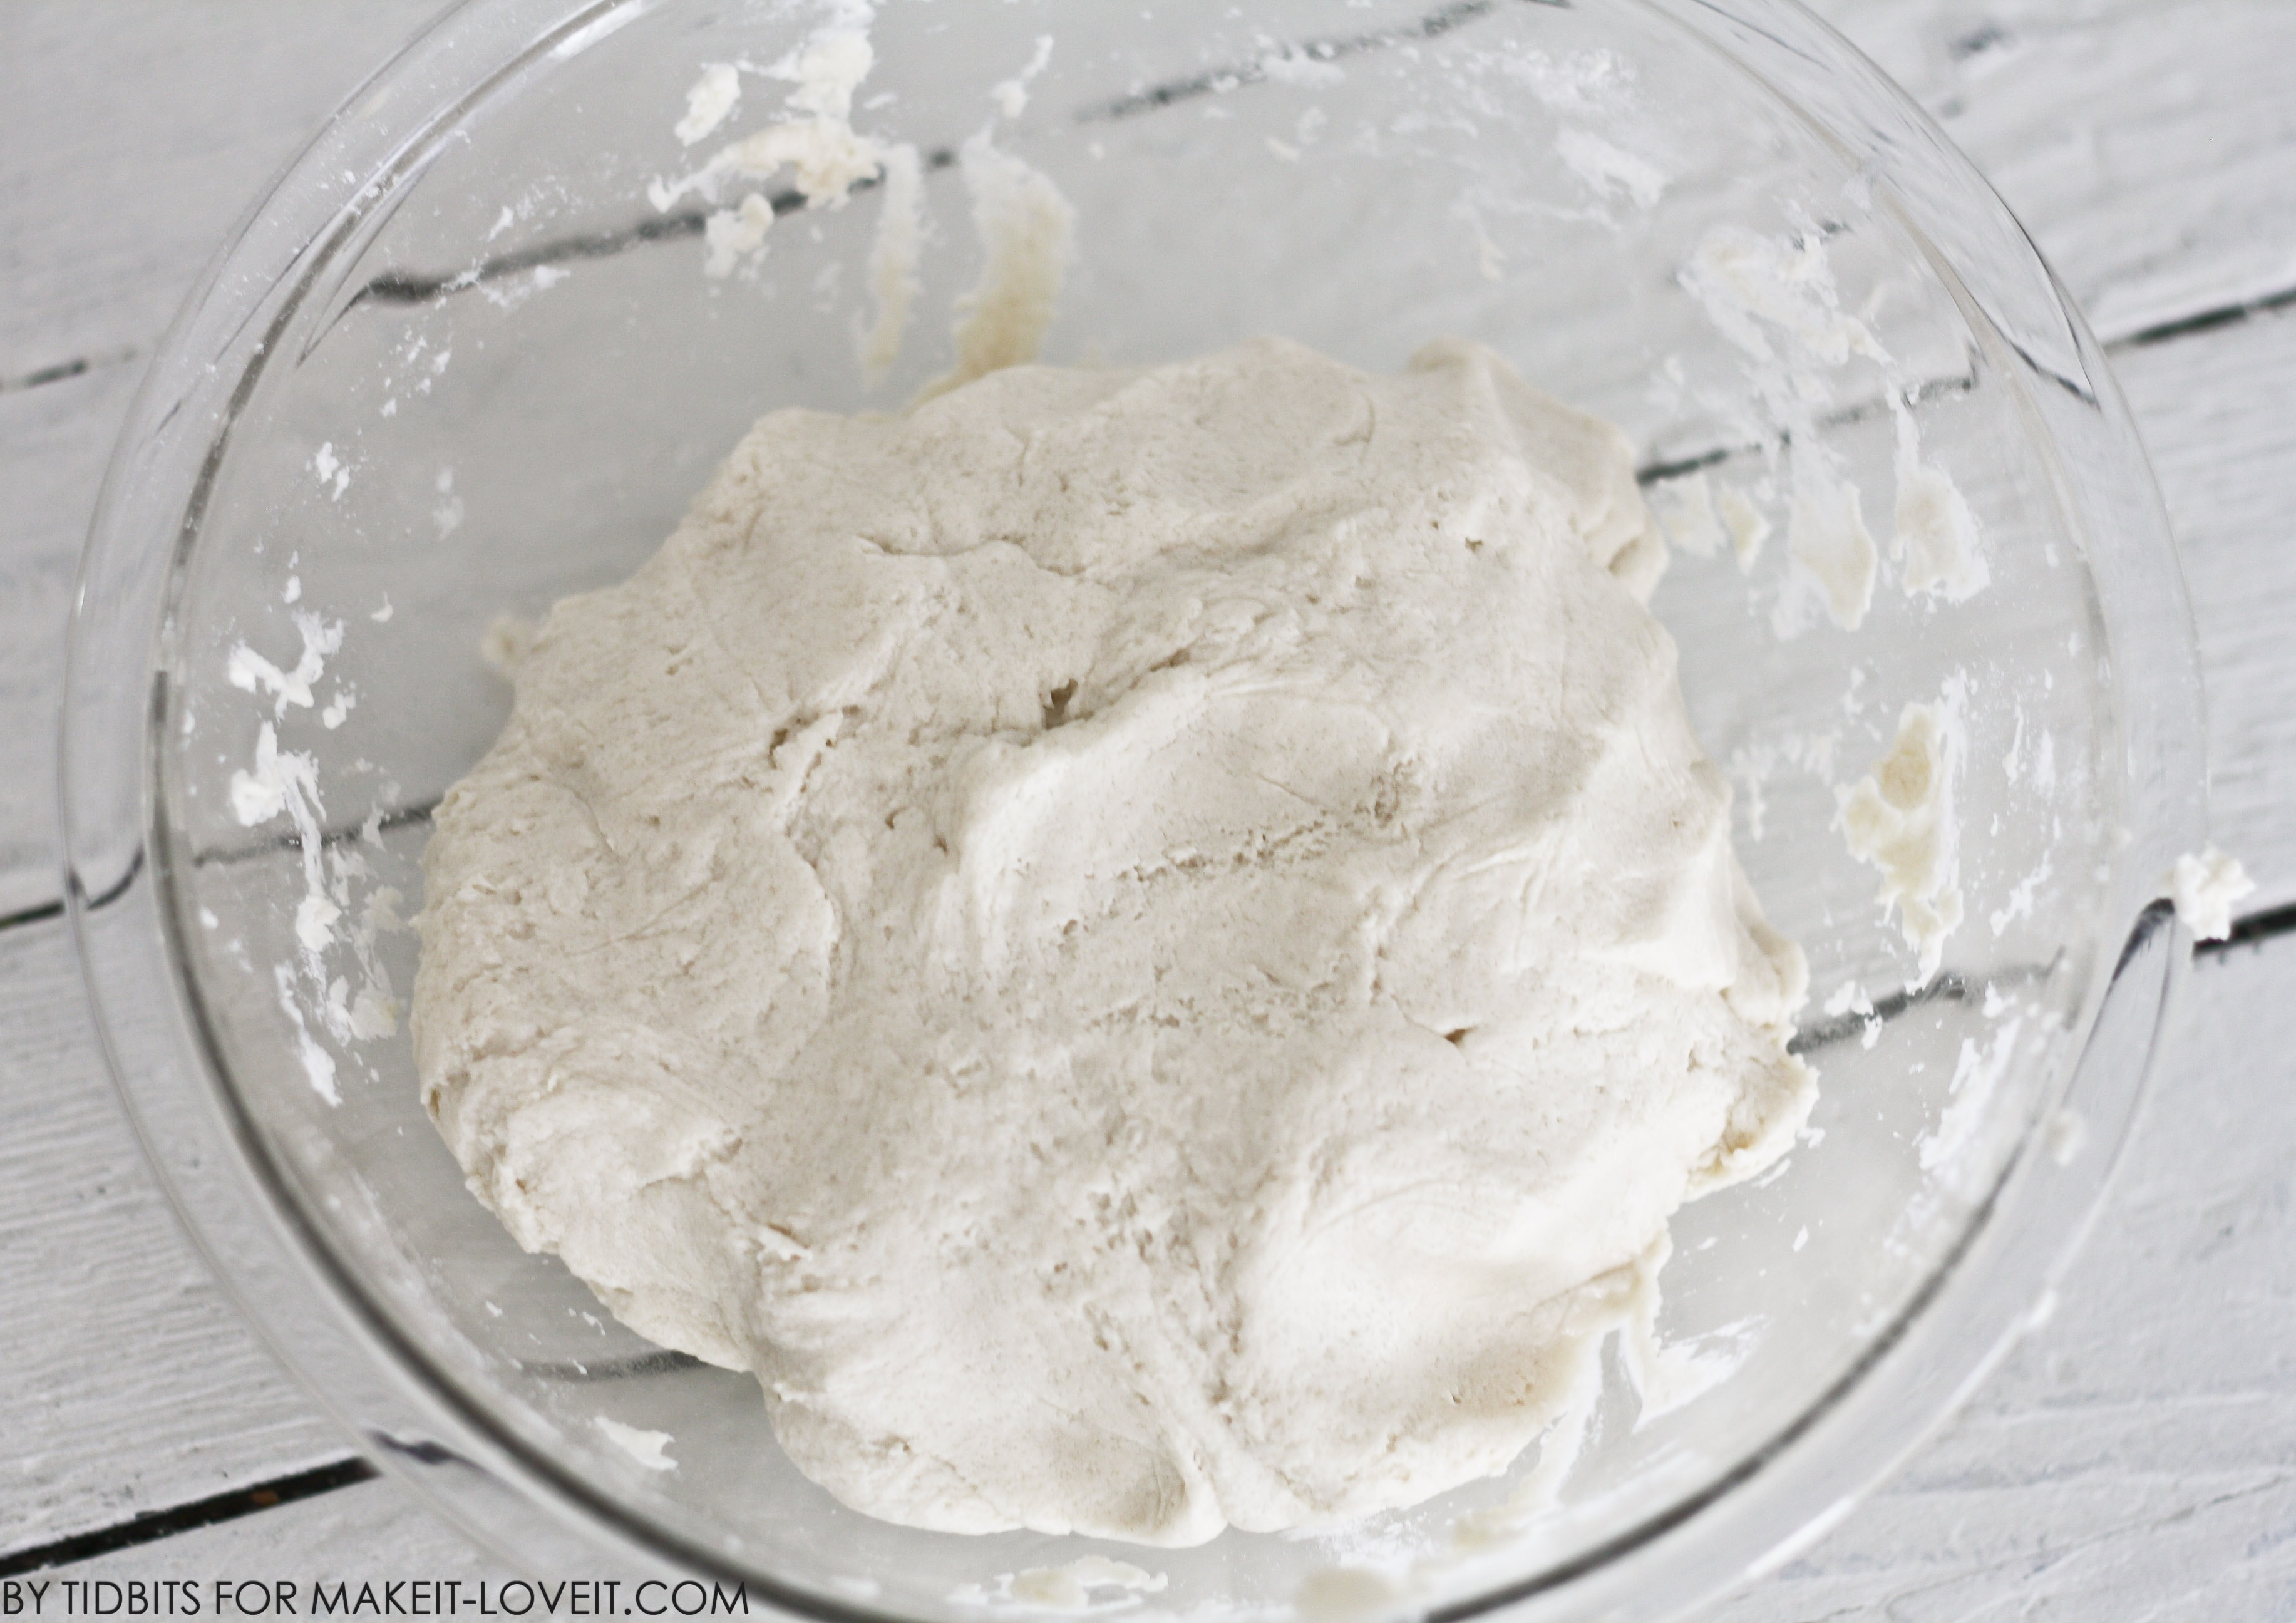
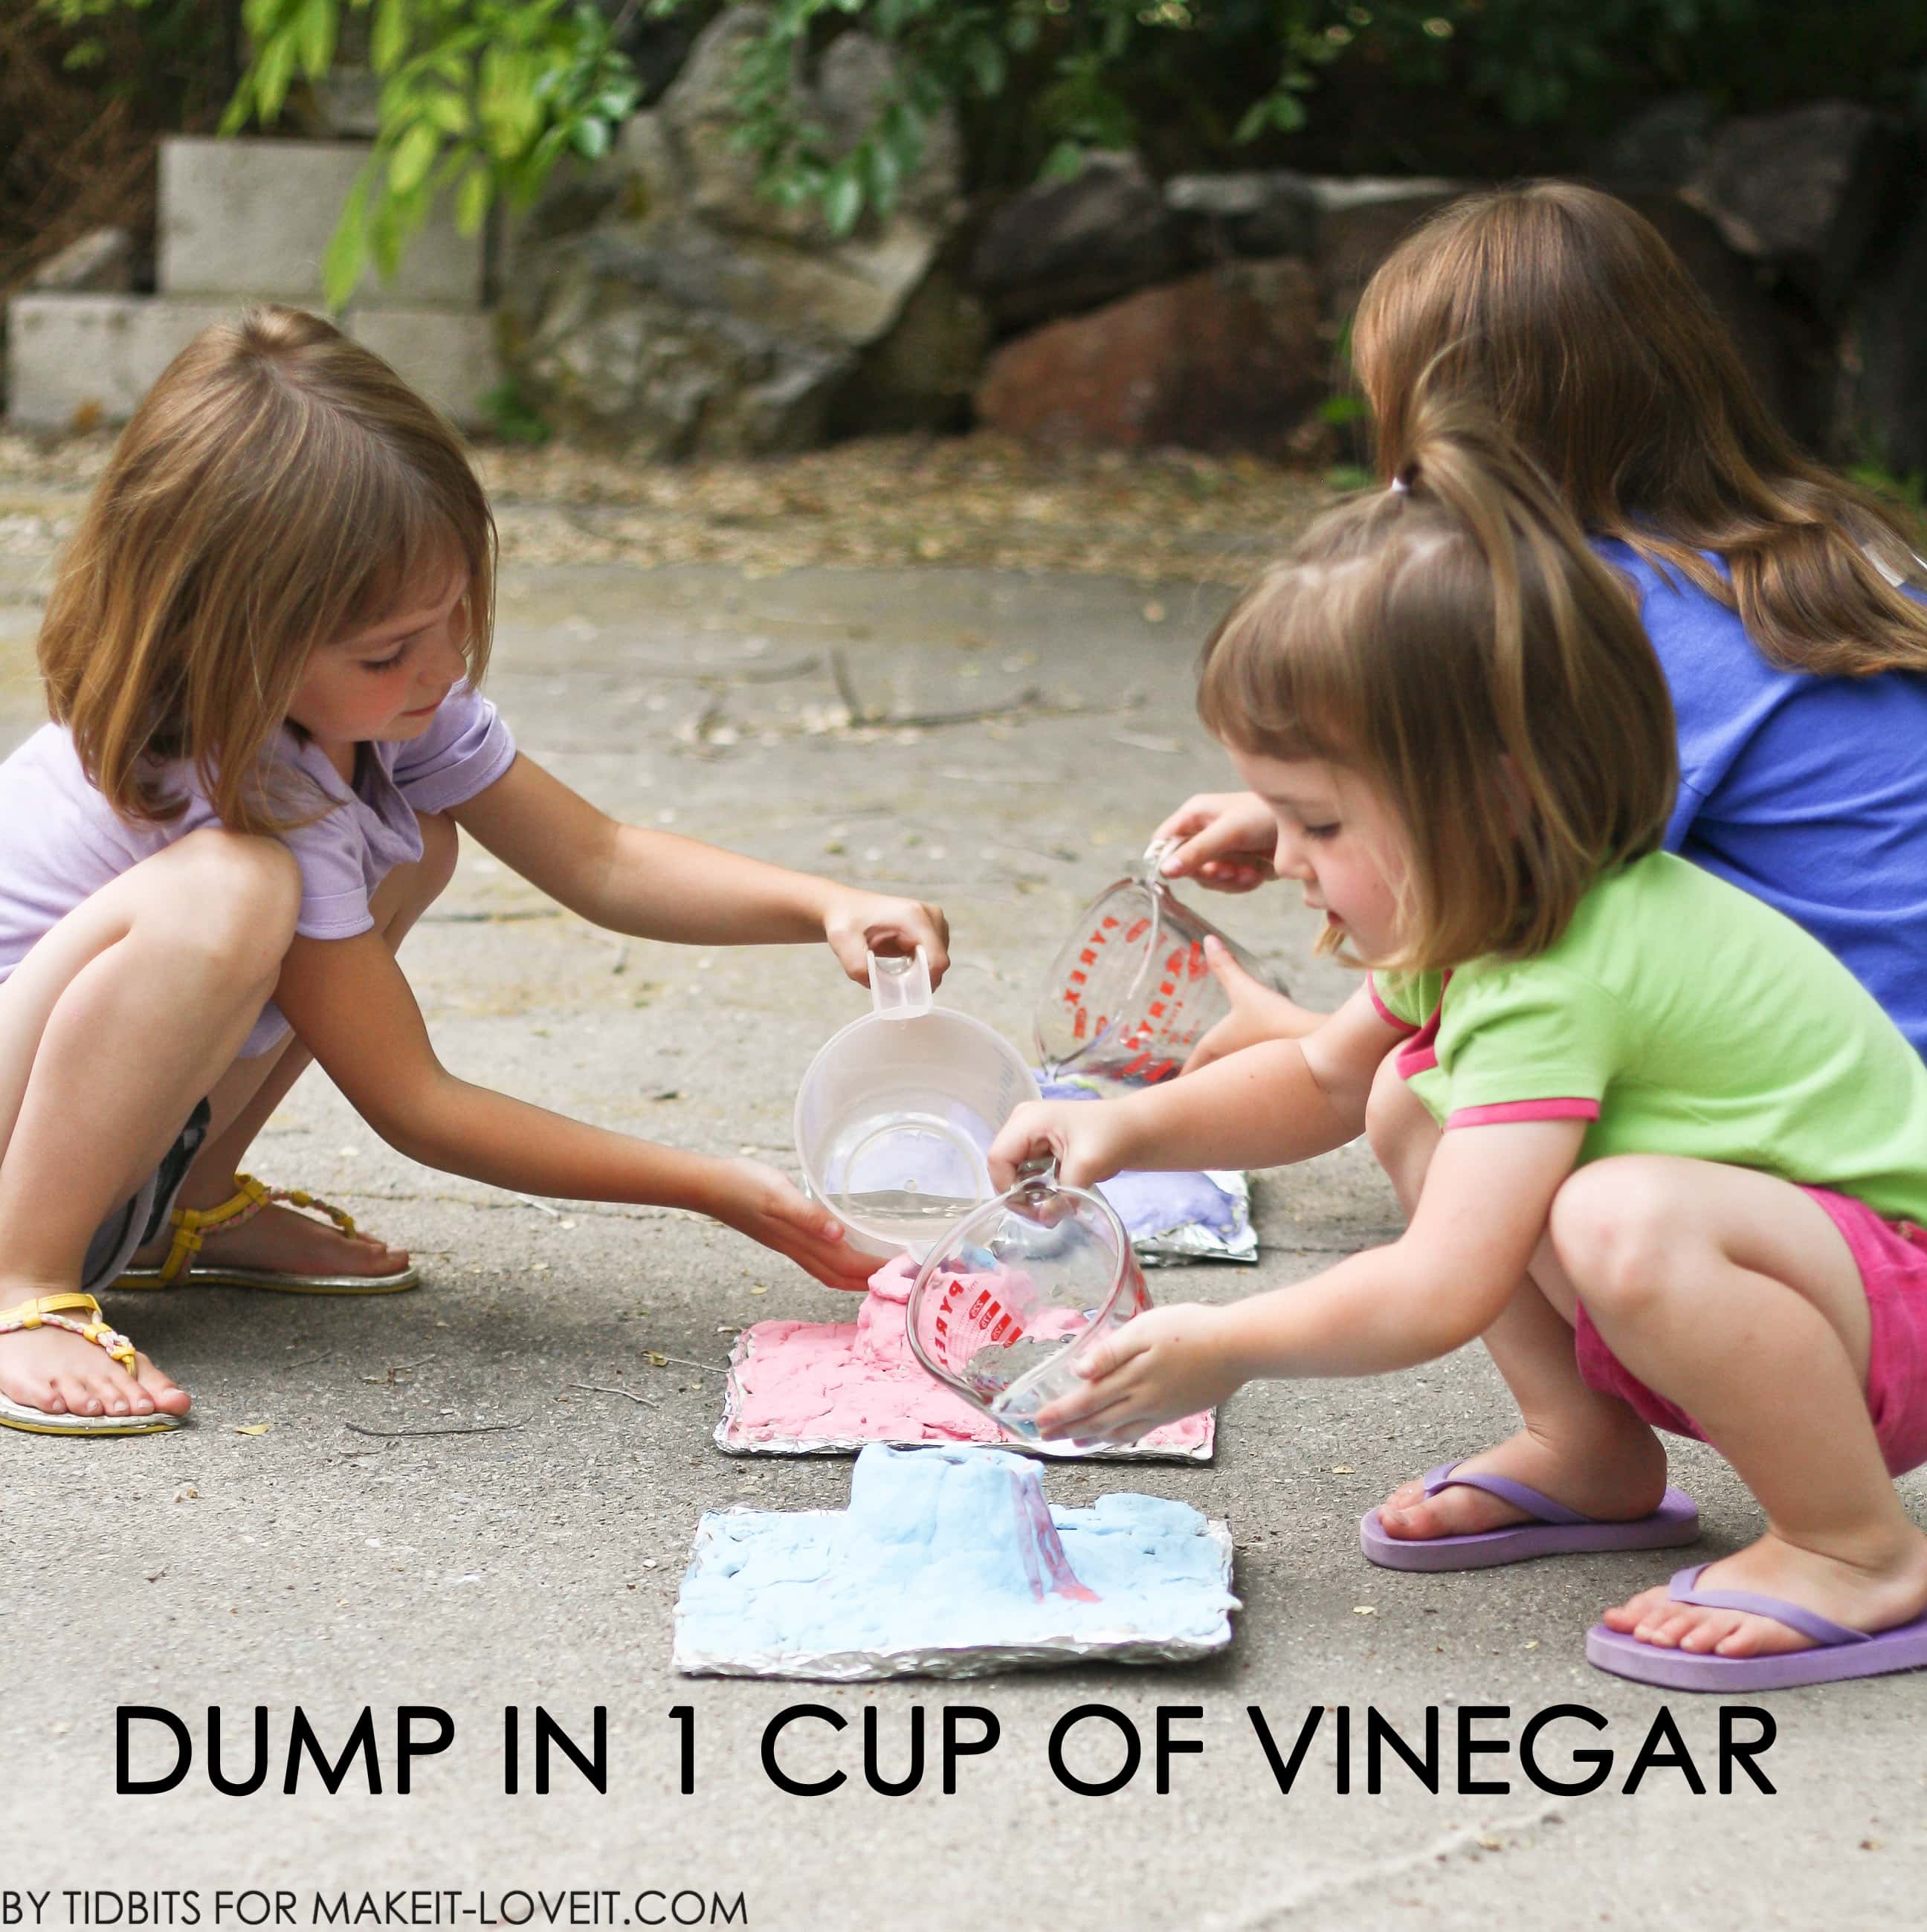
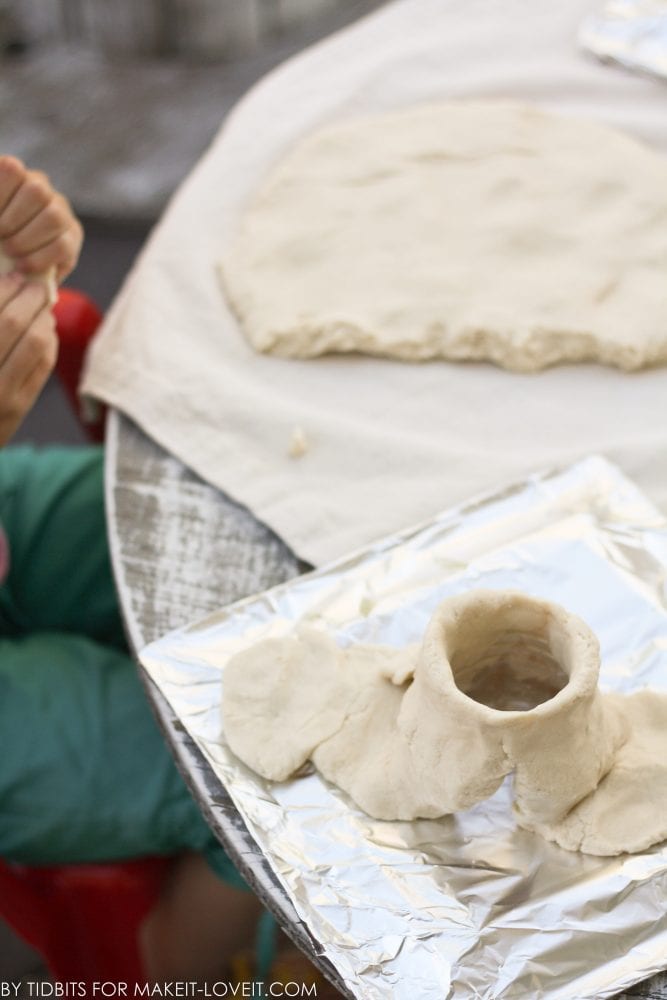
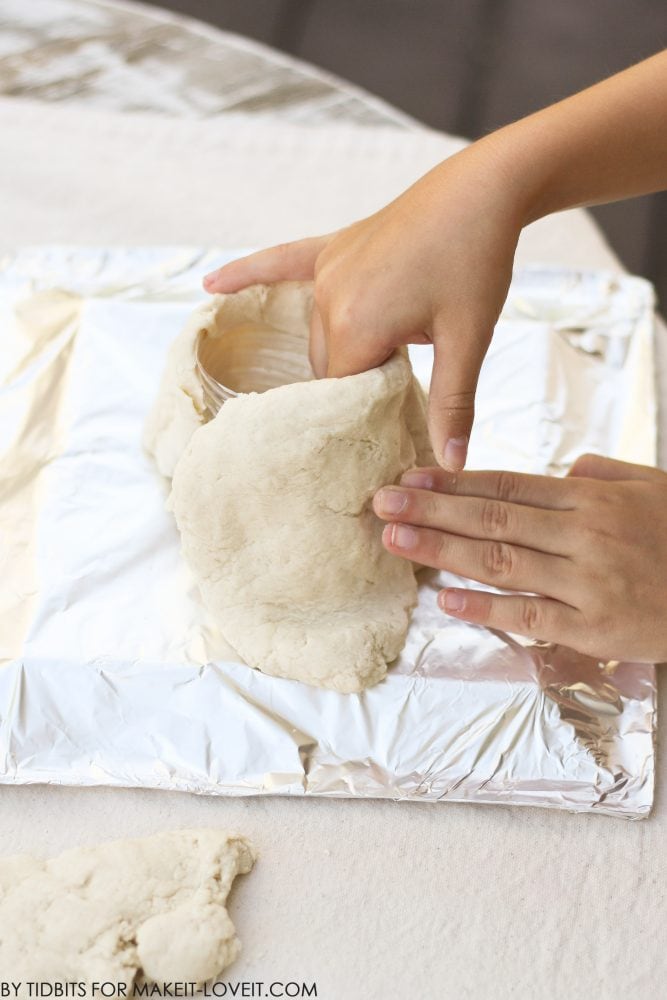
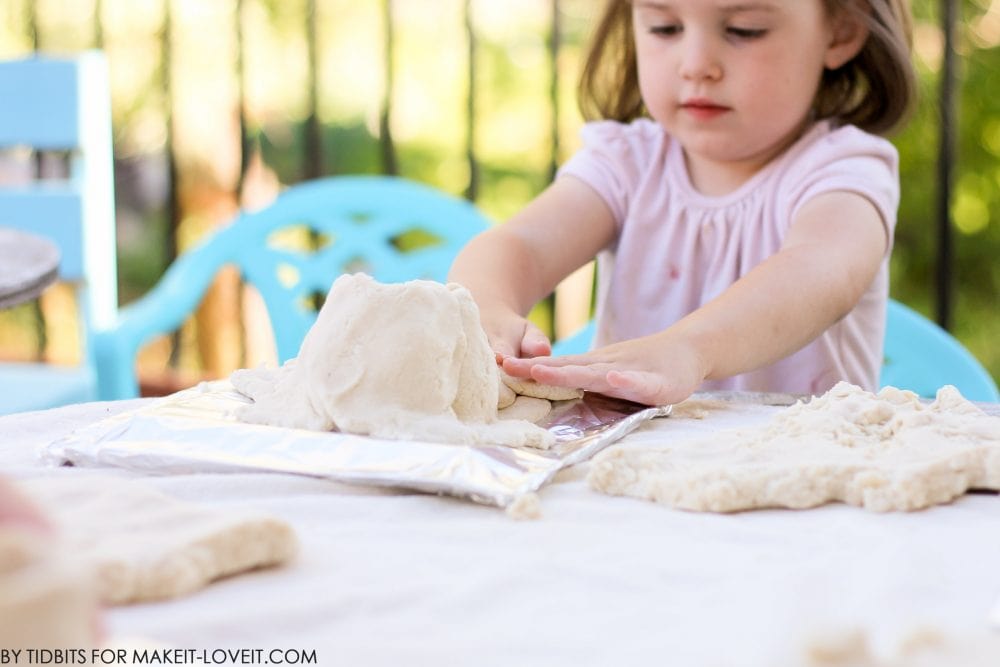
I am going to walk you through each step in helping your child make his/her volcano – and how to blow it up! **Proceed to the end of the post if you would like a fun learning printable about volcano’s for you and your child to work on. Let’s get started!! Making the dough: I tweaked and tested the recipe and settled with the following measurements for the perfect amount of dough for 1 personal sized volcano.
Mix as follows:
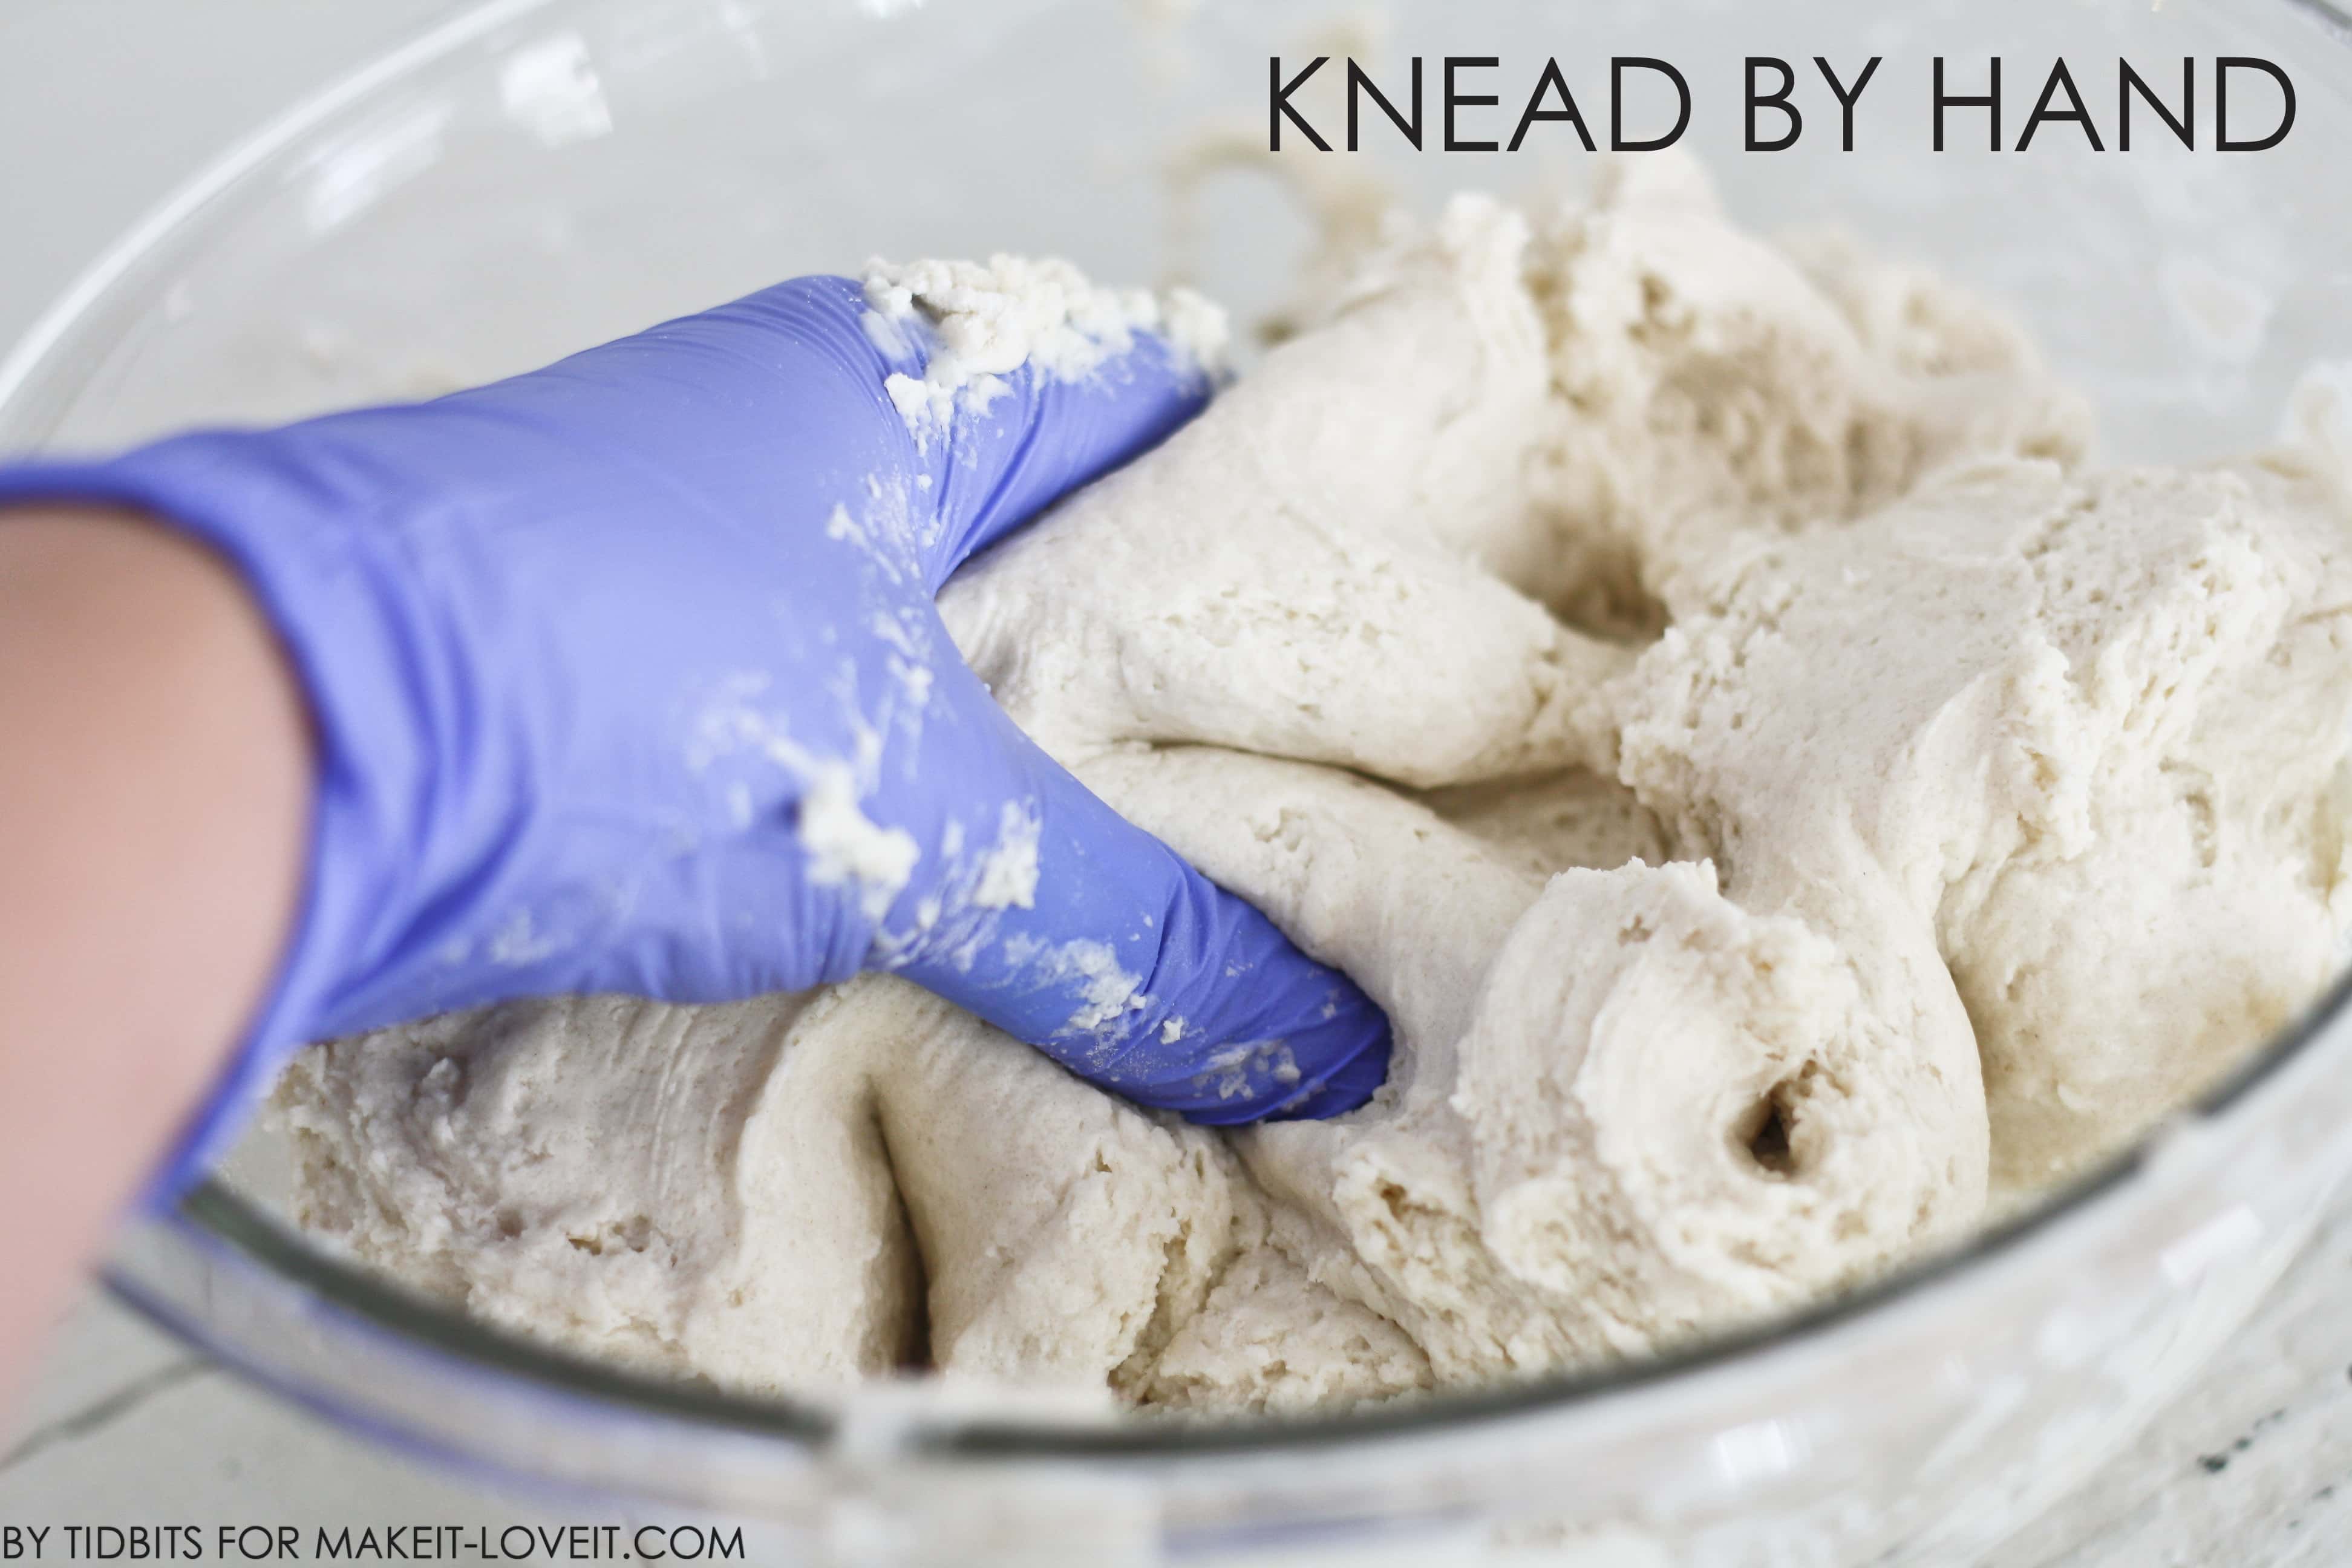
(I use gloves for everything. I hate yucky stuff in my nails) And there you have it! Enough dough for 1 volcano.
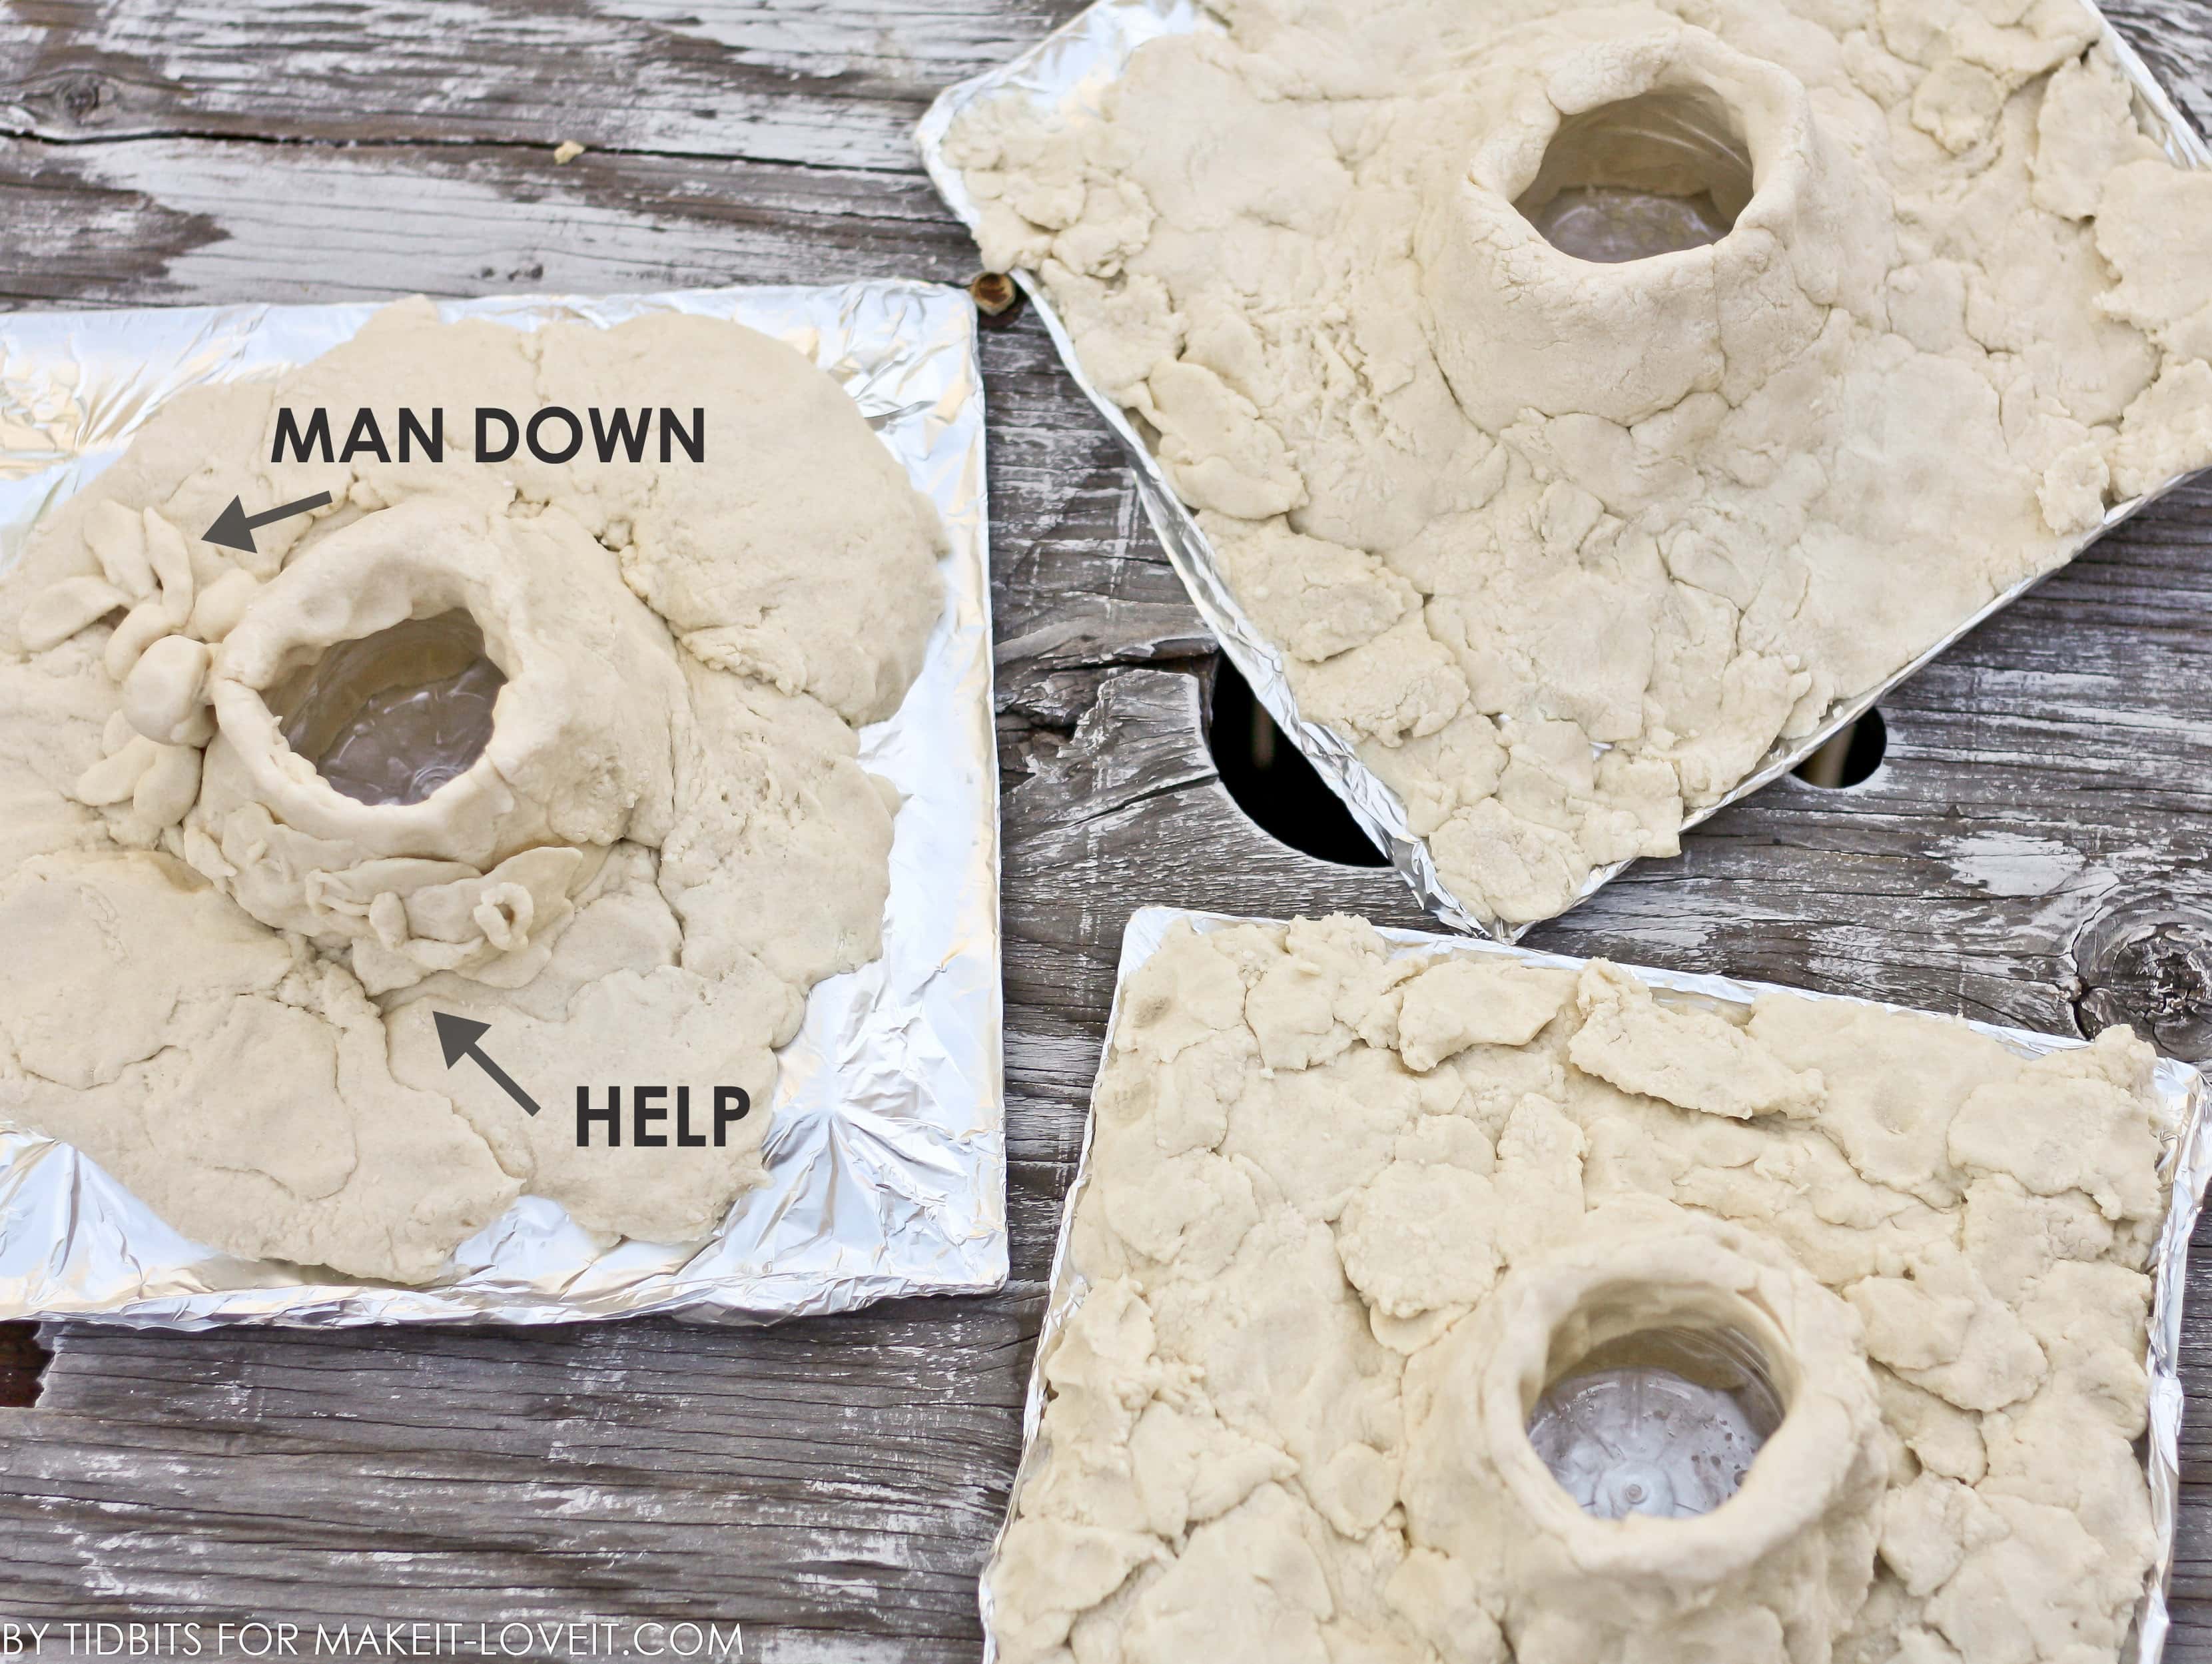
Hand the dough to your child, and let them roll it . . . .
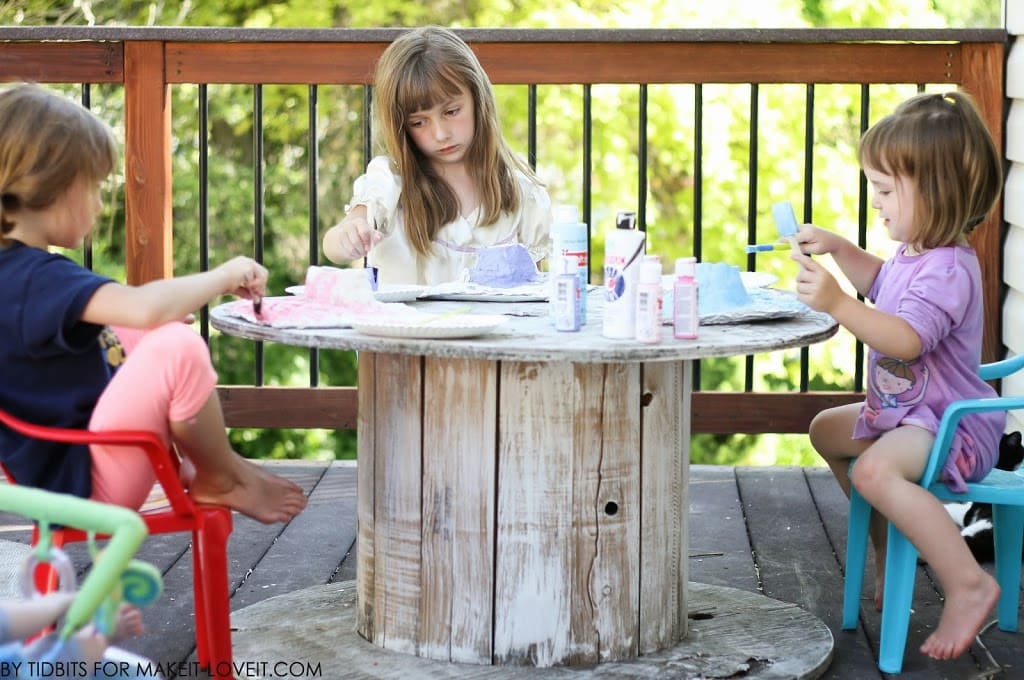
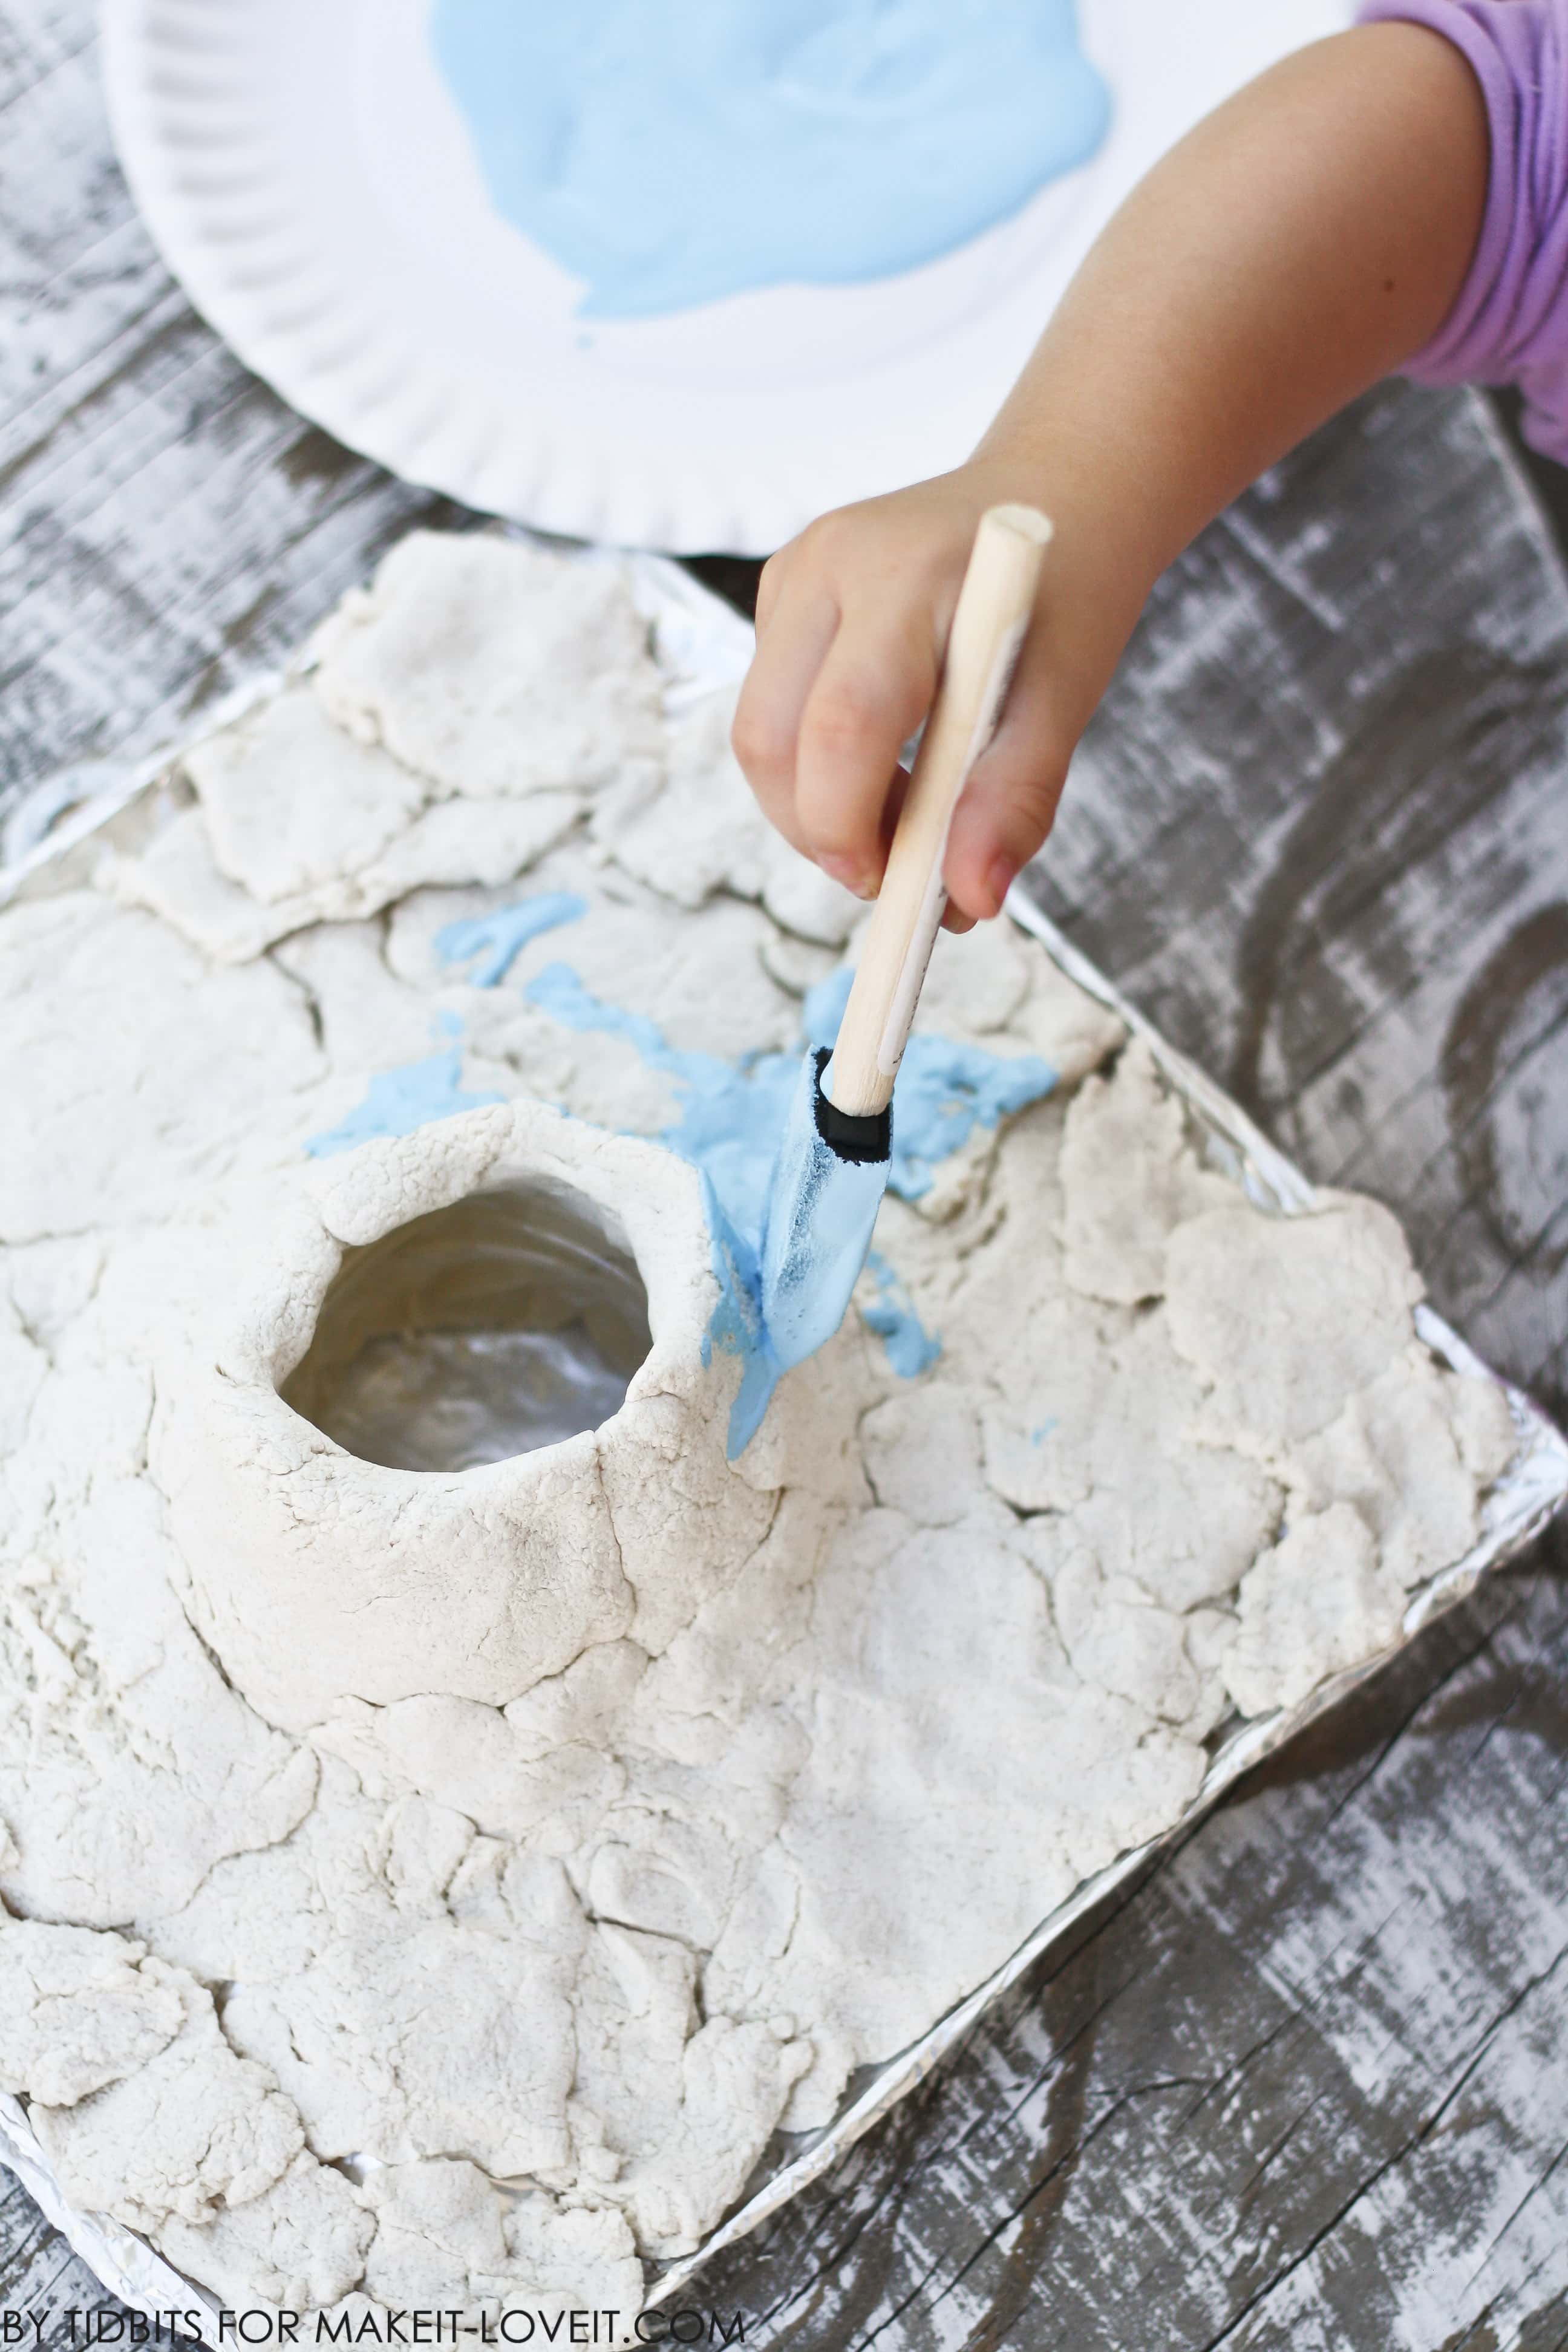
Painting the Volcano: This was my favorite part. But then again, I love to paint anything ;) We used whatever craft store acrylic paint we had on hand, and some foam brushes. Then I drug my kids outside right before bed time and already in their pajama’s, to paint their volcano’s.
We had a great time chatting and enjoying the cool summer night.
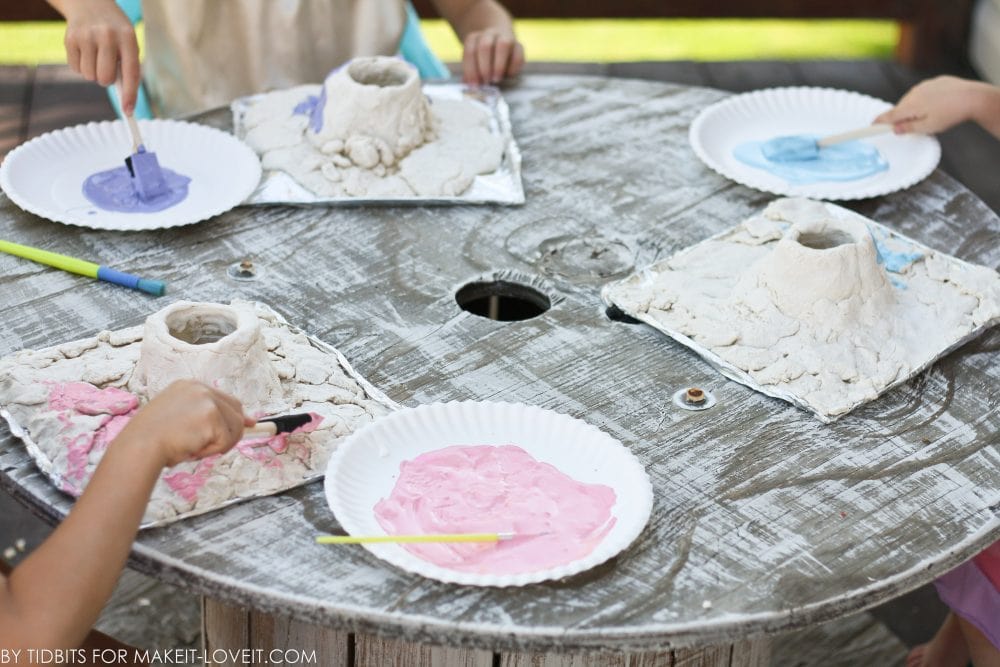
But you could just as easily give them many colors and see what they create.
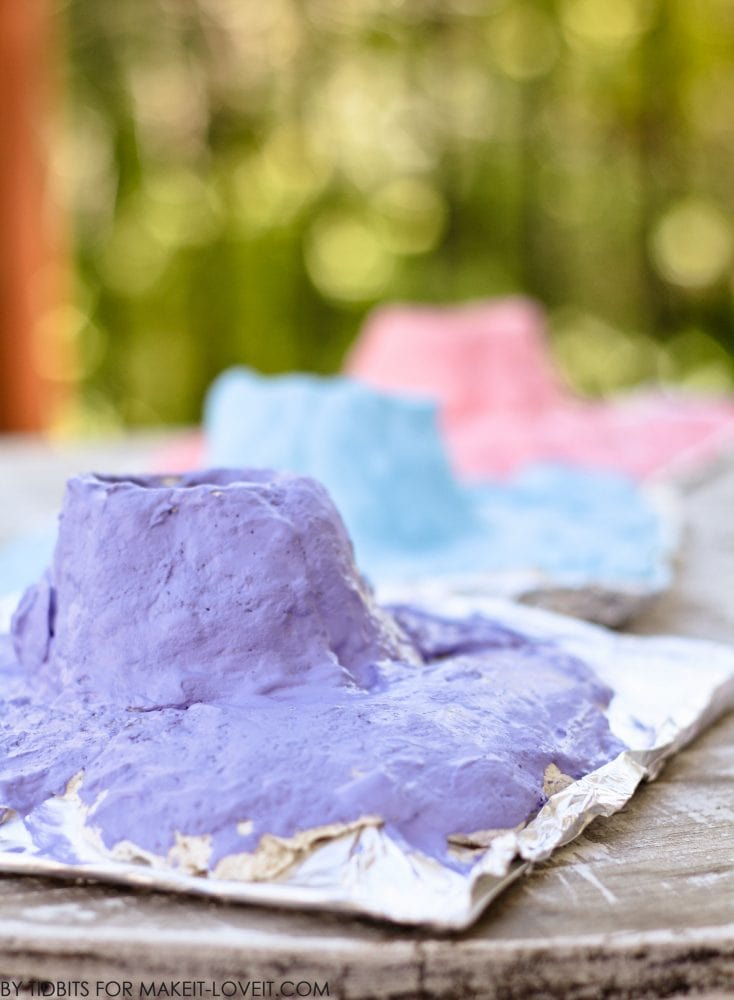
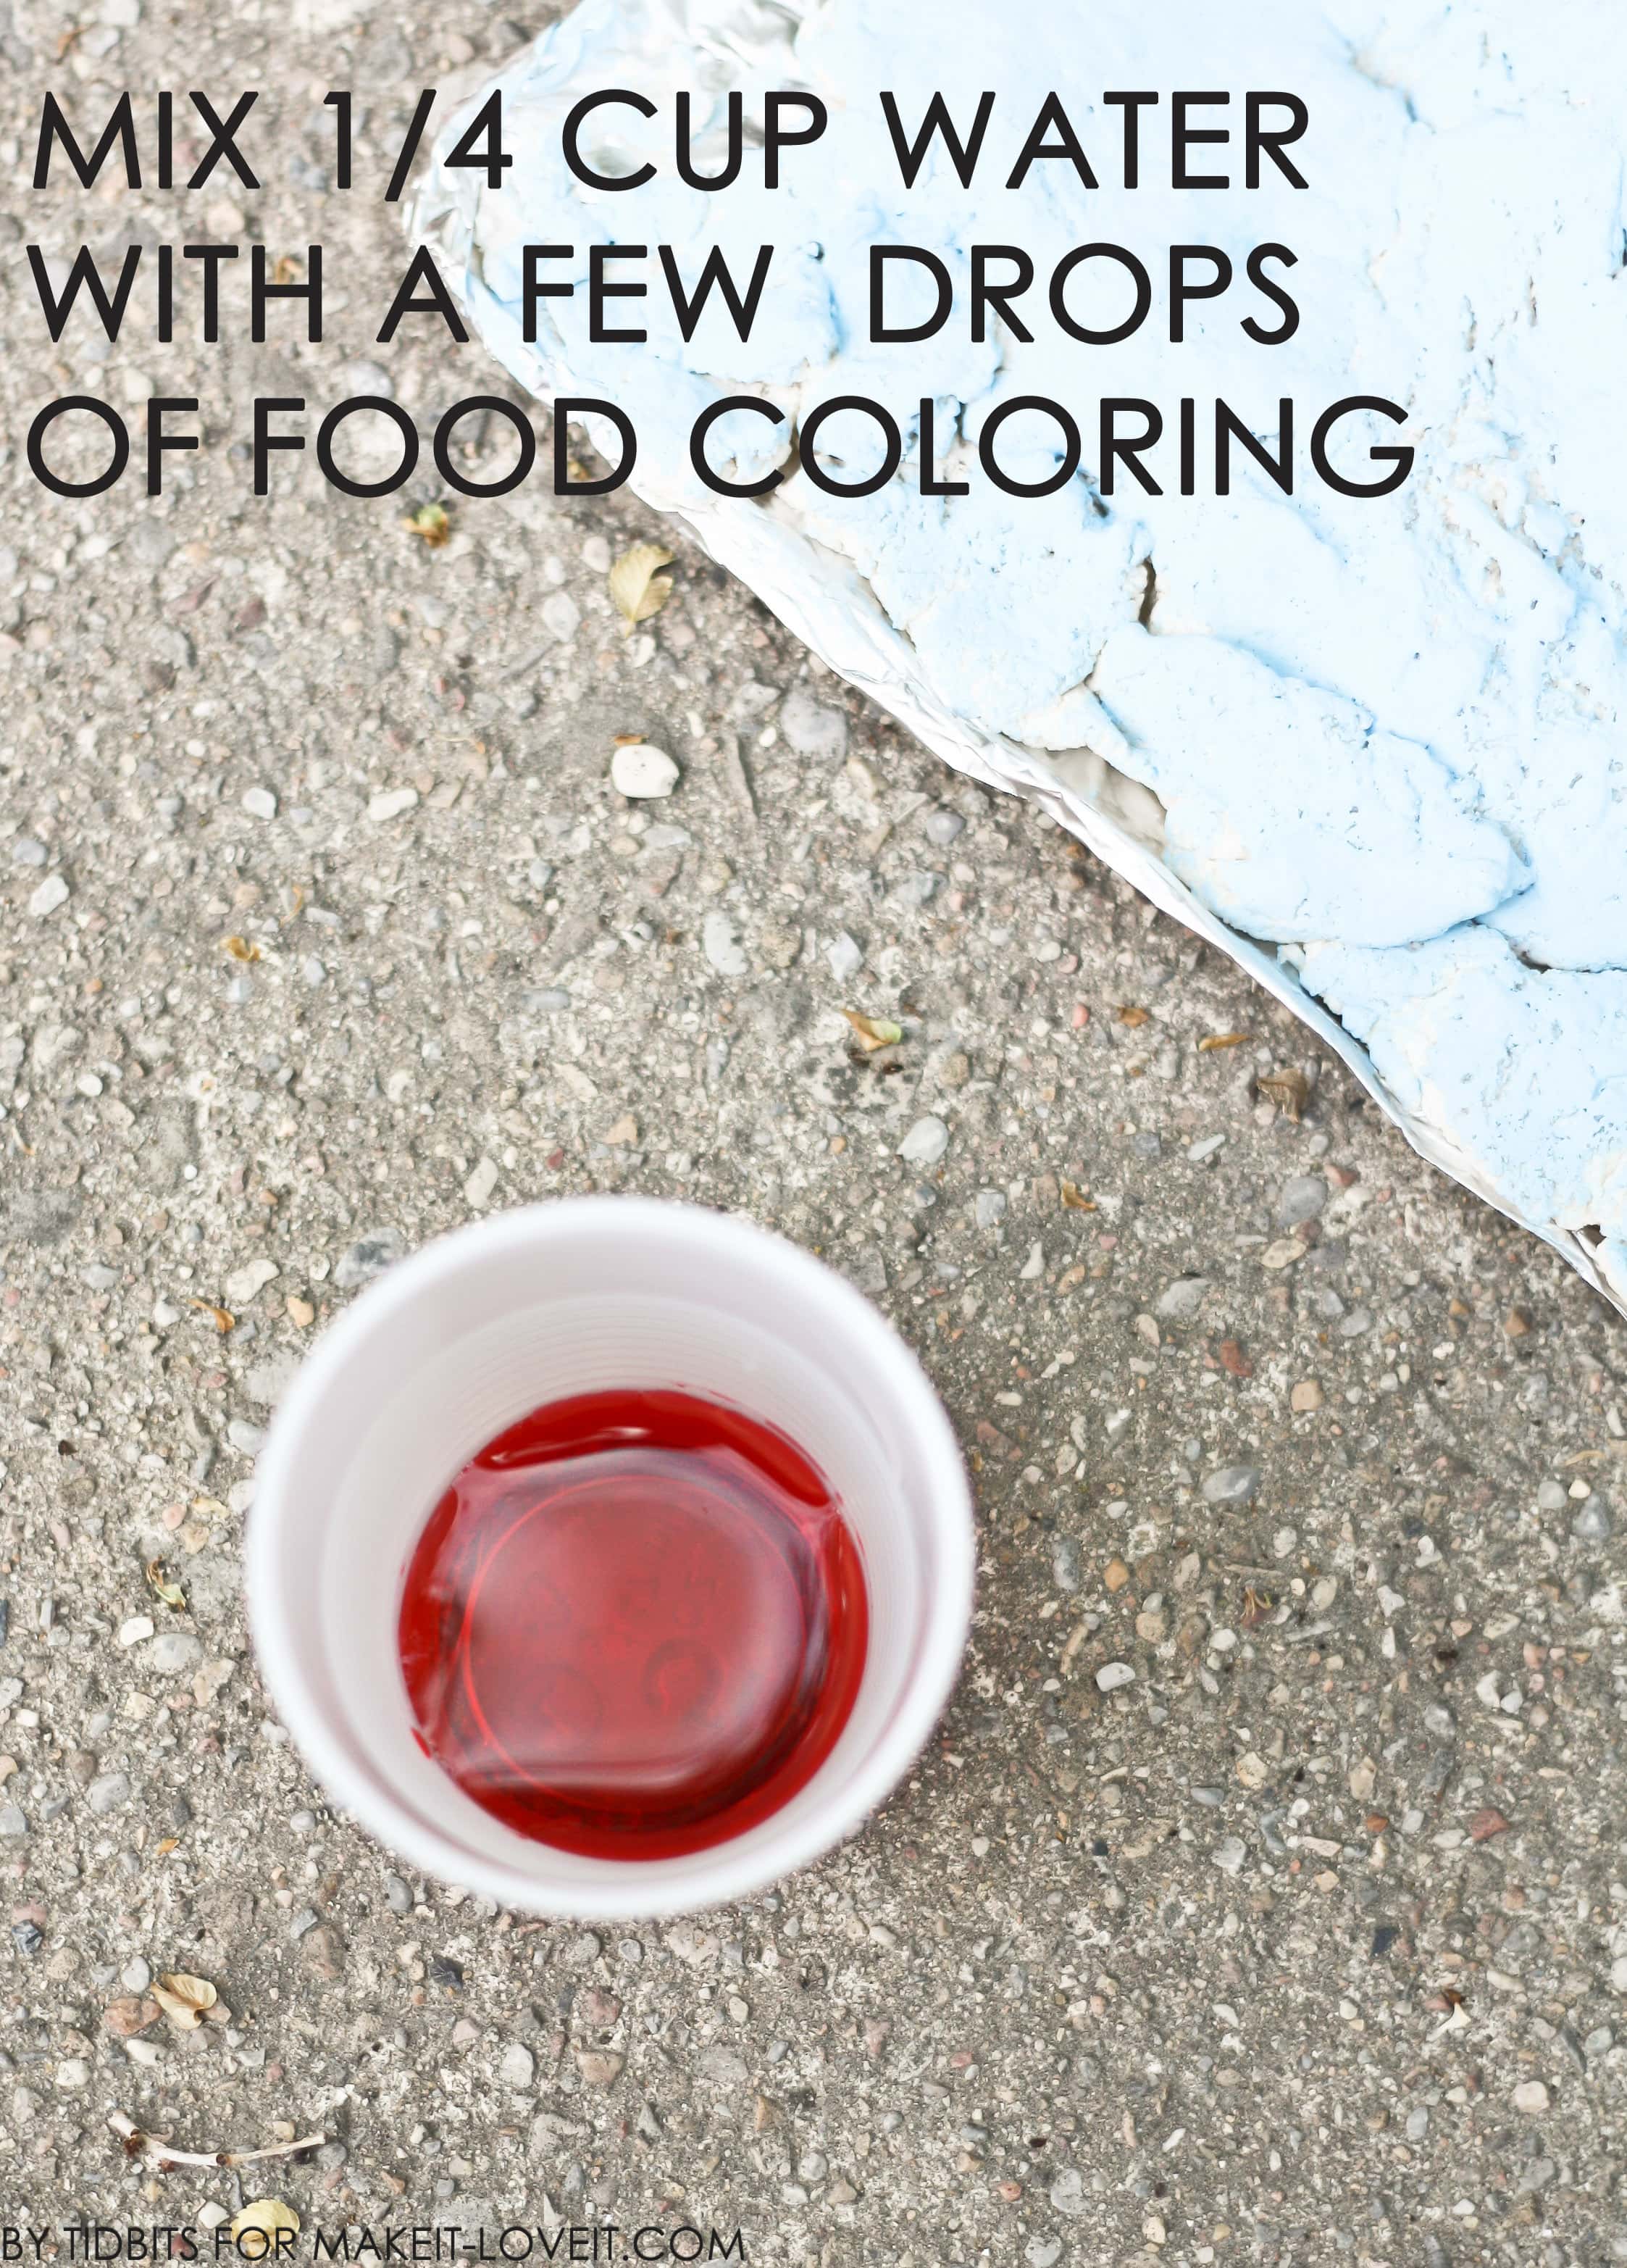
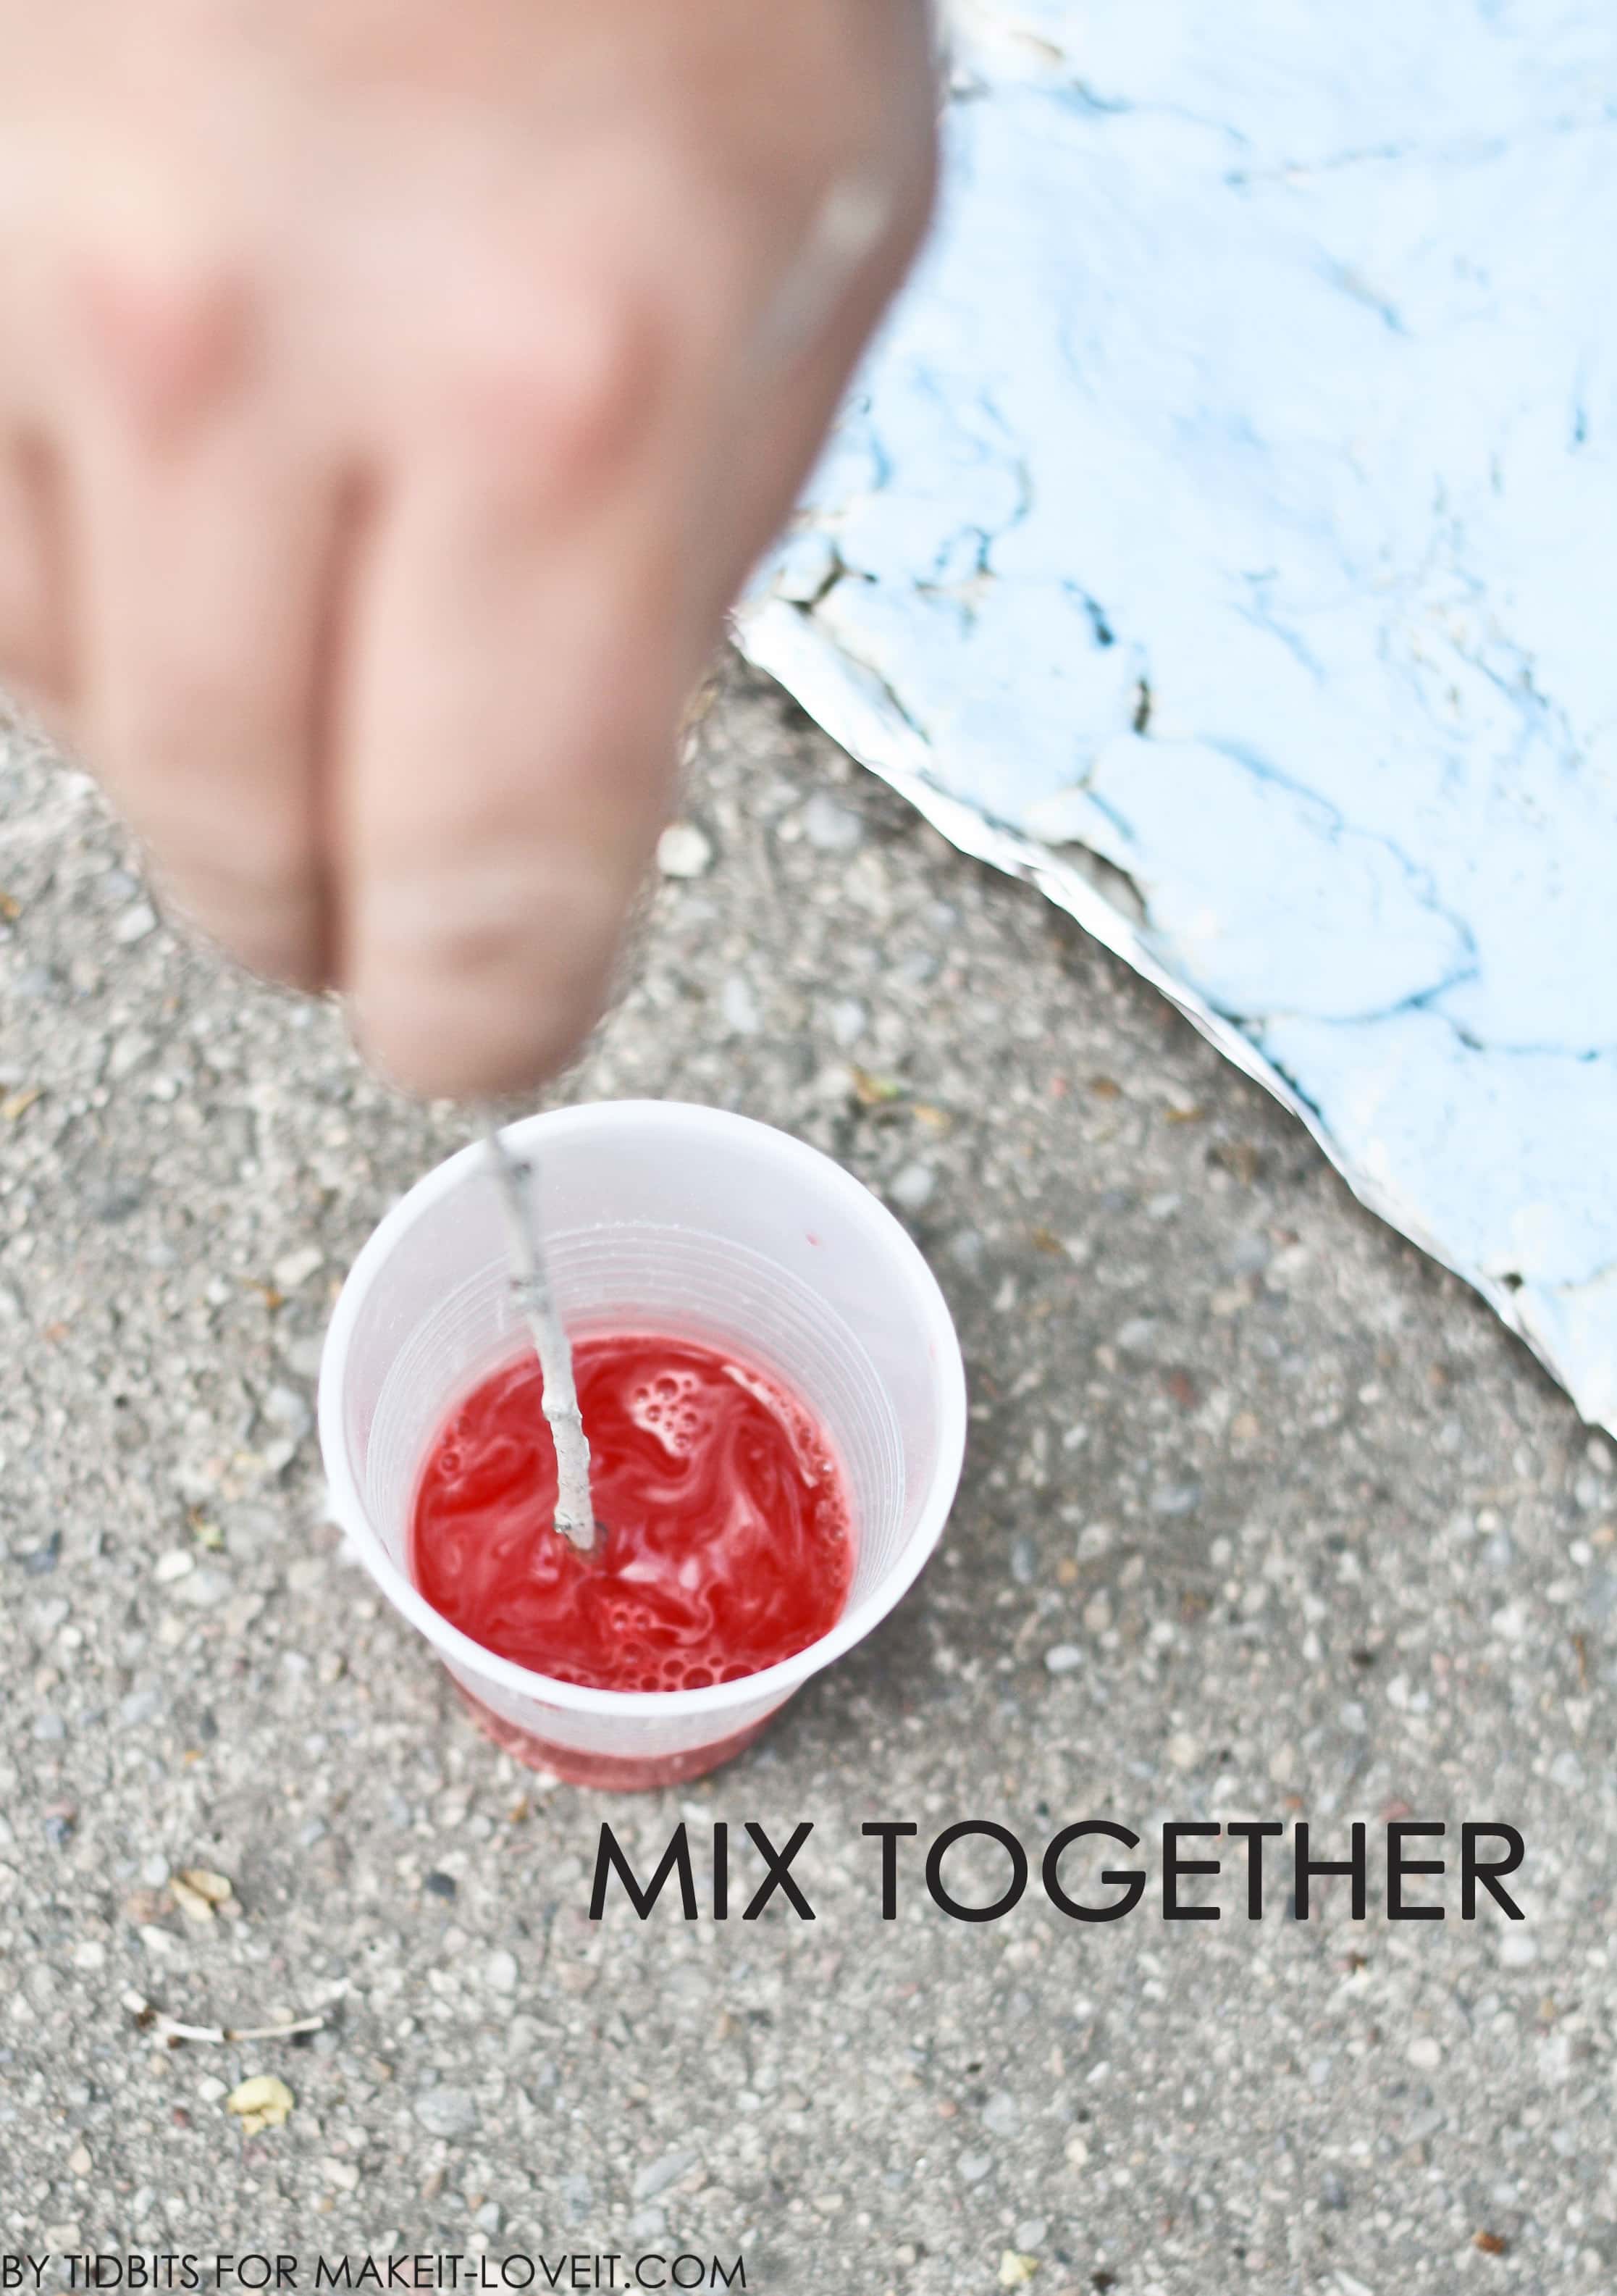
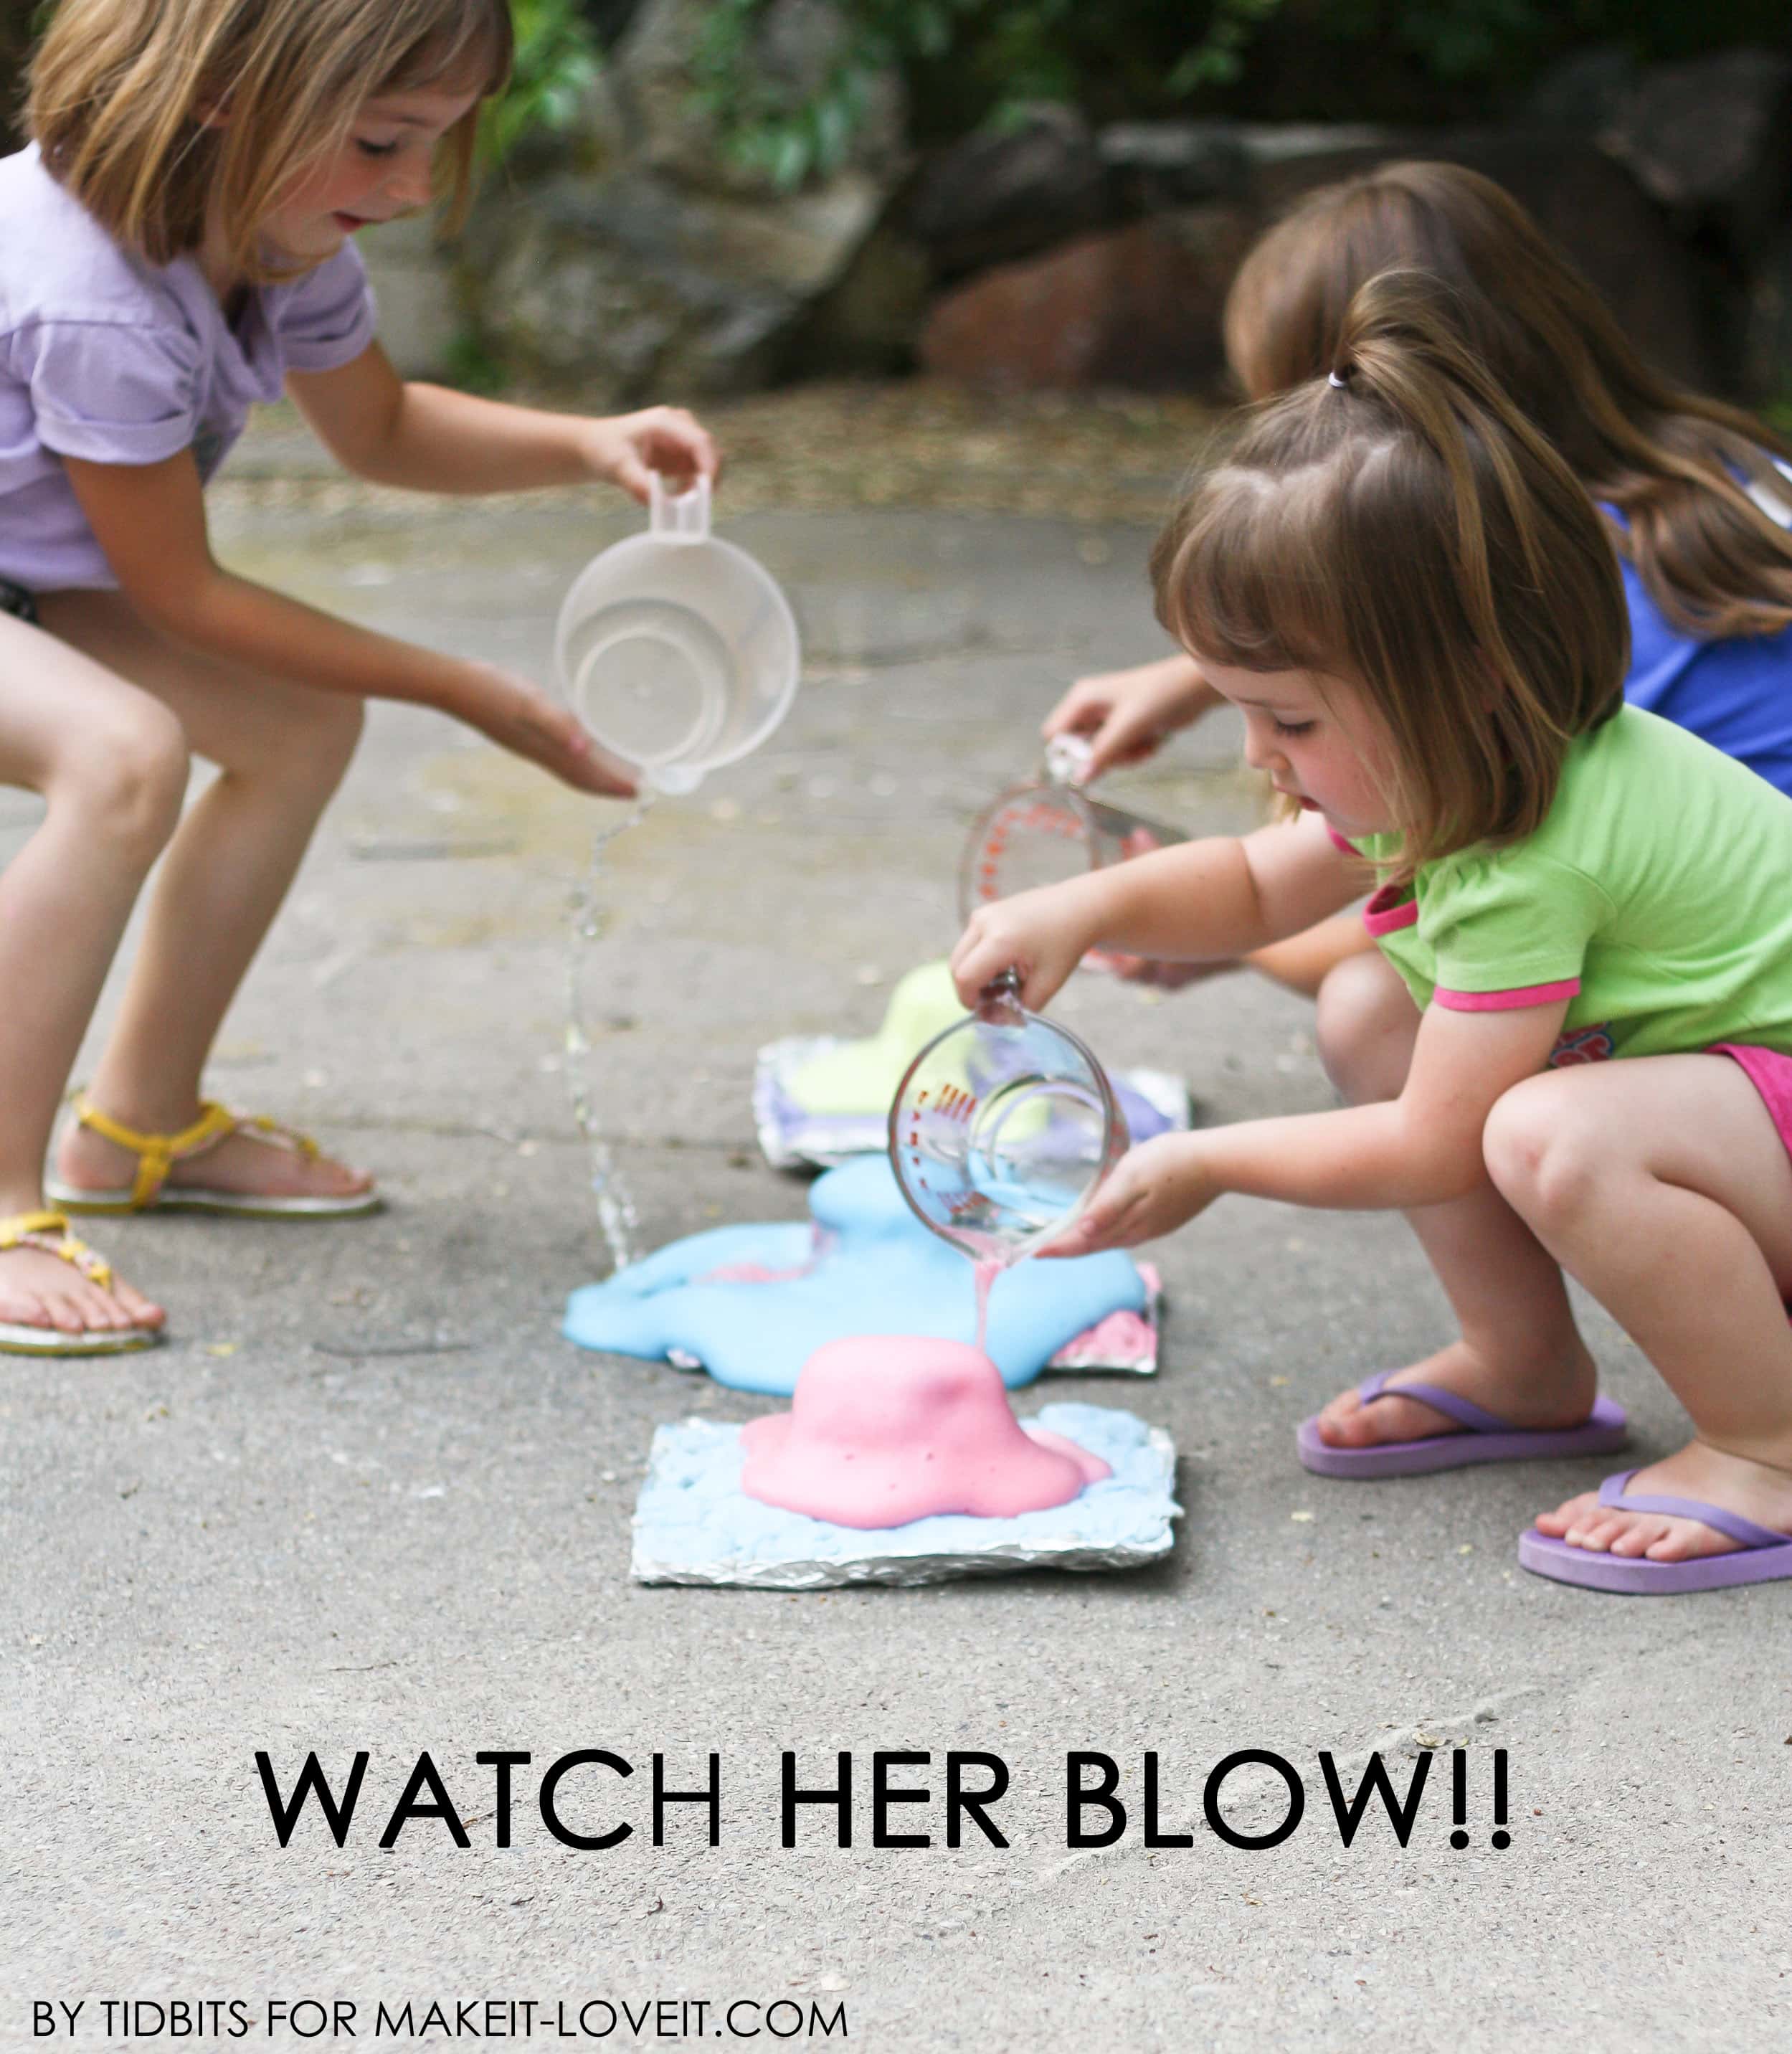
Once that paint is good and dry, it is time to see it explode!! My kids didn’t know what to expect and they were a little worried at this point. Ha!
Do the following:

(Mix well, because the baking soda likes to settle on the bottom. Don’t ask me for the science behind all that either. Ha ha!).
My girls just couldn’t get enough of this.
And after they realized no one was going to loose any limbs by this explosion (ewe, sorry – way gross) they just kept going and going . . .
And a mess. :)
Click the link below:

Hi, I’m Ashley—the DIY-enthusiast behind this crazy blog!