Home » DIY Tutorials » DIY Costumes » Cinderella Dress – Halloween Costume
Cinderella Dress – Halloween Costume
October 8, 2010 - By Ashley Johnston 216 Comments
.
Wow. It officially happened.
Taking my little girl to Disneyworld a few weeks ago completely sealed her obsession with Cinderella. I think it had something to do with that huge castle at Disneyworld that Cinderella “lived” in. The whole trip left this little girl in complete awe of the princess in a blue dress.
So, there was no question what she wanted to be for Halloween. I even offered her a few suggestions.
“How about dressing up as a Mrs. Potato Head for Halloween this year?”
“Nope.”
How about Little Bo Peep? You like Sheep…”
“No mommy.”
“Hmmmm, you really like cowgirls……..how about a cowgirl?”
“No, how about Cinderella mommy?”
Ha. Okay. I just wanted to be sure…
So Cinderella it is.
(And my little guy’s costume is in the works. I’ll show you next week.)
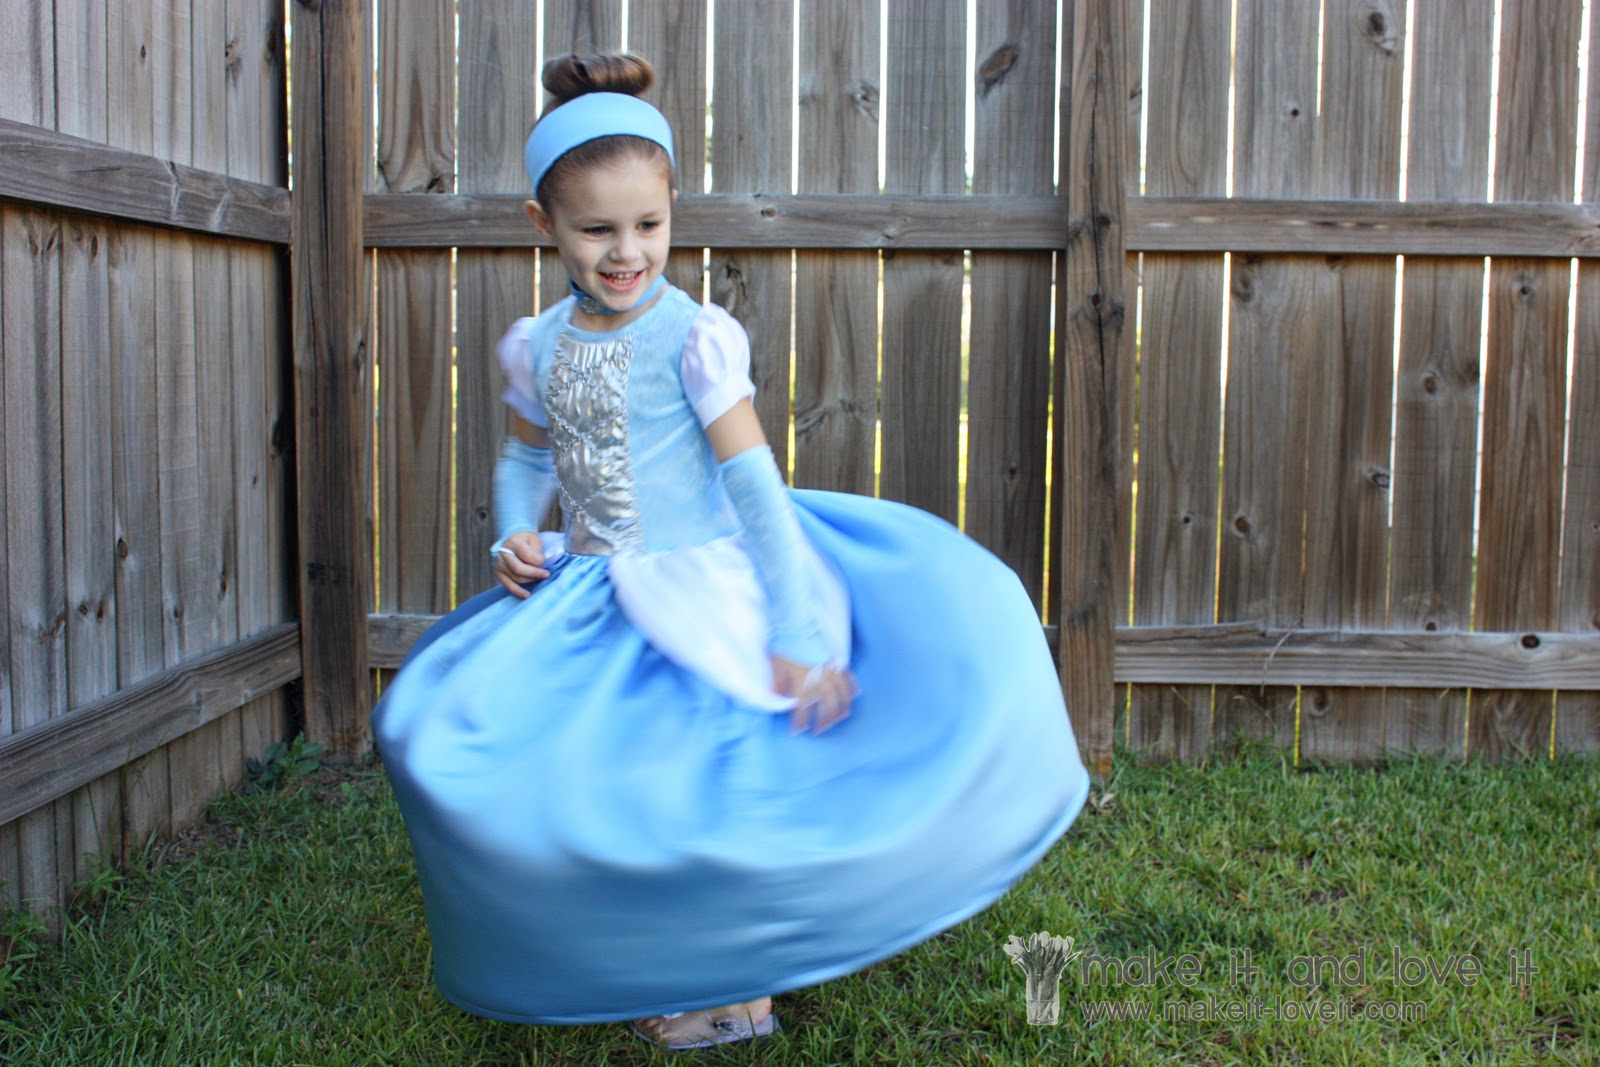
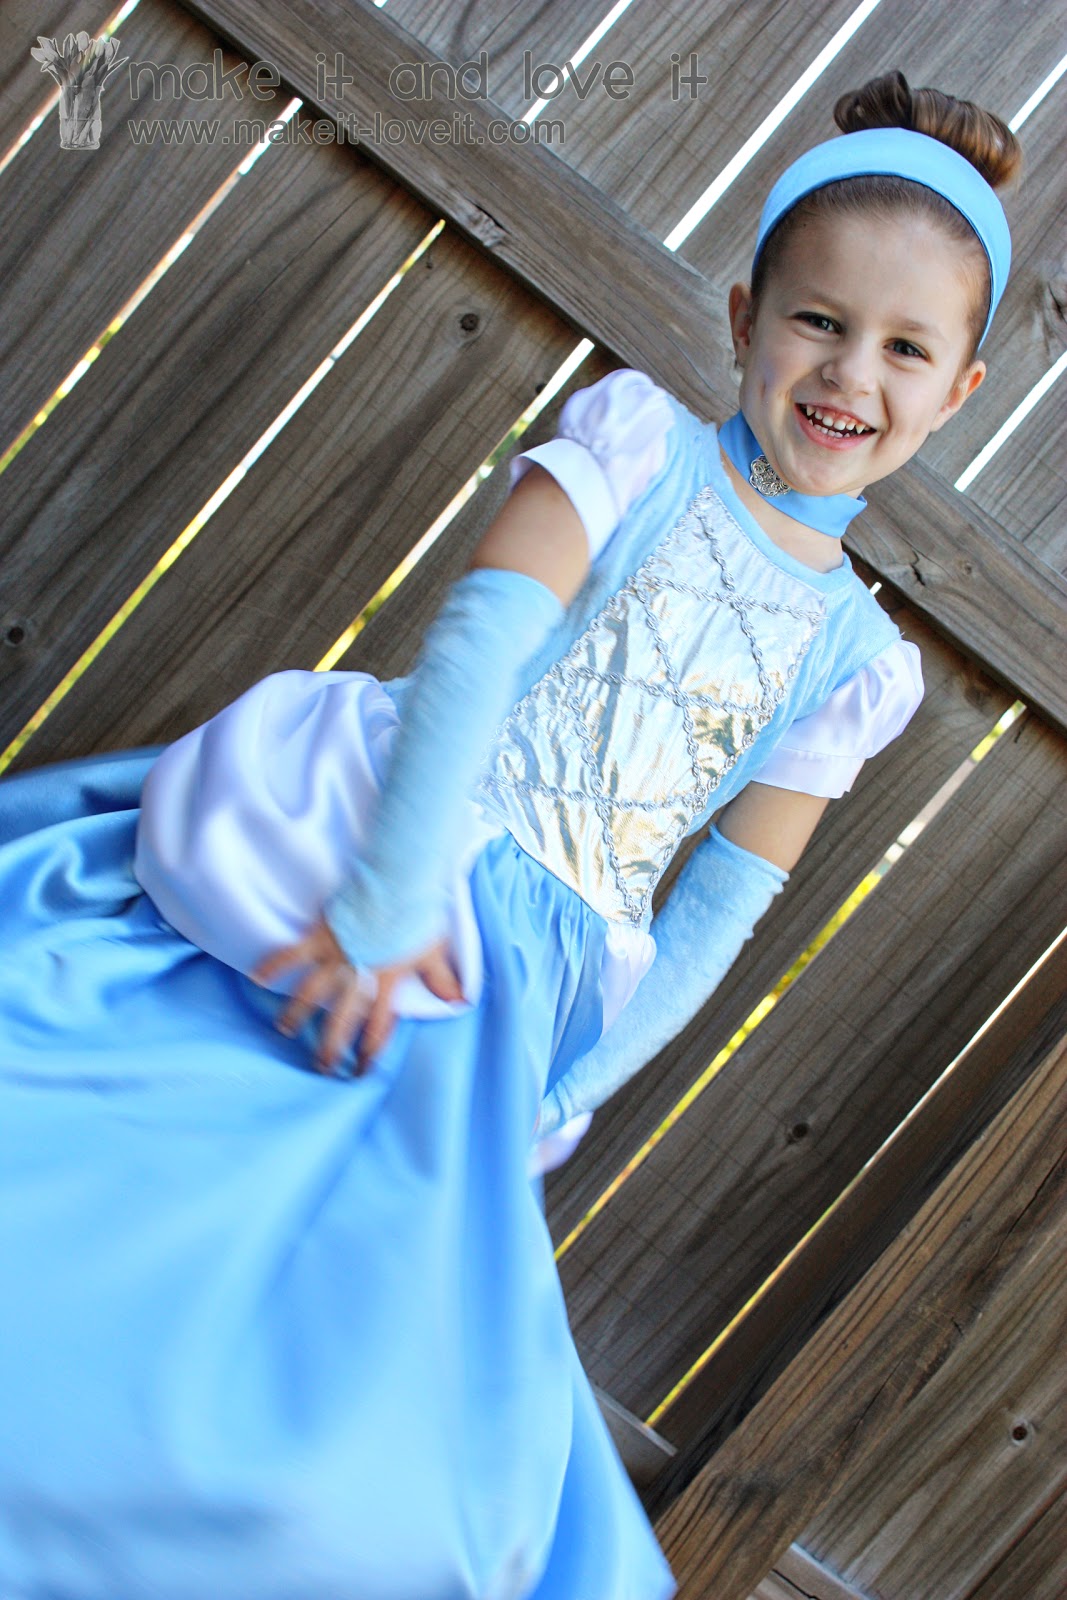
Complete with lots of shine…
And Cinderella’s signature gathered hip detail…
Also, an easy on/off velcro closure in the back.
This dress may have just put my little girl in
the best mood that day.
She ate it all up.
And automatically turned into a complete princess………with no prompting from me.
(Has she seen too many princess shows? Maybe.)
She could hardly keep her body still while in her new dress.
Her little body kept twirling, twisting, and prancing around.
I’d say, Cinderella was a good pick for Halloween this year.
**Tutorial for the accessories found here.**
Interested in making a Cinderella Dress for Halloween?
Or as another dress for the dress-up box?
Or how about as a dress-up gift for Christmas?
Remember, tips from this dress can be used for many dress styles and Halloween costumes.
Here’s how I made mine for my size 4T-wearing daughter.
**Warning: I tried to fit in every step so there are tons and tons and tons of pictures and explanations. So be patient while scrolling through, if you already know how to do a certain technique. :)
I started to make the dress like I do many of my
made-from-scratch clothing items, by using the shape of another piece of clothing that fits, as a guide to make something new. (some examples
here,
here, and
here)
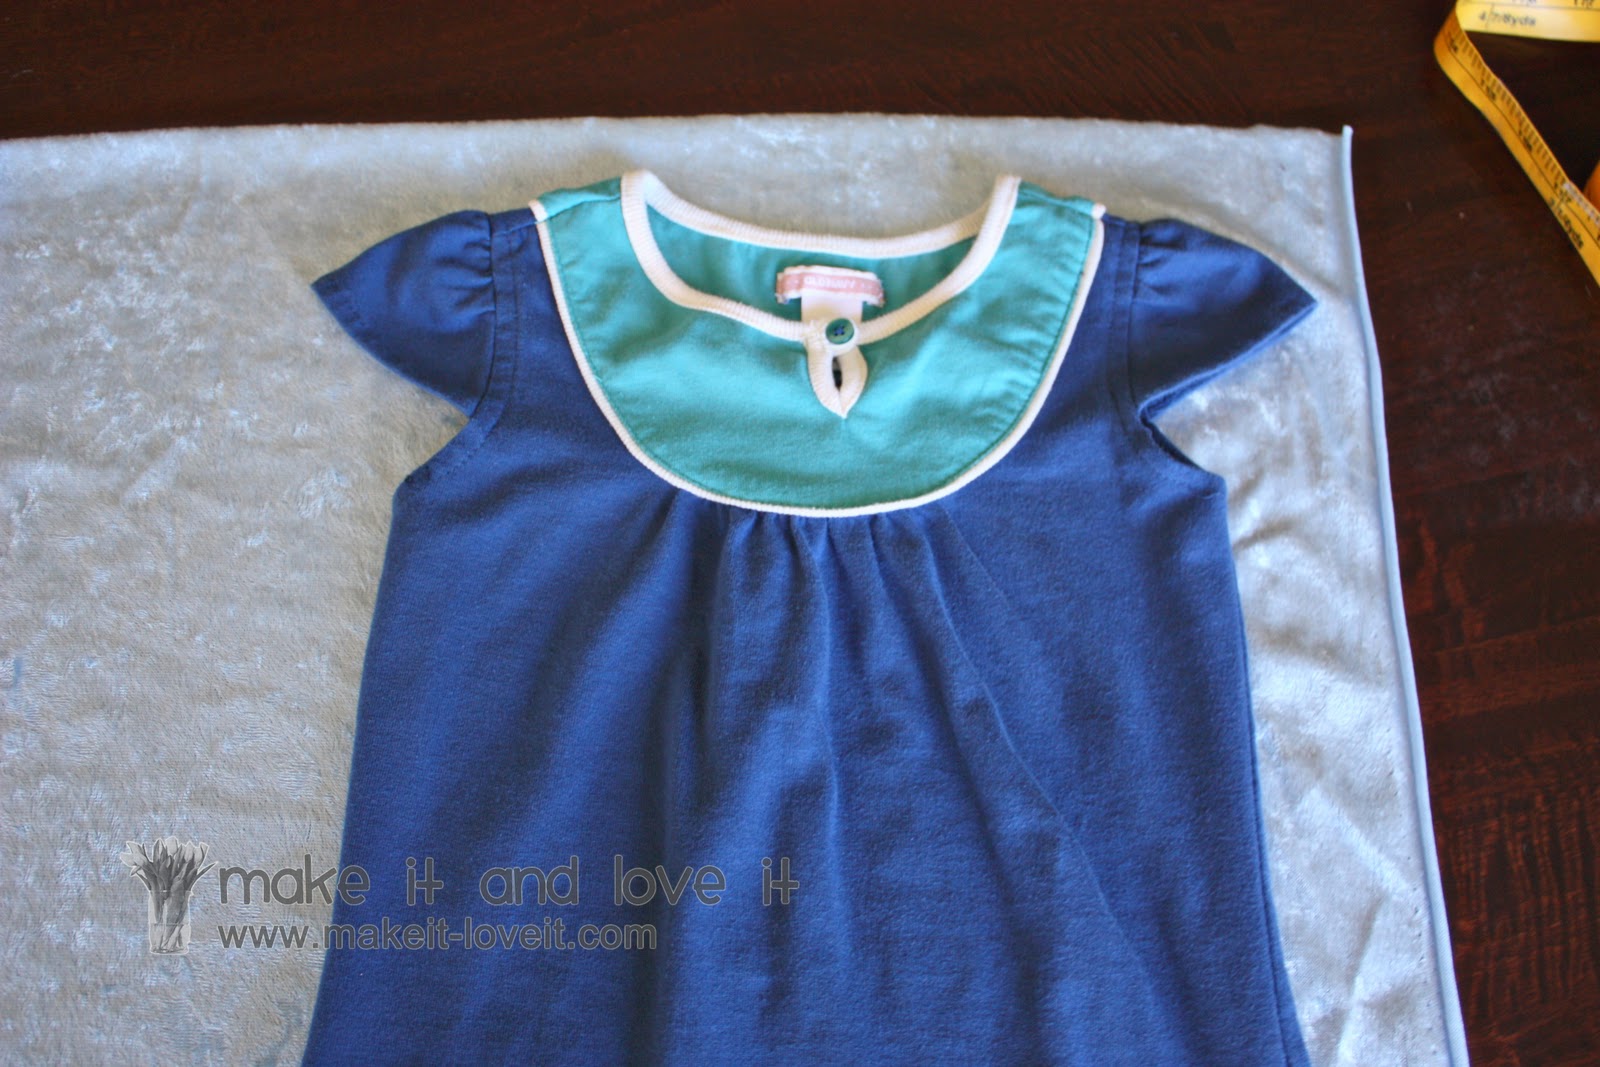
I decided to use the same top shape as this knit dress…..without those sleeves and without the gather below the bib section.
I measured my little girl and knew that I wanted the dress to be 31 inches long, from the shoulder down to the very bottom of the dress. I also decided where I wanted the waist seam to hit her (compare to another dress with a waist seam if unsure) and measured that the bodice would need to be 10 1/2 inches, from the top of the shoulder down to the waist line.
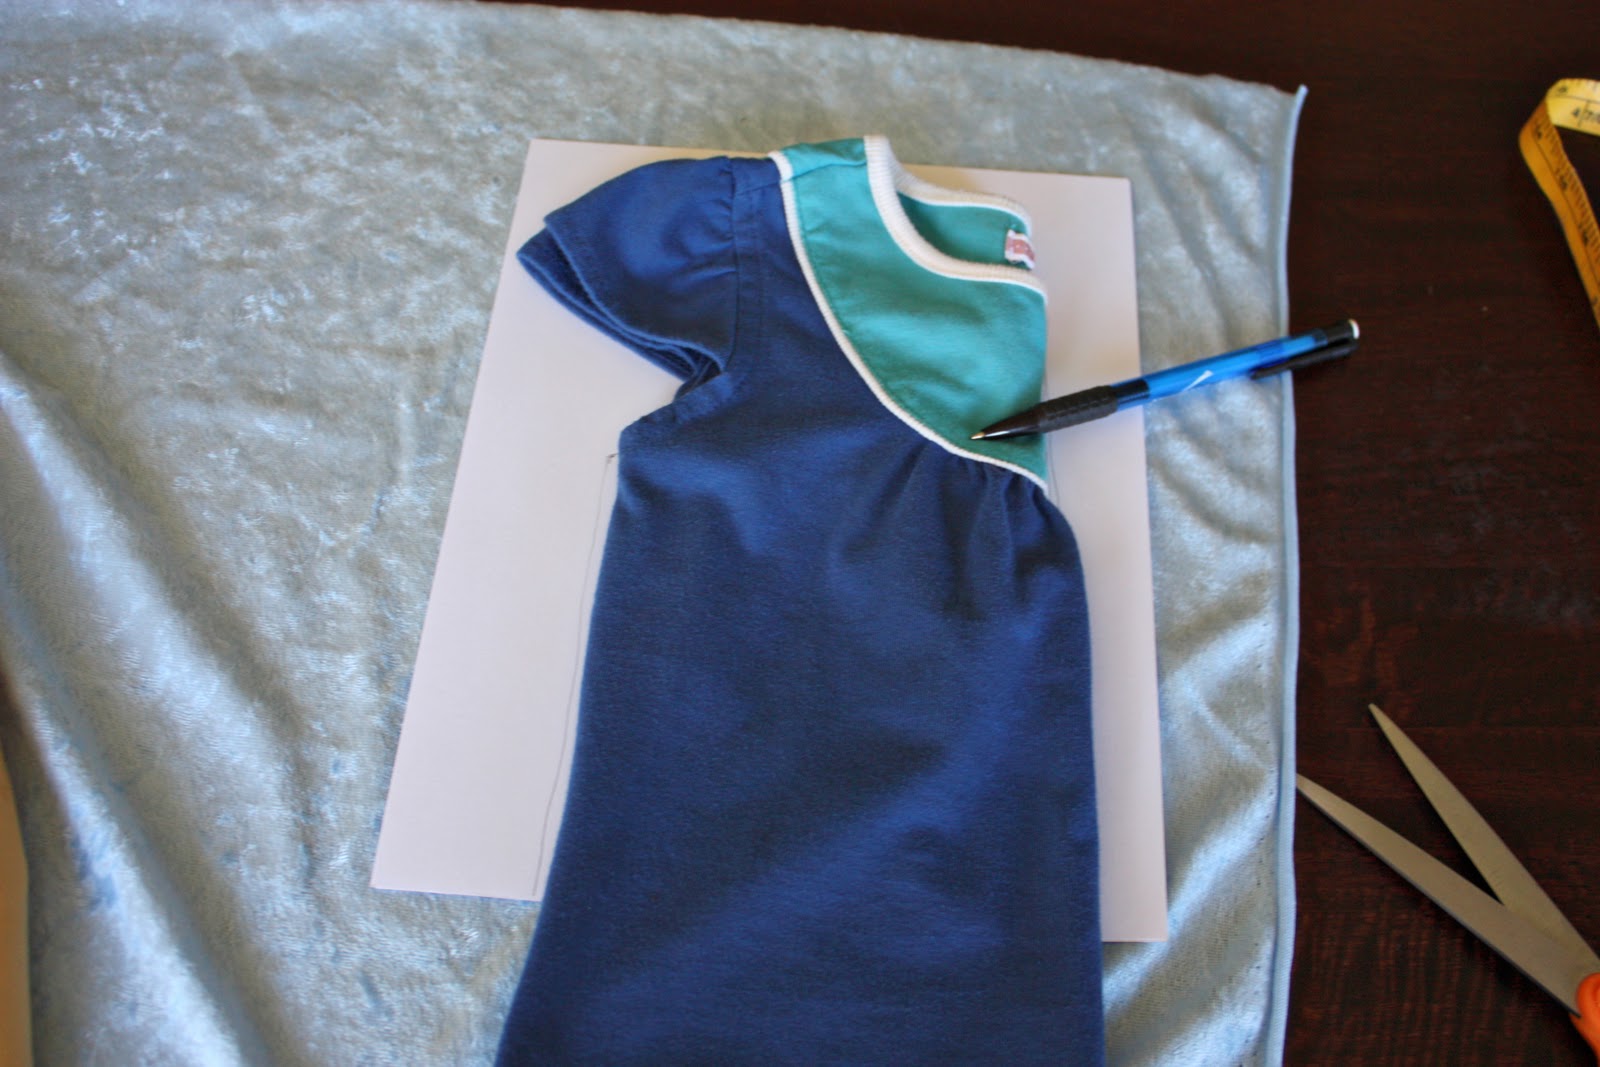
So I folded the dress in half, matching up the arm pit area and traced around the top bodice of the dress. I was tracing to make the front bodice piece first, so I made this piece with the scoop of the front neck line but subtracted the sleeves.
Then I used this paper guide to cut out some of this stretchy knit fabric on the fold, that created the whole front shape after it was opened up. Make sure that if you’re using a one-way stretch knit, that the stretch is going width-wise and will stretch across the body, not up and down.
(**I used this stretchy knit for the bodice section so that it would stretch with her and allow my daughter to wear it longer. Also, I wanted it to fit comfortably while cutting it to fit more snug against her body while not using a more restricting satin for the bodice like I used for the skirt section. But it’s up to you.)
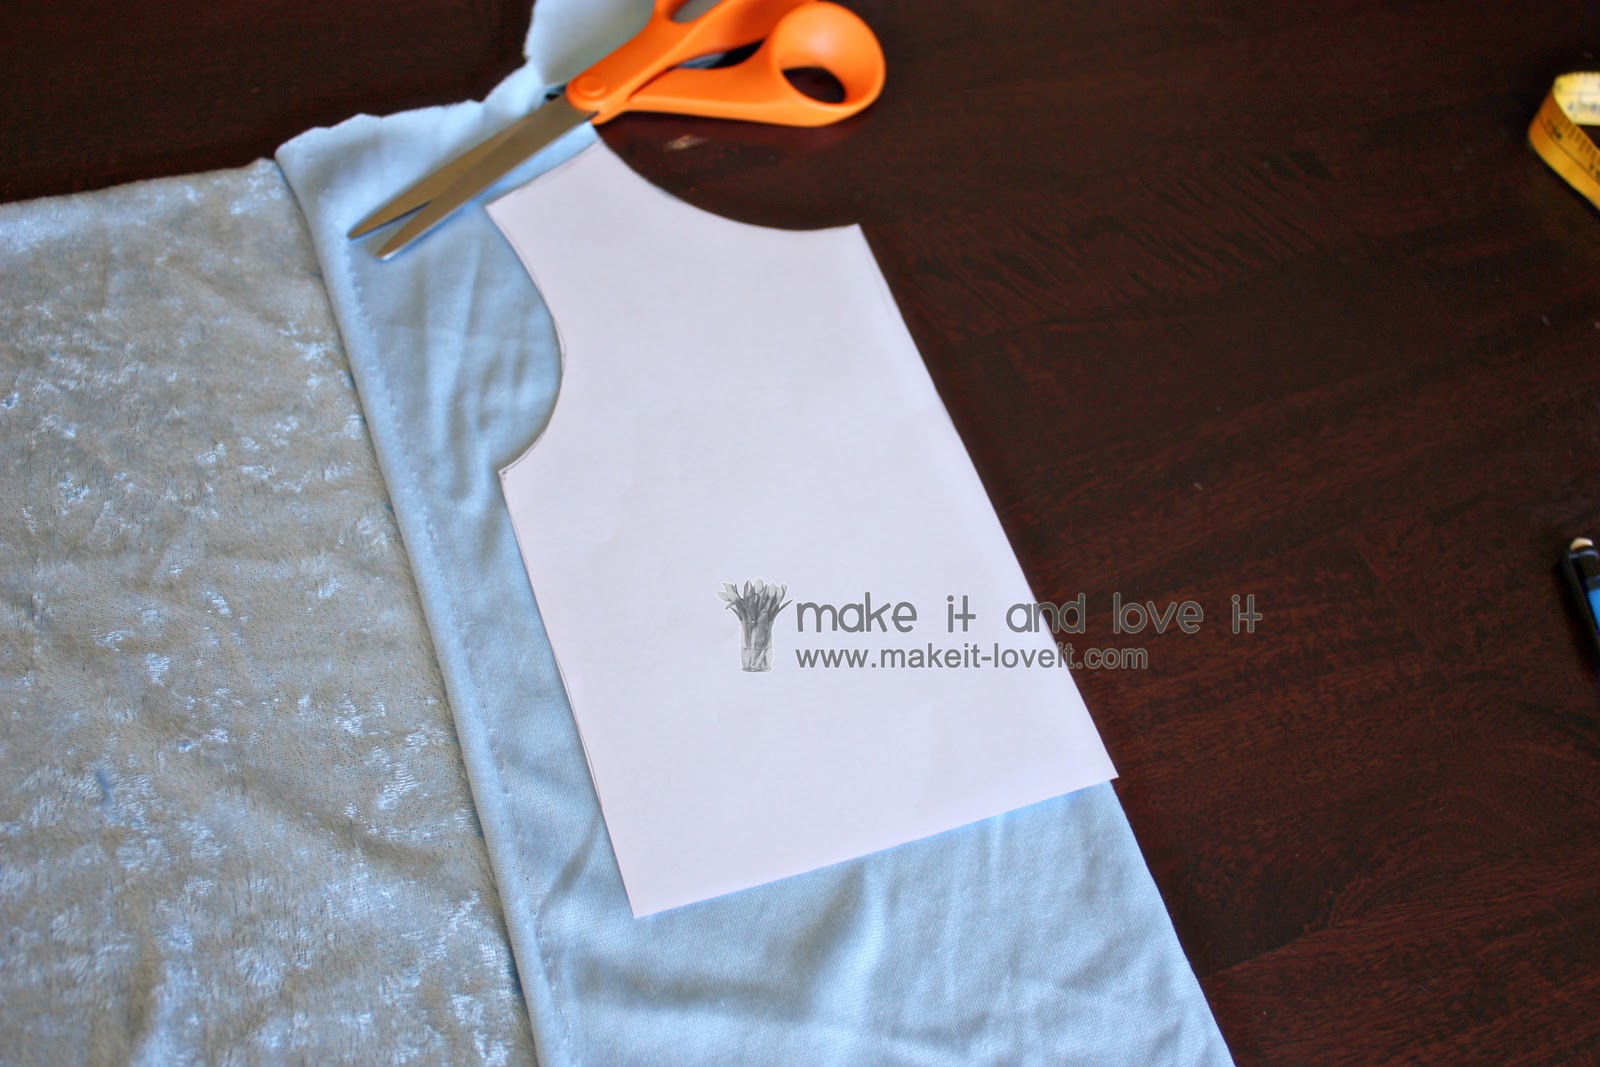
I cut out my entire piece on the fold, adding a 1/2 inch along the top and sides for a seam allowance……and added another two inches to the bottom because my paper pattern wasn’t big enough and I was too lazy to tape more paper on to make it bigger. (I could have created a bigger pattern piece from the beginning that included the seam allowance and the correct length, but again, I was too lazy. But you choose what you’d like to do.)
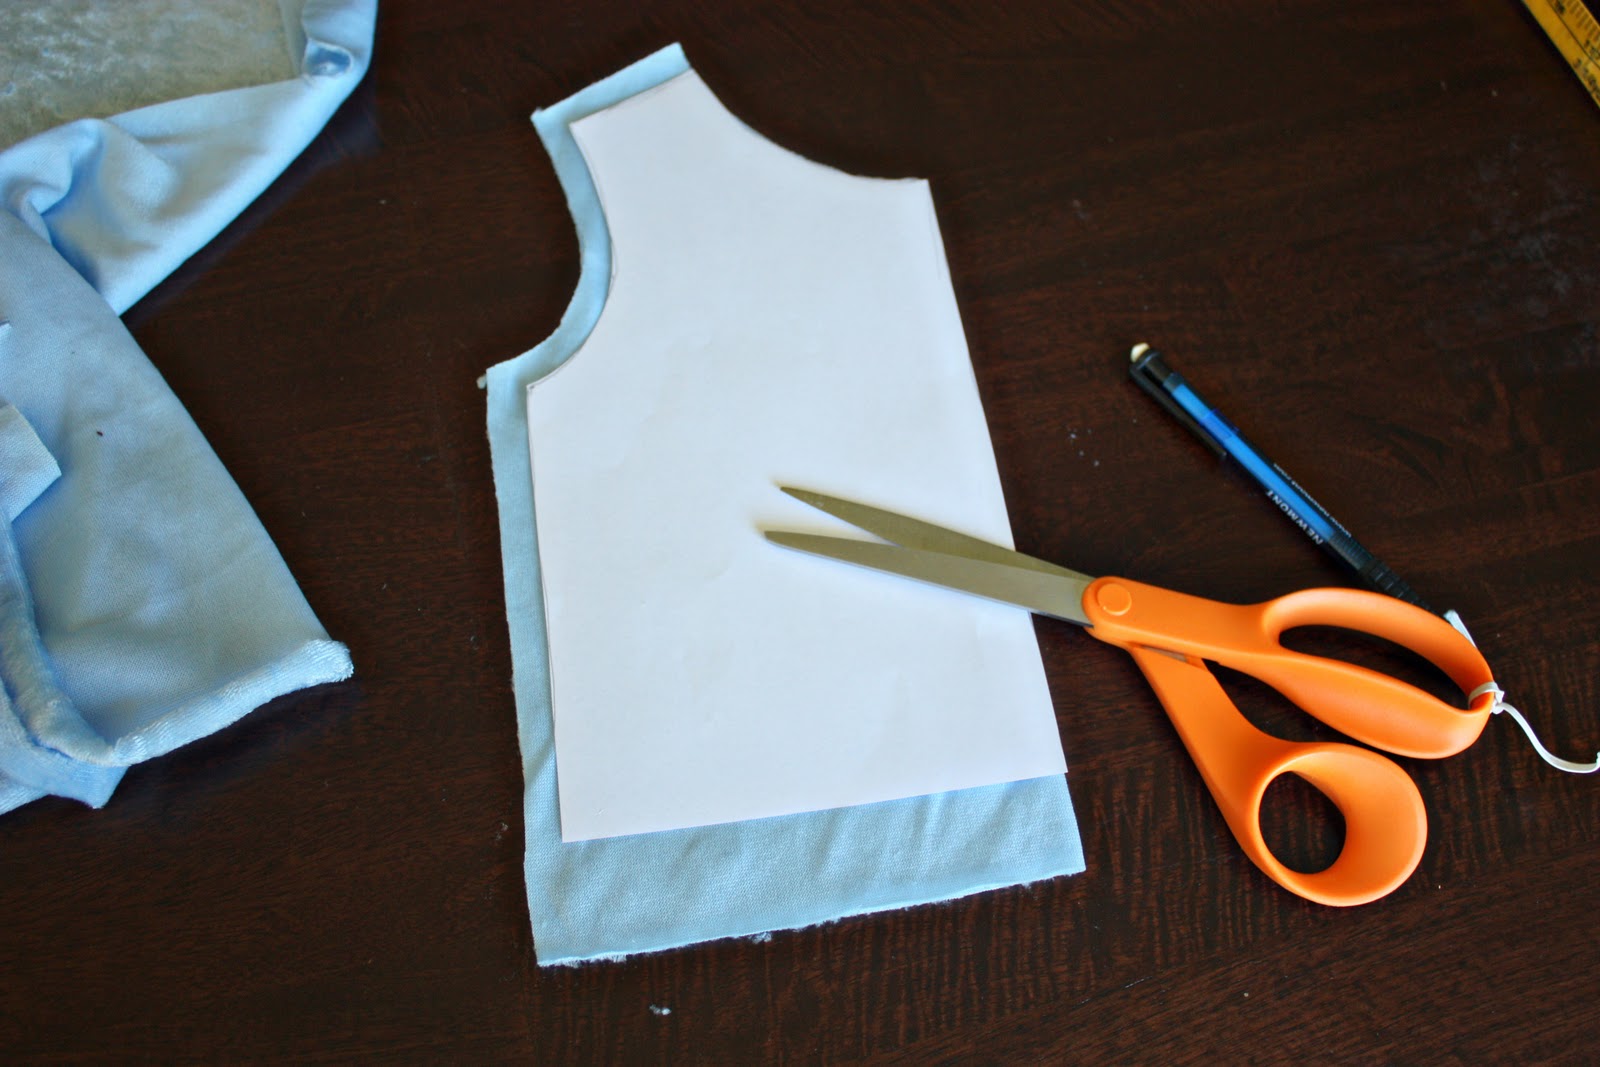
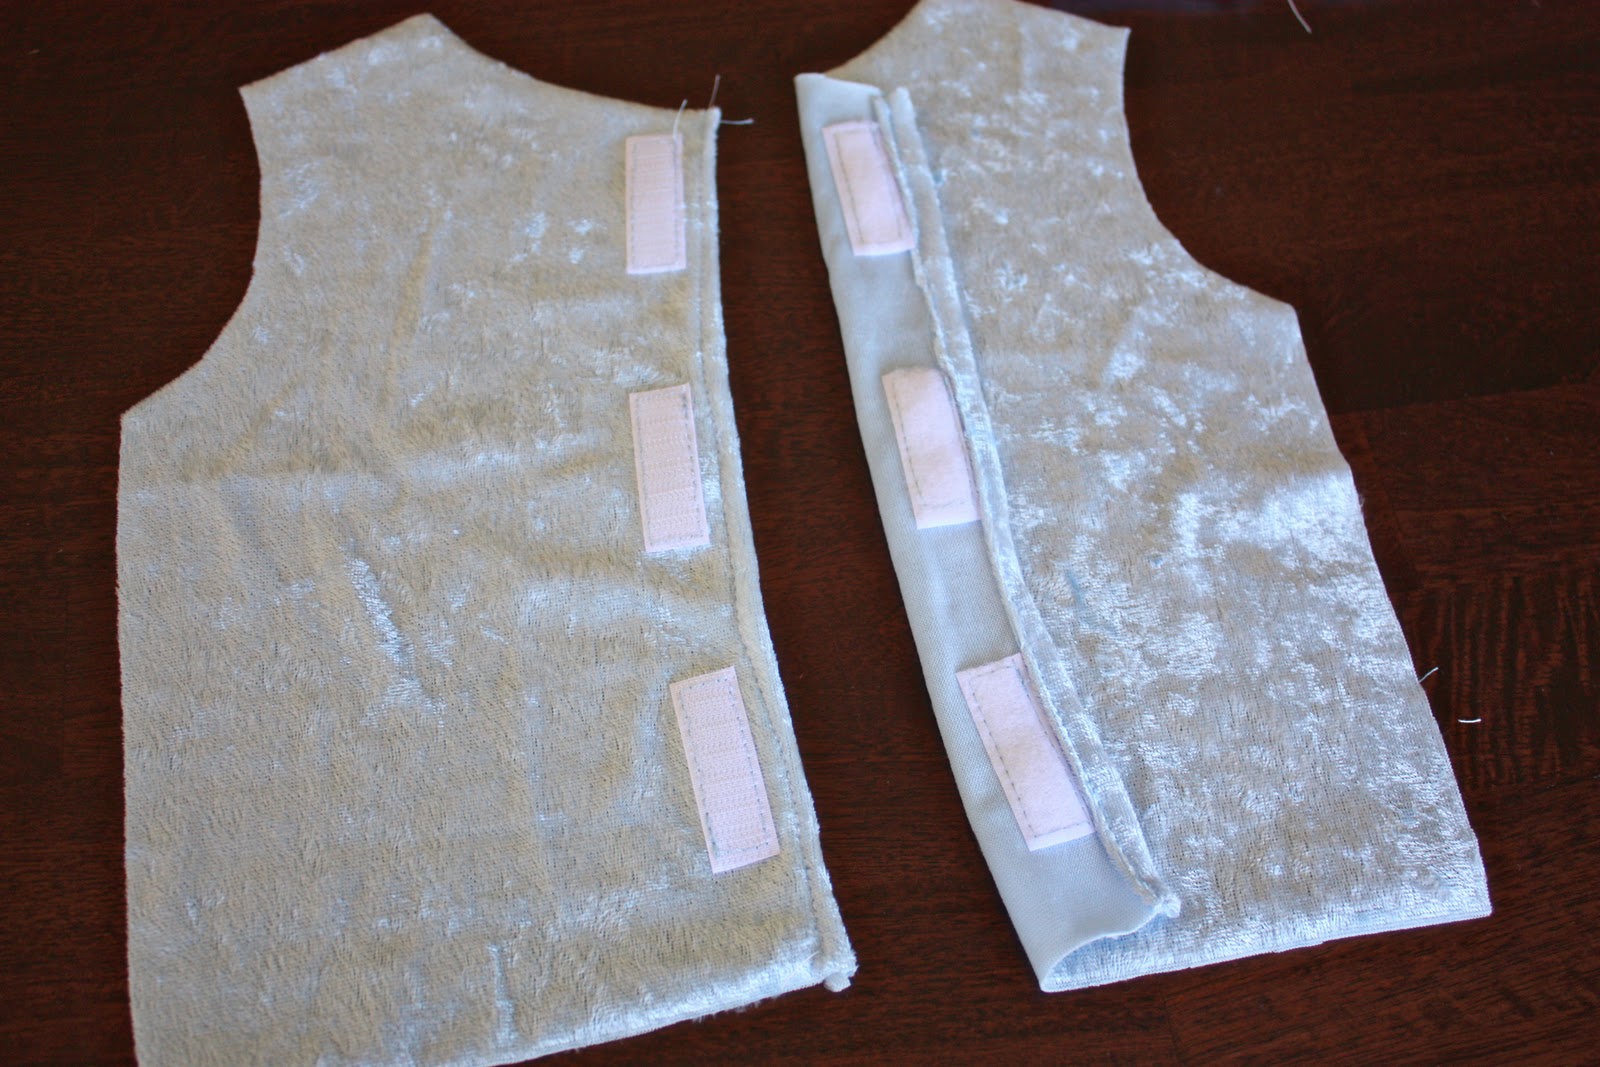
Then I used my front piece that I kept folded in half, as a guide for the 2 back pieces…..so don’t cut on the fold this time. We will be making a back with a velcro closure…..perfect for little ones to get on and off themselves.
The 2 back pieces need to be cut out exactly the same size except for adding an inch and a half to the center back and making the neck line higher. Refer to your original shirt to see the slope of the neck on the back if needed.
Now you have your 3 main bodice pieces: the front and 2 back pieces.
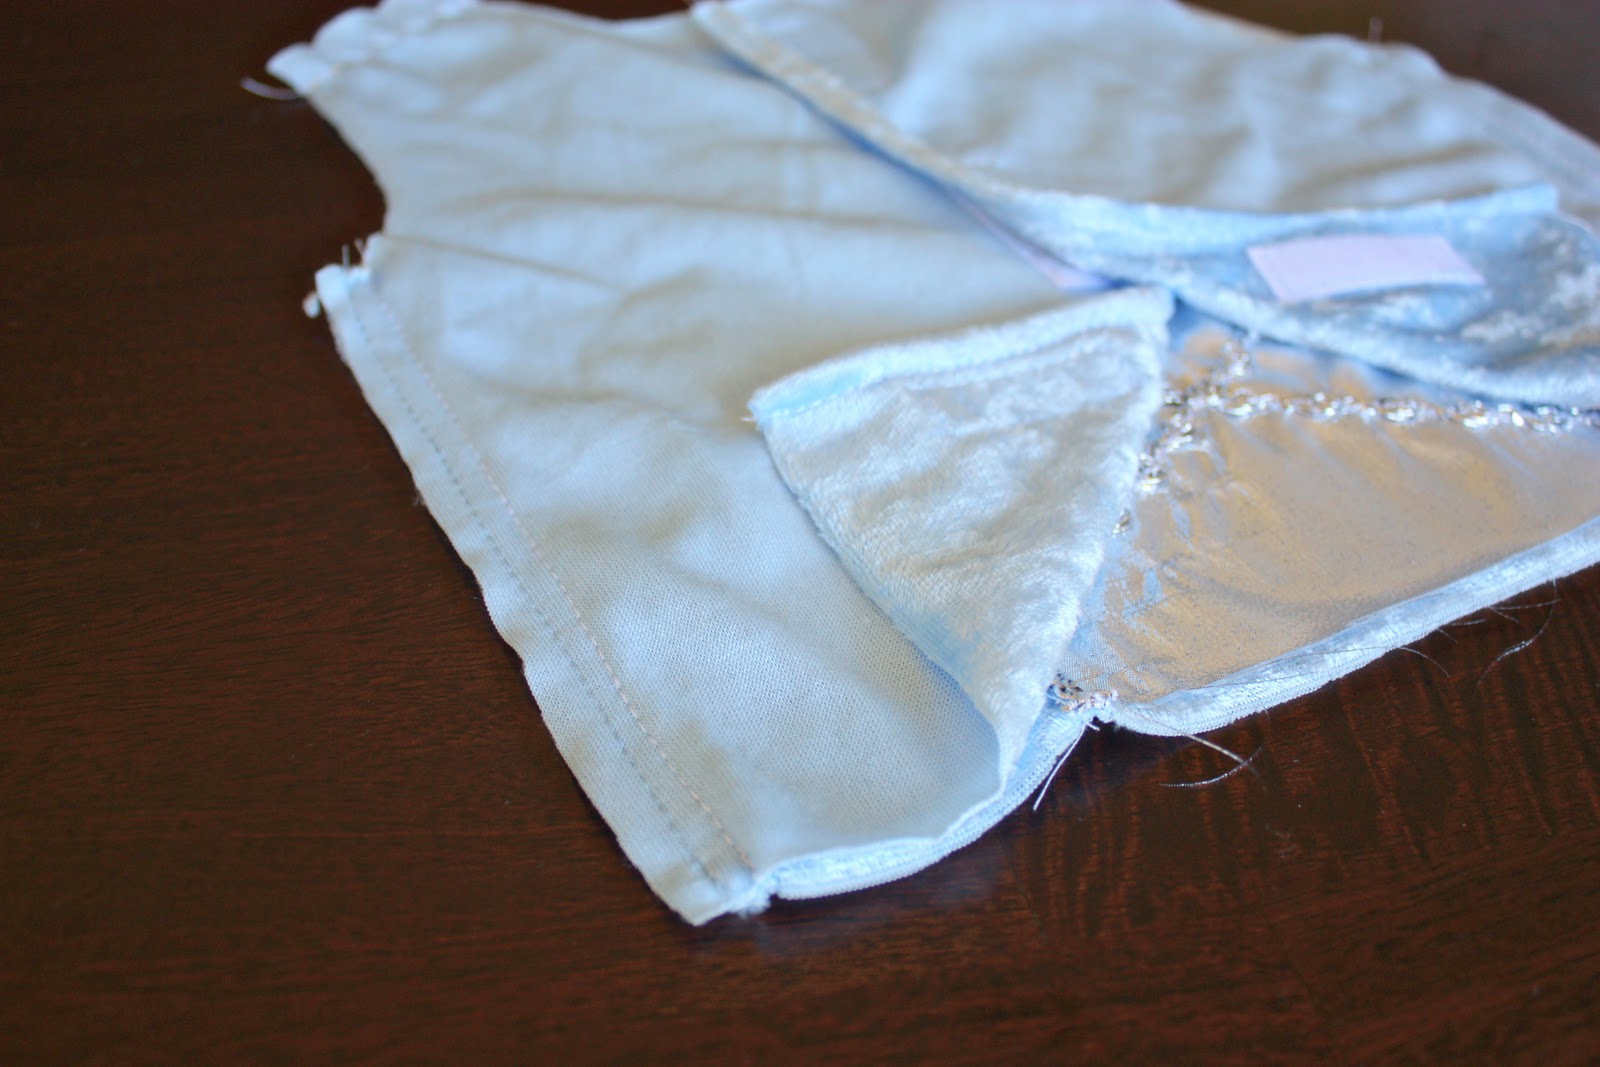
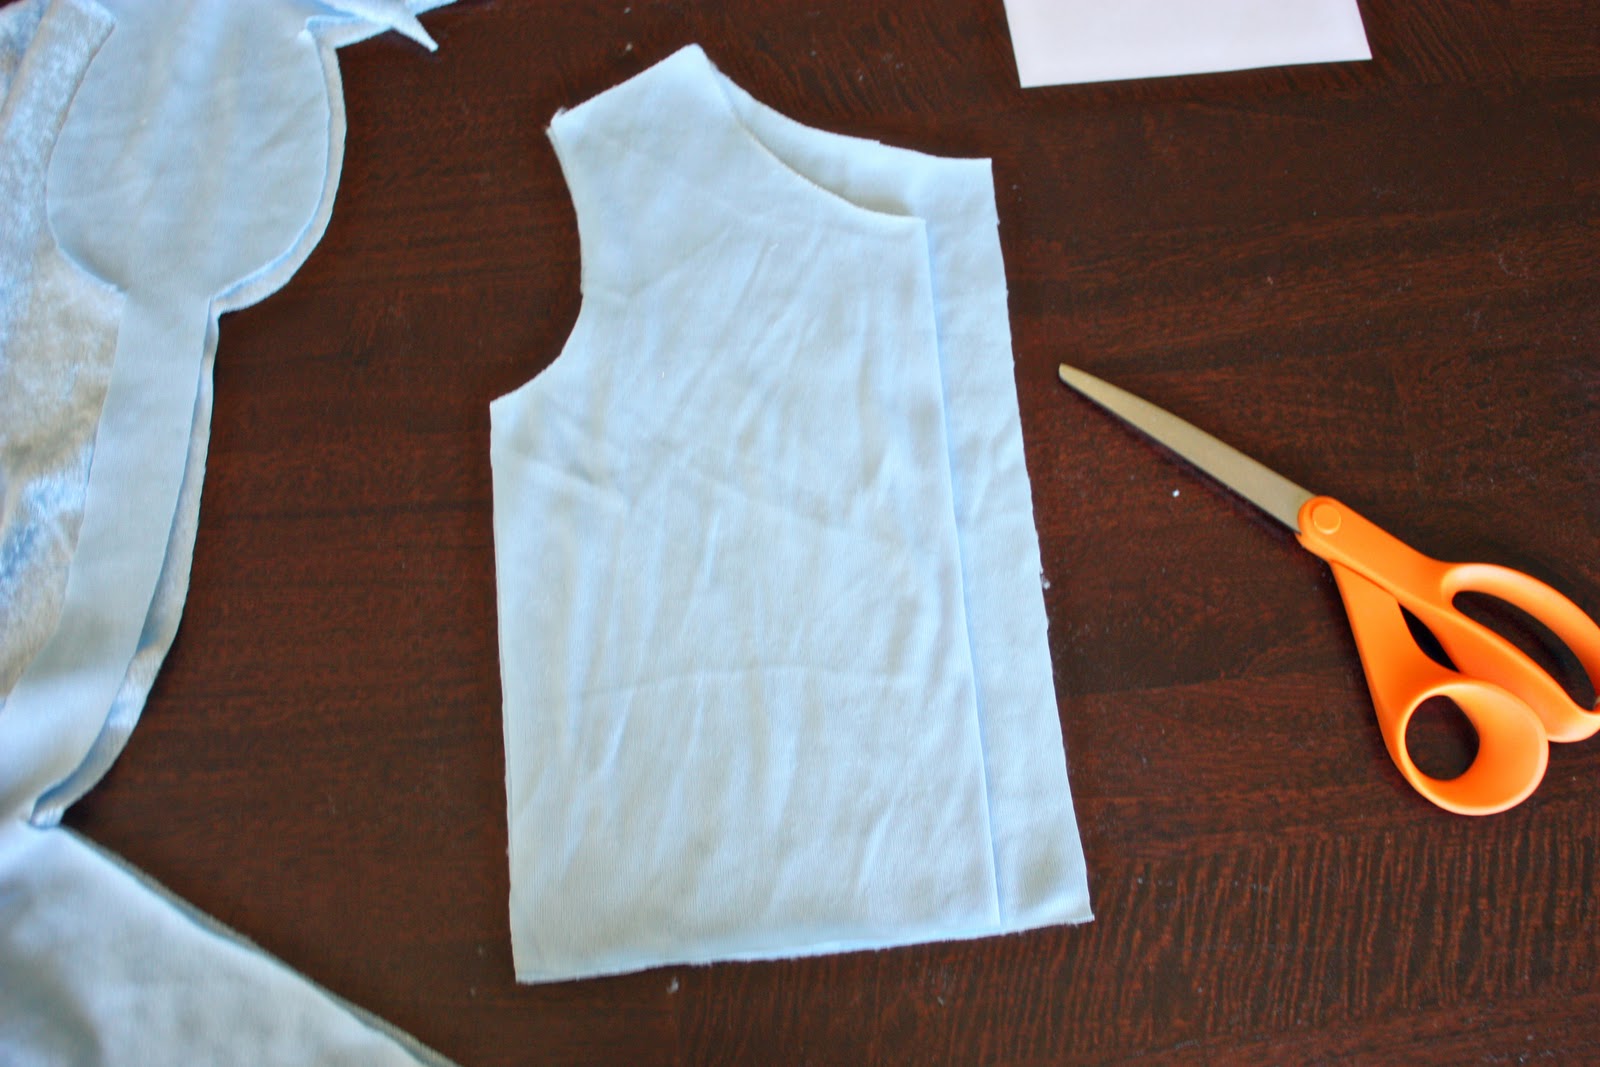
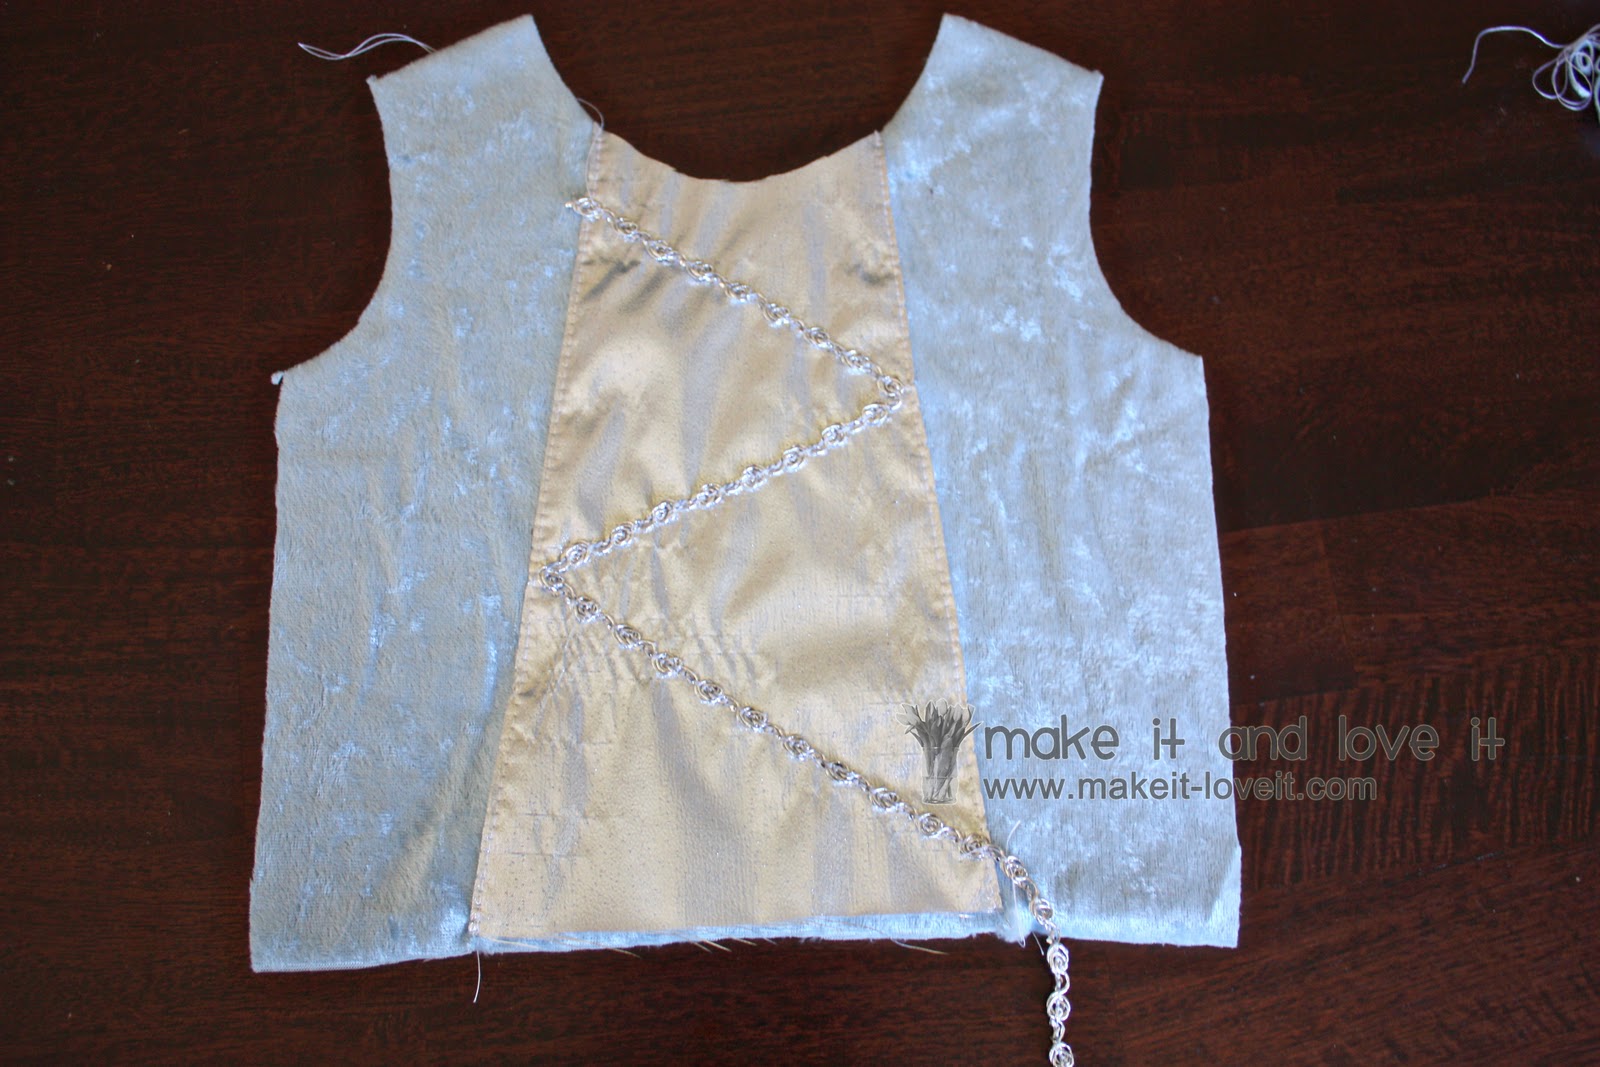
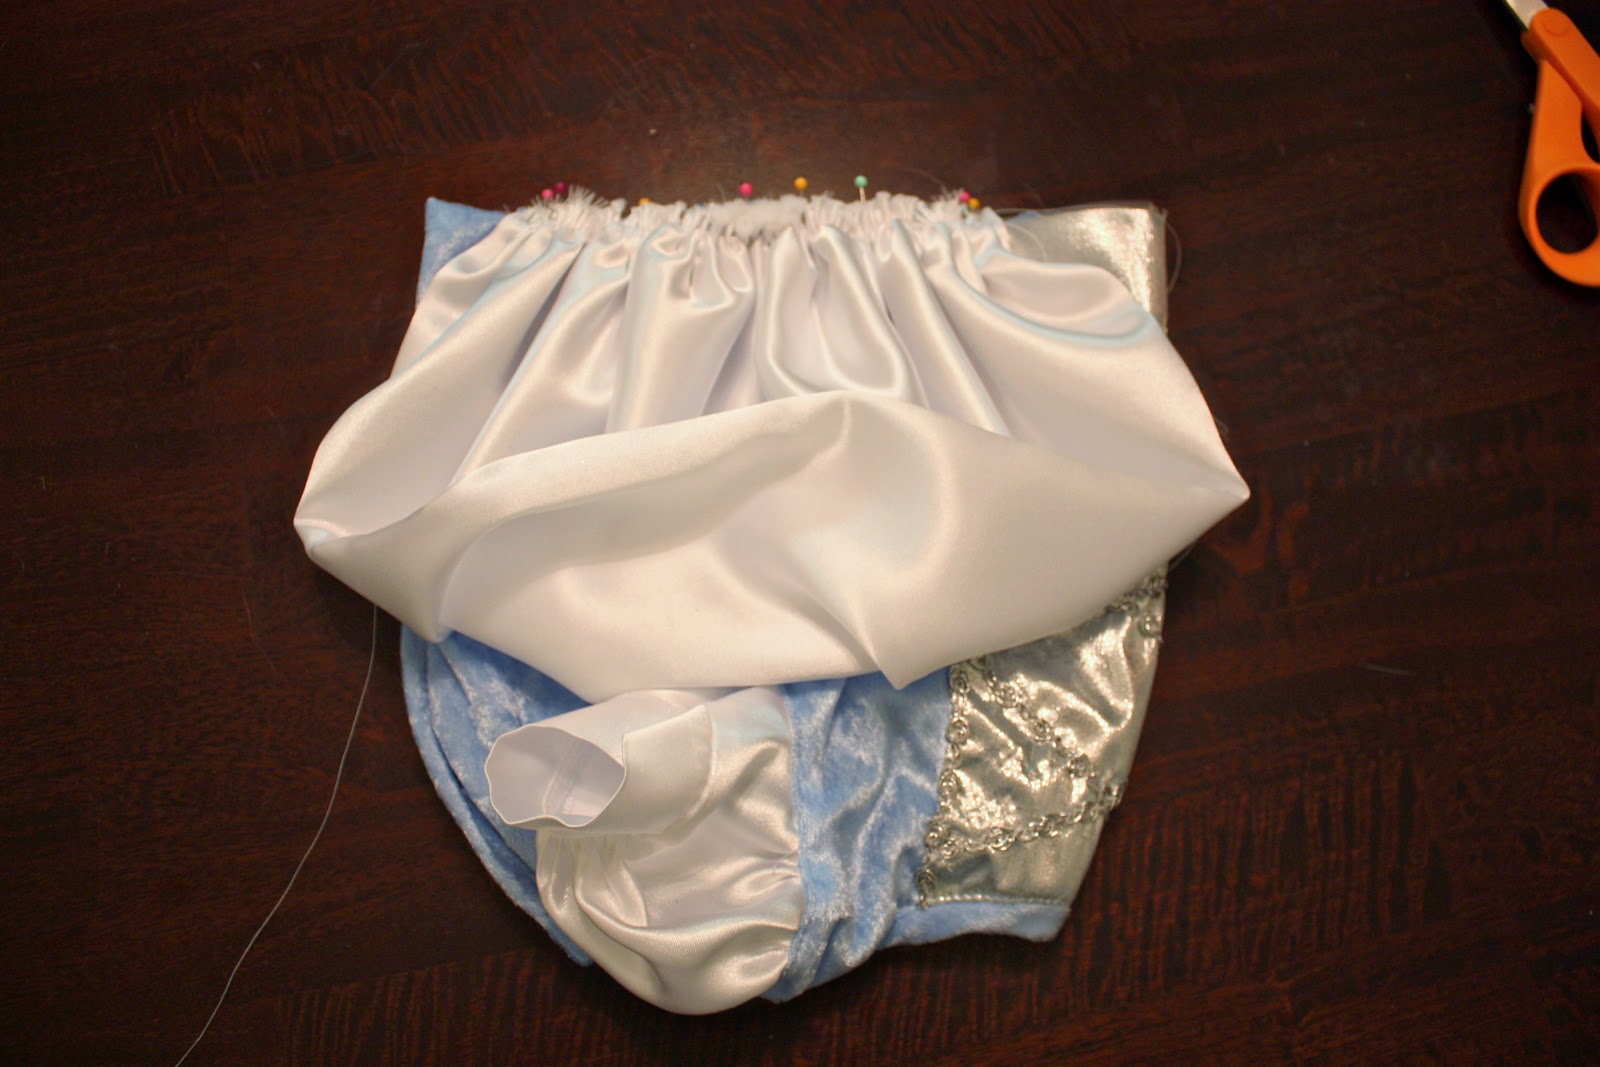
Now, to make the silver center portion on the front of the dress, I just cut a rectangle out of this shiny silver costume-y material (a syntethic fabric of some kind…..no idea what it is, I didn’t look) as wide as I wanted it for the bottom and then tapered it off up towards the top. I had plenty of it, so I was willing to mess up and have to cut out a new one…..but create a paper pattern first if needed. Then I tucked under each edge, ironed in place, centered it on the front bodice, pinned it down………
Then sewed along each side.
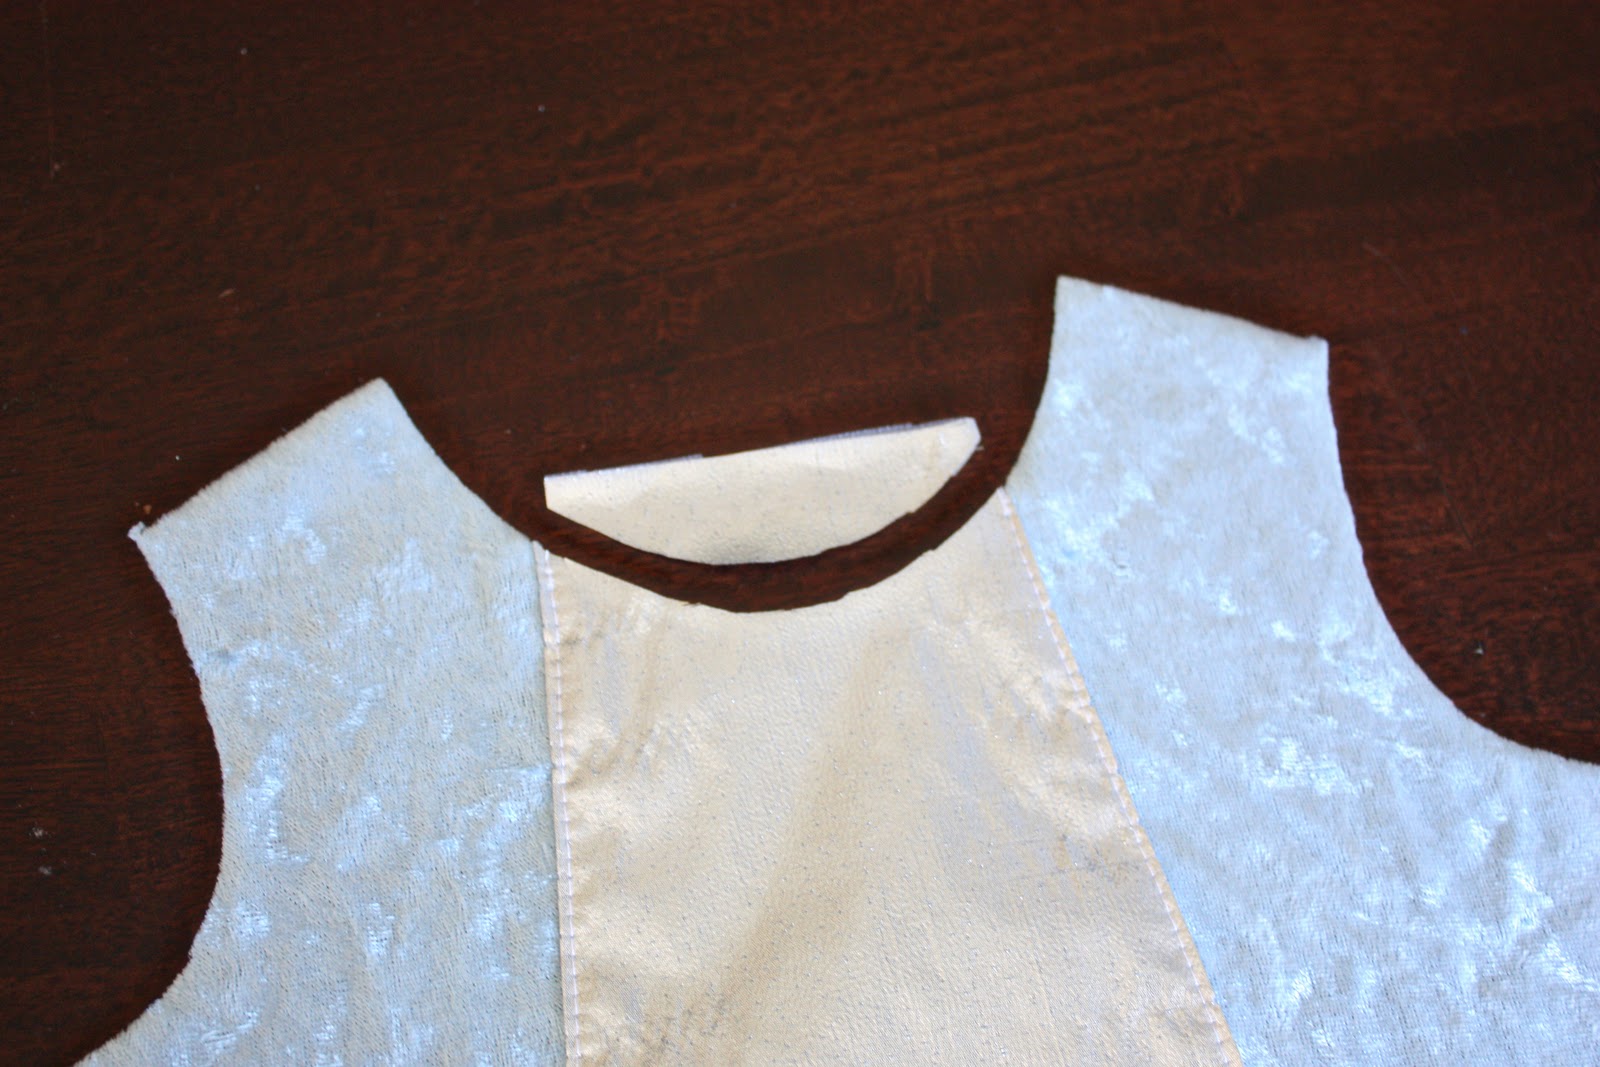
Then I trimmed the excess off along the top, following the shape of the bodice below.
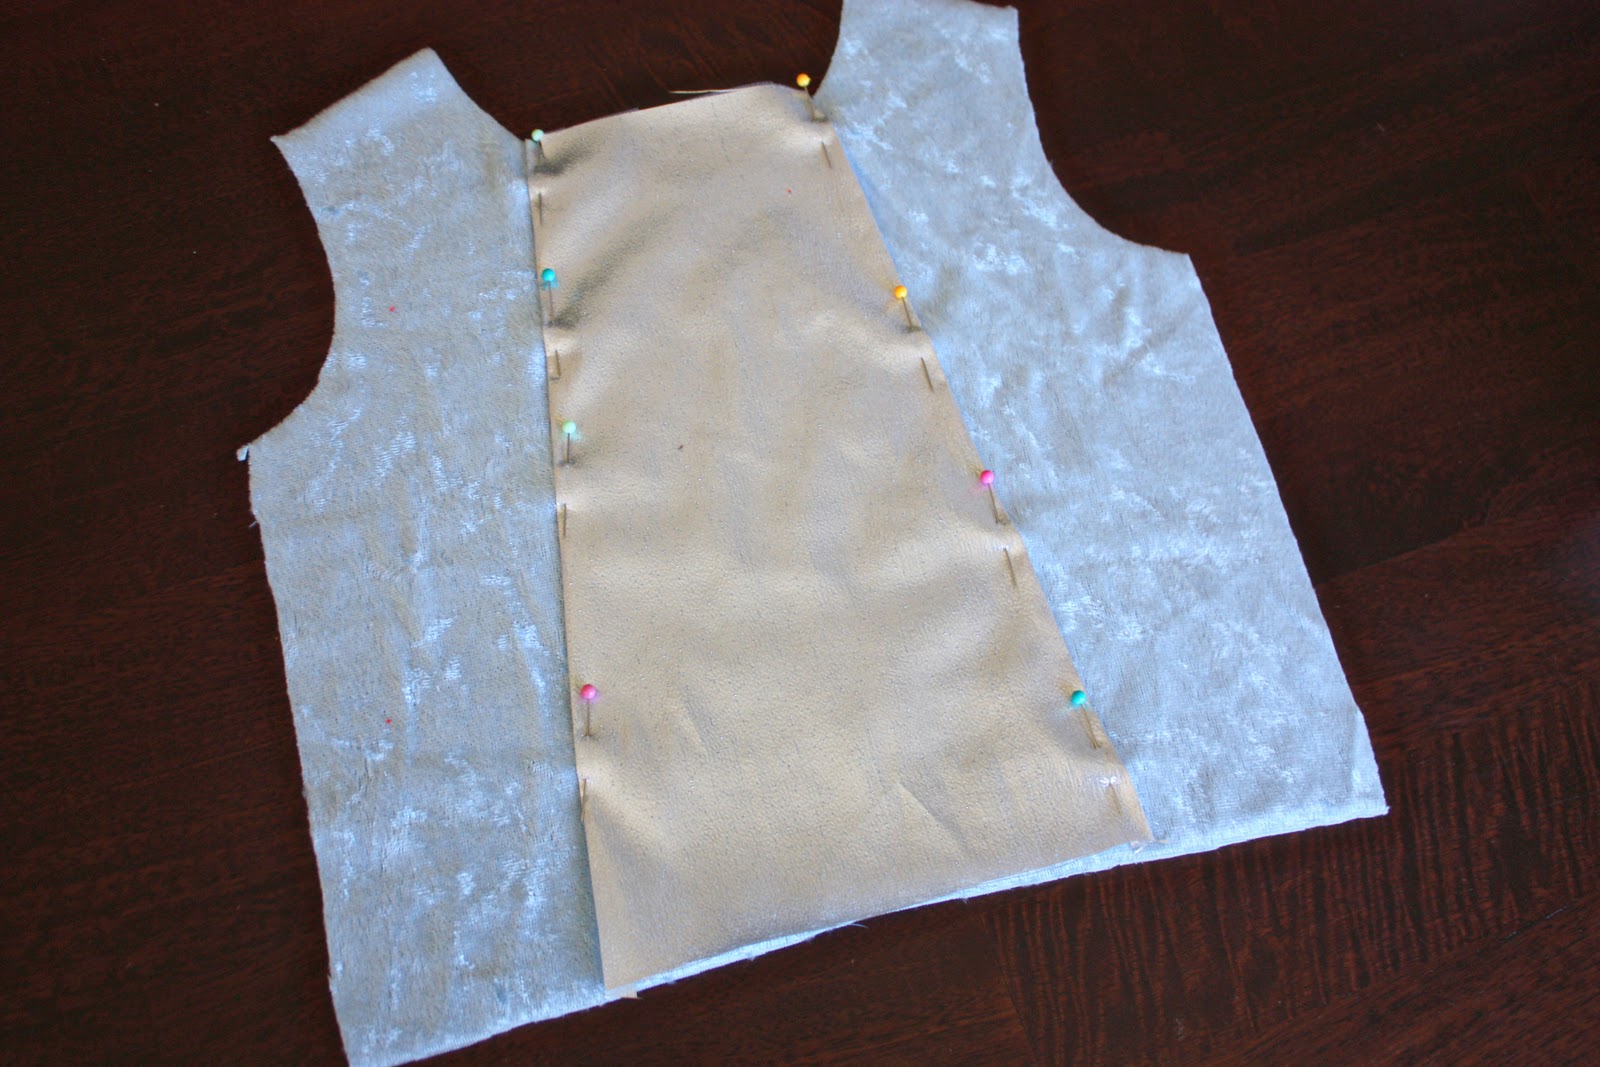
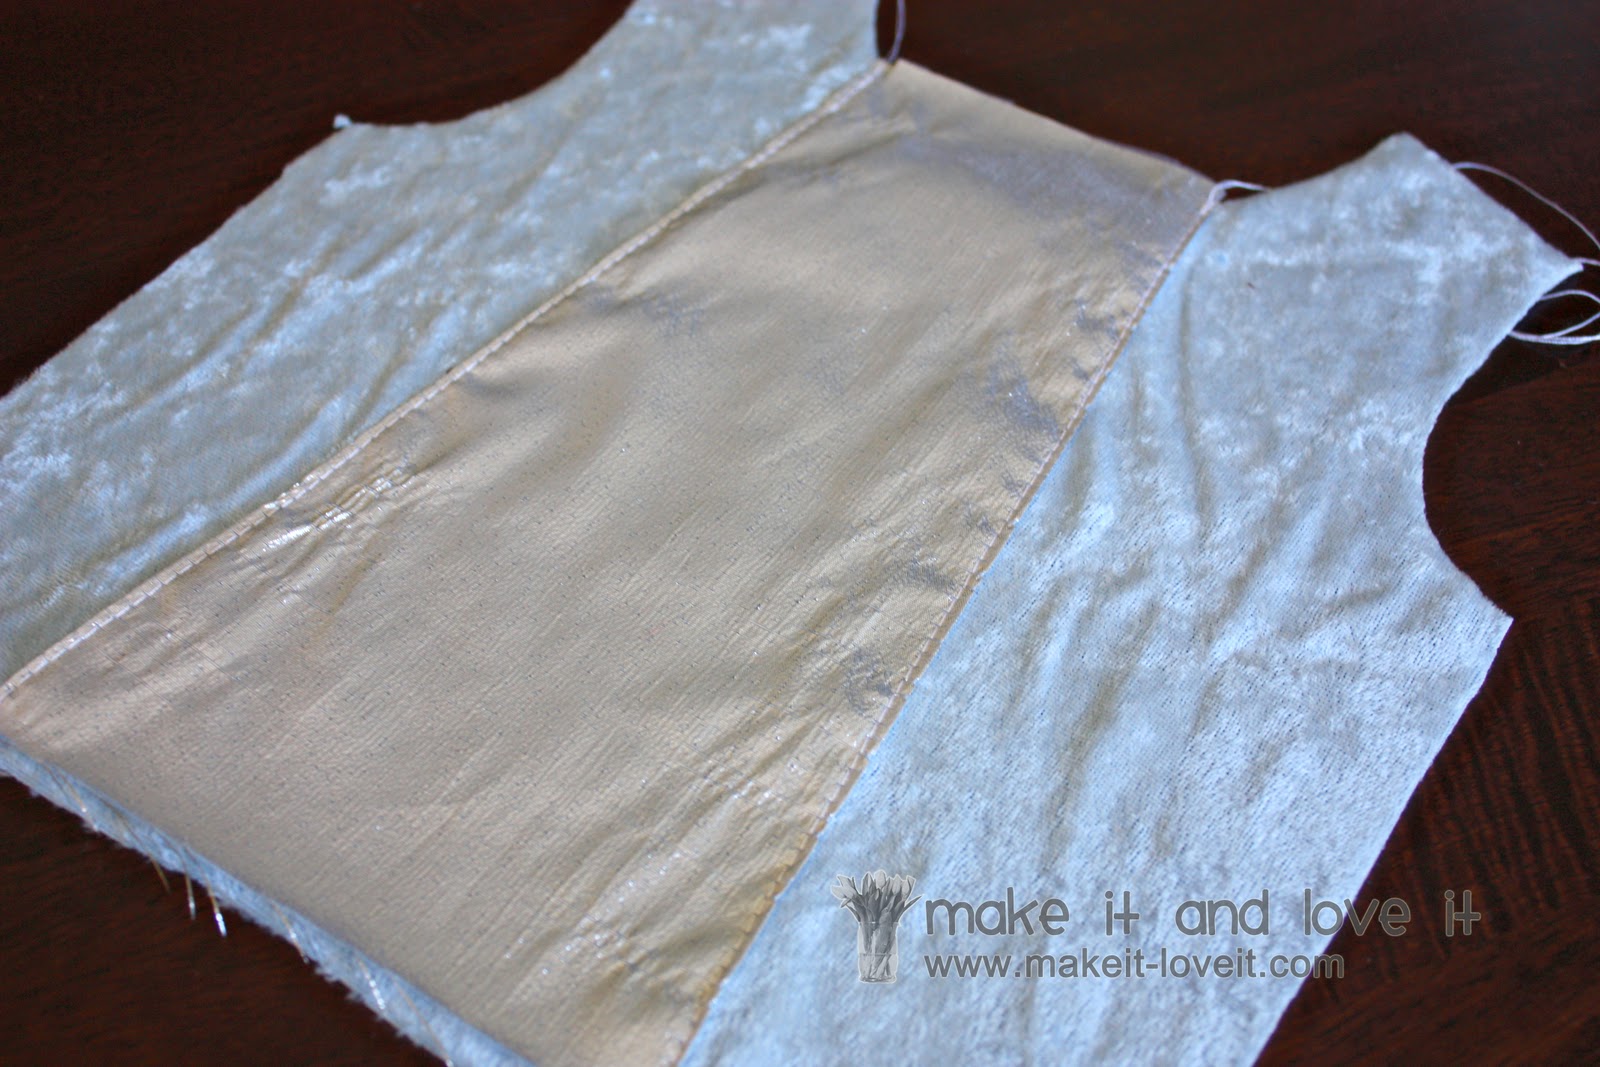
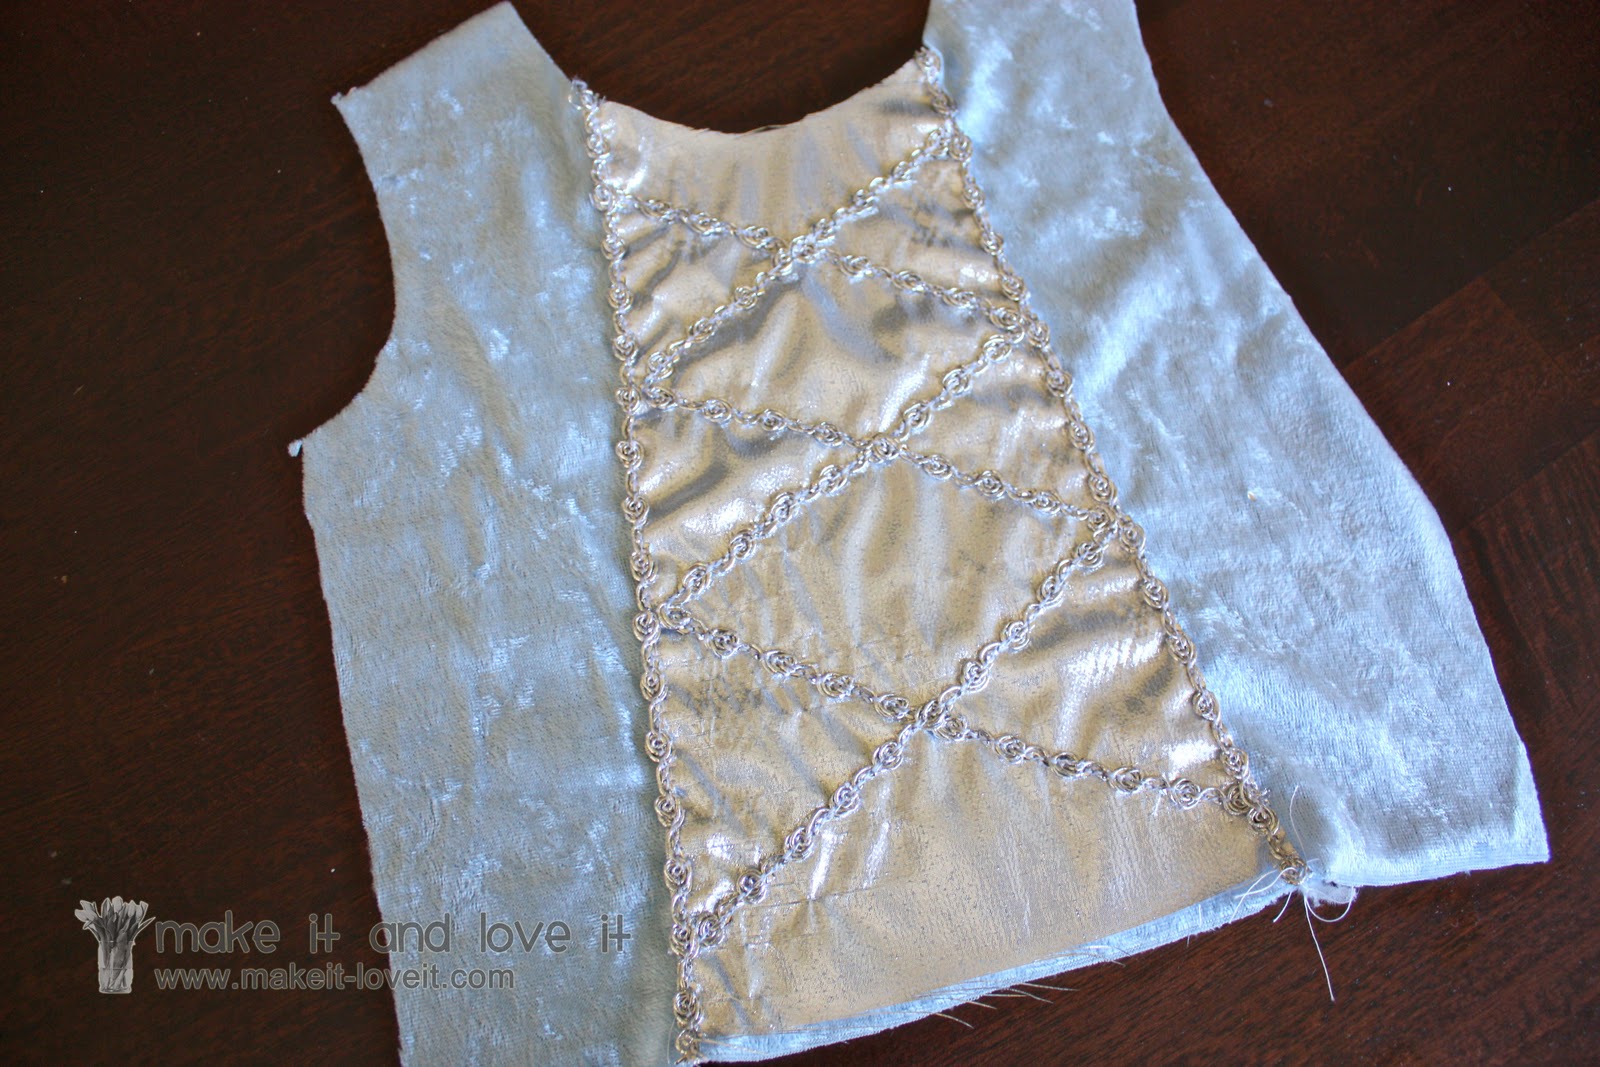
Then I used some silver trim that I found at the fabric store and with one continuous line, created 3 lines of a zig-zag down the center. I made sure to start an inch from the top and an inch from the bottom……because of seam allowances later on. Then I sewed the trim right down to the bodice. (Hint: Use a longer stitch length to sew over bulky trim. This may help if your needle is getting jammed in all of that fabric.)
Then with another continuous line, created another zig-zag……giving it that crossed over and cinched in bodice look with the trim. Sew this piece in place too.
Then cut two more piece of trim that are long enough for both sides of the silver section and sew into place along each side. Trim off excess trim.
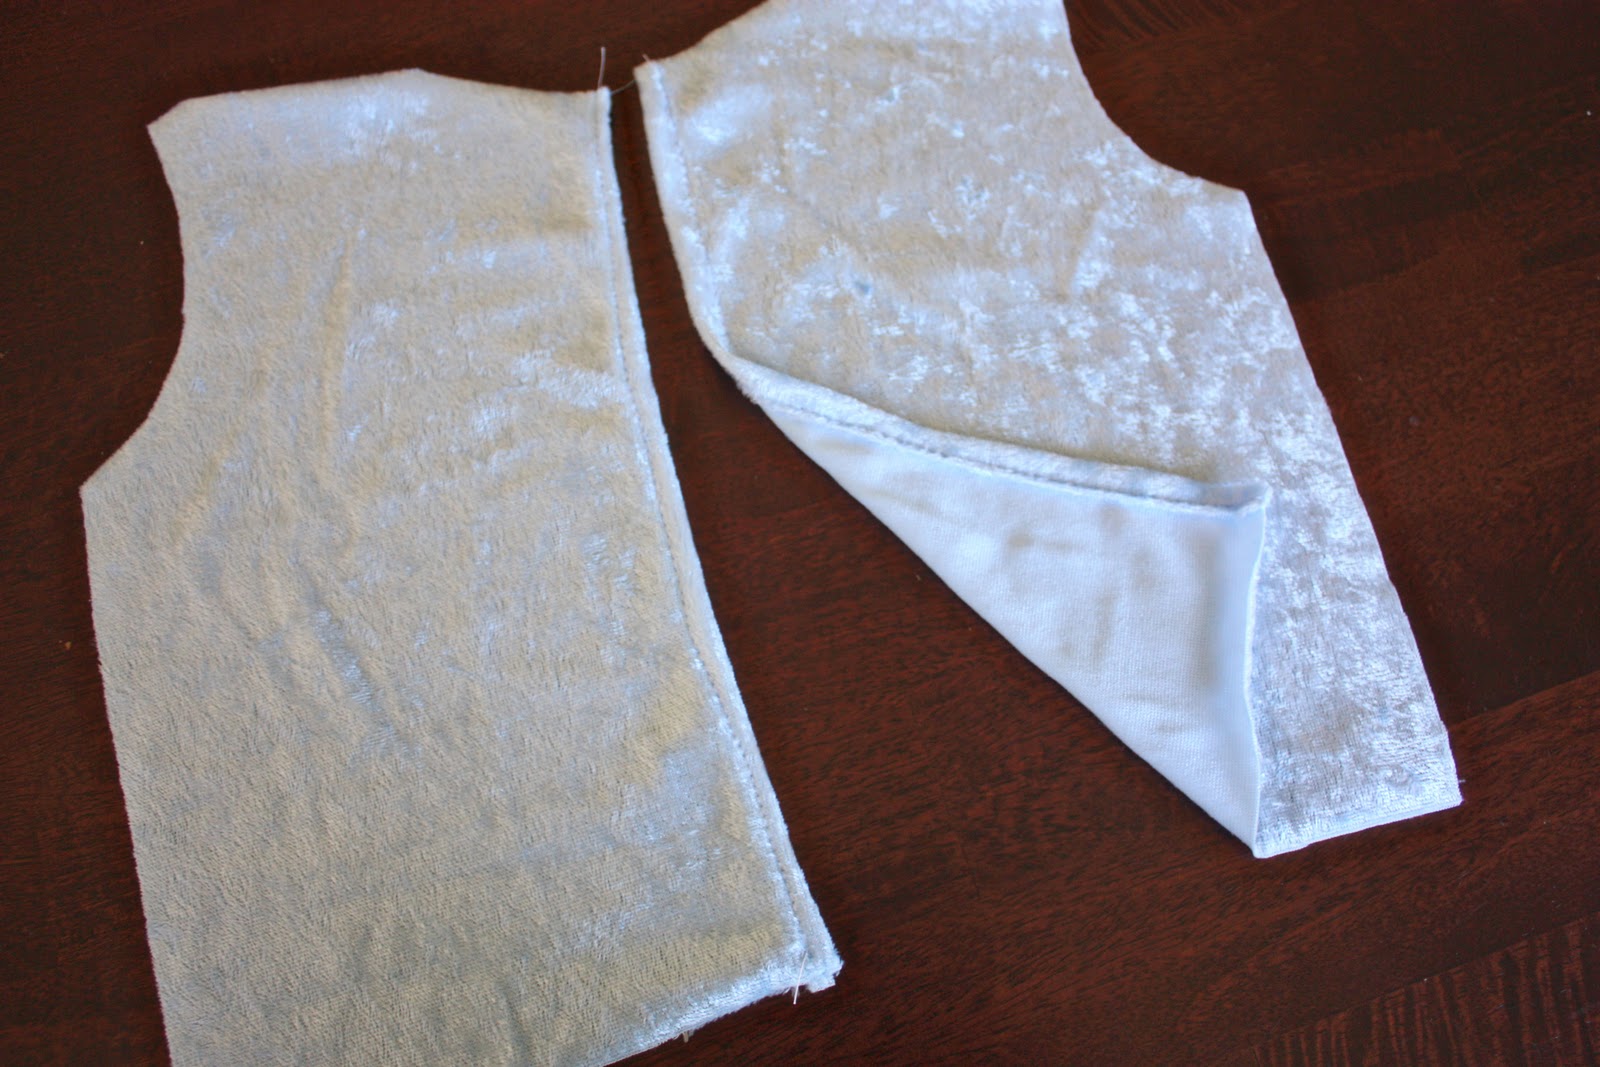
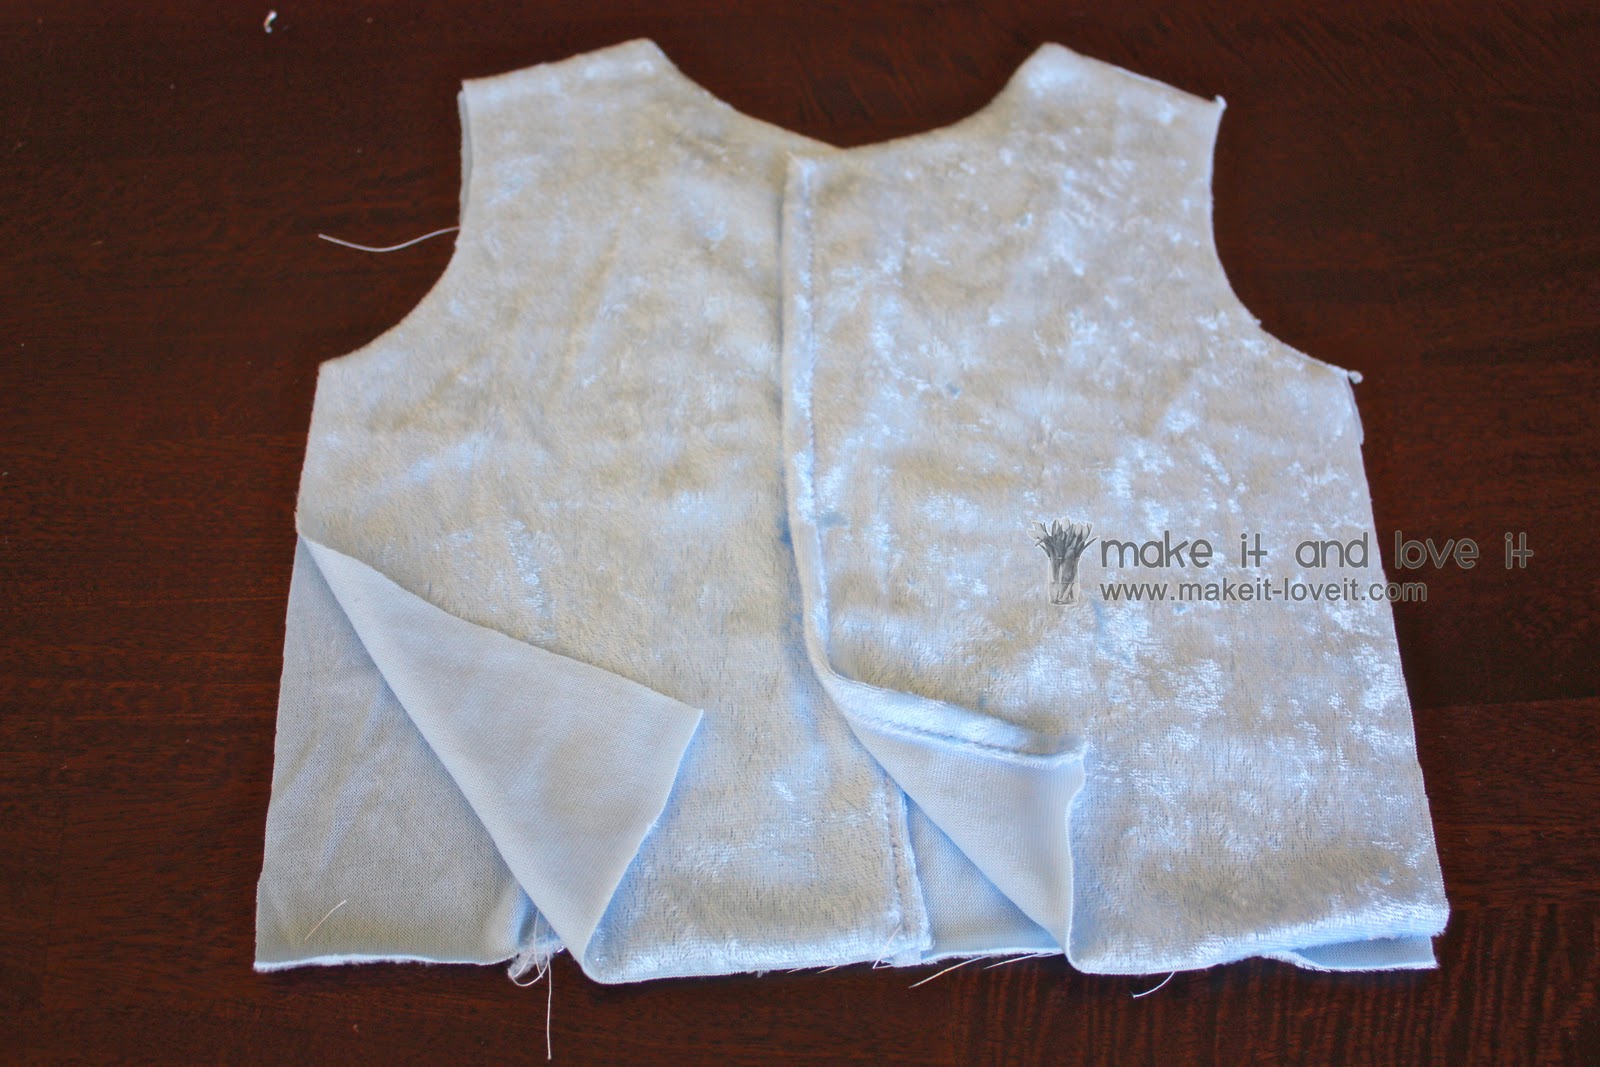
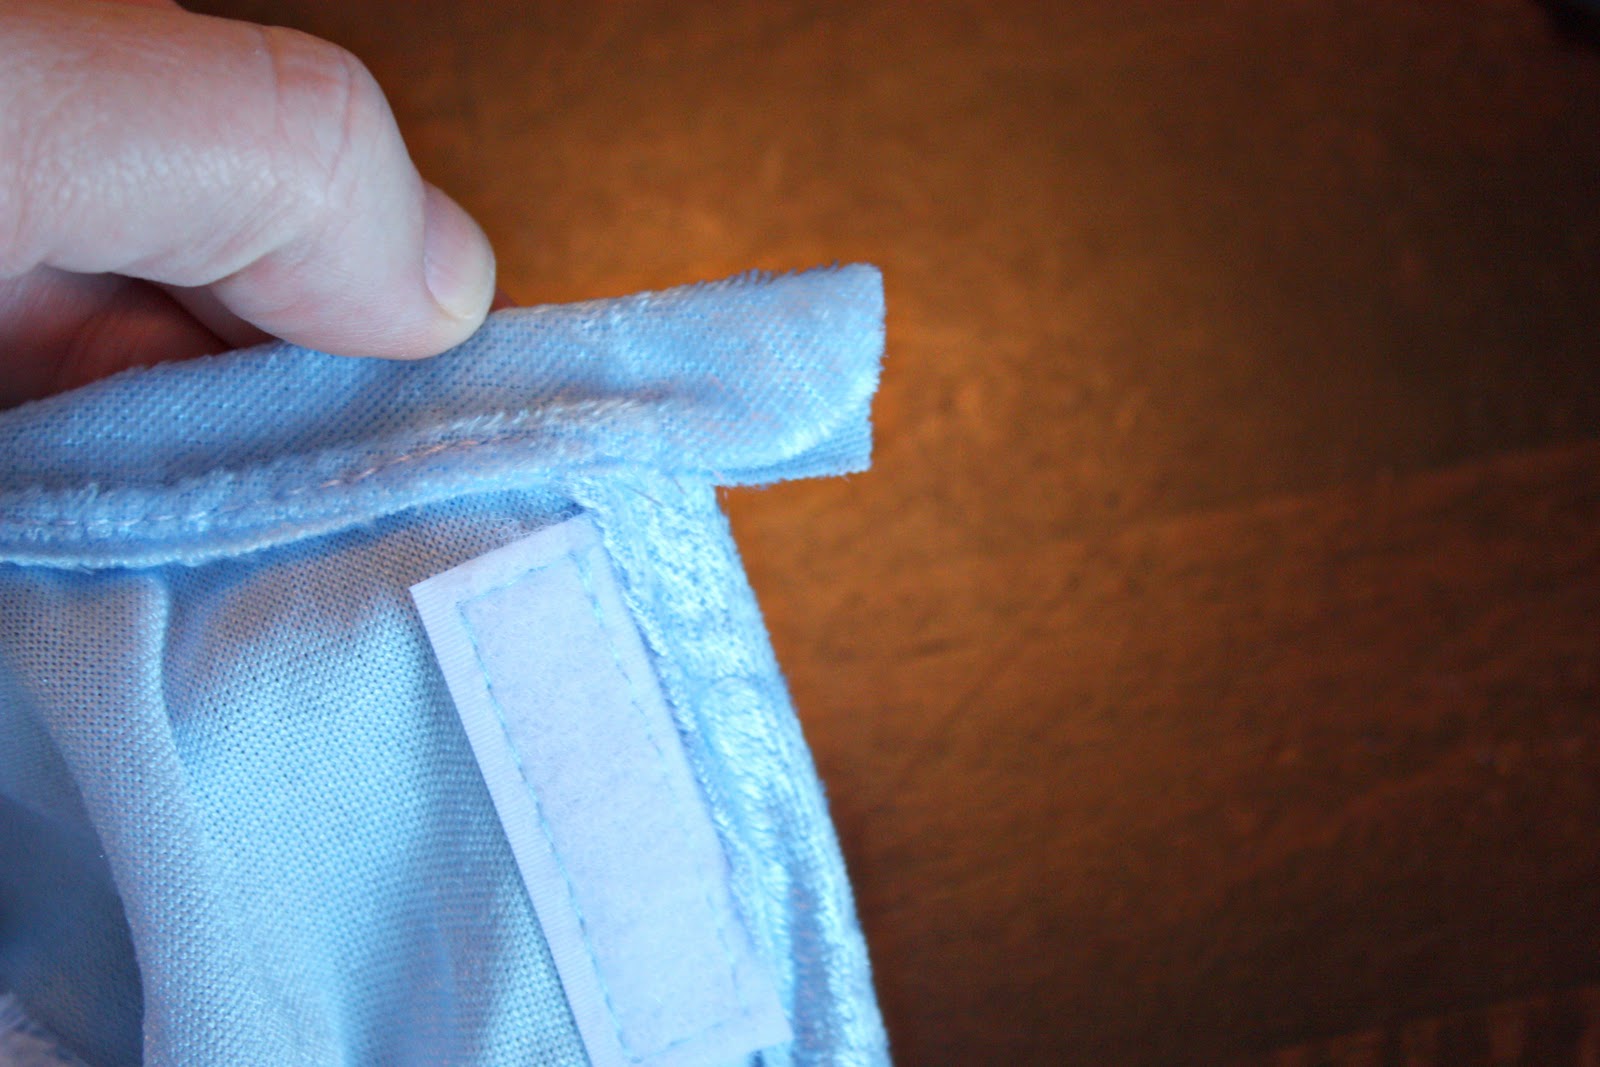
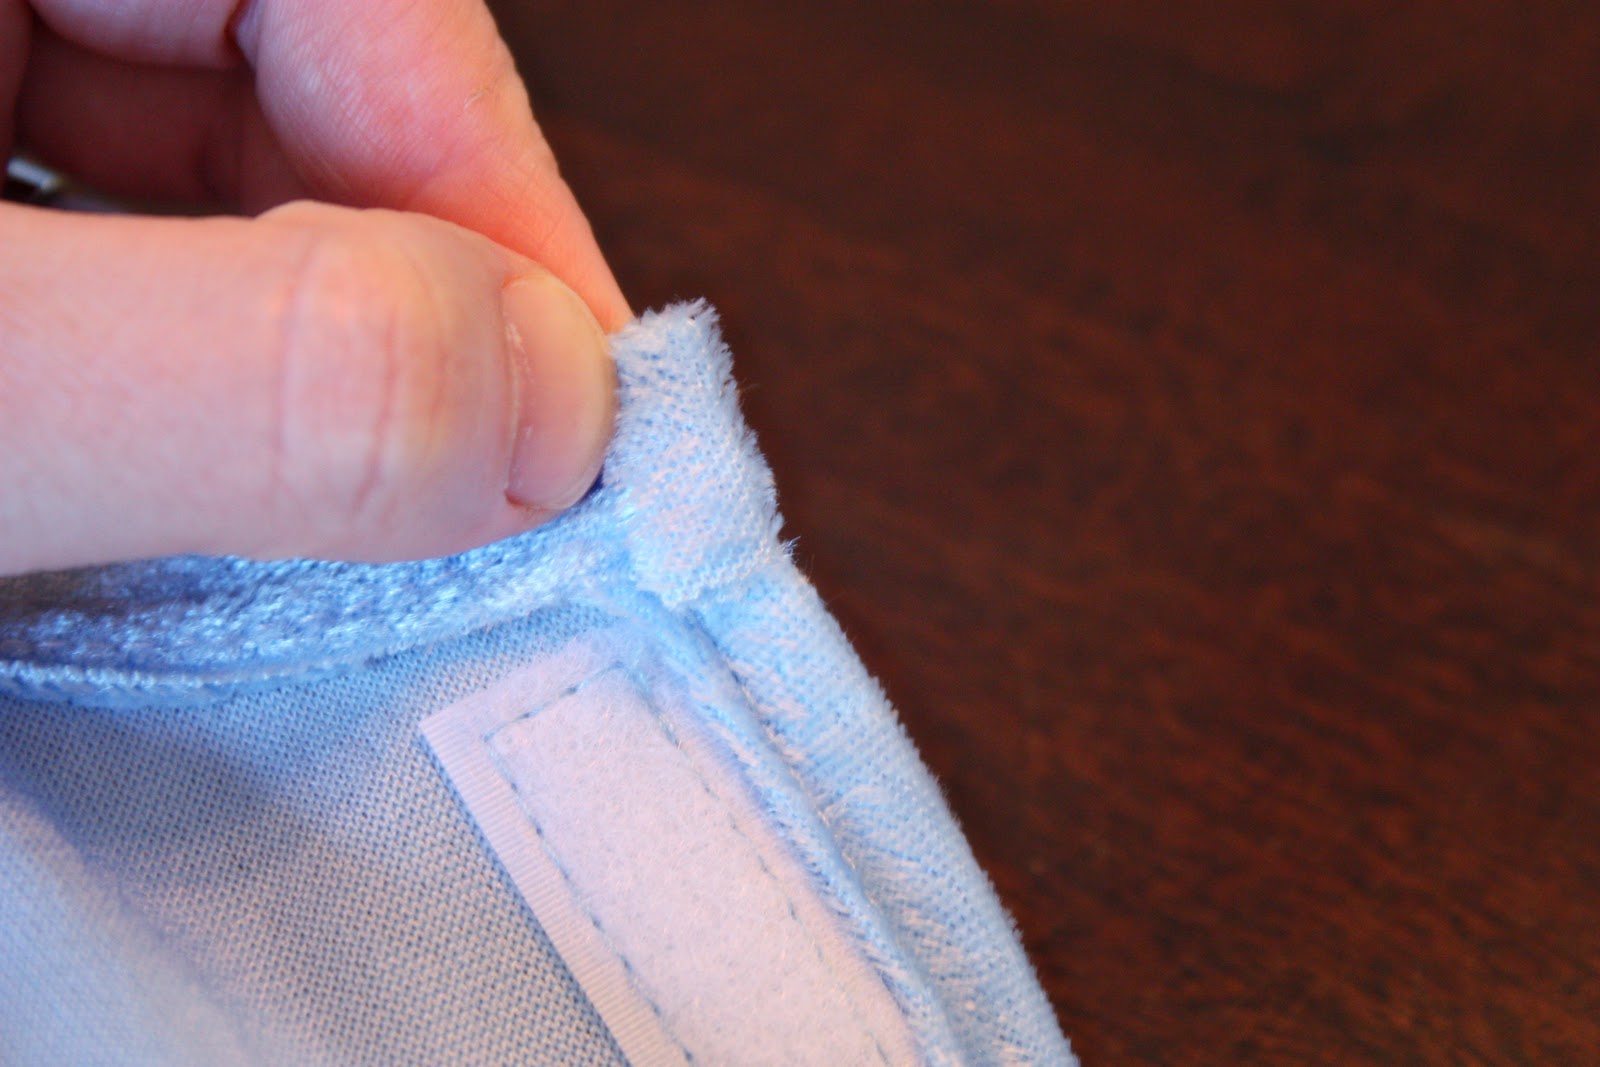
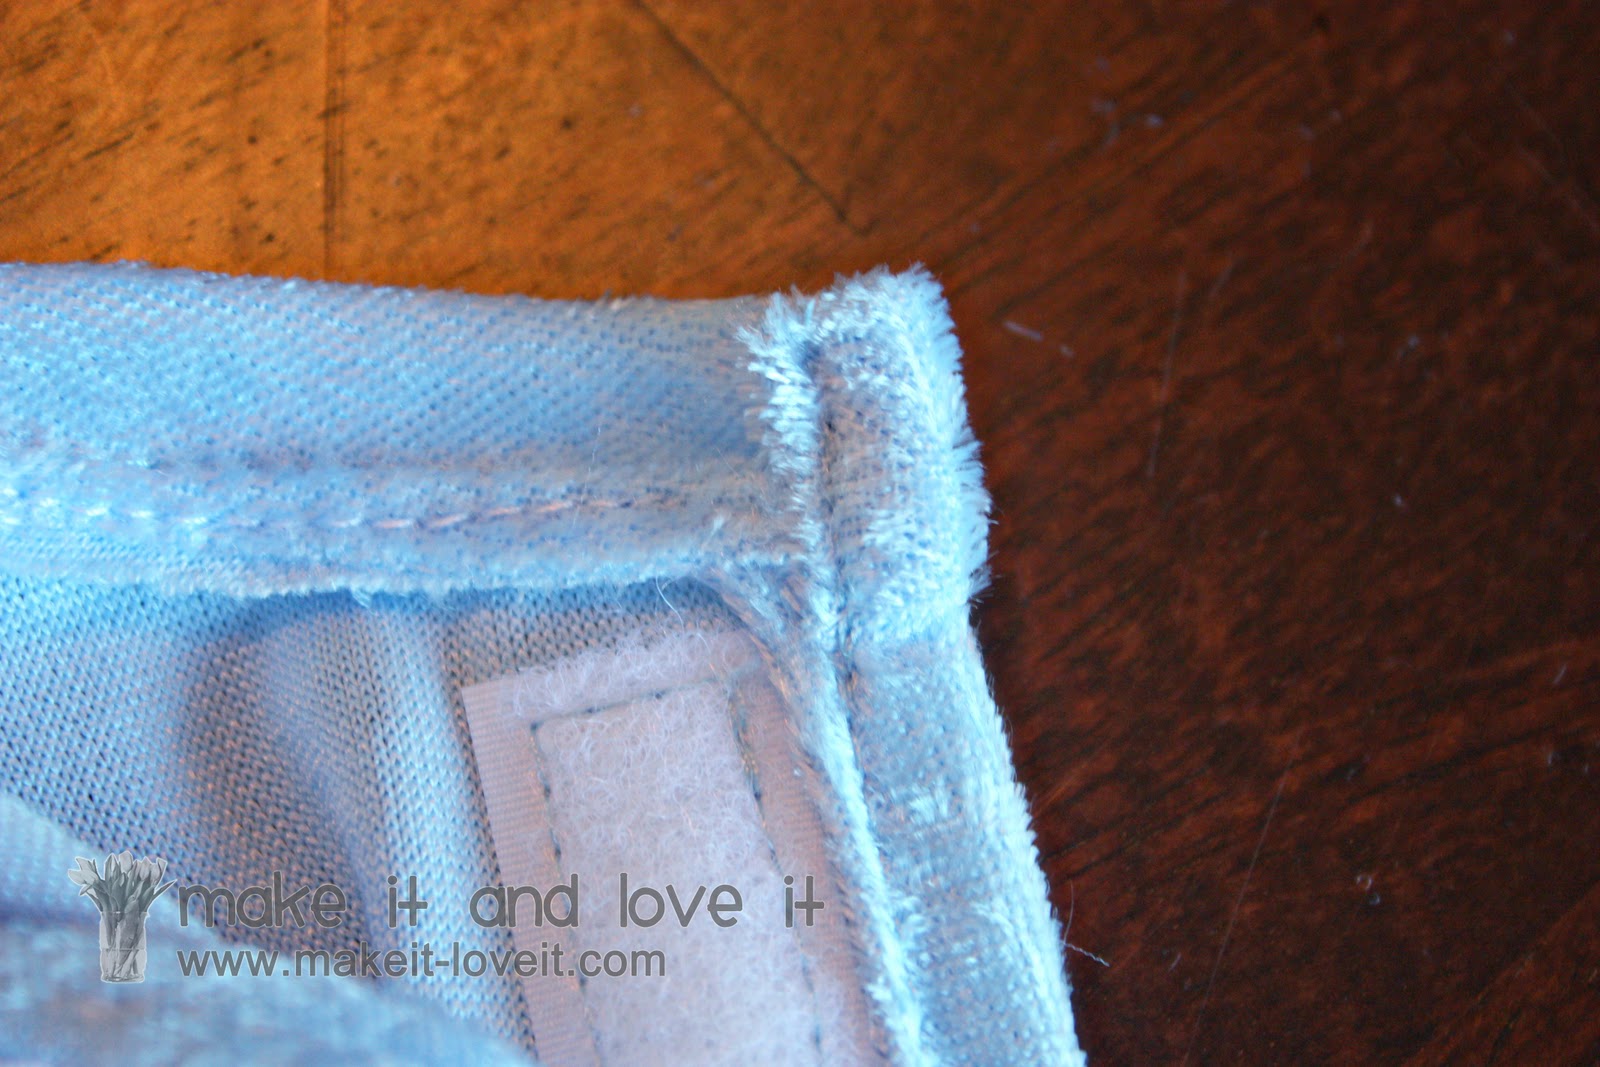
Next, fold under the center back edges of the 2 back pieces, a 1/4 inch, another 1/4 inch….then sew into place.
Then place your front bodice piece down as a guide as you lay the two back pieces on top, matching up the sides, the bottom and the two shoulders. Overlap the two center seams and pin in place. This is how far of a fold-over you’ll need to keep the bodice of the dress in the right proportion.
Sew velcro along both edges of the back center seams, keeping the same fold over proportion.
Next, place the front bodice piece together with the back bodice pieces with right sides together. Sew along the top of each shoulder…..using a zig-zag or overlock stitch (like I did) to allow for stretch in the knit. Use a 1/2 inch seam allowance.
Then, sew along each side of the bodice section, attaching the front piece to the back. In this direction, since there is no stretch to the fabric, I just used a straight stitch…..because I didn’t need to allow for any stretch. Make sense?
**And this is where I’m a creature of habit. I know it’s easier to create tops by leaving the bodice open at the sides, attaching the sleeves to the bodice and then sewing along the sides of the bodice and sleeves. I do that when I remember. But when I’m winging it and not using pattern pieces that I have created………I make the whole bodice first and then make sure the bodice fits, take it in or out if necessary, and then cut out sleeves that will fit in the arm hole opening. I know, it must make my mom and grandma sick (they are more precision driven seamstresses) but sometimes I just want a quick top, am not using a pattern, and need to make the bodice first and then make the sleeves to fit. This way, I only have to adjust the bodice once if needed and not have to adjust the sleeve. Does that crazy talk make any sense?????? Maybe not. But it carries over into my tutorials many times. But if you have planned ahead with pattern pieces and have a sleeve cut out, attach the open sleeve to the bodice before sewing down the sides……then sew along the sides in one full sweep. Whew. I had to explain my insanity. :)
And once again, my habit took me this route again. So onto the sleeve after the bodice was already sewn together…..even though it was all cut out and ready to be attached. Oh well.
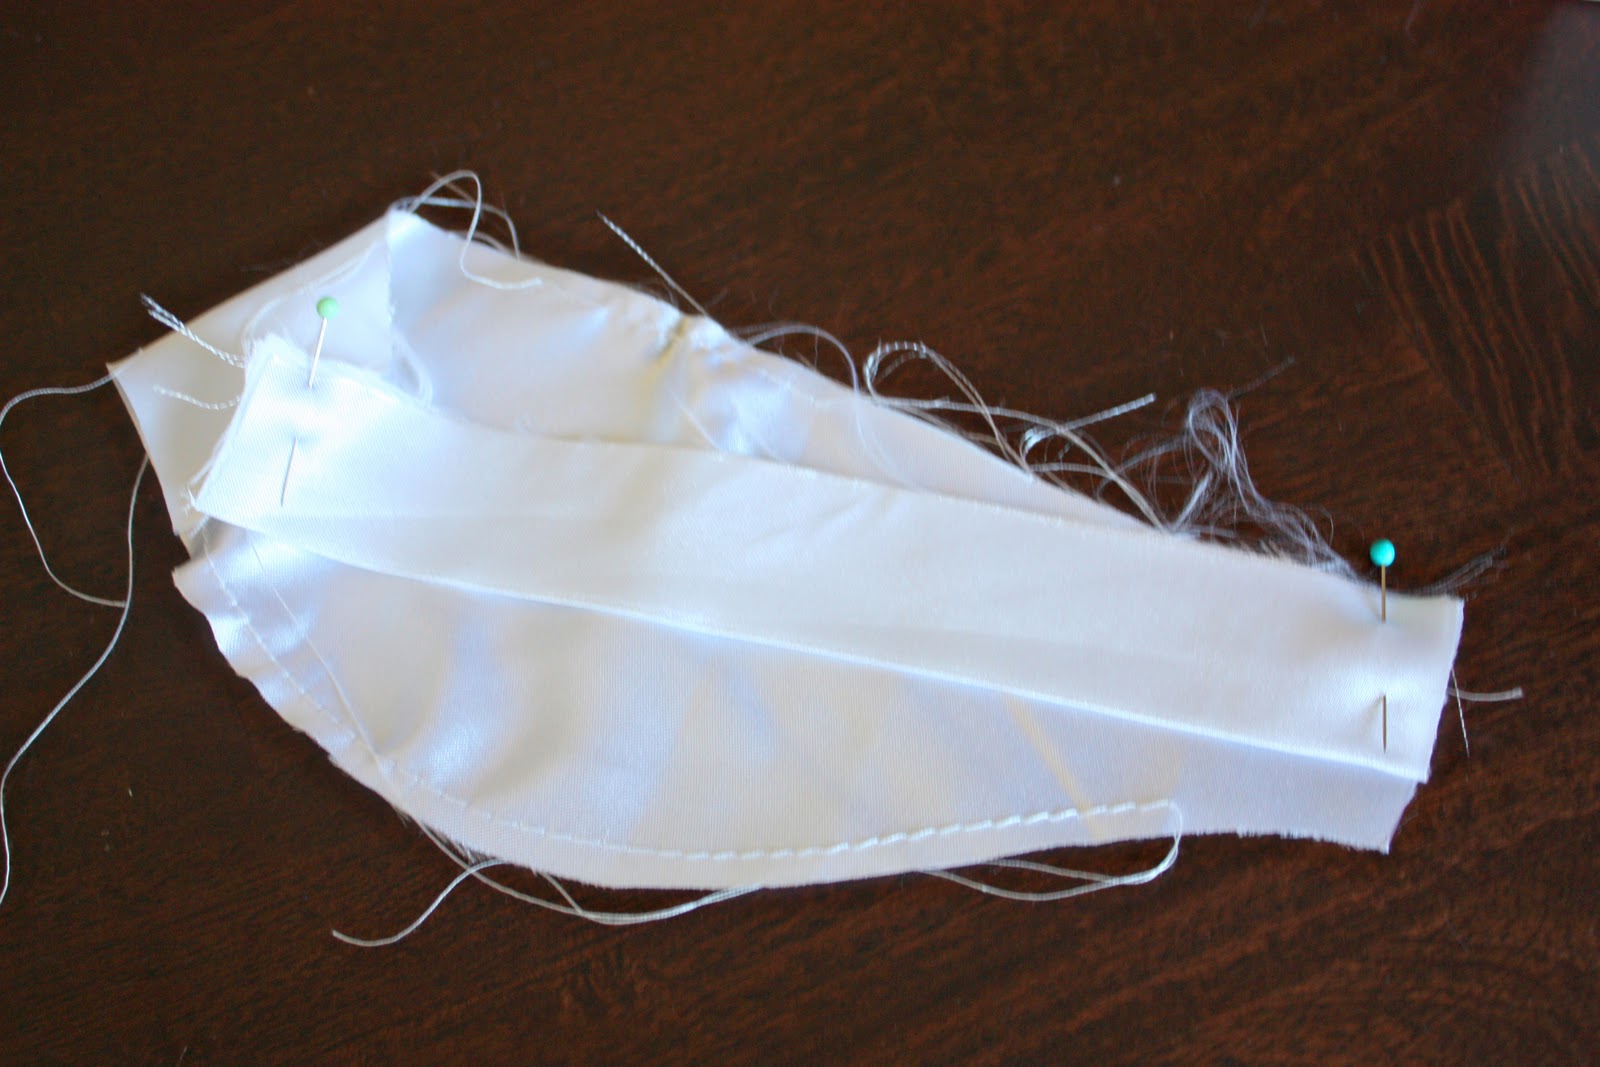
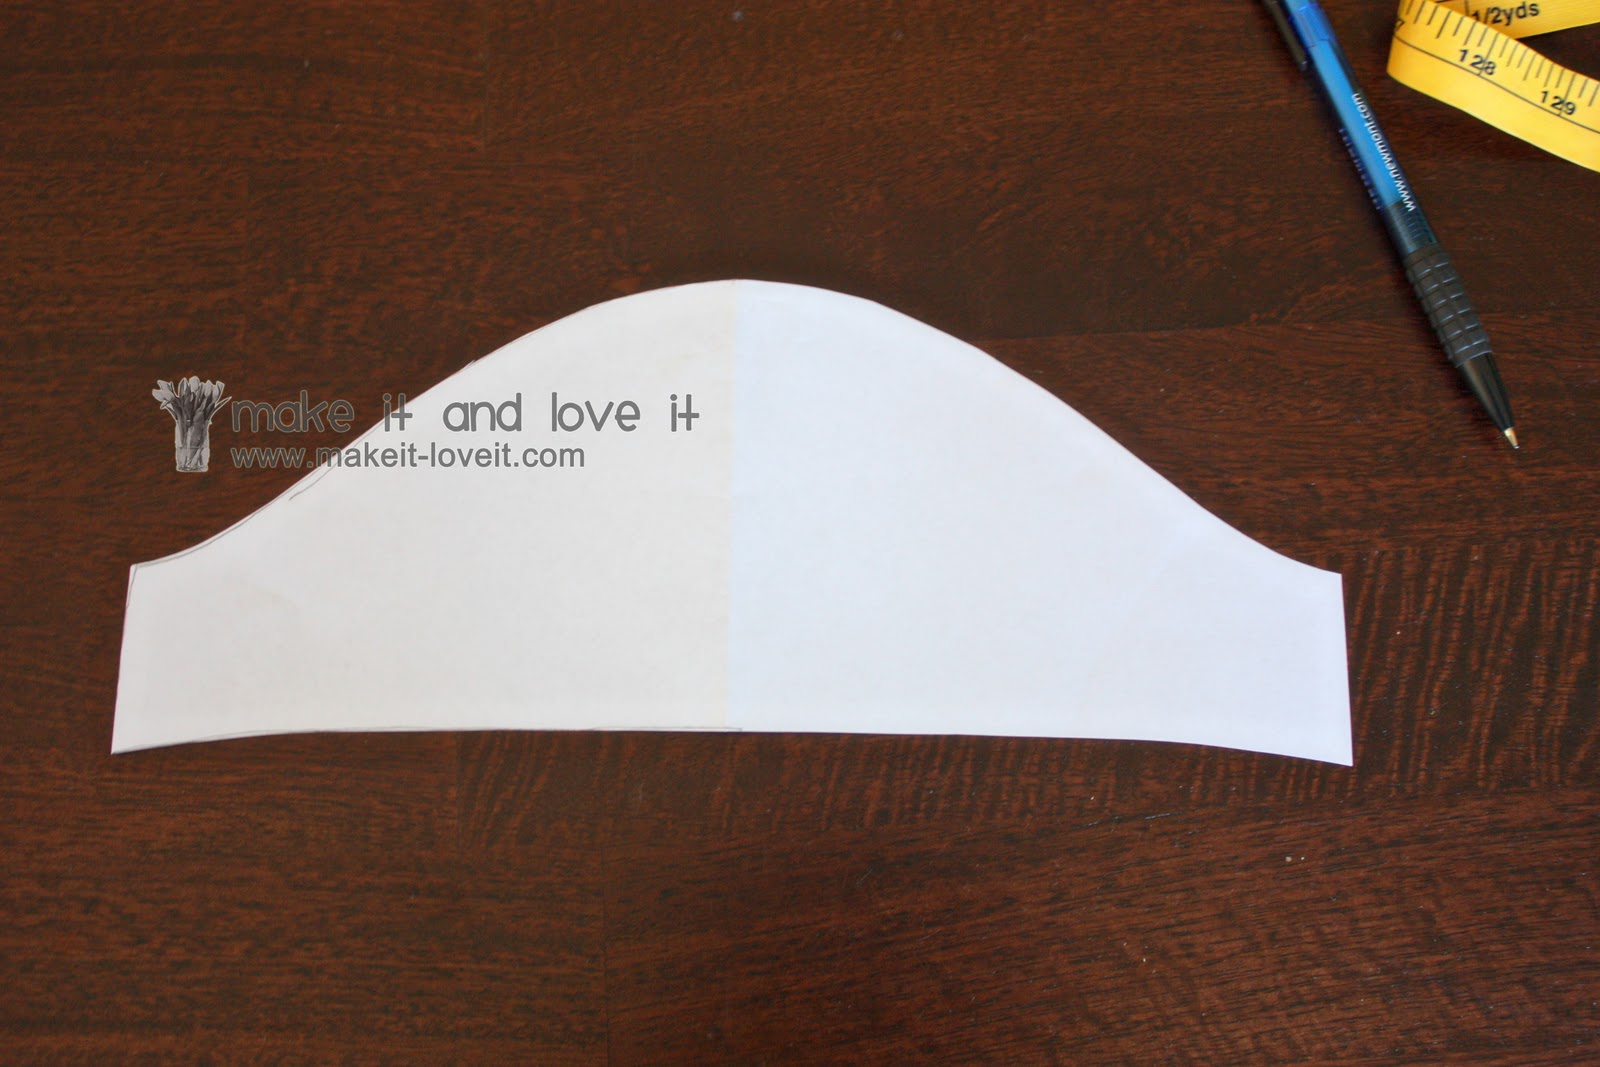
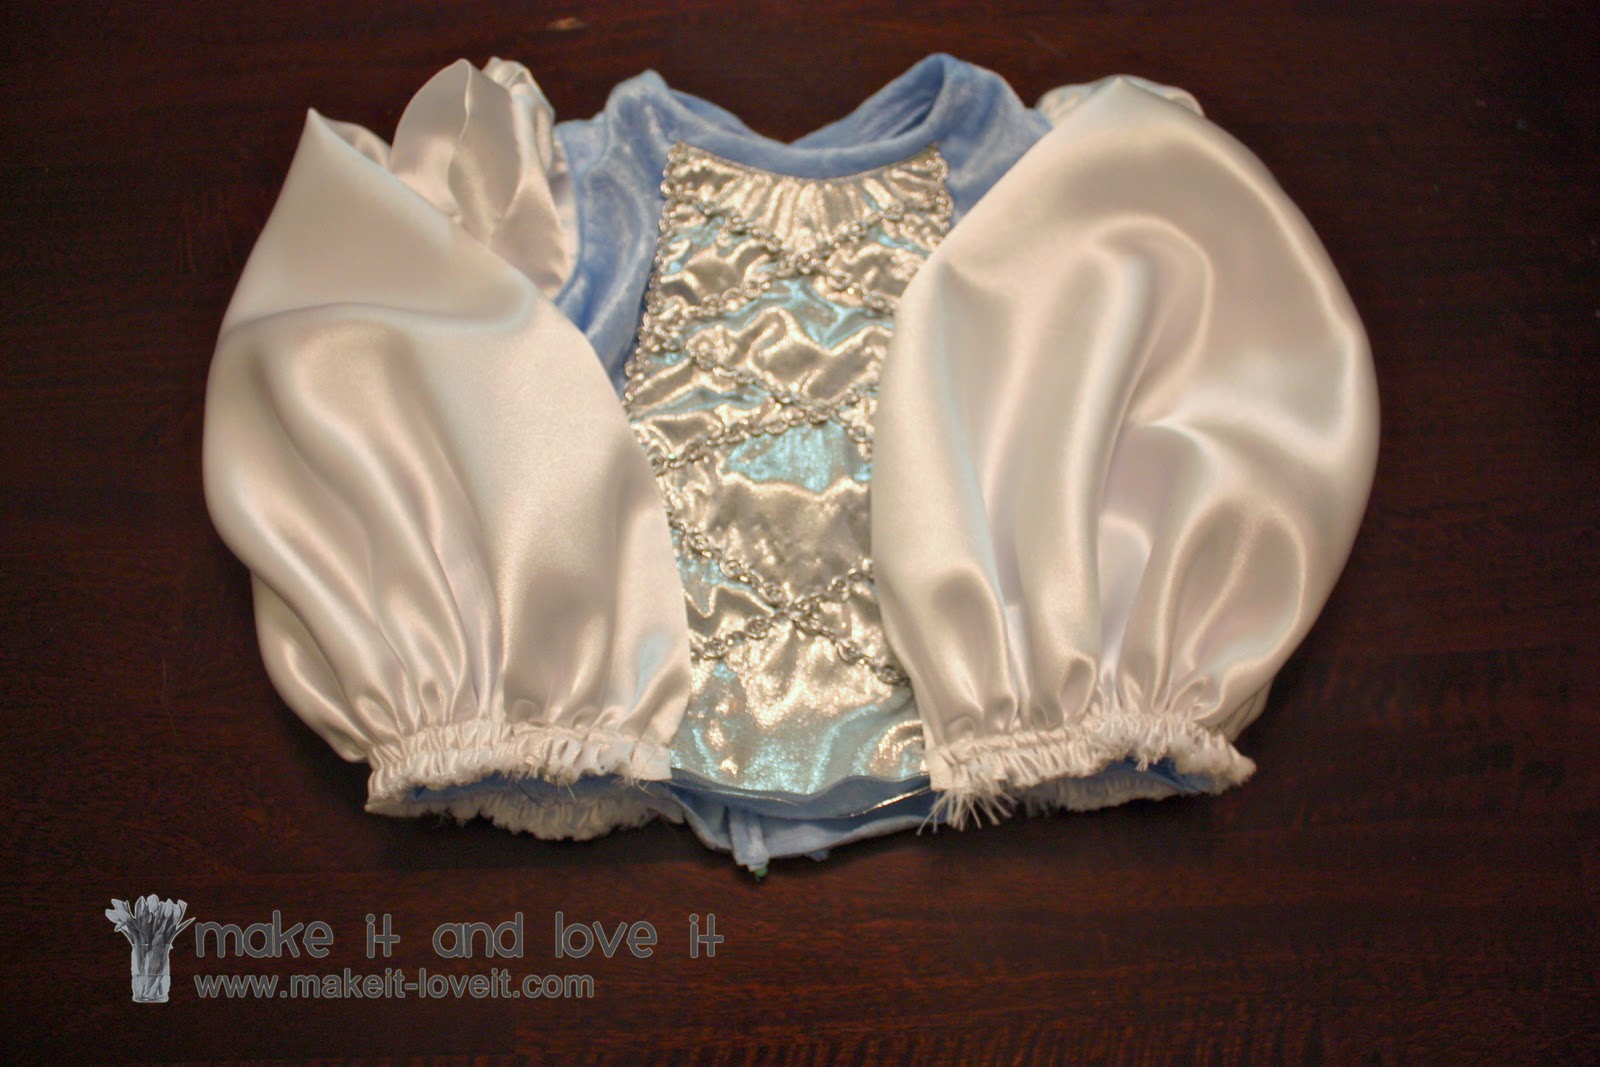
Okay, if you’ve never made a gathered puffed sleeve before, this is the shape if it. This is the shape of a short sleeve and will be gathered along the top and a bit at the bottom by the band of the arm hole. (This is where using a store bought pattern in the past helps with pattern making experience just a bit. Just to know how things look and are attached.) But even if you’ve never made a puff sleeve, you can still give this a try with some scrap fabric. But I measure my little girl’s arm and decided that 8 1/2 inches around would fit comfortably loose for the band around her bicep area. So I made this puff sleeve shape, made it about 12 inches wide to allow for a seam allowance and to give the bottom of the sleeve some gathers too…….and then the top curve of the sleeve shape will automatically give the sleeve more of a puffy gather at the shoulder. If you want it more puffy, increase the width and the circular shape at the top.
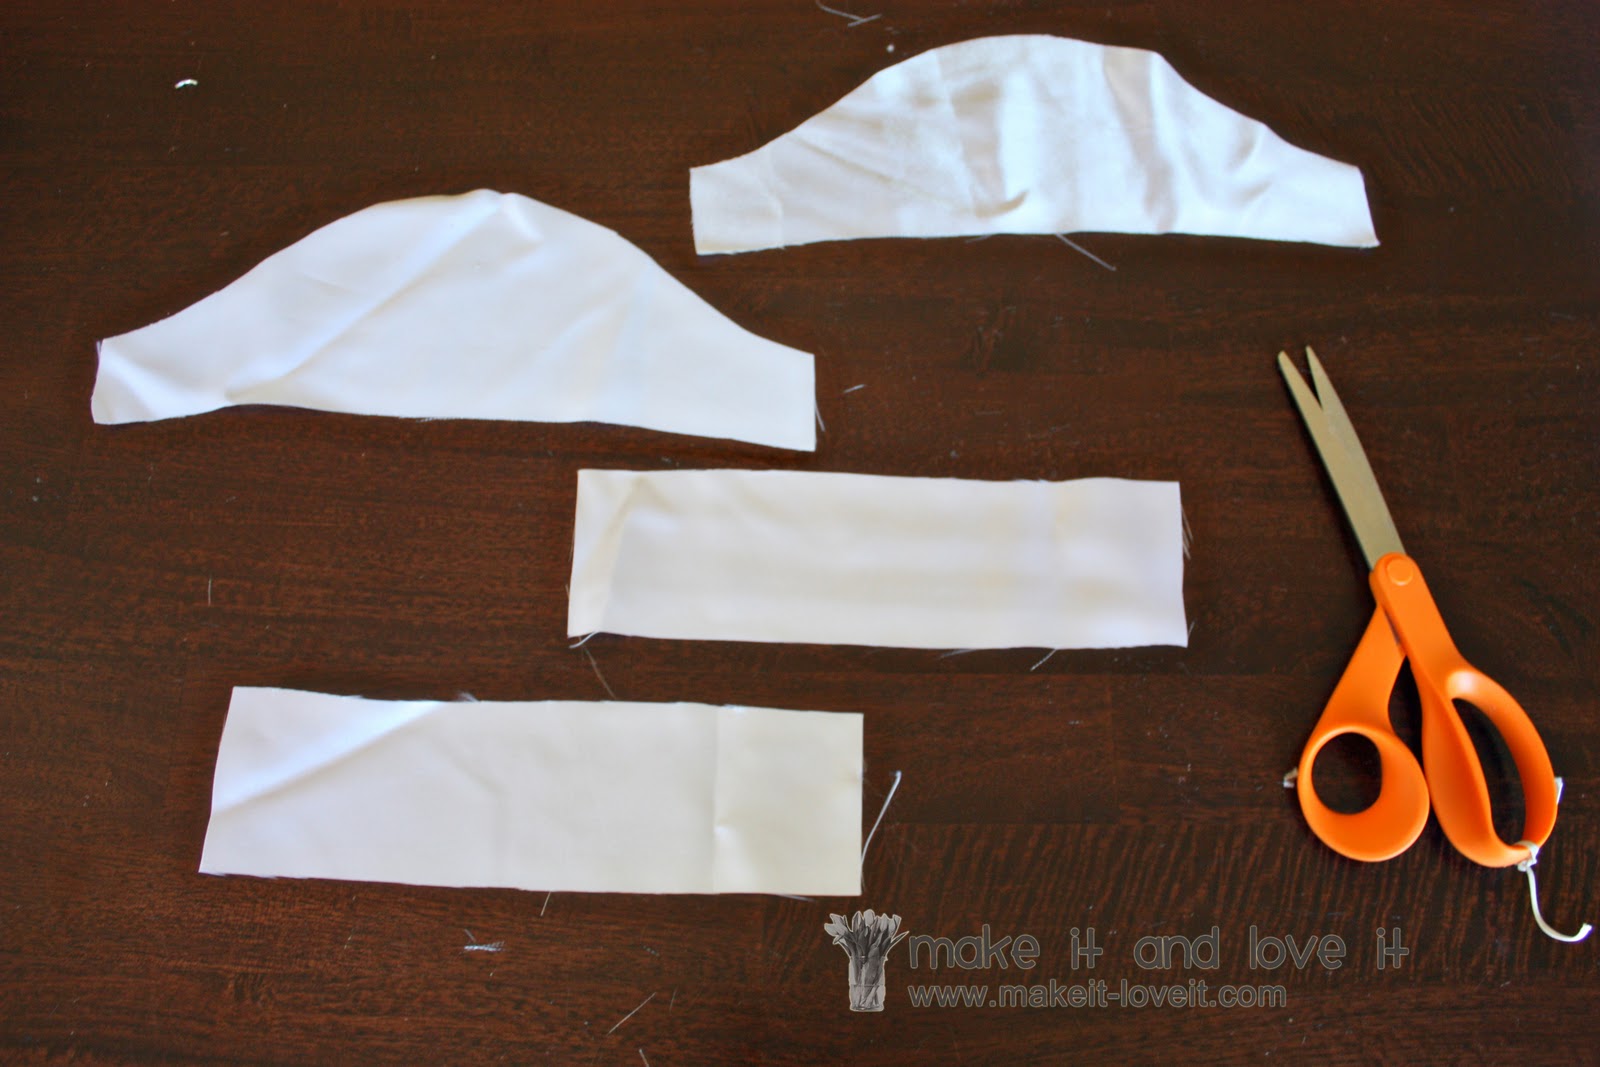
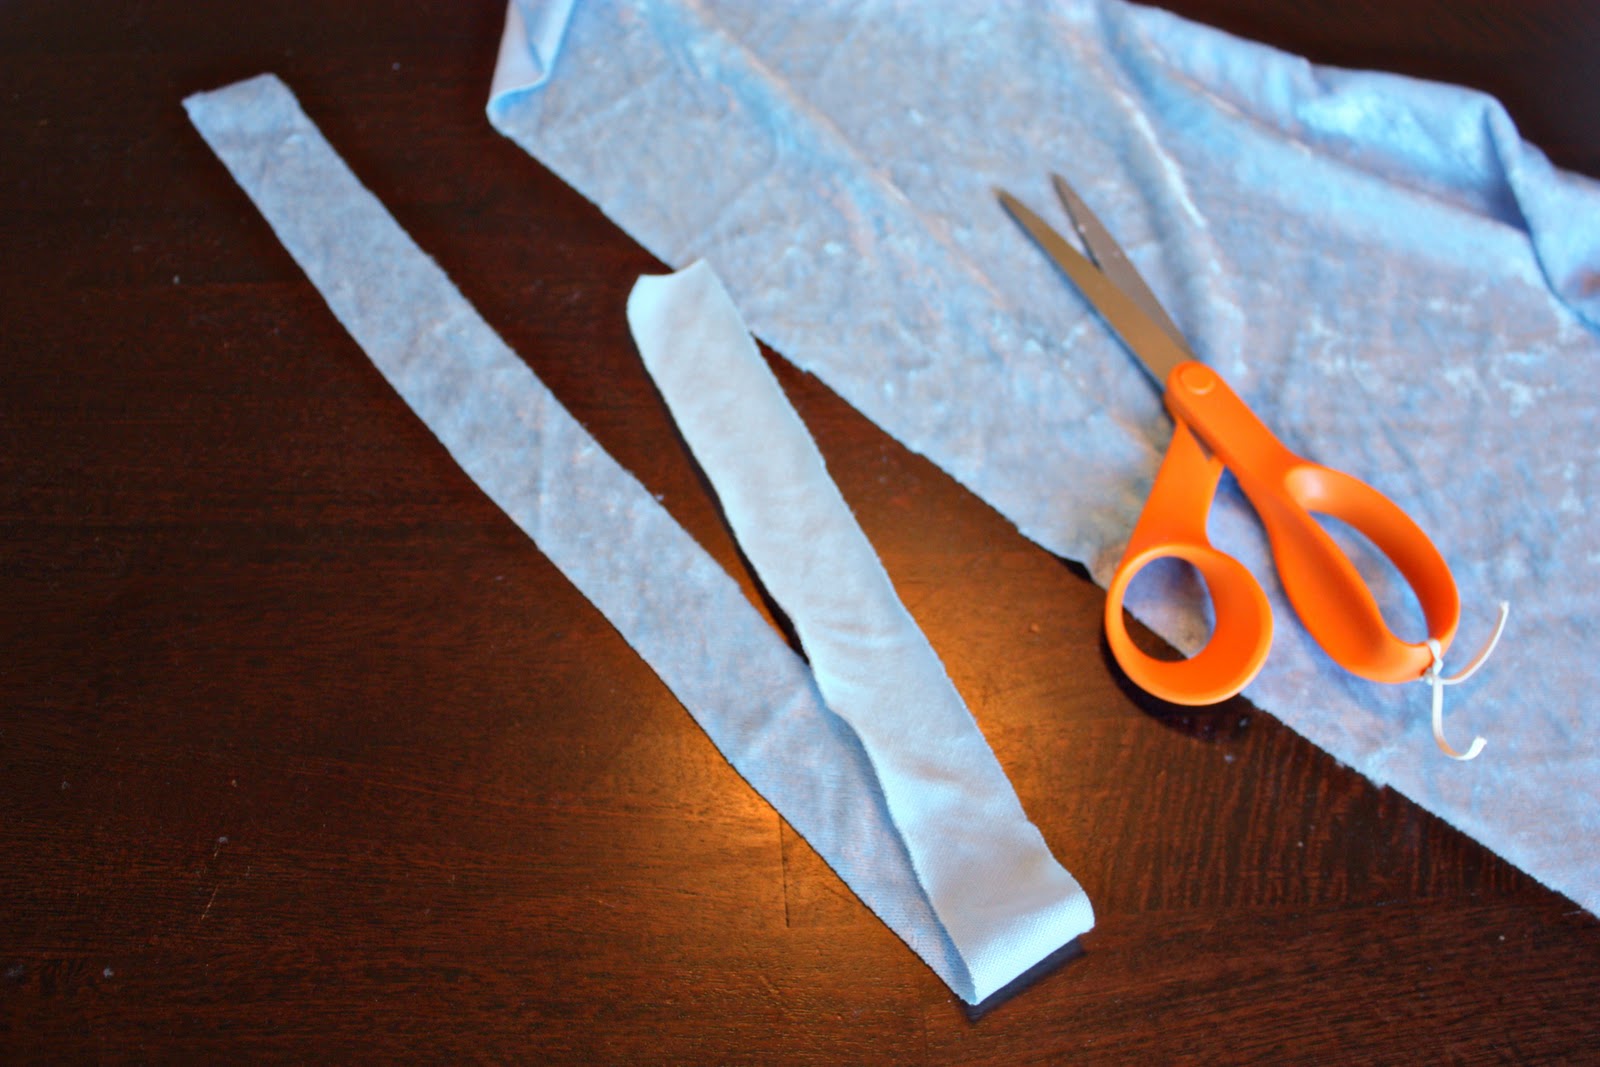
I cut out 2 sleeve shapes the same size and two bands that were 3 x 9 1/2 inches. (that included enough for seam allowances….don’t forget.) This is satin material…..nice and perfect for Cinderella sleeves.
Next, I folded each band in half lengthwise, with the right side (shiny side) facing out, and ironed flat.
Then I made a basting stitch along the top slope of the sleeve, starting and stopping about 2 inches from each end. I also made a basting stitch along the bottom that was about 5 inches long, centered right along the bottom. (Need help with gathering and basting stitches? Click
here.)
Then pin the band (which is folded in half legthwise) to each end of the sleeve. The band is shorter because you’ll have to gather the sleeve to match it up. Pin right sides together and match up the raw edges.
Then start pulling on the top basting stitch and gather the bottom edge of the sleeve. Then pin the sleeve to the band. Make sure you are pinning the raw edges of the band, not the folded edge.
Then sew along the raw edge with a 1/2 inch seam allowance. Then zig-zag or use some sort of finishing stitch to seal off the edges.
Then open it up and iron the band down.
Then fold the sleeve in half with right sides together and sew along the inner edge with a 1/2 inch seam allowance. Then zig-zag to finish it off. (Or if you attach your sleeves to the bodice first……skip this step and attach the open sleeve to the open bodice. I didn’t because of that creature of habit thing that I explained up above. Ha.)
If you’re doing it my way, turn the bodice inside out and sleeves right side out and slide each sleeve into the arm hole openings of the bodice, matching up the side seam of the bodice with the side seam of the sleeve. Then gather the top of the sleeve enough to allow a perfect fit inside of the arm hole of the bodice. Make sure to pin the sleeve and bodice together with right sides together.
Then, using a 1/2 inch seam allowance, sew around the arm hole…….making sure to match up the raw edges as you slowly sew them together.
Then sew a zig-zag stitch to finish off the raw edges. Then trim off any excess.
Turn the bodice right side out, fold the raw edges of the sleeve toward the bodice and top stitch around the arm hole……but on the side of the bodice, grabbing the raw edges of the sleeve that are underneath as you go. (This step is optional…..you don’t have to do this. But if you don’t, try to at least iron this seam flat as best as you can, so that it looks more finished.)
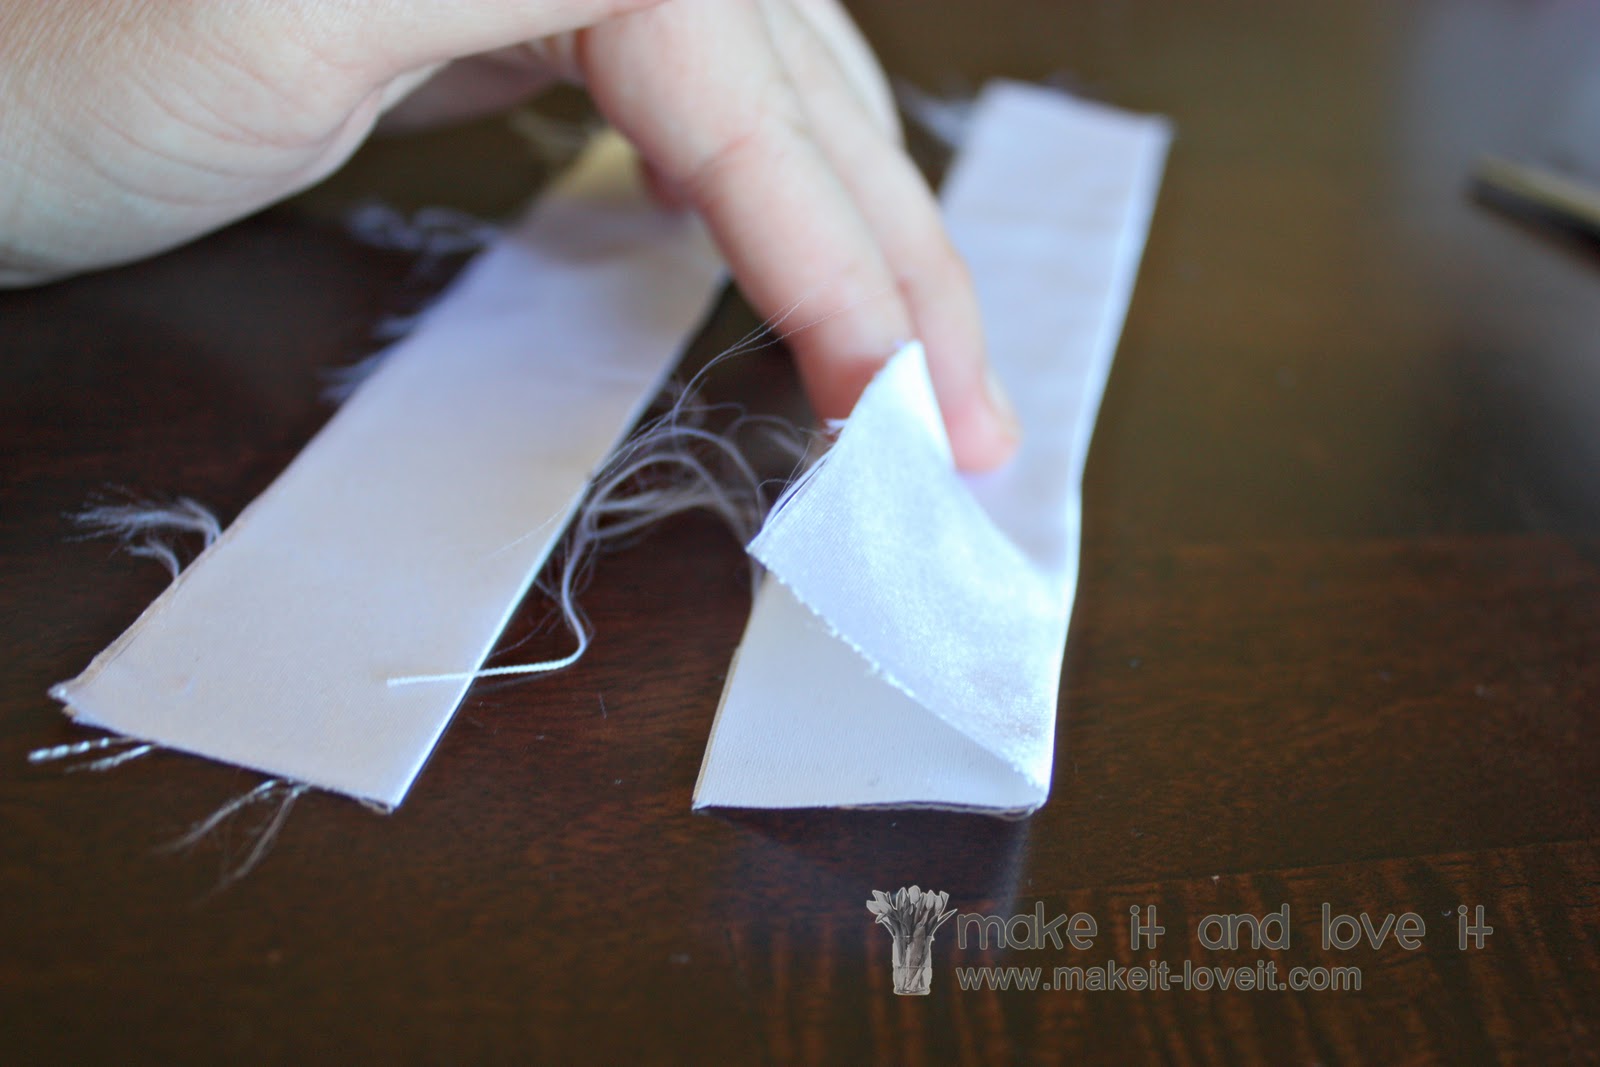
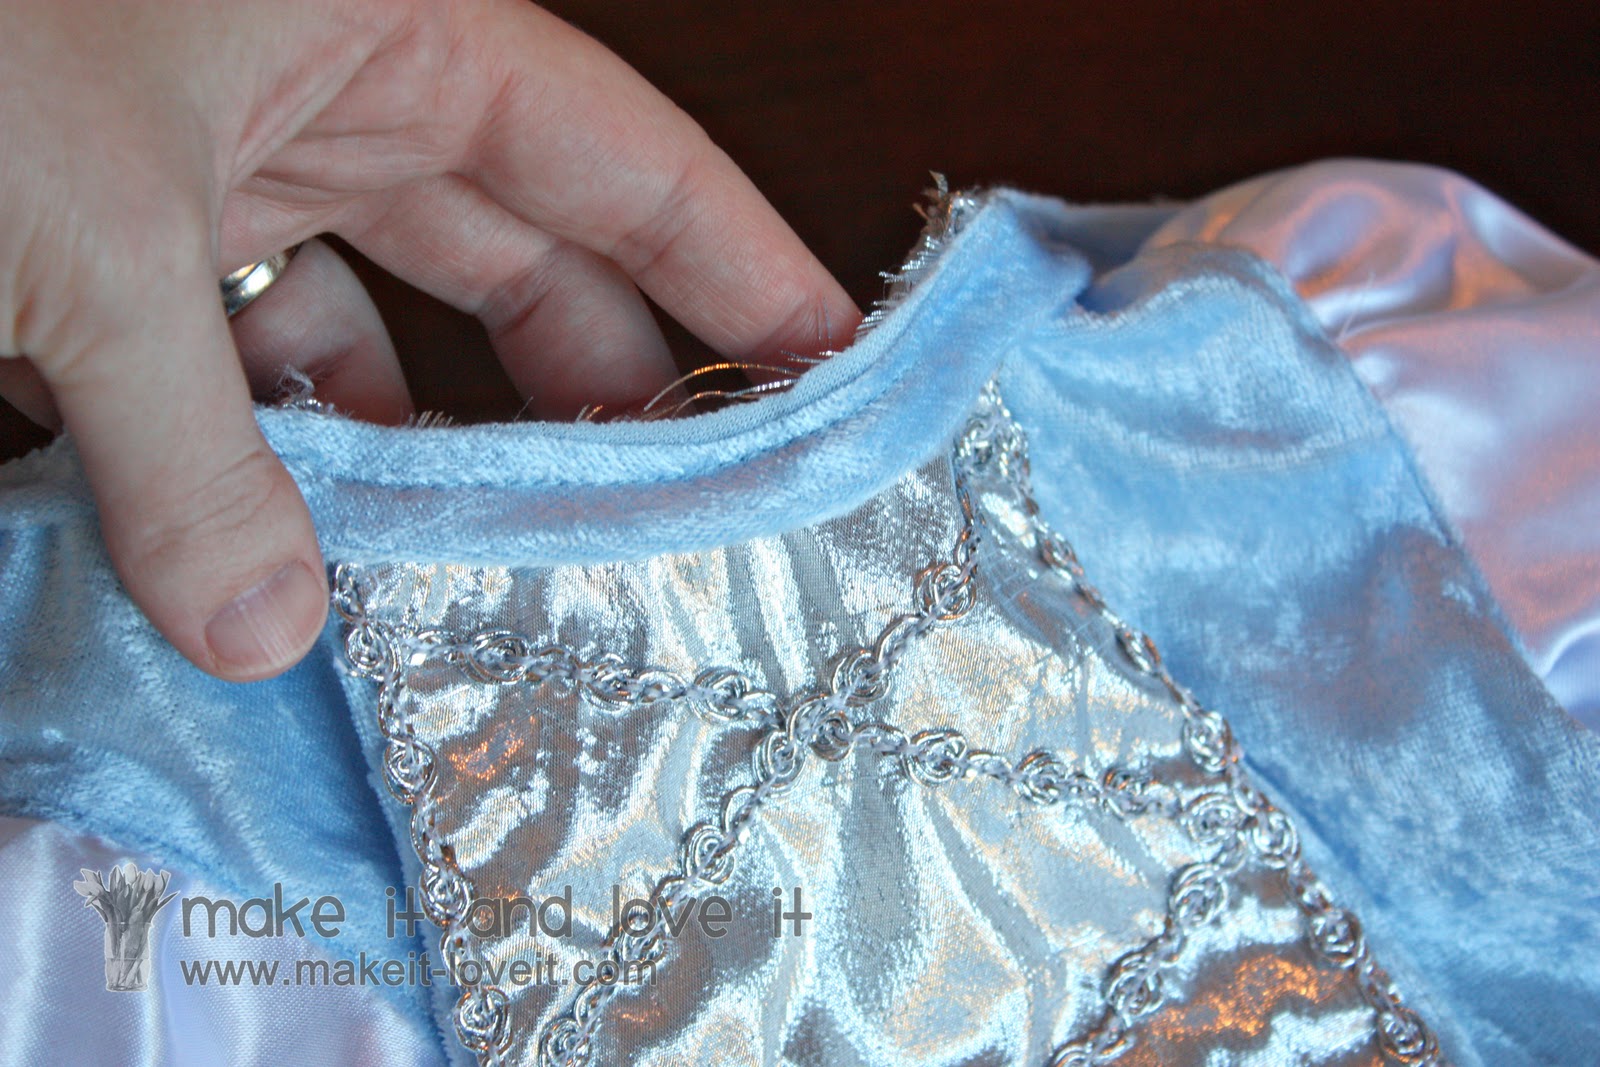
Now onto the neckline. Measure around the neckline to see how much fabric you’ll need and then add a few inches to that length so that you can tuck under each end at the back of the neckline. How wide you make your neckline is up to you but I cut my strip 1 1/2 inches wide…..giving me a 1/2 inch wide neckline after it’s folded in half and sewn on. (After it’s folded in half lengthwise, I used a 1/4 inch seam allowance to attach it to the bodice neckline.)
Cut your strip of fabric on the bias (diagonal) to allow for the right stretch and curve as you sew it around the neckline. If you’re not sure what the bias is or why it’s better to cut on it for steps like this, read
this link.
Then I folded that strip in half lengthwise (with the right side of the fabric facing outwards) and lined up the long raw edges with the raw edge of the neckline and pinned them together with the fold pointing down…….pinning the strip to the front side of the bodice neckline. I left at least an inch at each end to fold over at the end. And as you’re pinning, pull the strip just a tad more then the neckline and then after you turn it, it will help with the shape of the completed neckline. Then sew along the raw edges, using a 1/4 inch seam allowance.
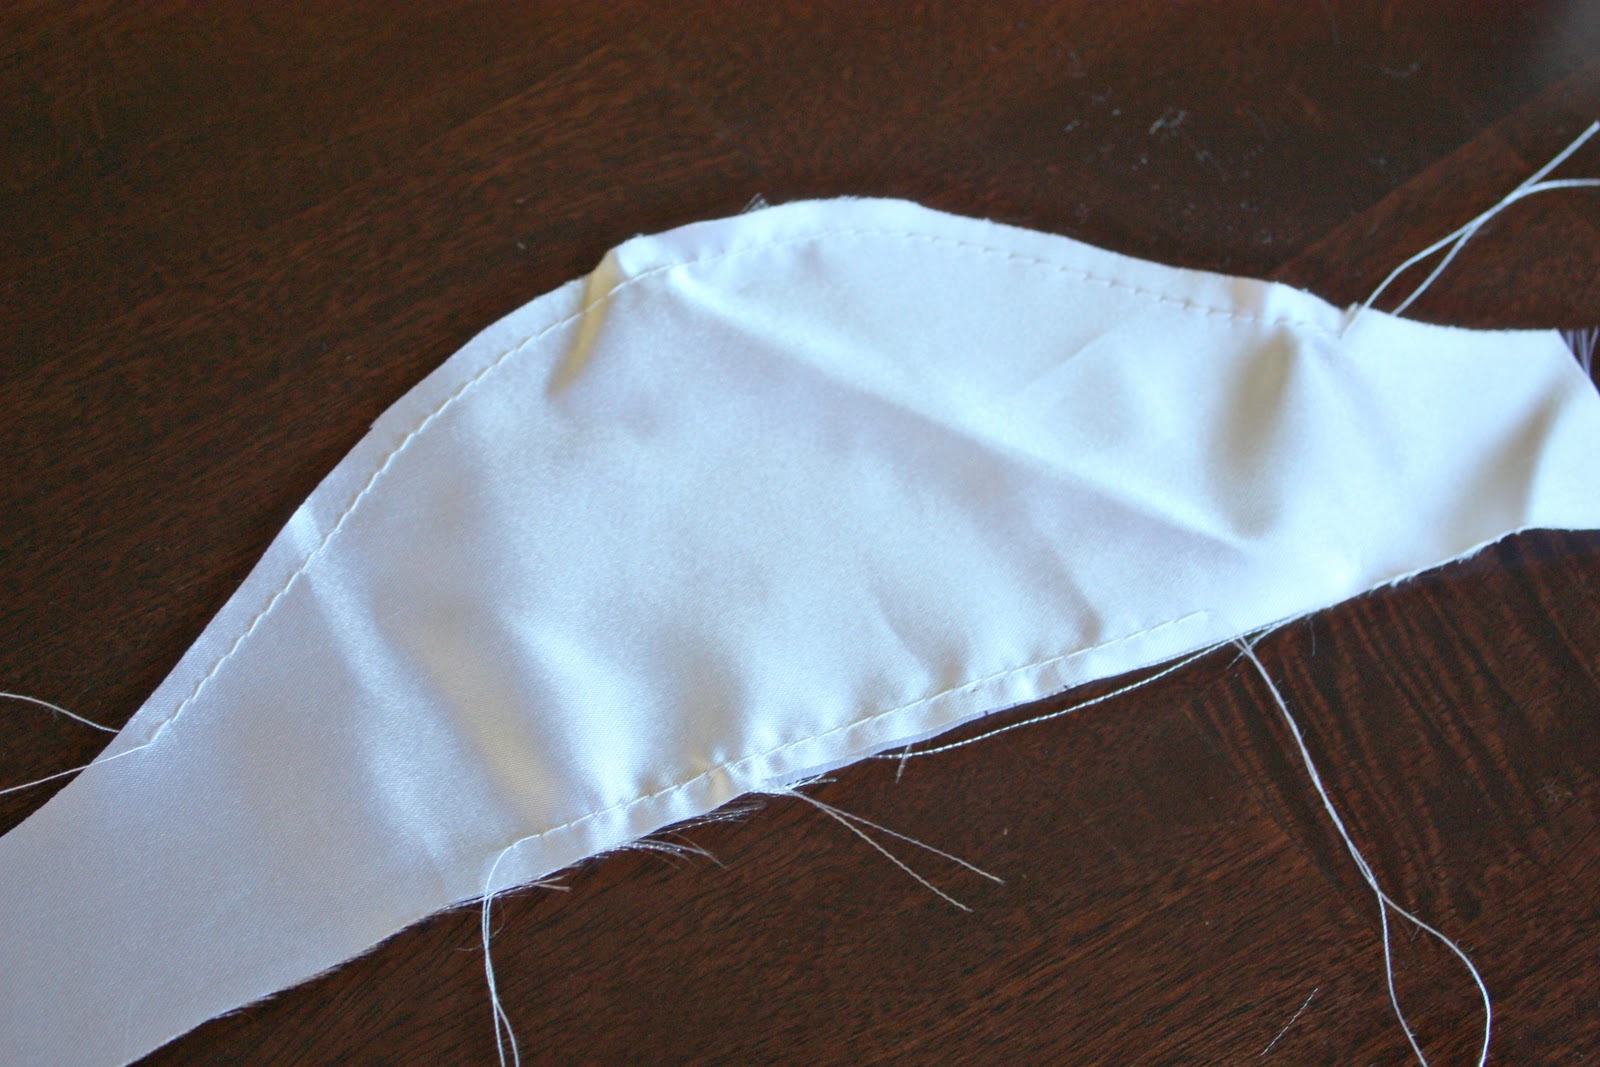
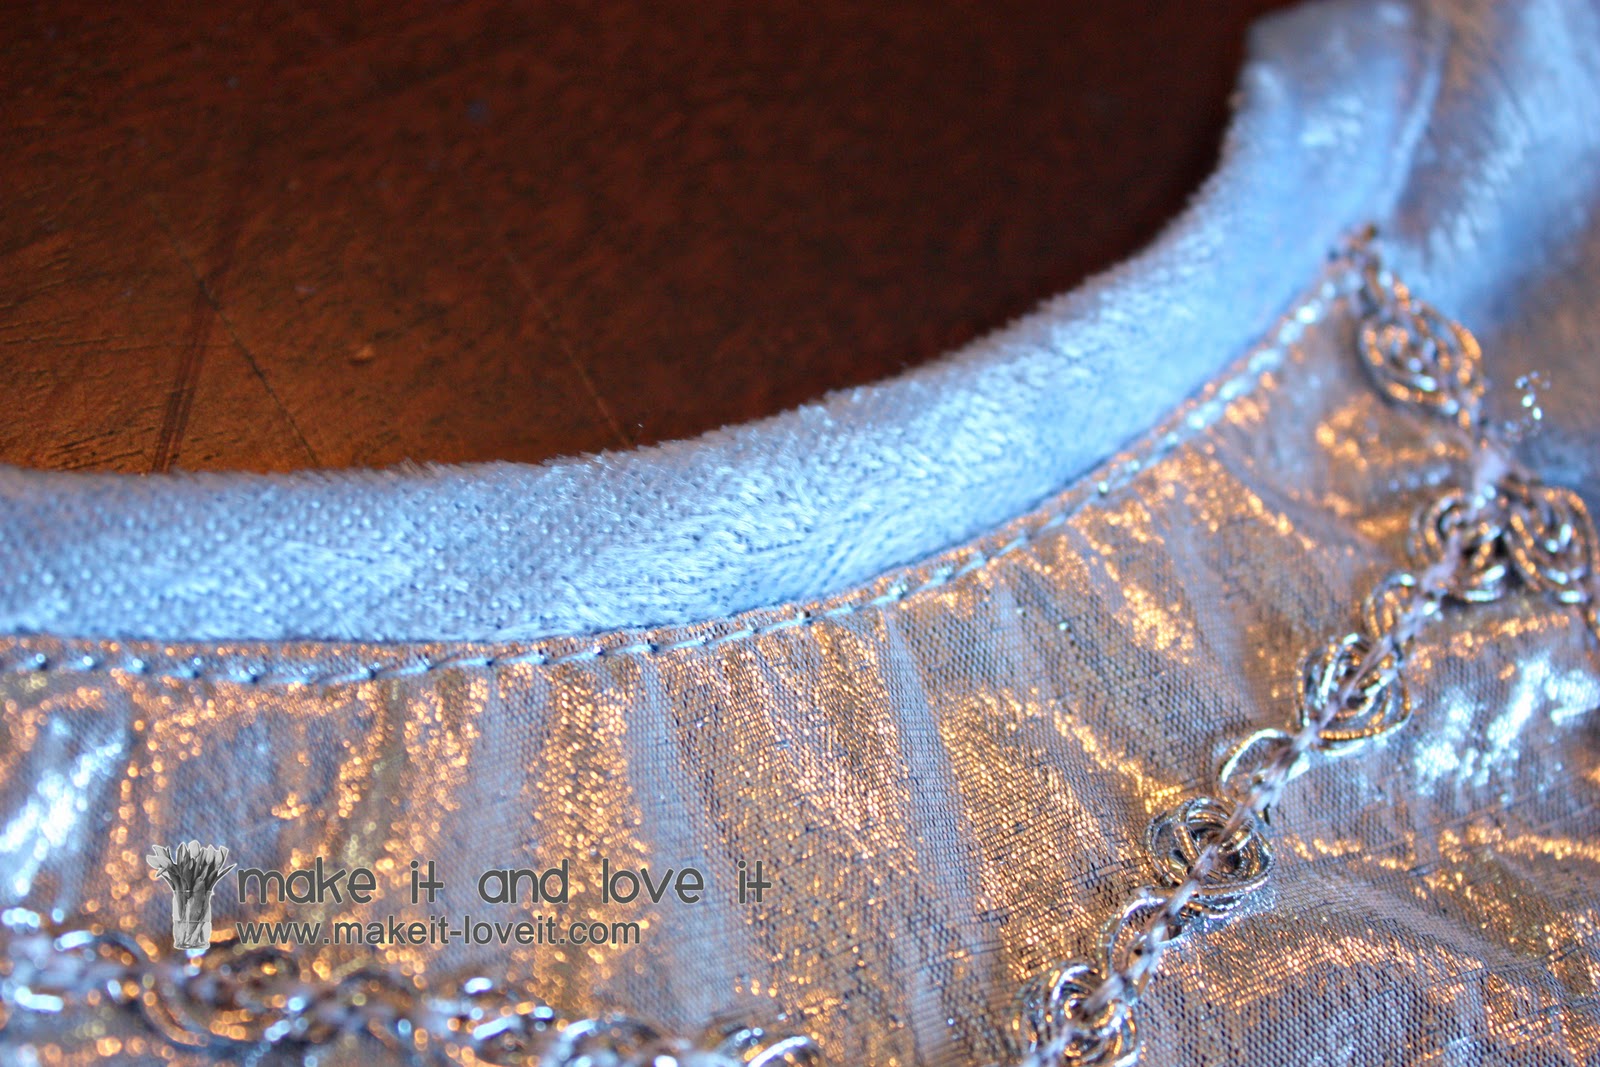
Then fold the strip up, iron flat with the raw edges from behind pointing downwards, then top-stitch along the front of the neckline, right below the seam.
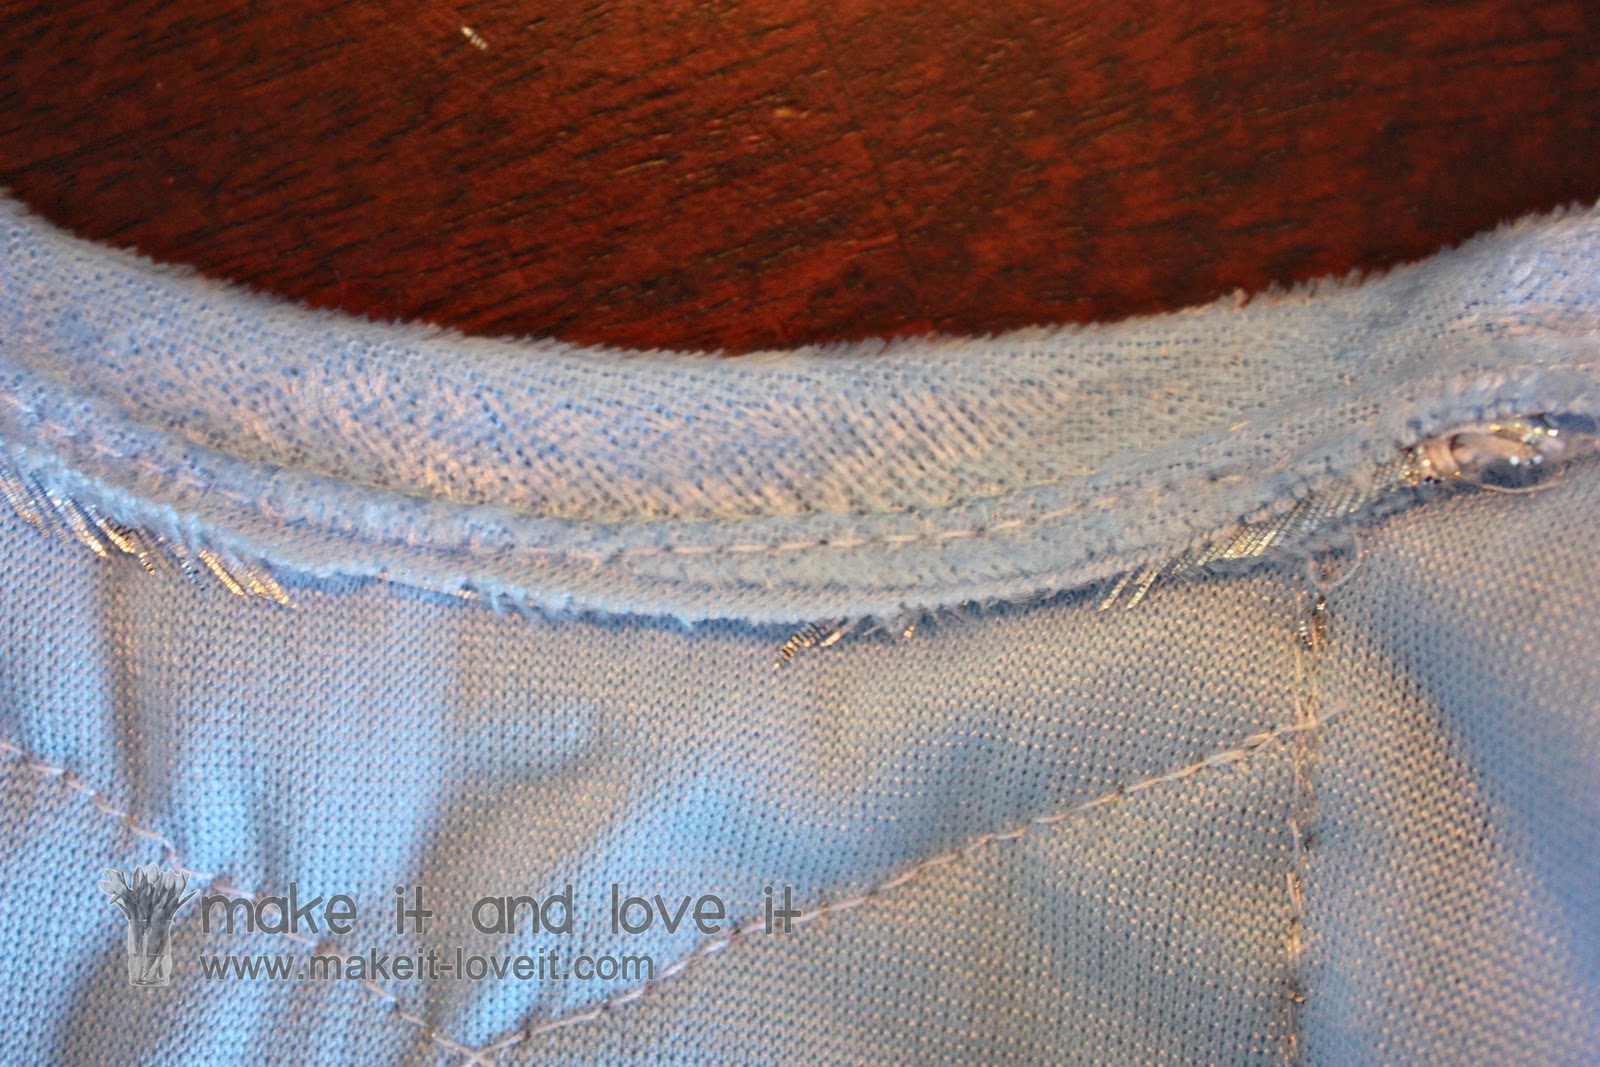
Here’s a view from the back of the neck line, with the raw edges folded down and secured in place with that top-stitch you made on the front.
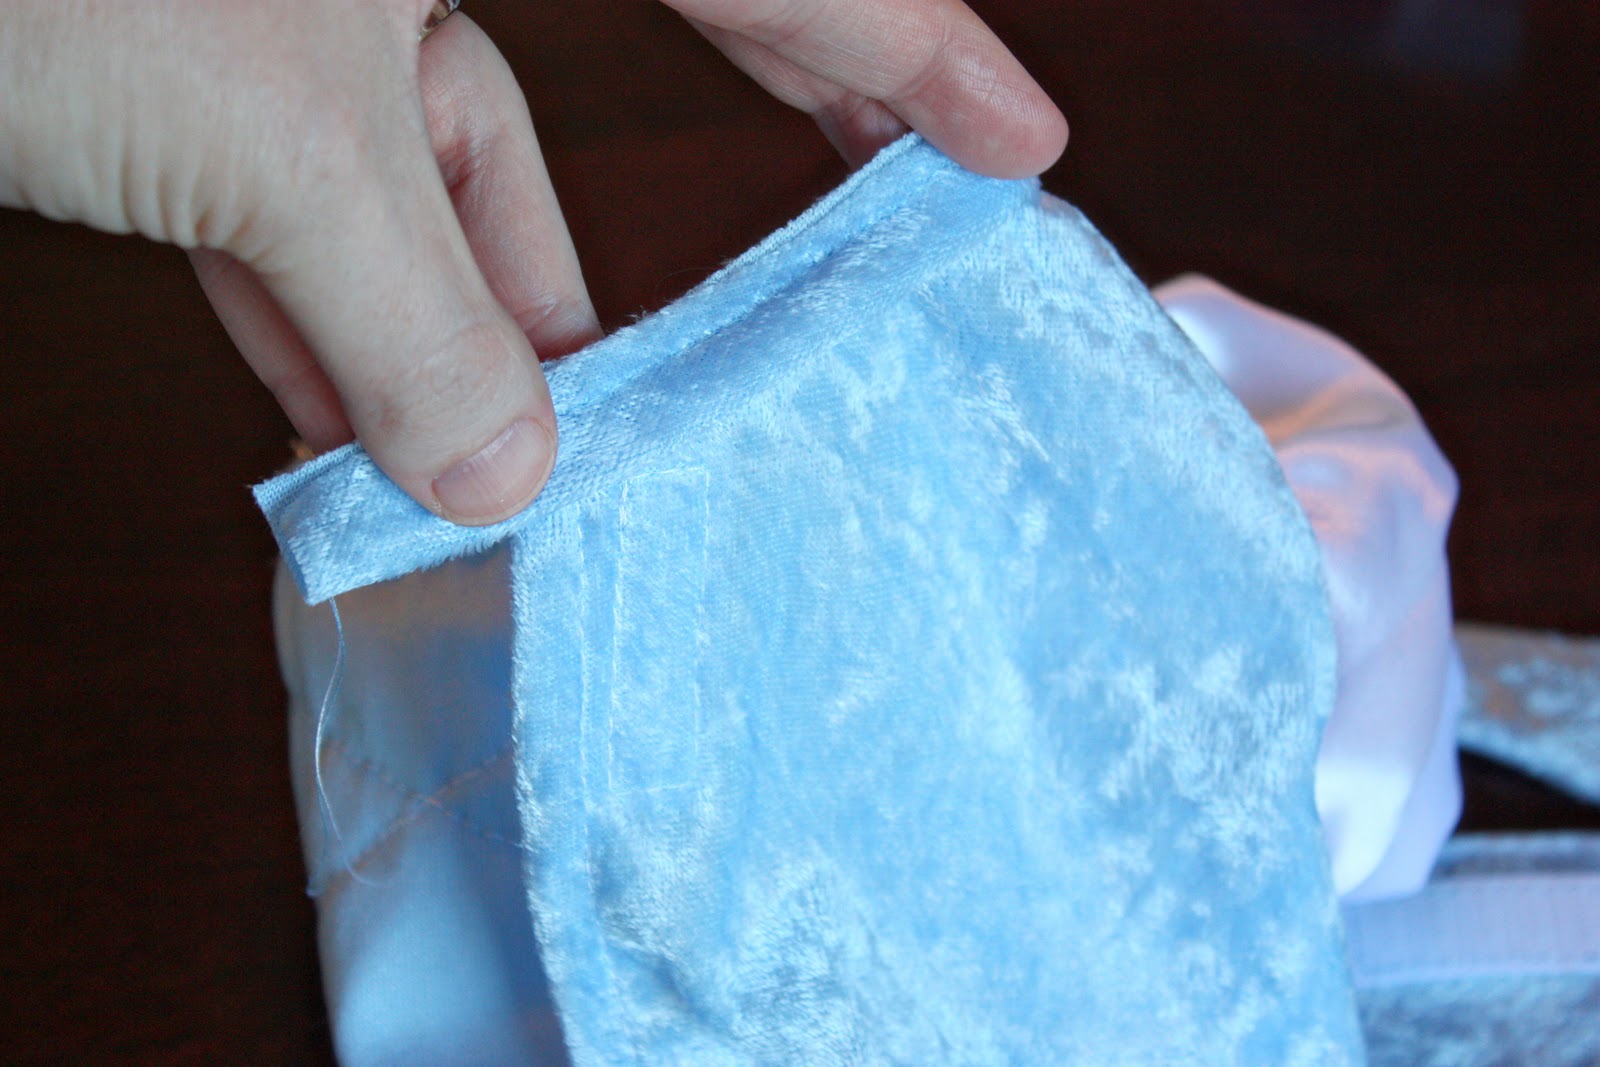
At each end, trim down each loose end to about a 1/2 inch.
Then fold over a 1/4 inch, then another 1/4 inch, and line it up with the rest of the edge of the dress opening.
Sew this folded piece right into place.
Onto the skirt portion of the dress.
First, we’re going to make those fluffy side flaps that Cinderella has on her dress. What those things are for…….who knows? But here’s my best attempt at creating them.
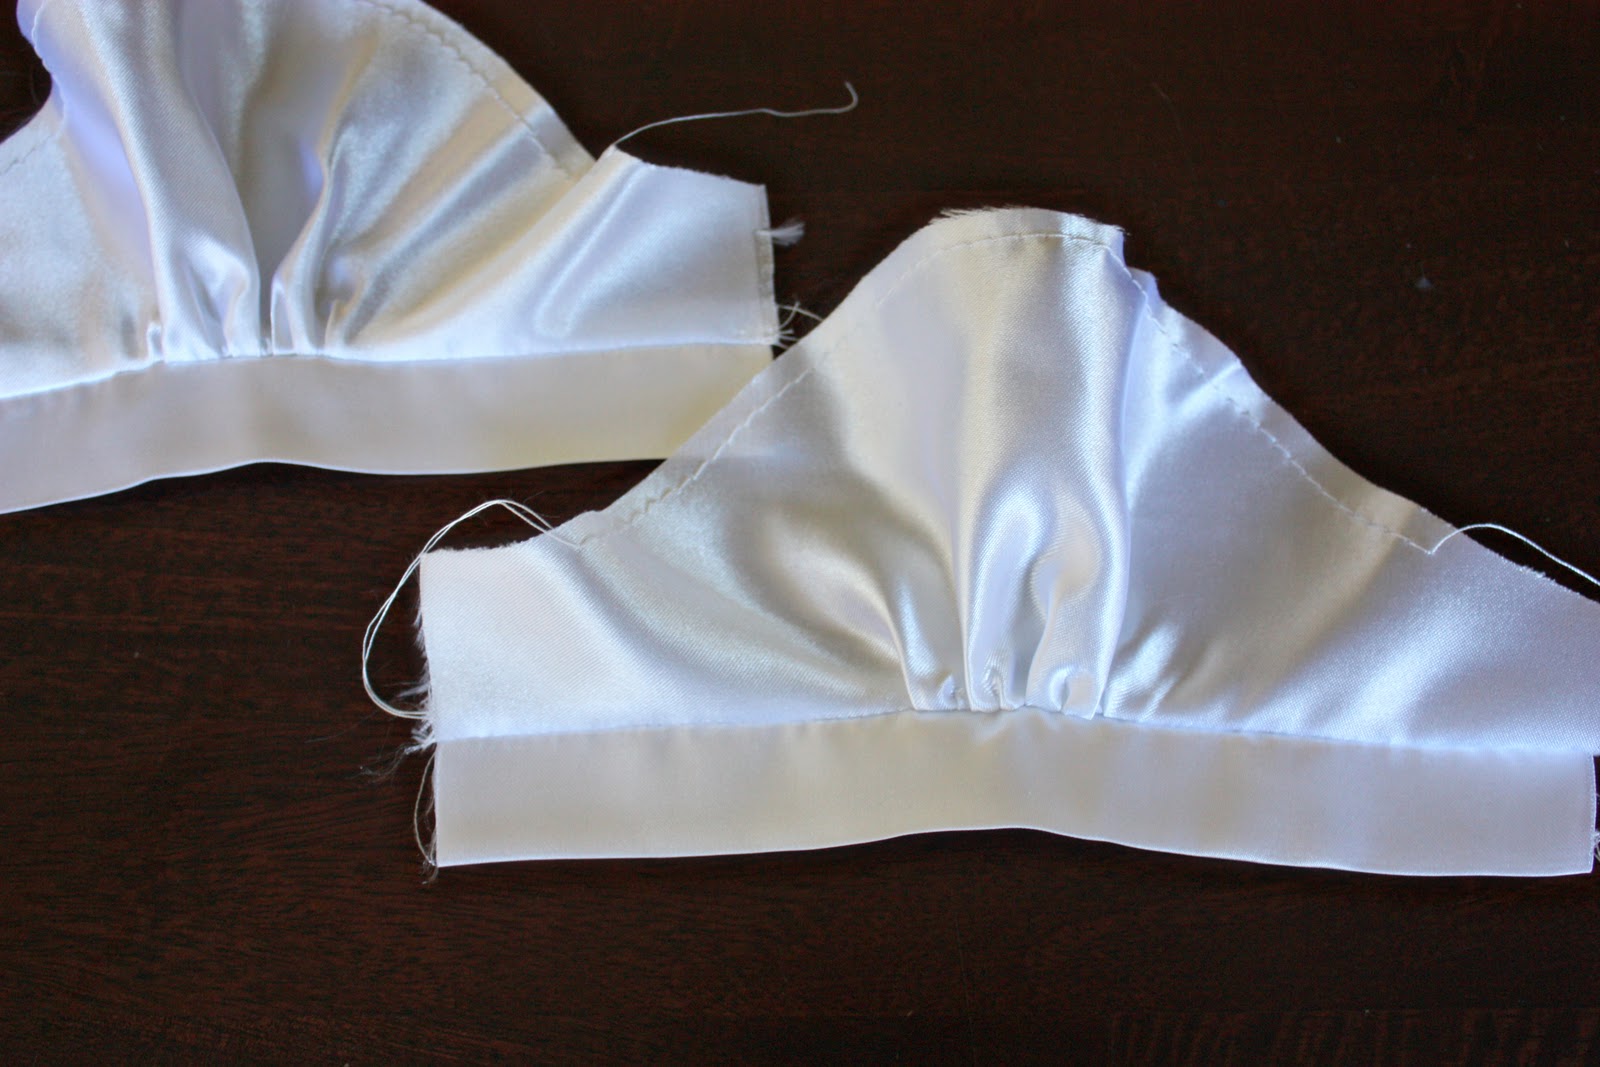
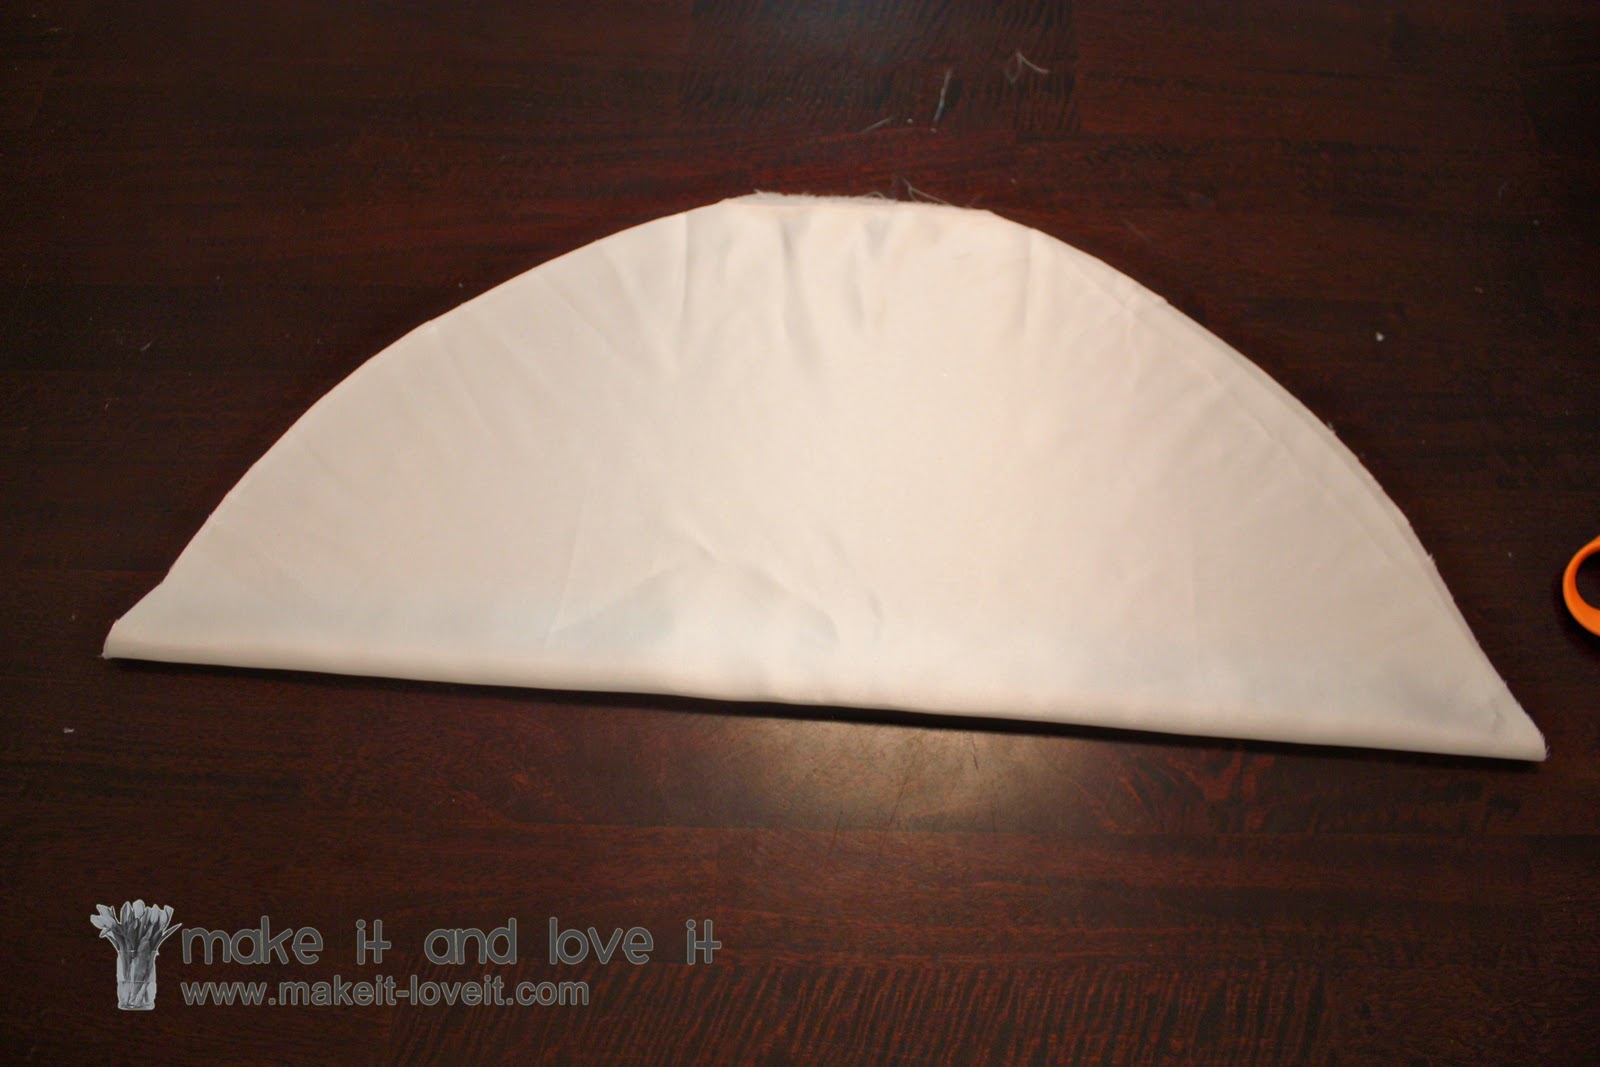
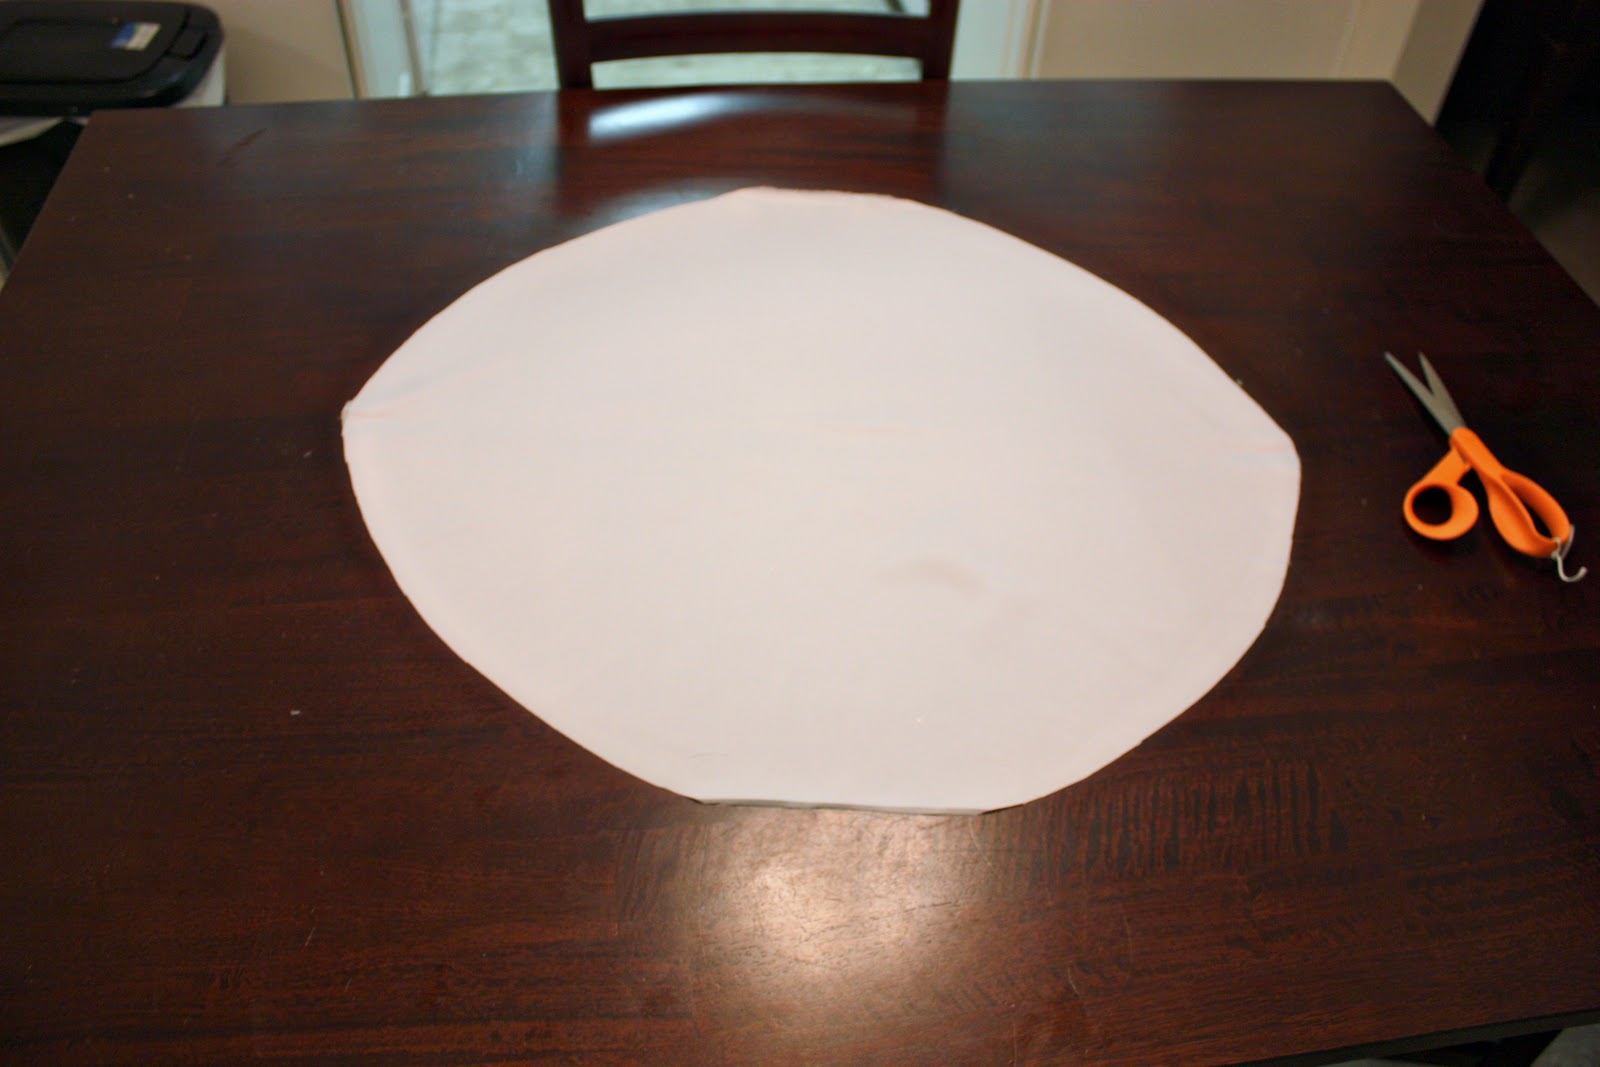
I first cut a piece of white satin that was about 23 x 23 inches.
Then I folded it in half…
Then I cut off the upper corners in a rounded shape, making sure to not cut through the fold at all.
Essentially making a circle if you open it up.
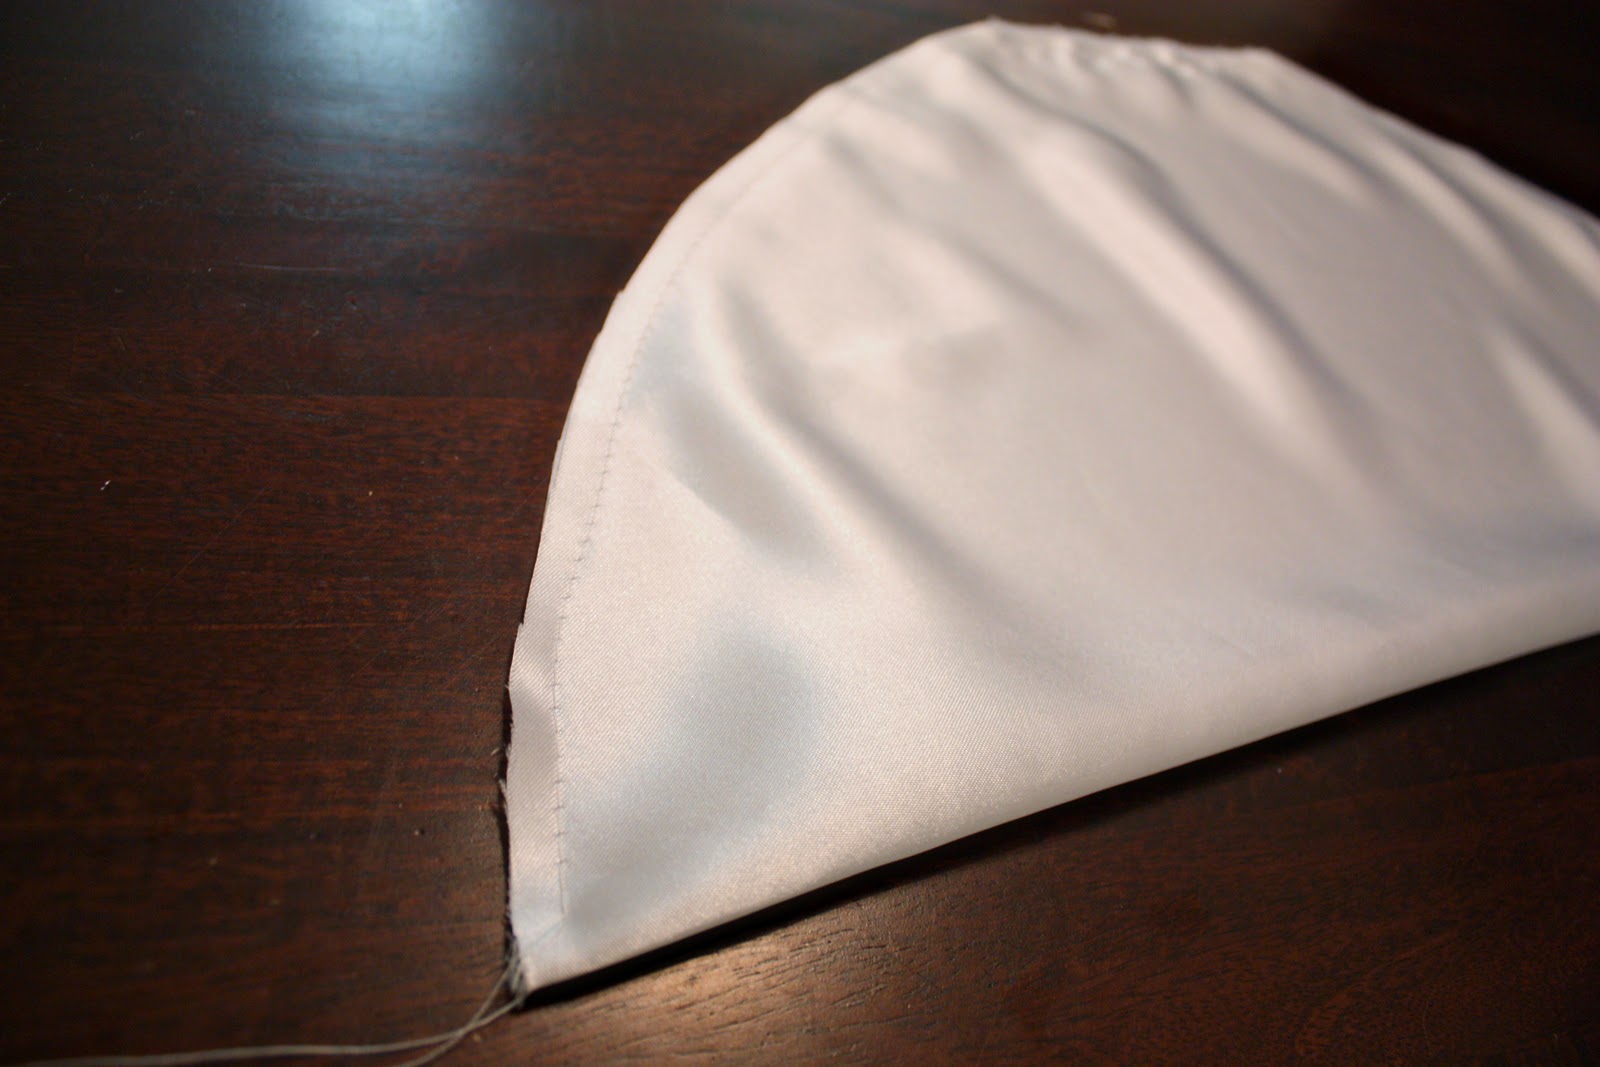
Then I folded the circle back in half, with the right side of the fabric facing outward (shiny satin side out), and then made a basting stitch along the outer perimeter of the curve, 1/2 inch from the edge.
(Need help with gathering and basting stitches? Click
here.)
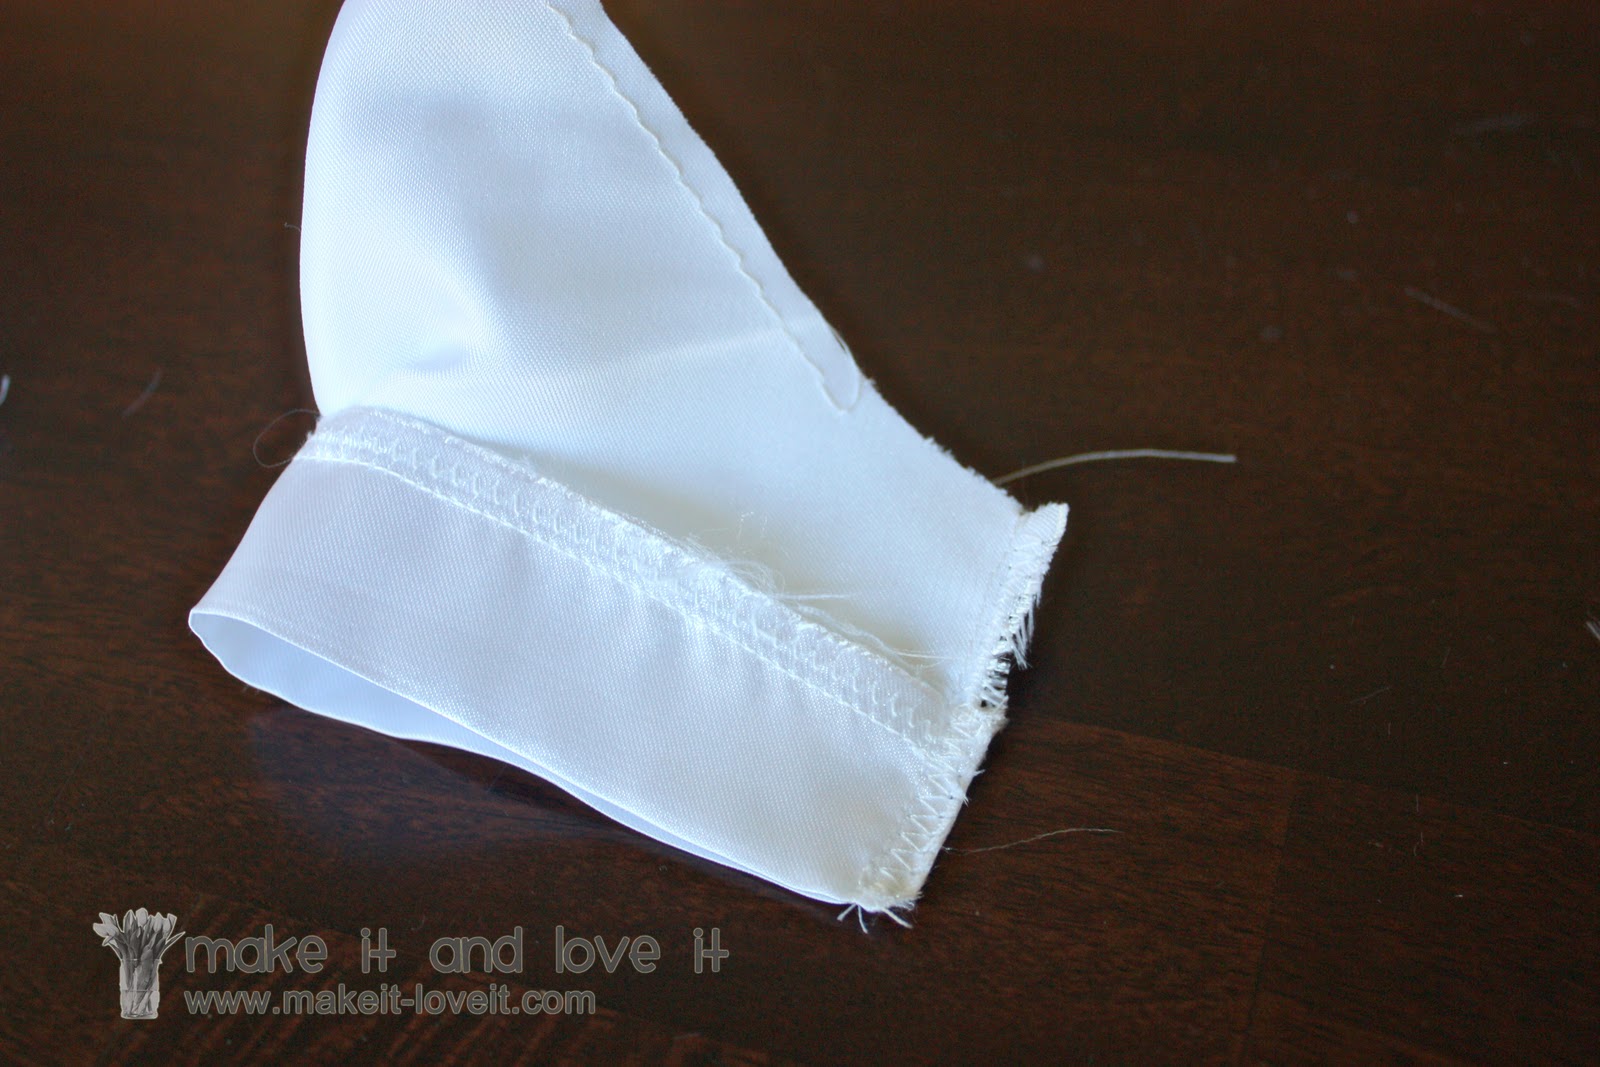
Then, as you pull the thread and gather the circle shape, it pulls up the fabric, creating a gathered swoop shape.
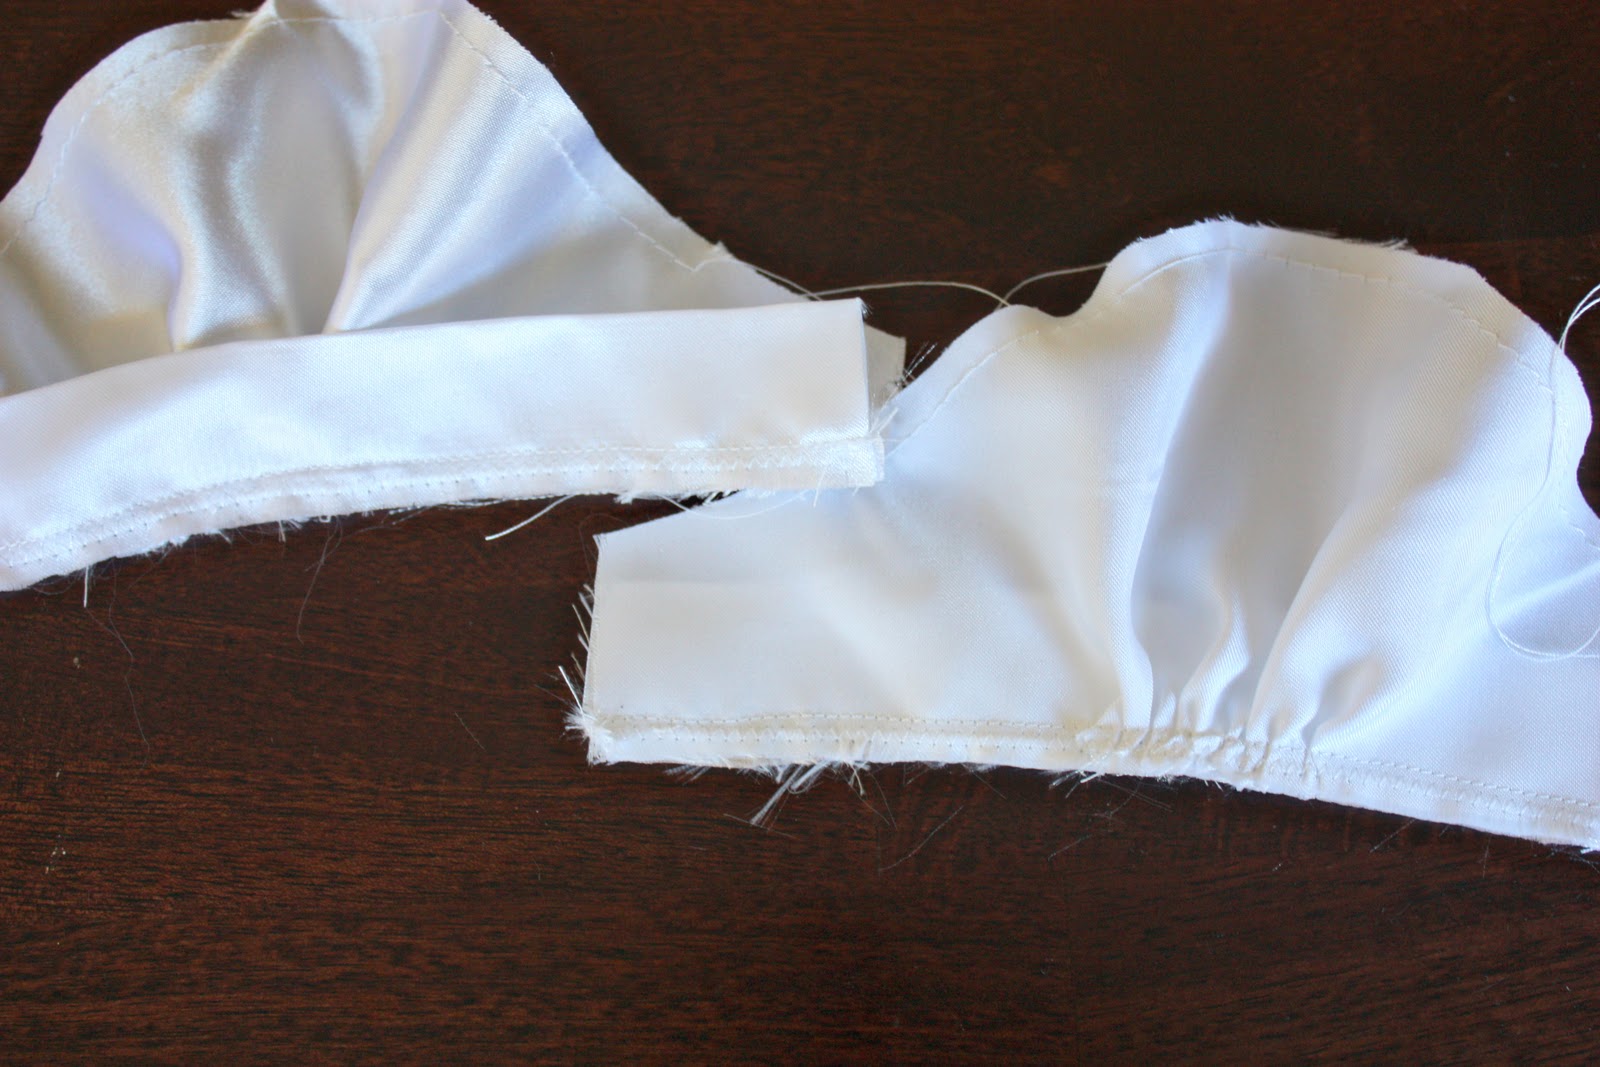
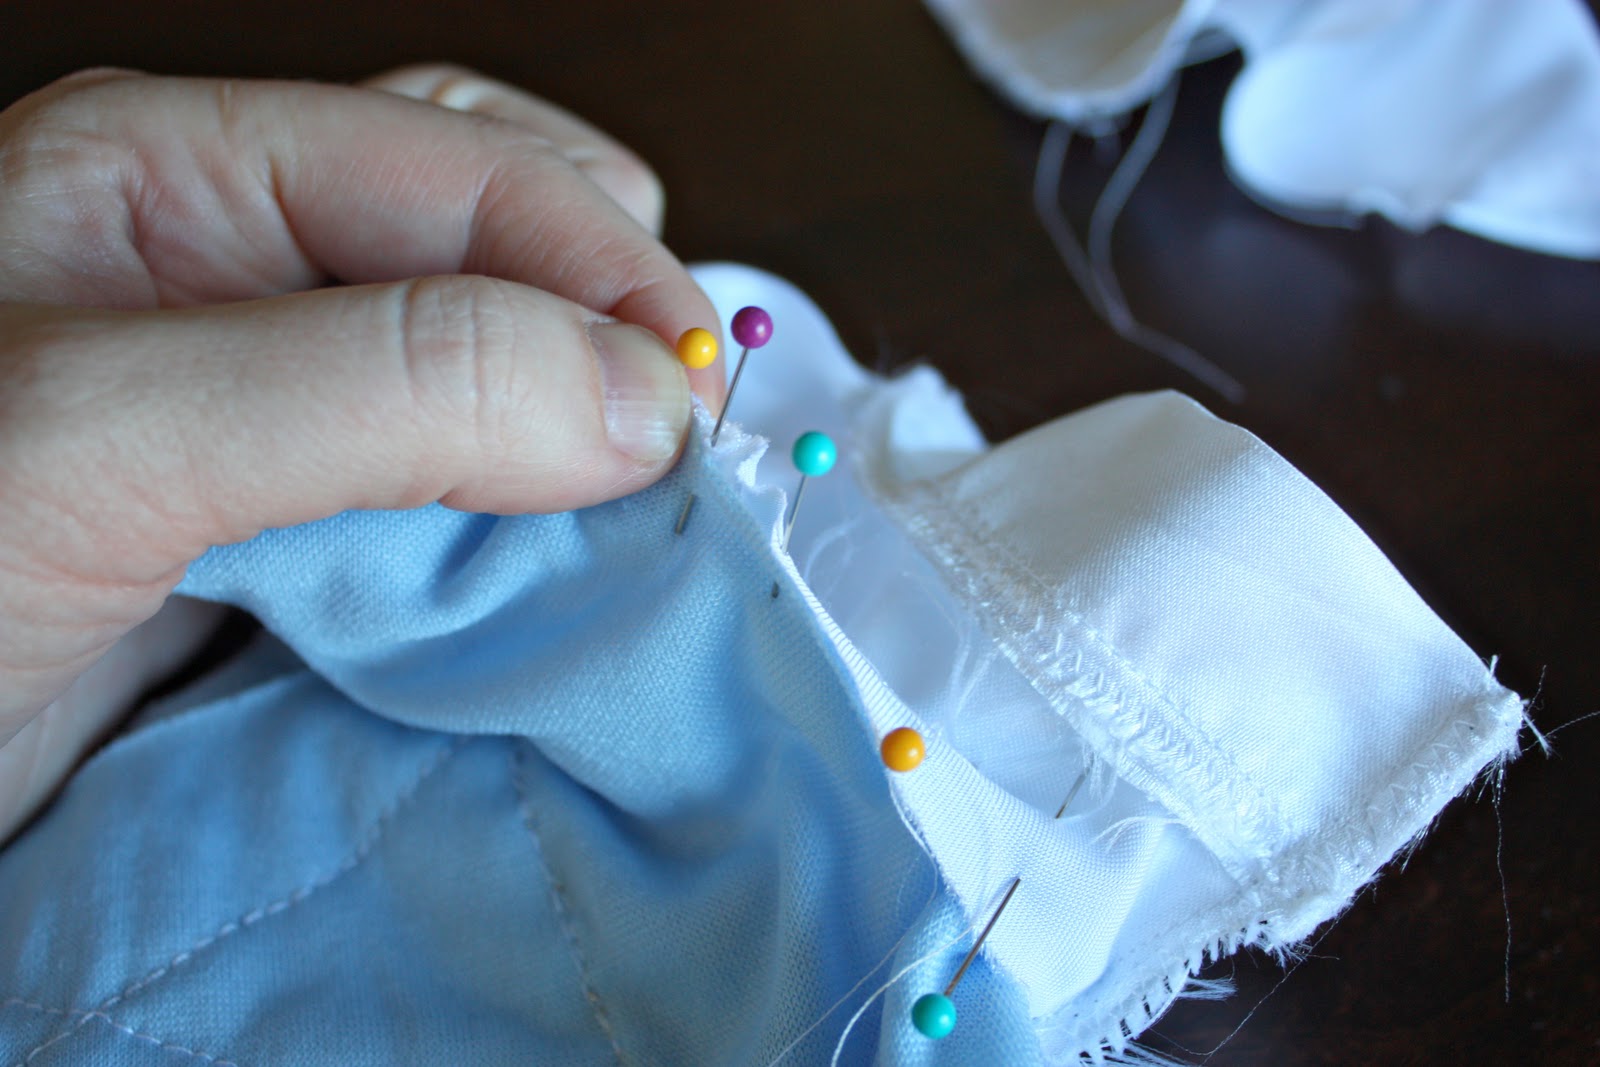
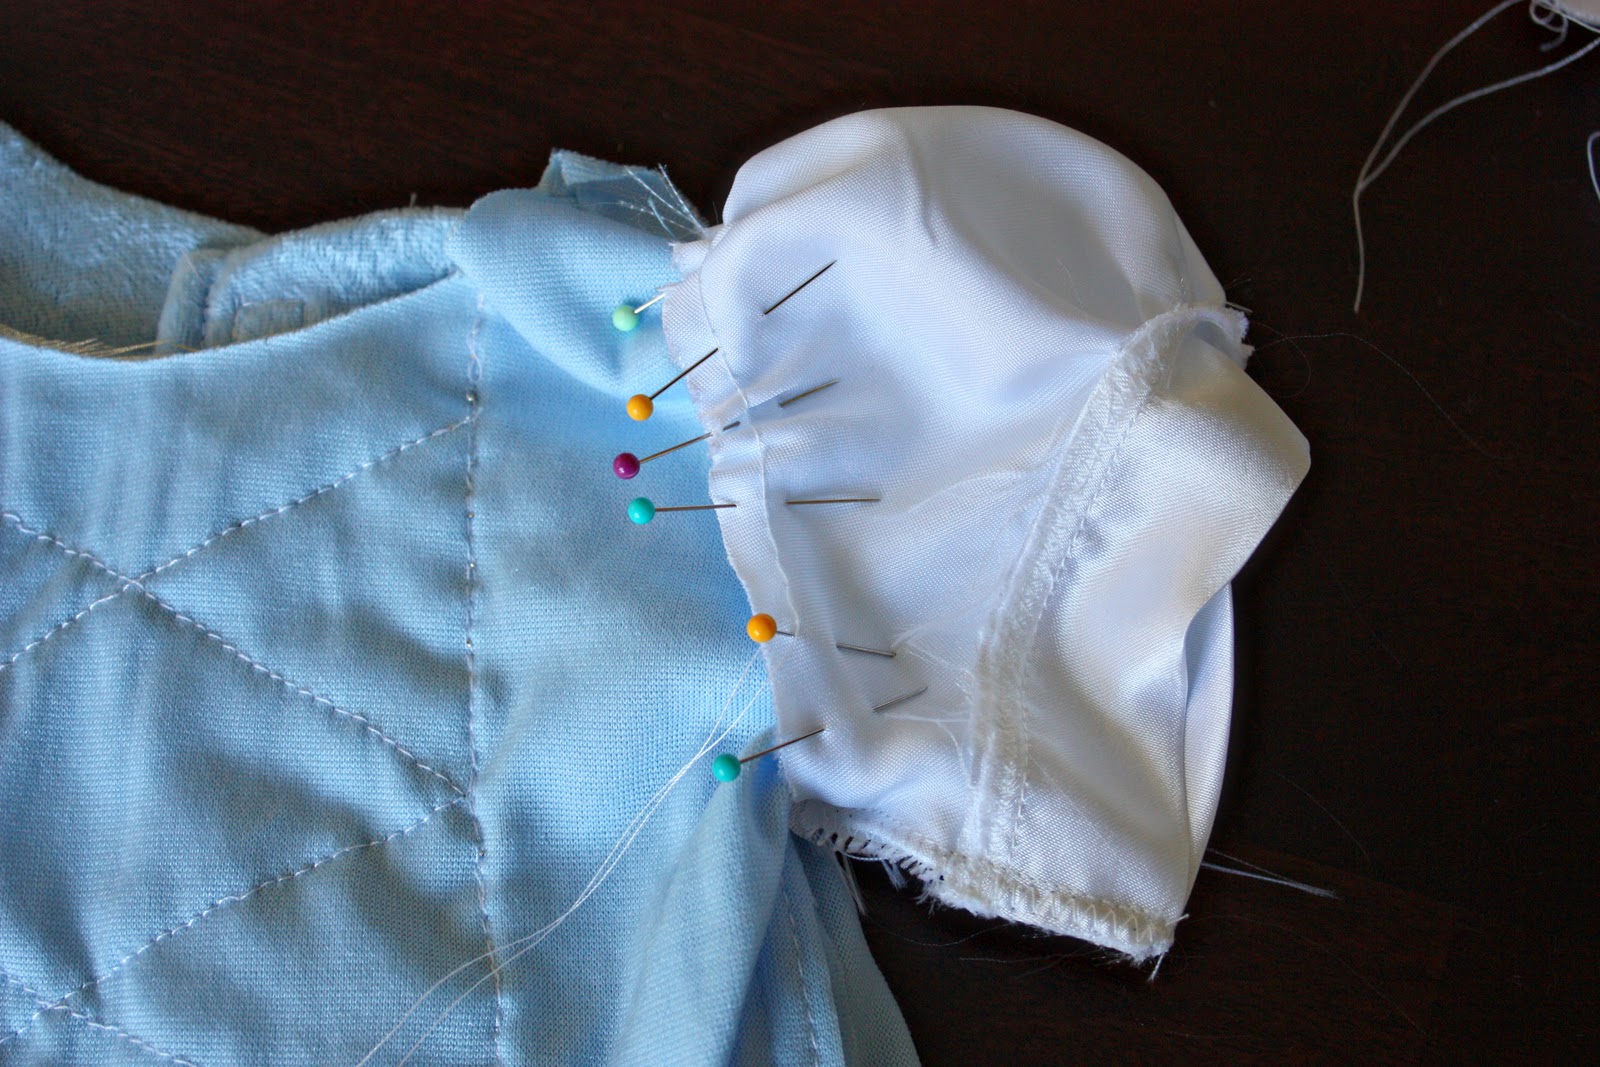
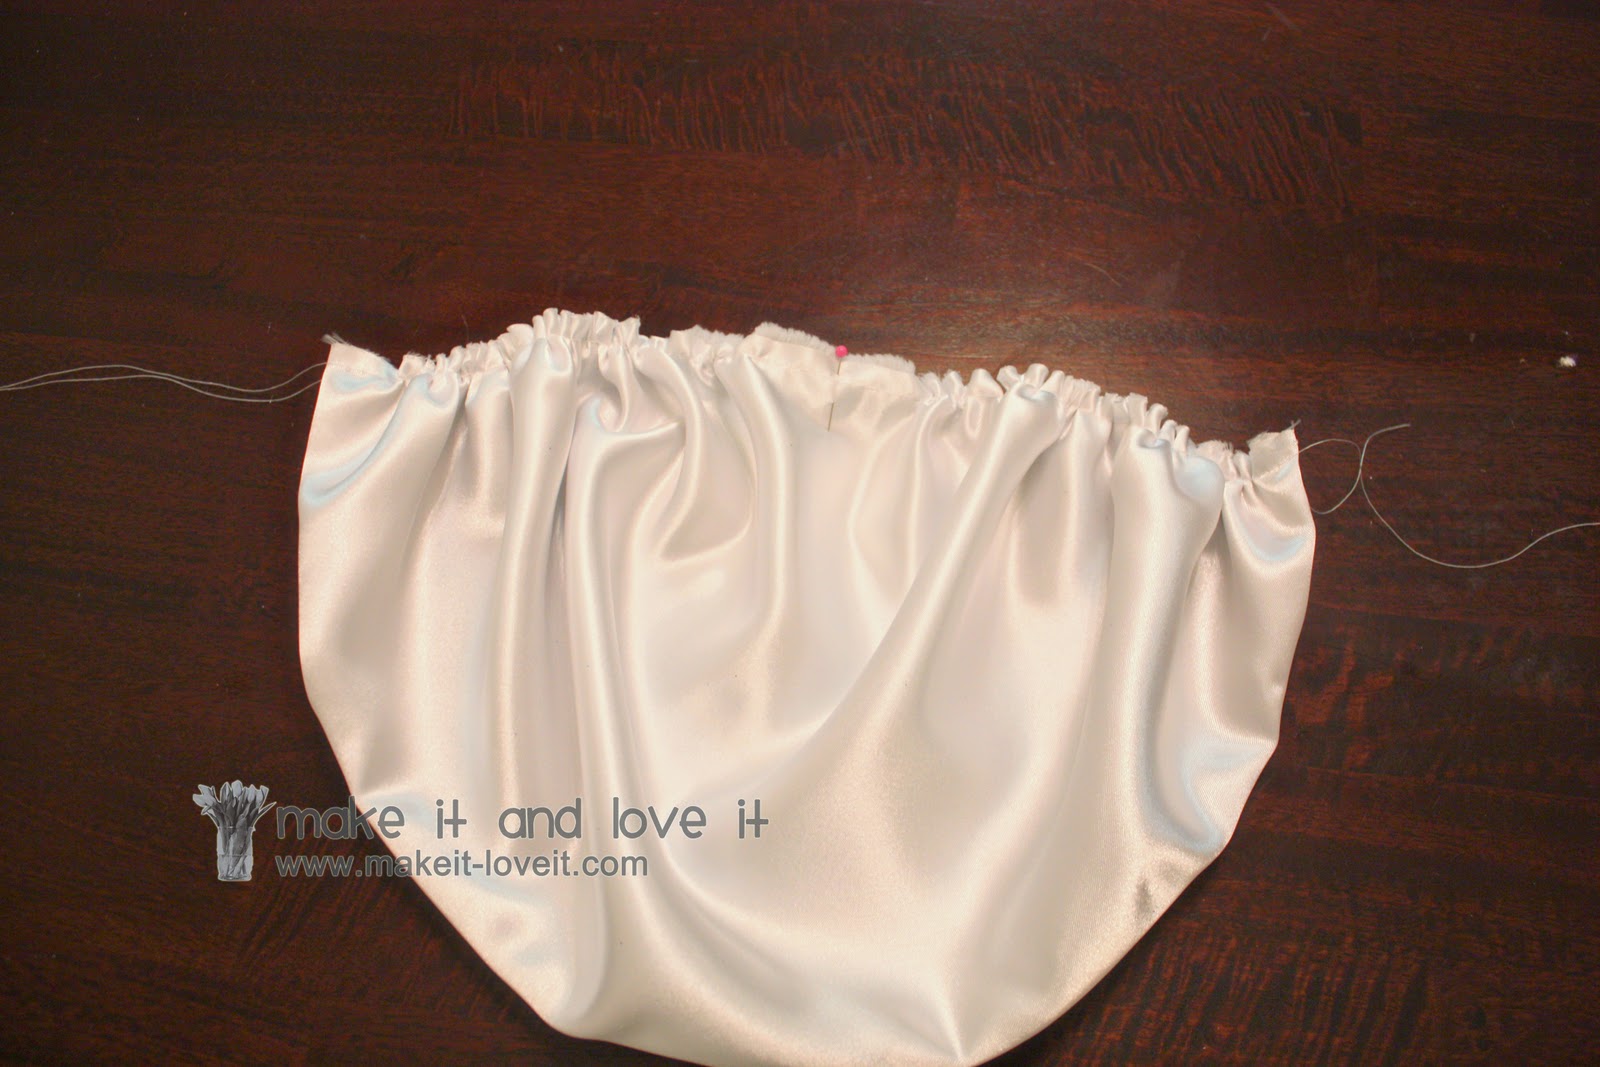
Grab your bodice piece, velcro the back closed, and line up the raw edge of the side piece with raw edge of the bodice on one side. Gather and in pin in place.
Then cut, and gather another satin piece and pin it to the other side of the bodice. When attaching each side flap to the dress, leave a gap at the front of the dress and at the back……..keeping each flap more on the sides and not meeting in the front or at the back at all. That’s just how Cinderella’s dress looks in all of the disney pictures.
Then set this aside while you put together the rest of the skirt section.
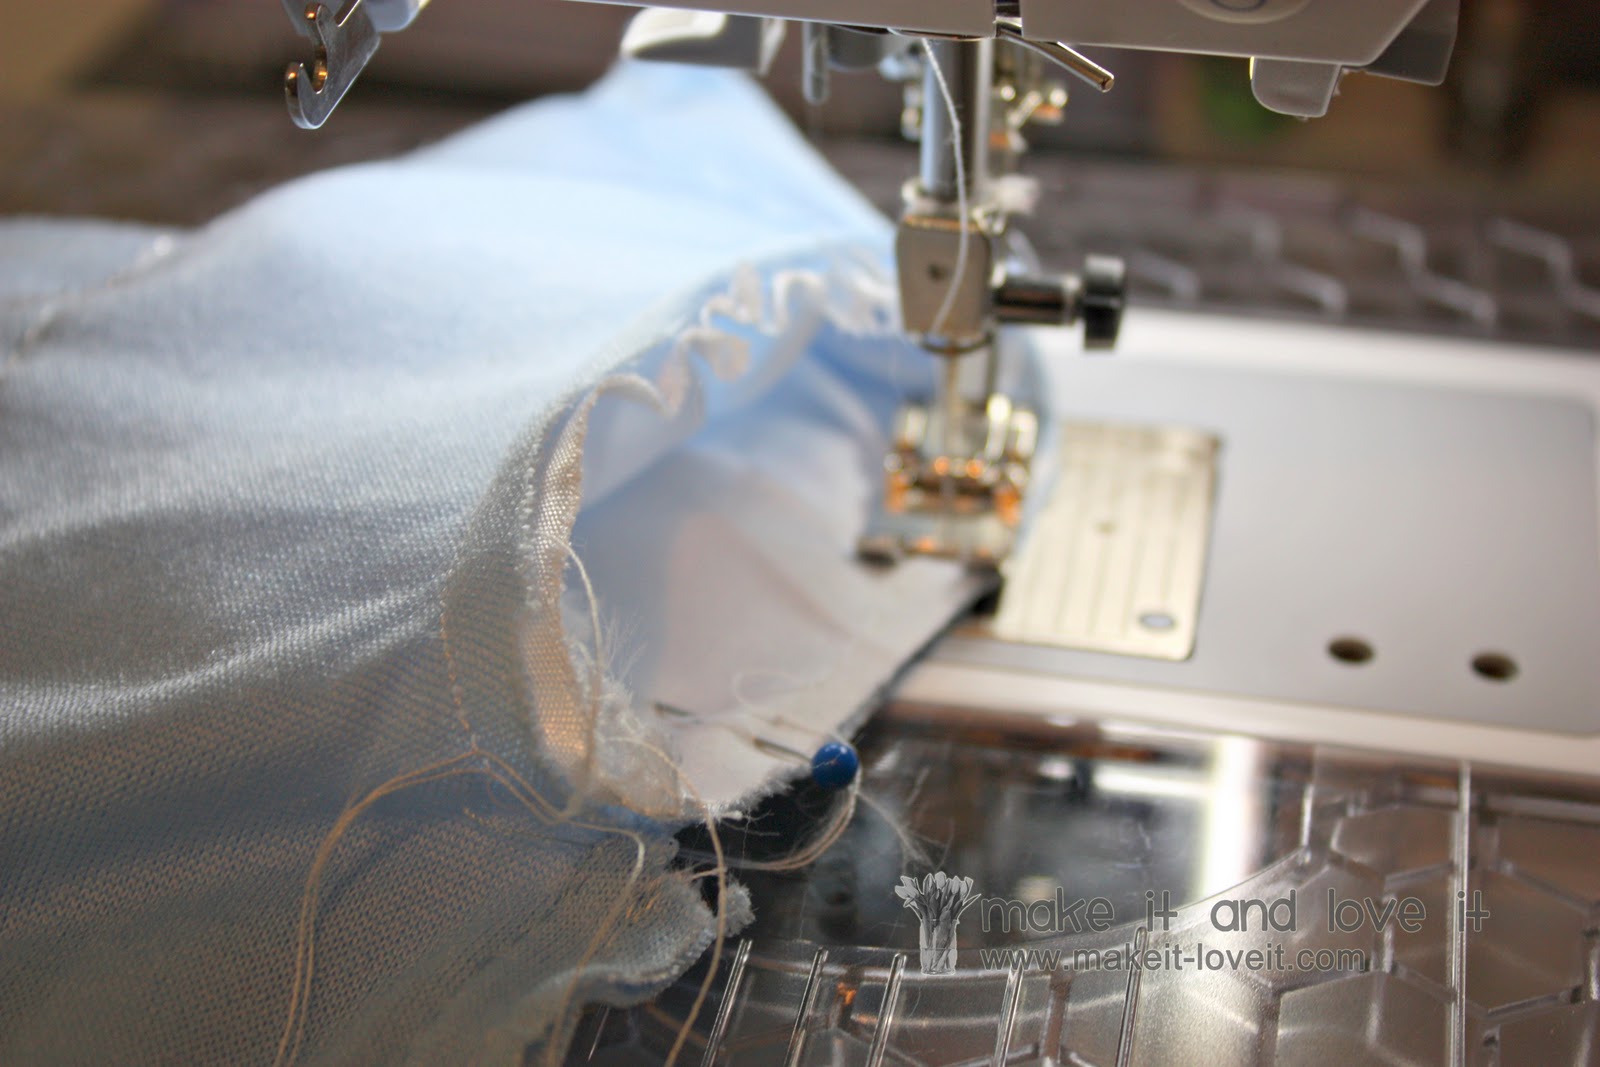
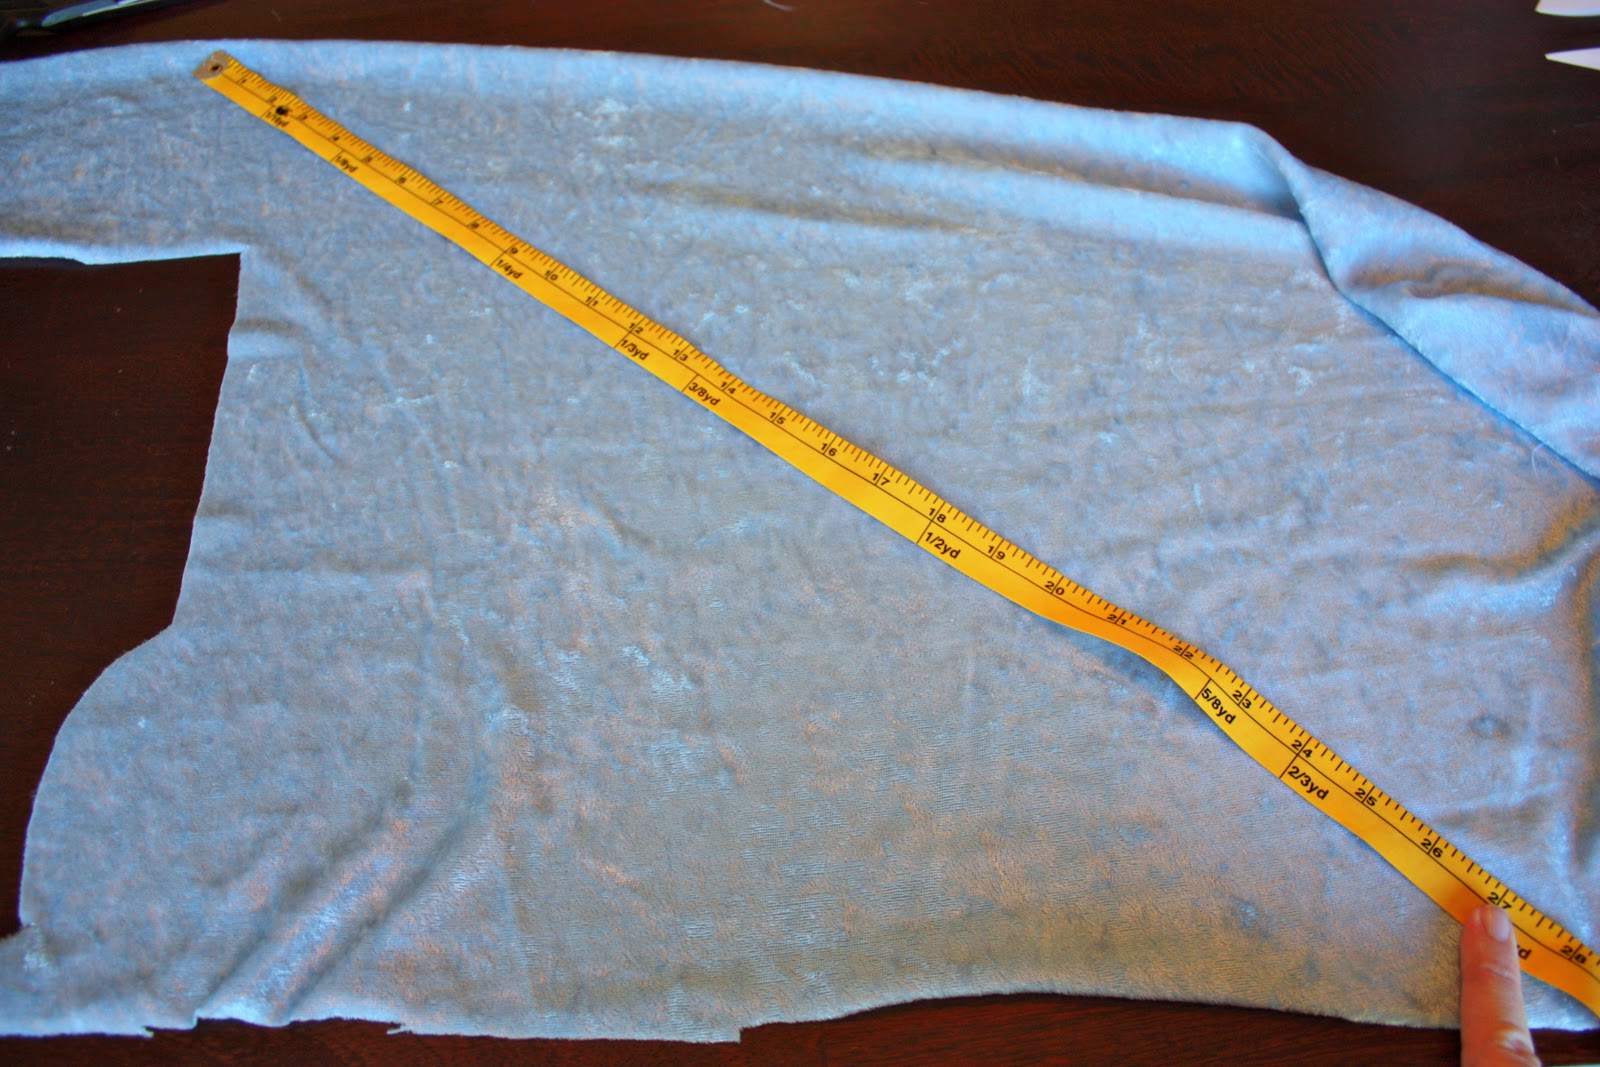
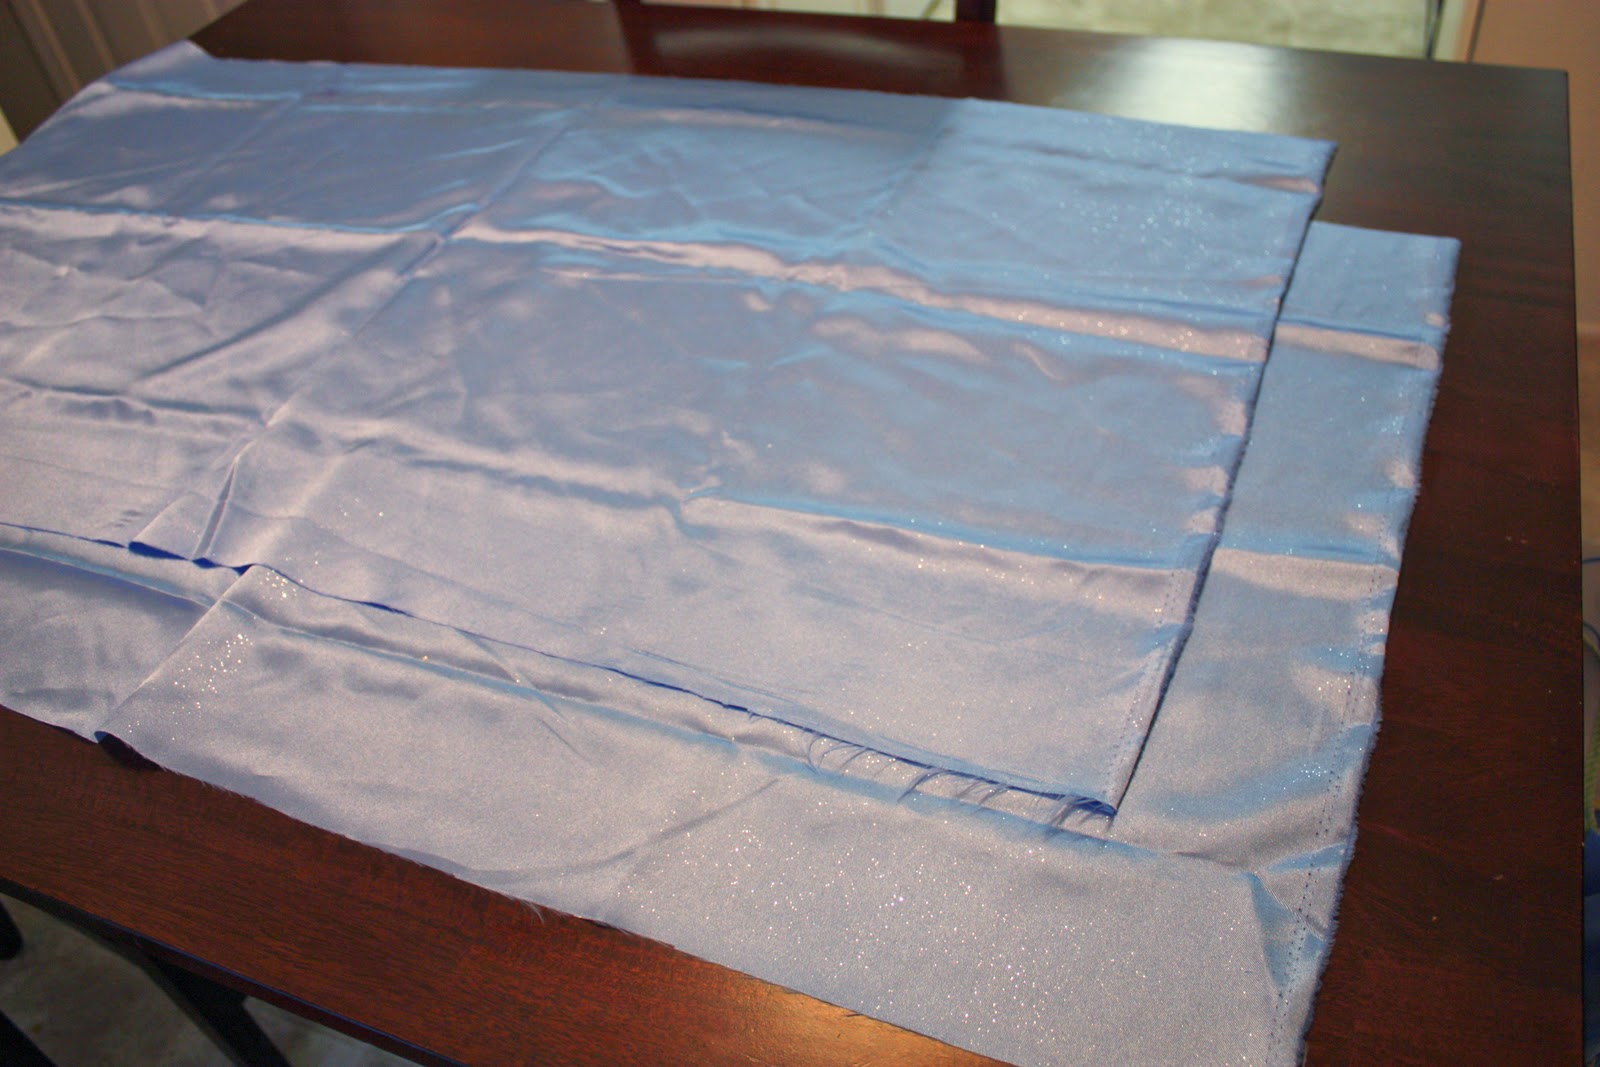
For my dress, I cut two pieces that were 45 inches by 24 inches.
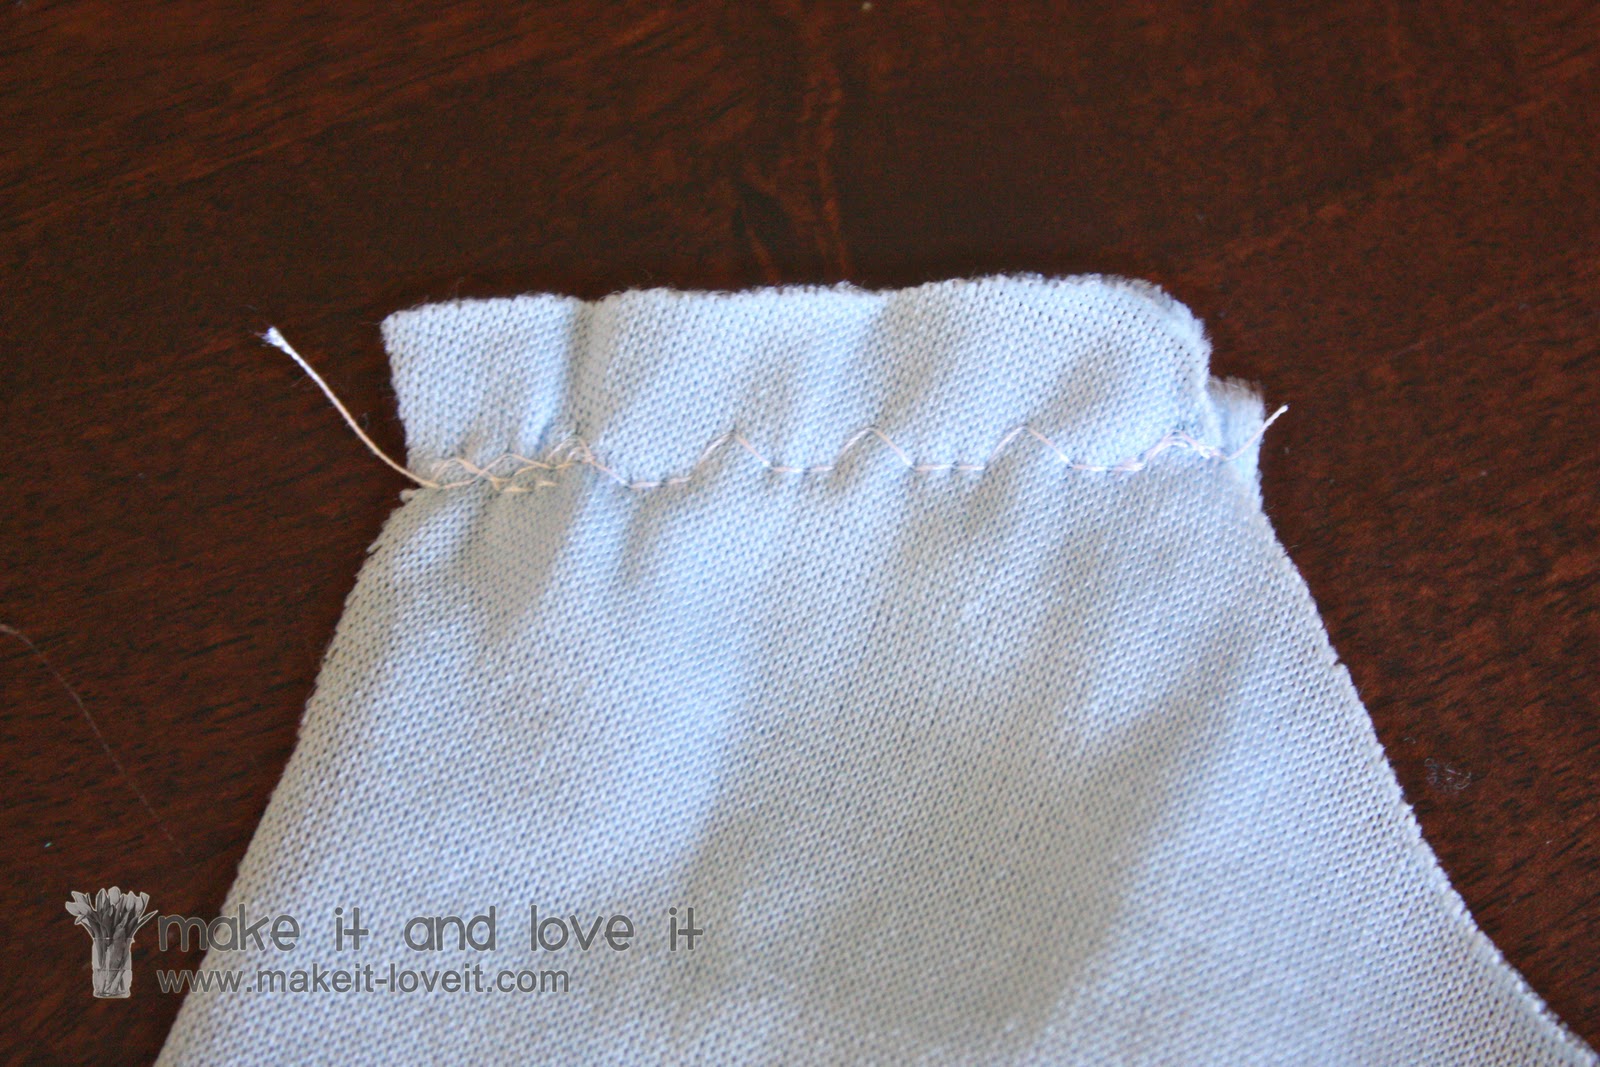
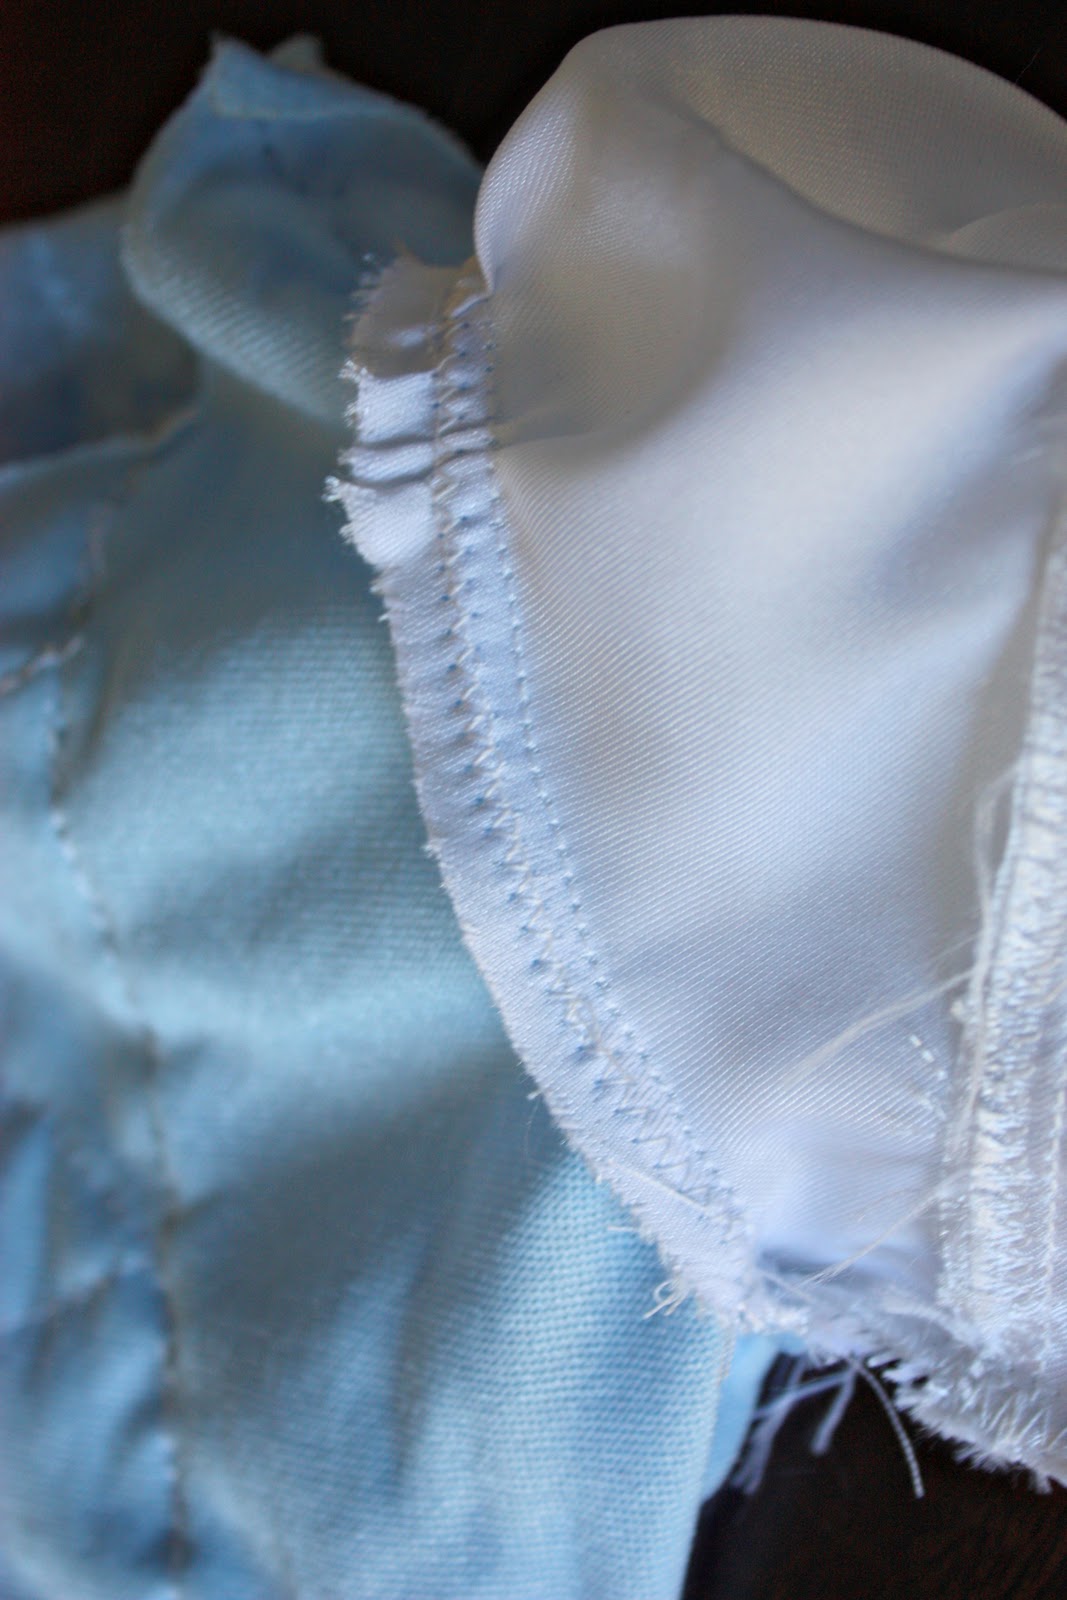
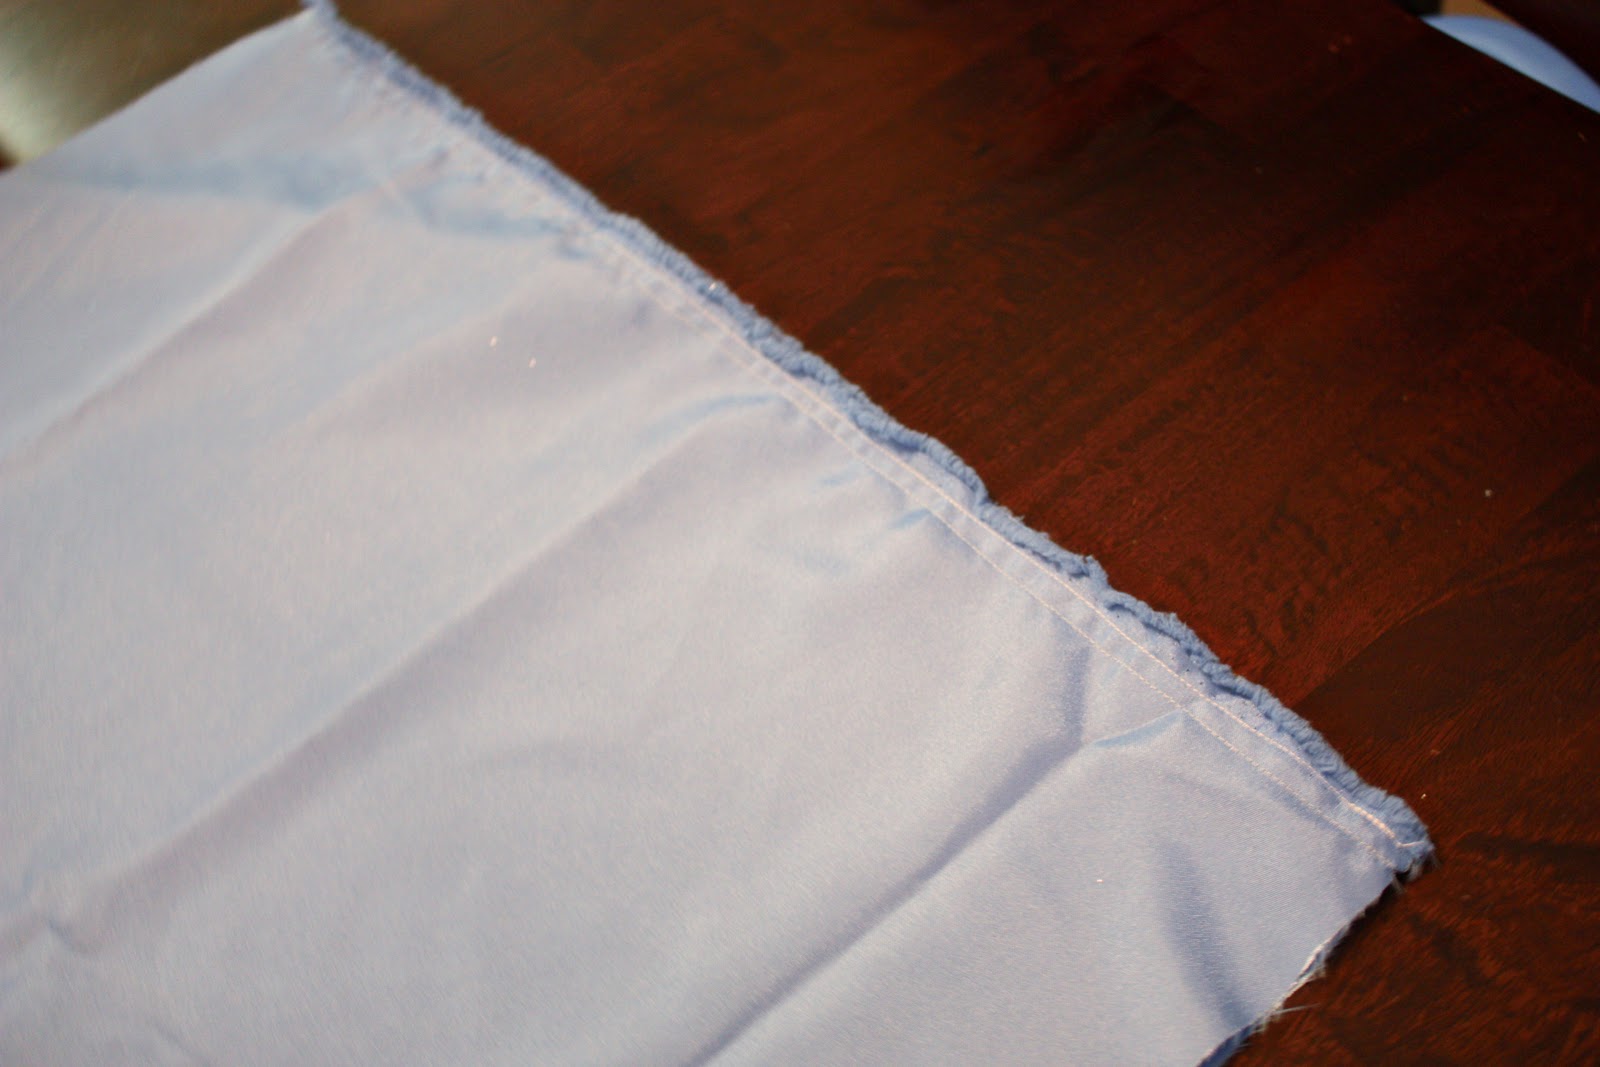
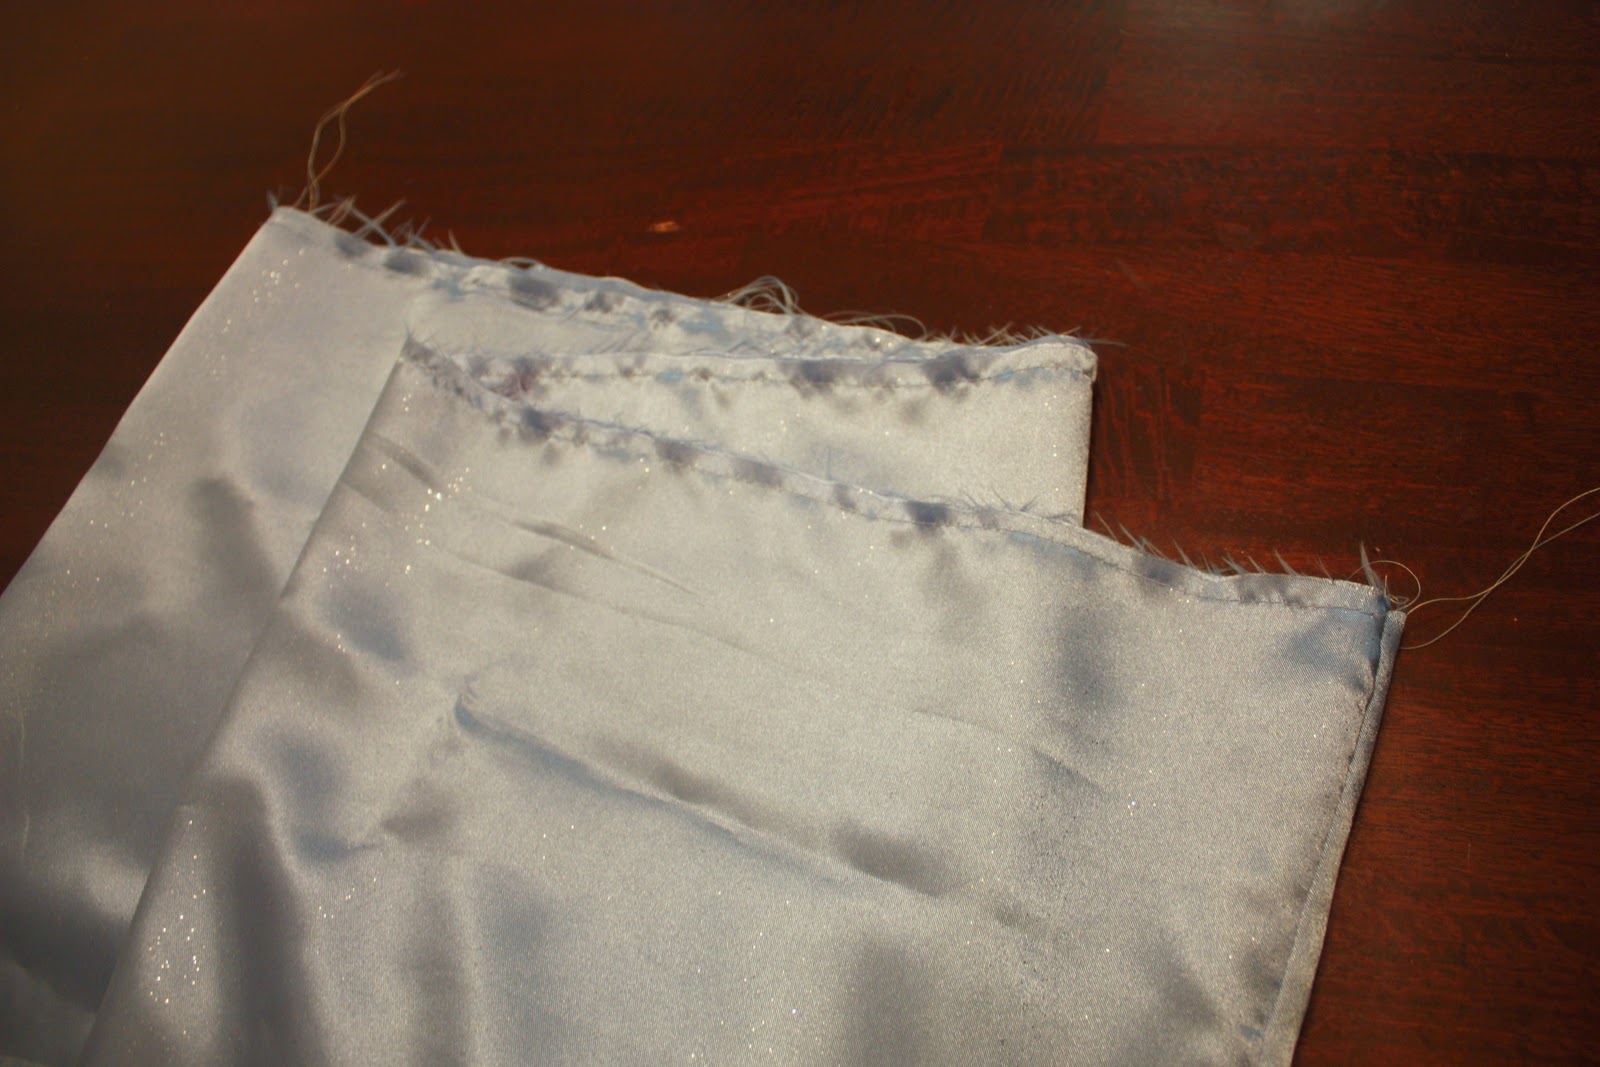
Then I sewed the two pieces together along each 24 inch side, with right sides together. Use a 1/2 inch seam allowance. Then sew another stitch or zig-zag stitch to seal off the raw edges.
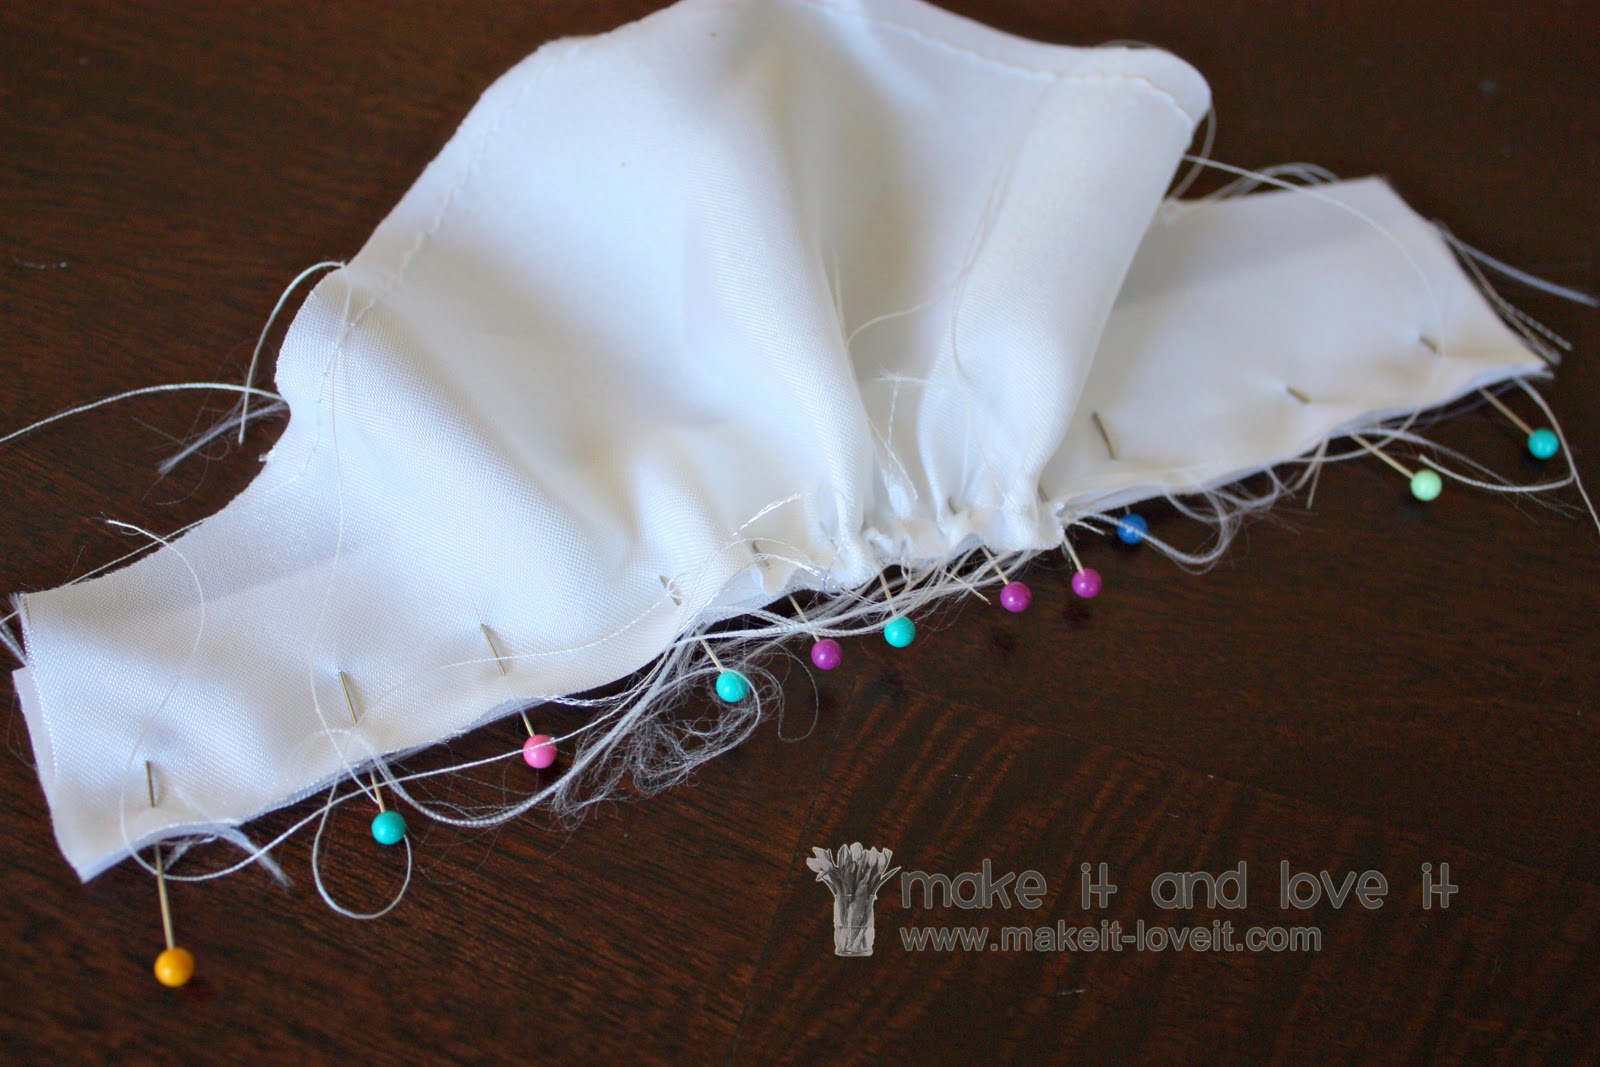
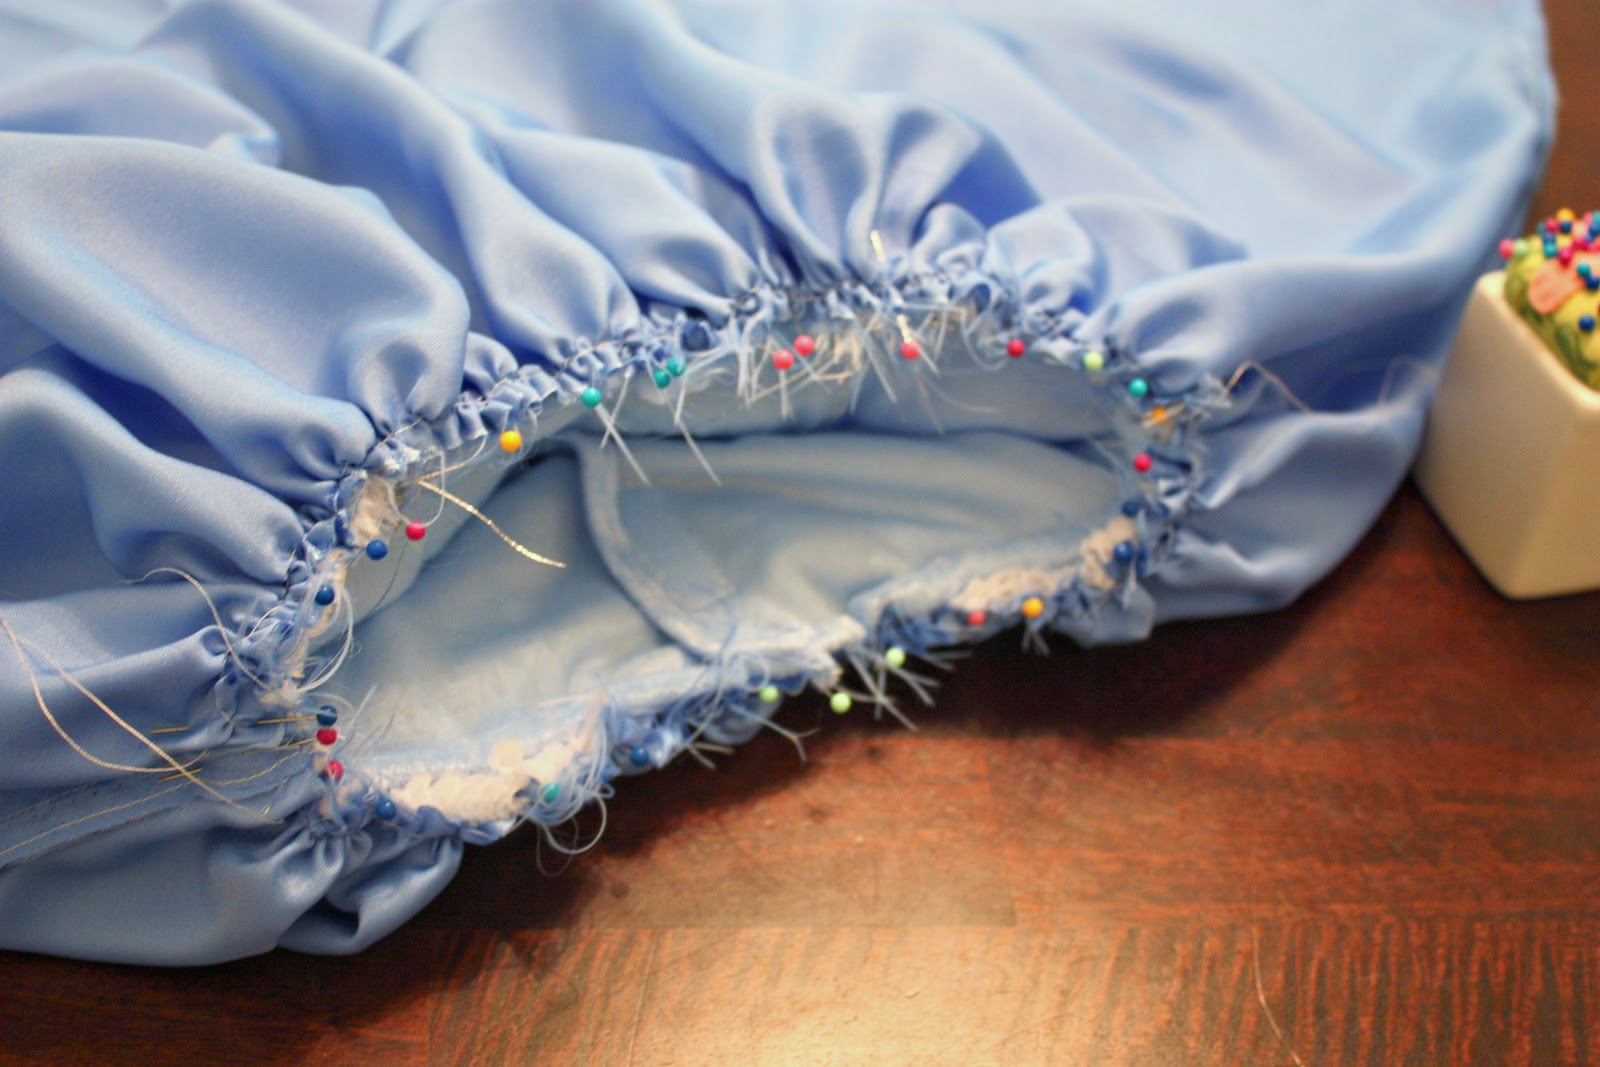
Then, sew a basting stitch along the top edge of the front of the skirt and then another basting stitch along the top edge of the back of the skirt……using a 1/2 inch seam allowance.
Pull on the top threads along the front and then along the back and cinch in the top of the dress section until it’s the same width as the bottom of the bodice. Pin it evenly in place. The easiest way is to turn the skirt inside out then slide the bodice down inside of it…..but right side out. Make sure the flaps are up and out of the way, flapped up towards the neckline as you stick it down into the skirt section.
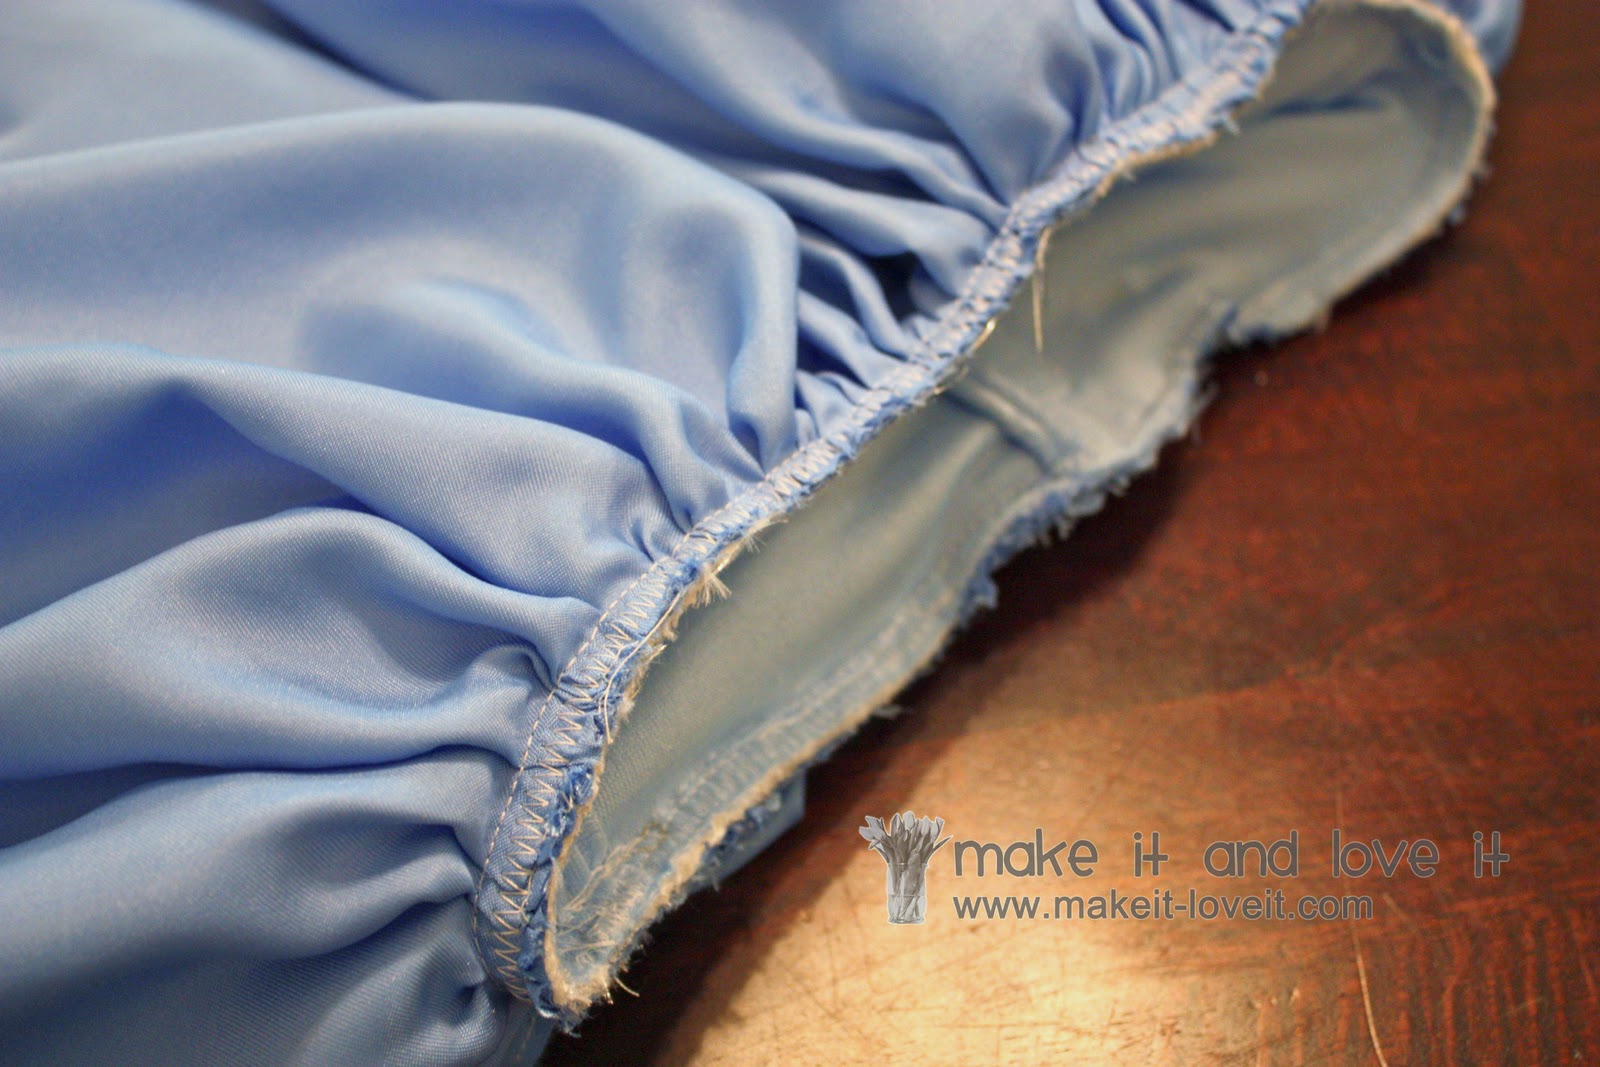
Then sew along these raw edges, using a 1/2 inch seam allowance, removing pins as you go. Then sew a zig-zag to seal off the raw edges. Trim off any excess fabric.
Now, turn the dress right side out and make sure that it all came together correctly.
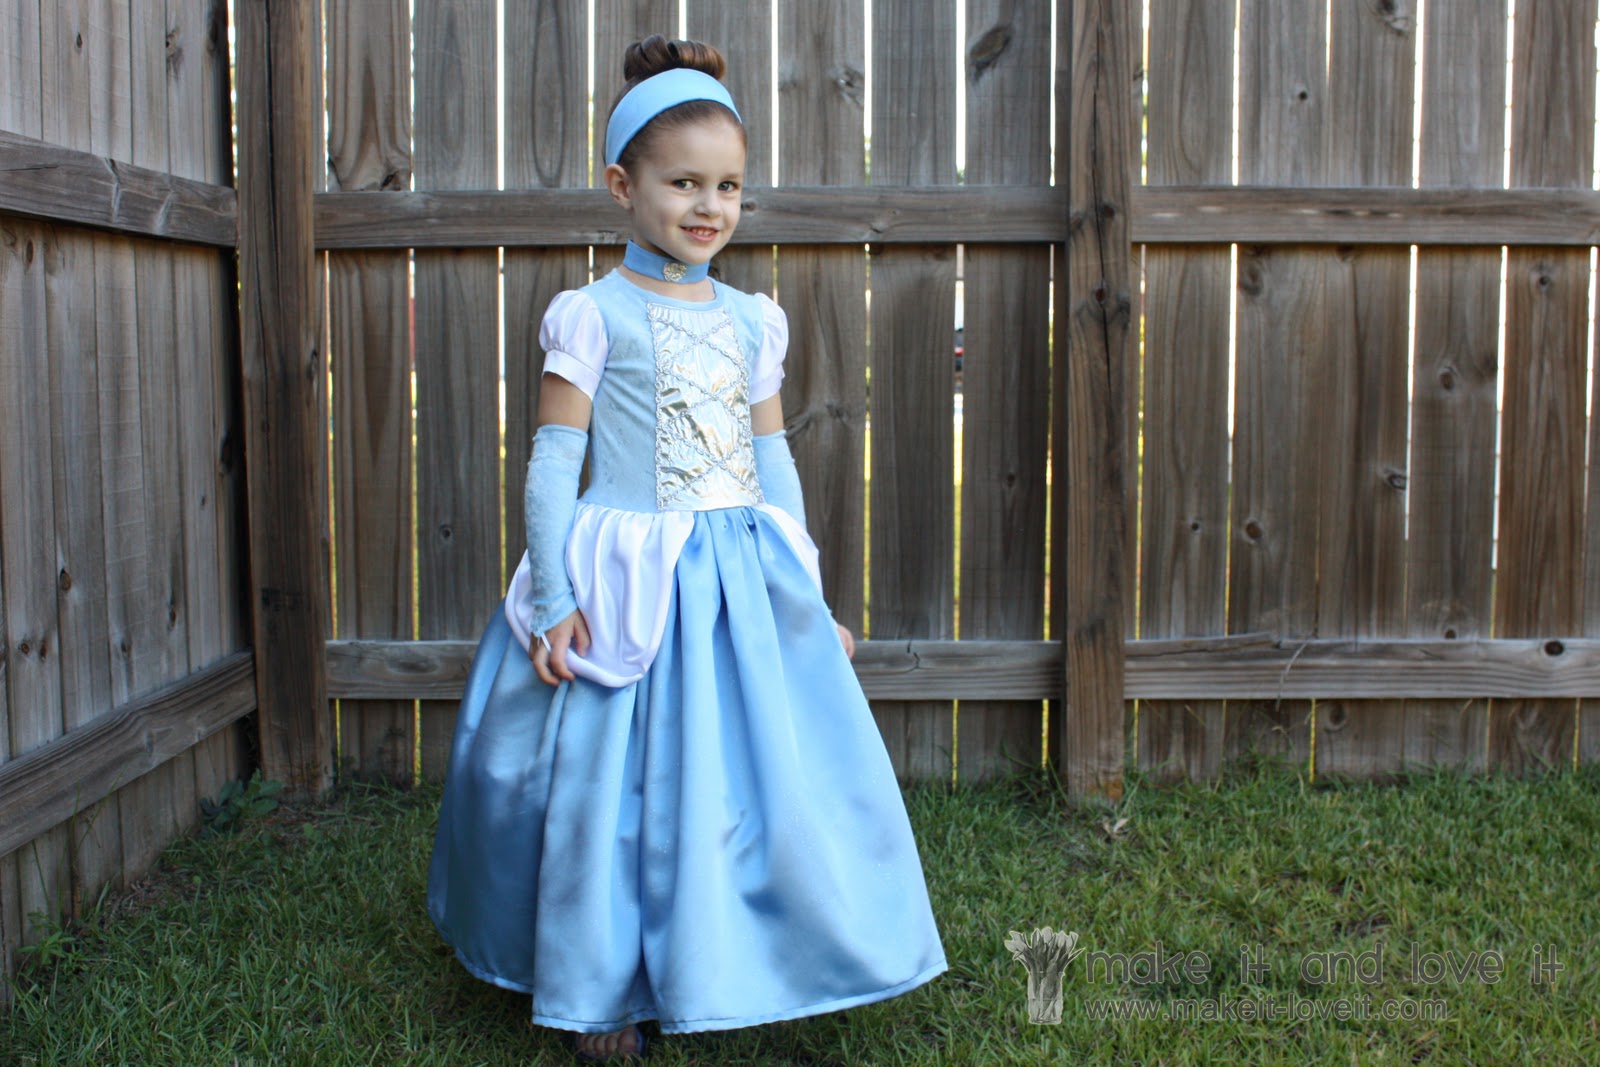
Then hem up the bottom after making sure that it’s the length you’d like it. And that’s it.
Whew.
You have just finished your sweet little Cinderella dress. Give yourself a hug.
EDITED: If you’re interested in the accessories that go along with this dress, click here for a tutorial on the headband, gloves, choker, and full slip ideas.


