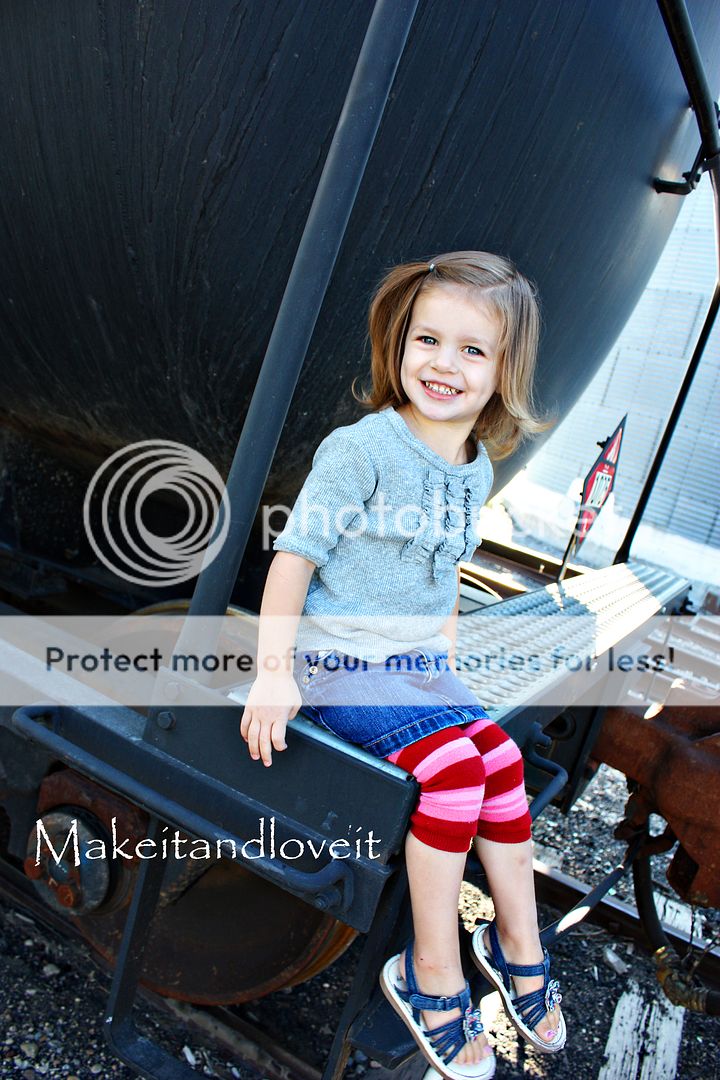
How about a sweet little shirt with a ruffle front, for a little girl……..or even a big girl/lady/mom.
I’m going to have to try one out for my size next.
You should too.
: : : Remember to click images to enlarge them. : : :
Alright, first I had to decide what shirt I wanted to pattern my new shirt after. I am using a ribbed knit so I found a ribbed knit tank top that my little girl already has and I knew I could cut a new shirt out about the same size, since they both stretched about the same. If you pattern after a different type of fabric, you’ll have to consider that before cutting. (They will probably lay and stretch differently.) So I knew the width of the shirt would be the same as this red tank.
I made a pattern out of paper, but made the shoulder width an inch or two wider, so that it would fall at the edge of her shoulders…..and then I could add sleeves.
Here’s what my paper pattern looked like. You can see that I measured the front and the back of the tank, making a line for the front kneck line too.
Then I cut out my front piece and back piece (out of an older, retired women’s ribbed shirt), using my pattern on the fold.
Then I sewed the front and back pieces together at the shoulders, with right sides together.
Then I found another shirt of the same size, that had longer sleeves. I just needed to know the shape of the sleeve folded in half. Make sure that the sleeve opening of your main shirt piece, is the same size as the top of the sleeve opening. That will ensure that they fit into each other. Make sense?
But I wanted half sleeves, so I cut some length off of my pattern.
So I cut out two sleeves, using my pattern on the fold.
Then I pinned the sleeves to the shirt, lining up the center of the sleeve, with the shoulder seam of the shirt. I pinned all along the opening of the sleeve, making sure to ease in the fabric. (It won’t fit exactly perfect, just line it up…pin it….line it up again….and keep pinning.) Sew into place.
Then, with right sides together still, I pinned the sides together and the underneath sides of the sleeves. I sewed one continuous seam along each side.
Then I clipped under the armpits because of the severe curve under there. (That will help it lay flat after you turn it right side out.)
Then, I cut out about 1 inch wide strips of fabric to finish off my kneck line and sleeves.
All I did was fold the strip in half…….
…..and then fold it over the kneck line, starting in the back. This isn’t a completely finished look…..but knit doesn’t fray and I really liked the more shabby look. And it would match the shabby look of the front ruffle too.
As you are sewing it in place (if you’re using knit), make sure to pull the strip of fabric and make sure that the shirt’s kneck line isn’t pulled at all as you sew. This will help the kneck keep its shape. Believe me, I didn’t pull the strip very much the first time and I had to pick out the whole thing and try again.
Here’s the finished neck line. Far from perfect…..but it will work for a first attempt.
Then I did the same thing with the sleeves.
And then I turned under the bottom once, and sewed it into place….making sure that it didn’t pull at all while I was sewing.
Then I cut out 3 more strips that were about twice as long as I wanted each ruffle to be….and about 3/4 of an inch wide. I made the center strip just a tad longer. Then I pinned them to the shirt, exactly where I wanted each ruffle to start.
And then, I don’t have a picture of it, but I pinned where I wanted each ruffle to end, so that I knew how much I should make it ruffle and where to end, as I was sewing.
As I started sewing each strip in place, I just bunched the fabric up as I went. I’d sew about an inch, bunch up some more fabric, and sew another inch.
No science to it really…….I just wanted a simple, imperfect ruffle.
And that’s it. I learned a lot from putting a shirt together from scratch…..but most of all, that it was easier than I thought it would be. Seems intimidating but seriously, give it a try. And consider that you aren’t wasting a single thing if you are re-purposing an old shirt of your own.
Go on, gather up some old shirts…..and make something new.