. . . . .
Hi, it’s Kristin here again from Grandma’s Chalkboard!
One activity my kids can’t seem to get enough of this summer is painting. Finger paint, watercolors, acrylic, you name it, they’ll paint with it! And since they are kids, the inevitable happens and paint ends up on things it shouldn’t—like their clothes. I know, hard to believe, right? ;)
So, to make my clean-up a littler easier, I’ve made each of my kiddos their very own easily-adjustable apron, using laminated cotton (that is totally safe for kids)!
And because the apron is made from laminated cotton, clean-up couldn’t be easier!
Just wipe down and air dry!
Of course, this apron could be made from any fabric you choose (from a thin cotton to a thick canvas) but this laminated fabric makes things so much easier.
Because the twill tape isn’t sewn in, this apron is very adjustable. Perfect for my daughter who grows like a weed, and for my little guy who has been wearing the same size clothing for the past 2 years. (He’ll grow eventually, right!?)
Grab some paint, brushes, and paper, and let your kids create some masterpieces, worry free. Who knows, they may be the next Rembrant, O’Keefe, or Renoir. (Yep, pretty sure I took one too many art classes in college.)
Pair an apron with some art supplies to make a super cute gift!
Want to make one?
You’ll need:
(Just a side note…I originally chose this green polka dot pattern because bright green is my go to color when I’m not sure if I’m sewing for a boy or a girl. I also like to stock up on bright green gift wrap, gift bags, and ribbon. That way, I’m always prepared to wrap up a last minute gift for a girl or boy!)
Okay, cut the fabric to a 21 x 24 inch rectangle. We’ll hem the long sides first.
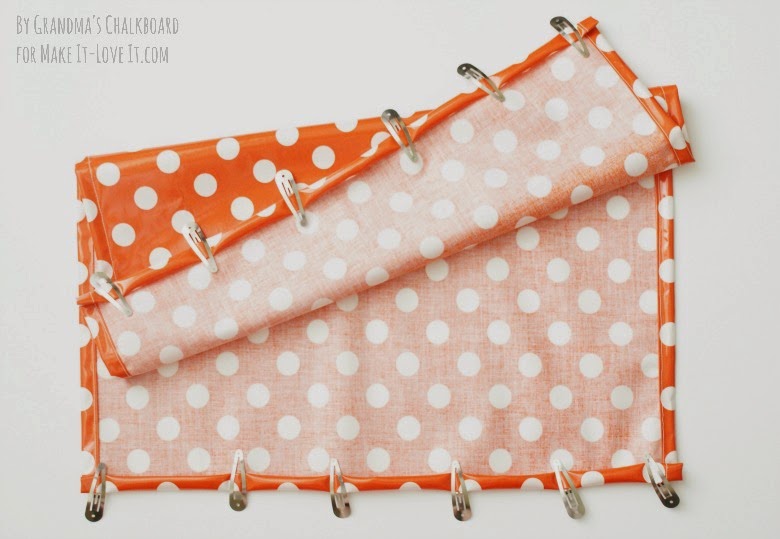
To hem the sides, fold the edges over 1/2 inch, then fold over again. This feels a little more like rolling than folding because the laminated cotton is stiffer than regular cotton fabric.
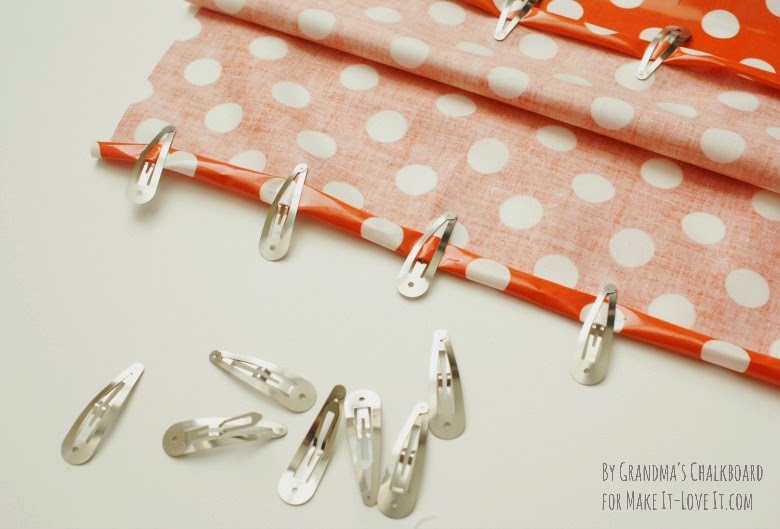
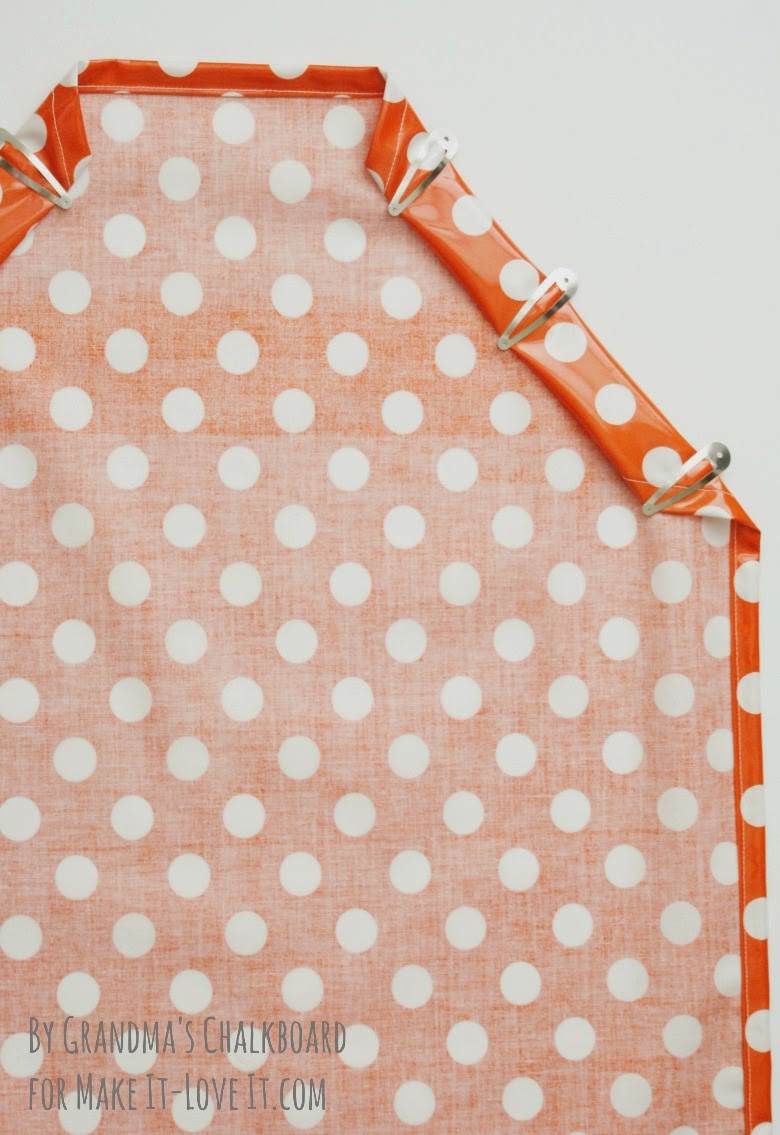
To keep the fold in place while sewing, use binding clips, paper clips, or even hair clips. It’s recommended that you don’t use pins on laminated cotton as it may leave holes in the plastic. Also, you’ll want to keep the laminated cotton away from your iron. If you do need to iron it (to remove any ‘dents’ in the plastic that are driving you crazy) spray it lightly with water, then place a thin press cloth on top of the laminate before ironing.
The first apron I sewed, I used my regular sewing machine foot. I didn’t have a problem with the plastic-y surface not feeding through my machine. On this apron, however, I tried my walking foot. Both feet worked, but the walking foot producing a slightly neater stitch. Sew from the right side of the fabric, using a 1/4 inch seam allowance.
If your machine has difficulty, try putting a piece of tape along the bottom of the foot, using a walking foot or a special Teflon coated foot. (Ashley has a “Sewing With Vinyl-Types of Fabric” tutorial as well.) I kept it simple and used what I had. :)
Next, hem the shorter sides, the same way.
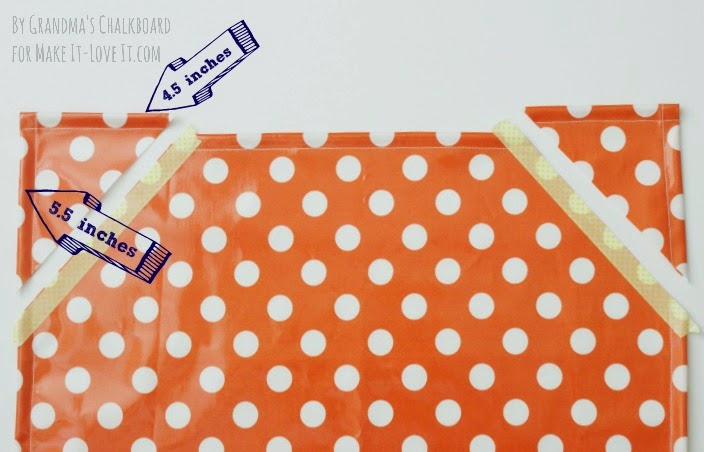
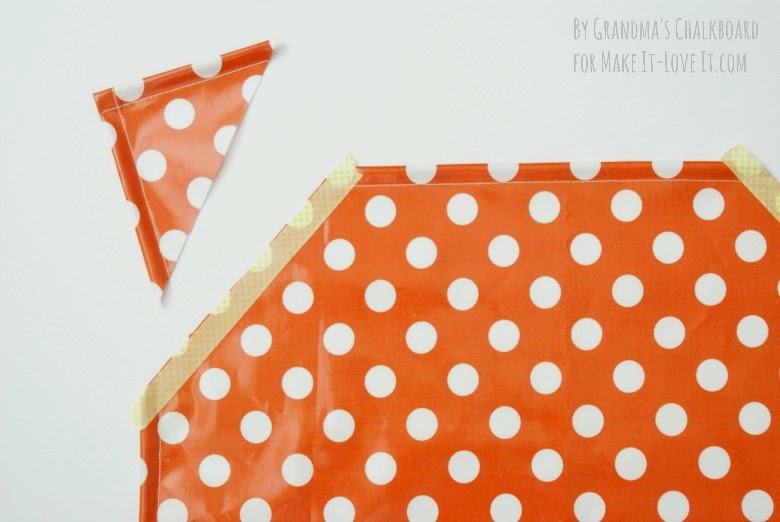
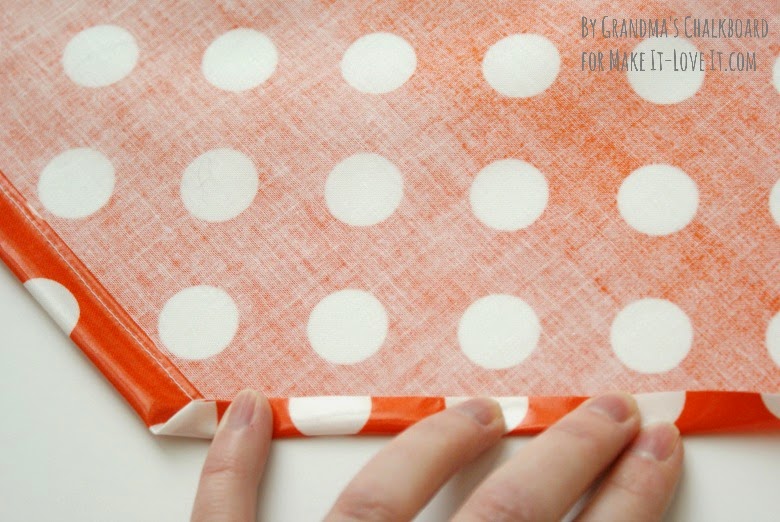
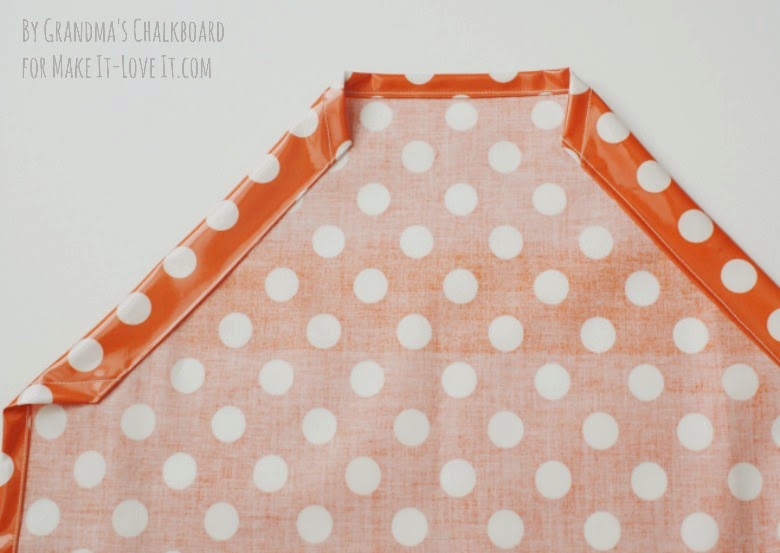
After all the edges are hemmed, measure and mark 4.5 inches in on the short sides, and 5.5 inches down on the long edges. Connect your marks and cut just inside the line.
Secure, then stitch, making sure to back-stitch at the beginning and end of your seam.
AND, you’re almost done! (Did I mention this is a super quick project?)
To lace the twill tape through the casing, I taped the twill tape to a pencil and pulled it through, going up one casing, and down the other. So easy!
Hem the twill tape ends by turning the raw edge under .5 inch, then another .5 inch, enclosing the raw edge inside.
Secure with a zig zag stitch.
Now it’s ready to be secured around your little artist…
And it’s TIME TO PAINT!
As always, I’ve enjoyed sharing this project with you and hope you’ll give it a try!
Happy painting (and sewing)!
Kristin
Check out Kristin’s blog, her darling shop, her Facebook page, and her Pinterest boards.

Hi, I’m Ashley—the DIY-enthusiast behind this crazy blog!