Home » DIY Tutorials » DIY Crafting » Crafting: Miscellaneous » DIY Foldable Wood Hamper…with Reversible Bag Insert
DIY Foldable Wood Hamper…with Reversible Bag Insert
June 23, 2014 - By Ashley Johnston 29 Comments
The super talented Cami from Tidbits is back today, sharing the perfect solution to all of your laundry woes. A lovely Foldable Wood Hamper…..with a reversible fabric bag. No need to hide this hamper in some dark closet……place one out in the open, wherever you may need one. I really, really LOVE this!
-Ashley
. . . . .
Hi, it’s Cami from Tidbits. It’s good to be back!! I am here today to attempt to make one of life’s never-ending tasks, a little more stylish. Because I am sure if my hamper is more attractive, then doing laundry is bound to be more appealing. Right?! :)
First of all, I will take you into our wood shop (aka – messy garage) and with the help of my handy dandy husband, we will show you how easy it is to build the frame for this fold-able hamper. I’ve never personally worked with wood, but he makes it look so easy I think anyone could do it!!!
Then, you can come to my sewing room (aka – messy sewing room) and I’ll show you how to make a reversible bag for the hamper.
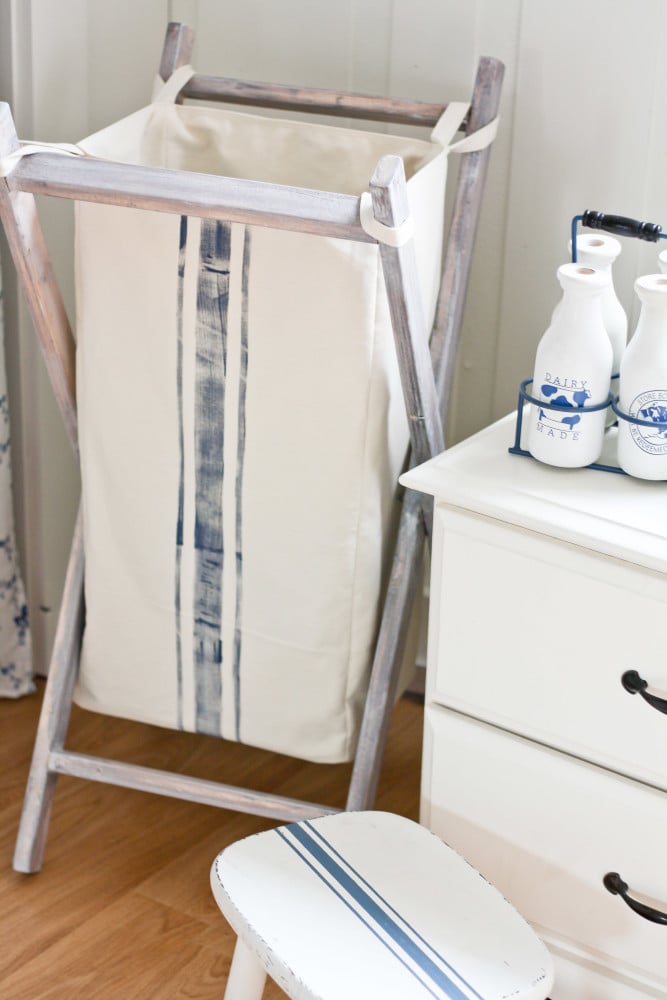
A reversible option is great for people like me, who sometimes crave a coastal cottage look.
But also find themselves dreaming of a farmhouse in France.
It’s like a hamper with dual personalities!! Actually, that pretty much sums up the style of our home as well. (See more of our home here). However, the one thing I know for sure . . . . the one thing I could never reverse . . . is my distaste for laundry.
I’ll do the dishes. I’ll scrub the toilets. I’ll change the diapers. I will even sweep and mop our massive amount of hardwood floors.
But could someone please come do my laundry.
With 4 little ones at home, I’m always behind. There are always baskets to be folded and we often run out of clean clothes.
And you know you’ve hit rock bottom with you find yourself wondering if it is okay to let the 3 year old borrow the 7 year old’s clean underwear for a day or two. (I’m not going to say if I’ve actually done that or not—ha!)
But I am sure that with this cute new hamper, I will be so excited to do laundry, that such a thought would never cross my mind again. Right?
Ha. One can hope.
So, if you too are in desperate need to find a way to make laundry more attractive, let us ignore all the clean clothes that need folding, and I’ll show you how to make your own hamper.
Oh, the irony.
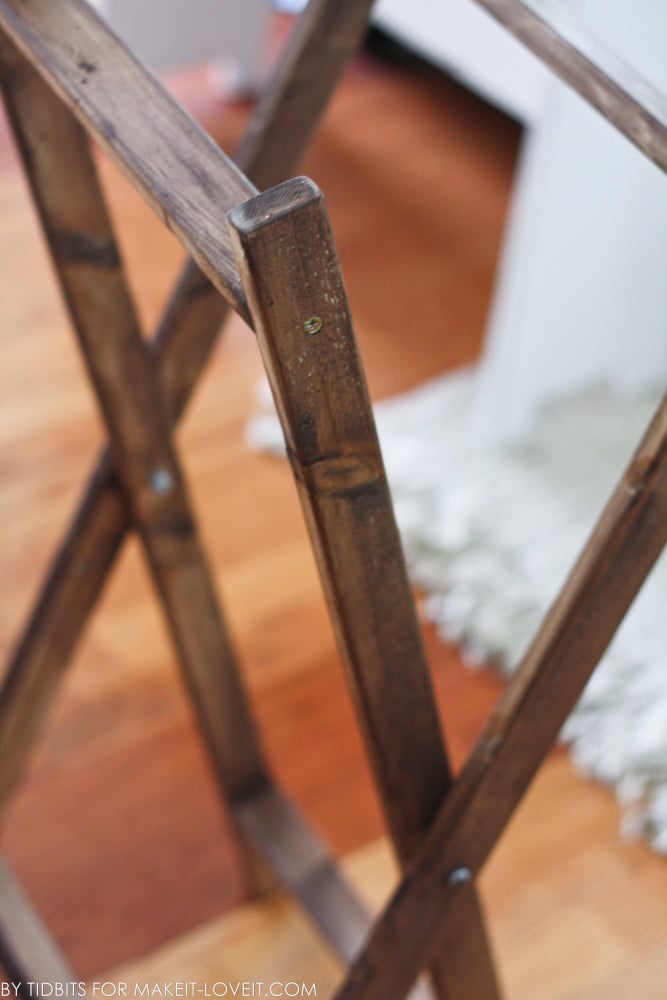
First to the wood shop!! (I do hope I make sense. Woodworking is a new world of tutorials for me.) Wood Supplies: You will need to buy 2 sticks of 1 inch x 2 inch x 8 feet of furring strip. My husband found these at Home Depot for about 2 bucks each!! You could even have them cut it to the measurements below while you are there. You’ll need: 4 long pieces measuring 34 inches. 2 short pieces measuring 13 1/2 inches. 2 short pieces measuring 12 inches.
Hardware Supplies: 2, #10 Bolts, 2 inches each (Green Package) 1, #10-24 Lock Nuts (Orange Package, there are two shown below but realized later you only need one package) 8, 1 5/8 Wood Screws. 4, #10 Washers (not pictured)
Woodworking Tools:
Wood Glue (optional but helpful)
Sandpaper
Measuring Tape
5/16th Wrench
Drill Gun with Drill Bits (we used a 3/16th and 1/8th)
Almost none of that made sense to me, but that is what my husband told me to write. Good Luck ;)
First thing, lay all of the 34 inch long pieces flat (on the wider side) and make a mark 2 3/8 inch from one end, at the very center of the this wide side.
Get your 1/8 inch drill bit and make a hole clean through where you marked on all 4 pieces.
Flip your long pieces over to the other end and make a similar mark at the other end…but this time, 4 1/2 inches from the end. And yes, right at the center of the wide side again.
Use your 1/8 inch drill bit and drill through each of those marks on all 4 pieces.
Staying on this end (with the holes 4 1/2 inches from the end), turn the 4 boards onto their sides and mark a line 4 1/4 inches from the end.
Grab one of the 12 inch sticks and add a little glue to one end, for added strength.
And then line up the glued end with one of your long sticks, right below the line that you just marked. And yes, it will be glued directly over the hole you made in the longer piece of wood. Be sure that both pieces of wood are sitting on their sides (not on their wider flatter sides).
Take one wood screw and screw it right where these boards meet and where you drilled your hole, keeping the 2 wood pieces where they meet, at a 90 degree angle.
Now, take the other 12 inch stick and repeat the last 4 steps to the other end of the stick, only this time make a mark that’s 2 inches from the end of the long stick (because remember, the hole is at a different measurement at this end) and place the short board just above that marking. The 12 inch long piece of wood should line up just right where your drill hole is. Now, screw in place.
This is what it should look like at this point.
Now, make your marks on another one of your long wood pieces, same as you did above.
Place your 2nd long piece right on top of the two 12 inch pieces, match up your marks, add glue, and insert your screws the same way you did with the first side.
And now you have 1 rectangle finished, with two 12-inch pieces at each end—one about 2 inches from one end and the other 4 inches from the other end.
Now, repeat the exact same steps with the other 4 remaining pieces of wood but instead of using the 12 inch pieces at the short ends of your rectangle, you’ll use the 13 1/2 inch pieces.
Now, you’ll have 2 complete rectangles…..but one is just a bit more narrow, so that it can fit inside the other one. Make sense?
Now, on all 4 long edges of the long boards of both rectangles, make a mark in the dead center.
Use your 3/16 drill bit and drill a hole on all 4 of those markings.
Place the smaller rectangle inside the bigger one, lining up the center markings you just drilled.
Take one #10 bolt and washer and screw them through both pieces of wood.
Take your wrench and a lock nut and twist it onto the other end of that bolt until it is snug in place. But not too tight…or the wood won’t be able to move like you need it to.
Do the same thing with the remaining bolt, washer, and lock nut for the other side.
**As you can see, this was our baby boy’s first lesson in wood working. I plan to have daddy train him well. :)
Now, you can do what you wish with the wood.
I first stained mine in Walnut Gel Stain, waited for it to dry, and then white washed the wood with watered down white paint.
The options are limitless. Have some fun!
. . . . .
OKAY, Are you ready to sew?
I am ready to speak my language again :)
First a few words. If you didn’t want to make this bag reversible, you would just basically call the inside layer a lining. Either way, both layers are made the exact same way and then joined together at the top.
Fabric Needed:
I just sifted through my ridiculous fabric stash and grabbed what I needed but I figure to make the hamper bag, you will need 1.5 yards of both the outside and inside fabrics. I used a variety of fabric types, but I found my off-white twill type thicker fabric was my favorite. It gave the bag more shape and sturdiness.
You will also need a small piece of super thick pellon. I used the non-adhesive, sew on type. The thickness depends on your preference but I wanted a super sturdy bottom. You will only need enough for a 9 x 13 inch rectangle.
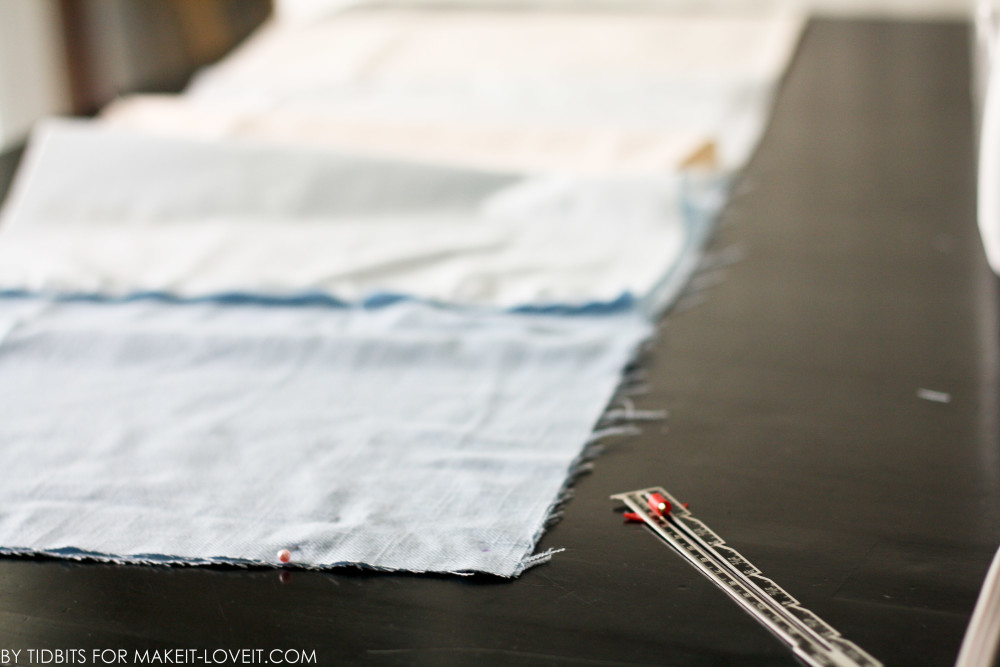
For the base of the bag, cut a 9 x 13 inch piece of both the inside and outside fabrics, plus the pellon of choice.
For the tabs cut 4 pieces of fabric, 11 x 3 inches.
Now, for the main shape of the bag, you’ll need the following measurements—
For the wider ends:
Cut 2 rectangles measuring 13 x 24 inches.
For the smaller ends:
Cut 2 rectangles measuring 9 x 24 inches.
(If you decide to go for the color block look like I did below, you’ll need to sew 3 pieces of fabric together….but just be sure that the finished size corresponds with the measurements listed above.)
Cut 4 more pieces of fabric for your lining, the same measurements as above.
I added some painted grain sack stripes at this point to the rather boring fabric. (If you need a few more tips for painting the lines, check out my
Pastry Cloth tutorial.)
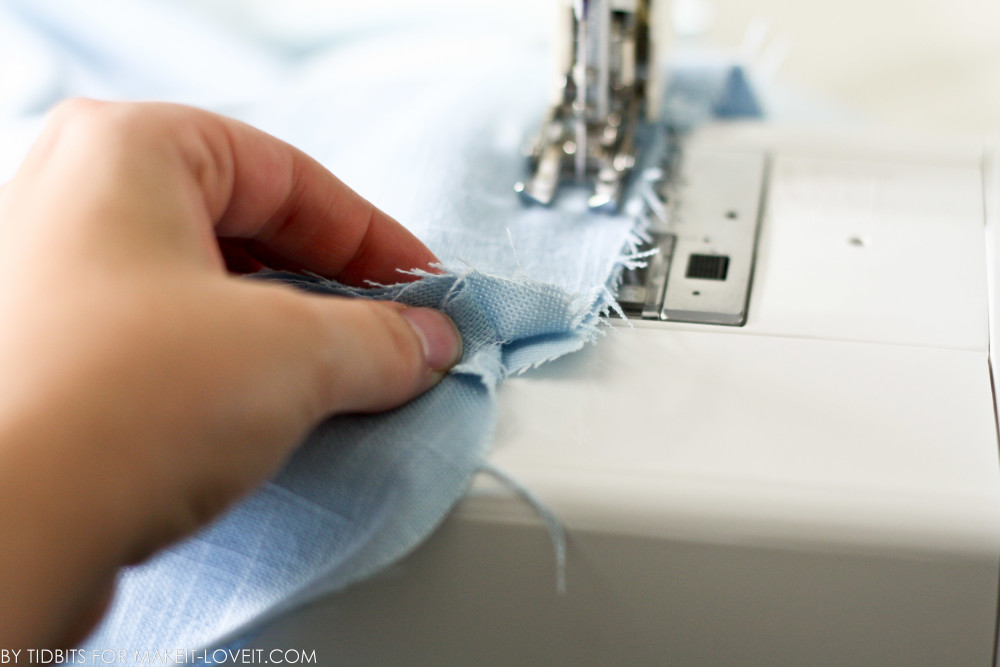
Now that all your pieces are cut out, choose one of your base fabrics (9 x 13 in size) to sew the pellon to. Layer the fabric and pellon together evenly, with the wrong side of the fabric facing the pellon.
Baste them together (with a long stitch length) as close to the edge as possible. (This will just help keep the pellon from shifting in the future steps.)
Now make your 4 tabs. Iron each one as follows:
Fold in half lengthwise and press. Open that up and bring both edges inside to the fold and meet the midpoint which you just pressed. Press those folds down as well. Keeping those edges folded in, fold again along the center pressed line and press again in place. (
Basically, you’re ironing them like a piece of double folded bias tape. Ashley has a bias tape tutorial if needed.)
Now, top-stitch along both edges of each strip of fabric, securing the folds in place.
With the sturdy base and tabs made up, you are ready to sew the bag.
Decide which fabric you will sew up first, the inner one or the outer one.
And before you get started, and to help you visualize, you are now going to basically sew a big plus sign by sewing the 4 sides onto the base.
First, line the base of the bag and the bottom of one of the side pieces, right sides together. Doesn’t matter which side piece of the bag you start with at this point, just match it up with the corresponding side of the base.
Pin these together along the bottom. This next step is very important. You need to mark a little dot a half of an inch away from both bottom corners. Do this by measuring at an angle from the corner.
Now you are going to sew from dot to dot with a 1/2 inch seam allowance. Back-stitch at the dots, and do not sew past these dots. (This will help you make the corners of the bag.)
Once you sew this line, you can open it up to see the base is attached to the bottom of one long side pieces.
Flip it around and pin your other identical side piece to the other side of the base, right sides together. Mark your dots, and sew the same way.
You now have what looks like a really long strip of fabric…..but the base piece is right between to the side pieces.
Now pin one of the other side pieces (right sides together) to one of the remaining two sides of the base. Be sure to mark your 1/2 inch dots at the corners, just like above.
This part gets a little tricky and may not make sense just looking at the pictures. But once you have the fabric in your hands, you should be able to easily see how this will work.
You will sew dot to dot just like before, but you first need to tuck the corner seam allowance from the other sides you have sewn, so that they are out of the way and won’t be stitched down.
Once those corner seam allowances are tucked out of the way you can sew dot to dot. But be sure to overlap the stitches on the other end just slightly so there is not a hole in your corners.
As you are nearing the other end, tuck that seam allowance out of the way again and stop at the dot.
Do the same thing to the other side and you will end up with your big plus sign
Now you need to sew the sides together. One at a time, pin and sew the side pieces that meet together, right sides together.
Again, tuck those corner seam allowances out of the way and overlap your corner stitches slightly. Sew 1/2 of inch away from the edge, as before.
Press all your seam allowances!!!
Repeat with the other set of fabric and create a whole second bag.
Once that is completed, it is time to join them together.
Keep the inside layer, inside out. Press the top edge over 1/2 inch all the way around.
For the outside layer (which is right-side out), press the top edge to the inside 1/2 inch, all the way around.
Insert the inside layer into the outside layer, wrong sides together. Pin evenly along the top, all the way around.
At each side seam of the bag (or corners of the bag) fold a tab in half so it is looped and insert the ends inside the 2 layers, about 3/4 of an inch to the inside.
Pin in place.
Do this for all 4 tabs, at all 4 corners of the bag.
Take your free arm off your machine, and topstitch these layers together, 1/8 of an inch away from the edge.
For a special touch and added strength, do a double topstitch along the top of the bag.
And you are finally done!!
Open up your wood frame up just a bit (the longer ends of the frame are the legs, the shorter ends are up at the top) and place each loop of the bag around each of the 4 wood ends. Adjust the wood frame until the bag is open, nice and wide.
And that’s it!!!
I’ve said it before, but I am pretty certain this time . . .
. . . . that was the longest tutorial ever.
I would LOVE to hear if you make one!!! That is my greatest reward ;)
-Cami
Interested in more fun home decor projects? There is definitely no shortage of them to be found at Make It & Love It! Try a few of these on for size: