Let’s brighten up your jewelery box………oooh, and add some texture to it too.
I made this bracelet using some of those big wooden beads you can find in the “make your own jewelry” section of the craft store. I bought mine about a year ago at Michael’s but I know I’ve seen them other places more recently. And really, you could choose any shape.
All you need to do is begin by attaching one end of a jewelry clasp to one end of some wire/thread/line (whatever you use to bead your jewelry). Add your beads until the desired length.
Lay your beads down along some fabric and cut the fabric about twice as long as your threaded beads and wide enough to wrap around the beads 1 and a half times.
Then, take all but one bead off and wrap one end of the fabric around the bead. Twist and pull the end really tight so that it is snug around the end of the bead. Then, thread a needle (with a long piece of thread), knot the end, thread it through the end of the fabric and then start winding the thread around the end of fabric and right against the bead, really tightly. Make sure not to tangle the wire and the clasp……you should be able to still pull the wire and adjust it as you go. Make a knot to keep all of the winded thread in place. Go here for a great knotting technique.
Then, twist the fabric around the bottom of the bead and pull really tight. And I mean tight. This will help keep the shape of the beads.
Now, you want to wrap the thread around the bottom of the bead but you want to hide the thread in between each section. So shove the needle under the fabric as far as it will go, pull it up and go back down in that same hole and repeat until you have reached the bottom of the bead.
Wrap the thread around the bottom of the bead, really tightly. (And you can trim the end of the fabric now or after you finish. Just make sure not to cut the wire.) Make a knot to keep all of this wrapped thread in place. Go here to use a great knotting technique.
Then thread another bead onto your wire and wrap the fabric around it.
Twist the fabric around really tightly and hold it tightly while you hide the thread under the fabric, until you reach the end of this bead. Wrap the thread around the bottom of the bead again, really tightly. (if you run out of thread, knot it and then begin with a new piece.)
Repeat until you reach the end. Trim off the excess fabric making sure not to cut the wire.
Attach the other end of the clasp.
Then apply some “Fray Check” that will help the ends from fraying even more. It’s alright if it does a little bit because it has kind of a shabby look to it anyway.
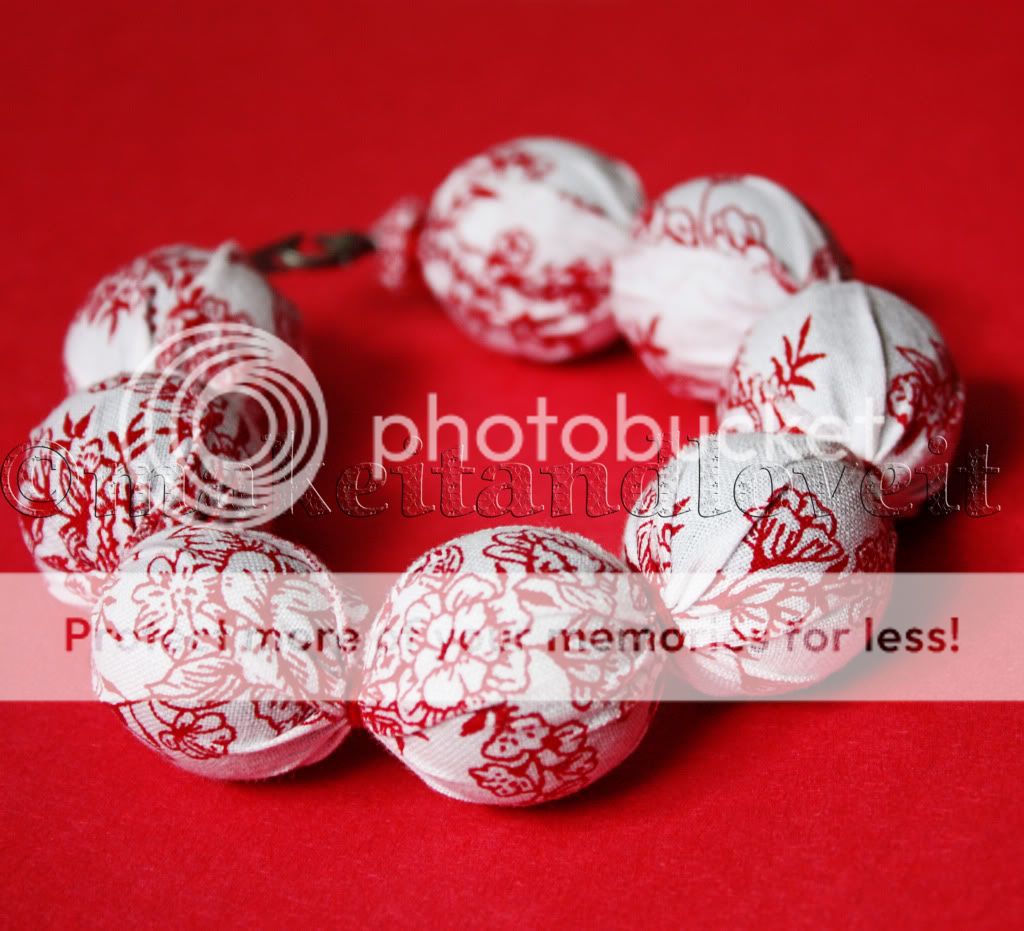
Now you’re ready to add some dazzle to any outfit.
Darling.

Hi, I’m Ashley—the DIY-enthusiast behind this crazy blog!