Home » DIY Tutorials » DIY Sewing » Make-a-Cake Series: ‘My Little Pony’ Cake and Rainbow Cookies
Make-a-Cake Series: ‘My Little Pony’ Cake and Rainbow Cookies
December 9, 2010 - By Ashley Johnston 42 Comments
Hi, it’s Brittany……and I have something fun to share.
I can’t even believe that my sweet little baby turned 2 on Saturday.
I know I am a bit biased, but she is the cutest angel on the planet.
She loves horses so I decided on a ‘My Little Pony’ theme for her birthday.
I will admit, I loved My little Ponies when I was young. I really wanted an excuse to buy her first ponies!
With this theme, it was all about bright colors, rainbows, glitter, and of course……the original My Little Pony Movie.
So for my sweet 2 year old, a My Little Pony cake and cookies:
With a delicious rainbow center…
We were having a small party so I didn’t need a big cake. I made a 10 inch My Little Pony cake and Rainbow Cookies. For this post, I am going to take you through the steps I took and in the order that I took them.
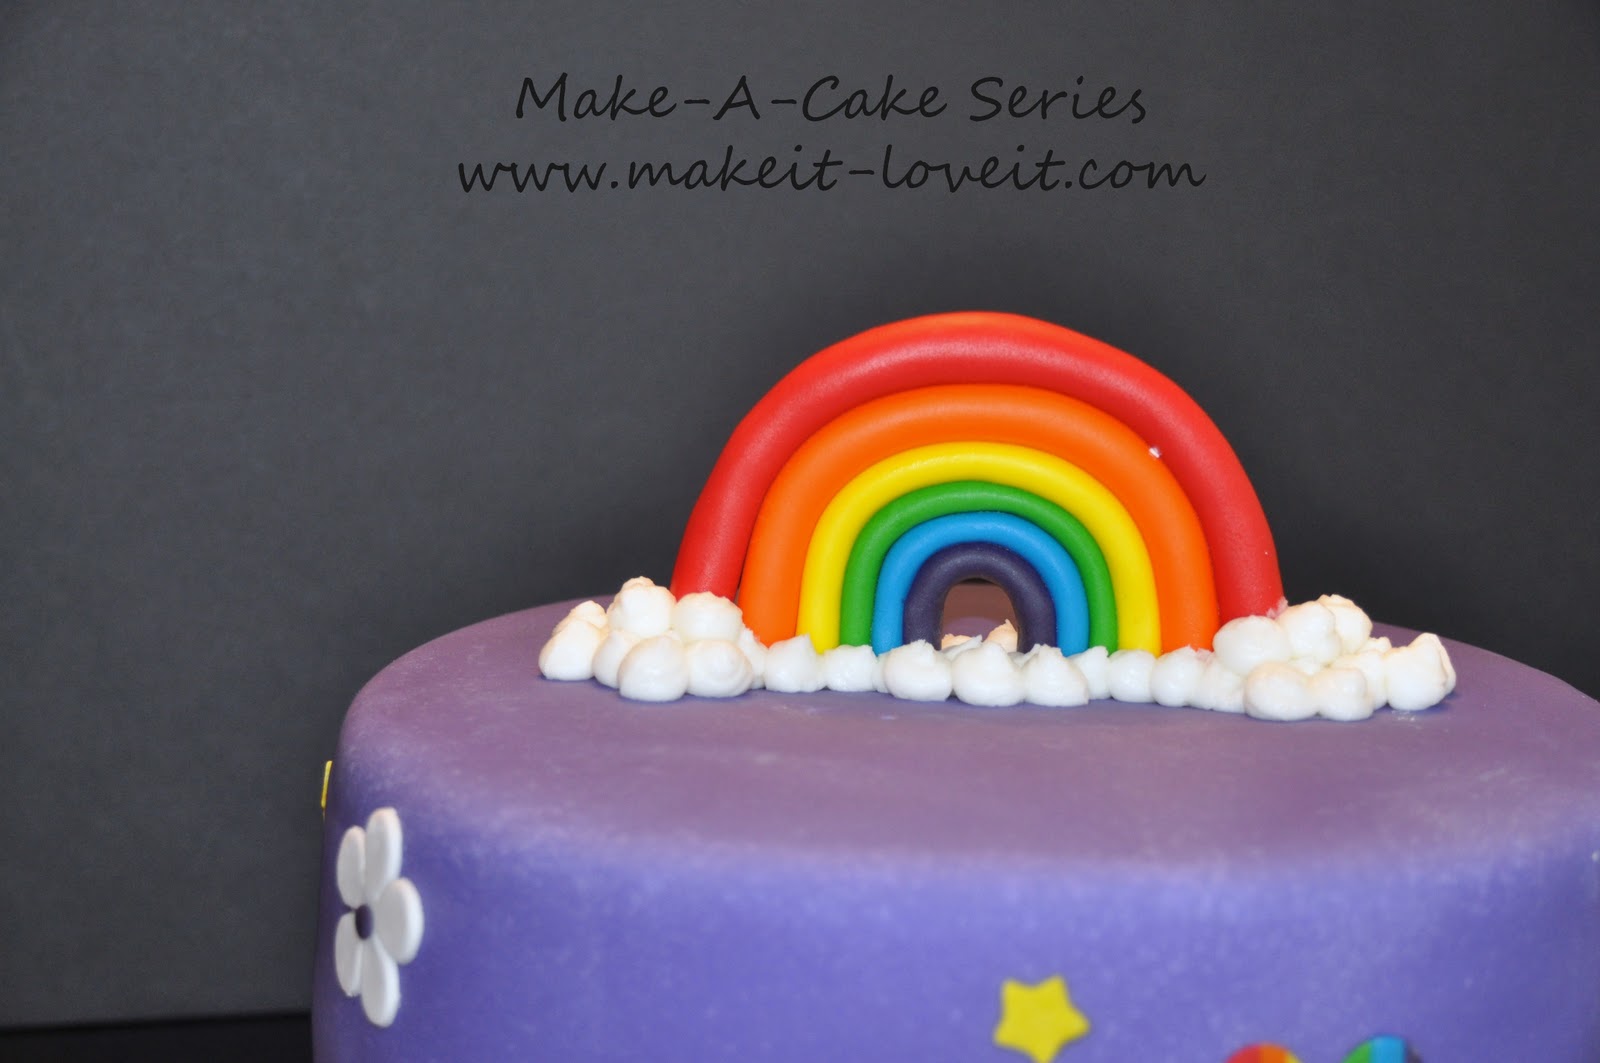
Gumpaste Rainbow
A few days before I made the cake, I made the rainbow so it would have time to dry.
Using gumpaste dyed in the colors of the rainbow, I rolled out a rope starting with red and placed it on a corn-starched cookie sheet in the size and shape of rainbow that I wanted.
I repeated this in all the colors.
After I placed all the colors together I painted a little bit of water between the roped with a clean paintbrush to help the different ropes stick together.
Then I inserted some toothpicks into the bottom on the rainbow. Break the toothpicks in half before you insert them. When the gumpaste dries it will hold the toothpicks and then you can insert the toothpicks into the top of the cake, holding it upright.
**Let the rainbow dry for 48-72 hours.
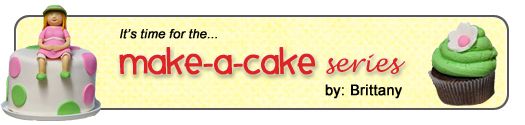
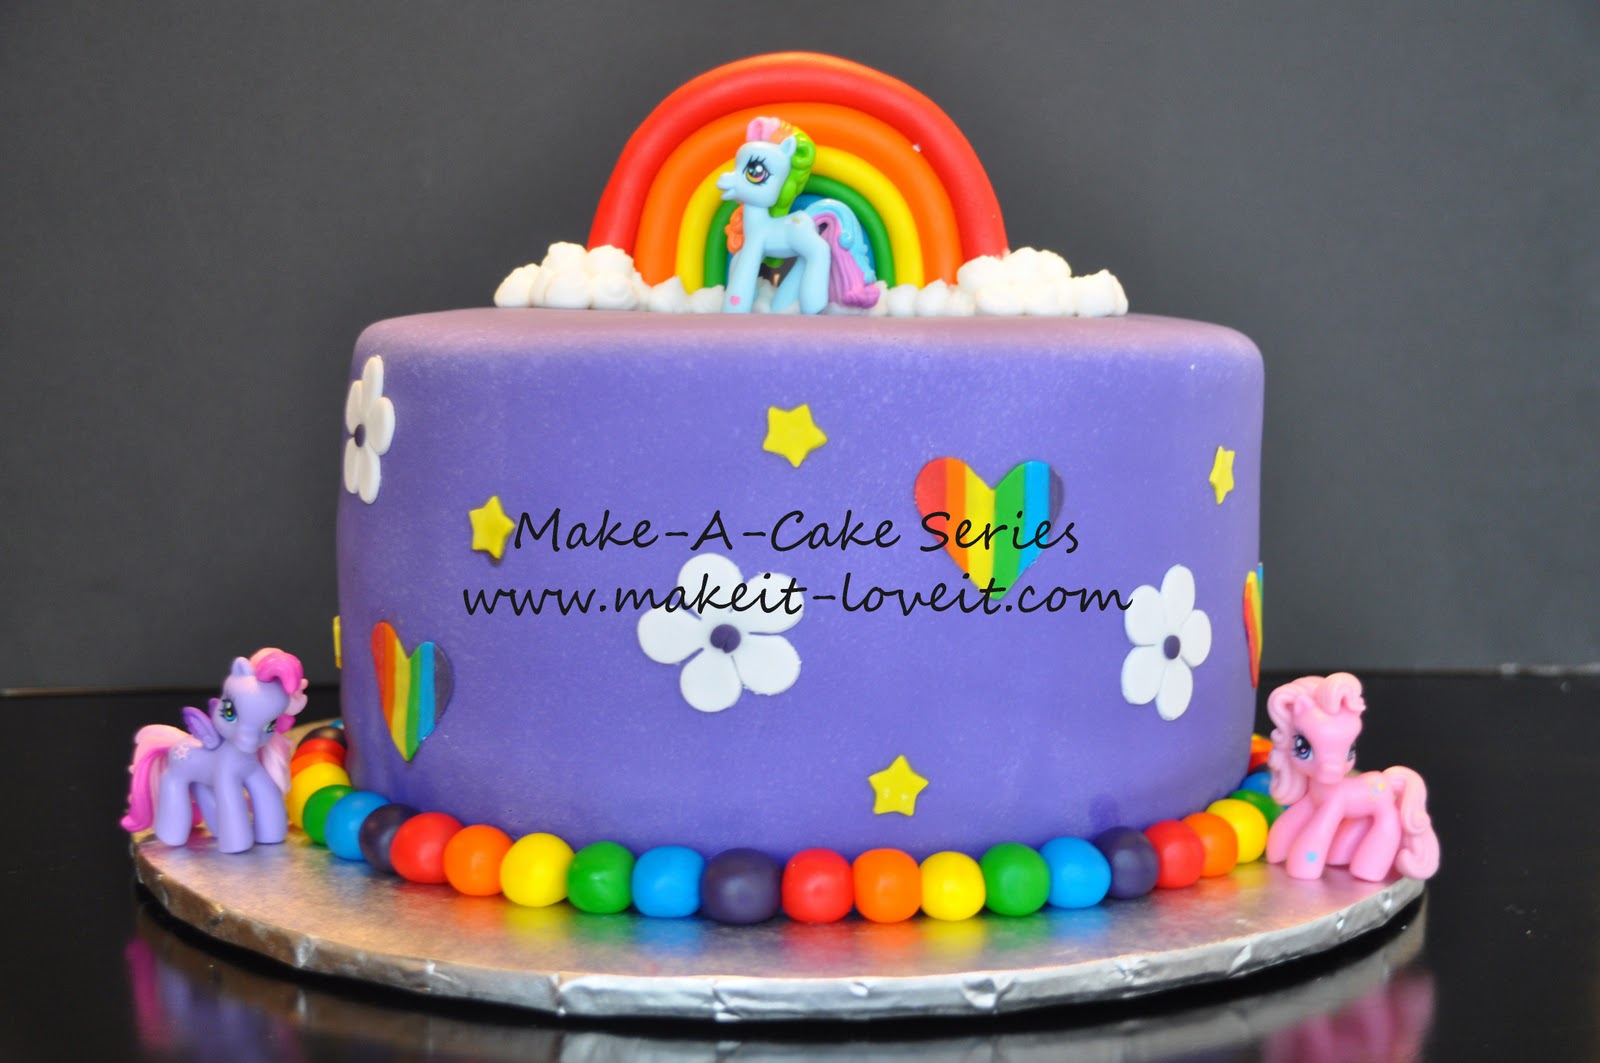
‘My Little Pony’ Cake
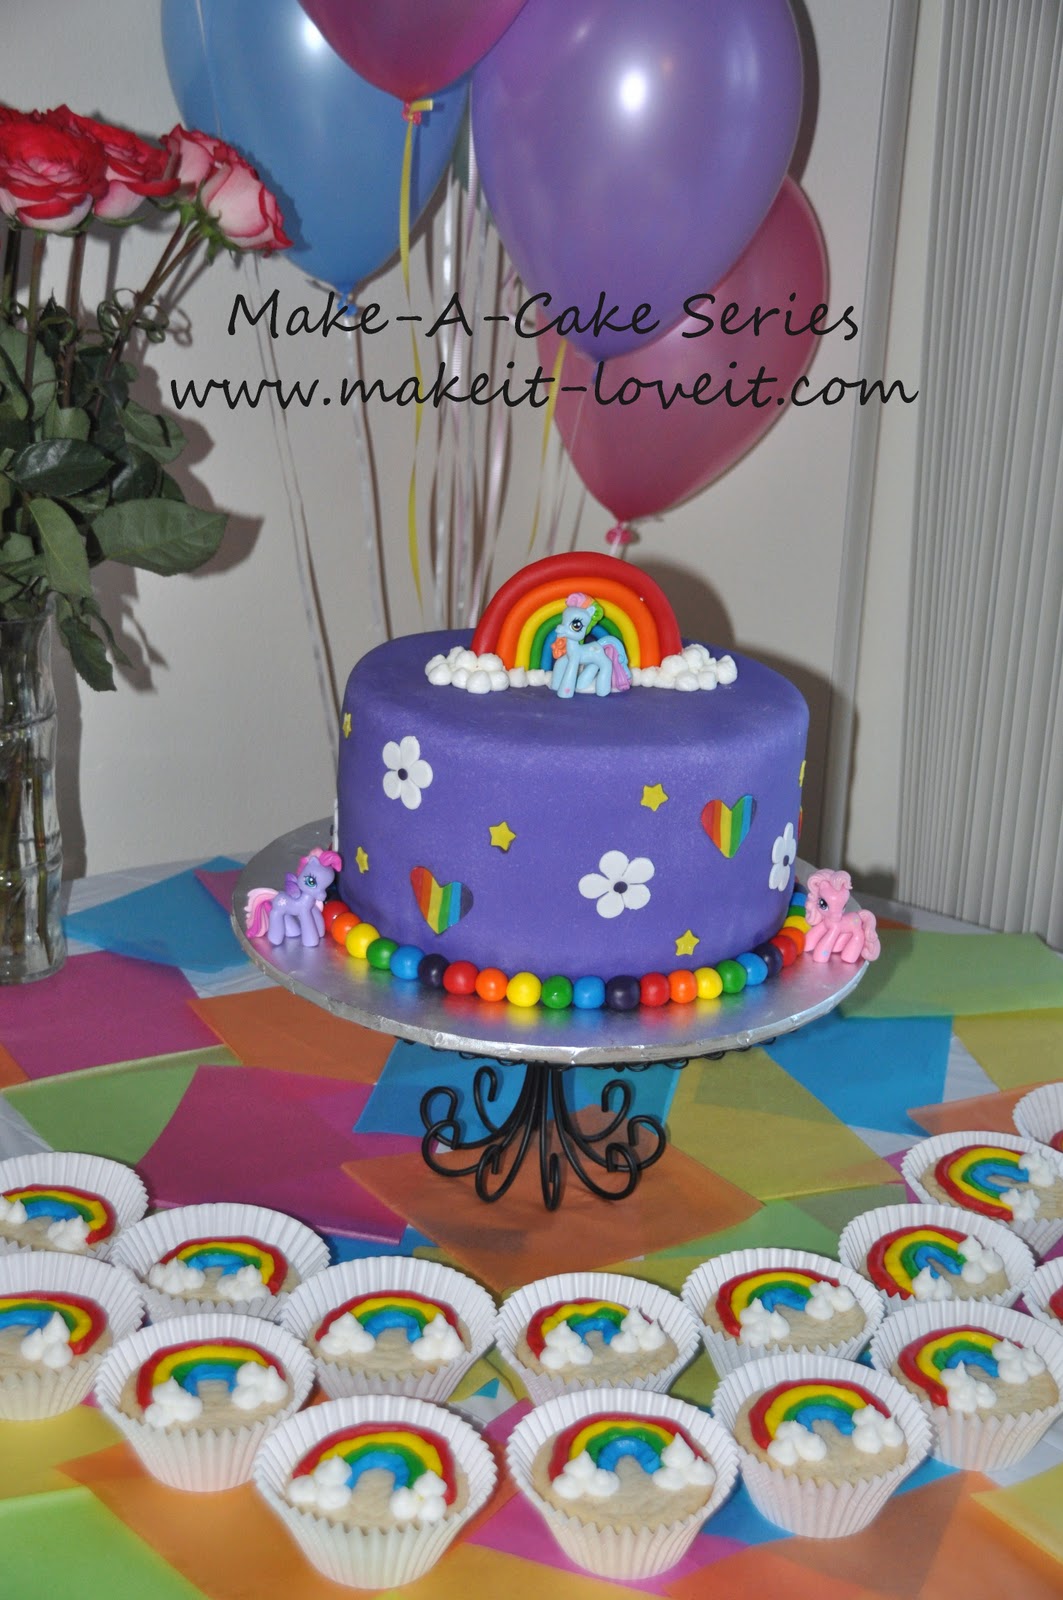
I wanted to carry the rainbow theme into the inside of the cake. It was a surprise I knew the birthday girl would love.
Using two white cake mixes and two 10inch pans, I dyed 2 cups of cake mix the 6 colors of the rainbow.
I used these baking, stacking and icing tips to get this cake started.
I iced the outside and covered the cake with purple fondant.
(Fondant tutorial
here.)
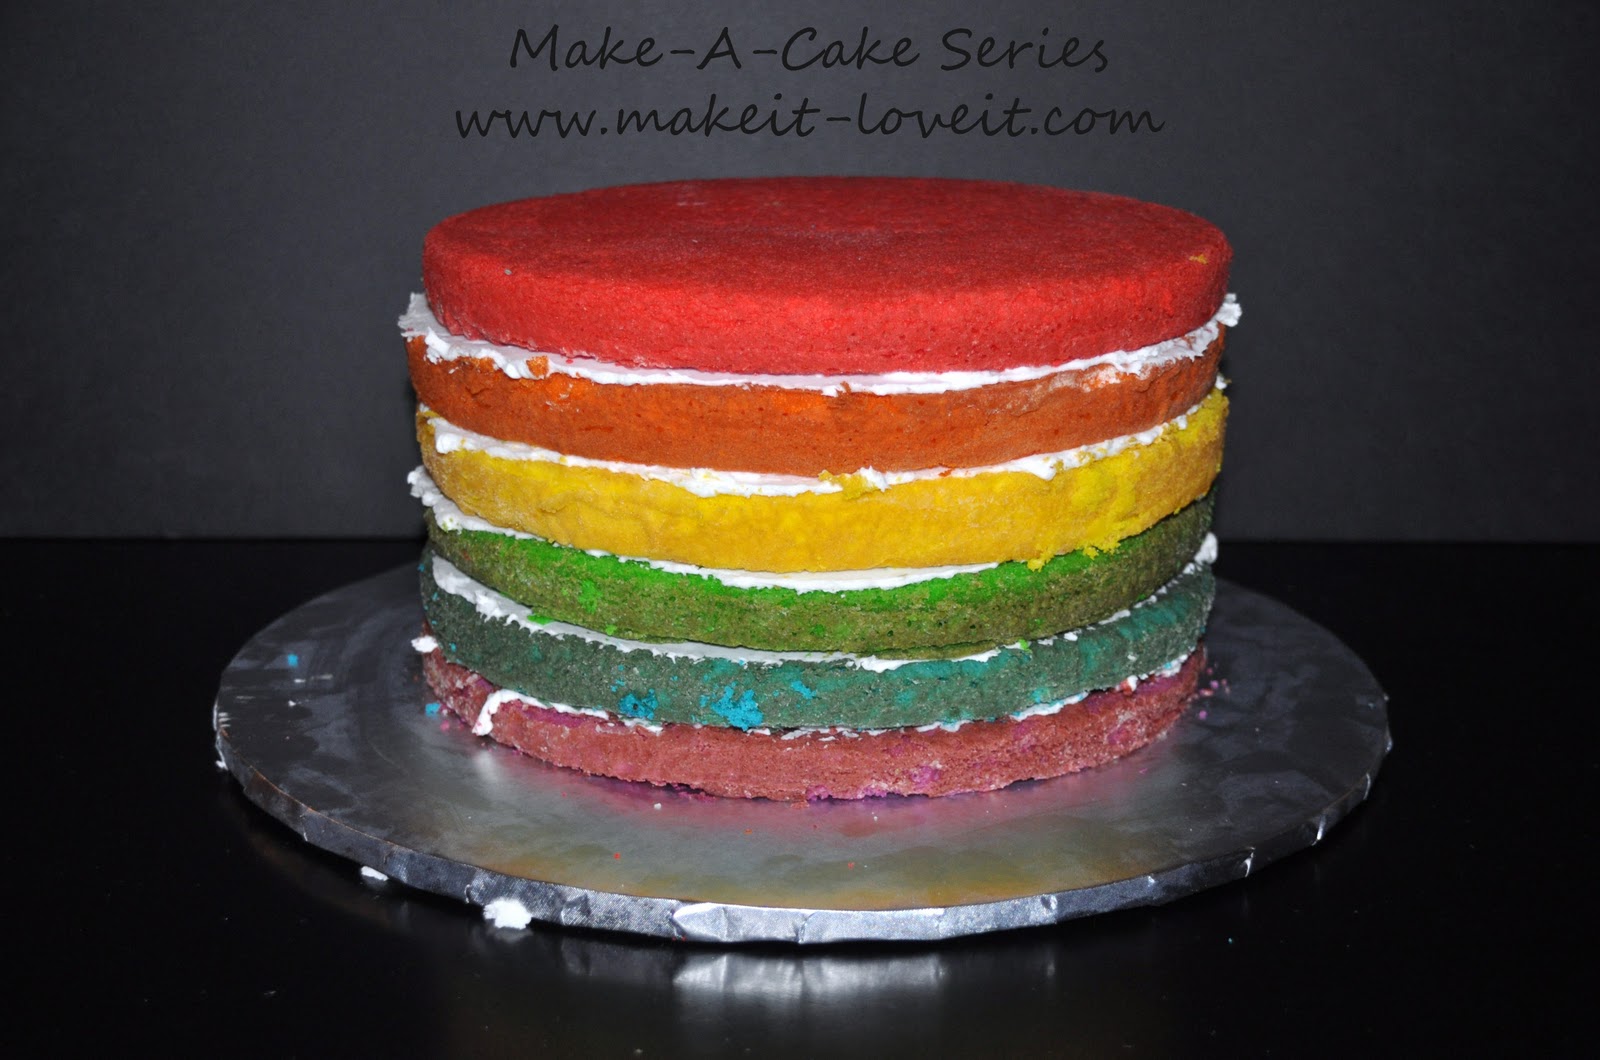
To decorate the outside of the cake, I rolled out white fondant pretty thin and cut out white flowers and added purple centers.
Then I added yellow stars cut out of thinly rolled fondant.
Also, rainbow hearts — see below
**For all three of these shapes I used fondant cutters, just like cookie cutters but smaller.
For the rainbow hearts, I rolled small snakes in the colors of the rainbow. I stuck them together with a little bit of water. I put cornstarch on the top of the snakes and used a small rolling pin to roll it out. I mainly rolled the snake flat by making it longer not wider, so I could get all the colors in my heart.
Cut the hearts out with a small cutter and attach then with water to your cake.
For the border, I rolled balls of fondant in rainbow colors and placed them around the cake.
Are you starting to think there are too many rainbows? Never, right?
Next insert your gumpaste rainbow into the top of the cake. Right in the middle. Put some white buttercream into a piping bag, cut off the tip, and pipe “clouds”.
Add your pony in the middle of the cake securing it’s feet in a little buttercream.
I used the pixie pony three pack for the cake. I chose plastic because it saved time and they were really cute.
I added two more ponies on the side and the cake was ready to go…
The Rainbow Cookies.
These are super simple. I bought pre-made sugar cookies from the grocery store, to save on time. I dyed buttercream yellow, green, red, and blue and filled piping bags.
I snipped the end off of each bag and piped a rainbow on each cookie. Using the left over white buttercream from the cake, I piped clouds. To display the cookies I set them into Jumbo Cupcake Papers. I doubled up the papers so the paper would not go flat from the weight of the cookie.
Together the cake and cookies helped my table look bright and cheery.
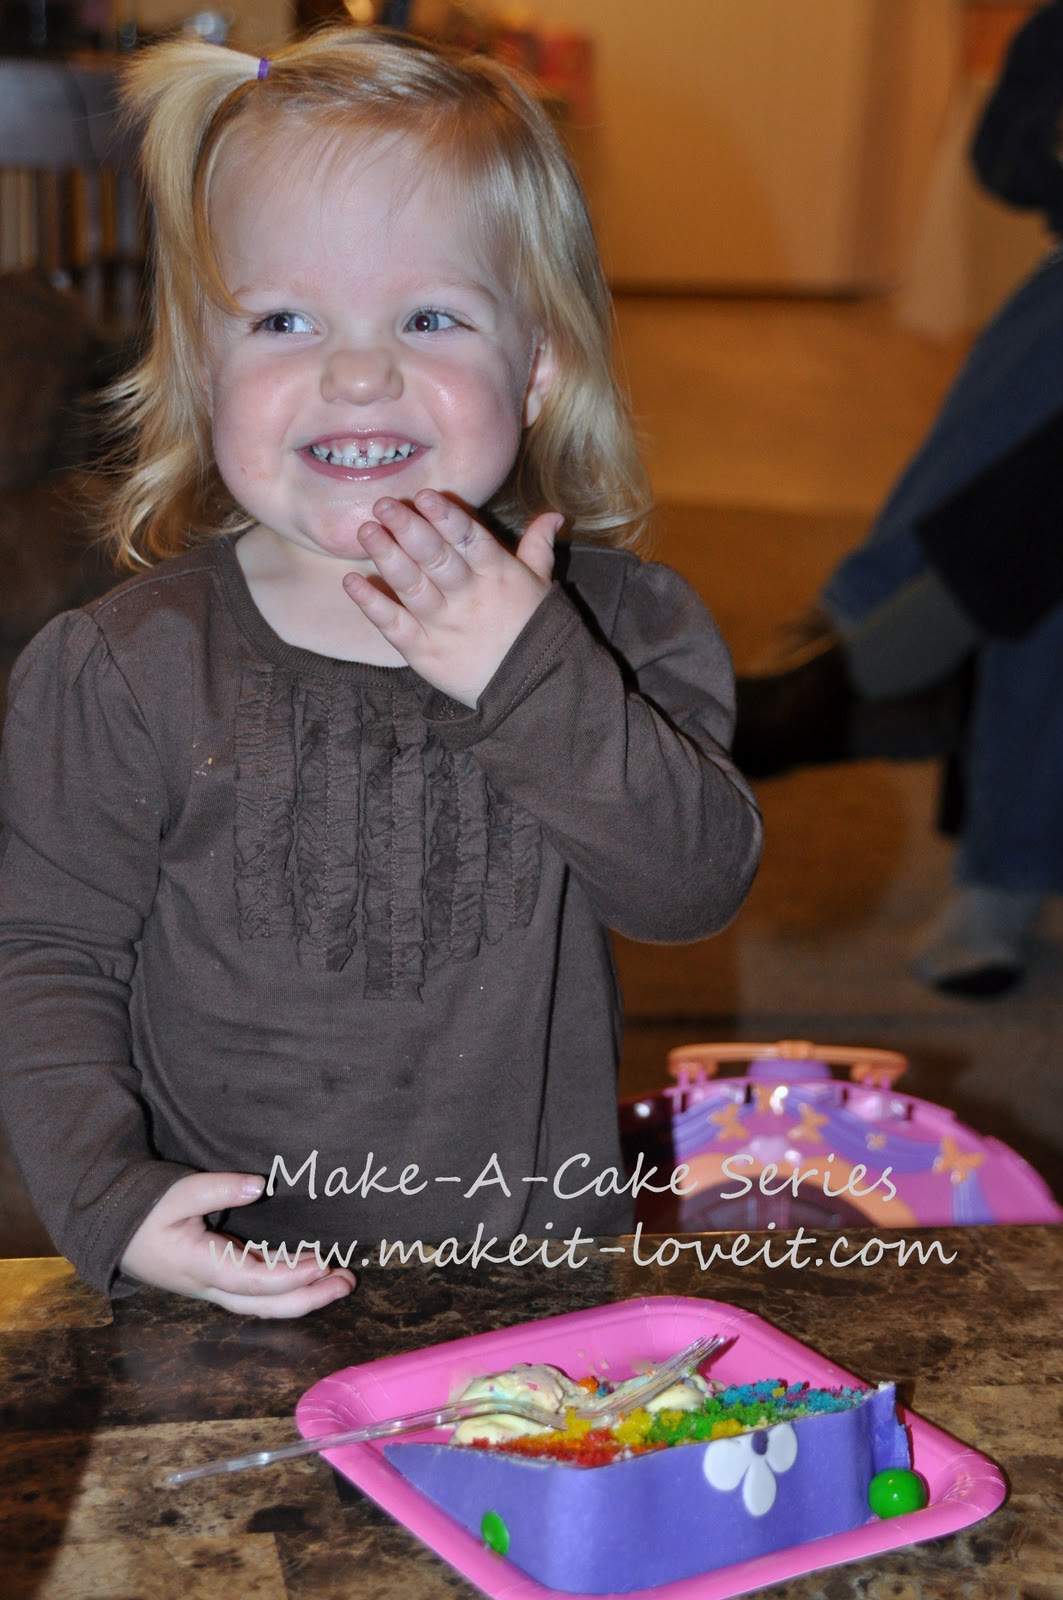
And cutting the cake?
That was the best part.
This little girl was sure surprised.
Happy Decorating!