Home » DIY Tutorials » DIY Holiday » Make-a-Cake Series: Flag Cake
Make-a-Cake Series: Flag Cake
June 16, 2010 - By Ashley Johnston 81 Comments
Have you noticed all the American flags showing up in the stores?
It has to mean the 4th of July is coming up and I could not be more excited.
It’s not for a few weeks but I can’t wait!
The 4th is my favorite holiday. I love the parades, the barbecues, the fireworks.
I appreciate the time to remember how lucky I am to live in America.
I could not let my favorite holiday go by without a special cake to take to our barbecue.
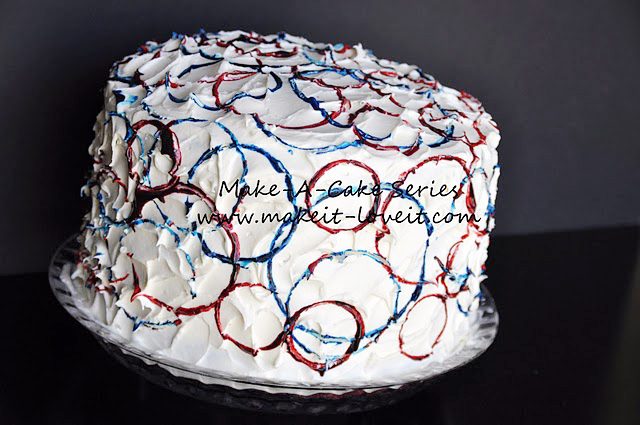
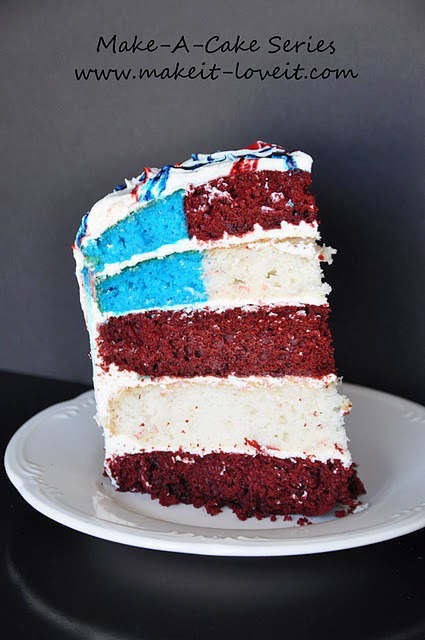
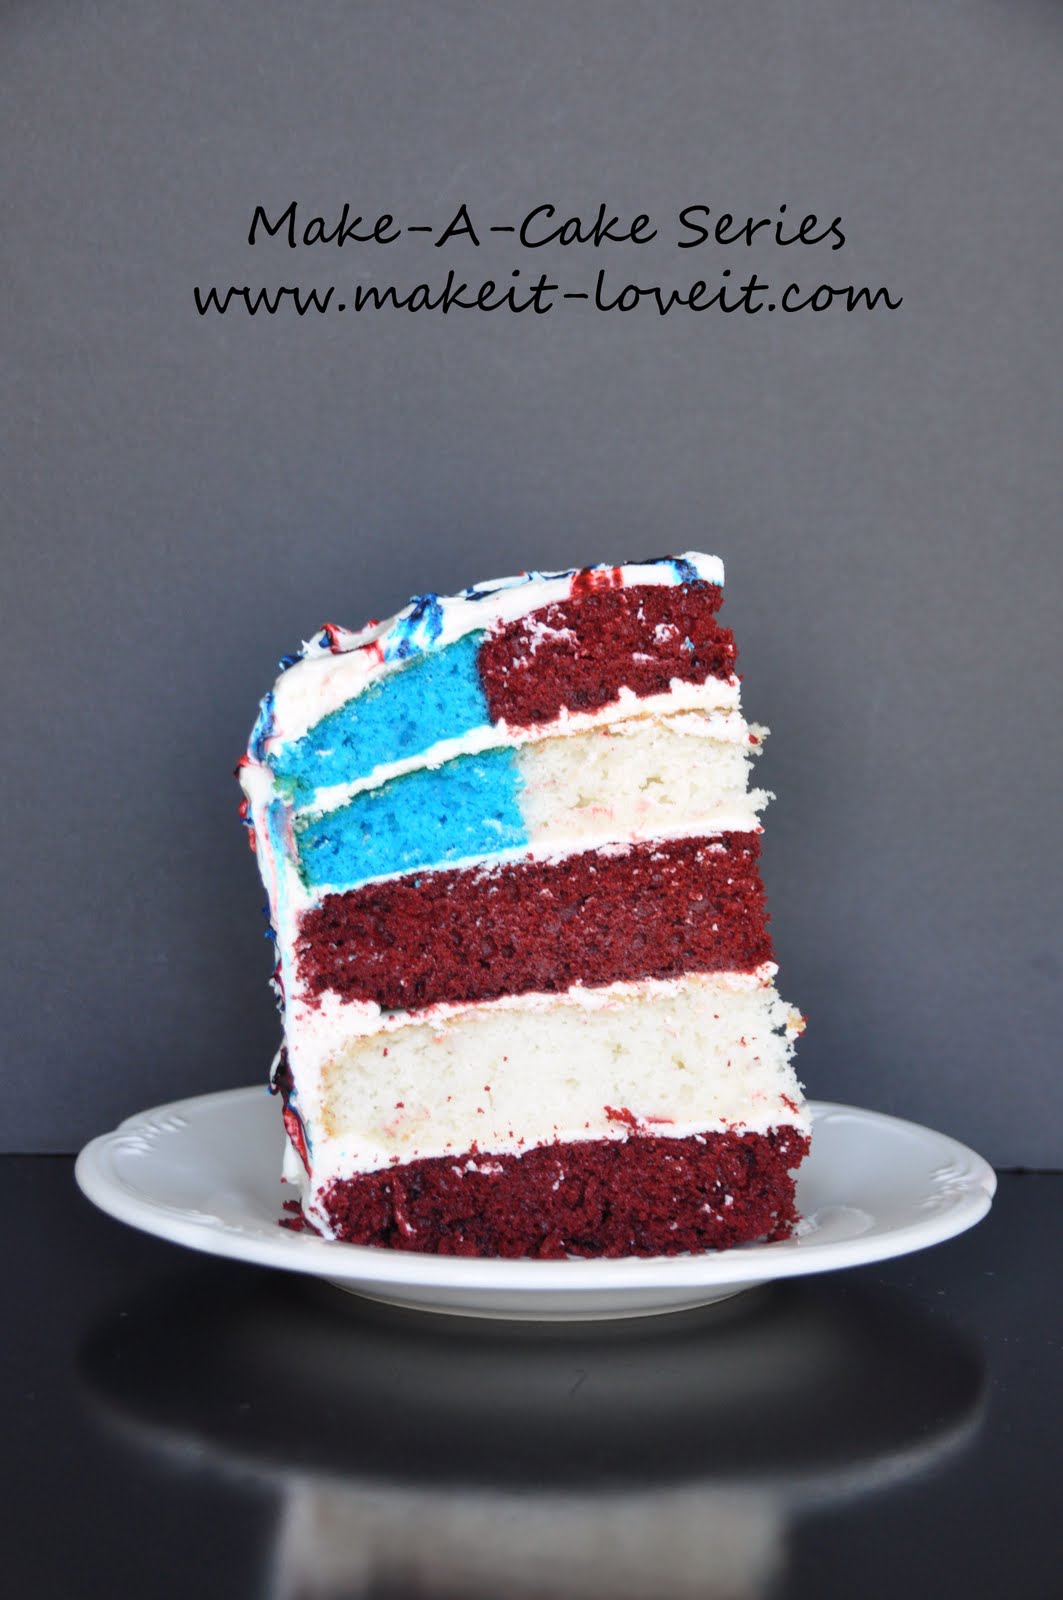
This cake not only looks delicious but it has a little surprise inside.
…….it’s an American flag!
Cute right?
Perfect for our celebrations.
Here is how you can have your own.
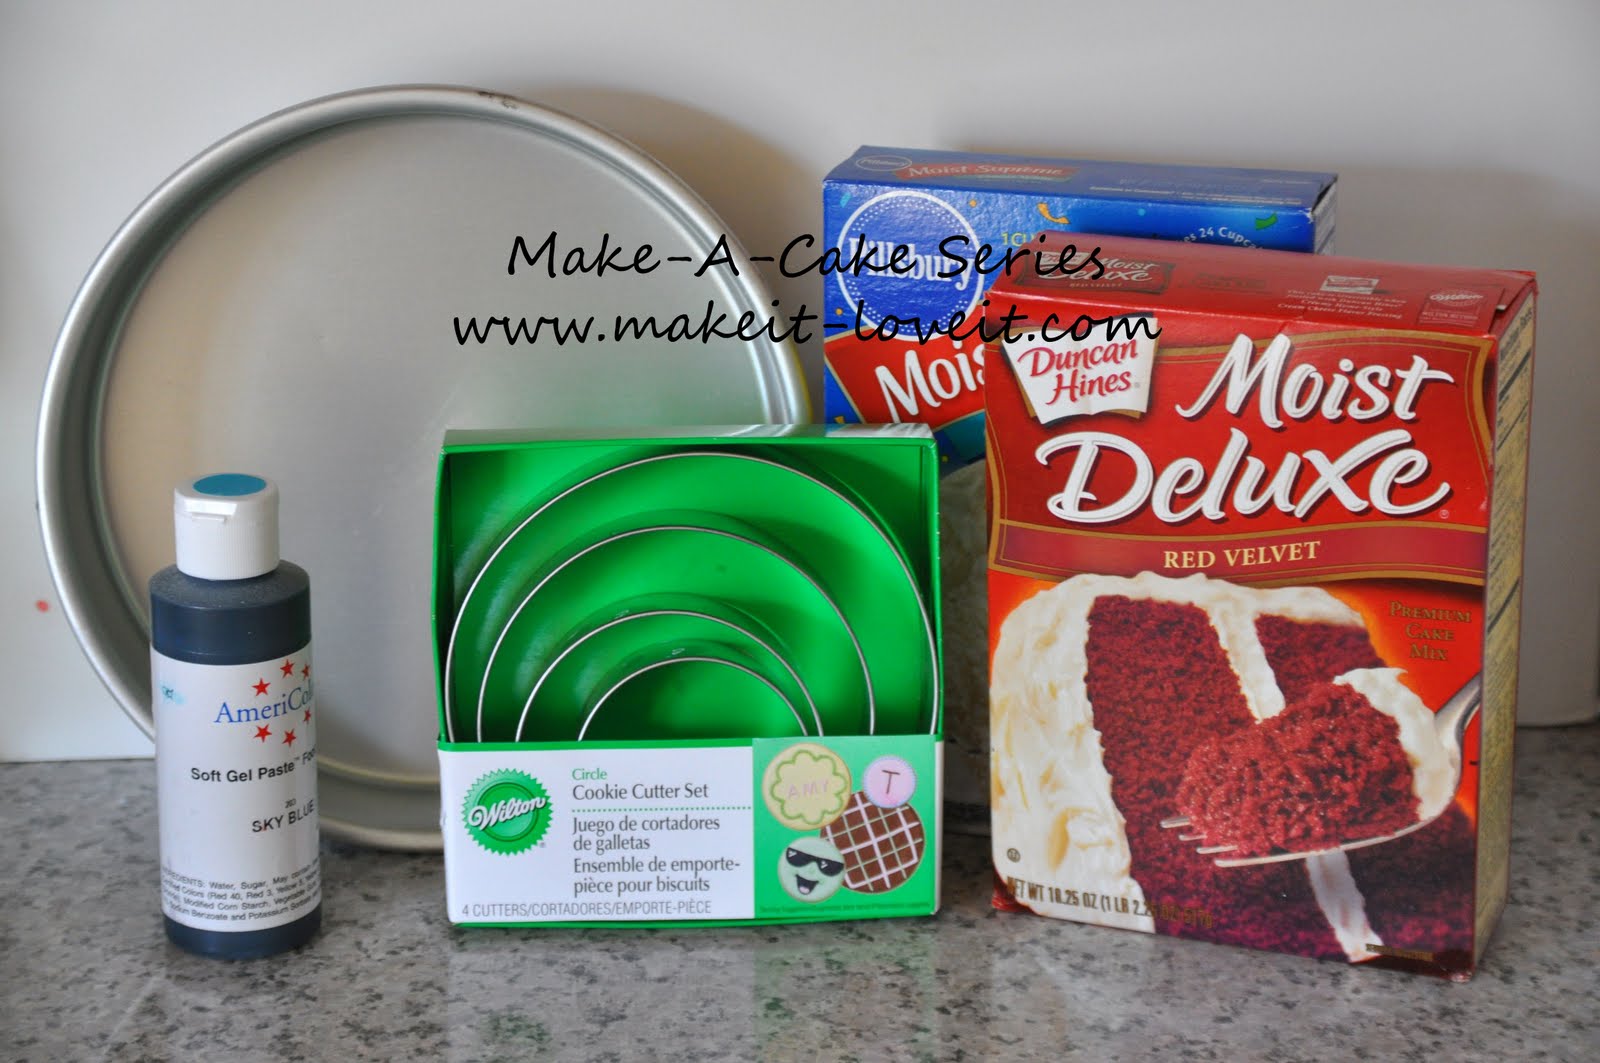
Supplies:
- Two 9 inch round pan
- Sky Blue gel color
- Wilton round cookie cutter set — purchased at Micheal’s
- White cake mix
- Red velvet cake mix
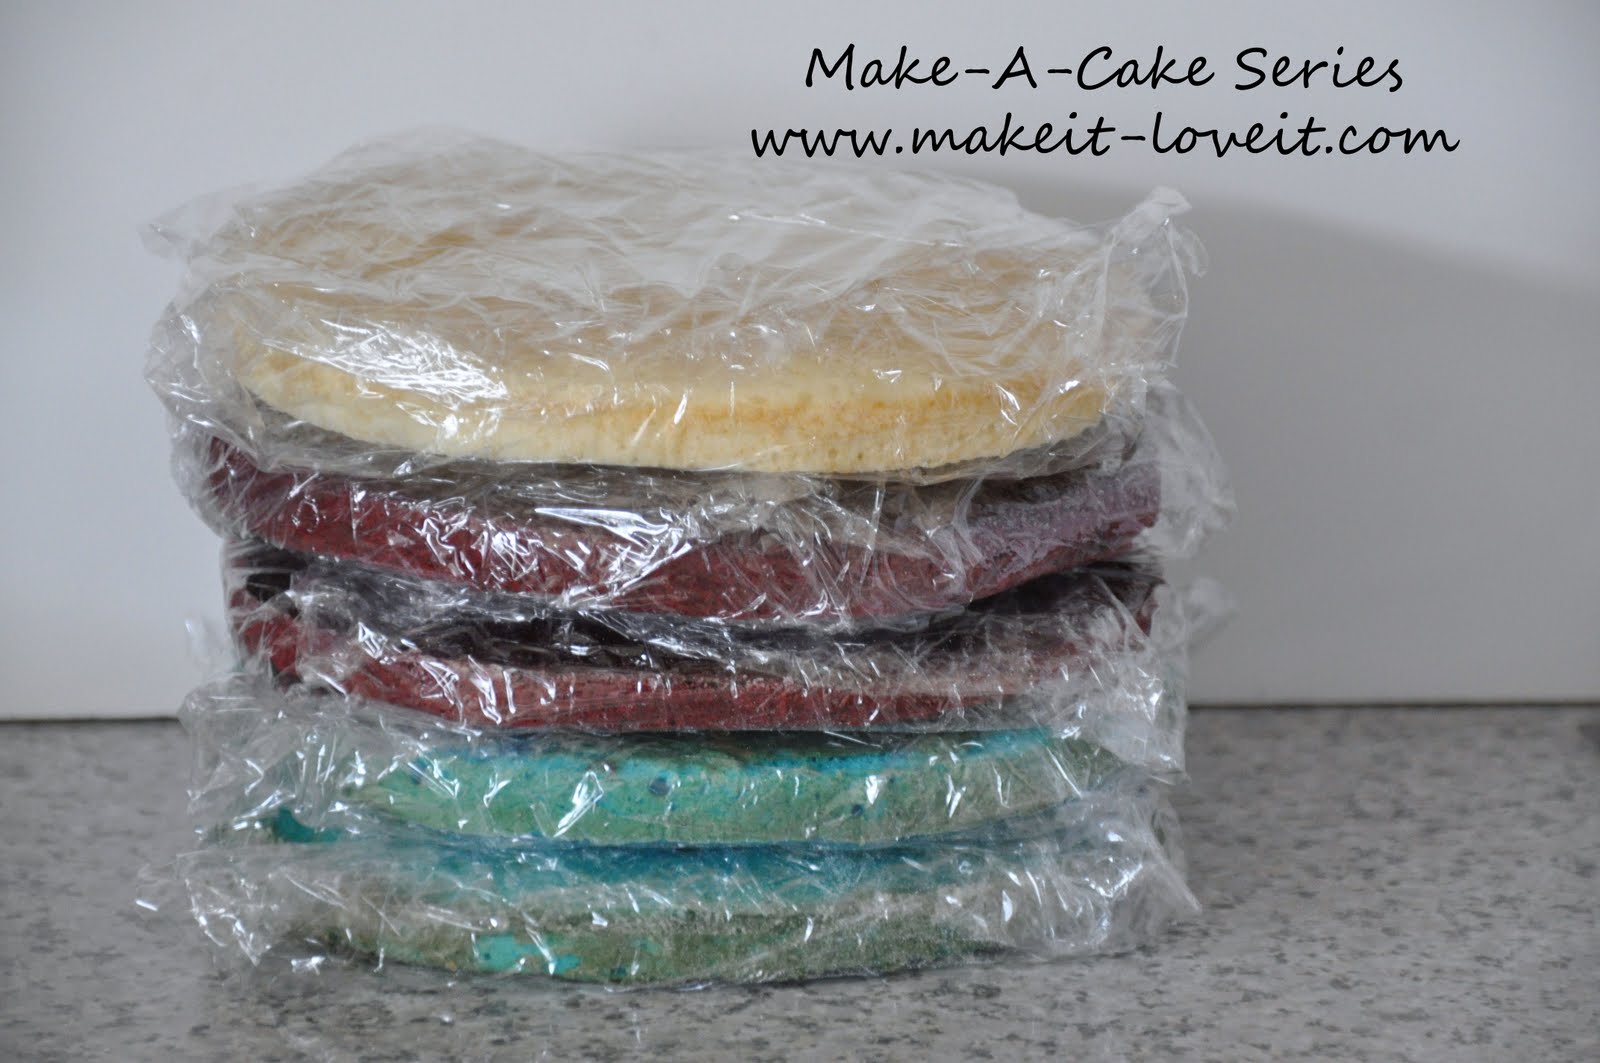
There are going to be 5 layers to this cake.
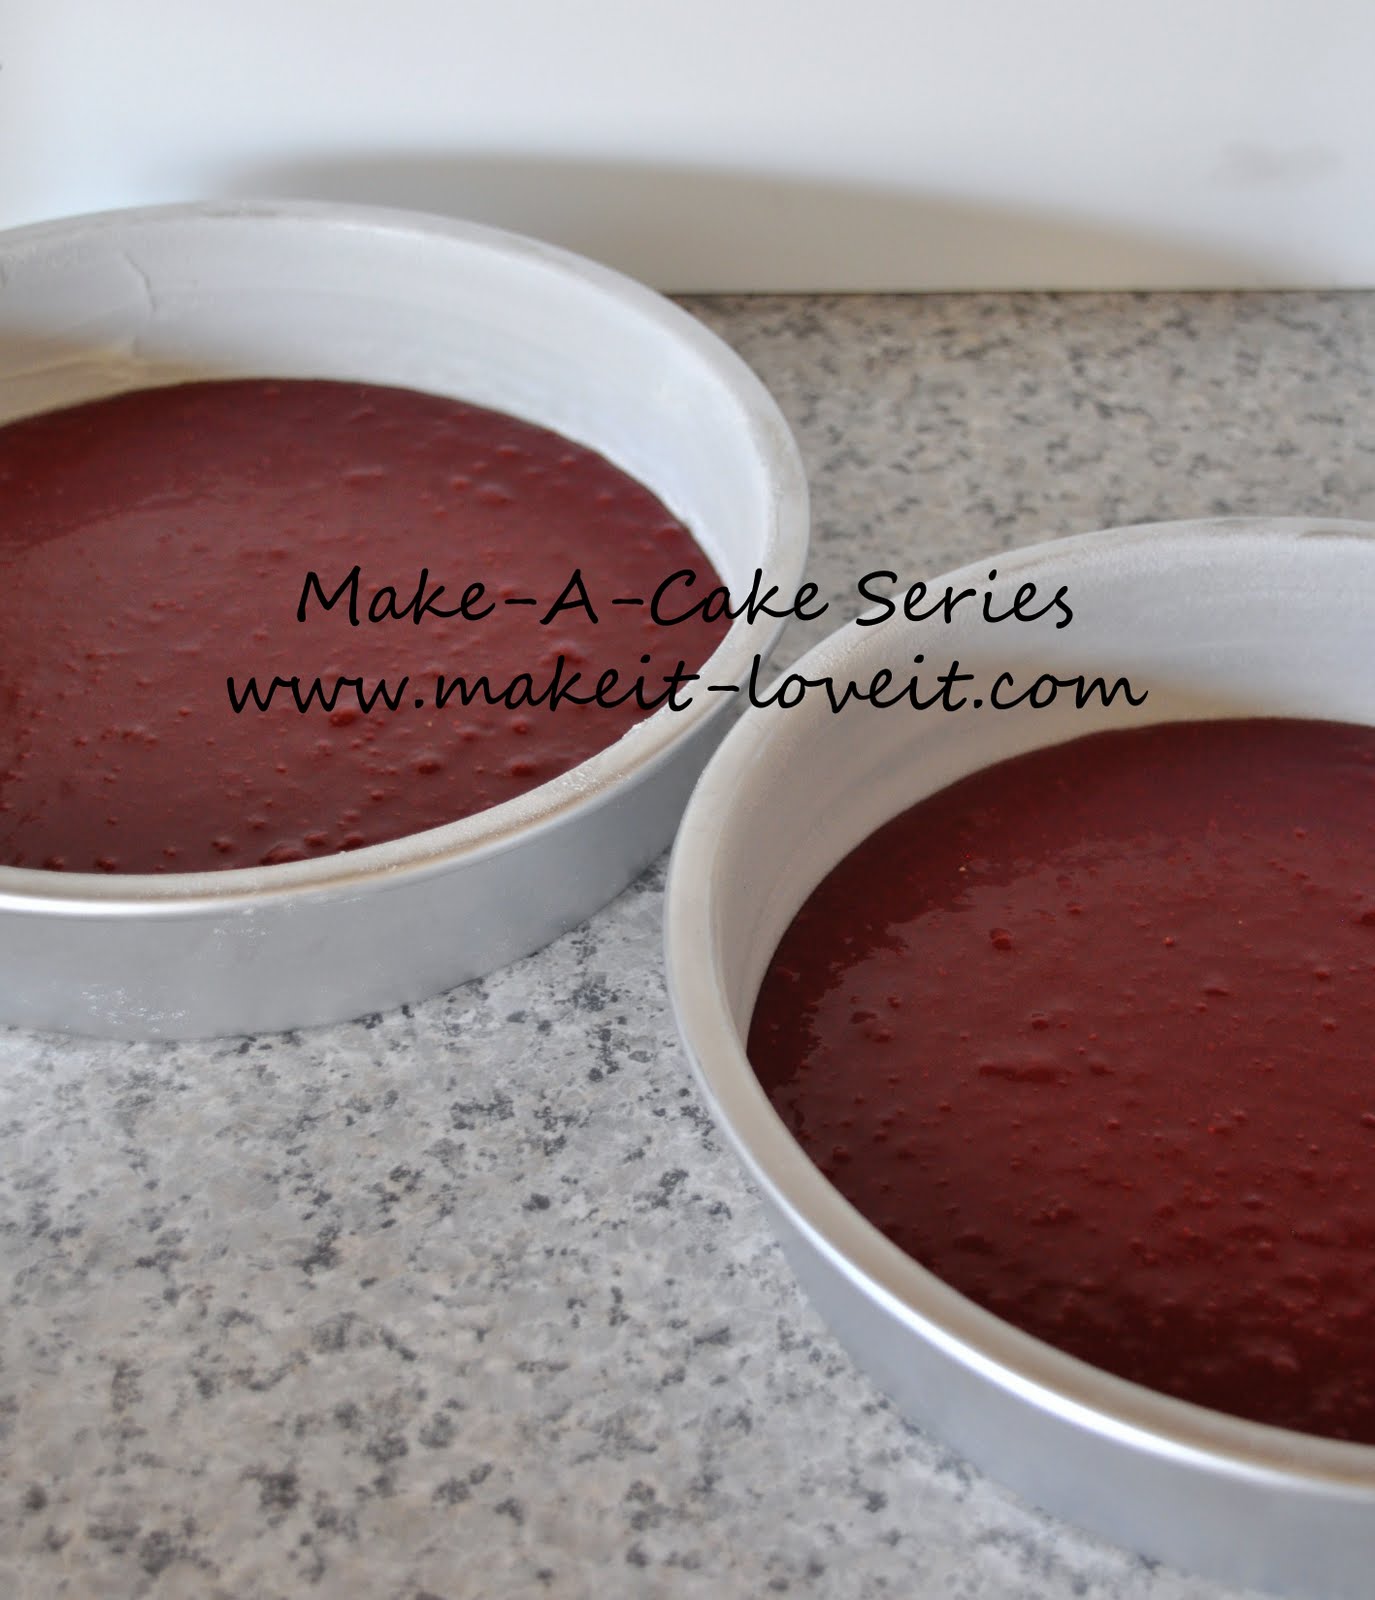
Mix your red velvet cake mix.
Put 2 cups of batter in each pan.
(And save the rest of the red batter for a later step.)
Bake for 13-15 minutes.
Cool for a few minutes, turn over onto a cooling rack, wash the pans.
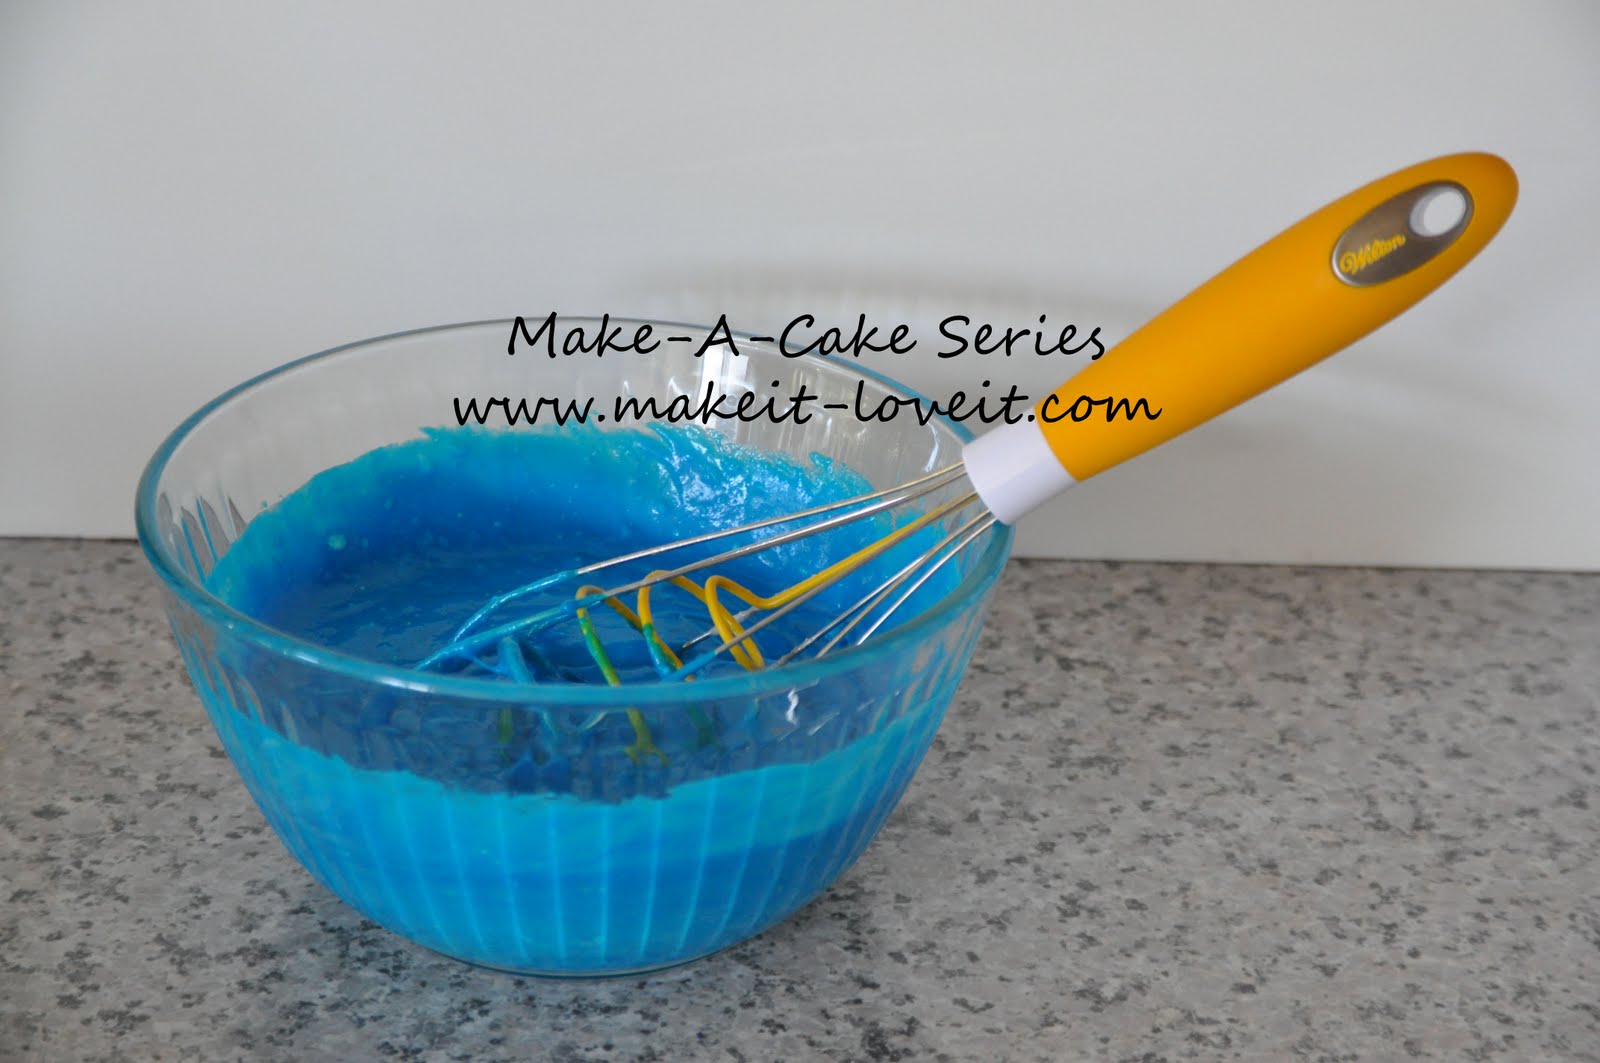
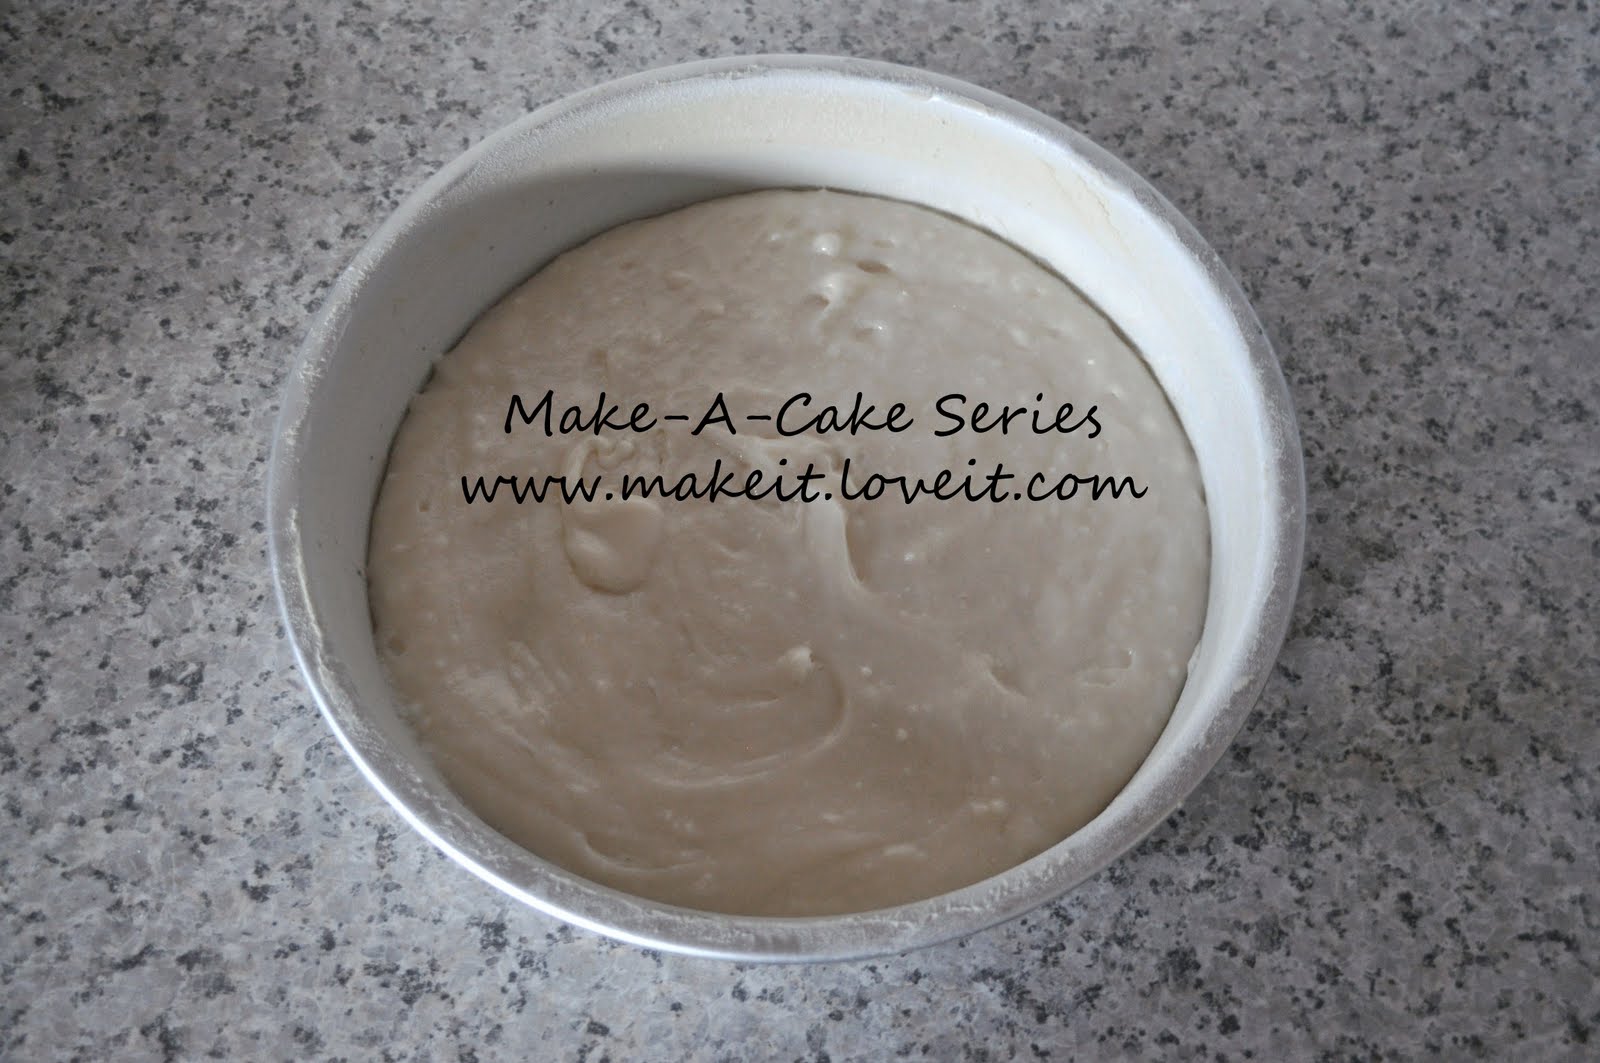
Mix your white cake mix using 4 egg whites instead of 3 whole eggs.
This will keep your cake mix white and not tinted yellow.
Put 2 cups of your white cake mix in an another bowl and use the gel dye to turn it blue.
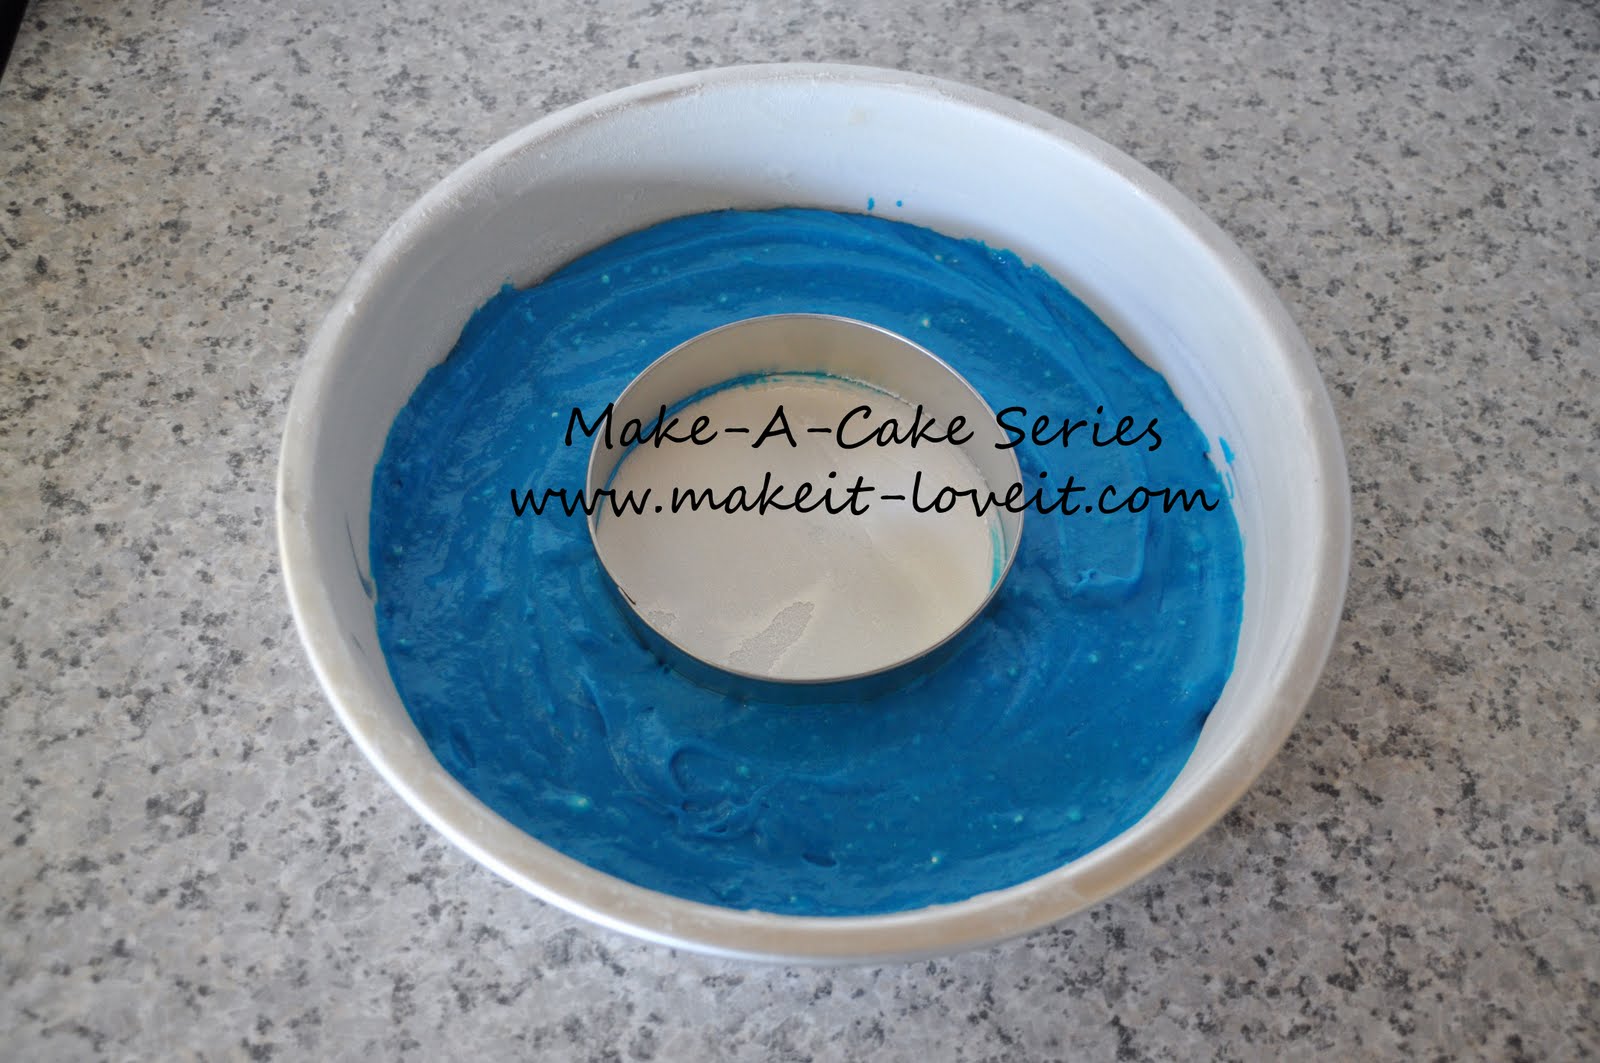
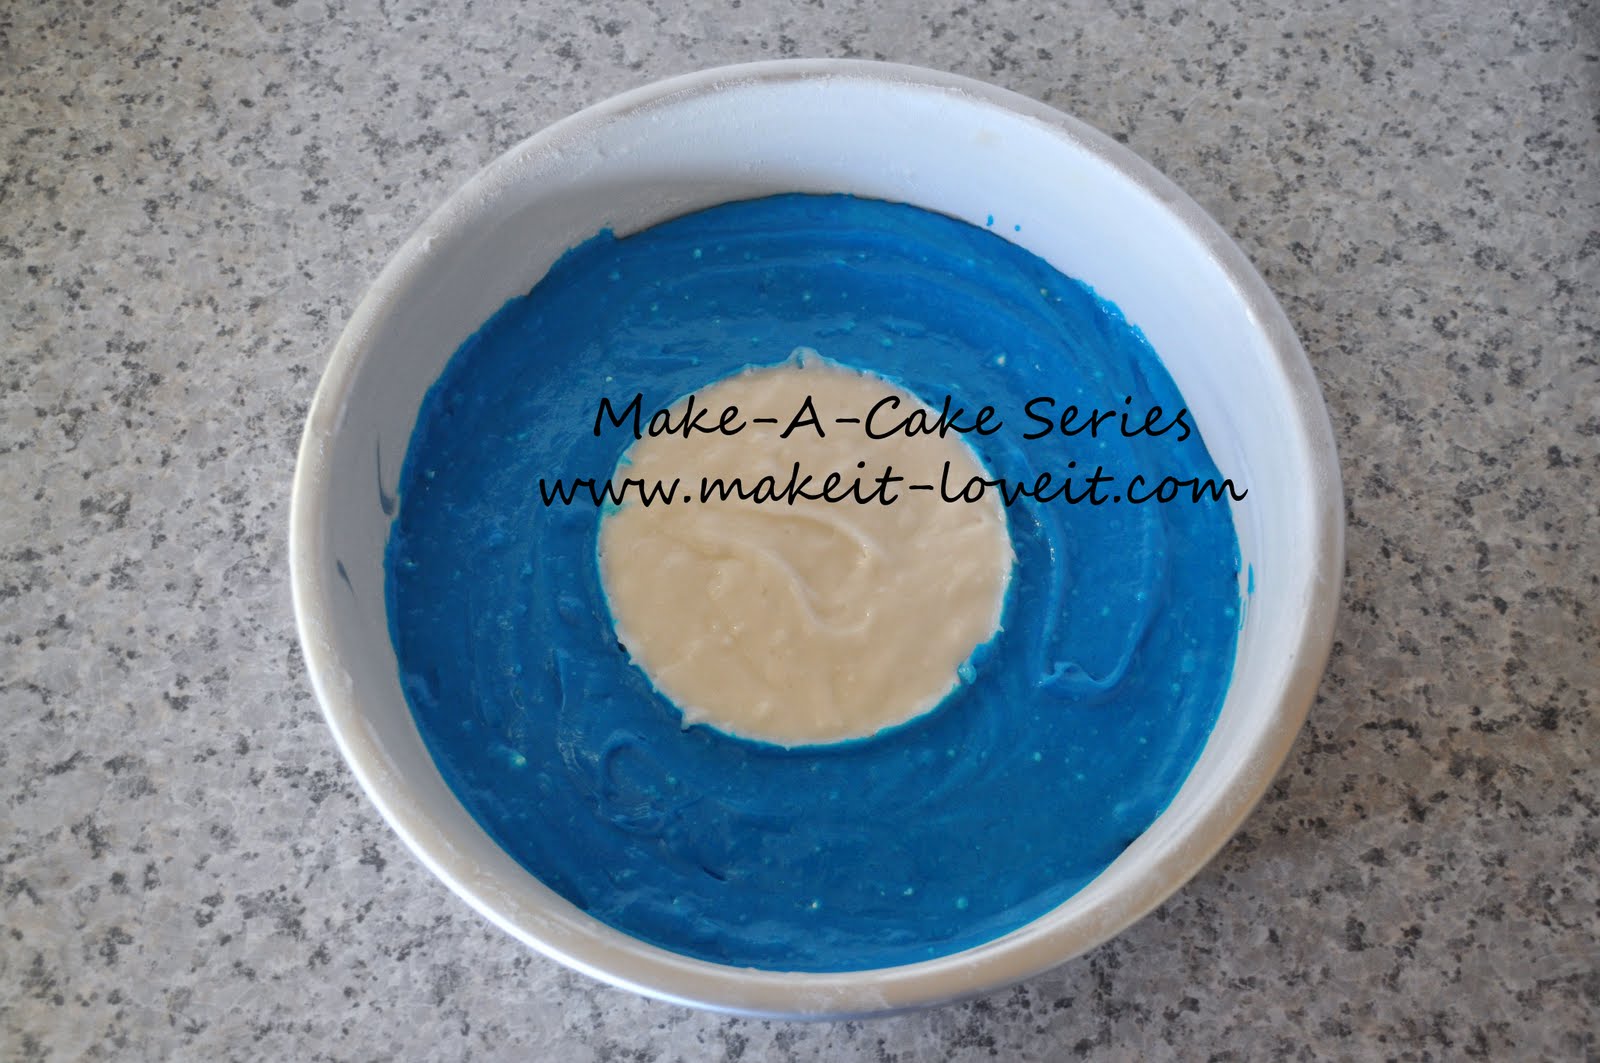
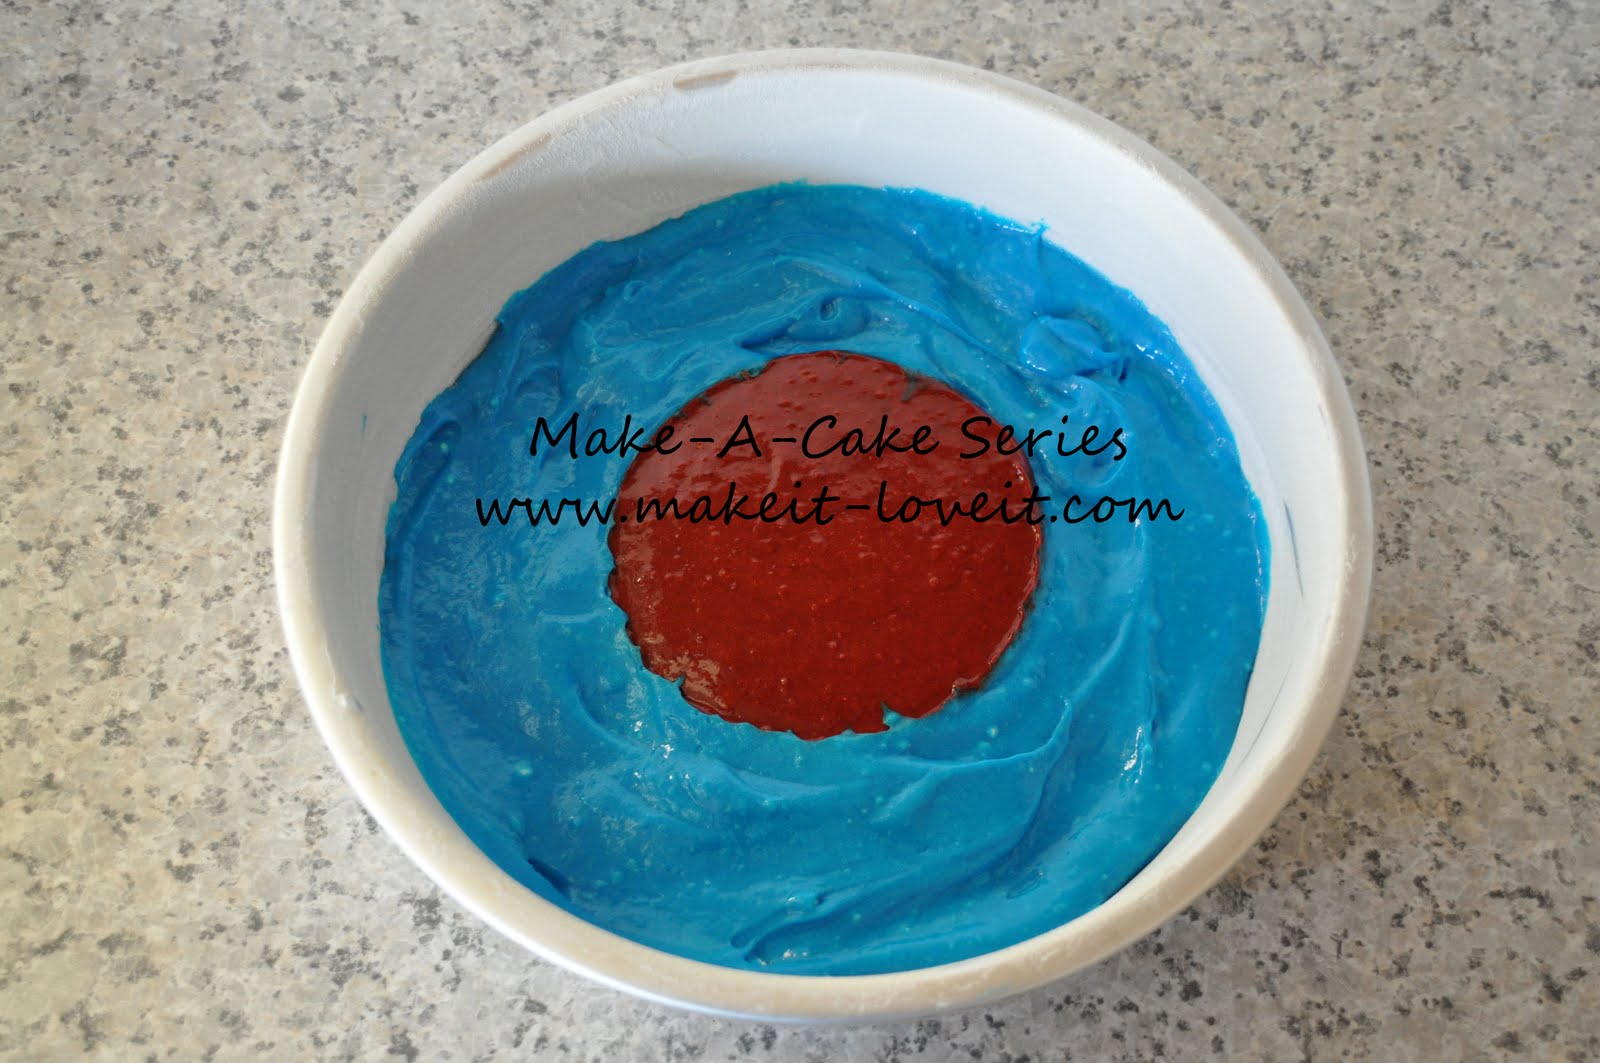
Take the second largest cookie cutter and place it in a pan.
My cookie cutter was 4.25 inches across. (One a little smaller will also work.)
Use what you have.
Spoon 1 cup of the blue into the outside of the pan. Using the back of a spoon to smooth it out.
Then fill the inner circle with 3/4 a cup of white.
Lift the cookie cutter straight up out of that batter.
Repeat this in the other pan……but with red (leftover from earlier) in the middle.
Bake both of these.
Put the rest of your white batter (about 2 cups) into a pan and bake.
After they cool, wrap them all in saran wrap and freeze for 24 hours.
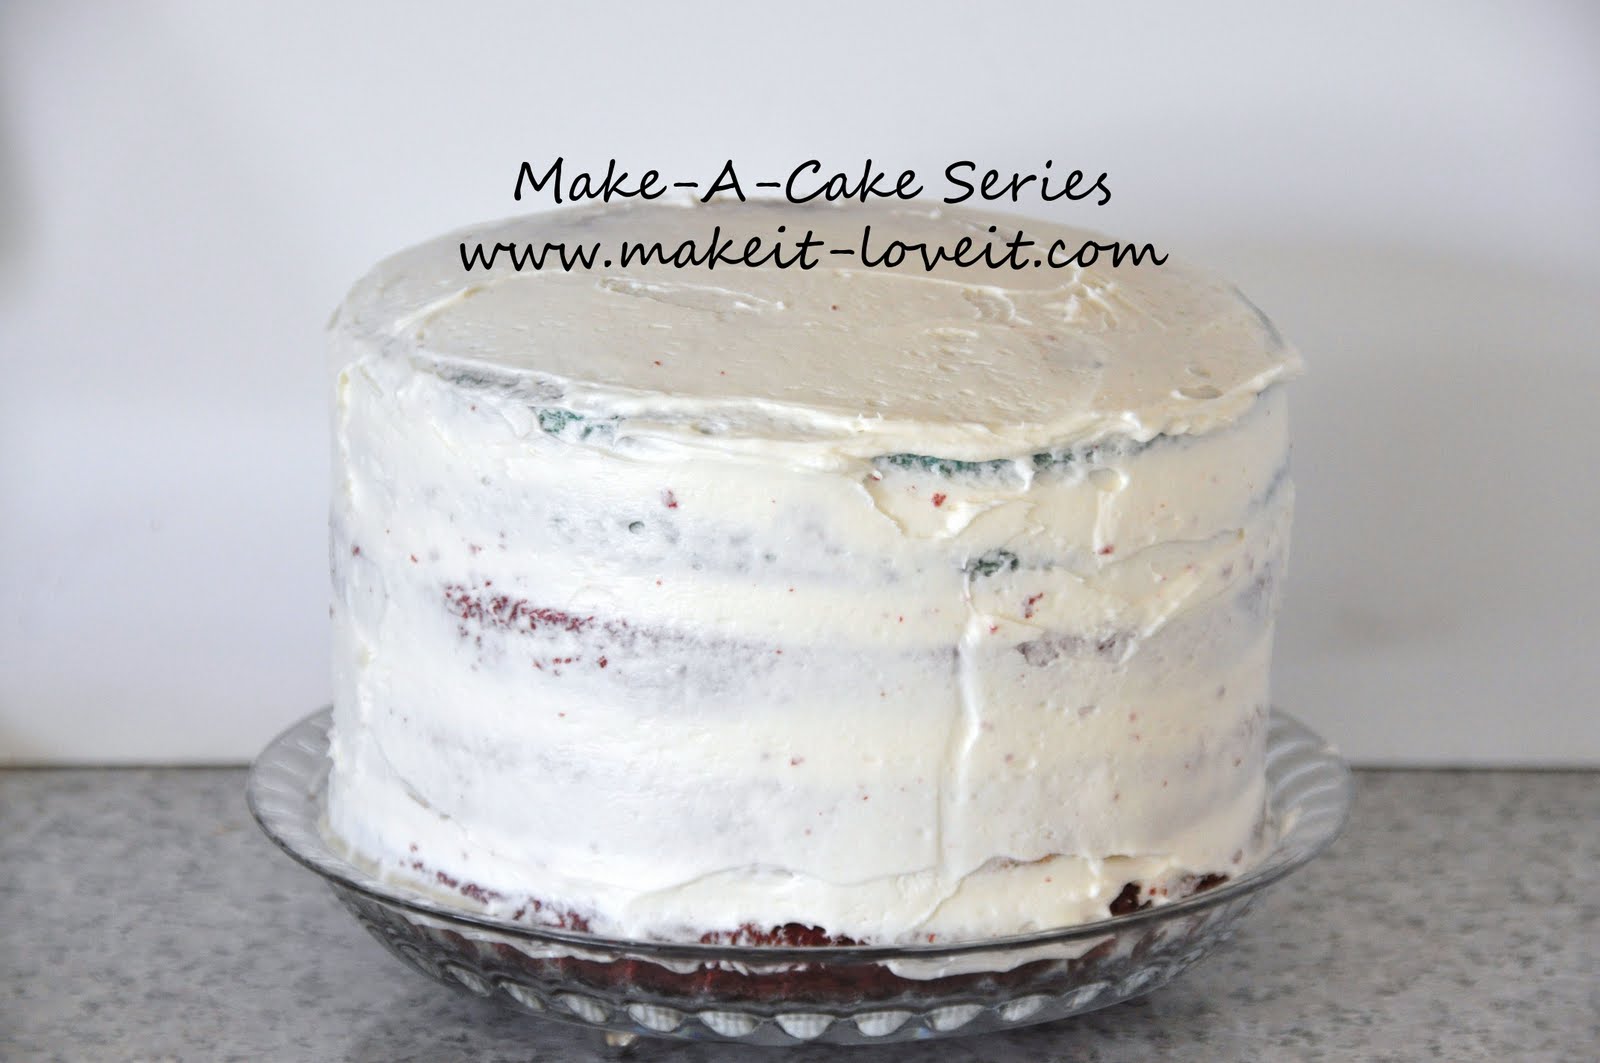
I used cream cheese frosting for this cake.
There are so many cream cheese frosting recipes out there
and I took what I liked about a few and created my own recipe.
Here it is if you would like to use it.
Yum!
Cream Cheese Frosting
1 pound cream cheese (two packages) — room temperature
3 sticks butter — room temperature
1 tablespoon fresh lemon juice
1 teaspoon vanilla
2 pounds powder sugar
Cream the cheese and butter together on low speed with a mixer. Scrape the bowl. Add lemon juice and vanilla. Mix together. Add powder sugar on low until incorporated. Mix on med-high for 3 minuets to make the frosting a bit lighter. Chill for 1/2 hour to stiffing up before using.
When you are ready to finish your cake.
Stack and ice your cake in this order:
Top
Blue and red
Blue and white
Red
White
Red
bottom
Remember to thinly ice the cake (called a crumb coat). Let it set for 20 minutes and then frost again with a thicker coat.
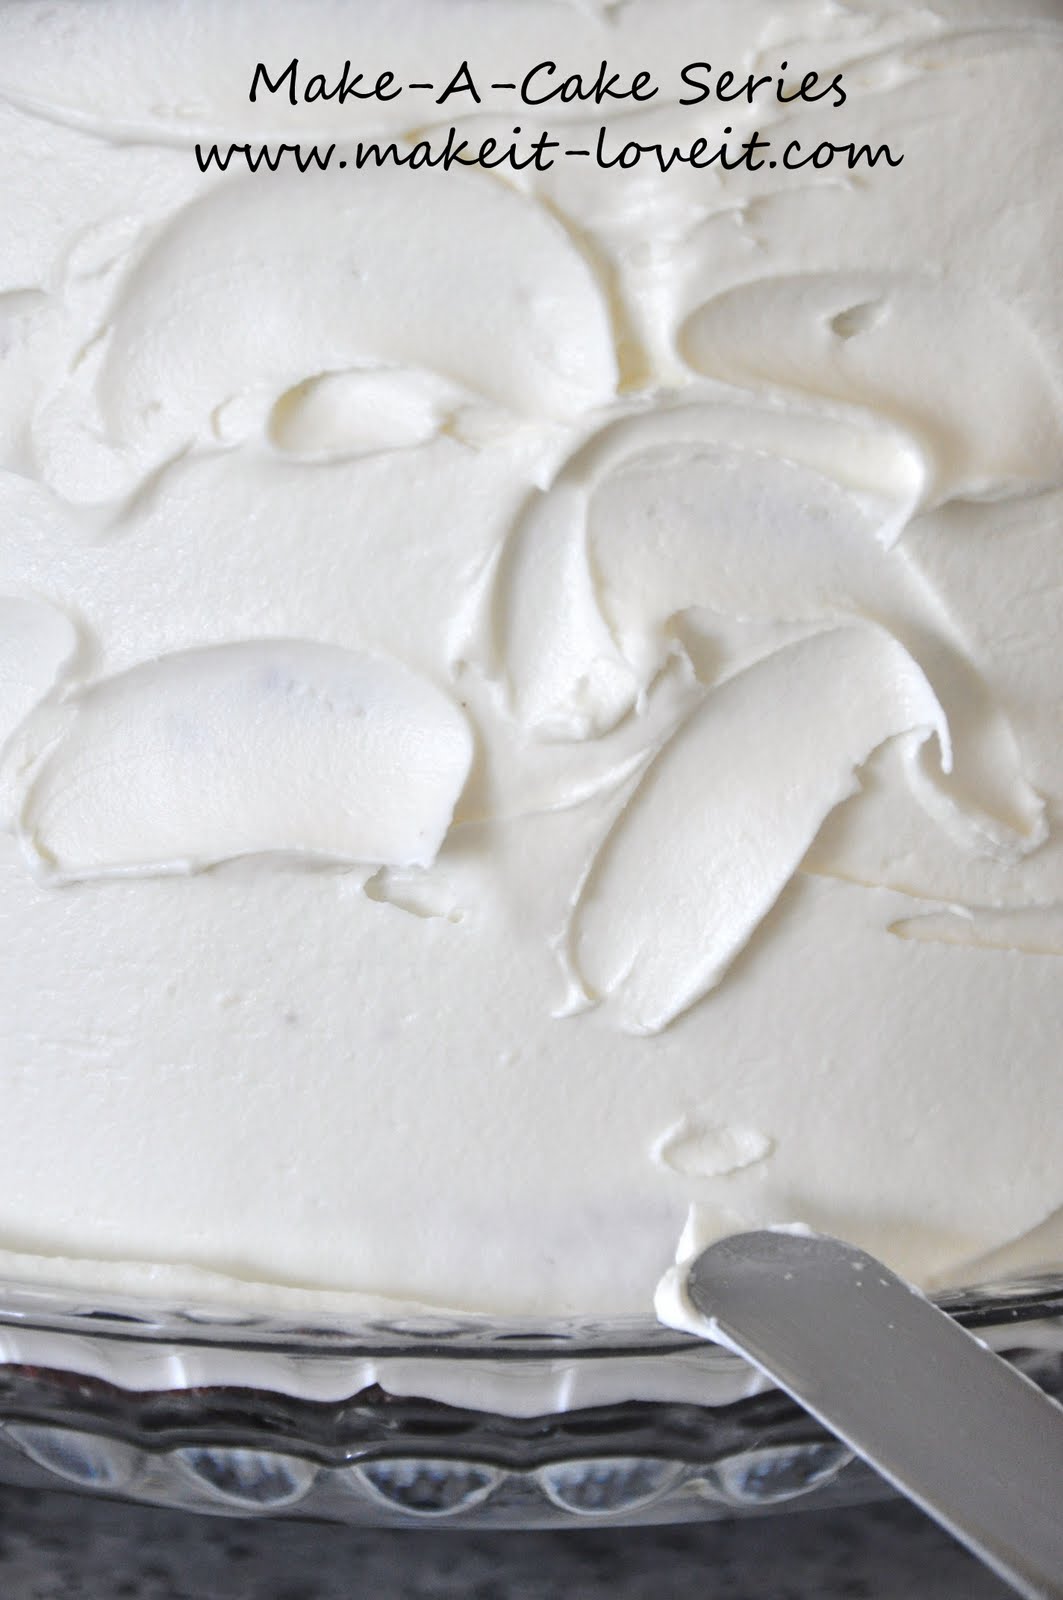
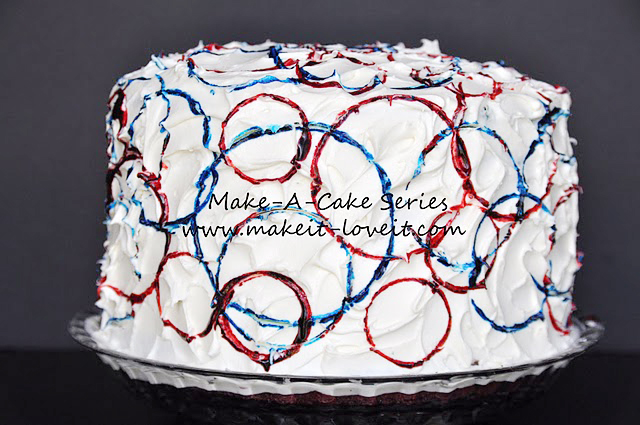
Instead of giving this cake a smooth perfect look I went for messy and loose.
You can decorate this any way you want.
You can cover it with fondant and place stars
like this, make it smooth and leave it white, or be creative and design a whole new look. Go for it!
Using a straight spatula, I made marks going every which way.
It has no pattern……….just let it be free form.
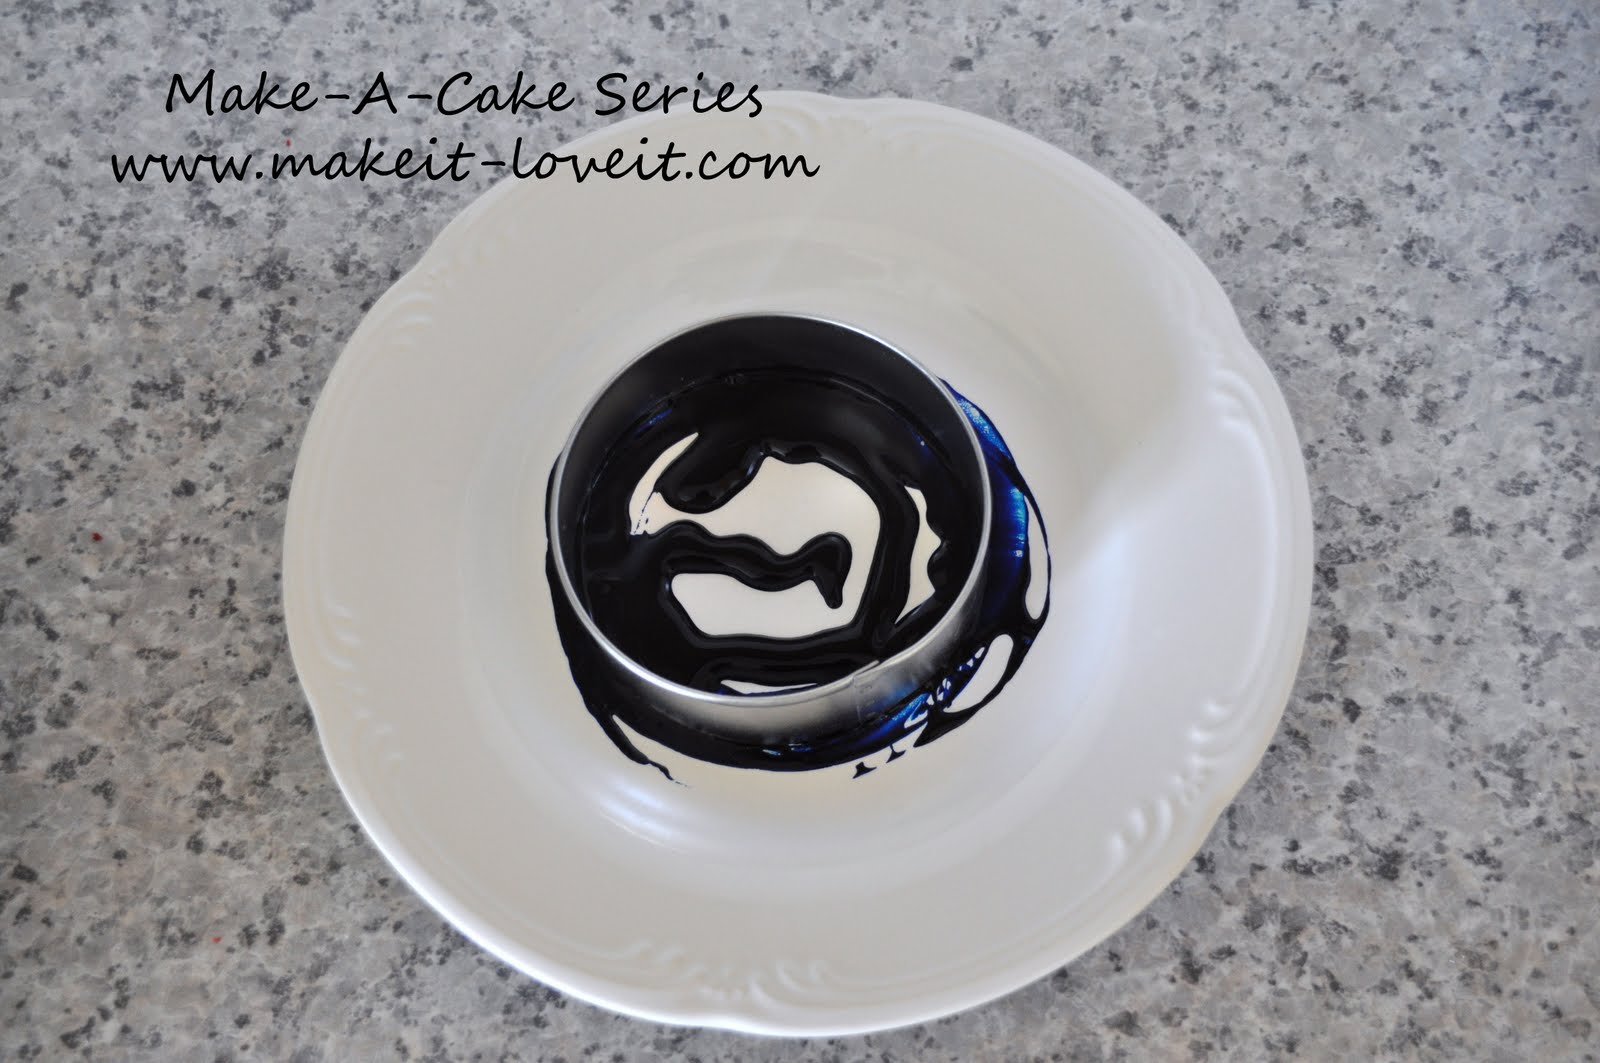
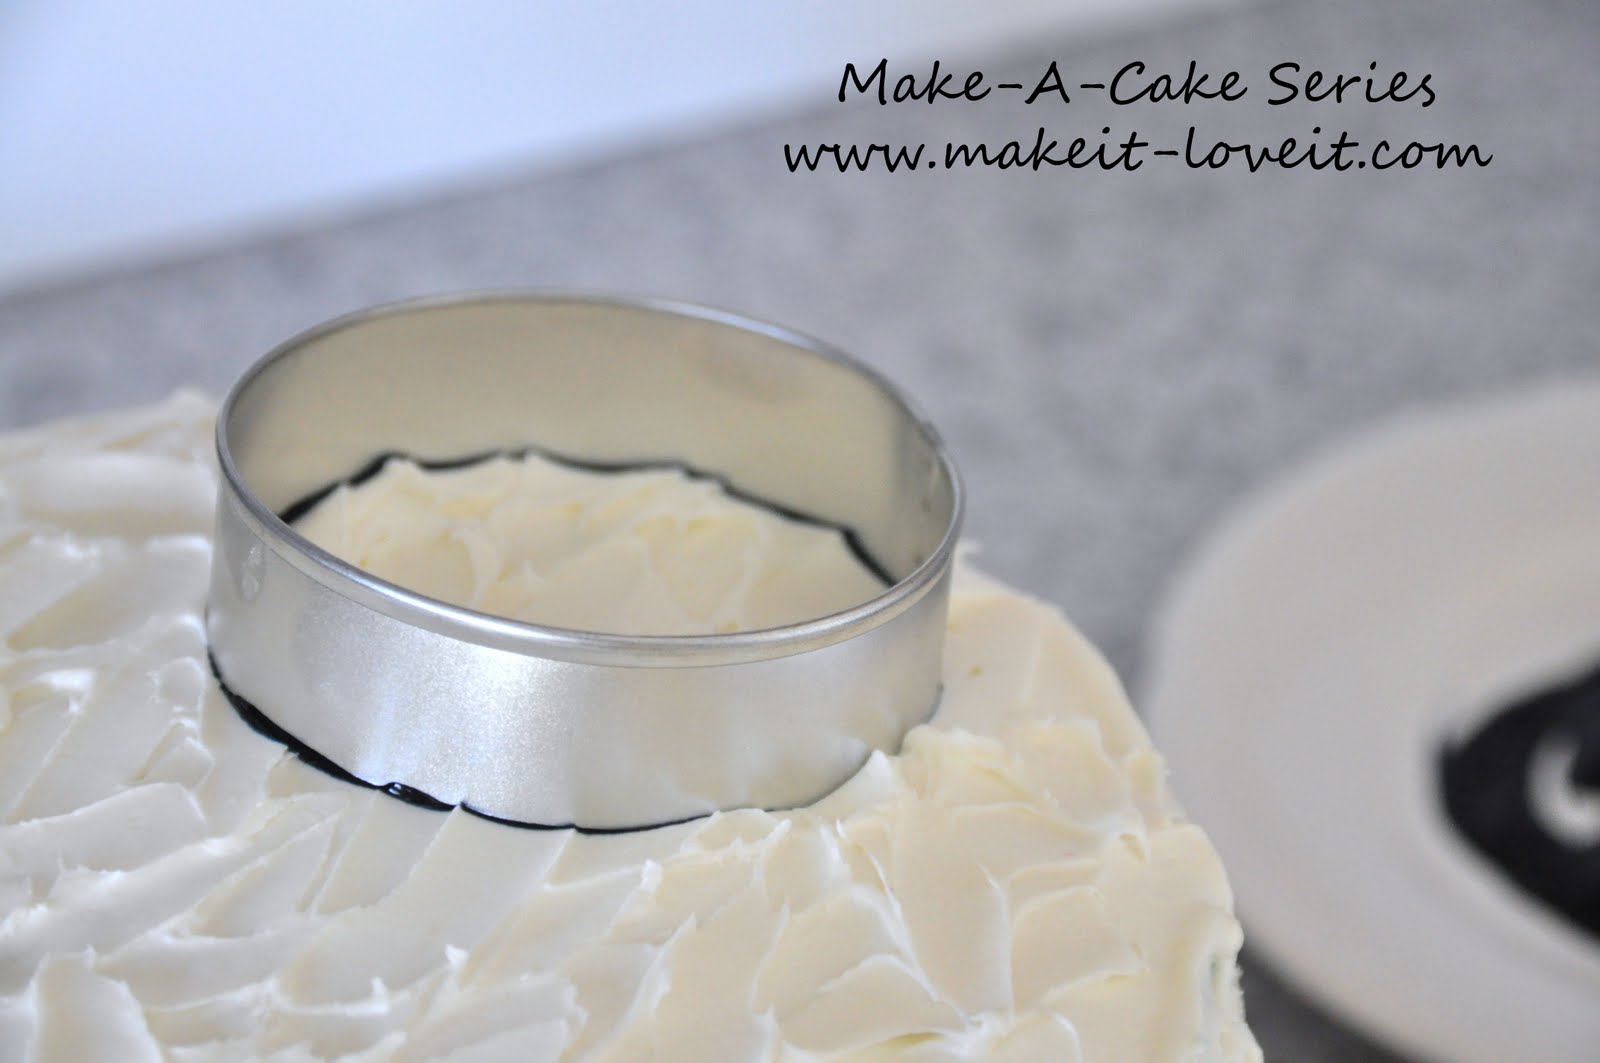
To make the circles, take your cookie cutters and dip them in food coloring.
Then place them on the cake and lift straight up. Use multiple sizes and colors.
Now you’re ready to take a
beautiful confection to a party.
And only you will know about the surprise that waits inside!
Happy decorating……..and happy 4th of July!