Remember how I always host a little Virtual Halloween Parade every year, posting many of the costumes you (or someone you know) made for Halloween?? Well, we can’t skip that…..it’s TRADITION! (Here are the costume parades from 2013, 2012, 2011, 2010, and 2009.) On the 31st, I plan on sharing your Handmade Halloween costumes here on my blog, that you and/or your kiddos are wearing this year. And no, they don’t have to be made by you…….maybe a friend/neighbor/grandma/etc. helped you out. Go on, share it! Anything handmade needs a little extra love. So, I’ll be sharing them here! :)
. . . . .
Are you so sick of Halloween posts yet? Well, hang tight….I have a few more really fun things that I am just dying to share. I wasn’t going to….and then I was…..and then decided to move on…..but then couldn’t. So, well, ummmm, let’s just ride this Halloween thing to the end of the week? Any objections? Good. :) (<—-see how I cut you off? You didn’t even get a chance to tell me how much you’re so over Halloween!)
We are having a little Halloween party on Wednesday night at our church (many of you probably already had one last weekend?) and I volunteered to make the prizes for the costume contest. So, I scoured the internet for some inspiration, fell in love with the concept over on U Create, added a few more categories, and WENT TO TOWN!
I think I even had more fun making these than my kids’ real costumes. They were so quick and so hilarious…..all at the same time.
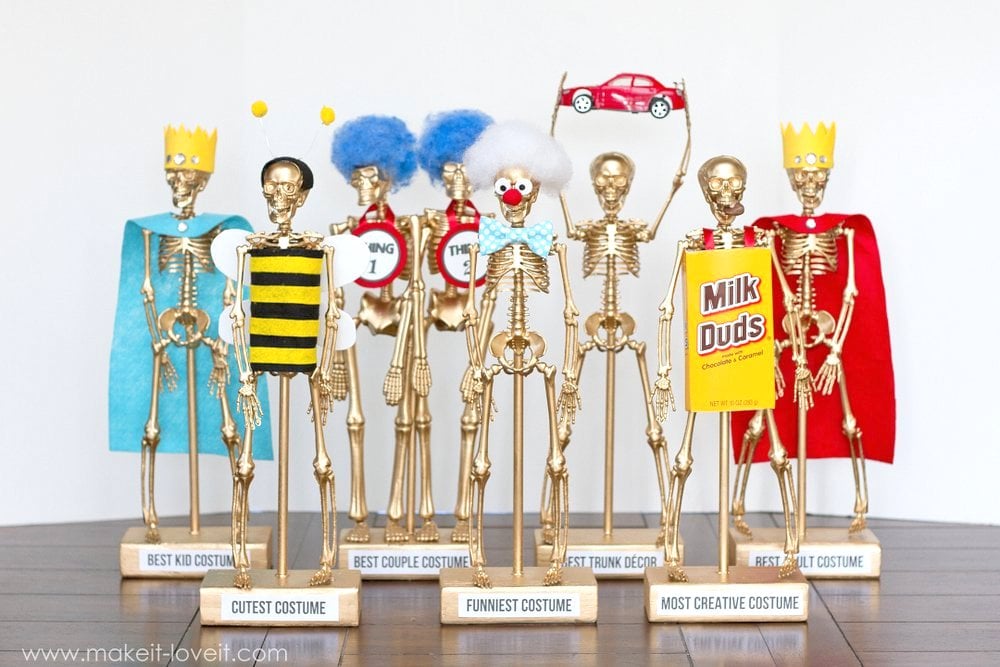
These would be fun for a school contest, a church party, a neighborhood contest, etc. And then each year, it can become extreme competition to win the shiny gold Skeleton Trophy!!! And who wouldn’t want one of these?? (Because after winning it, the trophy can become part of your Halloween decoration that you bring out each year.)
I bought these little skeleton’s at Michael’s….but that’s only because they didn’t have as many as I needed at the Dollar Store. (Well, they did have 2 and you’ll see those down below, used for the Couple Award.) But they really weren’t expensive at all. I had all the little bits of fabric and supplies…..so all I had to buy was the skeletons, the paint, and some wooden dowels (I already had the 2×4 blocks as well).
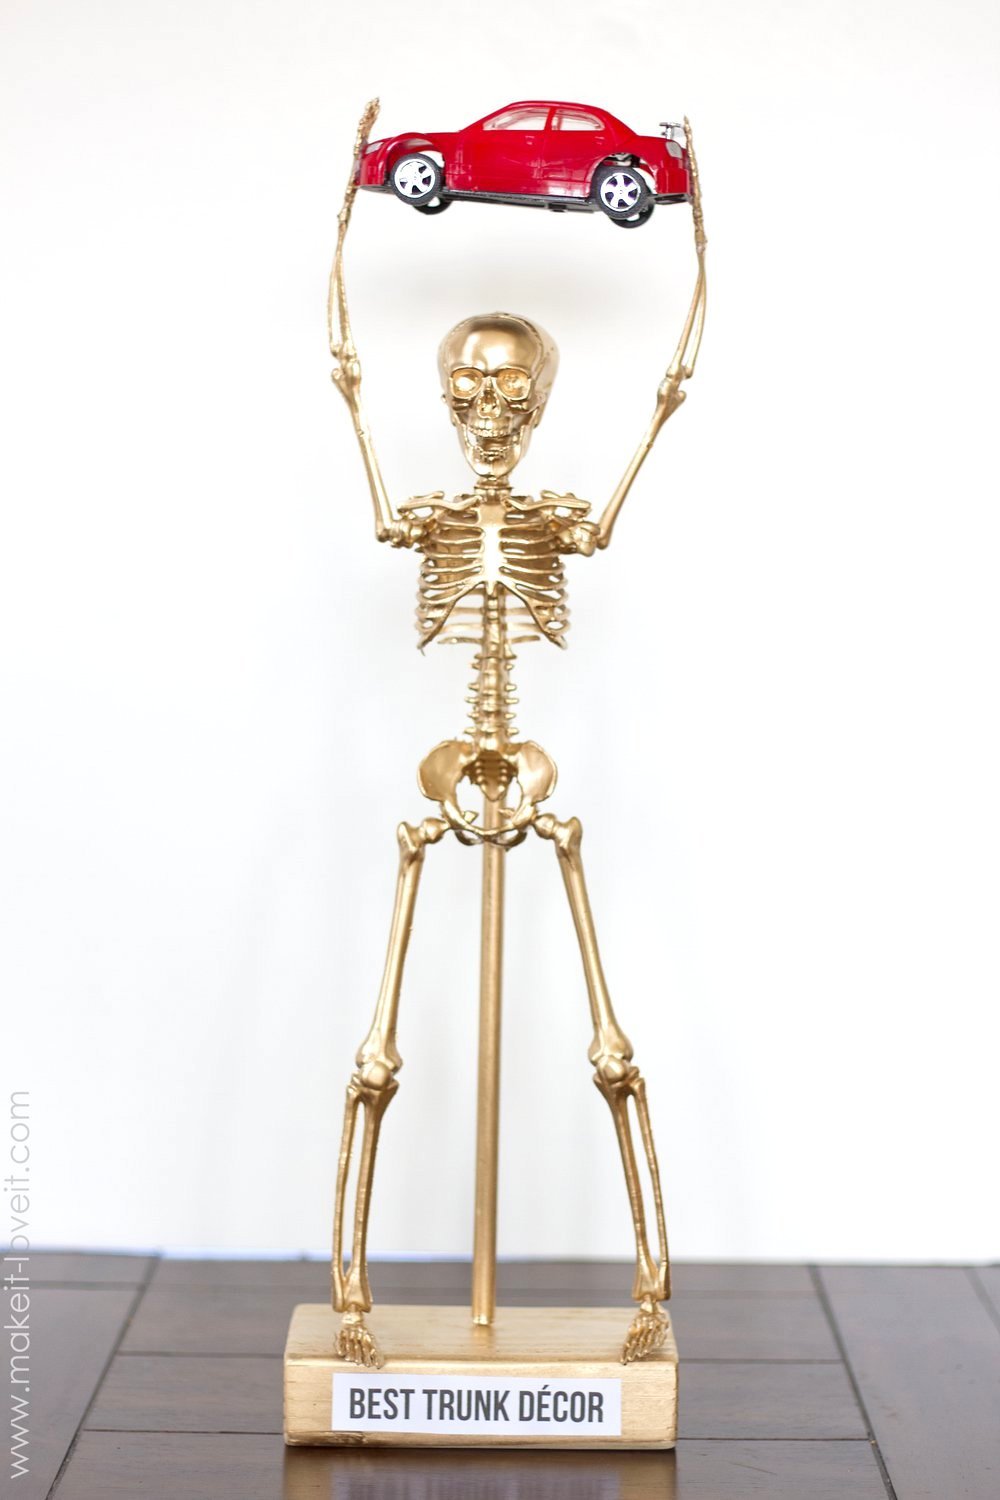
At our church party, we are also having a Trunk-or-Treat out in the parking lot after the party and games inside. And we encouraged each person to decorate their trunk. So, that’s why the skeleton in the middle is holding a car in the air. You know, because he is the trunk decor CHAMP! The other 2 King Trophies will be given to the overall BEST child and adult costumes.
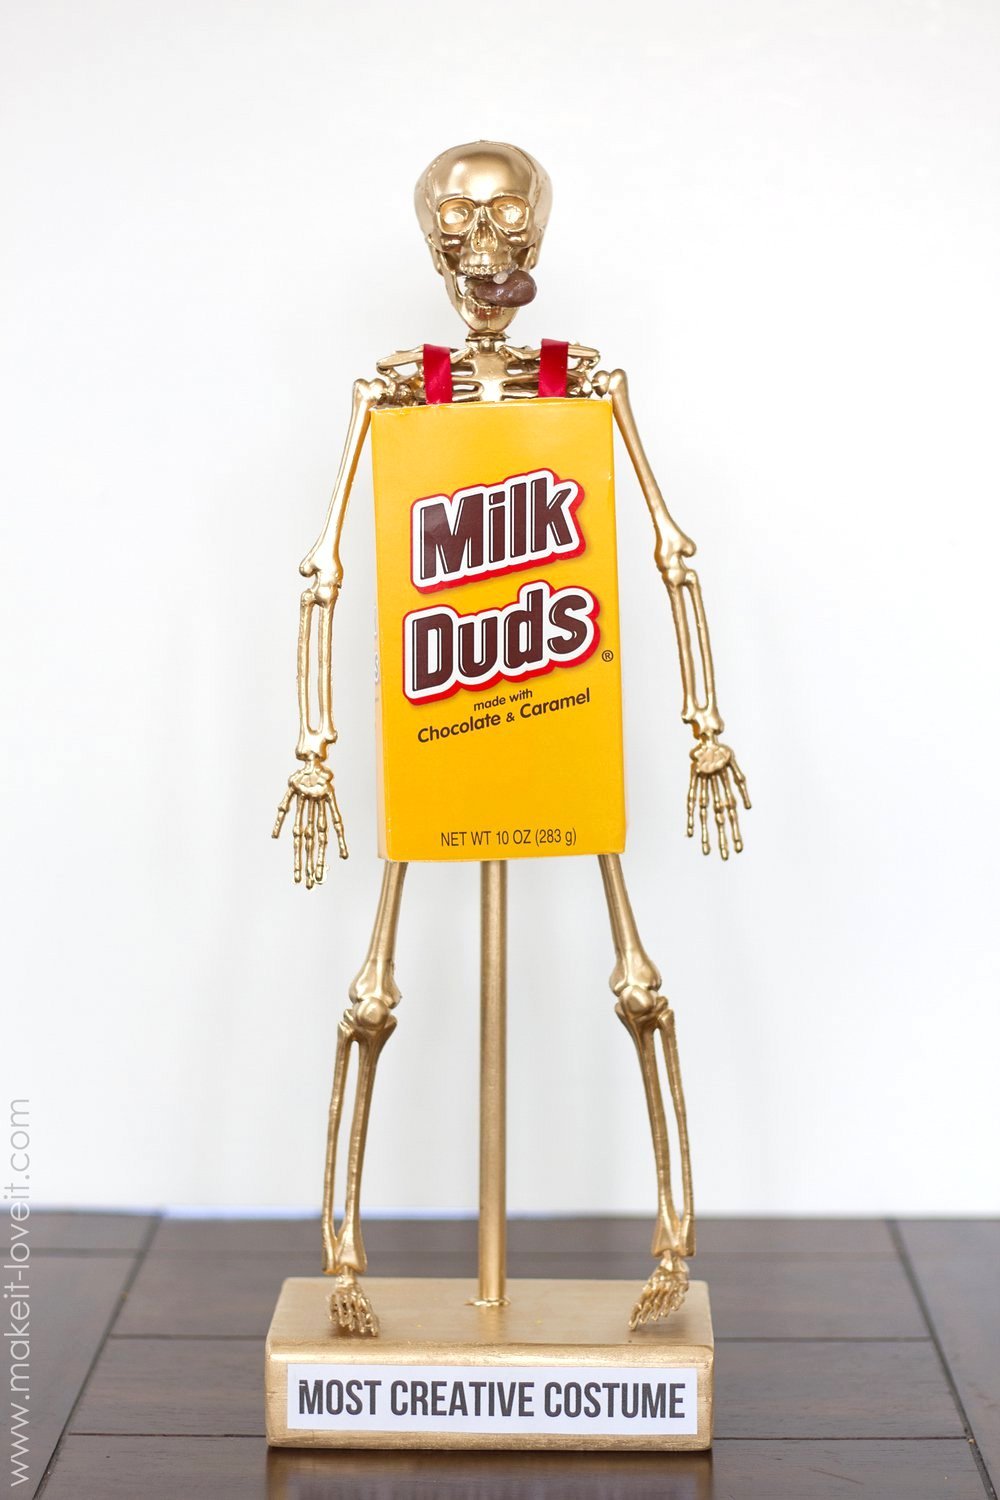
And then, because I couldn’t stop there (and to increase the number of happy smiles), I added 4 more awards. The best couple costume, the most creative (haha, this one is Steve’s favorite…and yes, there’s a Mild Dud in his mouth), the cutest costume (my personal favorite…haha!) and the funniest costume (Connor’s favorite….he thinks that bow tie is pretty rad!!).
Seeing them all together…….looks as though they’re having their own little Halloween party! And for that reason, I think I’m going to make more, just to keep in my Halloween Decor stash and set up on a shelf each year. They just crack me up!!! (Maybe no one will win them at our party and I can bring them home?)
Shiny gold award trophies just make your Halloween parties that much more fun. So go on, whip up a few…..your guests and party-goers will LOVE them! :)
SUPPLIES:
Now, depending on the size of your skeleton, you need to cut a wooden base for it to stand from. My skeletons were about 14 inches tall, so I cut my 2×4’s into 6 inch long pieces….and that was perfect. Then, I cut the dowel long enough to go down into the hole of the base plus high enough to glue to the back rib cage of the skeleton.
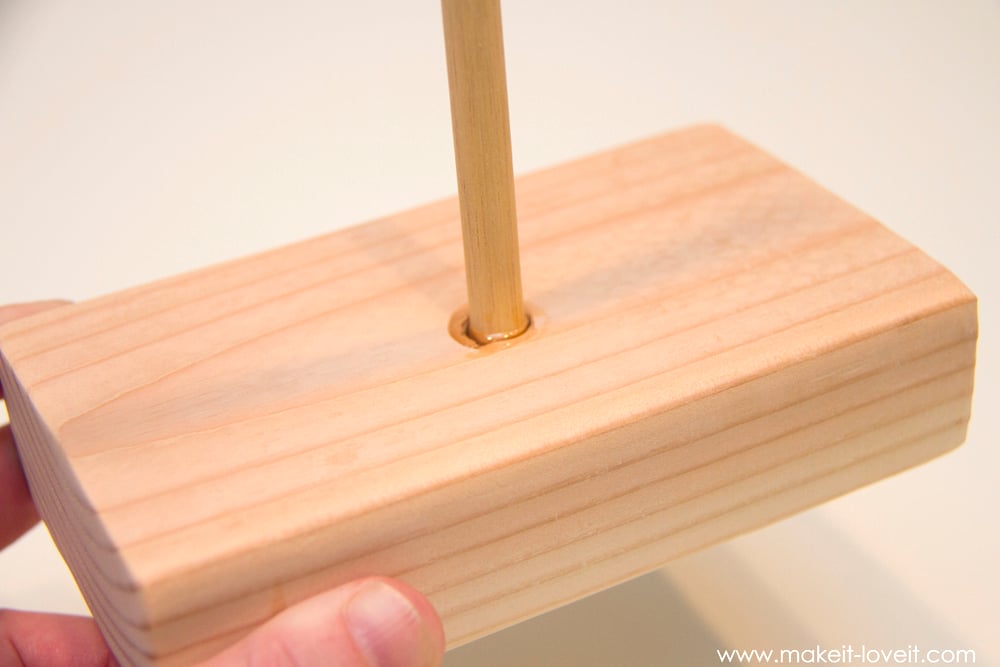
Drill a hole into the base that’s centered from left to right but is closer to the back than the front, so that the skeleton can sit right in the center. (Hold your skeleton over the base to get a good idea of where to drill your hole.) Drill the hole just big enough to fit your dowel through.
Place a little epoxy glue around one end of your dowel…
…and then slide it down into the base, until it reaches the very bottom of the base.
Once the base is dry, attach the skeleton to the other end of the dowel with hot glue. Make sure that you attach it so that the skeleton’s legs can reach the base.
And for added security, wrap a bit of wire around the spine and dowel…….because heaven forbid this awesome trophy malfunctions and breaks apart. This will help prevent such a tragedy! :)
Next, spray paint the entire thing with your gold metallic spray paint. (Be sure to cover the thing from every angle.)
Now it’s time to decorate. I didn’t take pictures of each step but will tell you what was needed to create each of my skeletons.
First, the MOST CREATIVE COSTUME:
Next, the CUTEST COSTUME:
Now, the BEST COUPLE COSTUME:
Now, onto the BEST OVERALL COSTUME:
And lastly, the BEST TRUNK DECOR (for the trunk-or-treat portion of our party):
For each of the title labels that are on the base of each award……I just printed them out on card stock and then hot glued them in place. Simple.
Now, your little Trophy Skeleton’s are ready to be presented to the winners at your party!!!
Get creative, add some categories to the bunch…….and most of all, have so much fun with it. Because guaranteed, these will bring smiles to many faces!
Enjoy!
-Ashley

Hi, I’m Ashley—the DIY-enthusiast behind this crazy blog!