Home » DIY Tutorials » DIY Sewing » Sewing: Clothing » Baby Clothing » 4th of July Shirts
4th of July Shirts
June 30, 2010 - By Ashley Johnston 75 Comments
.
Thanks for all of your responses yesterday.
I loved reading your feedback. Thank you, Thank you.
. . . . . . . . . . . . . . . . . . . . . . . . . . .
I know, there’s only a few days until the 4th of July this weekend.
But here’s a fun little project you can do last minute.
And pretty quickly.
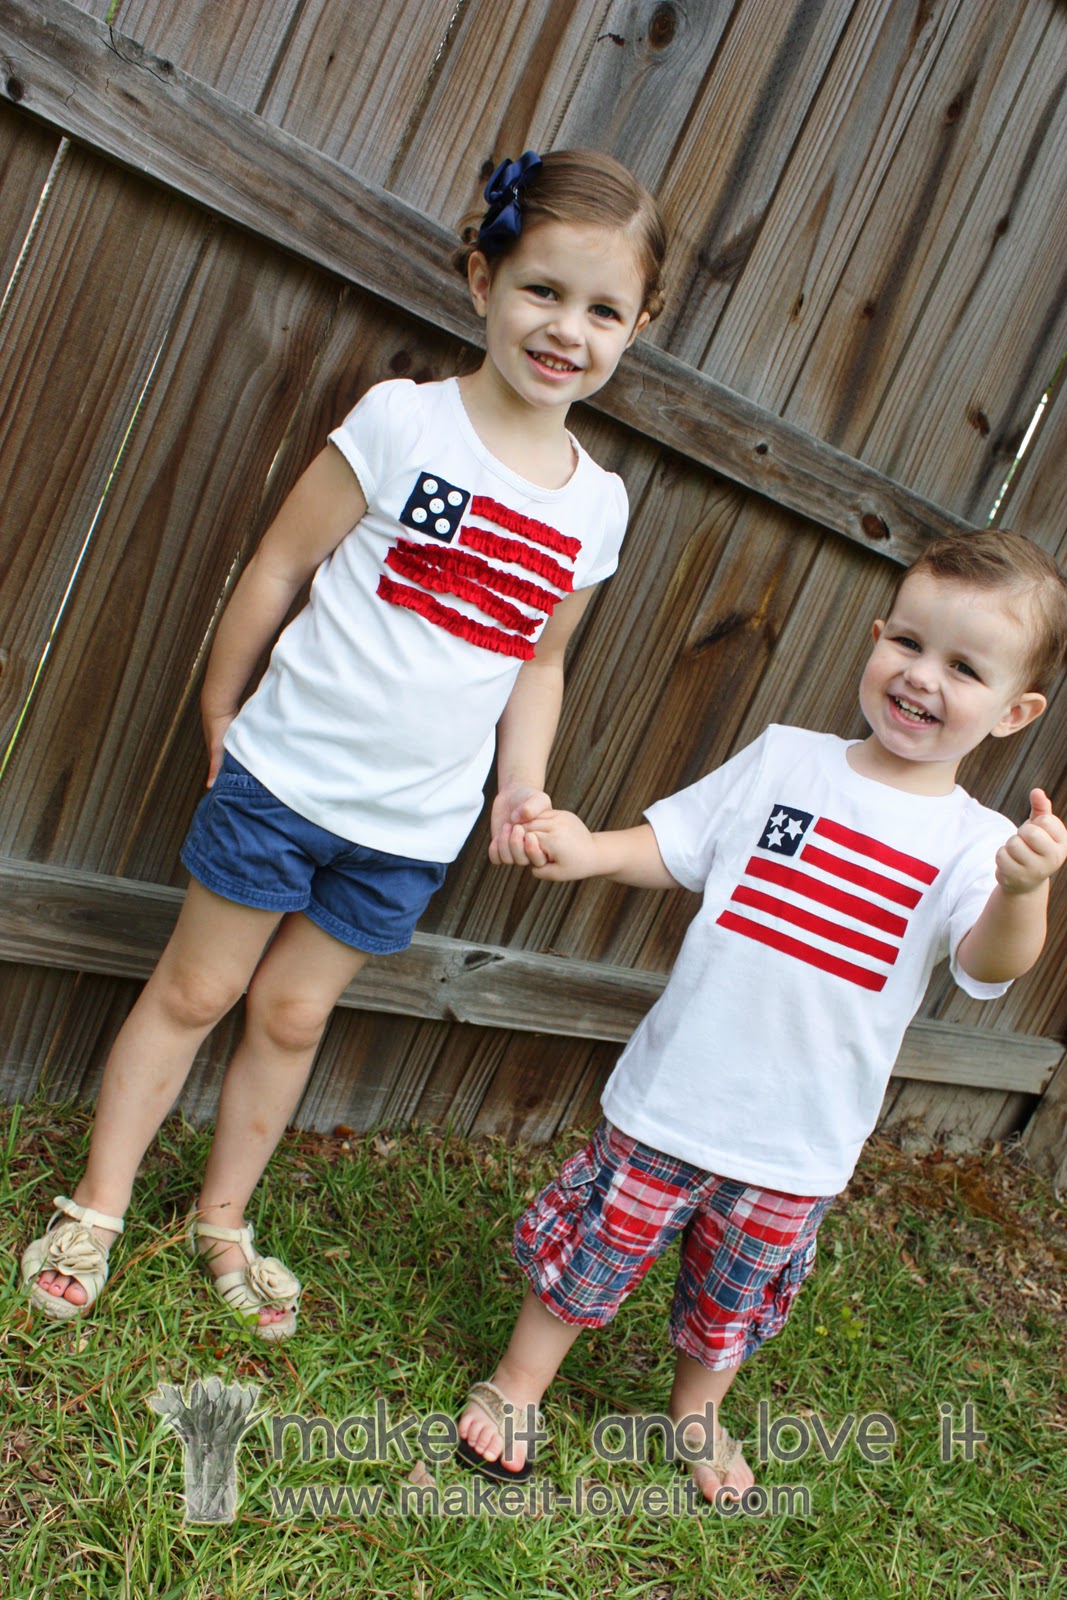
Little 4th of July shirts.
Nice and vibrant.
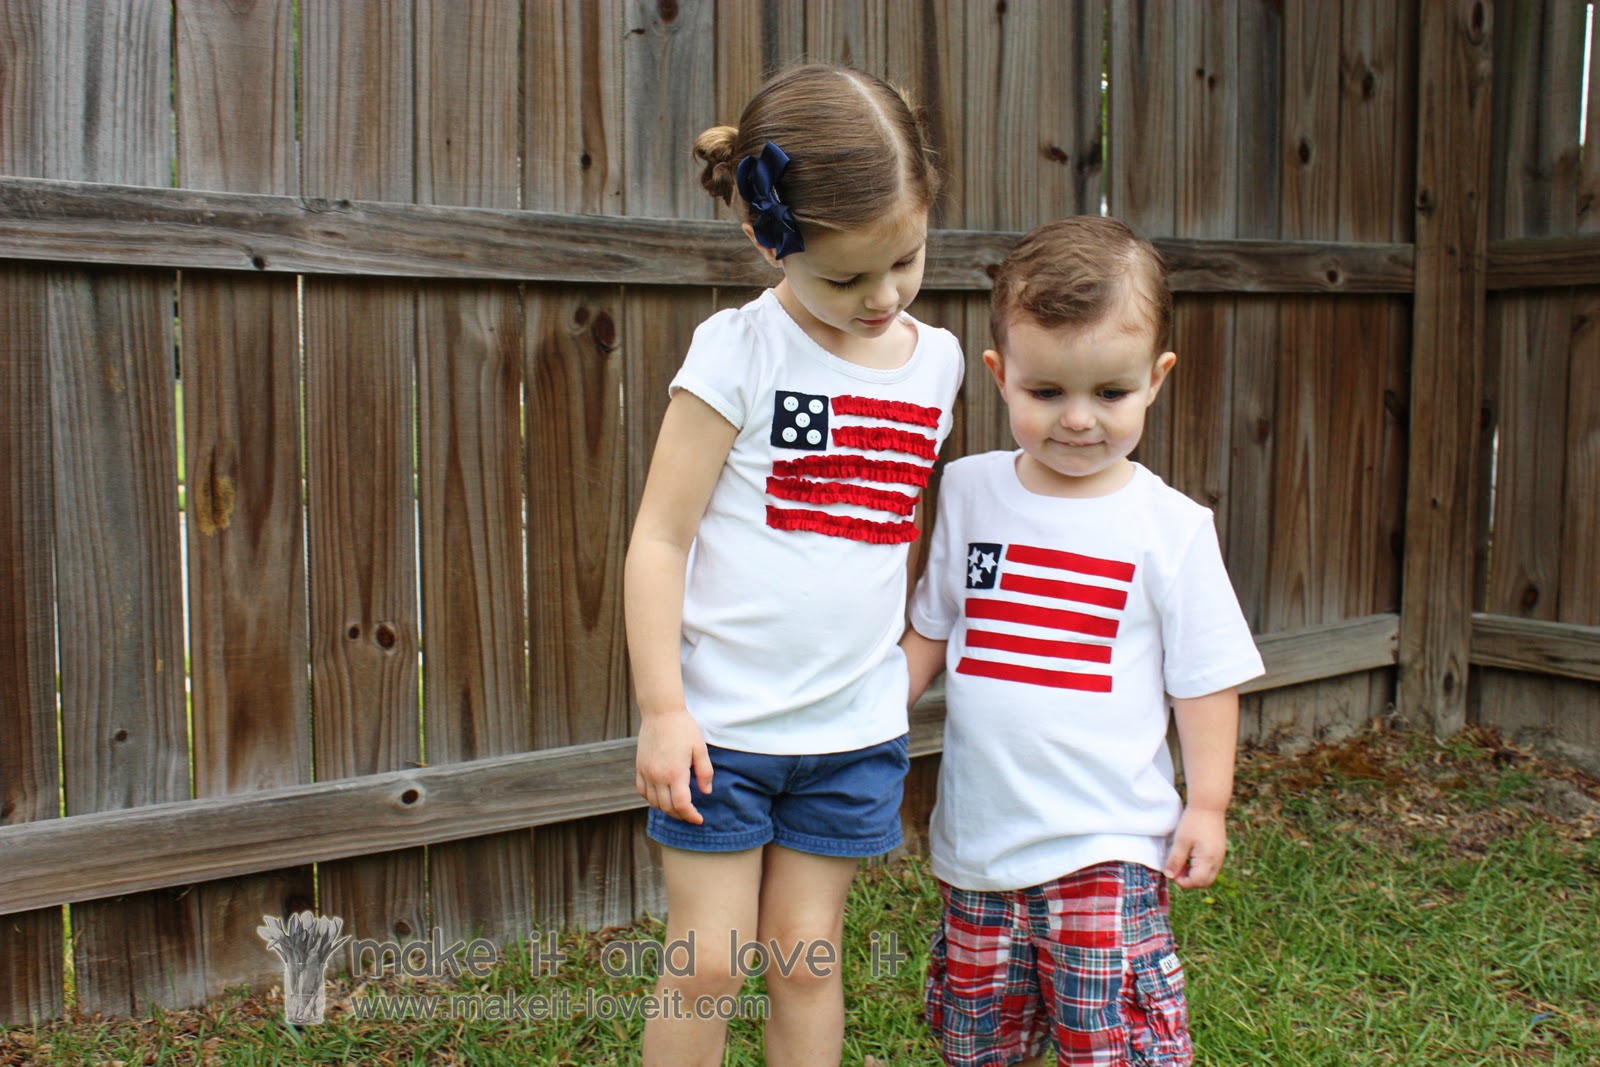
And a little more ruffly for a girl……..
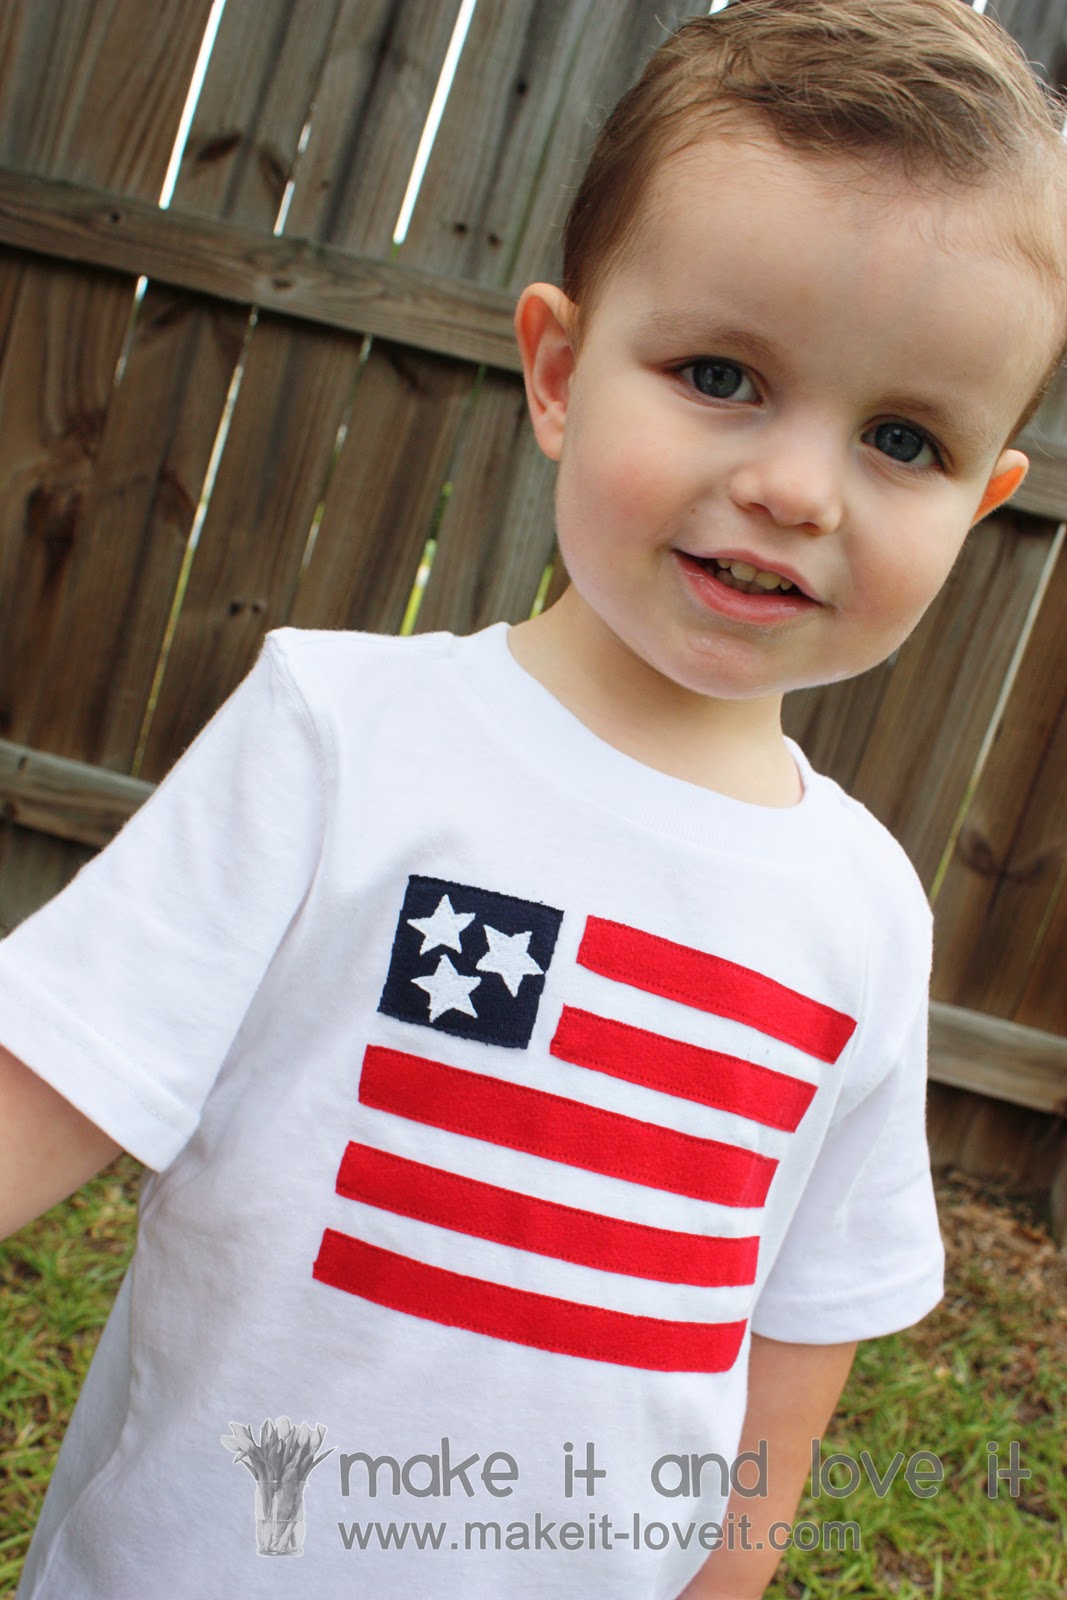
And smoother lines for a boy……..
Together, they make a sweet pair.
Ready to make your own?
(Remember to adjust the measurements below for smaller or bigger shirts. This sizing was made for a 4T girls shirt from Target.)
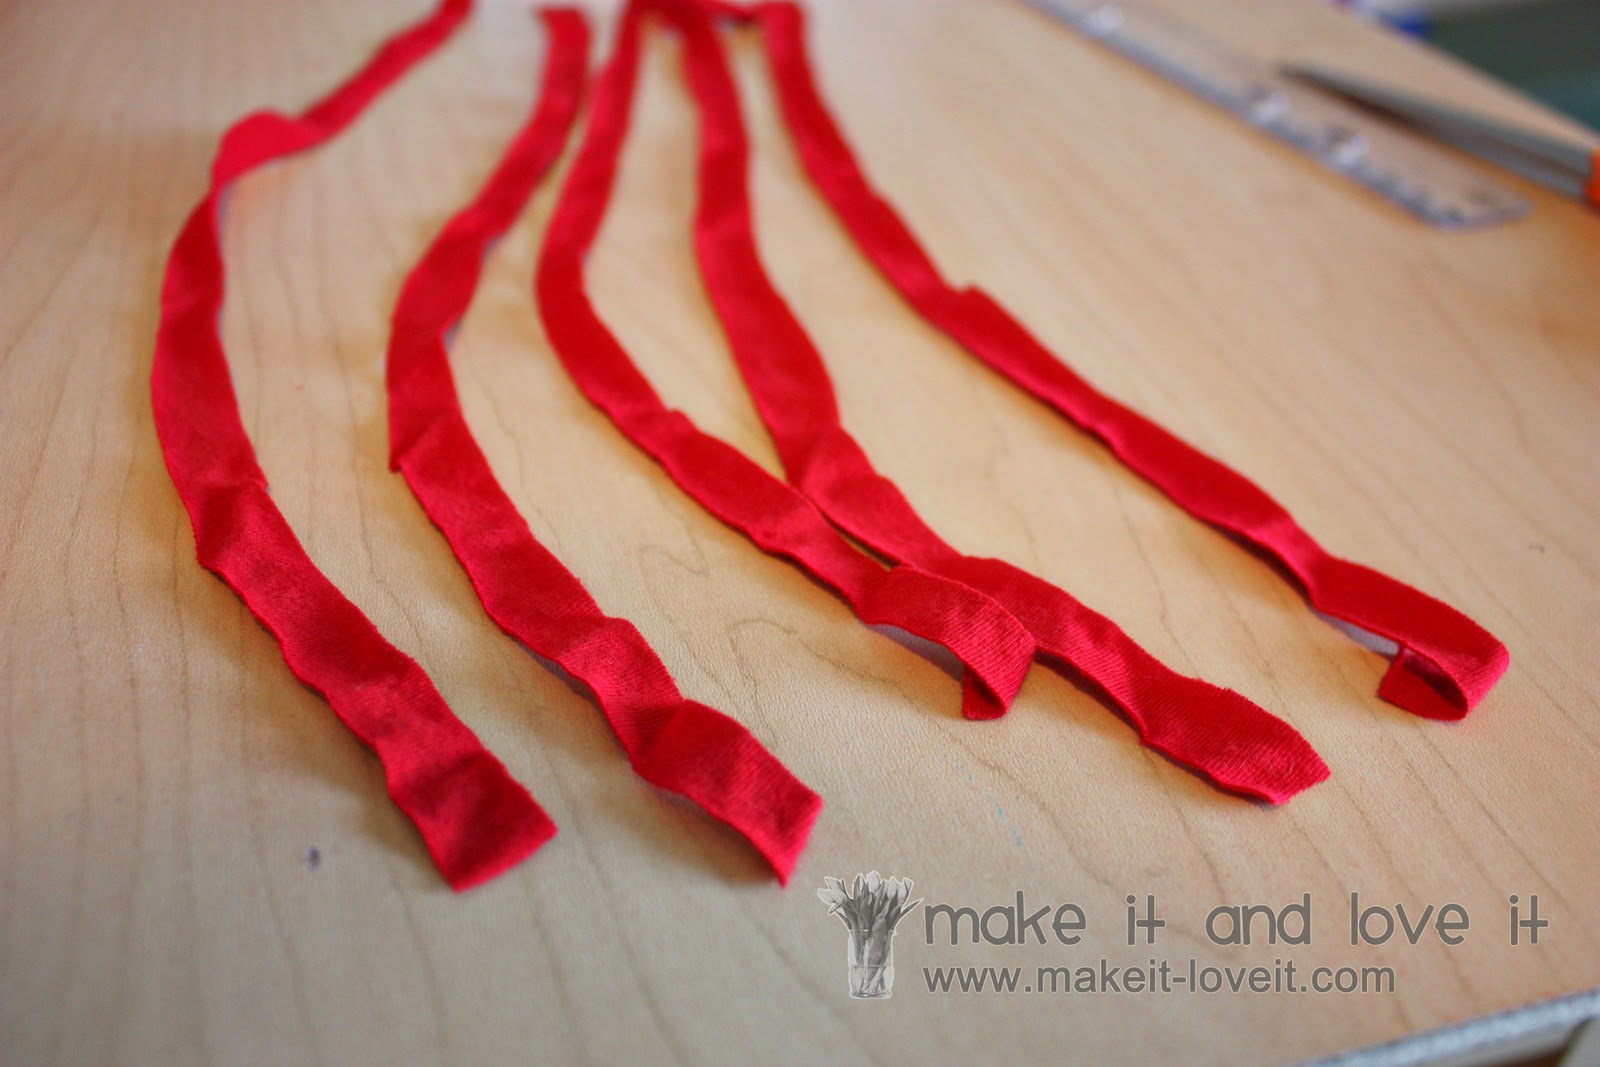
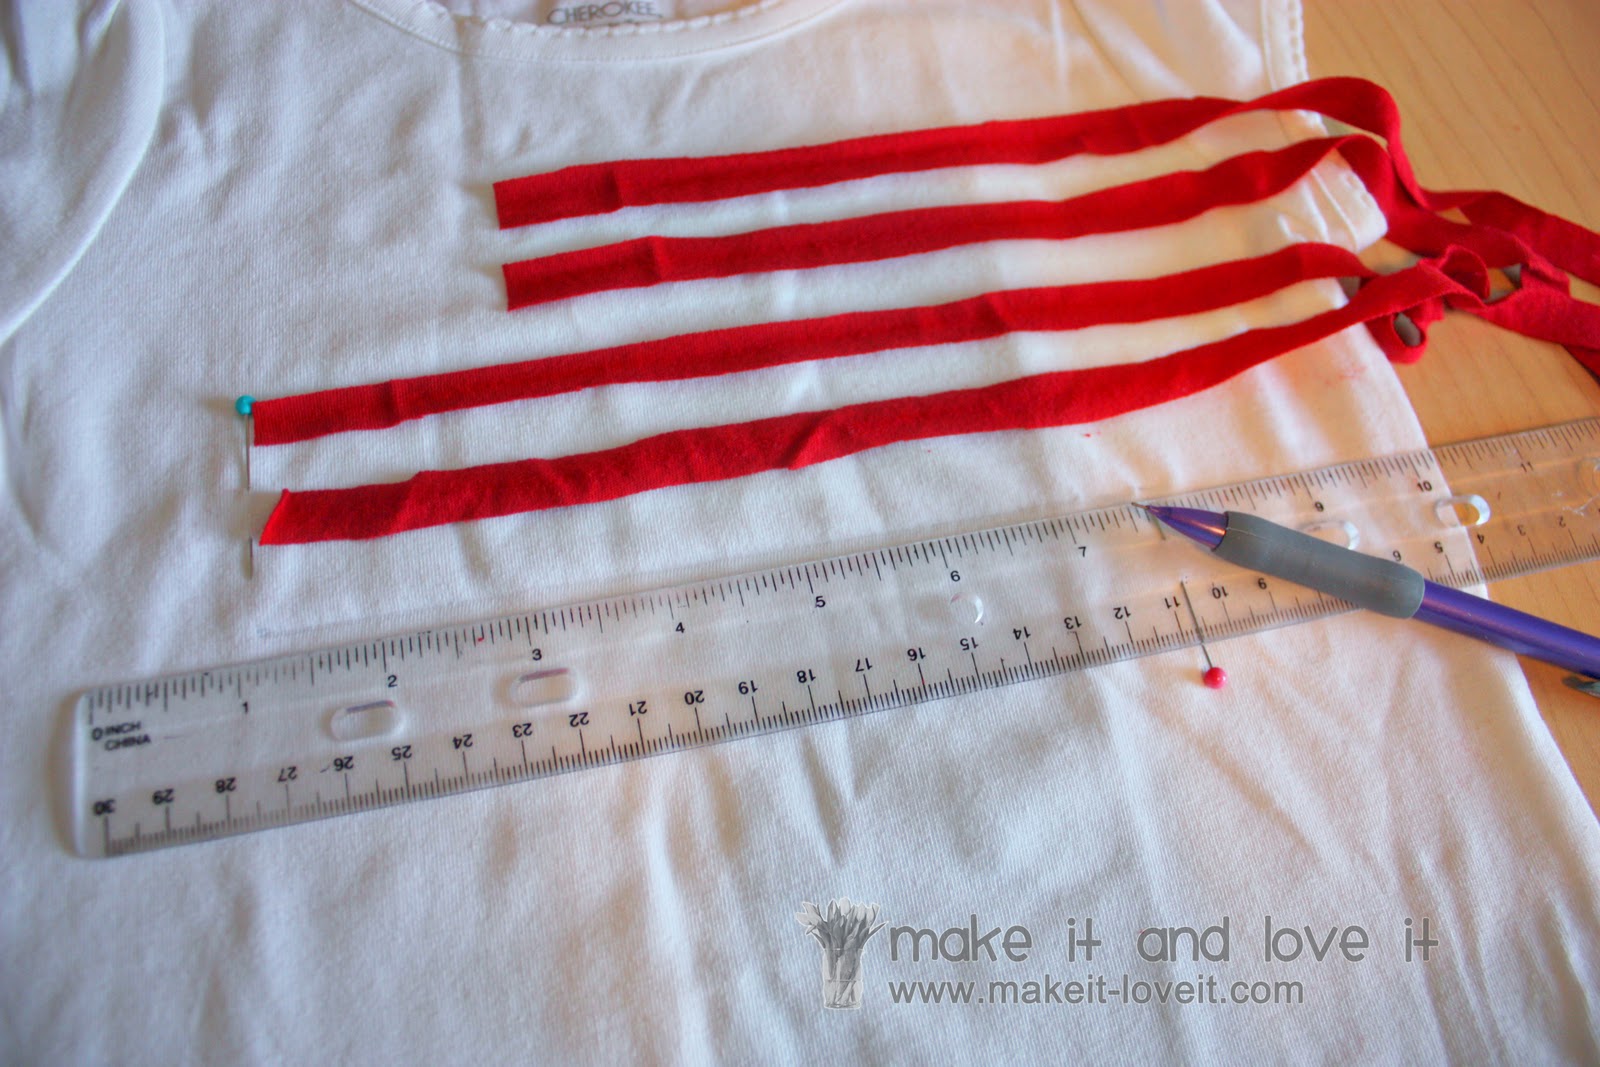
First, to make the little ruffled girly flag…..I cut up an old red tshirt and made strips out of the knit that were 1/2 x 12 inches.
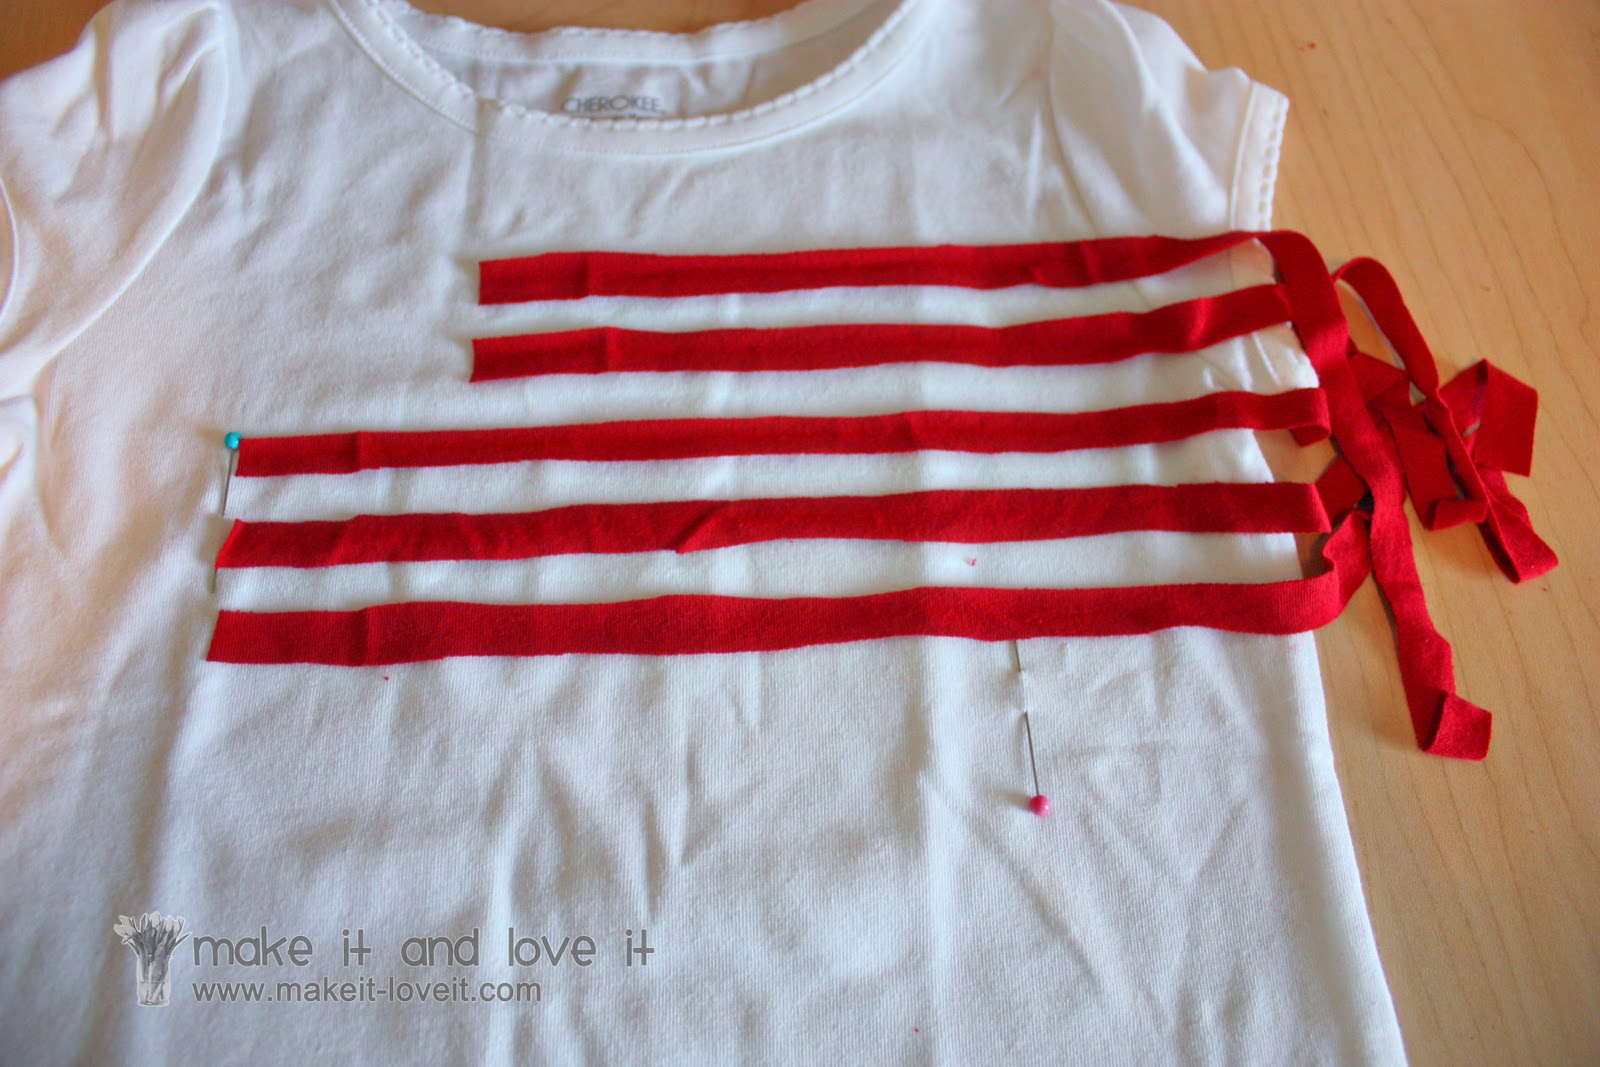
Then I decided how wide I wanted to make the flag (about 6 1/2 inches wide) and placed pins at each side. Then I layed the strips down, just how I wanted them from the left side, and let the tails hang over the right side for now.
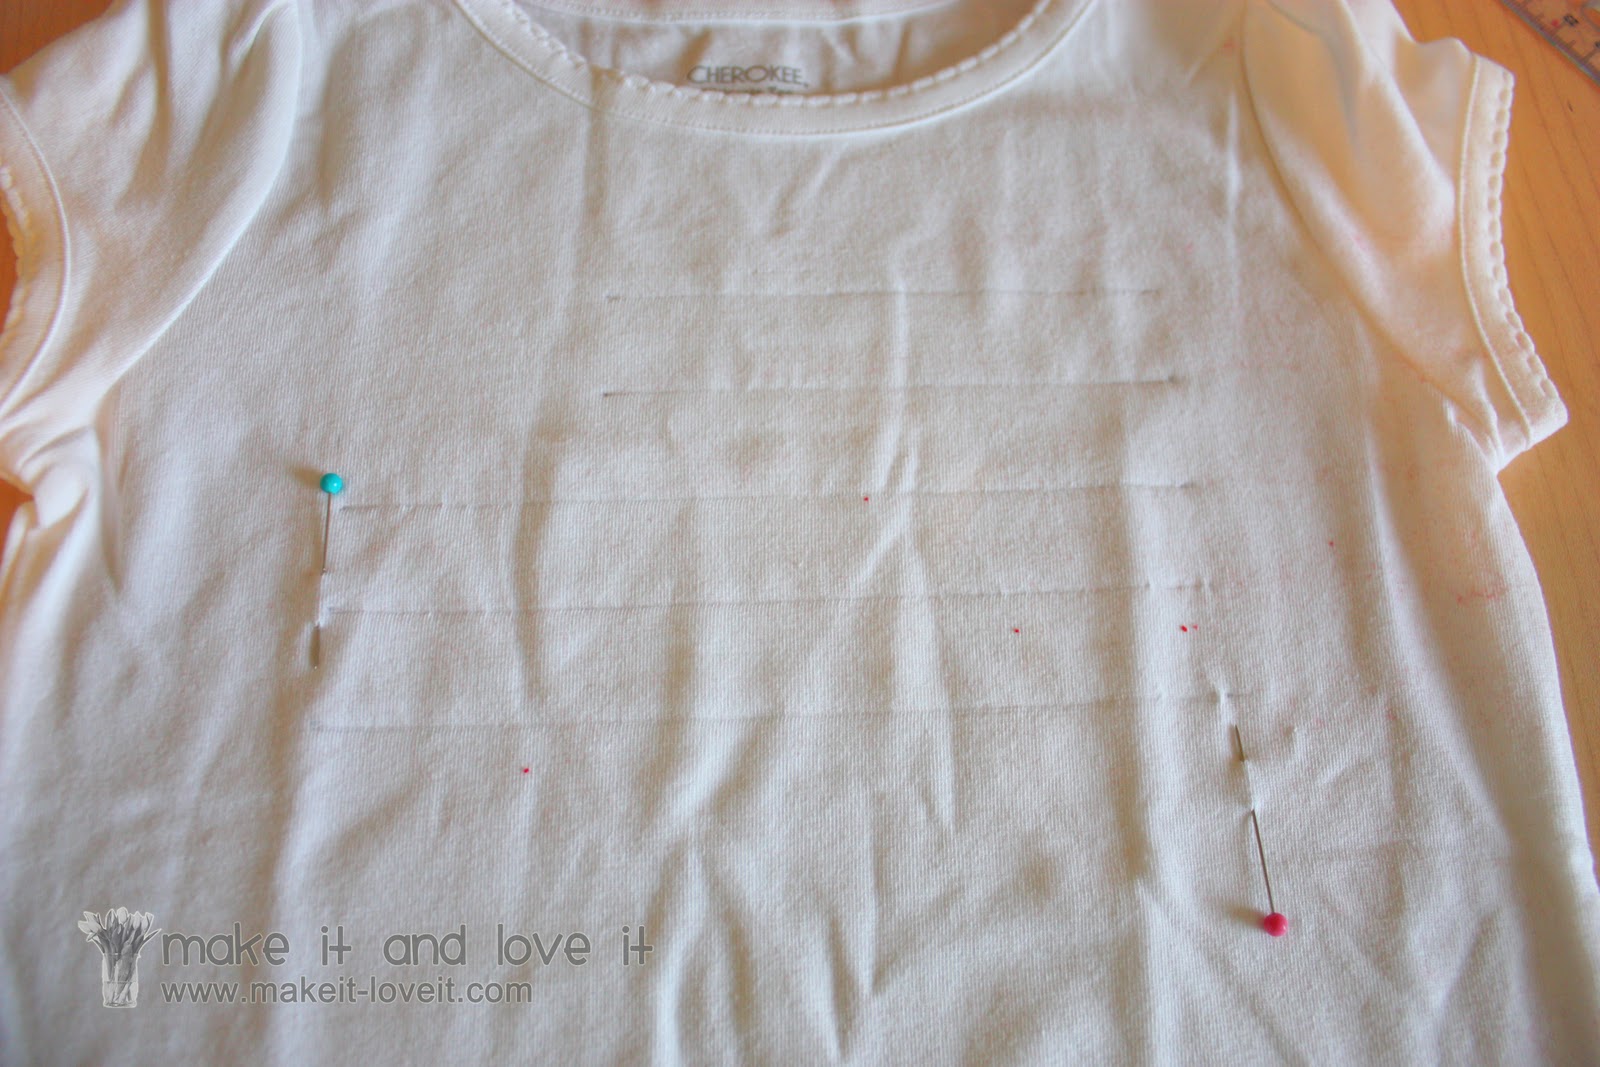
Then I made a pencil mark at the left side of each strip and the right side of each strip, 1/4 inch down from the top of the strip (so the line would be centered down the center of each strip). And then I made a straight line with my pencil.
I did that for each strip so I would know exactly where to lay each strip after I ruffled them. Make sure your pencil lines are exactly as long and spaced exactly how you’d like it……so that placing the ruffles will be easier.
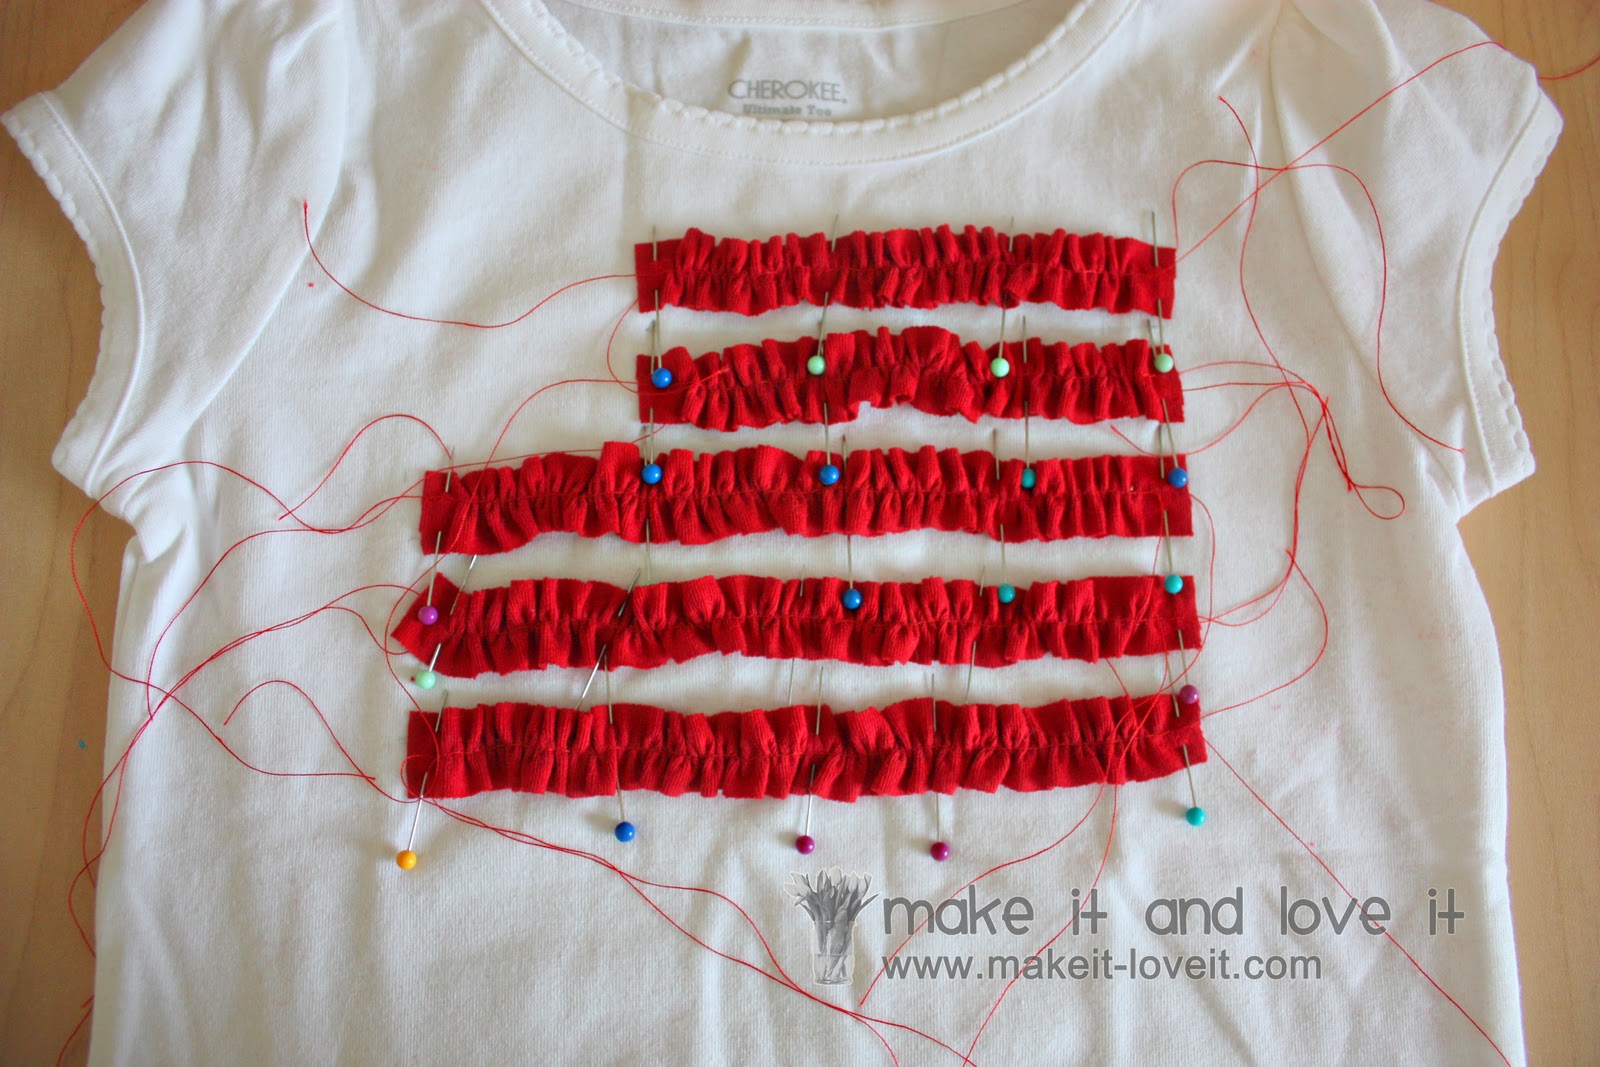
Then make a basting stitch down the center of each 13 inch strips and gather them so that they are only 6 1/2 inches wide (because that’s how wide my flag is). Pin each ruffle in place, directly over top each pencil mark. (And I ended up trimming about 2 inches off the ends of the top two ruffles because they were more ruffly from being gathered more to fit a smaller space. Make sense? If not, just ignore.)
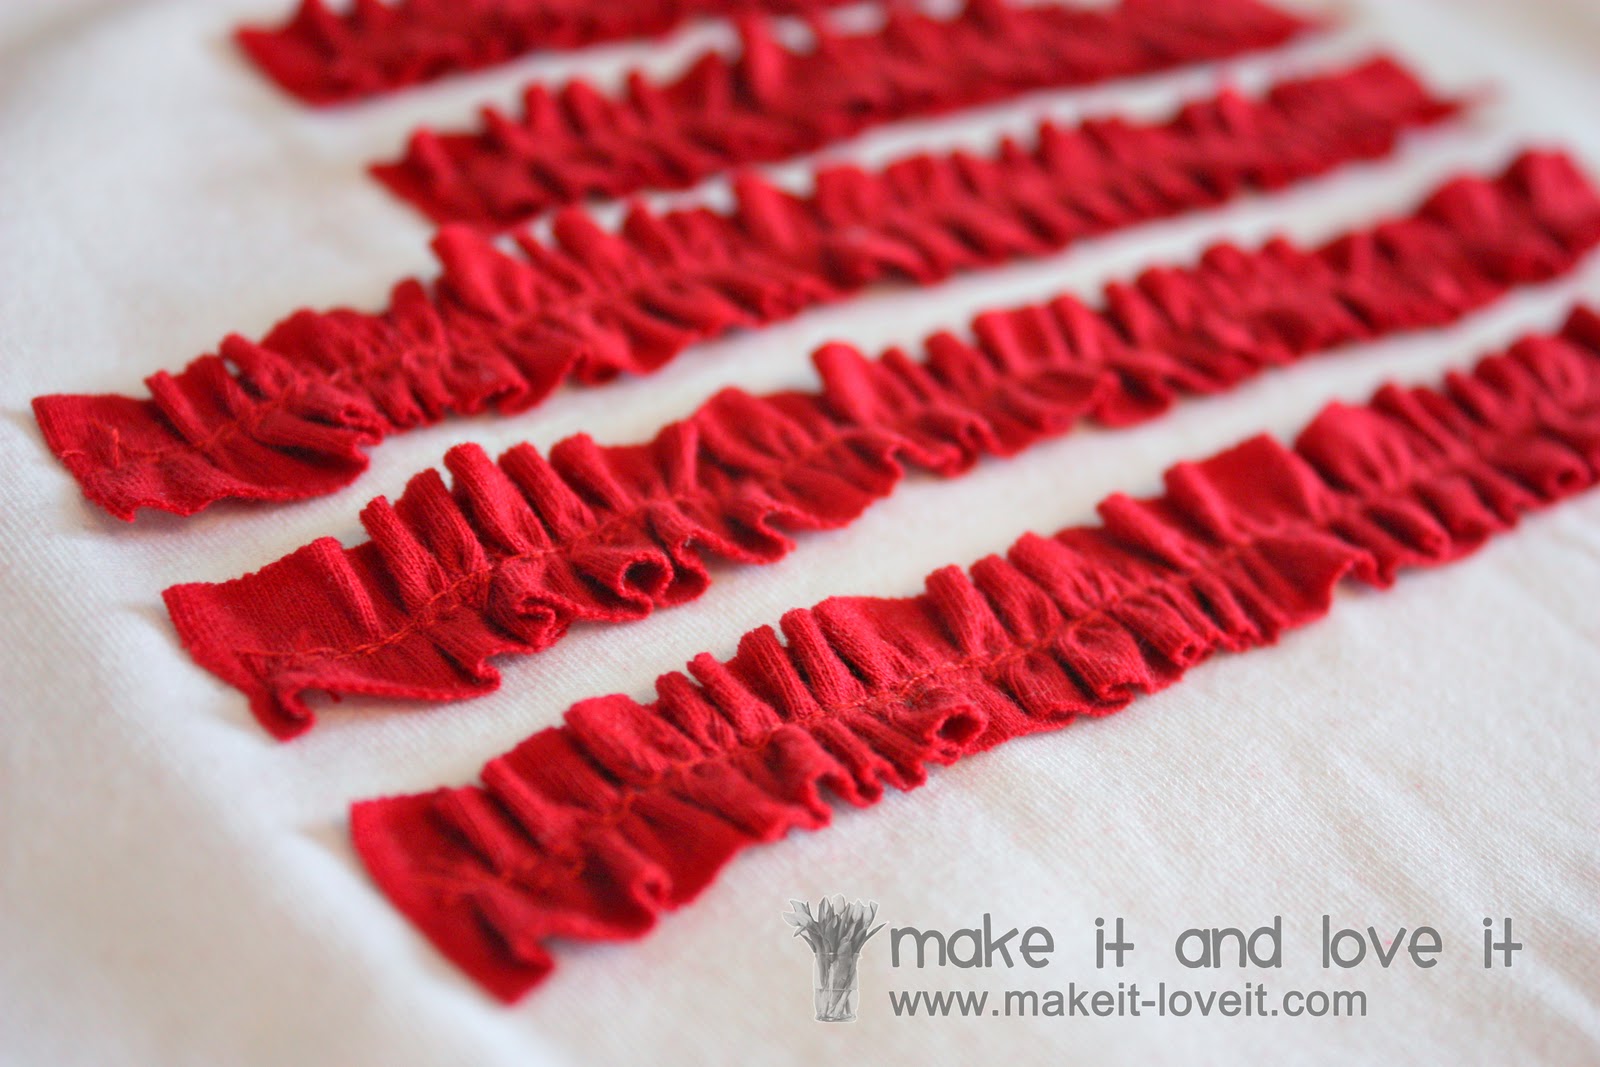
Then sew each ruffle in place.
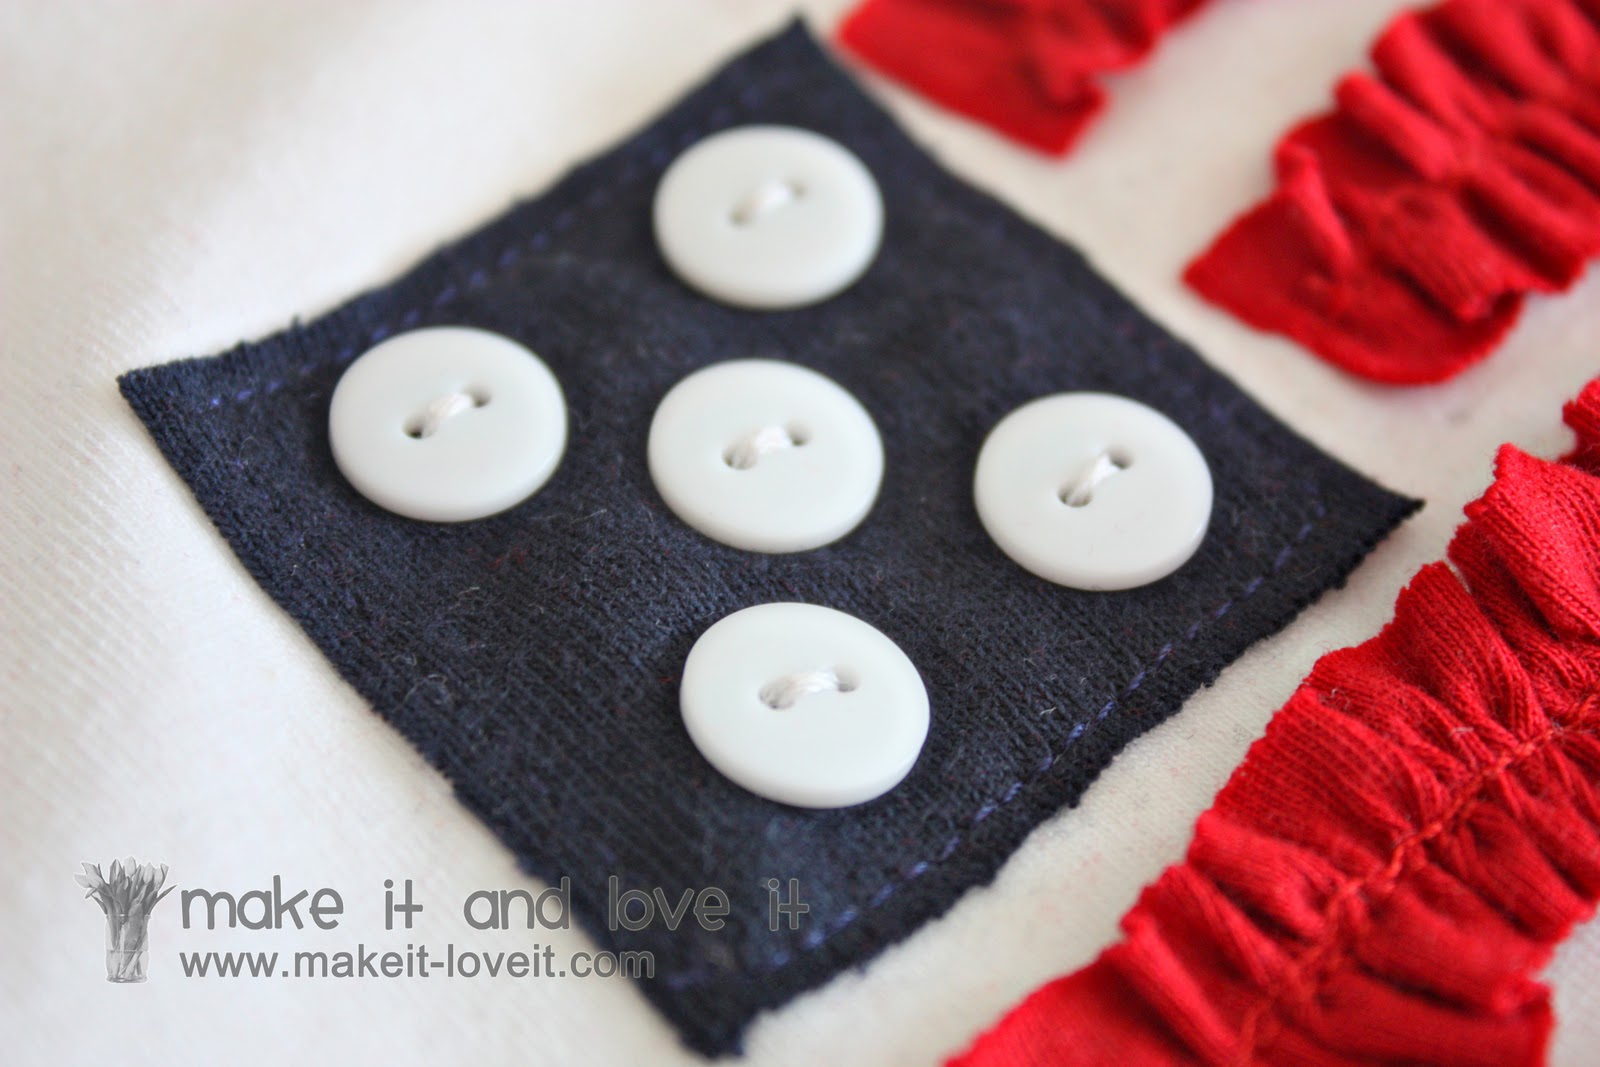
Then I cut a blue knit square (again, from an old tshirt scrap) and sewed it right to the shirt. Then I sewed five little buttons onto the square.
The more girly flag is now done.
Onto the more plain flag.
(Remember to adjust the measurements below for smaller or bigger shirts. This sizing was made for a 2T boys shirt from Target. And I just picked off the little pocket with a seam ripper.)
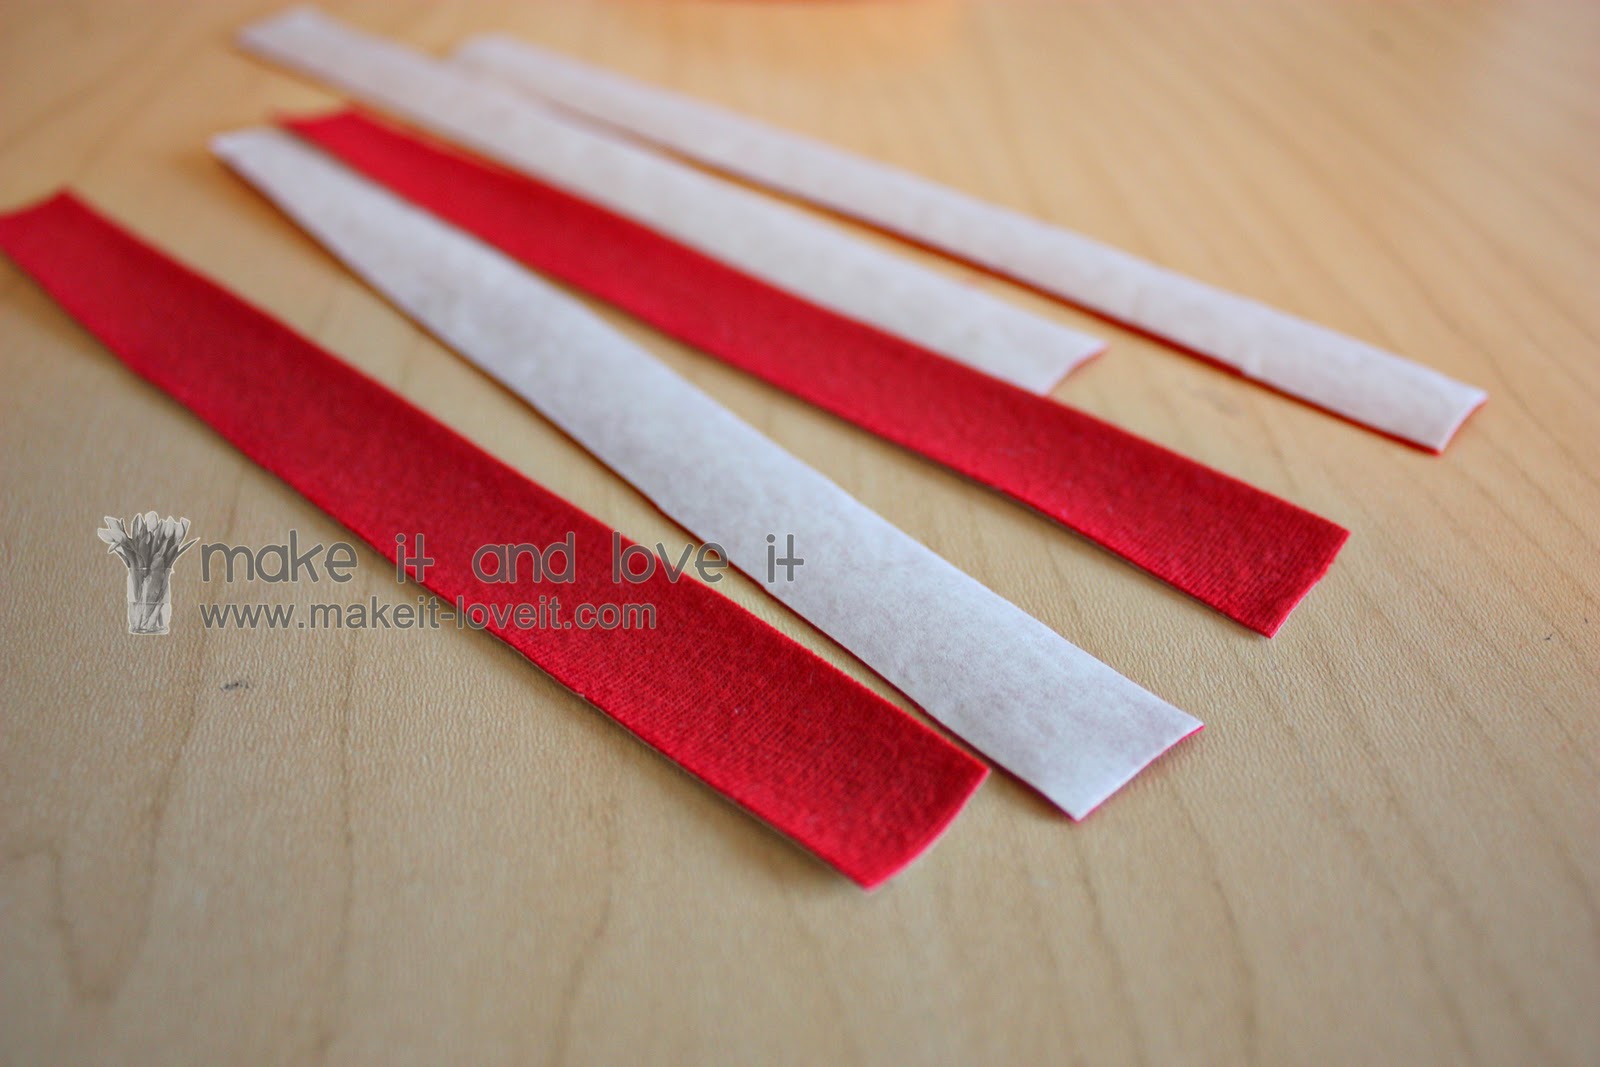
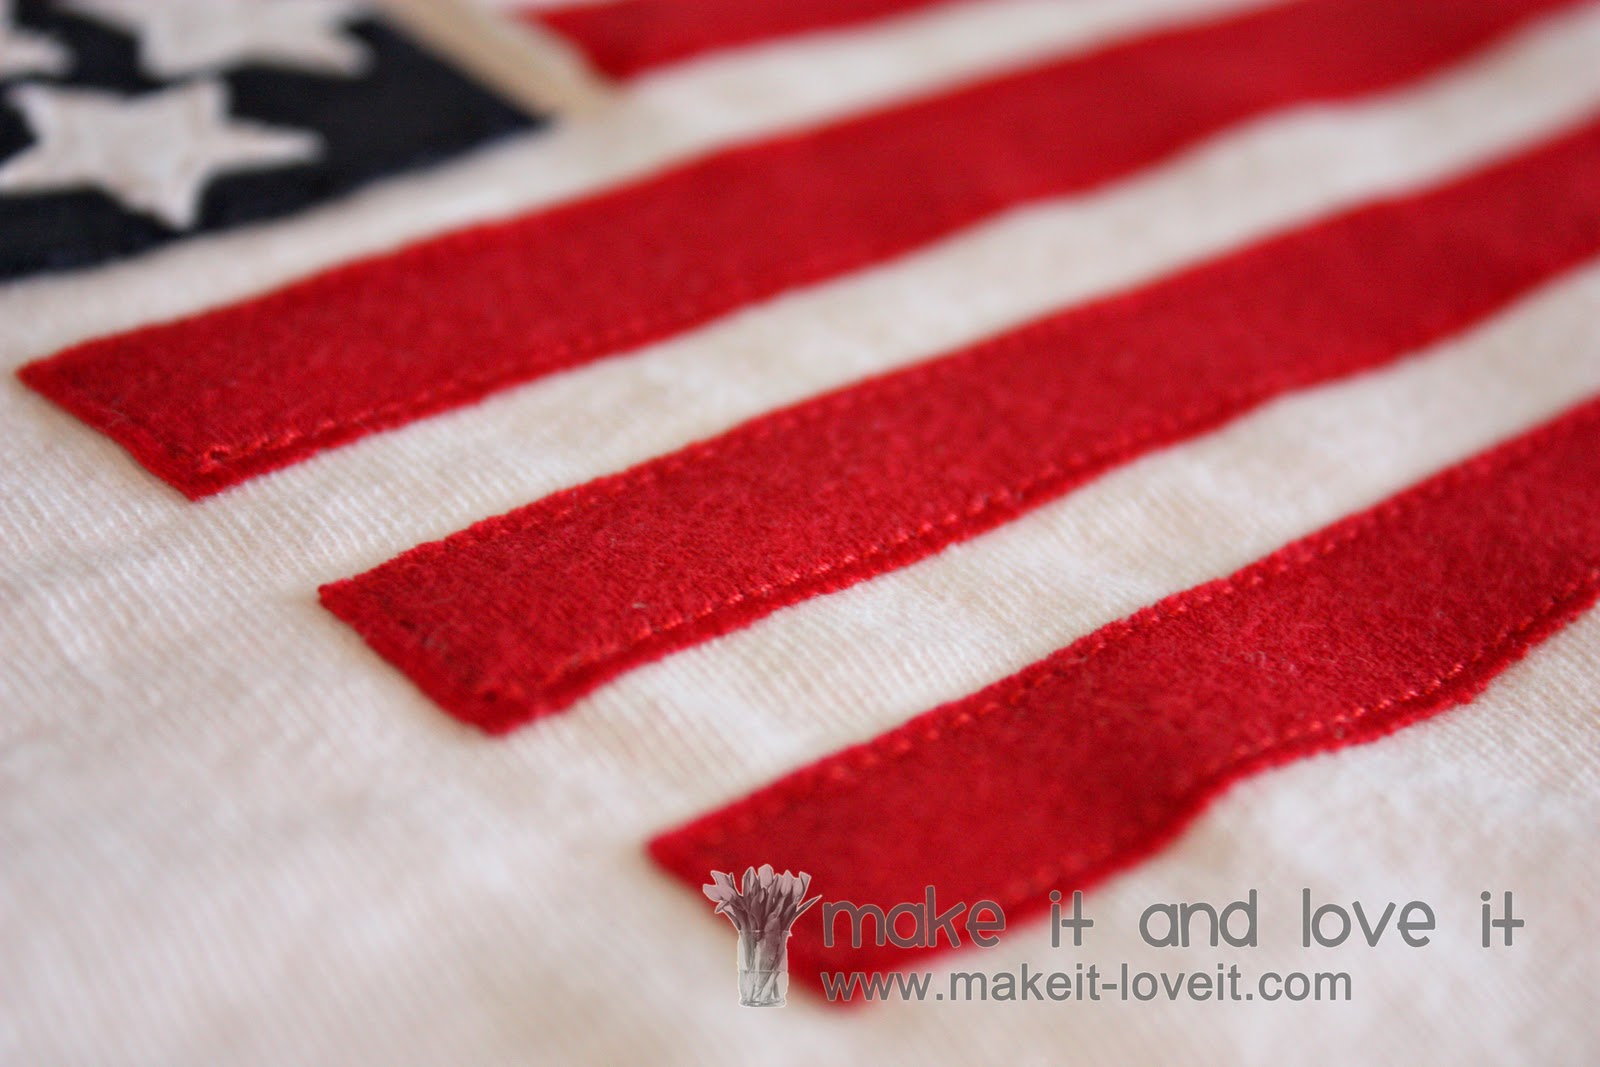
I first ironed on some Heat ‘n Bond (double sided adhesive) to a big chunk of the red knit. (from the old red tshirt I used above, remember?) From that, I cut strips of red that were 1/2 x 6 inches.
(See the paper backing of the adhesive on one side and the knit on the other side?)
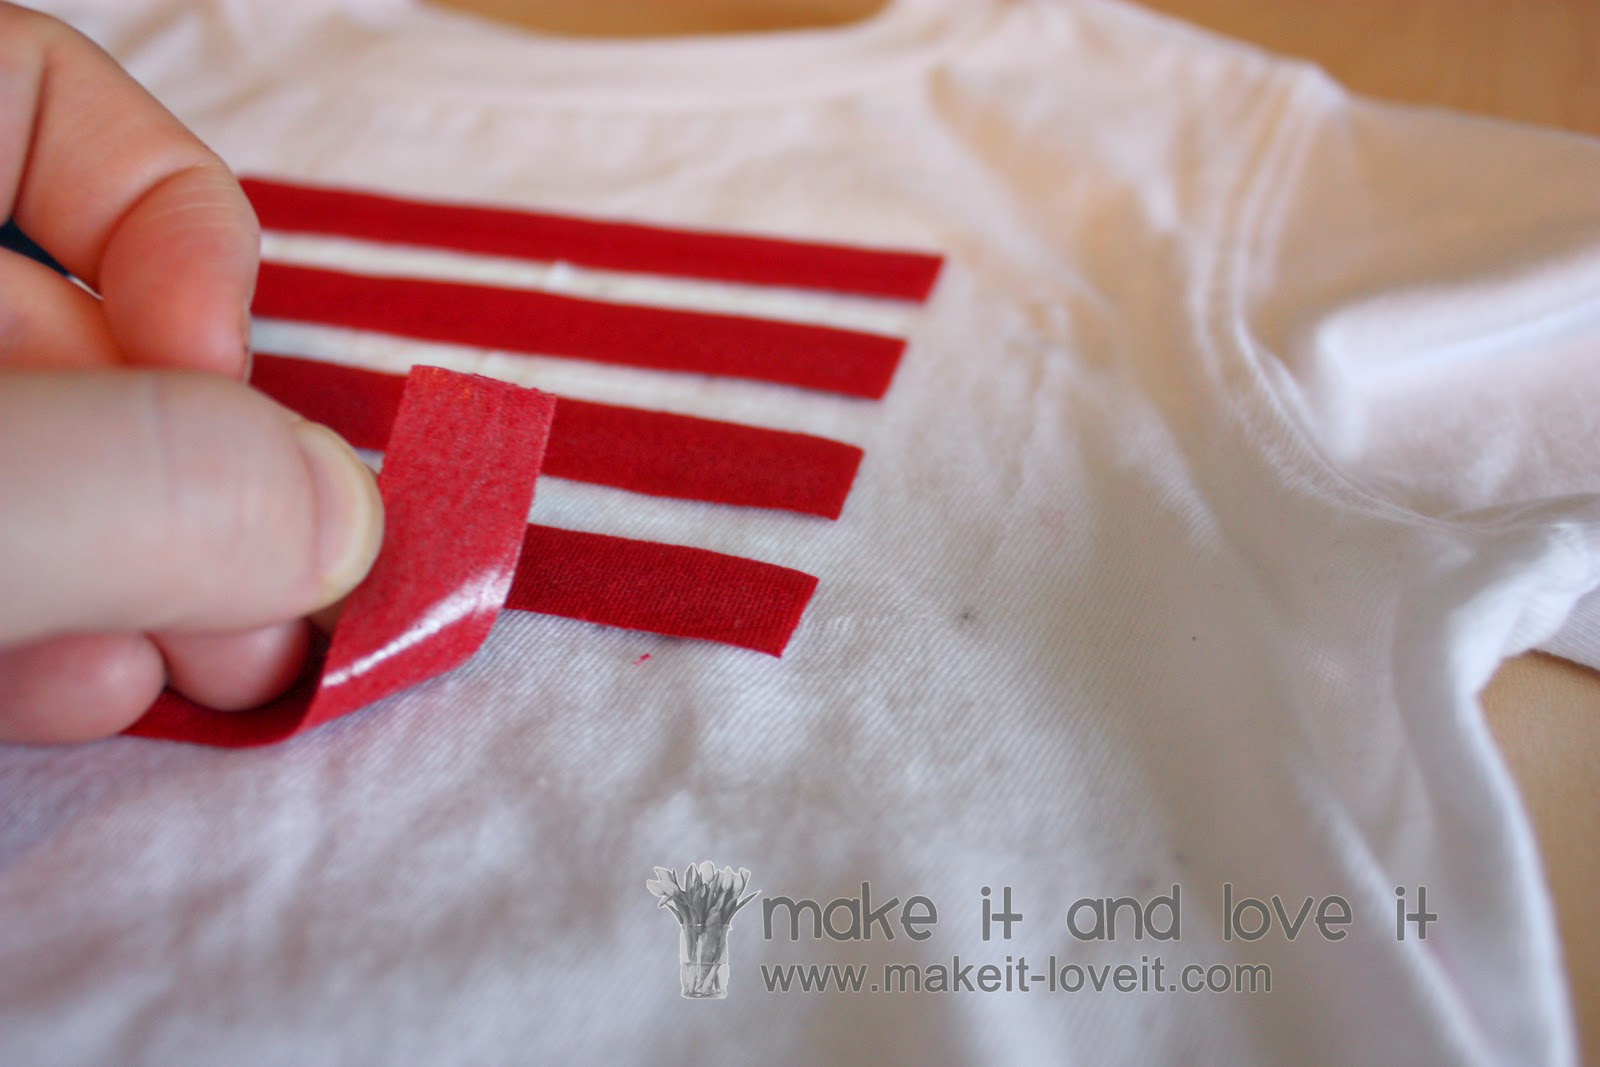
Then I peeled off all of the paper backing and layed each strip on the front of the shirt.
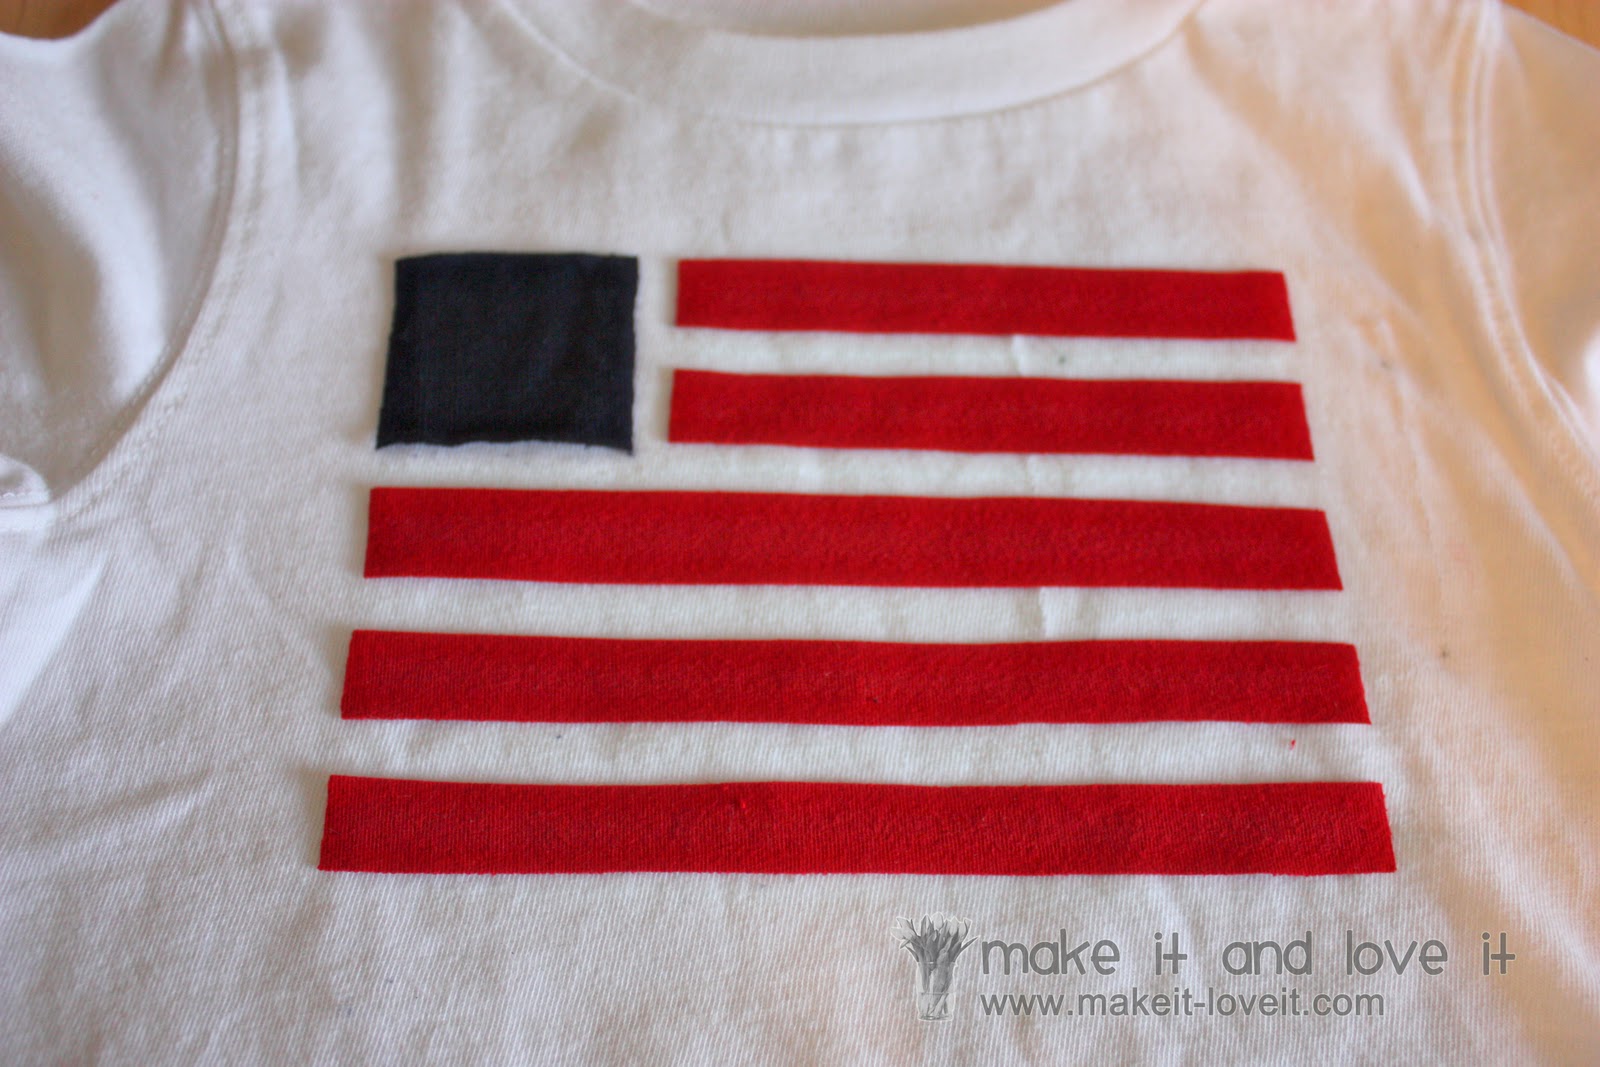
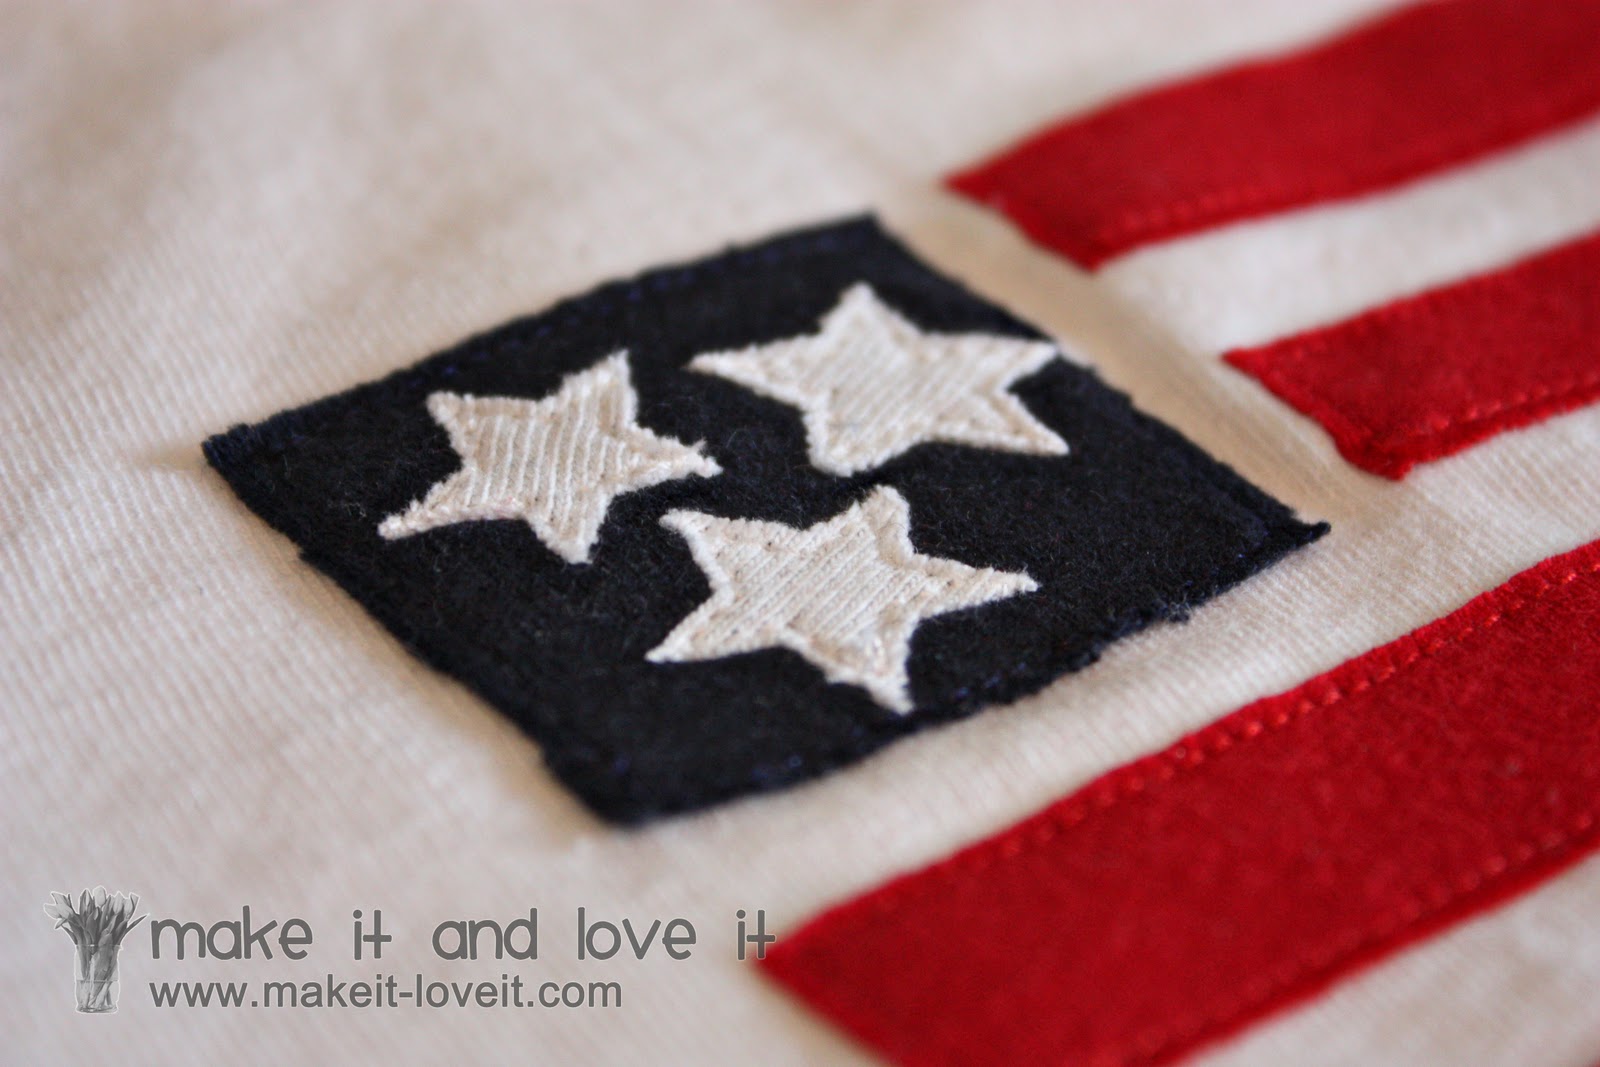
I added some Heat ‘n Bond iron on adhesive to a little blue square as well, and placed everything just where I wanted it.
I also attached some of the same Heat ‘n Bond to the back of a white square of fabric (it was actually the pocket that I picked off the shirt), then traced some stars onto the paper backing of the adhesive, cut them out, then added them to the blue square. Then I ironed everything in place.
Then I stitched around everything…
And that was it.
Nice and quick.
And pretty inexpensive. And yes, I know you can buy little flag shirts everywhere for about $5…….but they aren’t nearly as cute/fun as making your own.
Perfect for the 4th of July weekend.
Excellent post. I was checking continuously this weblog and I’m impressed!
Very useful information specially the ultimate phase
:) I handle such info much. I was looking for this certain information for a very lengthy time.
Thanks and best of luck.
I love the ruffles!
Thank you so much for sharing this idea. I made 7 of them for my grandkids; 1 girl, 5 boy, and 1 onsie. They turned out so cute and I am very pleased with them. You are the best!
I just decided against buying the Old Navy flag shirts… yet! Now, I see this and it is sooooo much cuter! I have twins coming and a bunch of white onsies that I feel bad returning. Now, I know what to do with them! Thanks for the tutorial you wrote sooooo long ago. Thanks to Pinterest old posts are becoming new!
I love this! for sure making this next year!!!
c’est une très bonne idée, j’adore !
Totally going to go pick up some plain white t-shirts!
I absolutely LOVE these shirts!! And have been waiting for this holiday to give it a try since I discovered your site in January. But I need your help!! I’ve perfected the boys shirt and have made 4 (3 for nephews, and 1 for my son). But I’m now onto the girl shirt for my 4 yo and I can’t get the knit fabric to gather nicely. It ends up twisting into a spiral and I can’t get it to lay flat without taking most of the gathering out. Any suggestions so I can finish this up in the next two nights?? ACK!!
Thanks for these seriously cute and easy t-shirts. I’m pinning them and including them in this little collection I put together… https://darlingadventures.com/?p=999
Thanks for the flag tee shirt idea. It is so cute! I am going to make it for my granddaughter. Thanks!
what a neat sewing project!
I am working on these tonight
So, cute, and at least they won’t look exactly like everyone else with the WalMart or Target 4th of July shirts.
Thank. Linda
Luv it
These are SOO cute! I am definitely going to make some for my girls. Thanks for sharing!!
This would be wonderful on the front of a pillowcase dress for a little girl. All White with dark blue double fold bias tape and red satin ribbon ties. Ohh and red,white and blue korker hair bows on pigtails….def. bookmarked for my daughters =)
i loved this i made one for each of my girls and i put one on a baby onsie and added the same ruffles to the bum
Smileynann – I see. The way to do that is open up the shirt and slide only the top side of the shirt under the needle…..and the rest of the shirt can stay bunched up off to one side or slide it under the bottom of your machine. You definitely have to move the rest of the shirt out of the way or yes, you'll sew through the back of the shirt. Does that make any sense? On my post here (https://makeit-loveit.com/2010/07/re-purposing-womens-long-sleeves-to.html), there is a picture showing how I attached little button snap strips to the inside of the sleeves of that grey shirt. There is a picture showing how I opened up the bottom of the sleeve, then wiggled the sleeve under the needle, making sure only the top lay of the sleeve was under the needle. That's kind of similar to the way you'll have to open up your shirt and only stick the top layer under the needle. Does that help? Let me know if you have more questions. (Email me at makeitandloveit@gmail.com……I get those messages quicker.)
So sorry, I still don't understand… So, I get that you sew through all the layers of the stars and background and shirt, but I just don't see how you can sew the pieces onto the front of the shirt without going through the back of the shirt. Those shirts are so TINY! And the neckholes are so small. So, I just don't quite know how you sew through the front of the shirt without accidentally catching the back side as well.
Thanks so much for your help!
these are so adorable! your little ones are too cute, as well! thanks for an awesome blog!
I used your SUPER cute tutorial and made shirts for my 3 kiddos for the 4th. Everyone loved them. Thanks for the inspiration…
here is the link to photos I took of them. I linked it back to you too. Thanks!!!
https://allaboutthegosselins.blogspot.com/2010/07/let-freedom-ring.htm
Just wanted to say thanks so much for the tutorial–I made the girl version for all 3 of my girls (and even one for a niece), and I love them! First time ruffling for me, too. If you click on my name's link, the pic is the header of my blog. Thanks for all your great ideas. :)
smileynann – I used double sided fusible web and ironed the stars onto the shirt and then I stitched around each star with my sewing machine. So I sewed through all of the layers. Does that make more sense? Let me know if you have more questions….
Ashley
This is such a cute idea! They turned out really cute!!!
Home run. Very nice job.anesseti
This is ADORABLE!!! I'm going to put this on a little white sundress for my daughter today!
One question I've had about sewing t-shirts… How on earth do you sew around those tiny little stars without accidentally sewing through the back? I just can't figure this one out!
These are adorable! I'm wondering if I have enough time to make one for myself today. . .
Thanks for the inspiration! I made a similar one for my daughter this evening :) Instead of buttons I hand sewed little stars onto the blue knit patch. It turned out cute! LOVE the blog, as always!!
So stinkin' cute! I'll be linking on Saturday for sure!
Darling shirts! Love them both – what a fun project :)
I am featuring this at somedaycrafts.blogspot.com! Sending you a little more traffic (like you need it:)
I love these!!!
U always have great ideas! I love it! :)
LOVE this…I am making it today. THANKS so much!
Love them! your kids are adorable!!
I love your blogsite too!
Lovely! Happy 4th July!
Very cute!
These are darling! I love both of them. Thank you for sharing your talents with us!
I am so making these for my girls. Thanks for the tutorial. I wanted something just like this.
Oh My. Goodness. That is so weird. I literally had the exact same idea, but I didn't have a shirt to use! Buttons and all! Except I was thinking red and white ruffles, you're much more clever to use the white shirt as the stipe :o)
You did it beautifully! And I love the boys version as well. Fantastic!
Sooooo cute!! I might have to do this to go with my little girls tutu!!
wow, you are amazing! I wish I could come up with my own ideas… until that day, I will just have to keep stealing yours. ;)
What a cute idea! Now, if only I had time to whip up a few before the holiday weekend is upon us. :-) Maybe next year. Great job though! I love these!
Adorable. Thanks for such great ideas.
Oooh, I love this. Just might have to make one for my little girl. Thanks! :)
Love!! I've been trying to figure out what to make for my daughter to wear this weekend! Thanks for yet another great idea!
You just inspire me every day! Thanks so much for the adorable ideas!
Ha! I usually don't comment…but I got a kick out of seeing your girly 4th of July shirt. It is very similar to a project I just did for a decoration for my house! Great minds think alike:-)
https://texastingey.blogspot.com/2010/06/4th-of-july-crafts.html
Those are so adorable and so easy! I can't wait to try them out.
OMG, cutest shirts EVER! So stinking cute. I am in heaven. Have the sewing machine…now to just learn how to sew:)
LOVE all your stuff!
these are sew adorable! I love the boy and girl versions!
I just may have to make these! What a fun idea! Thanks so much!
Love these! Too cute!!!:)
i love these shirts I might have to make one for my lil guy!
ok, so my boys are getting one each. IF i find time to do it…i'll let you know if i post pictures.
That is SEW cute! I just love the idea and wish I had seen it sooner! There is no way I can pull that off before this weekend with everything else I have going on :)
Thanks for sharing! :)
VERY Cute! If I wasn't running around crazy trying to pack for our out of town trip, I would so do this! I'll have to remember for next year! :-)
cute :)
The shirts are adorable. But the kids… they are so cute!!!! Thanks for sharing.
These are so cute I love them!
Is it pathetic that I want to make the ruffly shirt for ME?
No, it’s not! I was thinking the same thing!
Very,ver…………………y cute
so so so cute! I don't have little kids, but I think I'm still going to have to make me some. I have nieces and nephews…I'm sure they want to be patriotic…
These are too cute for words! Thnaks so much for sharing, can't wait to make my kiddos some!
This is absolutely what I was looking for. I was going to try to do the upcycled hoodies for my kids and their cousins but, I LOVE this idea so much more! FANTASTIC!
How creative and super cute. Thanks for all of your fun and affordable ideas!
LOVE it! You just changed my life. I was going to make everyone matching Lil Blue Boo stuff. Now, I am going to do yours. This is EXACTLY what I wanted! LOVE YOUR BLOG!
These are so cute. I was looking for a fun outfit for the 4th. Thanks!
I have been planning to make a shirt for my daughter, but this is much cuter than what was in my head. Thanks!
I love the little shirts… it makes me want to go back home for the 4th of july…. but alas here I sit in Canada…. oh well…
SO cute! Thanks for all the fun ideas!!
So cute!
Adorable!!
wow! so stinkin cute.
I took your argyle shirt pattern you did for your little boy and made some for my boys with a red white and blue theme. I love them. Thanks for all the great ideas!