Okay, I don’t think it has ever taken me this long to finish up costumes because I usually try to have them complete several weeks before Halloween…..but that didn’t quite happen, Halloween is in less than a week, and I’m just now sharing Oliver’s costume. Ack! I’m SO SORRY if you’ve been waiting on me to use these “How To Train Your Dragon” costume tutorials for this year — but the good news, is that this very last tutorial is absolutely the EASIEST of them all! And it’s so darn cute, that you’ll just have to whip one up really quick before the 31st!
In case you missed it, Connor’s Hiccup Costume HERE was finished up last week and he is in absolute love with it! And is counting down until the 31st (because I don’t let them play with them freely as dress-ups until after Halloween is over)!!
Connor is also really excited that his little buddy has now come to life…..because Toothless is DONE! And is ready to take flight, sword fight, and find new adventures together!
Oliver’s pretty happy about that too. Okay, let’s be honest….he has no clue what’s really going on, but he loves hats and thinks it’s funny that we keep laughing and gushing over how cute he is. This child is definitely the youngest and LOVES when everyone is staring at him and giggling. It makes him laugh—every time!
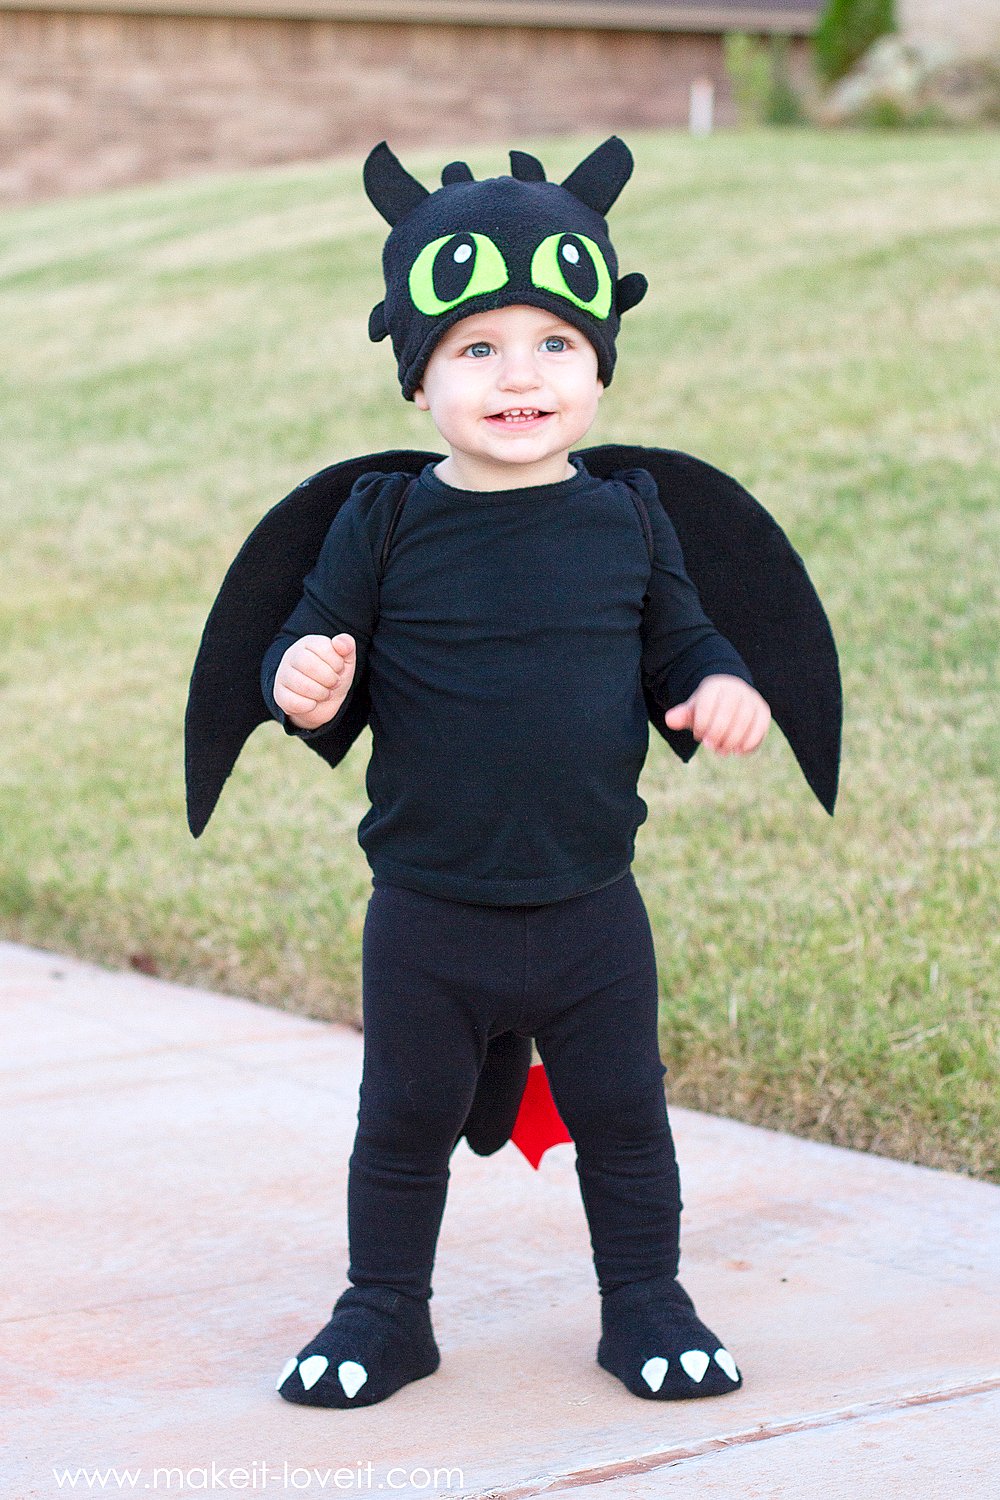
But come on, how cute is this little baby Toothless. I just about die every time he puts his head down and starts walking, so that we mostly see the big green eyes….it just cracks me up!
And while this costume isn’t quite as detailed as Hiccup, it didn’t really need to be. But don’t worry I didn’t forget to add Toothless’ tail……and the red prosthetic wing on his tail. (The tail is attached to a circle of elastic that you wear like a belt — nice and simple!)
Oh, and these feet are the EASIEST things you’ll ever make. They only happened on accident…..but I think I’ll make costume shoes like this in the future, EVERY TIME.
And the reason they turned out this way, was because I was running out of light to take pictures, I still hadn’t made the feet that I had planned on, and then last minute my husband said, “hey, why not cover some shoes with Connor’s black church socks?!” ((cue angels signing)) Great idea! So these are just black socks over some of Oliver’s shoes and then tucked under his pant legs…..with little claws glued on. PERFECT!!!
Those little wings are also SUPER EASY and quick to make (and would work great for all sorts of costume ideas)! They don’t involve any sewing….and are actually pretty sturdy without being heavy.
And since Oliver has recently learned to walk, he thinks he’s such a big kid. I guess he’s ready to try knocking a few doors this Halloween with his daddy!
A quick fleece hat + a speedy tail + a simple set of wings + some socks with claws glued on + shirt and leggings from the store = the cutest and fastest little TOOTHLESS around!!!
Want to make one too?
SUPPLIES:
***Check out my Sewing Terms 101 post, for additional help.
Okay, let’s get started. You could either buy a black stretchy beanie or you can make a really SIMPLE one out of fleece by using the pattern pieces from the Baby Cow Costume Tutorial. The hat is sized for a 6 month old but I used it on my almost 16 month old and just make the pattern pieces longer (not wider) and the shape still worked great.
Then, if you look at the real Toothless, he has some ears, some horns, and then some little side ears or flaps of some sort. So, I cut some really basic shapes out of felt for each ear and horn and then made each of them 3 layers. So each little shape down there is actually a pile of 3. This will just make them stiffer. Then, sew around the top and side edges. (Or, you can even glue these layers together but just leave the bottom 1/4 inch or so free from glue so that you can sew them to the hat.)
Now, just like the baby cow tutorial above, sew the darts in your hat pieces and then attach your ear and horn pieces the same way as the cow ears and then sew the hat together along the sides.
Now, cut some green eye pieces, some black inner eyes, and then little white circles for light reflection all from FELT and then place them on the hat where you’d like them. You can sew around each piece but I ran out of time and just hot glued each layer down. It worked just as well! :)
Now, for the tail, I cute two triangular pieces that were about 4 inches wide at the top and about 1 inch wide at the bottom. I also made sure to add an extra 1/4 inch around all the edges for a seam allowance. (Your tail size will vary depending on the size of your subject…..but don’t overthink it. Your tail can be more narrow and shorter or longer than mine, and will probably still look great!) Then, Toothless has his little red prosthetic wing piece on his tail so I cut one from red felt and the other side from black felt. But I cut two layers of each color for stability. Then sew the 2 layers together all the way around……or, if you run out of time, you can use hot glue. But just be sure to keep the hot glue 1/4 inch away from the edge where you’ll be attaching it to the tail.
Now, attach these wing pieces to the RIGHT side of one of your tail pieces and line up with straight edge of each wing with the edge of the tail….and about 1/2 to 1 inch from the bottom of the tail. Sew in place about 1/4 inch from the edge.
Place the two tail pieces together with RIGHT sides together and sew around the edges and bottom, using a 1/4 inch seam allowance.
Turn the tail right side out…..success!!!
Stuff the tail with a little bit of batting……don’t over stuff it…..just lightly, so it’s not bulging and awkward when it’s being worn.
Now, cut a piece of 1 inch wide elastic that is the same length as your subject’s waist. Overlap the ends of the elastic by 1 inch and then sew together with a zig-zag stitch along both raw edges. Then, place the edge of the tail along the bottom edge of the elastic and overlap by about 1/4 – 1/2 inch…..and then sew the tail to the elastic with a zig-zag stitch. (I pulled the elastic a little while sewing, that’s why it looks like it pulled in a bit and rounded out the top of the tail.)
Now, onto the wings. This sheet of plastic canvas is 12 x 18 inches and it was the perfect size for my wings. But if you are making this for a larger child, you may want to buy two pieces and overlap them by a few inches and then either loop some yarn through the edges to stitch them together….or wait until you have them all cut out and then hot glue them together when you’re constructing the wings. Also, you could always use cardboard for the wings too….however, they might get bent and won’t last as long. But that’s okay if this will only be worn a few times.
Draw your wing shape onto the canvas.
And then cut it out. As you can see, I decided to make the scallops bigger……so my sketched shape wasn’t exactly helpful. (If you had to use 2 pieces of canvas, make sure that the pieces are overlapping by about 3 inches but don’t glue together until after the next step.)
Now, cut 2 one inch slits near the upper center that are about 2 inches apart. This is where you’ll insert your elastic for the arm straps later on….so don’t forget this step.
Now, hot glue your canvas wings down onto some black fleece…..making sure to not place glue over the slits that you cut into the canvas.
Trim down the fleece to 1/4 inch away from the canvas edge. Then cut through your fleece fabric where those slits in the canvas are, with a sharp utility knife placed over a cutting board.
Then glue the canvas side down to another piece of fleece….also making sure that no glue gets on those slits.
Cut the other piece of fleece down to the same size and then add more glue around all the edges, sealing the layers of fleece together. Cut the slits through the other layer of fleece.
Now, fold some of your 1/2 inch wide elastic in half, slide the folded end through one of the slits and then back in through the other, leaving enough elastic at both ends to loop around each arm. Then try it on your subject to determine how much elastic to keep, put a knot in the two ends (or you can sew them together) and then adjust so that the elastic loops are even.
Now, the feet are SUPER EASY!!!! And I wish I would have thought of this sooner for other costumes. But I just slid some black socks over a pair of Oliver’s shoes……
…..and then hot glued little white felt claw shapes onto the front of the socks. Then, when it’s time to put them on, I just pull the socks down about halfway (so that it doesn’t mess with the claw placement), put the shoe on, and then pull the sock up over the entire shoe and up onto the leg. Then I pull the pant leg down over the sock and you can’t even tell. (Oh, and I also used a pair of black socks that had no-slip grip stuff on the bottom to keep him from slipping while walking. But if yours doesn’t have that, you can always add lines of hot glue to the bottom.)
And that’s it! Wasn’t that super quick and EASY?!?!
Have fun making your little Toothless…and enjoy!
-Ashley
. . . . .
If you’re looking for more inspiration, you can find all sorts of DIY Halloween Costume Ideas HERE.

Hi, I’m Ashley—the DIY-enthusiast behind this crazy blog!