Remember to add your homemade Halloween Costume photos to the YOU Made It and LOVE It Flickr account for our annual VIRTUAL COSTUME PARADE! There are so many absolutely DARLING costumes in there….add yours to it and I’ll share here on Halloween! (Make sure you have added them by October 30th)
——
Today’s contributor is Tiffany from Making the World Cuter. All posts written by Tiffany for Make It and Love It, can be found here.
. . . . .
Hi, I’m Tiffany from Making the World Cuter!
Thanksgiving is my favorite holiday…I feel like I say a lot of holidays are one of my favorites, but I REALLY love Thanksgiving the most. No presents, no big expectations, just a day to enjoy some delicious food and reflect on being grateful for those in my life. The fall decor is dreamy and I love making new pieces like this ‘Give Thanks’ board that can serve as a reminder all month to focus on gratitude.
Of course I understand those that don’t love it, but I love to cook, and we usually only celebrate with our own little immediate family or with one or two of our extended families, so it’s not too stressful for me. It’s lovely. I have had stressful Thanksgivings with family stressing out in the kitchen, or family members who fought…but every year I look forward to this holiday of being thankful for what we already have before we start buying and giving more things for Christmas. (Oh how I love Christmas though, it’s one of my favorites! ;))
For this ‘Give Thanks’ board, I wrote out some of the what I call “Sunday school answers” for what I’m thankful for…you know the usual suspects; family, friends, home, food, and a couple I’m fond of — talents and forgiveness. I wrote them in a silver metallic marker that matches the vinyl and hung them on the board using clothespins.
Then I stuck the whole thing on the mantel against my pretty ship-lap wall with some white pumpkins and a glass container of extra clothespins.
I have a Thankful “tree” on my table as my centerpiece with cute little free printable leaves for all of the kids and everyone to write what they are thankful for during the month, so this is just for decoration. You could totally use it for everyone else to write on though, if you wanted.
Do you decorate for Thanksgiving or do you just head right into Christmas? Like I said above, Thanksgiving is my favorite so I decorate everything…but you can bet your pumpkins that once everyone is finishing up with their third slice of pie, I’m out in the garage pulling out the reindeer, wreaths and jingle bells. :)

Want to make your own ‘Give Thanks’ board?
This project is simple and can be as big as you want it to be. I wanted mine BIG so that it could be the statement piece on my mantel.
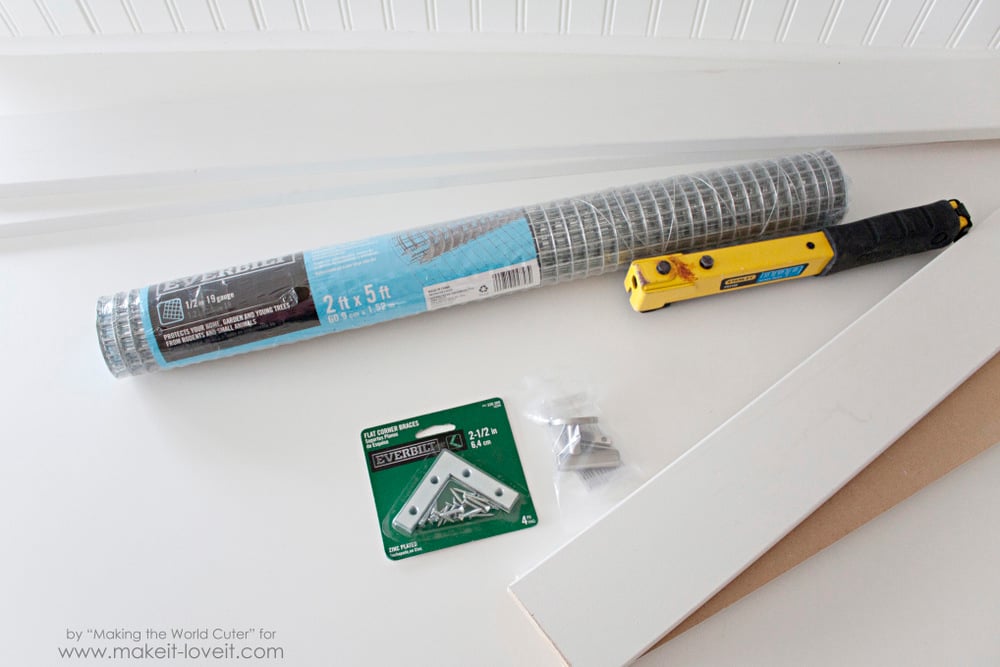
Supplies for this project:
After you have your boards cut, the next step is to build your frame.
Using a drill bit and the corner braces as a template, line up your boards and use the drill to create pilot holes for your screws. Put the 2 foot boards in between the 3 foot boards. So it will stand about 2 and a half feet tall.
This makes it easier to make sure you get the screws in the right place and also makes it so your boards won’t split. Pilot holes baby, always drill the pilot holes. :)
Then you just drill the screws into the holes. Easy peasy!

Then you have a frame! This project comes together fast!
The wire mesh, if you do it this same size, is already the right height. You just need to cut it to the right width. I set my drills on the wire to hold it down while I was measuring. 
You will want the wire to hang over the inside of the board enough so that you can staple it nicely. Using a pair of wire snips, trim the wire next to the edge of the square for a nice clean edge. That’s one of the many reasons I like this more than chicken wire, less scratches and cuts! Ouch! I still have about 2 feet leftover, so more fun projects!
Staple your wire onto the back of the frame. I tried using my husband’s staple whammer thingy first, HAHA, sooo not the right tool for the job! A good staple gun can have this part done in just a few minutes without any headache. I suggest going that route, for sure!
There you have the basic frame. Pretty! 
I wanted to be able to hang a wreath from it, so I purchased a hook that I liked and again, drilled the pilot holes before I screwed in any of the screws.
Then before adding the vinyl, you can definitely paint this in any color you choose, but I decided to just rough up the primer white with a sanding block. Can I just say WOW? It looked like a drug deal gone bad in my craft room when I was done! White powder everywhere! I would suggest doing this outside… 
I added the ‘Give Thanks’ and cute little arrow that I cut out on my Silhouette in a silver vinyl. If you have a Silhouette I saved the file in my dropbox, you can download the cut file here—>Give Thanks and Arrow Cut File. 
Then I hung a plain neutral twig wreath that found at Hobby Lobby and loved. A colorful wreath would also be adorable on it, don’t you think?
And that’s it!
Do you decorate for Thanksgiving or do you just head right into Christmas? Like I said above, Thanksgiving is my favorite so I decorate everything…but you can bet your pumpkins that once everyone is finishing up with their third slice of pie, I’m out in the garage pulling out the reindeer, wreaths and jingle bells. :)
What are your family’s “Sunday school answers”? What thankful strip would you add?
-Tiffany
You can find Tiffany over on her blog (Making The World Cuter) on Instagram (@makingtheworldcuter), and over on Pinterest (@tiffhewlett).

Hi, I’m Ashley—the DIY-enthusiast behind this crazy blog!