Ooooooh, I’ve been having so much fun planning costumes and gathering supplies! My mind is spinning in circles….so forgive me if I jump from one costume to another. Remember how we voted a week ago on what costumes you’d like to make? Well, the results showed that you guys are really wanting to try your hand at “mermaids” and “How To Train Your Dragon” characters. So, yes, you’ve got it……those are in the works! But, because I really need to purge this idea so that I can move on to something else, I just had to make this strawberry costume real quick. (And if you’d like to own this costume…I’m giving it a way. More info below!)
Yes, that’s the beautiful thing about this costume……it’s definitely a “quick” one! Chloe has changed her mind about what she wants to be for Halloween a trillion times and in a previous post, I mentioned how she told me one day that she changed her mind and wanted to be a strawberry for Halloween. I don’t think she was all that serious but the idea stuck in my head and I just knew it would be cute! :)
So even though it didn’t win the vote (it wasn’t in last place either), there was still some interest, so I went with it…..and made a sweet little Strawberry Costume!
And ha, it turned out even better than my brain imaged!! Especially that cute little leafy head piece!
There are no zippers, button holes, or finicky loop closures. Just an elastic casing at the top (for easy on and off)……
…..and more elastic at the bottom, to kind of pull the berry in and give it some shape.
The arm holes are very basic (no sleeves…yay!) and the whole thing is stuffed loosely with some fluffy batting. Because a happy berry is a plump and juicy berry!
Definitely a fun costume to make!
When I finished this berry costume, Chloe was so excited to try it on and take pictures with me! This child has so much spunk and is always making us laugh. After a few darling poses, she decided she wanted to be a strawberry from Fruit Ninja (a game on my phone) and starting slicing the air with her razor sharp imaginary swords. Hi-yaaaaaa!
Okay, back to sweet berry….whew!
When we were done taking a few pictures, Chloe asked if she could go put this costume in the dress-up bin…..but I reminded her that this costume wasn’t going to stay at our house (heaven help us—we have so many dress-ups!). I told her that maybe another child who lives far, far away has been dreaming of being a Strawberry and would like to wear this costume trick-or treating! She liked the sound of that…..and told me to make sure that it goes to a 4 year-old girl, just like her! ;)
SO—
If you don’t sew, don’t have time to sew, or would rather not sew…….this costume is up for grabs! It would work for a 3 year old (and would be longer) up to probably a 6-7 year old (and would be a little shorter). And no, you don’t have to be 4 and a girl to win this costume — as requested by Chloe! ;)
If you’d like the costume, leave a comment below (make sure you leave your email address in the comment form, not inside the actual comment, just the form) and let me know who you’d like this costume for! :) Hopefully it will work out for one of you! ****Giveaway closes Monday September 14th, 11:59 p.m.
However, if you’d like to make your own Strawberry Costume — let me show you how!
SUPPLIES:
***Check out my Sewing Terms 101 post, for additional help.
First of all, you need to decide how big to make your costume. Measure from the top of the shoulder (where the costume will begin) down to the point where you’d like the costume to end on the leg. Add 3 inches to that length. Then, measure around the largest section of the body (most likely the shoulders). Write down that number. These are the 2 dimensions you need to cut a FRONT and BACK piece from your minky.
For example, I wanted this strawberry to be about 22 inches long (if it’s stretched out flat, it’s actually a little longer than 22 inches….but the bottom pulls in and under a bit, but the 3 inches includes some to make up for that). So I added 3 inches to that 22 inches, which is 25 inches. And then the circumference of Chloe’s shoulders, was 22 inches. So, I cut 2 pieces of minky fabric (a FRONT and BACK piece) that were 22 inches wide and 25 inches long.
Then, I placed the 2 pieces of minky together, with right sides together, and sewed along the sides (the 25 inch length), with a 1/2 inch seam allowance. HOWEVER, you need to leave an opening at both sides, for the arm holes. To determine where to place those arm holes, place a measuring tape at the neck where the costume will start and determine how far down your arm hole will need to start. Be sure to add 1/2 inch for the seam allowance that you’ll be sewing later on at the top of the costume. So, I wanted my arm hole to start at about 4 inches from the top……but I marked a pin (the top black arrows below) 4.5 inches down on both sides for the arm hole to start. I placed another pin 10.5 inches down from the top edge on both sides (the bottom black arrows below).
Repeat the exact steps from above with the red fleece fabric…..so that you have 2 identical tubes of fabric with arm hole openings.
Now, slide the red fleece tube of fabric inside the minky tube of fabric, so that the RIGHT sides of the fabric are facing each other and match up the side seams from both tubes of fabric.
Also, be sure that the arm holes are matched up.
Then, sew around the upper edge of fabric (the edge that’s closer to the arm holes), attaching the minky tube to the fleece tube….using a 1/2 inch seam allowance. However, leave about a 1-2 inch opening (see the star below) along the top edge (doesn’t matter where), so that you can add elastic later on. (Also, be sure you’re sewing around the top edge in a circle, so that a head can fit through here, not straight across closing off the entire thing.)
Then, turn the fabrics right side out, slide the fleece so it’s down inside of the minky fabric……and line up the sewn edge, right along the seam. Pin in place, and then sew all the way around, using a 1 inch seam allowance (the dotted line below). You’ll also see that 1 inch opening from the last step…..which is now the opening for your elastic casing.
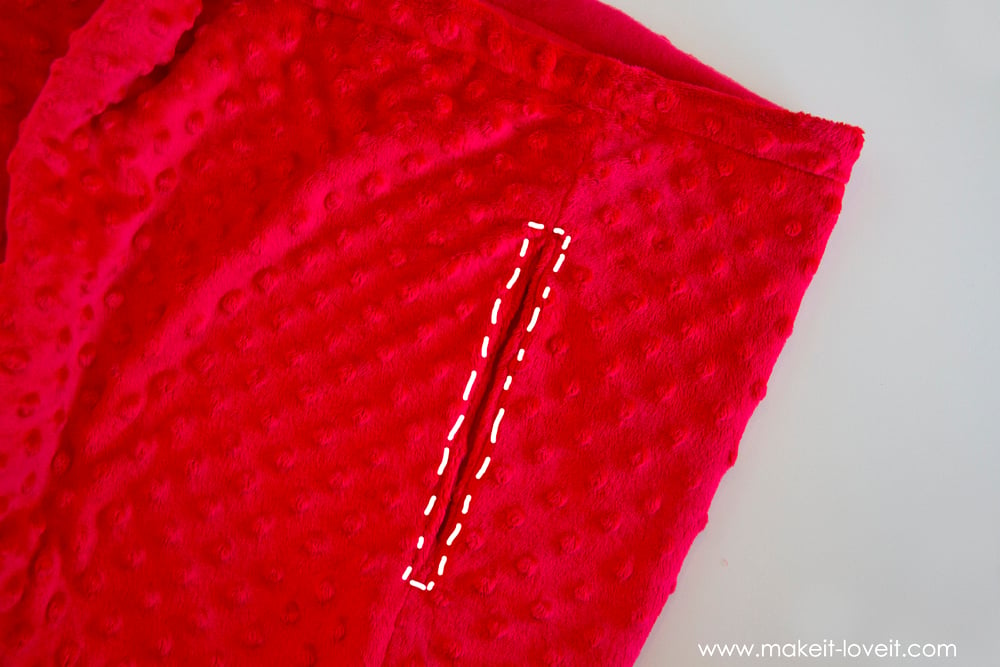
Now, locate one of your arm hole openings and line up the minky and fleece fabric along the side seam and pin in place (just to keep it from shifting).
Along one side of the arm hole opening, fold the fleece edge up and over 1/2 inch…..
…..and then fold the fleece edge down and under 1/2 inch, and then sandwich the folds together, enclosing the raw edges for both fabrics.
Continue all along the edges of both fabrics (along this one edge of the arm hole opening) and pin in place.
Repeat with the other edge of the arm hole opening.
Sew along the folded edges, in a narrow rectangle shape, completely closing off and raw edges. Repeat with the other arm hole opening.
Next, cut some basic leaf shapes from your green fleece fabric…..making sure the one edge is a straight line.
Then, pin them to the upper edge of the costume (the edge you just made the casing for), overlapping each leaf as you attach them. Pin them all the way around this upper edge, matching up the straight edge of each leaf with the upper edge of the red fabric.
Sew the leaves in place using a 1 inch seam allowance (which will sew right on top of the existing seam from when you created the casing seam).
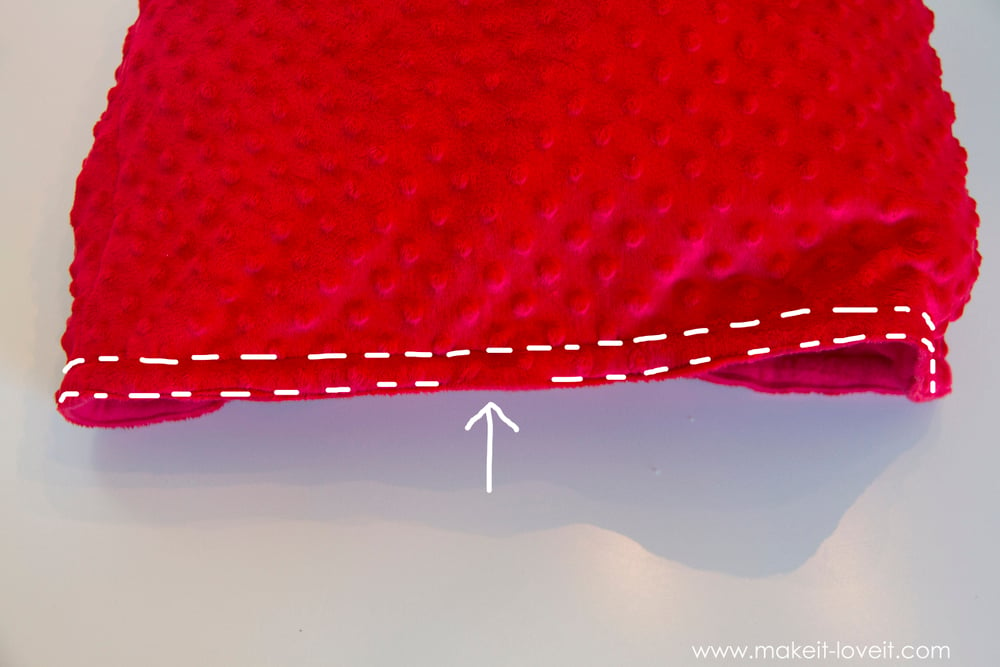
Now, line up the bottom edges of the costume and tucked under the the raw edges of the minky fabric towards the fleece 1/2 inch. Fold the fleece up toward the minky 1/2 inch. (This will enclose the raw edges of fabric.) Sandwich them together and pin in place (similar to what you did with the arm hole openings).
Repeat all the way around the bottom edge of the costume, making sure the folded edges are even with each other before pinning.
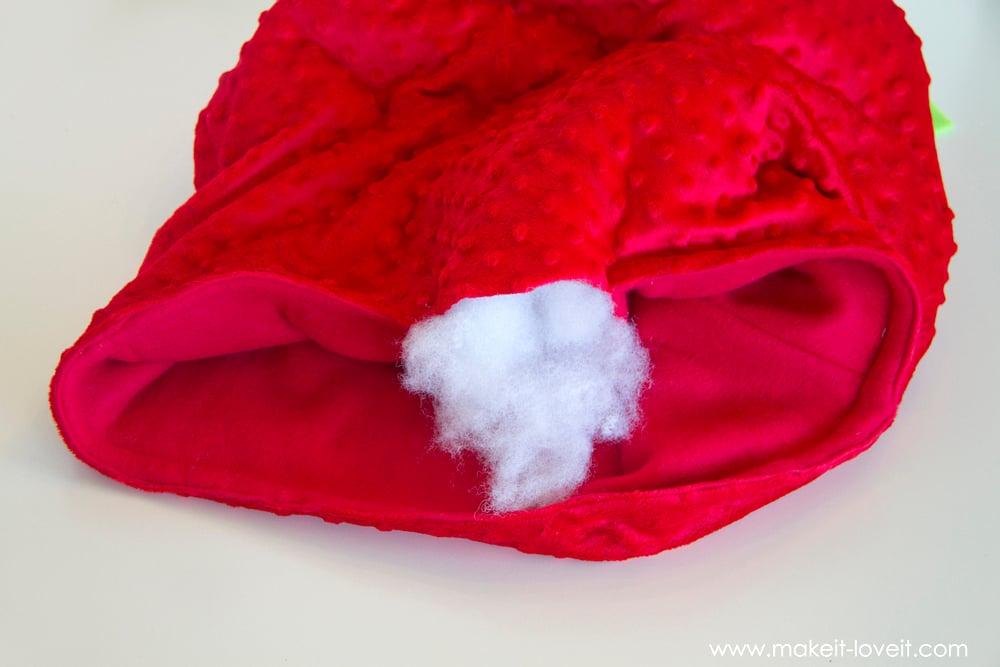
Then, sew along the very bottom folded edges, all the way around the bottom of the costume, leaving a 4-5 inch opening. Then sew another line, parallel to the first one, 3/4 of an inch from the first seam….also leaving a 4-5 inch opening.
Here’s the opening….which you will use for stuffing your batting inside.
Next, thread some of your elastic through the top casing of the costume (under the tops of the leaves).
Pull in the elastic so that it’s tight enough to cinch in the strawberry but still loose enough to fit over your subject’s head. Tie the ends of the elastic in a knot, trim off the ends, try to stuff the ends into the casing, then sew your casing closed.
Next, start stuffing pieces of batting in through the bottom opening, trying your best to evenly distribute all the way around the costume. (It doesn’t need to be firm and super stuffed. Just add enough so that it puffs out the costume just a bit.)
Now, you’ll need to close off the upper seam of the casing, which will enclose the batting area. But notice you don’t sew the other line of stitching closed.
Through the remaining opening, thread another piece of elastic all the way around the base of the costume, cinching it in just a bit (so that the strawberry pulls in a bit at the bottom)……then tie the elastic ends in a knot, stuff into the casing, and then sew the casing closed.
For the head piece, you’ll need a headband and some tin foil to wad up and shape into a stem shape.
Cut a circle from your green fleece, glue the center to the top end of your stem and then glue down the edges to the foil.
Then cut a rectangle slightly longer than the stem piece and start wrapping it and gluing your fleece to the stem.
Then cut some different sized leaf pieces from your green fleece……
……and then pleat the base a bit and glue in place.
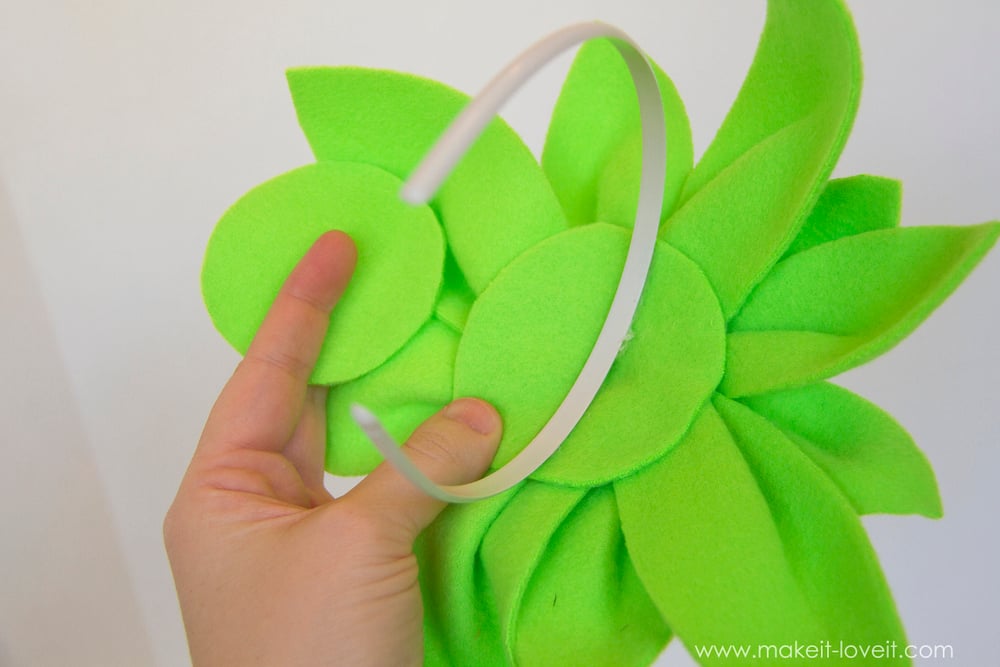
Cut a circle from your fleece to use as the base for your leaves……..and then start gluing your bigger leaf pieces to the base.
Keep stacking and alternating sizes.
Then, place the stack of leaves onto your headband (trying it on your subject is helpful) and then use glue to attach the base of the leaves to the headband.
Then, place the raw edge of the stem down into the center of the leaves with hot glue.
To help keep the leaves from shifting or flopping around on the headband, cut another circle of fleece, place some hot glue down, and then place this 2nd circle right on top. Press firmly.
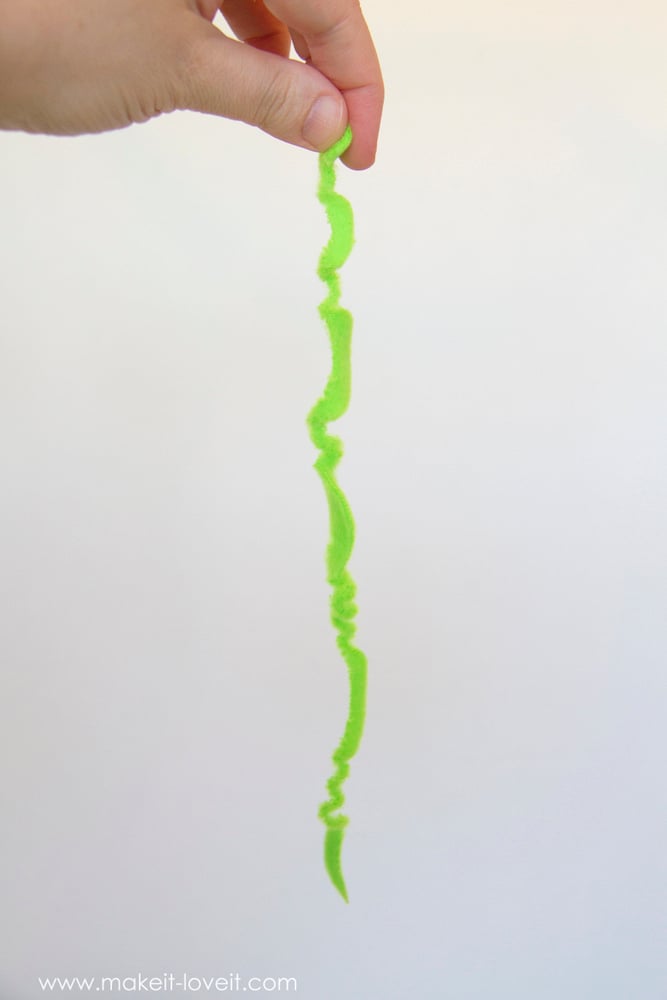
To add vines, cut out a circle from your fleece, then cut the circle into a spiral…….
……so that when you pick it up, it’s kind of curly.
Then, if you pull on the fleece, it will stretch out and get more curly and a little more authentic looking. Make several vine pieces.
Glue one end of your vine pieces to your head piece, hiding under a leaf here and there.
If you’re having problems with the head pieces slipping off your hair, add some lines of hot glue and let dry completely. This will help stick to the hair a little better.
And that’s it! A little strawberry costume all ready to wear!!!
Enjoy!
-Ashley
. . . . .
Want a few more costume ideas??
Star Wars R2-D2 Costume for GIRLS
Mary Poppins, Bert, and a Penguin

Hi, I’m Ashley—the DIY-enthusiast behind this crazy blog!