So happy to have Kim here, from Straight Stitch Designs! To continue with the Halloween ideas…..she has a simple costume that would be so cute for any age! Such a quick costume to whip up…..and also hilarious!
. . . . .
Hey Everyone! I am Kimberly from Straight Stitch Designs and I am back today to share with you something for your kiddos this month, just in time for Halloween.
How is it possibly already September? My kiddos are just headed back to school this week and I know Fall is going to be in full effect before I know it. The biggest part of fall in my house is Halloween and if your kids are anything like mine, they have been talking about Halloween since last year.
I will admit that I am usually a Costco costume kind of mom, or if I have really dropped the ball, I am an Amazon Prime 2 day shipping kind of mom. Not that it happened at all last year :) This year is going to be a little different, thanks to inspiration from Ashley on this blog. Seriously have you checked out all the amazing costumes she has made her kids?!
Even though I was totally inspired by Ashley, I had to be real with myself and do something easy for my first foray into costume making. The idea that immediately popped into my head was to make my budding sewist a spool of thread costume. This kid absolutely loves to hang out with me in my sewing room. So a spool of thread costume seemed like the perfect fit for him.
By using simple to find materials and an afternoon of your time, you will have a fun costume for your kiddo this Halloween. The huge bonus is that this only requires one sewn seam so it’s great for a beginning sewist as well. :)
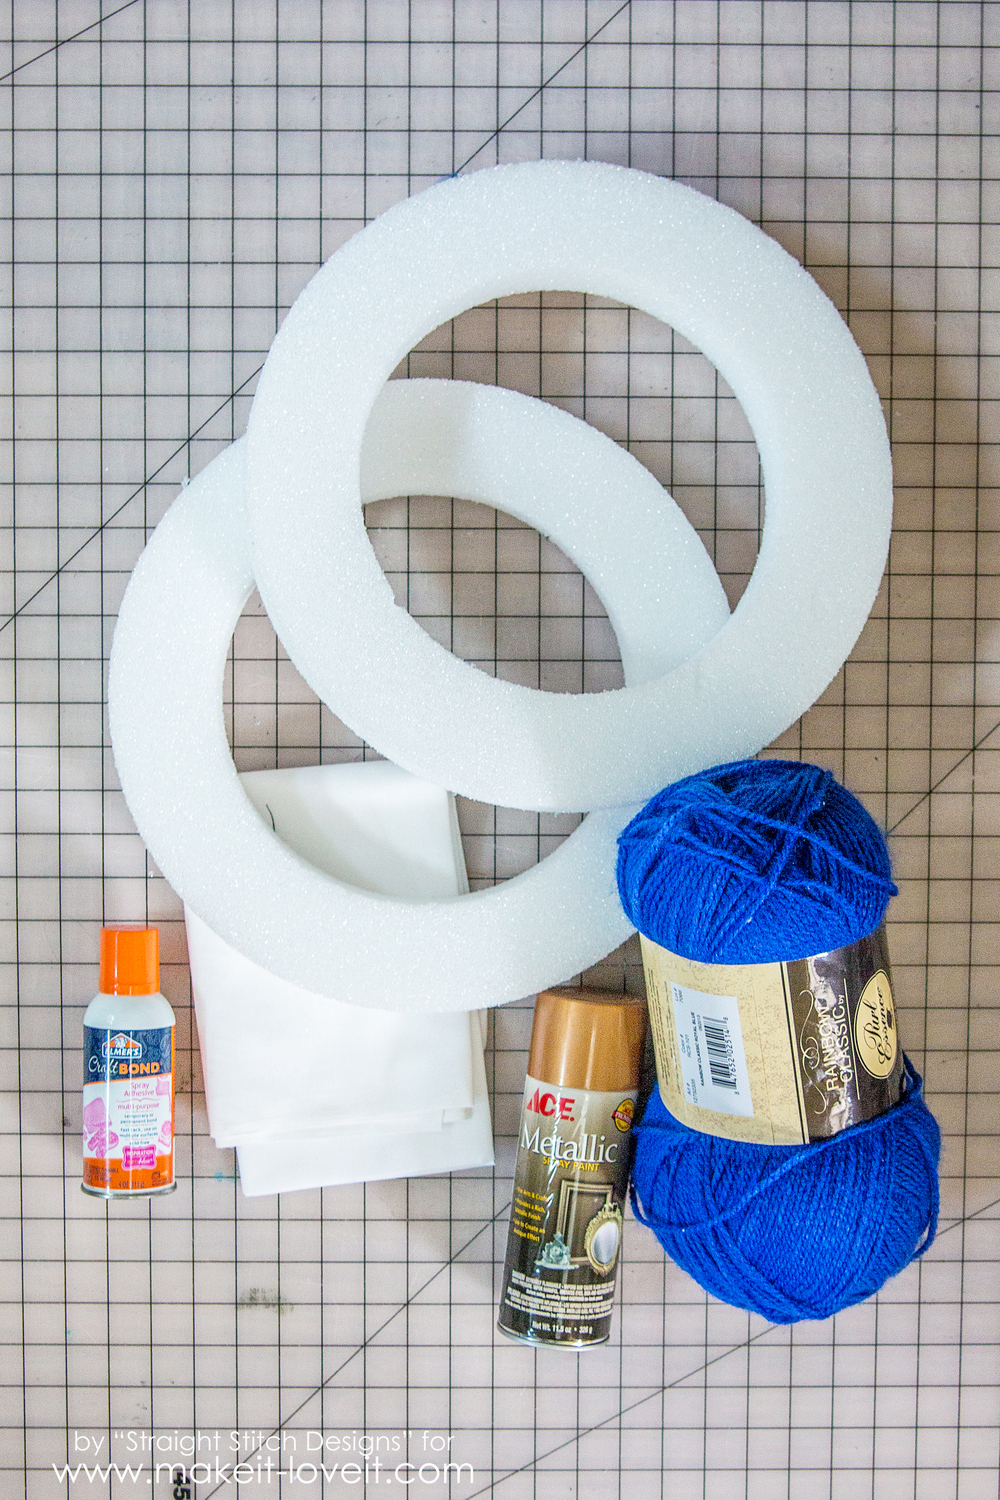
Here is a quick rundown of all the supplies you need for this project:
***Check out the Sewing 101 post, for more help.
You will need to start by measuring the inside of your foam ring. This will be the width you will use for your fabric rectangle. For the length of your spool of thread, measure your child from under their arm to the desired length. Once you have these two measurements add 1 inch to both numbers to allow for seam allowance and cut out a rectangle from your muslin fabric to that size.
To allow for enough drying time, lets go ahead and spray paint your foam rings. You can make these rings any colour you would like, I just happened to have a large supply of various spray paints in my shed and thought the brass one would be perfect. Give them a few coats, making sure to paint both sides of the foam.
Okay while that is drying lets head back to the fabric and start applying the yarn.
This step doesn’t have to be exact since you will be sewing the two ends of the fabric together forming a tube later. So just take your yarn and measure the width of the fabric. Once you have that length you can just create a whole bunch at one time by looping them back and forth. Cut the loops at both ends and you have a huge bundle of strings the width of the fabric.
This is the part that gets a little sticky so I highly recommend you put a piece of cardboard under your fabric so you don’t get your table or cutting mat all sticky. Take your spray adhesive and spray along the top of your fabric so you can fold the top over giving it a more finished look for attaching it later. Repeat for the bottom of the fabric.
Now you get to start attaching the yarn. Because the adhesive is pretty sticky I recommend working in small sections. Spray across the top of the fabric down probably 6 inches and the full width of the fabric, this is a great starting point. Now take small bundles of yarn and lay them out across the fabric. You are creating the effect of thread wound around the spool. Make sure to leave 1/2 inch at the top without yarn, for attaching to the foam later on.
Repeat until you have covered the entire piece of fabric.
Before sewing, make sure to fill in any empty spots with yarn. Just give it a fresh spray of adhesive and lay more yarn down. Repeat until the fabric is completely covered.
Fold the fabric in half, right sides together, matching up the raw yarn edges. This will be creating the tube to attach to the foam.
Sew the two ends together with 1/2″ seam allowance.
To reduce the bulk at the seam on the inside of the costume, you will need to trim the excess yarn down to the seam allowance. This doesn’t have to be exact but I found that using a ruler and rotary cutter worked great for me.
You are nearly done.
Grab your foam rings and your yarn tube which we are now going to put together. I decided to use both the spray adhesive and a staple gun to make sure the fabric was attached to the foam. If you don’t have a stapler, you can also use either some sewing pins or push pins, but definitely still use the adhesive.
In small sections, spray the inside of your foam with adhesive and press the top edge of the fabric to the foam. You can either staple of pin the fabric in place at this point, to give it extra support. Work your way around the circle spraying and sticking the fabric to the foam as you go. Once you have done this, I recommend giving it a little bit of time to cure before moving on.
Once the adhesive has dried, you can repeat the same process for the other end of the fabric and your second foam circle.
The last thing I did was stick my kid inside and cut ribbon to fit for the shoulder straps. Secure those with spray and a staple or safety pin (or hot glue) and you are all ready for trick-or-treating!
The costume comes on and off pretty easily for potty breaks and has enough room to fit layers underneath if your weather is cooler for Halloween.
My little guy was pretty excited to wear his costume and I know he is going to get a lot of attention on the big night! You don’t always see a spool of thread walking down the street. ;)
Have fun making your own spool of thread for your kiddo!
-Kim
You can find Kimberly over on her blog (Straight Stitch Designs) on Instagram (@straightstitchdesigns), and over on Twitter (@straightstitchd).

Hi, I’m Ashley—the DIY-enthusiast behind this crazy blog!