Oh you guys, we have another really fantastic guest blogger to introduce you to today. Kimberly from Straight Stitch Design is one talented lady…….and whips up some darling sewing projects! Especially all of the clothing items she sews for herself — so much inspiration on one blog! :) Thanks for joining us Kimberly, so excited to have you join us today!
-Ashley
. . . . .
I am Kimberly of Straight Stitch Designs and I am so excited to be here sharing how I keep my kiddos occupied in the car with my chalkboard lap desk.
As the summer gets into full swing, everyone is squeezing in all the family time they can. And many times that means a road trip. Whether it is a trip to see the sites around the country or a long drive to see family, keeping the kiddos occupied is the key to a successful road trip!
The best part about this project (besides how quickly it comes together), is that you can customize it to fit your car seat. So don’t worry if you have one that isn’t as large as ours, because goodness our car seats are huge!
What’s great, is that the surface has a chalkboard coating and works with chalk, but the desk is also perfect for coloring books and other toys!
And all of the supplies can be kept handy on both sides of the desk, in these removable pouches.
Let me show you how to make your own…
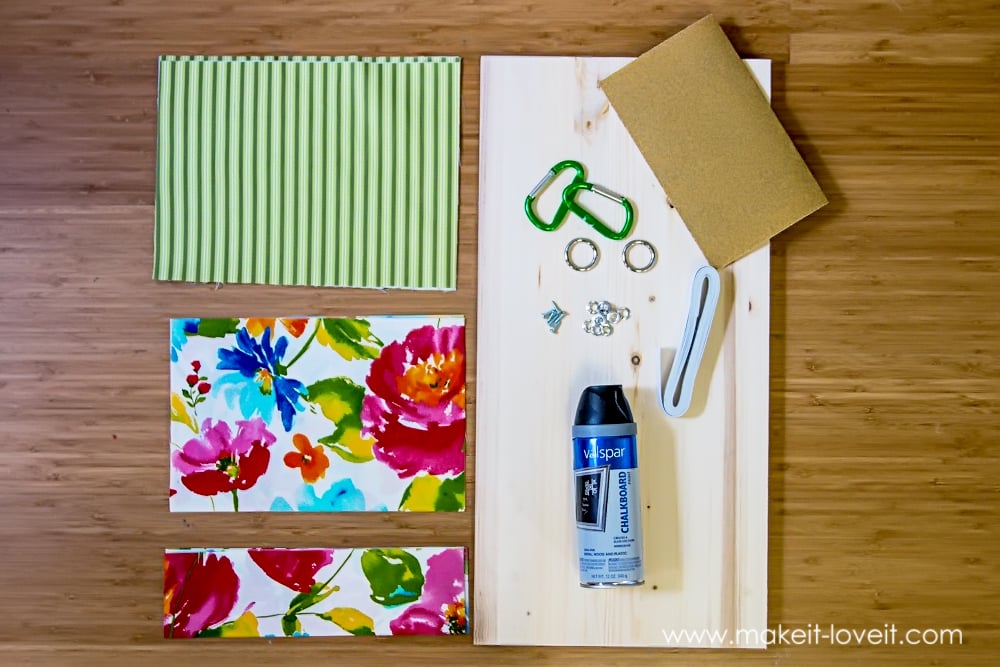
Here is a quick rundown of all the supplies you need for this project:
***Check out the Sewing 101 post, for more help.
You will need to cut the following pieces from your fabric:
Since the chalkboard paint needs a little bit of time to dry it’s best to get started on the desk part first. When you purchase the wood it is going to have hard edges and maybe even some rough wood where it was cut down. I like to take a piece of sand paper and sand all of the edges and corners making them slightly rounded. This step is completely optional but I think it ends up leaving you with a more professional look to the project.
Now the fun part!
Is anyone else addicted to spray paint? I pretty much get heart eyes every time I am in the spray paint section of the hardware store. There is a never ending list of things I want to spray paint. My technique has continued to improve over the years for sure, but I like to think I am getting pretty good at it. We won’t even talk about some of my first attempts years ago that ended up with more paint on my hands than the project.
When spray painting something like this I like to prop up the wood with something so the painters plastic doesn’t stick to the paint while it is drying. I highly recommend following the instructions on the can, while it is pretty straightforward it is good to know the time to leave between coats and how long it takes to cure because it could be different for chalkboard paint.
While I waited for the second coat to dry I headed into my sewing room to get started on the hanging pockets at the ends of the desk. We will start with the pieces that measure 12.5″ x 3.5″ that make up the small pockets for crayons and chalk.
Take two of the pieces and place them right sides together. Sew both of the long sides with a 3/8″ seam allowance. You will be left with a tube that has two open ends.
To reduce the bulk at the seams I usually cut down my seam allowance to 1/8″ before turning the tube right sides out.
Flip your tube right side out and head to the ironing board to press the seams, this will allow for crisp edges when top stitching. For your second pocket piece you will be following the same steps as above with the exception of only sewing 1 of the long sides. This will all make sense when you put the pockets together in the later steps.
Top stitch the top edge of both small pocket pieces with a coordinating thread. Set pieces aside.
To create the large pocket for a sketch pad or books it will be following the same process as you did for the second pocket above. Take your 12.5″ x 8″ pieces and place them right sides together. Sew along one of the long sides with a 3/8″ seam allowance and trim your seam allowance down to 1/8″. Fold your fabric wrong sides together and press seam.
Topstitch the seam with coordinating thread.
Now to put everything together. Lay your large 12.5″ x 9.5″ with right side up. Take your small pocket piece that is only sewn on 1 long side and align the raw edges with the bottom of your piece. Pin in place. Center the second pocket piece vertically in the space above the bottom pocket. Pin in place.
Sew along the bottom edge of the top pocket securing it to the background fabric. This will close the bottom of the pocket. Lengthen your stitch slightly and baste the pockets along the two short ends and along the bottom. If you aren’t familiar with basting I highly recommend reading this great Sewing Terms post that Ashley put together. It explains so many sewing terms in great detail.
Take a second piece of your main fabric and lay with right side up. Align the raw edges of your large pocket with the bottom and sides of your main fabric piece. Pin in place.
Baste in place along the three raw edges of the pocket piece, securing it to the main fabric piece.
Place your main fabric piece with the two small pockets basted to it right sides up. Lay one of the main fabric pieces right sides together and pin in place. Sew two pieces together making sure to leave a 3 inch opening along the bottom to allow for flipping it right side out.
Clip all of your corners so you can get a clean sharp corner after turning it.
Turn your piece right sides out and press all seams well. Make sure to fold the seam allowance of the opening inside so that you can sew the opening close.
Topstitch around the entire piece making sure to close the opening along the bottom. Repeat with the large pocket piece.
I love the world of sewing because it gives you a chance to try something new, and I have to say I may have found a new obsession, GROMMETS! Who knew they were so easy yet super satisfying.
Lay your grommets out along the top of your pocket piece, you can be super scientific and measure or do what I do and just eye ball it.
The basic process for grommets is the same but I recommend you reading the packaging for your grommets if you need any additional help, they do a great job of walking you through the steps.
Once you have determined the placement of your grommets you will need to trace the inside circle of the top grommet piece to know where to cut out the fabric. Repeat with the second pocket piece.
Using the small tools that come with your grommets, hammer the grommets in place. Step back and admire your finished pocket pieces!
Because little kiddos don’t always keep things on their laps in the car I have put together a quick easy elastic tie to hold the desk in place. Head to your car and measure from the arm of the carseat to the latches where the carseat attaches to the car. Use this measurement for the elastic.
Take 1 of your O rings and the piece of elastic you just measured for. Put the elastic through the O ring and sew in place.
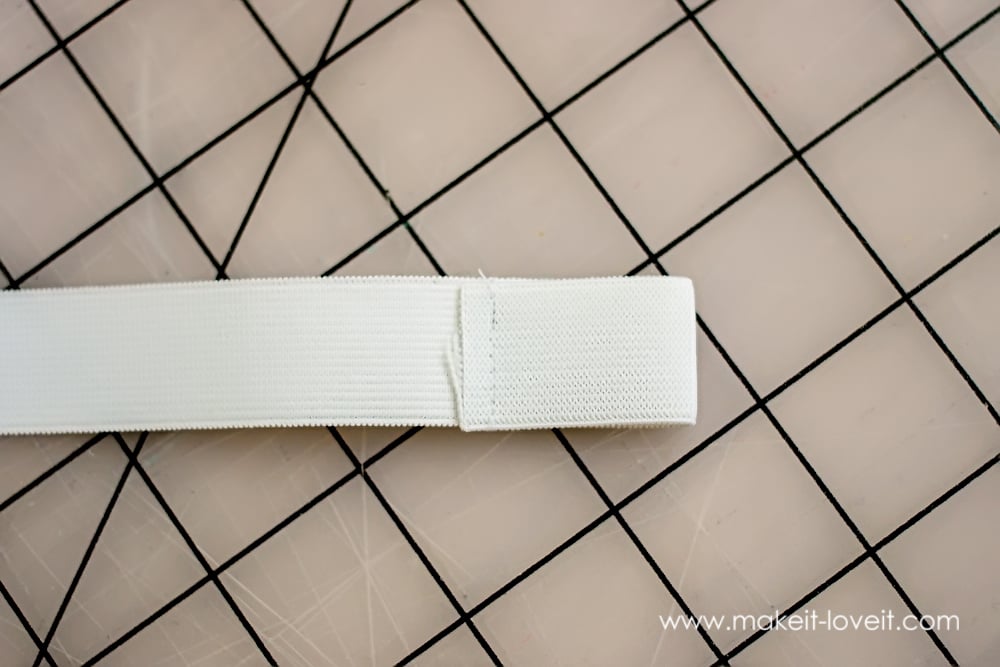
On the other end of your elastic you need to make a loop for the carabiner to attach. Just fold over your elastic 1″ and sew in place.
Repeat to make a second elastic tie. Easy peasy, am I right?
We are in the final stretch, grab your desk piece which should now be all dry and cured. Hold your pocket pieces up to the end of your desk piece and mark where the grommets line up. Screw in three screws making sure to leave the outside screws out 1/2″ and the center screw out slightly more to leave room for the O ring and grommet to hang.
Ta-Da! You just made your very own chalkboard lap desk!!
Good luck!
-Kimberly!
You can find Kimberly over on her blog (Straight Stitch Designs) on Instagram (@straightstitchdesigns), and over on Twitter (@straightstitchd).
If your car seat is needing a little TLC, you might like this tutorial on how to recover it!
Try making this fun Car Trash Bag that fits right on the back of your seat. Imagine the fun fabric matching possibilities with these projects!

Hi, I’m Ashley—the DIY-enthusiast behind this crazy blog!