Home » DIY Tutorials » DIY Crafting » Crafting: Miscellaneous » Trash Bag – Car

Save
Does it just bug you?
It drives me crazy. I hate the pieces of trash everywhere (especially the small pieces like gum wrappers, post-it notes, receipts, etc)………..so I genuinely needed a solution.
Here’s something worth a try.
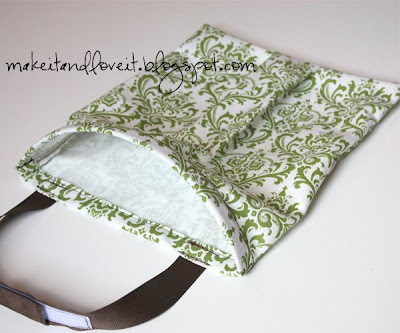
A little bag to attach to the back of your head rest.
That is always propped open.
(Scroll down to see the secret.) ((wink))
And it’s fabric, so if you happen to get something sticky in there…..pop it in the washing machine.
You’ll need:
Along the 12 inch side of the front piece (the bottom), find the center and pin it. Then measure out 1 inch on either side and place another pin at each spot. Then measure out another inch from that and place more pins. So you now have 5 pins, all an inch apart.
Save
First, fold over your fabric from the 2nd pin from the left over to meet the first pin on the left.
Save
Then do the same with the 2nd pin from the right, over to meet the first pin on the right. Now you’ve got 2 pleats that will be at the bottom of your bag.
Save
Then, place your front piece together with the back piece, with right sides together. Pin along the bottom and sides.
Save
Sew along the 2 sides and the bottom with a 1/2 inch seam allowance. Clip your 2 bottom corners. Then do a zig-zag stitch close to your seam. Trim the excess fabric away.
Save
Turn right side out and poke your corners out with a pencil (or something similar) to make them sharp and crisp.
Then, fold your front top edge towards the inside, 3/4 inch. Then fold it down another 3/4 inch, creating a casing for your boning. Pin it into place and then sew along the bottom fold, securing the casing into place. Don’t sew the back side yet.
Save
Then sew one end of your casing closed, right by the seam where the front piece and back piece meet.
Save
Cut an 11 inch piece of boning and slide it in your casing, making sure you slide it in the right way, making the boning push outward. Then sew the other end of the casing closed, on the other side where the front and back pieces meet. If you need to trim your boning to fit better, go ahead and do so but the boning needs to fit in there pretty snug.
Save
Then, fold down your back piece the same way (3/4 inch, and then 3/4 inch again) and sew it into place.
Save
Then cut two pieces of ribbon (I used grosgrain)……you might need to measure your seat and headrest and see how long you’d like it to hang down. I cut each of my ribbons 8 inches long. I heat sealed the ends of the ribbons and then attached them towards the outer edge of the bag so that it would hang well in the car. (**Or you can just make strips of fabric.) Then I attached velcro to the other ends of the ribbon.
Save
And now you’re set.
Go tidy up that car. :)

Share via:

