Some of you have reading this blog for years and years (or maybe it’s only been my mom for that long…hi mom!) — but some of you may remember years ago, when the sweet little face of Ruby Jane first graced the internet with her big beautiful eyes……and has since made a big impact on this world. In short, little baby Ruby left this world after 7 months of life, due to liver failure. My heart is still drawn to baby Ruby, even after all these years.
Ruby’s mom, Ani, contacted me several weeks ago about a project that she and her older daughter Kate started recently, called Project Serve Together. (instagram: @servetogether) She said that any time they have felt sad since losing Ruby, they would think of some sort of service to do, and do it RIGHT THEN….and have found so much joy in doing so. They started Project Serve Together on Ruby’s 3rd Angel Day (or 3 years since her passing) and decided to invite others to join them. Each week, they pick a service to do, and ask everyone to join them in completing the service with their own family. On her site, Ani mentions that “[serving] has helped us in our journey of grief, in bringing us joy and happiness as we lose ourselves in others.”
After scrolling down a bit on her site, my eyes fell upon a quote on her sidebar… “the happiest people I know are those who lose themselves in the service of others. — Gordon B Hinckley”
Right at that very moment, I immediately recalled how many times in my own life that any sorrow/frustration/discouragement in my life, has always been lightened when I have forgotten myself, and reached outward. There is so much truth in that one single statement.
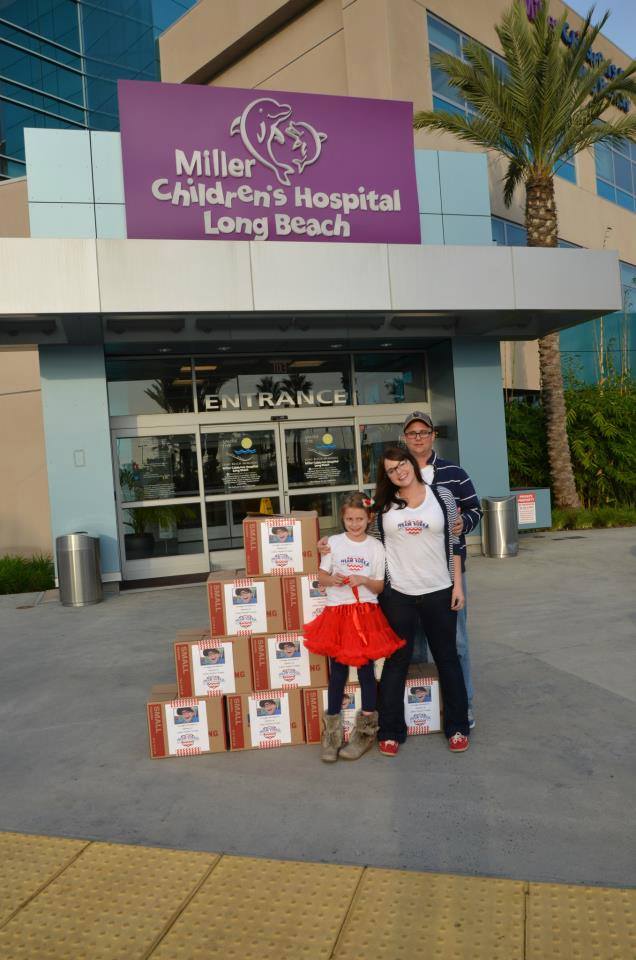
The reason for Ani contacting me recently, was to tell me about her most recent project that she and her daughter have been wanting to do and asking a quick favor. They met a family while Ruby was sick, who also ended up losing their son Collin, or “Bubba”. Each year, Bubba’s mom Julie, collects pillowcases and donates them to the Children’s Hospital. She remembers Bubba receiving a pillowcase in the hospital and was so impressed by the warmth that this one little pillowcase brought her son, so she wanted to continue doing the same for other sick children.
This is where I come in. But my part is the easy part. I’m just going to show you how quick and simple it is to make a basic little pillowcase (3 different ways), so that you can consider possibly sending a few off to help lift the spirits of struggling little kiddos, by donating to Bubba’s Pillow Case Drive. Yes, maybe you need a few new pillowcase in your own house (I do too!), or want to make a few sets as gifts (that sounds like fun, I’ll probably do that too!), but while you’re at it, cut out a few extras and join in on the incredible joy you’ll find in serving kiddos who could sure use some love. A simple gift that will give right back to your own heart, ten fold. :)
Pillow cases are a really fast project and can be made in so many fun colors and pattern combinations. And if something so simple brings big smiles to kiddos’ faces, I’m in! So I made 3 in a little more than an hour. :)
Adding the little trim piece and a coordinating cuff piece does take a little longer….but what’s 10 more minutes when it adds such a cute pop of color!
I decided to show you how to create a really polished pillow case on the inside, using french seams. Don’t fret, these take 2 more seconds to do…..but are so much more clean and professional looking.
You don’t have to worry about stray thread or any sort of fraying. So pretty, inside and out!
Not only will you want to make a few of these to brighten up the hospital rooms of children who are struggling to get better…..but why not do an overhaul of all your old pillowcases and make new ones for all the beds in your house? I will share the exact dimensions to make all 3 styles in the standard, queen, and king size…down below. No guessing. :)
Are you a beginner on the sewing machine? Well, this is PERFECT for you!
Cute little pillow cases for so many purposes…that don’t take much time at all to make.
And because I thought it was important to share a little more about Julie and her son “Bubba”…I’m going to include a few thoughts of hers (plus more info on the pillowcases) that was sent to me:
I remember countless nights and days spent in a sterile white hospital room with my sweet little boy. Imagine how scary and overwhelming it was to him… to me (and his father)… and to his little sister when she would visit. One day Bubba received a birthday present from Child Life wrapped in a pillowcase and that simple gesture has forever changed my heart. That fun pillowcase brightened and changed a scary hospital room. That little toy piano brought laughter and smiles to our faces. Such a simple act of kindness changed our world. After fighting a long and hard battle our sweet little boy Collin “Bubba” Presley returned home to Heaven in the arms of loving angels just after his 12th birthday.
My grief was overwhelming and it was only fitting that I found the best outlet for my grief in the form of service. I decided to turn my pain into purpose. We started Team Bubba shortly after his passing on August 9, 2012.
Team Bubba has managed to sew and donate over 2,000 pillowcases to local children’s hospitals, Ronald McDonald houses, orphanages, and special home deliveries over the past two years. Would you consider helping Team Bubba change a child’s little world with one small act of kindness? What we are asking from you is simple.
We need you to put your talents to use and sew standard size (20×26 inches) pillowcases with new child friendly fabric (please no weapons or aggressive prints) and donate them to Team Bubba.
You can’t sew?? No problem!!! Put your great shopping skills to use and purchase a new child friendly pillowcase from a local store and donate it to Team Bubba. You could also donate fabric, or a gift card so we can make more pillowcases!
Thank you so much and remember that by doing small acts of kindness we can do great things!!!
Julie Presley
What a beautiful story. And such a big heart you have Julie! Thank you for loving others with the same love you have for your sweet Bubba! (You can read more about Team Bubba here.)
“Standard size” pillow cases to be donated to “Bubba’s Pillow Case Drive”, can be sent here (and are needed by 12/19/14)
Team Bubba
C/O RJF
PO BOX 505
Trabuco Canyon, Ca 92678
***UPDATE (2/19/15): The PO Box listed above is still open and accepting pillow case donations. The original due date above was just a date for that particular drive they were hosting so that they could get the cases in before Christmas. But donations are ALWAYS welcome and will still go straight to children’s hospitals!! -Ashley
***UPDATE (6/1/15): THE PO BOX IS CLOSED AND WILL NO LONGER BE ACCEPTING DONATIONS!!!!! -Ashley
Now, onto the 3 different ways you can make a pillow case:
Also, I’ll share how to make these styles in 3 different sizes……but just keep in mind, any pillow cases that are donated, need to be the standard 20×26 inch size.
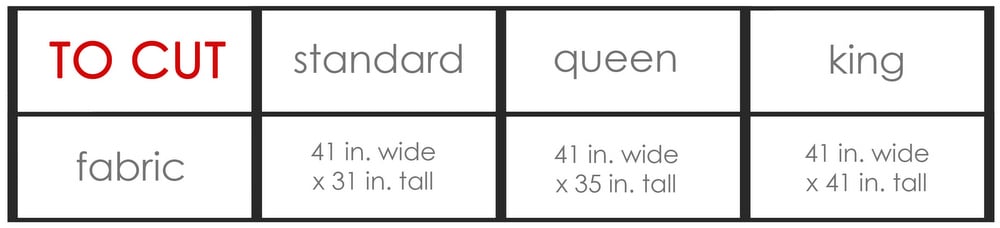
The finished dimensions —
Standard: 20×26 inches
Queen: 20×30 inches (which I realized is the size we have the most of in our house…so check your pillows before sewing)
King: 20×36 inches
1. First up, the “Basic” pillow case:
***This pillow case has a 4 inch hem along the opening, so plenty of the “right” side of the fabric shows if it flaps open.
This is how much fabric you’ll need to make the “Basic” pillow case in 3 different sizes:
***And remember to use the dimensions up above to decide what size pillow case to make. Without even knowing, most of our pillows fit the Queen size best. But the donated pillows for this project need to be standard size.
Now, cut your fabric as follows:
Now, sew that flap down, about 1/4 inch away from the bottom fold.
Now, with the fold still at the top, fold the entire thing in half by folding the left side over onto the right side, with “wrong” sides together. (Don’t worry, I didn’t lose my marbles and forget to fold “right” sides together….we’re creating the french seam here.) Sew along the right edges and along the bottom, using a 1/4 inch seam allowance.
Now you should have a pillow case shape….but with raw edges along the right side and along the bottom.
Clip the corner off the very bottom right hand corner…..but don’t clip through the threads.
Then trim about 1/8 of an inch off the right raw edge and the bottom raw edge.
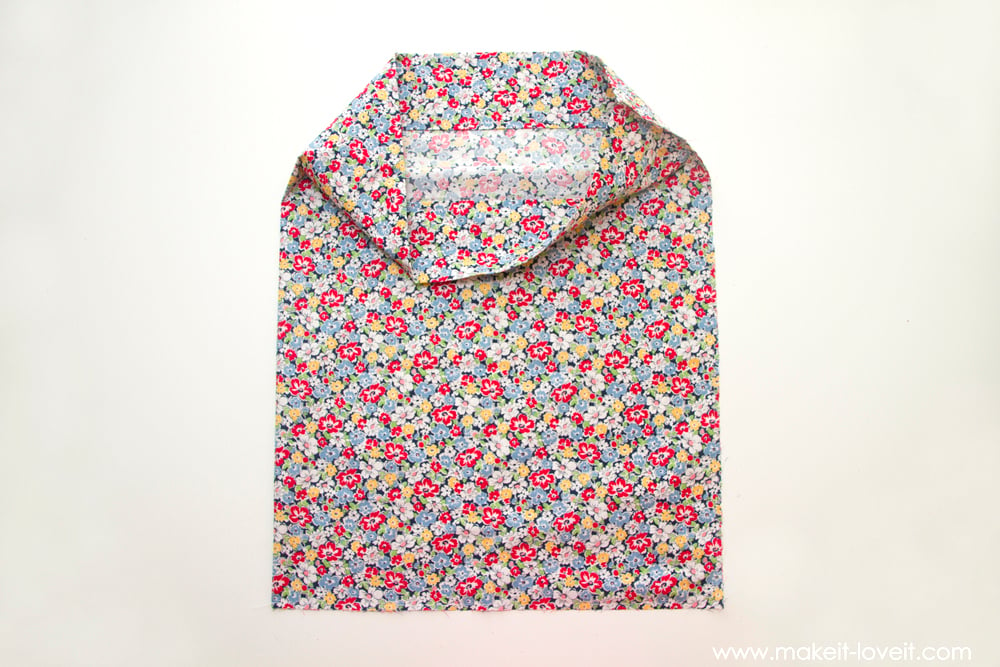
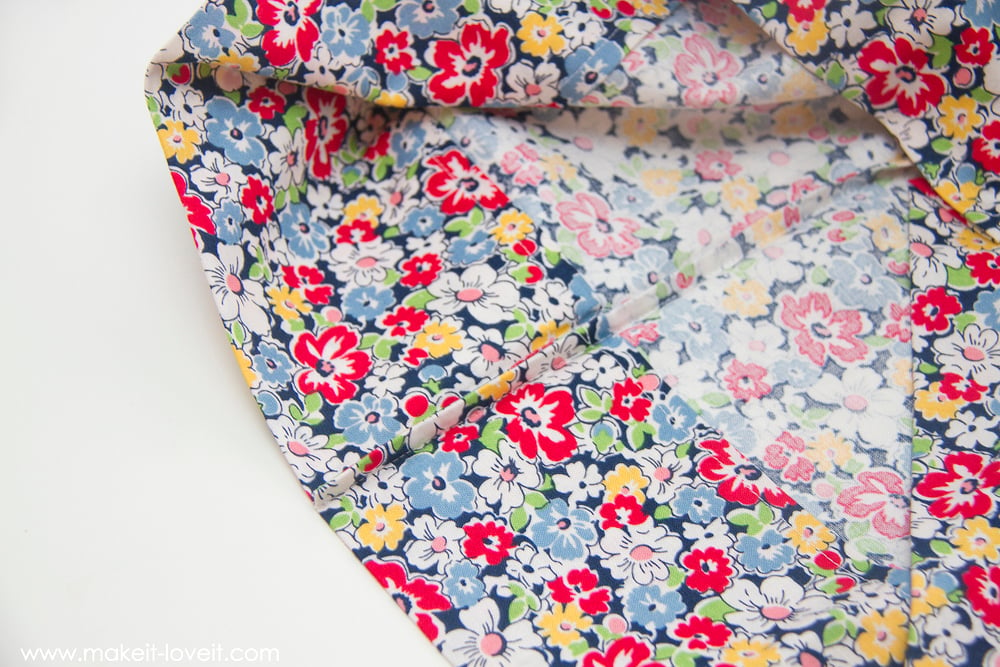
Then turn the entire thing inside out and press flat, poking out the bottom corners and making the edges as flat and even as possible. Then sew along the right edge and the bottom edge (making sure that those are the same edges that were sewn in the last steps), using a 1/4 inch seam allowance.
Now, turn the entire thing right side out and again, poke your corners out, and iron flat.
Now you should have beautifully encased seams, AKA “French Seams”.
And that’s it. See? Quickest project on your list! :)
2. Next, let’s make the “Tri-Color Cuff” pillow case:
(this is also known as the “burrito” method)
This is how much fabric you’ll need to make the “Tri-Color Cuff” pillow case in 3 different sizes:
***And remember to use the dimensions up above to decide what size pillow case to make. Without even knowing, most of our pillows fit the Queen size best. But the donated pillows for this project need to be standard size.
Now, cut your fabric as follows:
Begin by folding your trim piece in half lengthwise, with “wrong” sides together. Iron flat.
Next, place your “cuff” piece down in front of you, with the “right” side of the fabric facing up. Place the raw edges of the folded trim piece along the top edge of the cuff piece and pin them together.
Next, place the “main” piece of fabric on the to of the first 2 pieces, but the main piece needs to be facing down. Re-pin along the top, to include all 3 pieces of fabric.
Continue pinning until the entire main piece is pinned together with the other pieces.
Now, begin rolling up the main fabric, to get it out of the way. (This is the beginnings of making your “burrito”.)
Then fold up the bottom edge of the “cuff” fabric up and over the rolled up “main” piece of fabric. Line up the edges and re-pin again.
If you look from the side, you’ll see that the “cuff” fabric completely surrounds the “main” fabric.
Just be sure that you have the first edge of the “cuff” fabric along the bottom, the two edges of the “trim” fabric (since it was folded in half), the edge of the “main” fabric, and then the other edge of the “cuff” fabric on top.
Sew all of those edges together, using a 1/2 inch seam allowance.
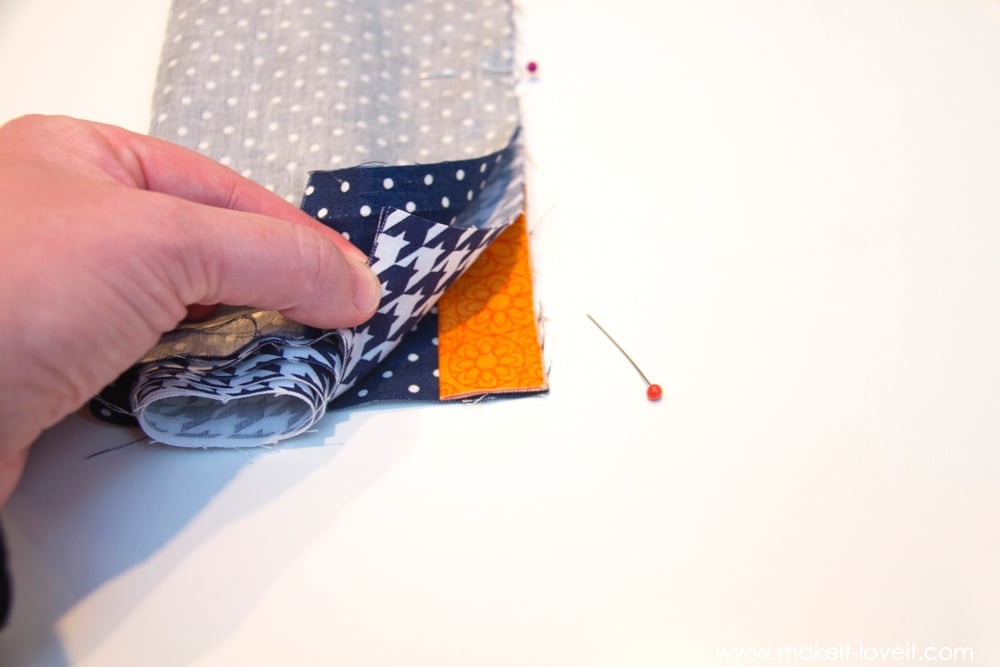
Now, from one end, begin pulling out the “main” fabric out, from the inside of the “burrito”.
Keep pulling until the cuff begins to turn itself right side out as you pull.
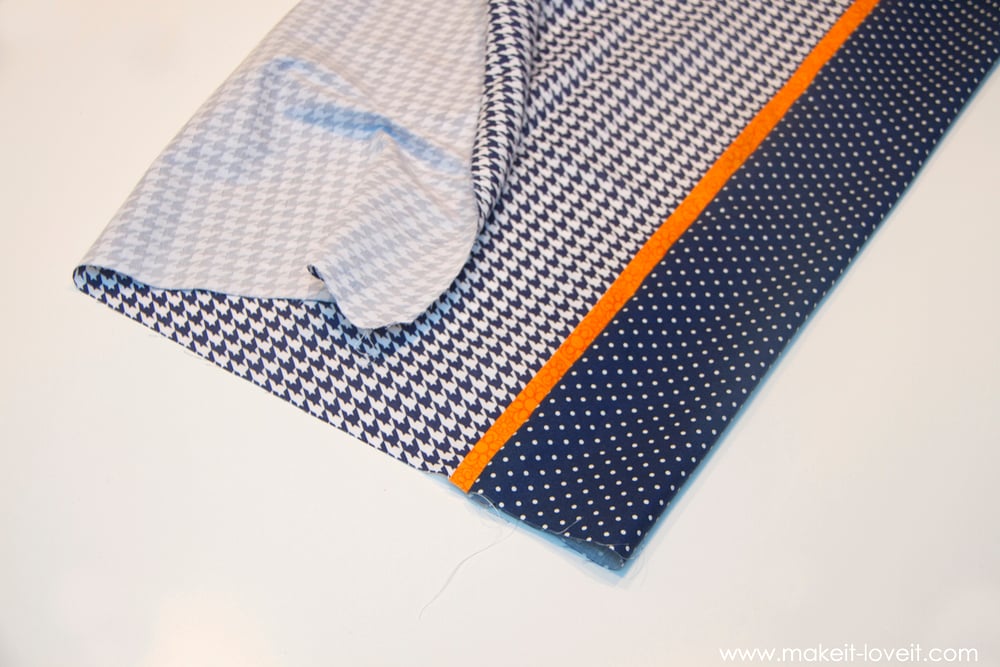
Once it’s completely out, it should look like this:
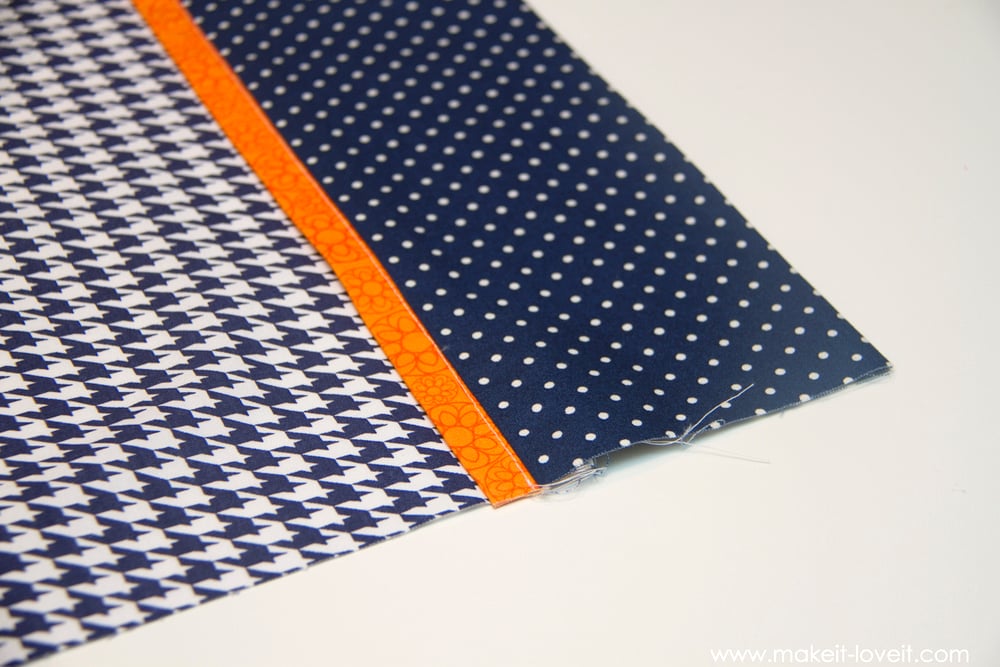
Iron the cuff flat.
Now, this is optional, but I decided to add a little seam along the trim piece, to keep it flat and in place. I decided later on that it probably wasn’t necessary…..but I kinda like the look of the stitch, so it’s a keeper for me! :)
Now, refer to the instructions above and fold the pillow case in half and sew the two sides and bottom edges together, using a 1/4 inch seam allowance.
Continue using the instructions above, until your case is complete!
3. Next, let’s make the “Same-Color Cuff” pillow case:
(This also uses the “burrito” method….but is made with all the same fabric. It looks a lot like the “Basic” style up above but is a little more fancy and adds just a faint trim detail.)
This is how much fabric you’ll need to make the “Tri-Color Cuff” pillow case in 3 different sizes:
***And remember to use the dimensions up above to decide what size pillow case to make. Without even knowing, most of our pillows fit the Queen size best. But the donated pillows for this project need to be standard size.
Now, cut your fabric as follows:
This method is exactly the same as the “Tri-Color Cuff” method up above…..so refer to that as you put this pillow case together.
And that’s it! Not much to it at all!
Best of luck…..and I truly hope you’ll consider making a few extras to donate. I’m dropping mine in the mail this weekend but will probably make a few more because, good grief, we always run out of clean pillow cases around here! :)
Thanks again Ani and Julie! Both of you have such loving hearts
-Ashley
. . . . .
Looking for more quick sewing projects??
Check out a few of our favorites!
(These are QUICK VIDEOS you can click on and watch!!)

Hi, I’m Ashley—the DIY-enthusiast behind this crazy blog!