BABIES NEED THEIR EXERCISE: How To Create An Animated Image
May 18, 2011 - By Ashley Johnston 38 Comments
I’ve had a little extra “love” hanging on after I had my little baby girl in March. (Yeah, I claim I was just giving her a little extra padding to lounge around in. I’d do anything for my kids, you know. Ha.)
So I’ve been doing more exercising lately and the kiddos have noticed.
This little missy likes to kick and punch with me while I burn calories with my kickboxing DVDs. She’s hops around right along with me, flailing her arms, legs, and torso…….watch out!
And this crazy monkey likes to call any sort of physical exertion his exercises. He throws something in the garbage? Exercise. He puts his shoes away? Exercise. He crawls on one knee with the other leg dragging behind him because he hurt his foot and won’t walk on it? Exercise. True story.
That video was created in Windows Movie Maker so that I could add music. But if you’d like to create a plain ‘ol animated picture……..I’ll show you. Well, using Photoshop CS4. If you have other versions of Photoshop, maybe this will give you a general idea how to animate your images. (I know, it’s been a few months since many asked about my last animated image……sorry.)
..
But is there another way to animate images for you without photoshop? I have no idea. (If you know, leave me a comment……I’m sure there are others who would like to know.)
Anyway, by animated image…….I’m talking about making a picture, where several slides of pictures rotate one after the other.
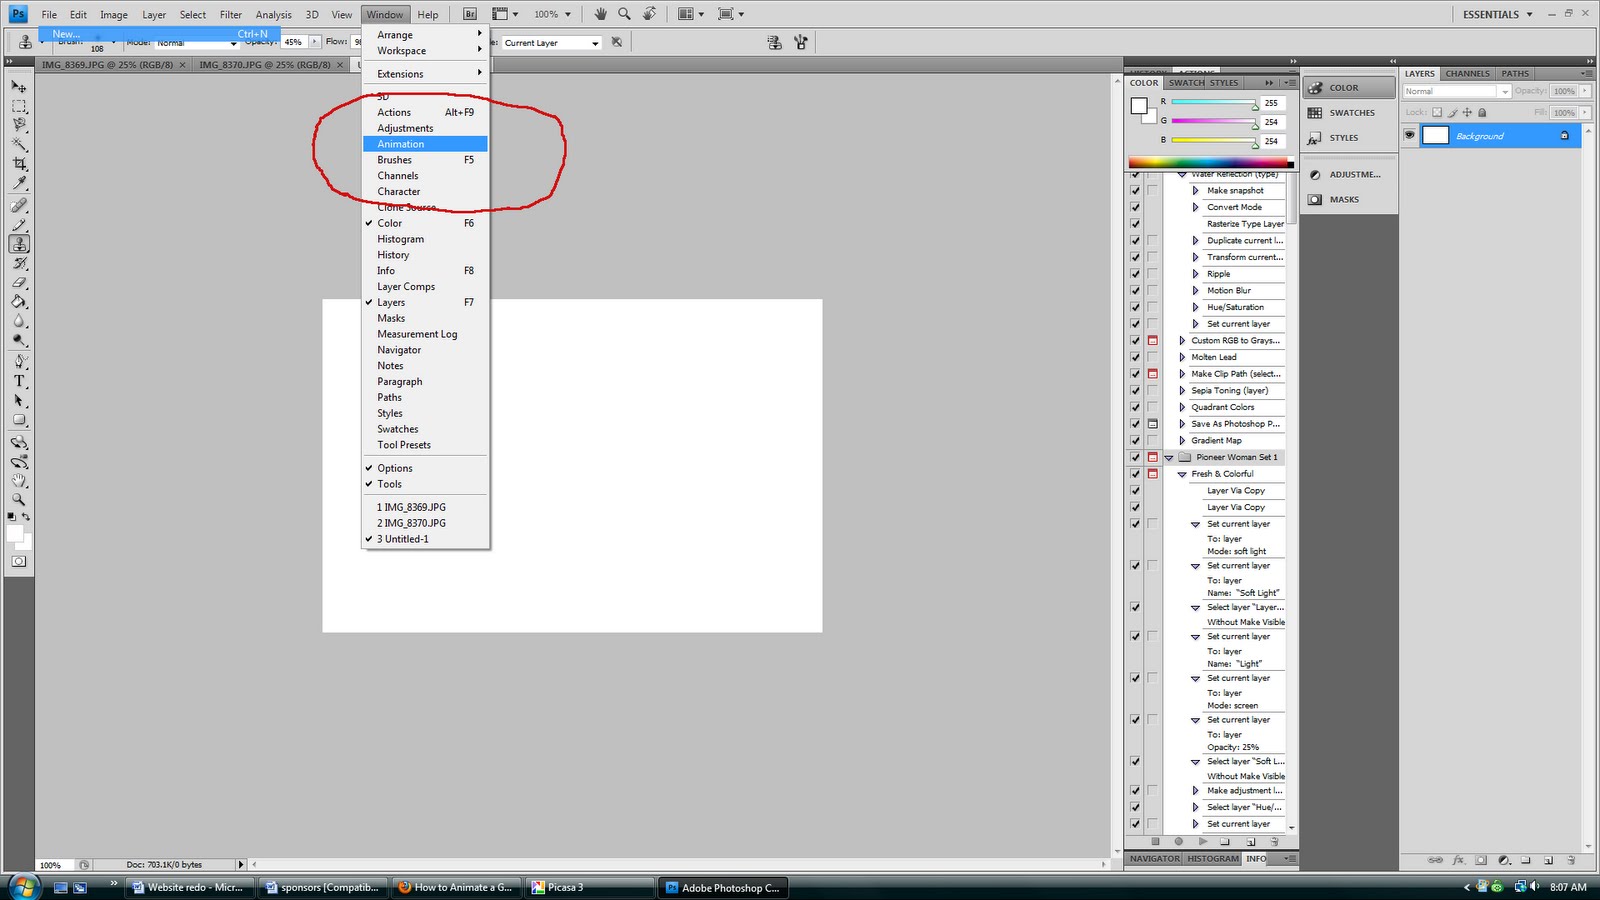
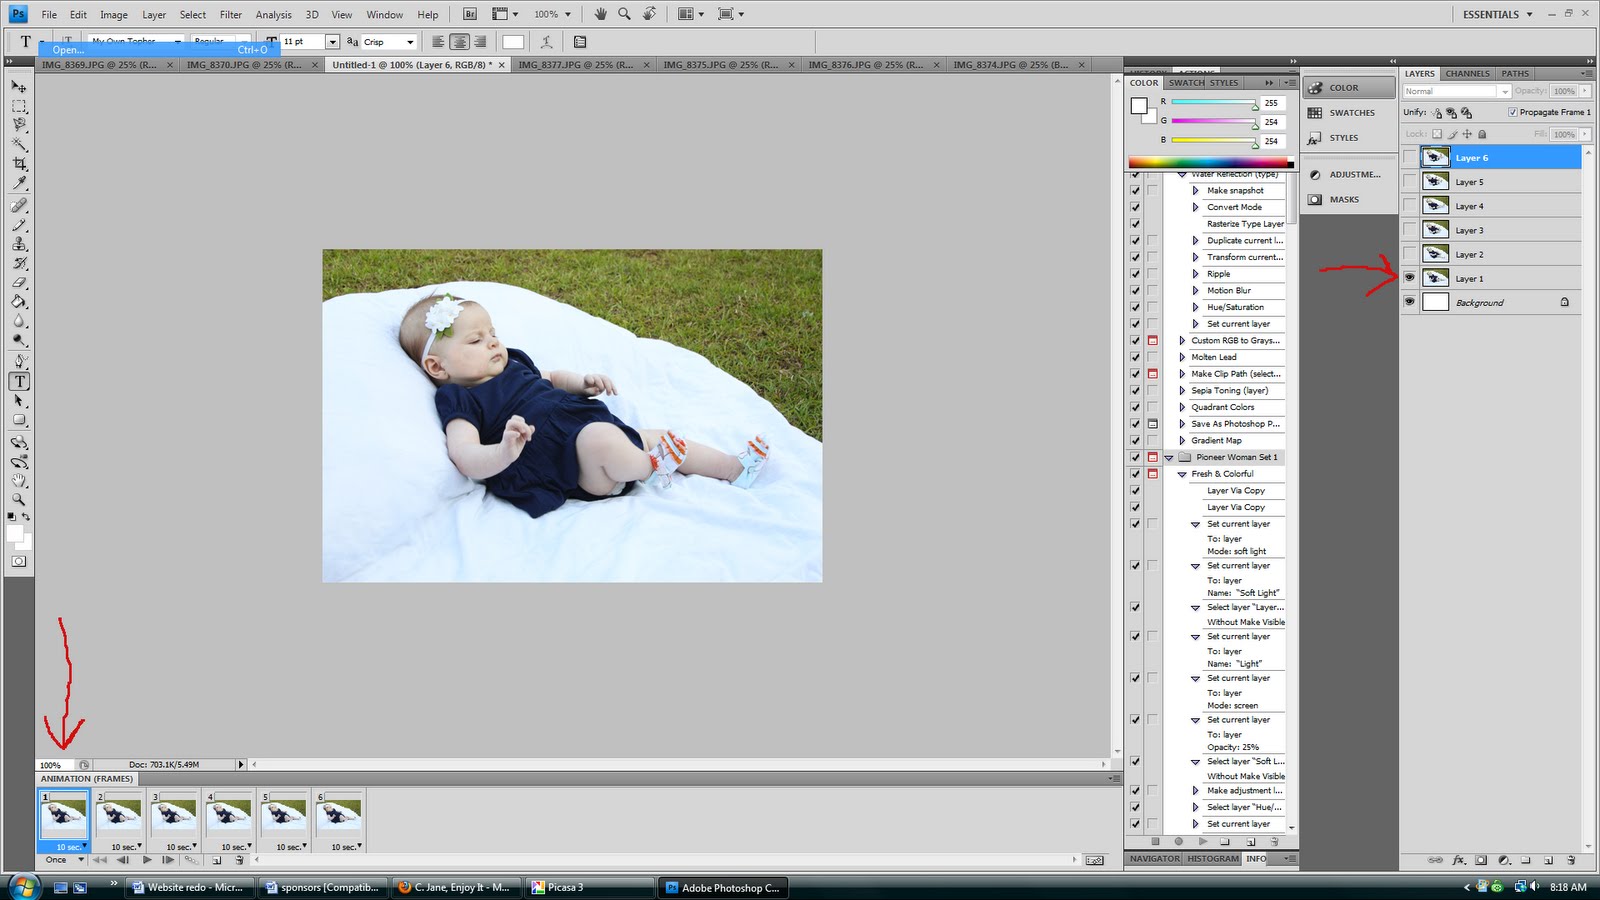
So start by creating a new project in photoshop. I made mine 400×600 pixels.
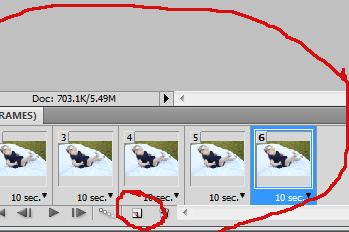
Then at the bottom in the animation area, click on that little square icon to add enough frame boxes to your animation. I had 6 pictures to use, so I added 6 frames.
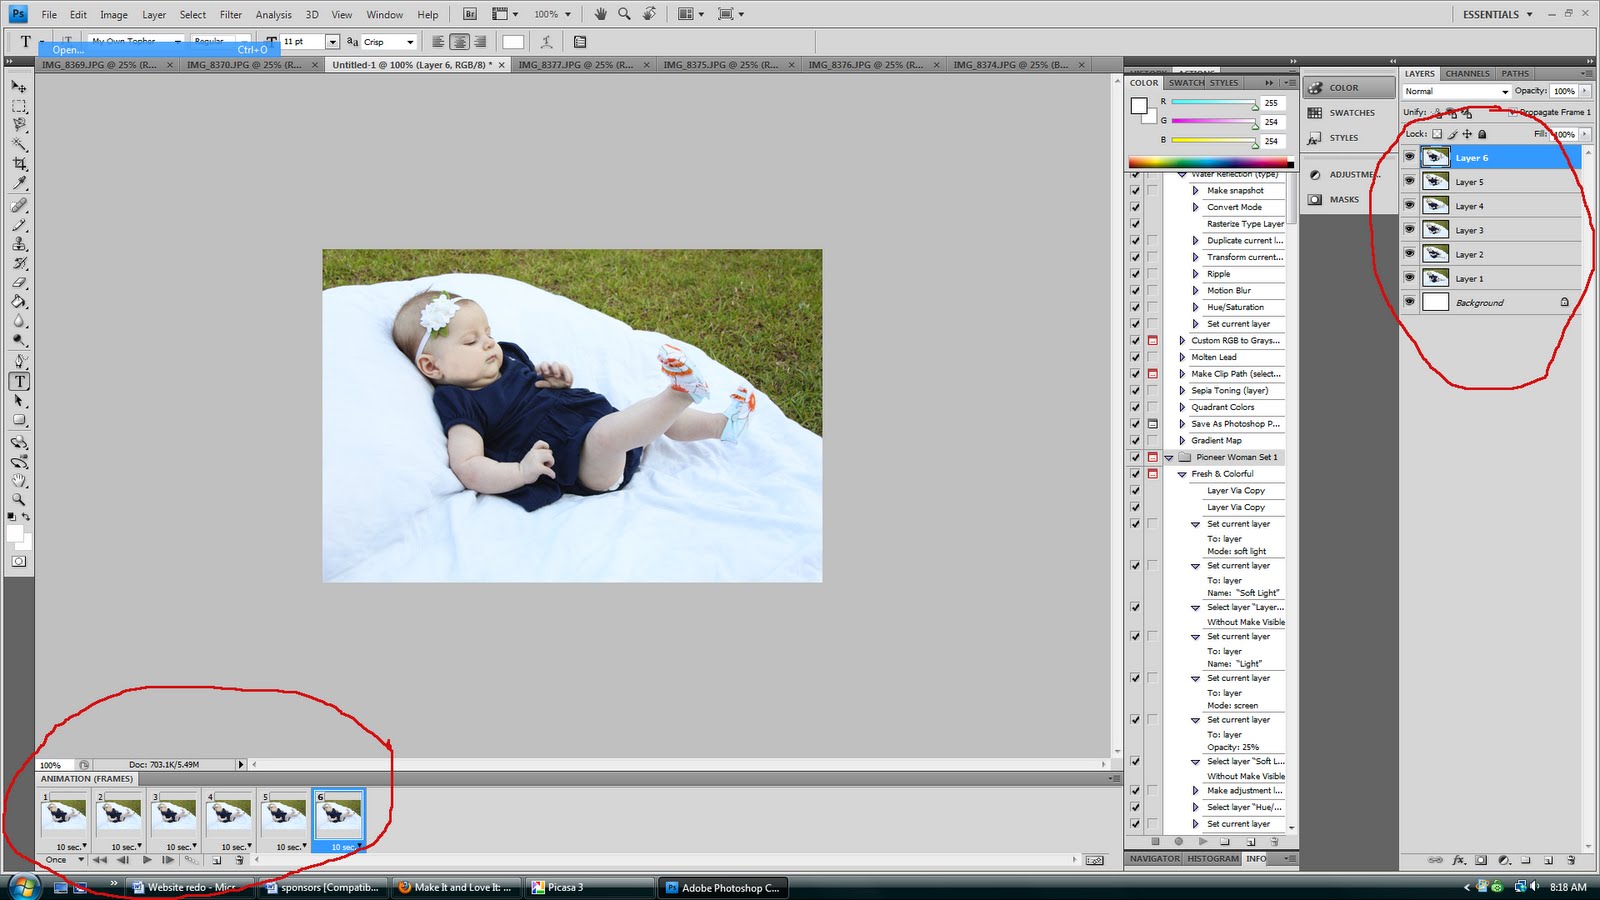
Then, click on the first animation box at the bottom and then make sure that the only layer that’s showing up in this animation box, is the first image you want to show. (To hide the other layers, click on the little ‘eye’ to the left of the layer. If there is no ‘eye’, then it won’t show up in that screen.)
Then click on the second animation box, and then make sure the ‘eye’ is only showing for the next image you want to show up for the second animation slide.
Continue until all your animation boxes have their own image in them. Then click on the time button below each image in the animation section. This will allow you to choose how long each frame will show in the animation. I chose .3 seconds originally, but then changed to .4 later. Also be sure that the button below the images says “forever”…….meaning that it will repeat the frames continuously. Press “play” (the triangle) below the little pictures to see if it’s how you’d like it.
Ashley Johnston is a professional DIY costume maker, sewist, crafter, and owner of Make It & Love It. She is a mom of 5 and a wife to a very patient (with the craft clutter) husband. In case you’re wondering, she always chooses crafting/sewing/designing over mopping/dusting/wiping base boards……but bathrooms/laundry/full bellies are always attended to. Whew!
You are here: Home Family
BABIES NEED THEIR EXERCISE: How To Create An Animated Image
Title:
BABIES NEED THEIR EXERCISE: How To Create An Animated Image