Have I ever told you that Oklahoma is BLAZIN’ HOT?!?! Haha……no, it’s not that bad (yet!) but it has definitely warmed up. And swimming in the pool, going to the splash park, and even playing in the backyard in the sprinklers is what this summer will be made of. And my kids are completely fine with that! :)
HOWEVER — with 4 children, that means lots of wet towels. And when the kiddos have wet towels wrapped around their bodies, they eventually become heavy and start dragging around on the ground as they’re taking a break from the pool/sprinklers/etc. So to remedy that little problem, I whipped up a few Towel Ponchos for them!
Oliver can’t quite walk yet, so I made Elli, Connor and Chloe their own ponchos……so that their towels will stay on their bodies. Perfect!
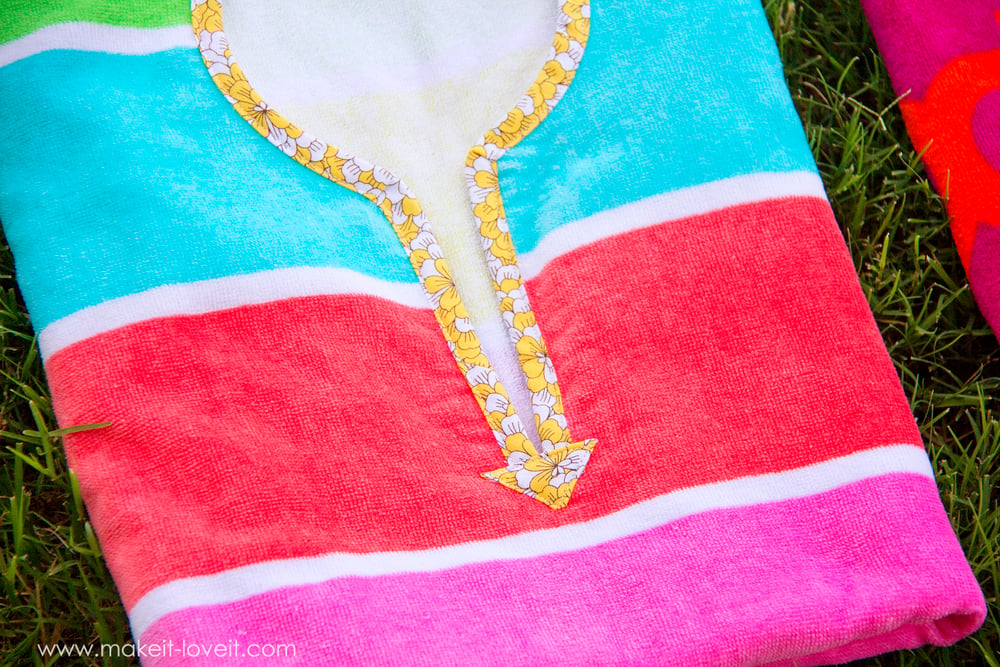
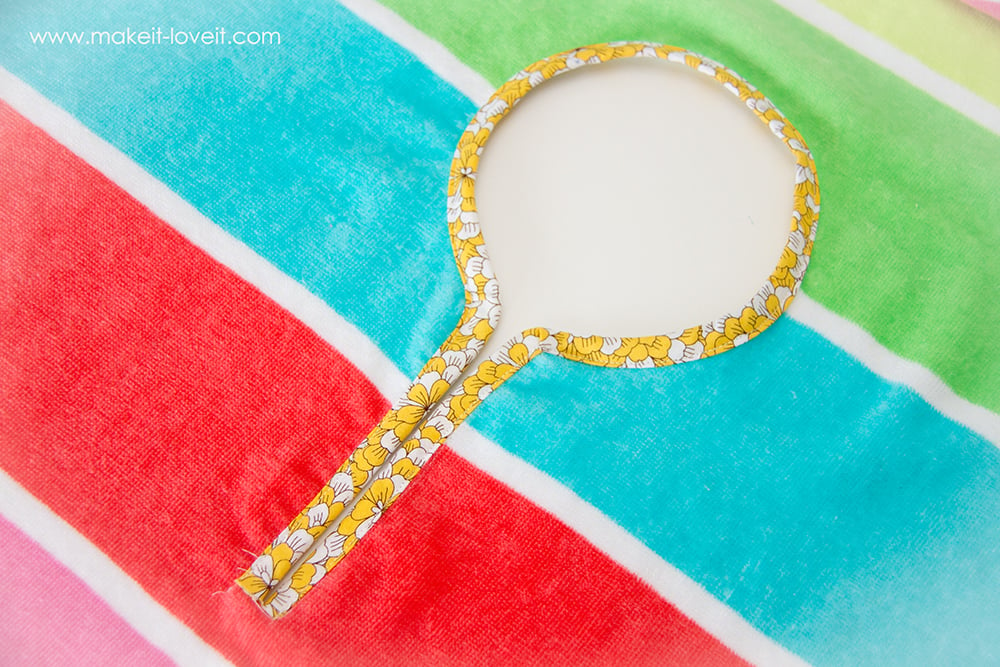
The towels each have a rounded opening with a slit, to allow enough room for their head to fit through……and is finished off with a little fabric trim.
The fabric sandwiches around to the back as well…..so there will be no unraveled edges.
And boys wear ponchos too, right?!?! Of course they do! :)
These ponchos are designed so that it’s just an easy slip over the head — and that’s it!
And they’re perfect for kids of all ages!
And the best part……is their hands are still free to dig in the sand, play with toys, enjoy some lunch, etc. The perfect little ponchos for your water activities this summer!
Ready to make your own??
SUPPLIES:
***Check out my Sewing Terms 101 post, for additional help.
To get started, you need to find the very center of the towel. So, fold the towel in half and then in half again…..and this will give you the very center of the towel. Place a pin there to mark it.
Then, either cut out a circle from paper that is the size of the neck opening you need, or find a bowl that has a circumference that’s about the right size (my bowl was about 5 1/2 inches in diameter, if that helps anyone). Center the paper circle or the bowl over the pin that’s marking the center of the towel…
…and then trace around it.
Cut out the circle.
Now, cut a slit down the front of the towel, at the center of the circle. (If your towel doesn’t have a particular print….choosing a front/back side doesn’t matter, since the circle is at the center of the towel.) The length of the slit can vary, depending on the size of the hole and the size of the head. But I cut a slit that was about 5-6 inches long…..and it was plenty long.
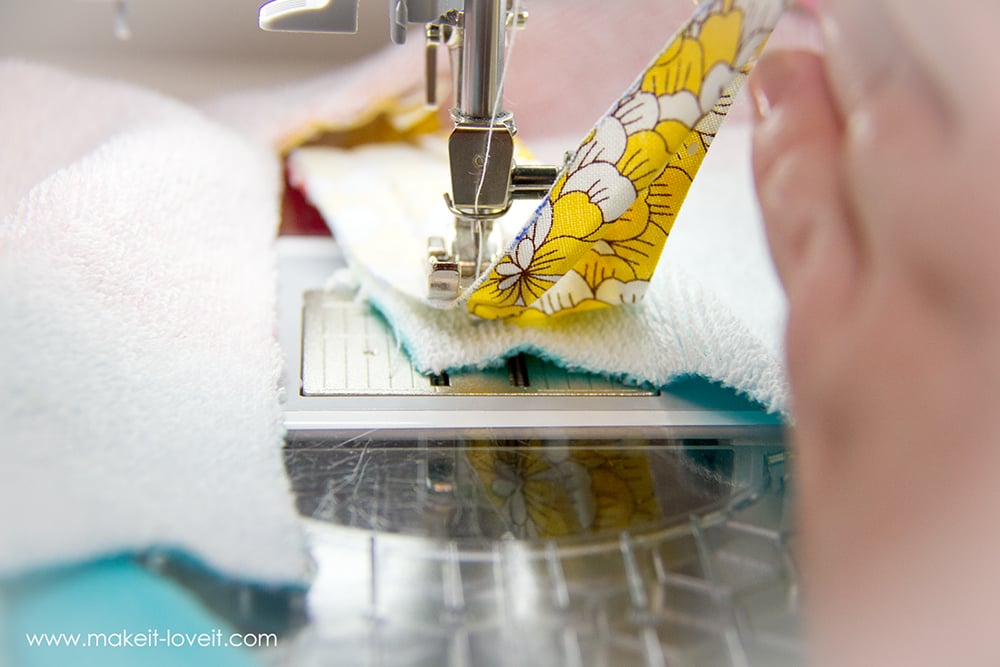
Now, you can either buy 1/2 inch Double Fold Bias Tape…..or if you want a fun print or a specific color, you can easily make your own. Use the Bias Tape tutorial HERE, to make your own….and also to review how to attach it. Turn the towel to the back side, unfold one edge of the bias tape, and pin it to one edge of the straight opening. Now, you can continue pinning around the corner and then the rest of the opening…..but I think sewing the corner as you go is a little easier.
Sew along the fold of the Bias Tape (just like the tutorial linked above) and then slow down as you reach the corner.
Stop when you are 1/2 inch from the end and then put your NEEDLE DOWN int the fabric.
Lift up your presser foot and then rotate your fabric. Try and move the fabric out of the way and then realign the raw edge of the Bias Tape along the curve of the circle. Put the presser foot back down and then continue sewing around the curve of the circle.
Now remember, when sewing Bias Tape to a curve, the fabric will curve a bit…..but just sew a little at a time, re-adjust, then sew some more. (Or remove from the machine and use pins to help you keep it in place.)
Sew all the way around the circle and then stop 1/2 inch from the end of the circle. Lift the presser foot and adjust just like above….
…..and then continue sewing down the other straight edge of the opening. Cut off any excess Bias Tape.
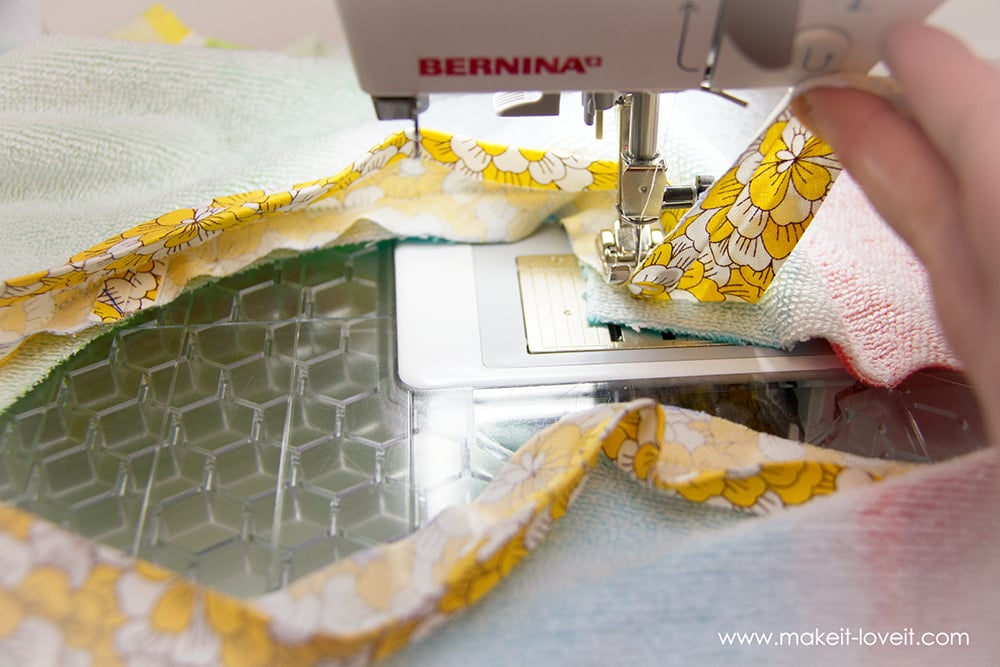
Fold the Bias Tape around to the front side of the towel and pin in place.
You’ll notice the corners of the opening pucker a bit……that’s okay.
You’ll just need to pinch over the fabric a bit and create a clean little fold. Pin in place.
Sew around the Bias Tape to secure it in place (and use the tutorial above if needed).
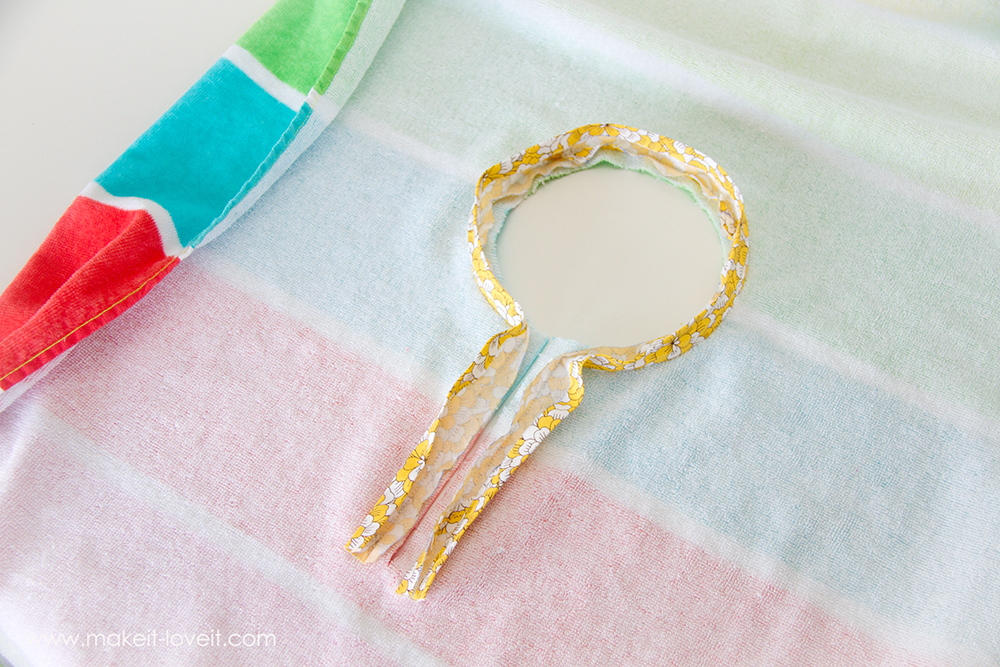
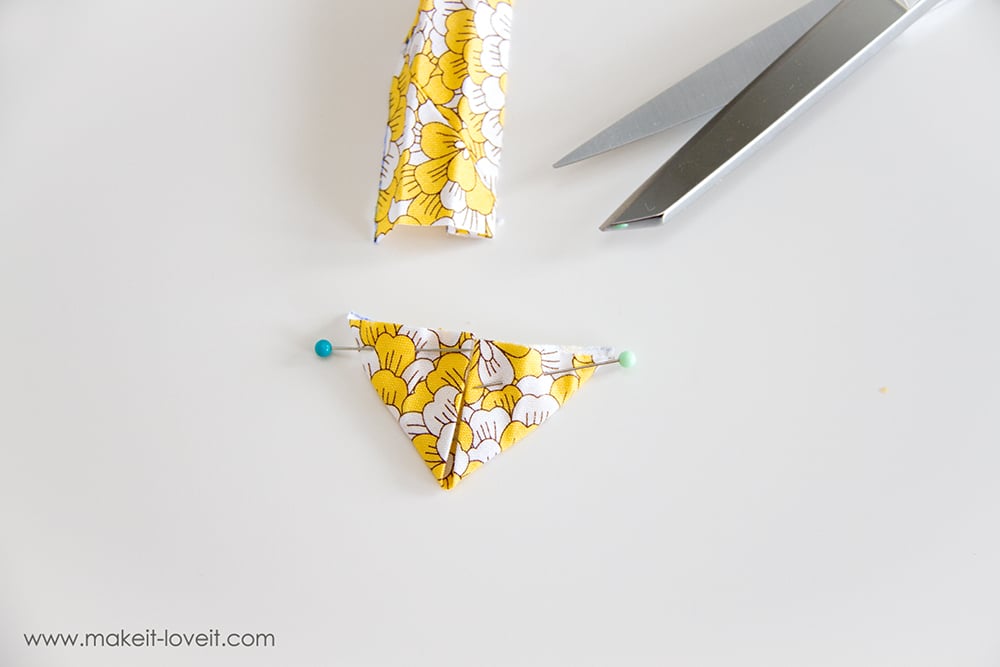
To finish off the raw ends at the bottom, you’re going to first cover the ends on the back side. Grab your Bias Tape and open it up one time. Fold over about 3/4 of an inch, then another 3/4 of an inch. Pin in place. Cut off the excess Bias Tape.
Place the raw ends of the folded fabric piece face down onto the towel, completely covering the raw ends of the Bias Tape attached to the towel.
Sew around the edges, securing it to the towel.
Now, for the piece on the front of the towel. You can create another rectangle folded piece of fabric…….or you can create a triangle for a fun detail. I created my triangle by opening one edge of the Bias Tape and then folding one edge up at a diagonal, just like shown below. Pin in place.
Then fold the other side up and pin in place.
Cut off the excess Bias Tape.
Then, fold over the top raw edge about 1/4 inch and pin in place.
Then, tuck under the extra points under this top fold and pin in place.
Repeat with the other point.
Turn over and place on the front of the towel, completely covering the ends of the Bias Tape.
Sew in place.
And that’s it!!!!!
Your towel is ready to throw in your pool/beach/lake bag for those wet kiddos to use!
Enjoy!
-Ashley

Hi, I’m Ashley—the DIY-enthusiast behind this crazy blog!