Home » DIY Tutorials » DIY Crafting » Crafting: Miscellaneous » Piecing and Binding a Quilt
Piecing and Binding a Quilt
July 26, 2010 - By Ashley Johnston 111 Comments
.
Looking for the Ribbon Retreat +Fabric giveaway? Scroll down or click here.
. . . . . . . . . . . . . . . . . . . . . . . .
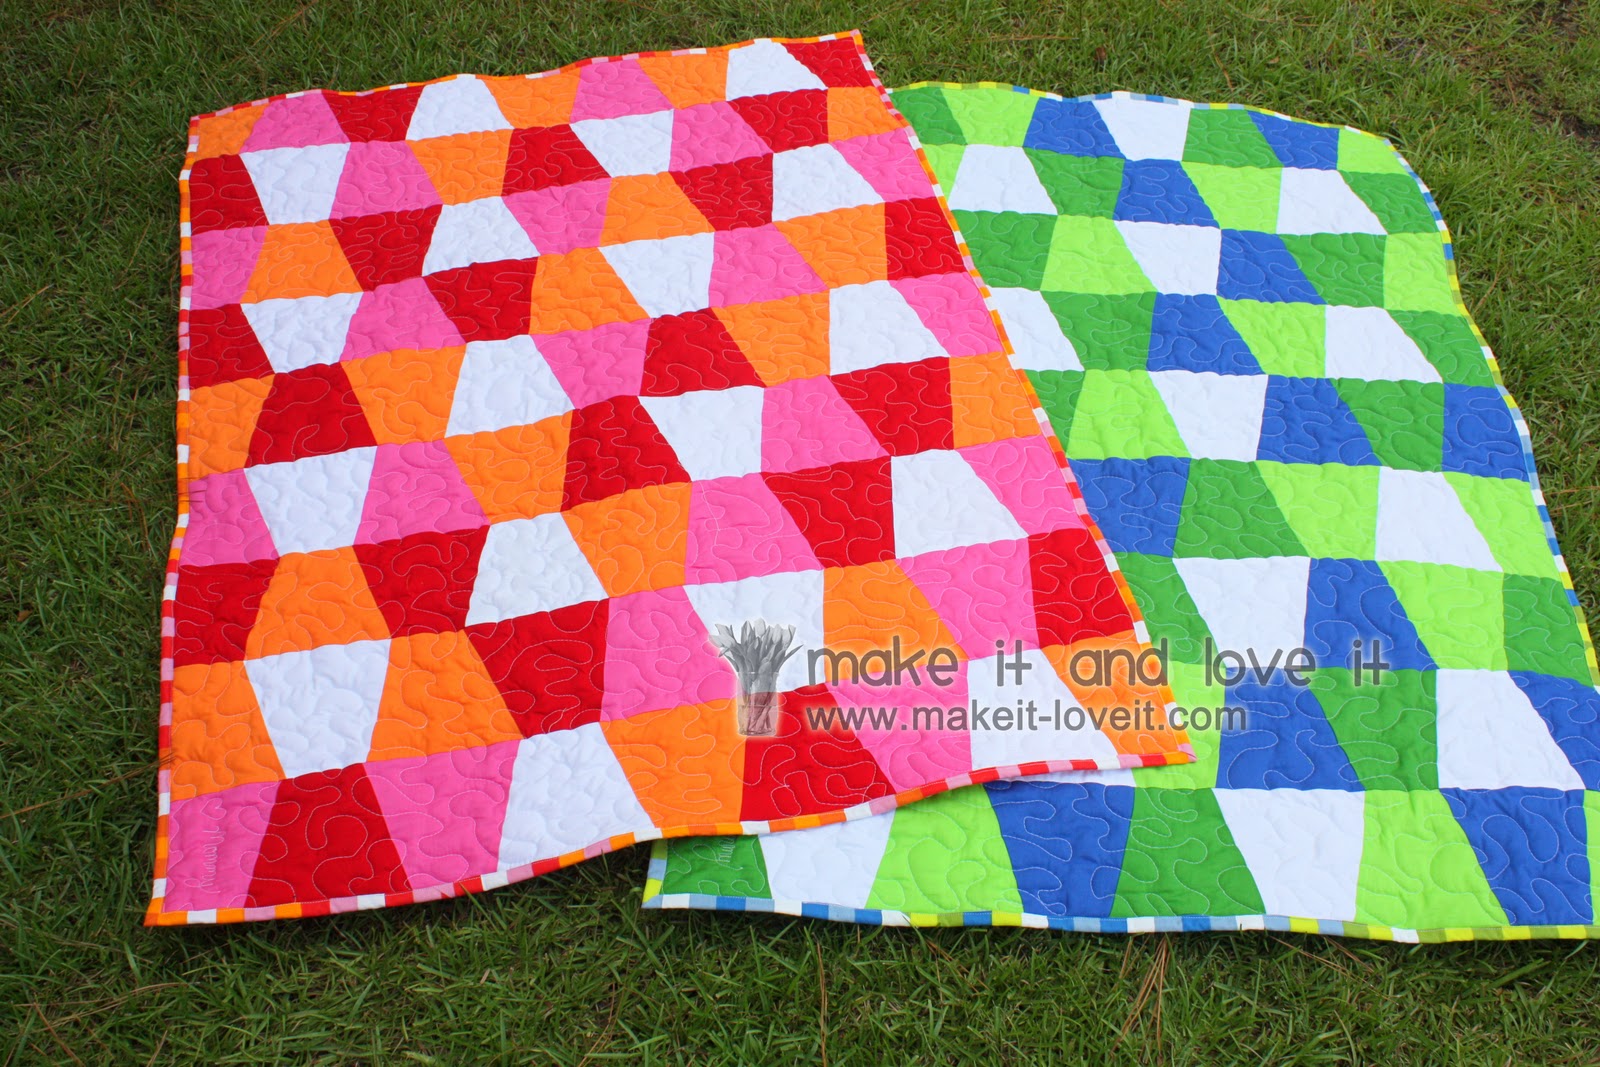
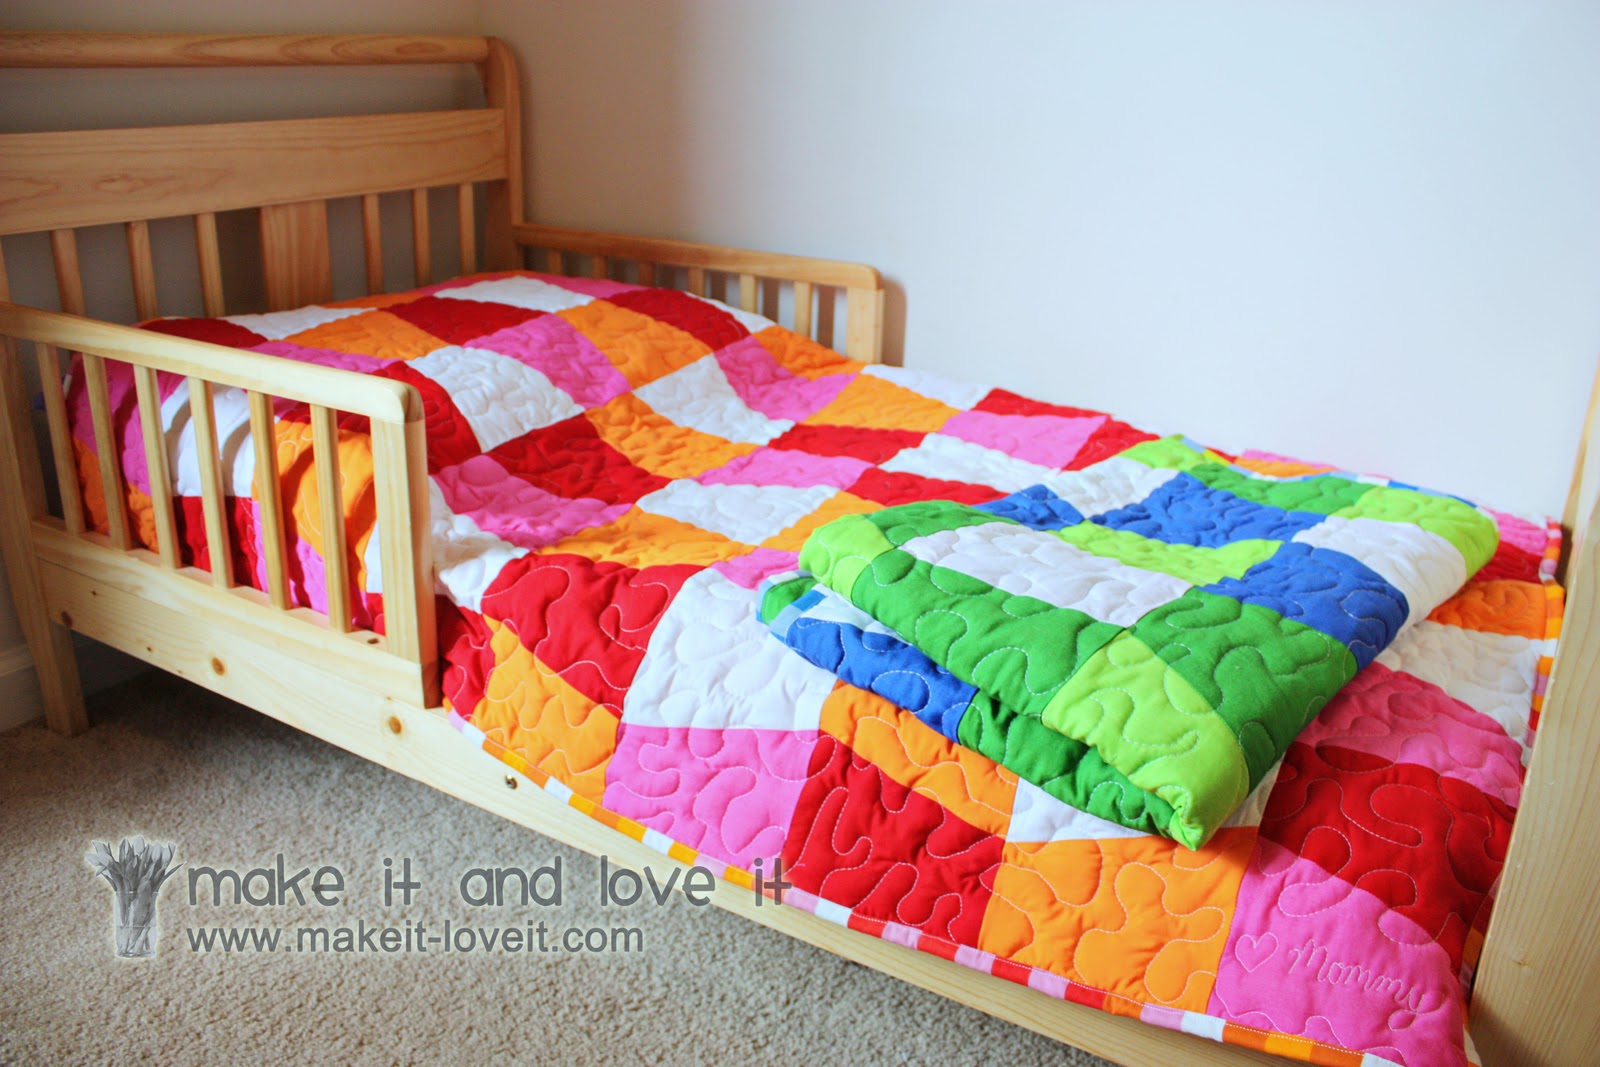
Remember the quilts I made for my girl/boy shared toddler room,
here?Some of you emailed with questions about putting those quilts together.
So I thought I’d share a bit more detail about how I put the quilts together.
With no hand-sewing.
(I know many people hand stitch parts of the binding, and find it relaxing. And hand quilting and stitching actually adds love and charm to the quilt. But I don’t enjoy it in this stage of my life, so I try to avoid it. Ha!)
But here are those little boy/girl quilts again.
Happily bound around the edges.
But I’m going to be a bit more specific about how I put these together, in case you’ve never pieced a quilt together.
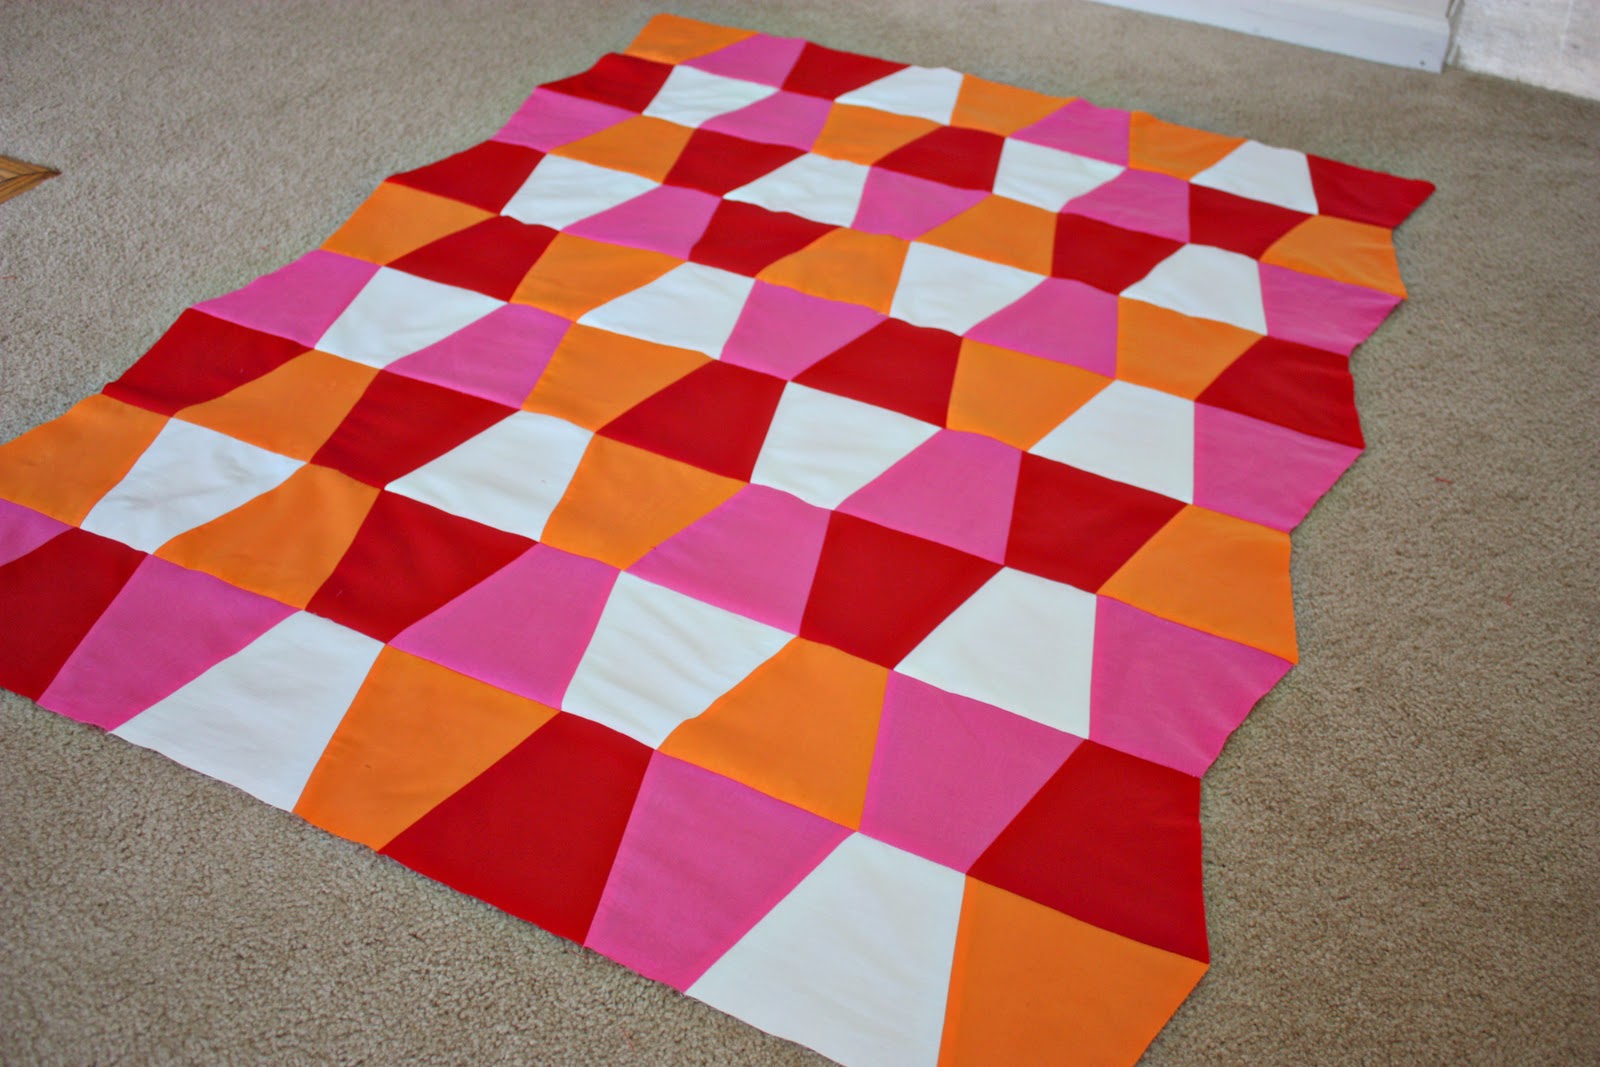
The easiest shape to start a quilt with, is to use squares (or one whole piece of fabric)….but these quilts will work as an example.
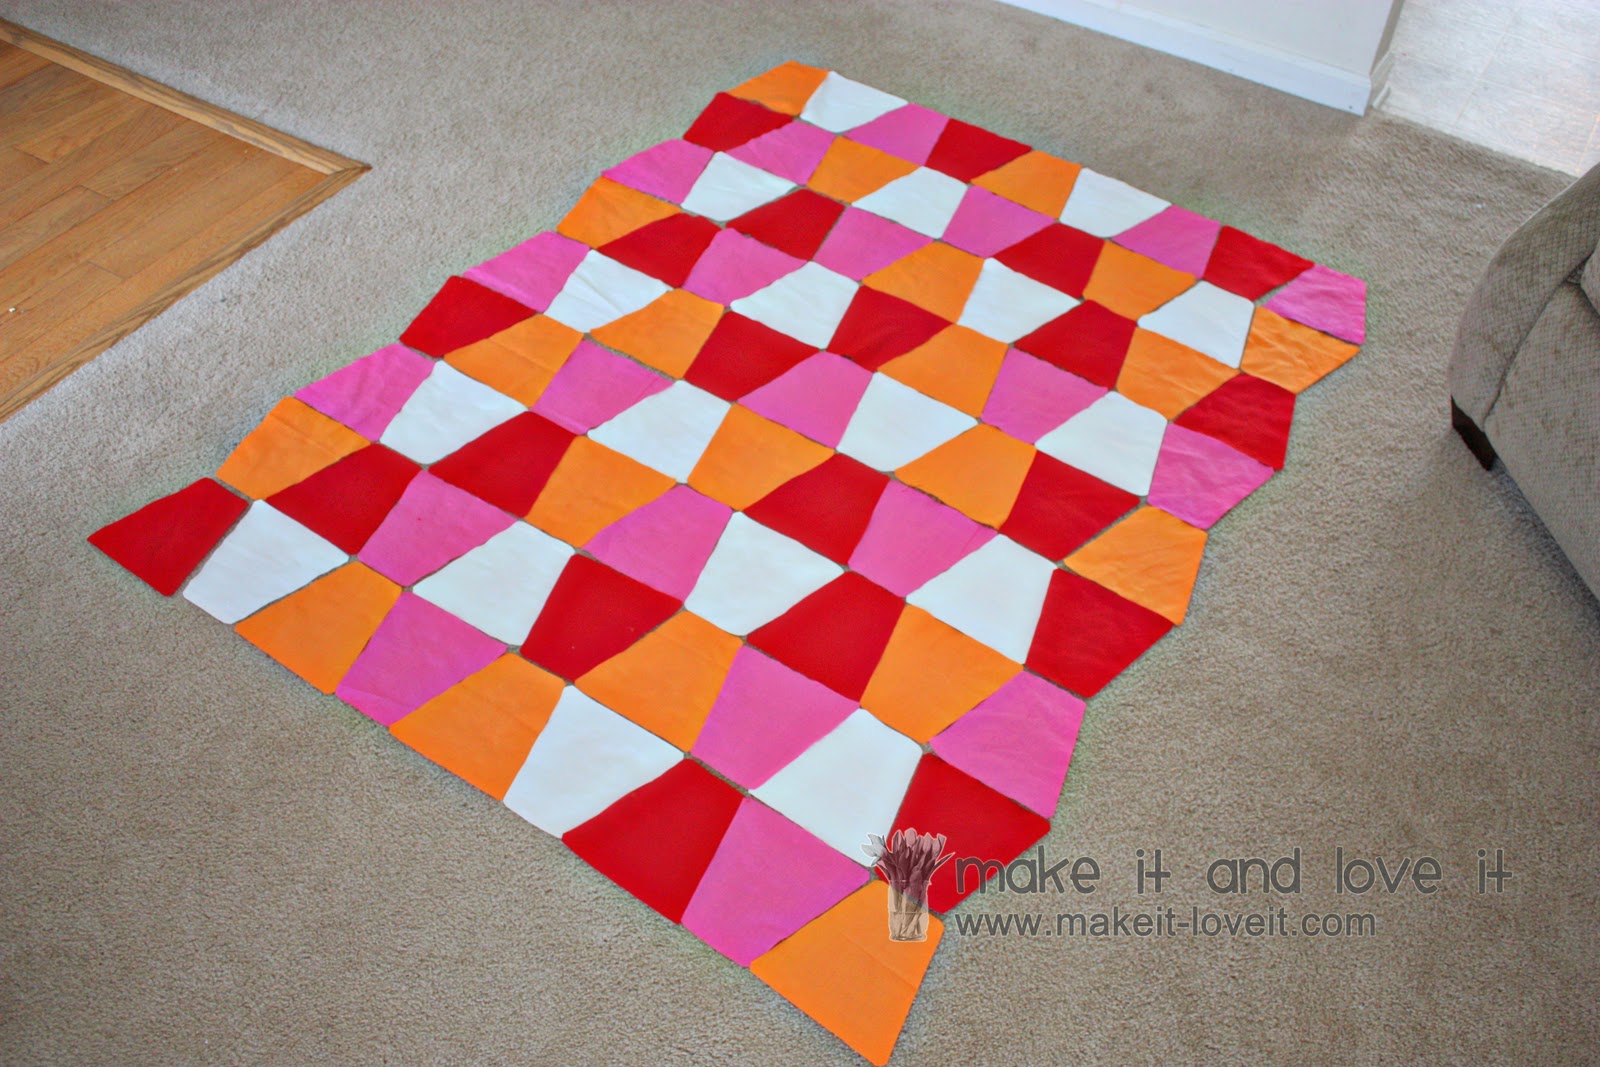
Cut out as many shapes/blocks as you need to create the right sized quilt for your project. Keep in mind that you’ll need to make it bigger than you think, because the quilt will shrink in size after all of those seam allowances.
Lay out the pattern that works for you visually.
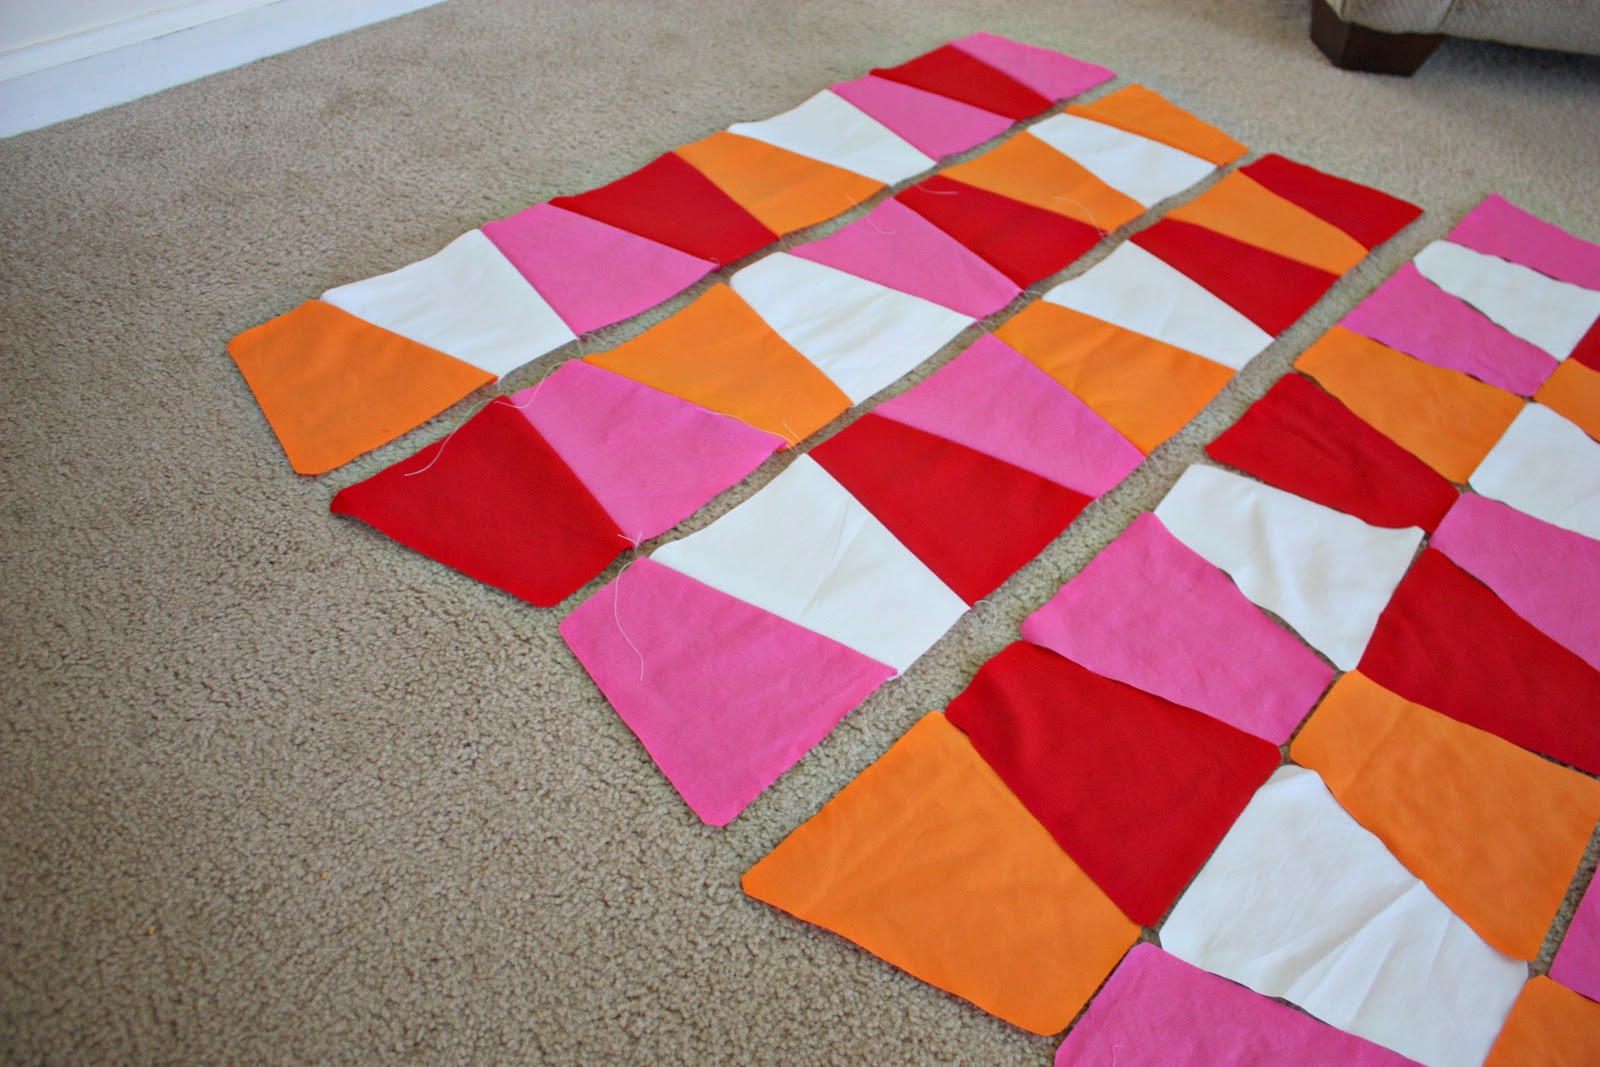
Then start sewing each row together, side to side, until all the rows are completed. (I would pick up one row at a time, sew it together, lay it back down on the floor, grab a new row, and so on. This helped keep everything in order…..without mixing it all up.)
Then sew each row together, completing the top of the quilt.
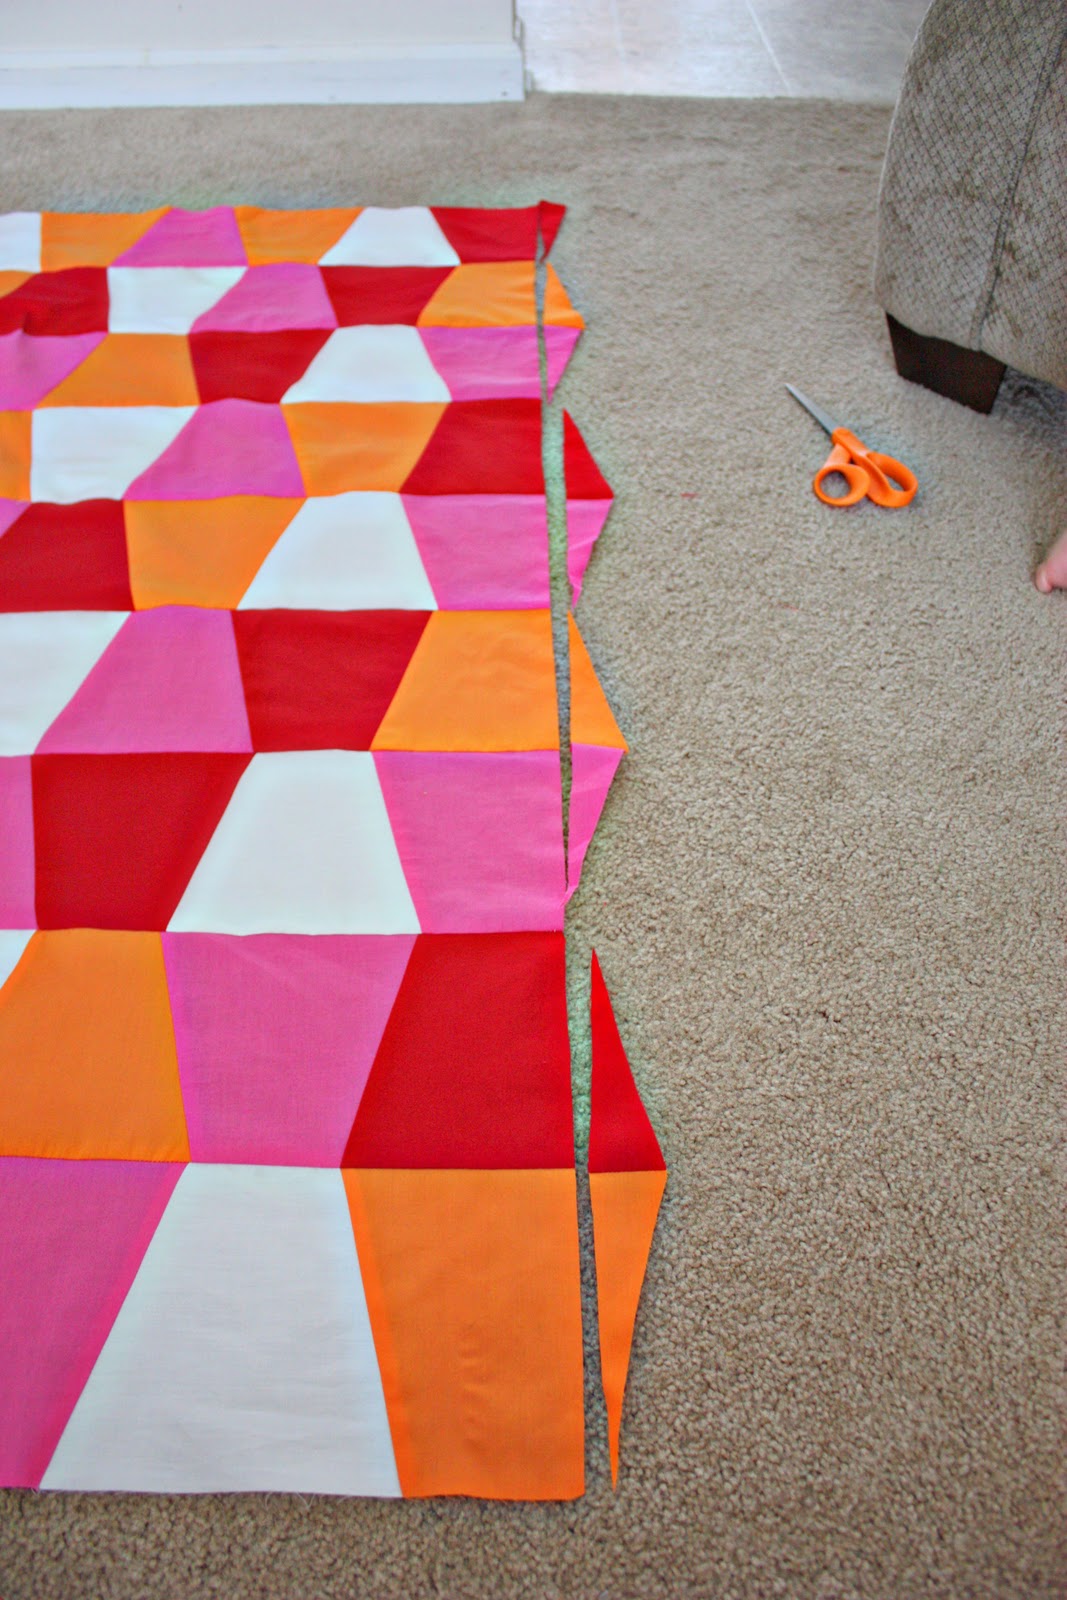
With these little
tumbler pieces, the edges were uneven, so I had to trim them, making the quilt top an even rectangle.
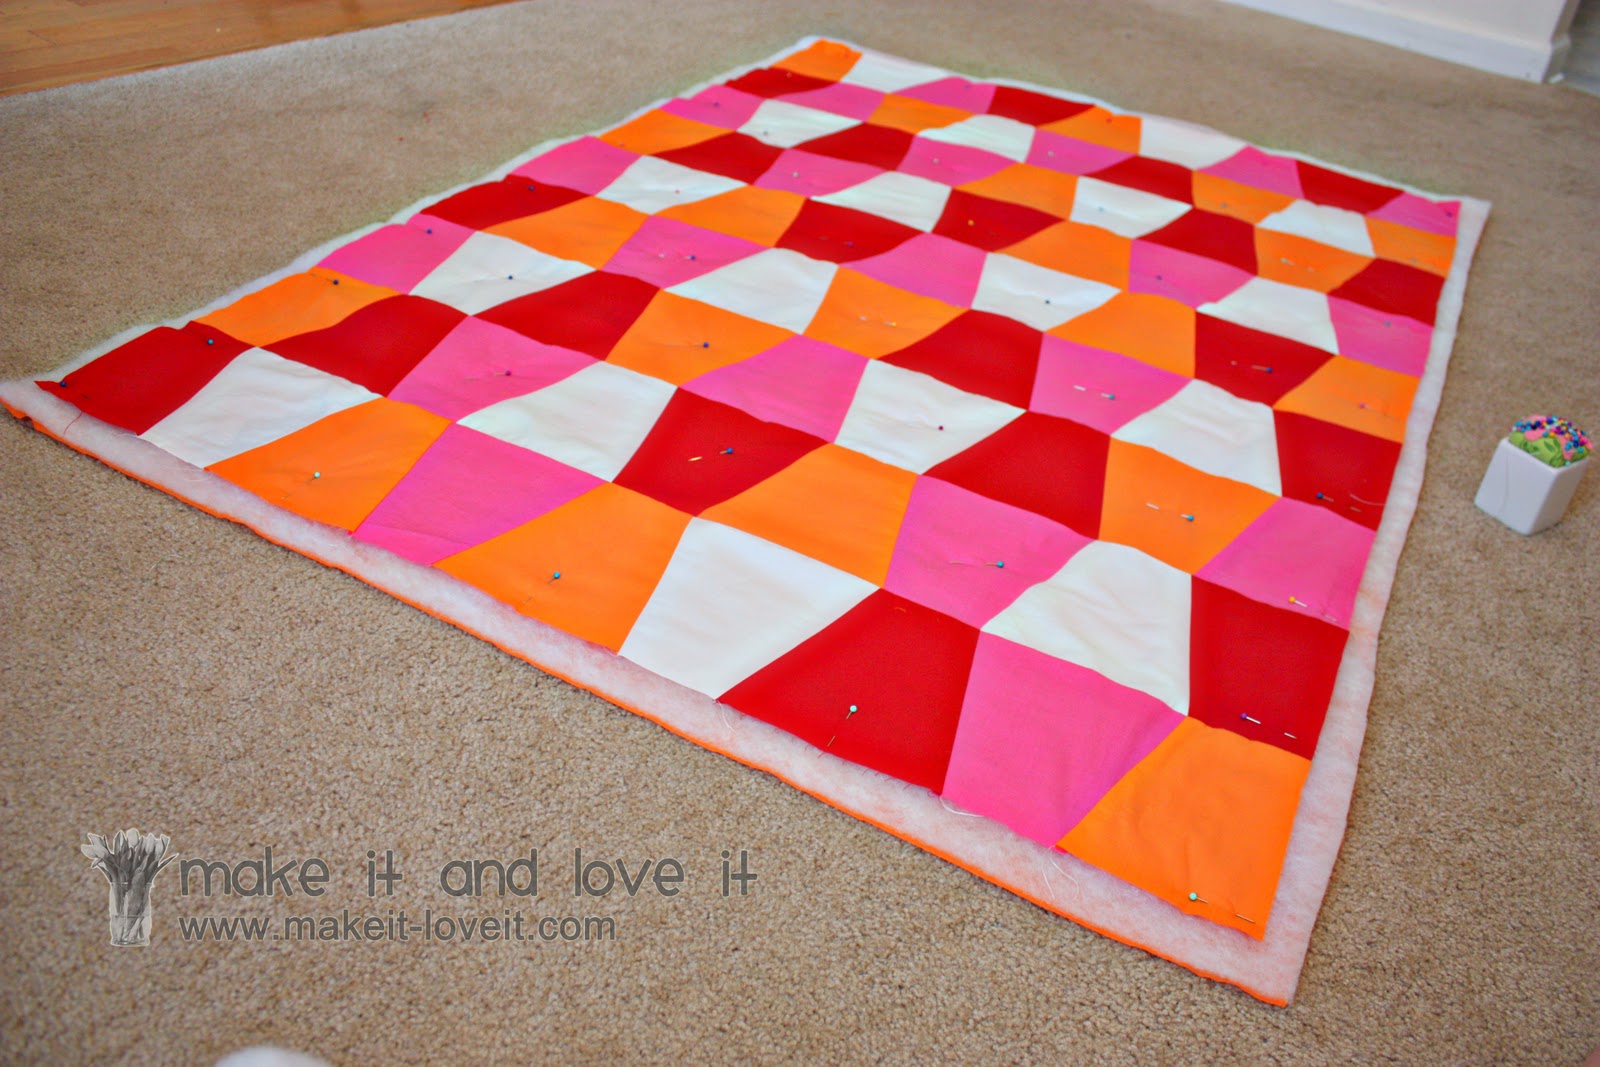
Then I placed a plain piece of material down on the floor, that was slightly bigger than my top piece. Then I placed a thin piece of batting (GA is hot!) on top of that. Then the block piece on the very top. I smoothed out each piece very flat as I layered, making sure there with no puckers. Then I place pins all over, pinning the 3 layers together.
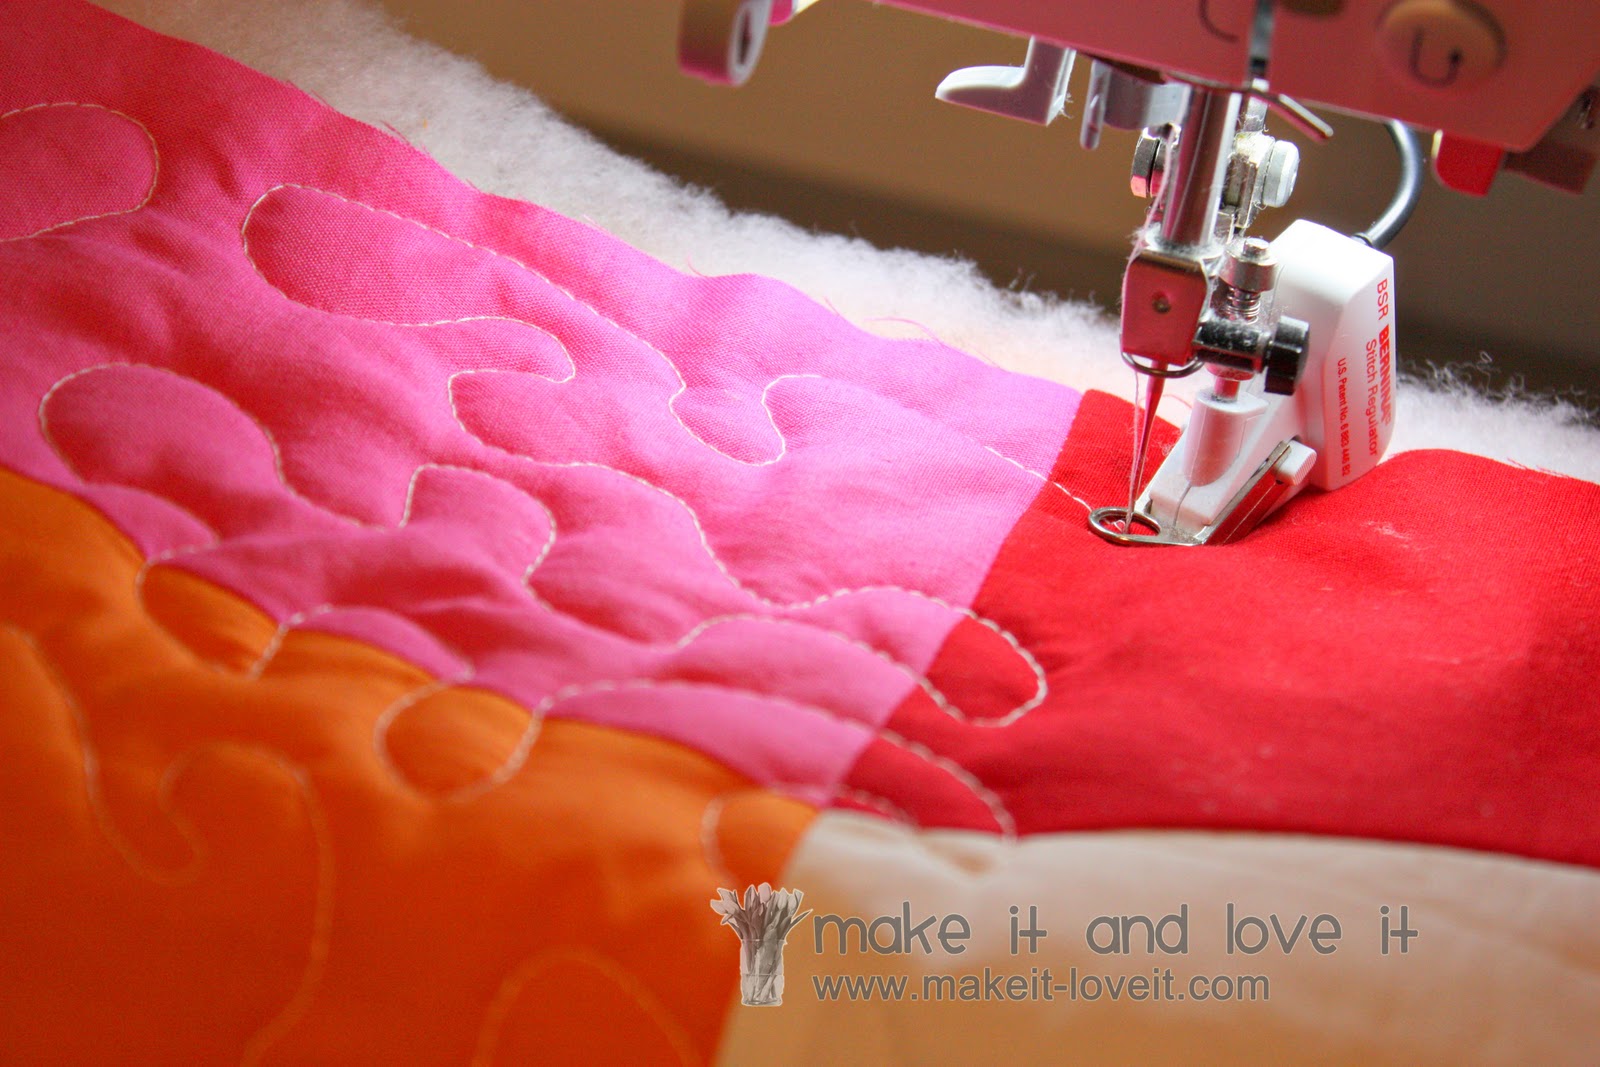
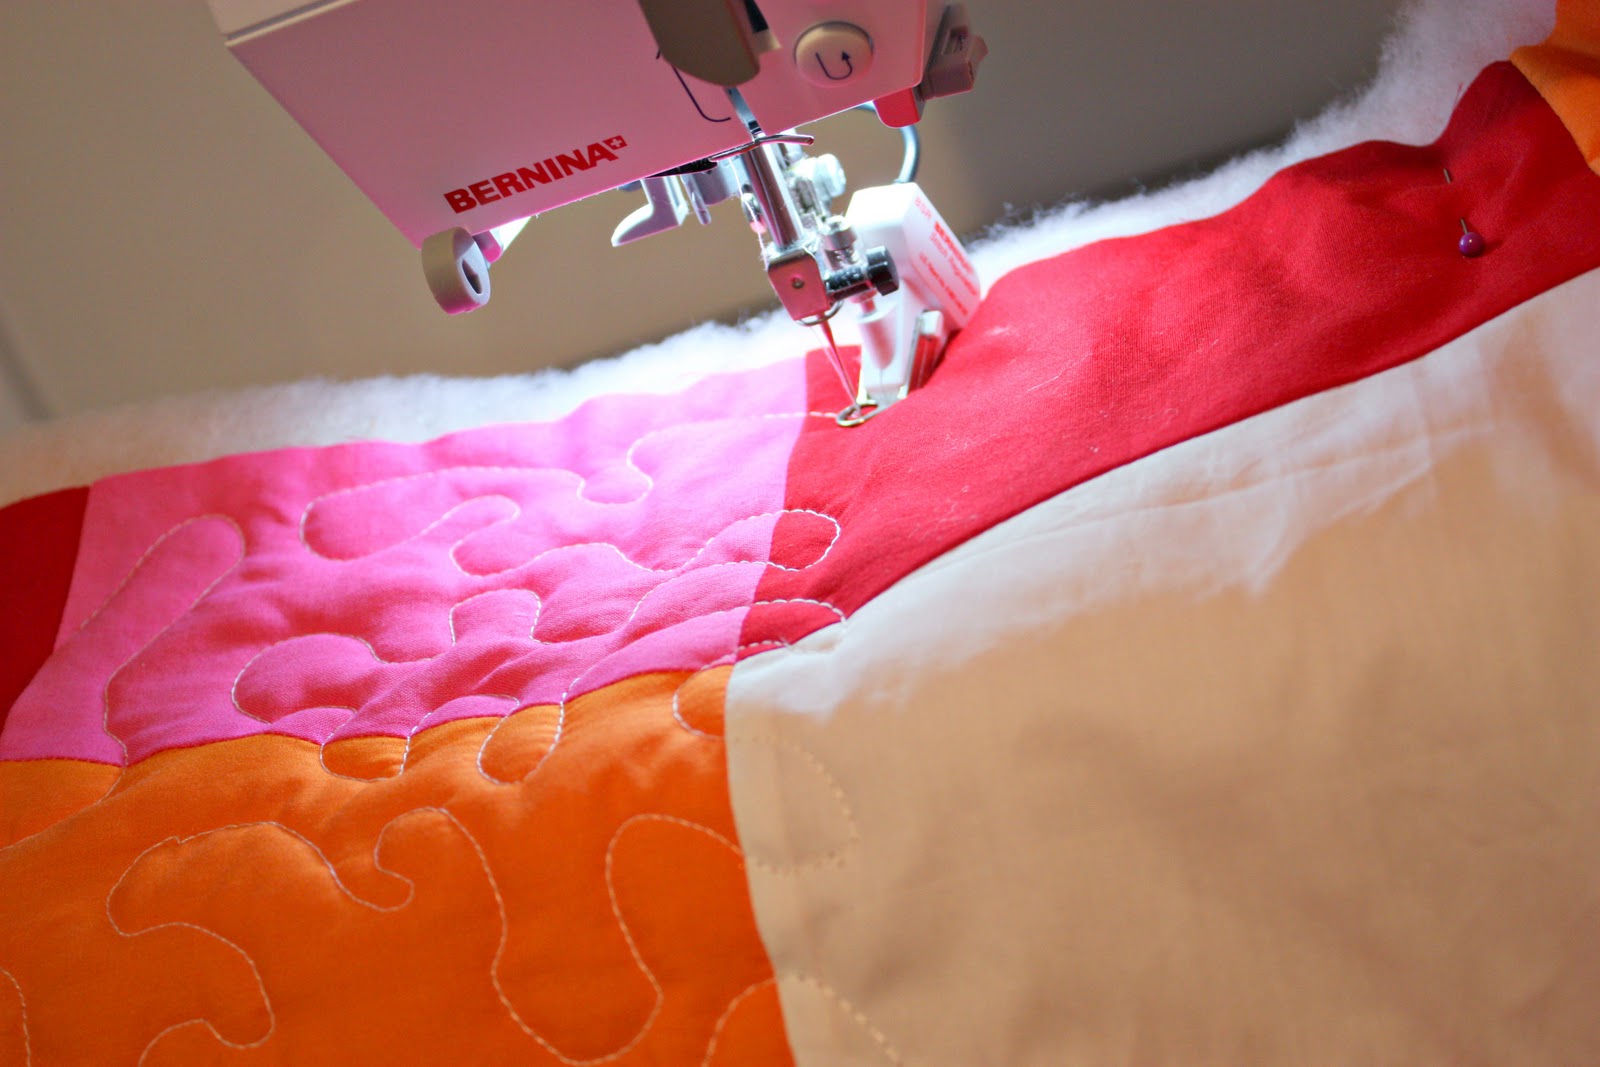
Here was the fun part. Quilting the 3 layers together with this
Bernina machine. It has a BSR attachment (Bernina Stitch Regulator) that quilts free-handed. And even with no prior experience…..it was pretty simple to use. And my word, so fun. Just imagine driving a car, turning whichever way you want, at whatever moment you want to. You don’t have to turn the fabric, you just guide it up/down/left/right/diagonal, and the little needle just glides right over it, stitching in whatever pattern or design you want it to.
And with this stippling look, there are no mistakes. Just bubbly twirls and ins and outs. Loved the ease of it.
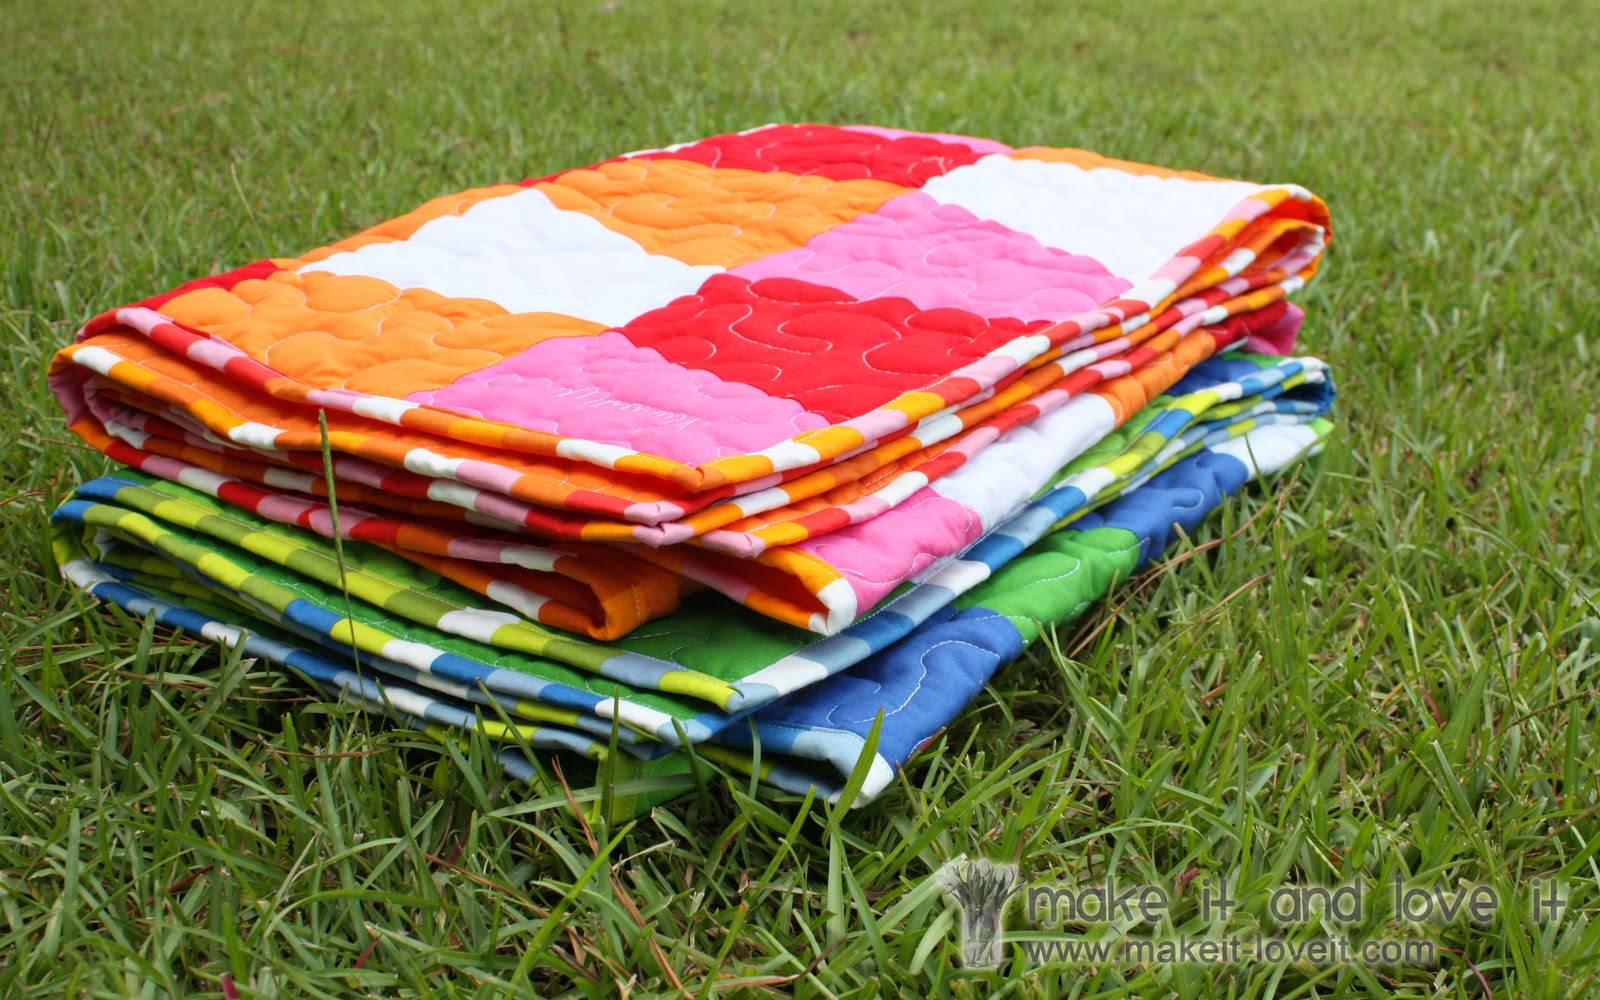
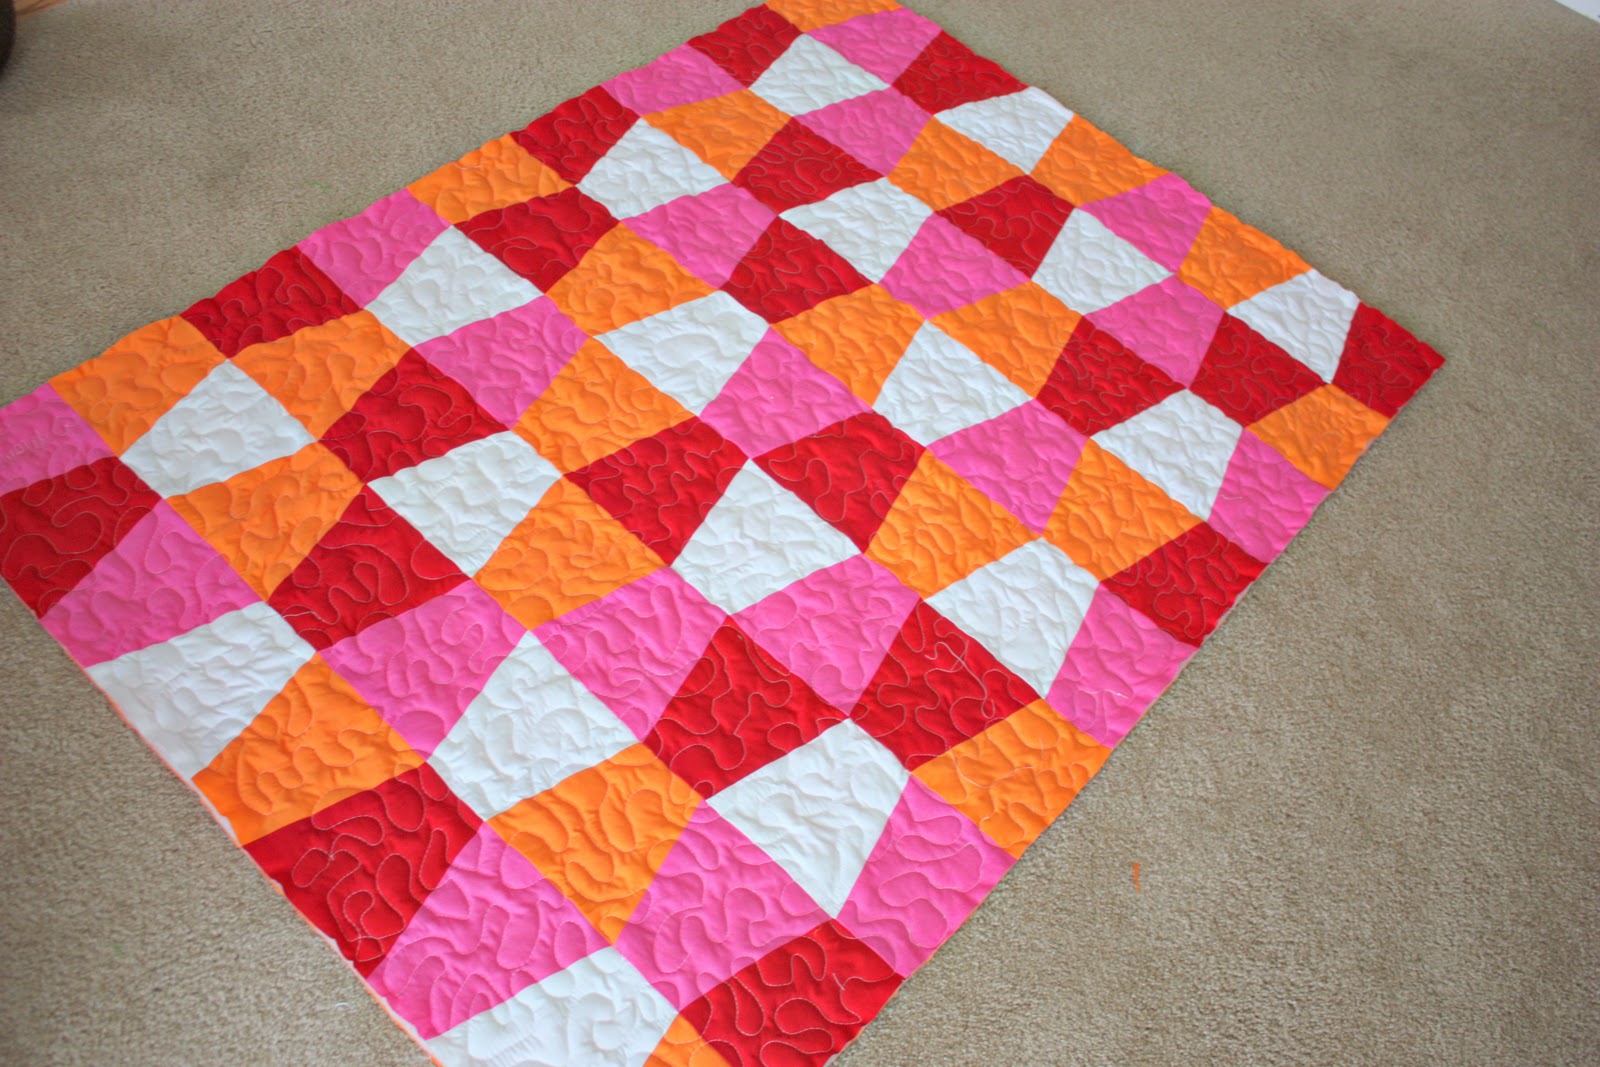
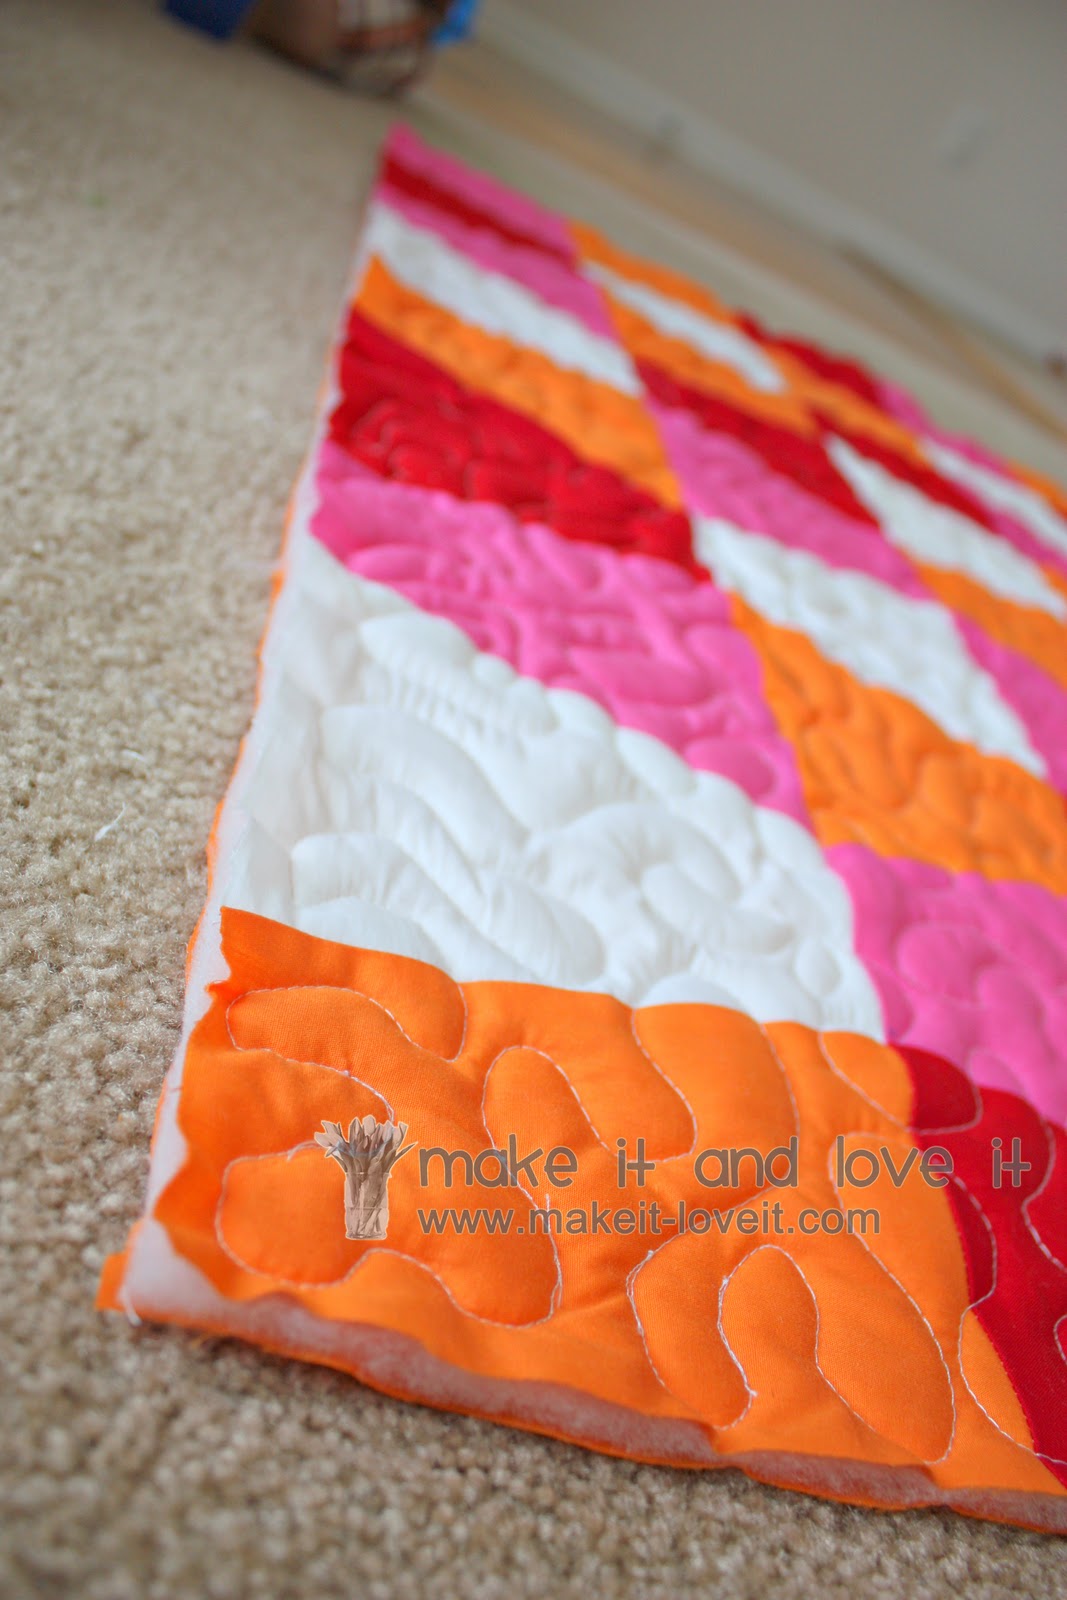
All quilted.
Oh, and I trimmed the edges right off, keeping the edges nice and even/straight.
Onto the binding. This part may seem intimidating……but it’s really not so bad.
I used the
Go! Cutter to cut lots of 2 1/2 inch wide strips really quickly, but you could cut them by hand, no problem.
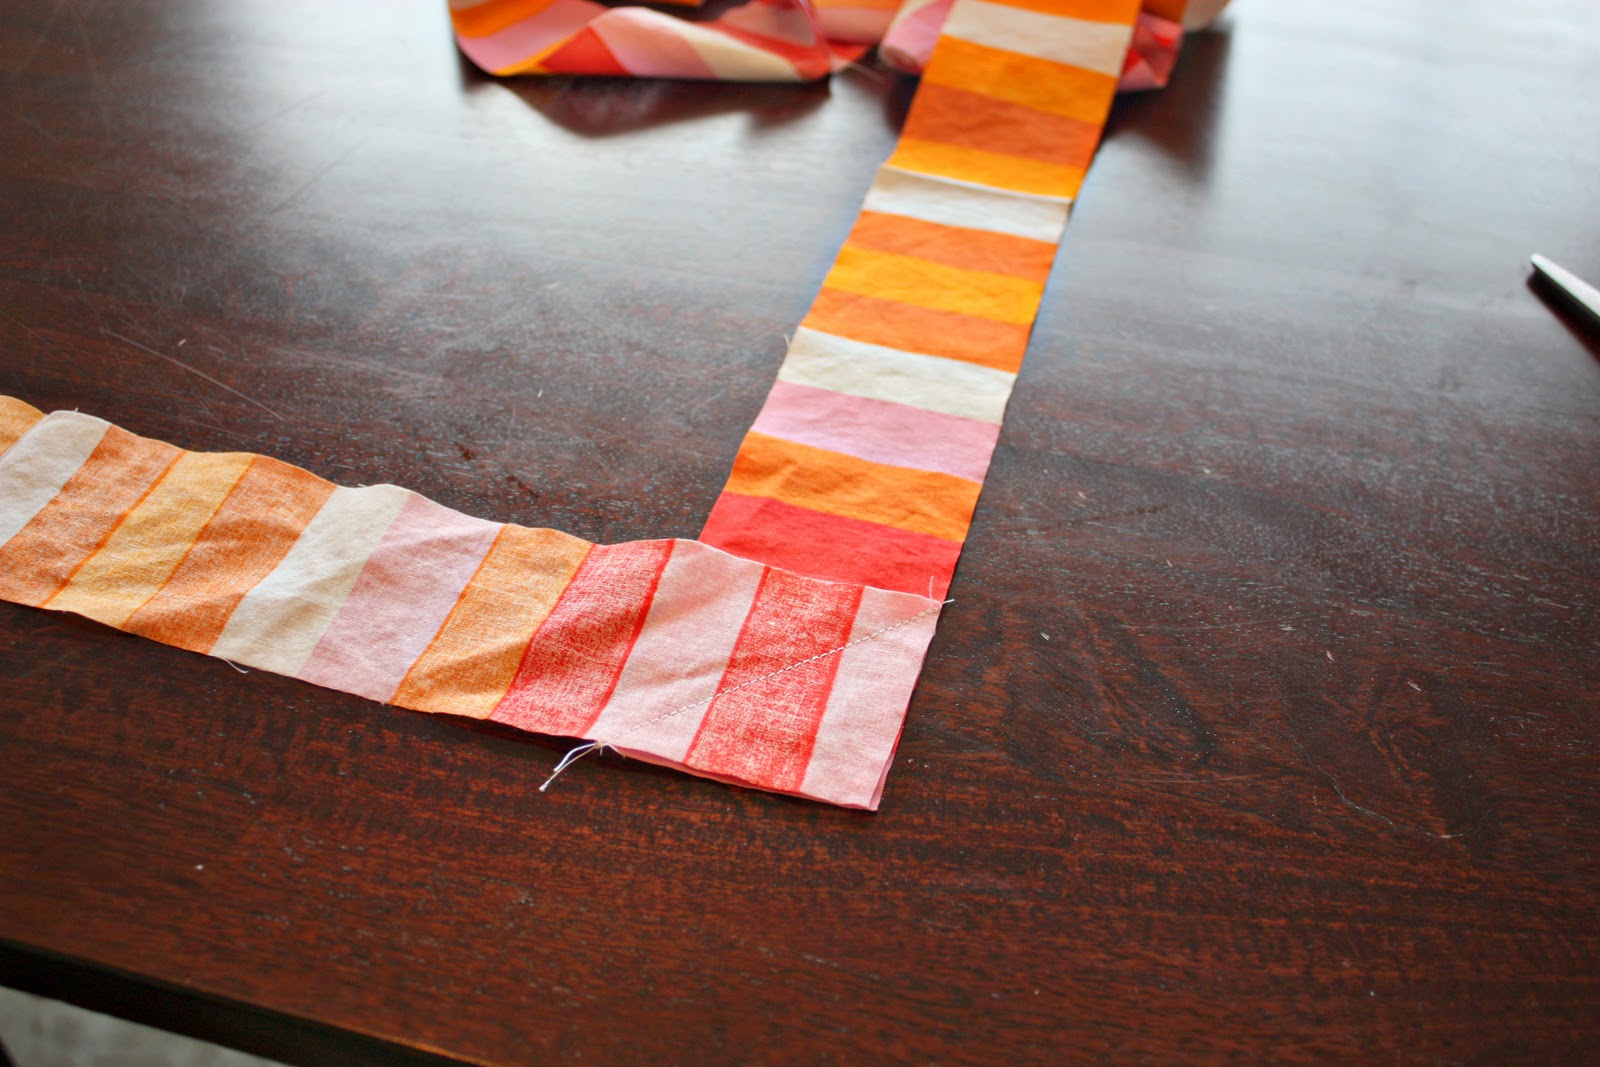
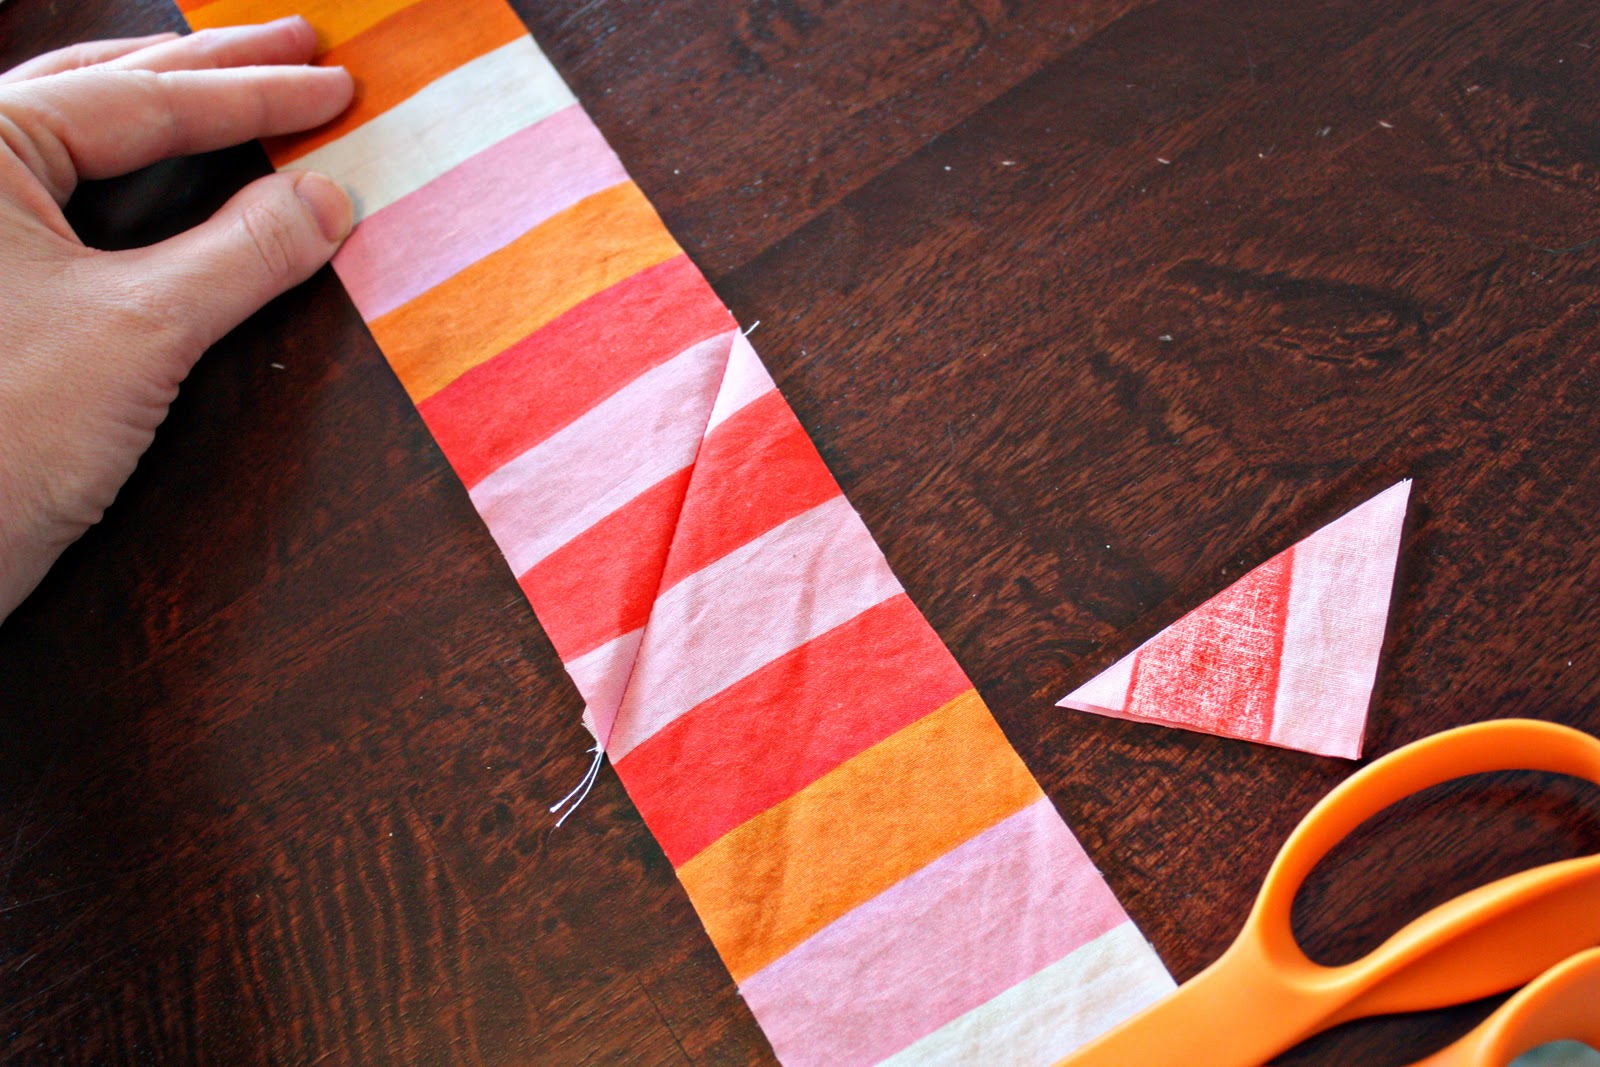
Next, you’ll want one long strip that will fit around the entire quilt, with a little extra length, just in case. So start piecing your shorter pieces together by placing two ends together. Place your first piece face up and your second piece face down, making a 90 degree angle with the two ends.
Then make a diagonal seam, like shown below. Then trim off the excess.
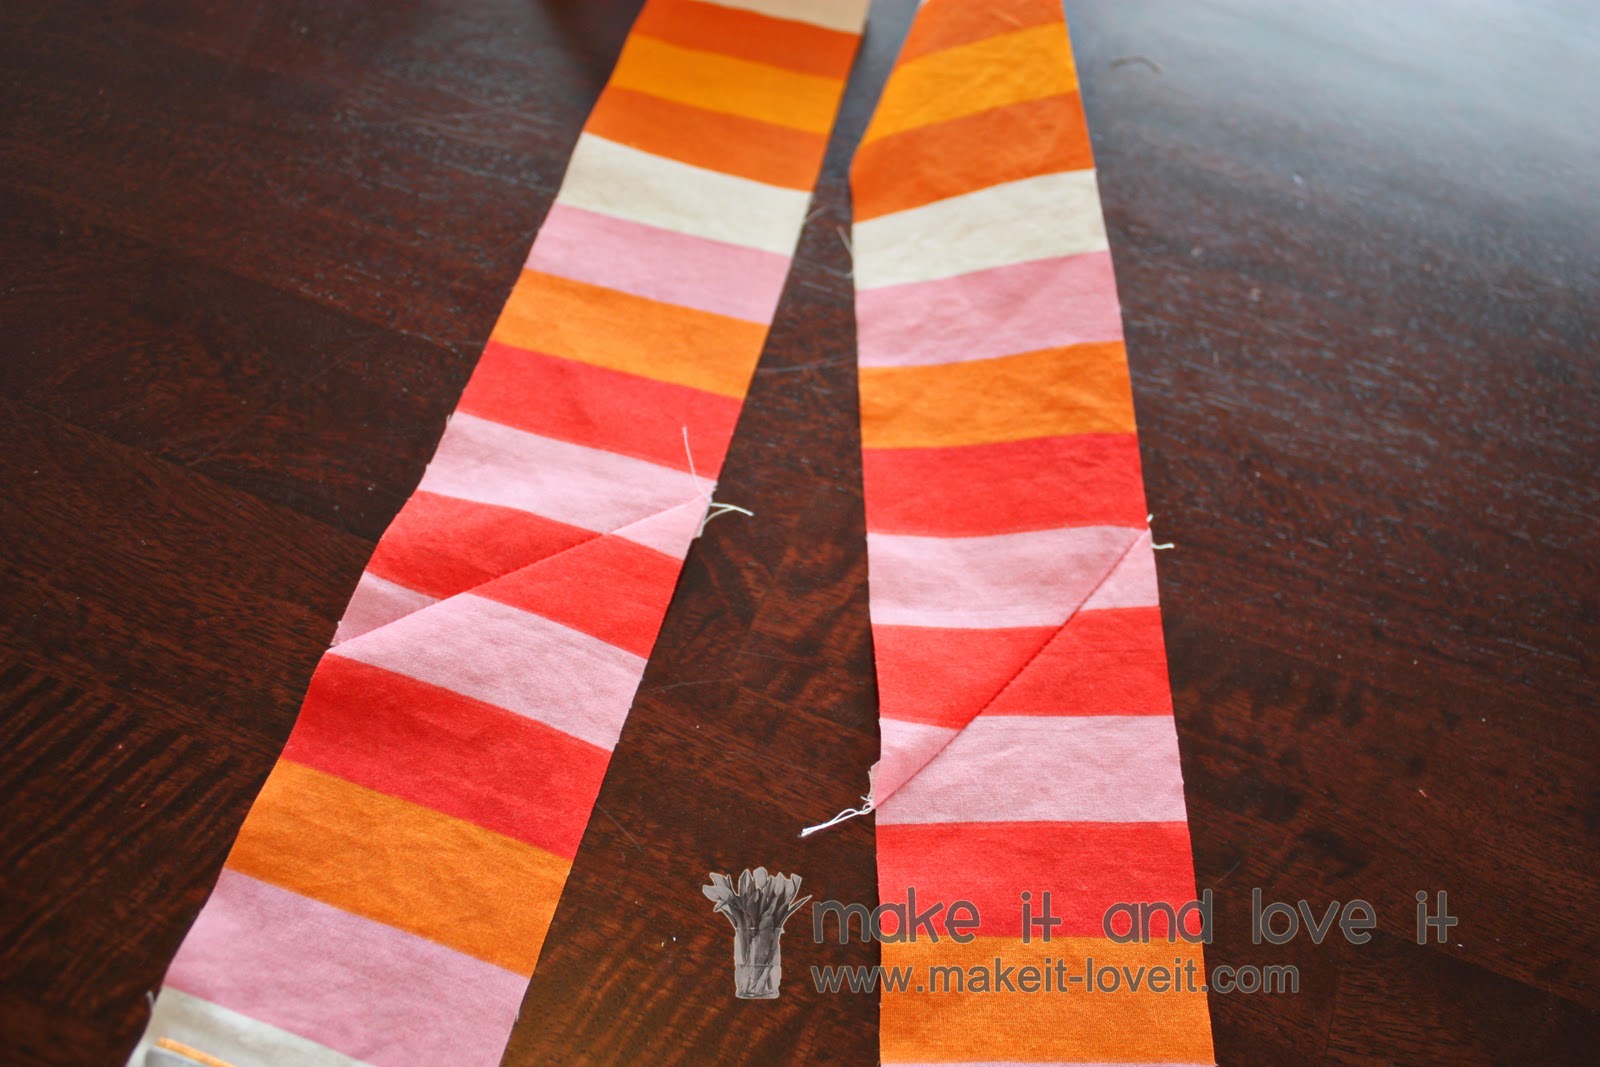
Once you open it up, you should have one
continuous strip. If you sew the diagonal the wrong way, it will mess it up, so be sure you’re sewing it correctly. (Sewing it together on a diagonal rather than just a straight line, eliminates a lot of bulk. Once you start folding the binding, then folding more and then sewing, you don’t want to sew over many layers of one straight seam. The diagonal spreads out the seam.)
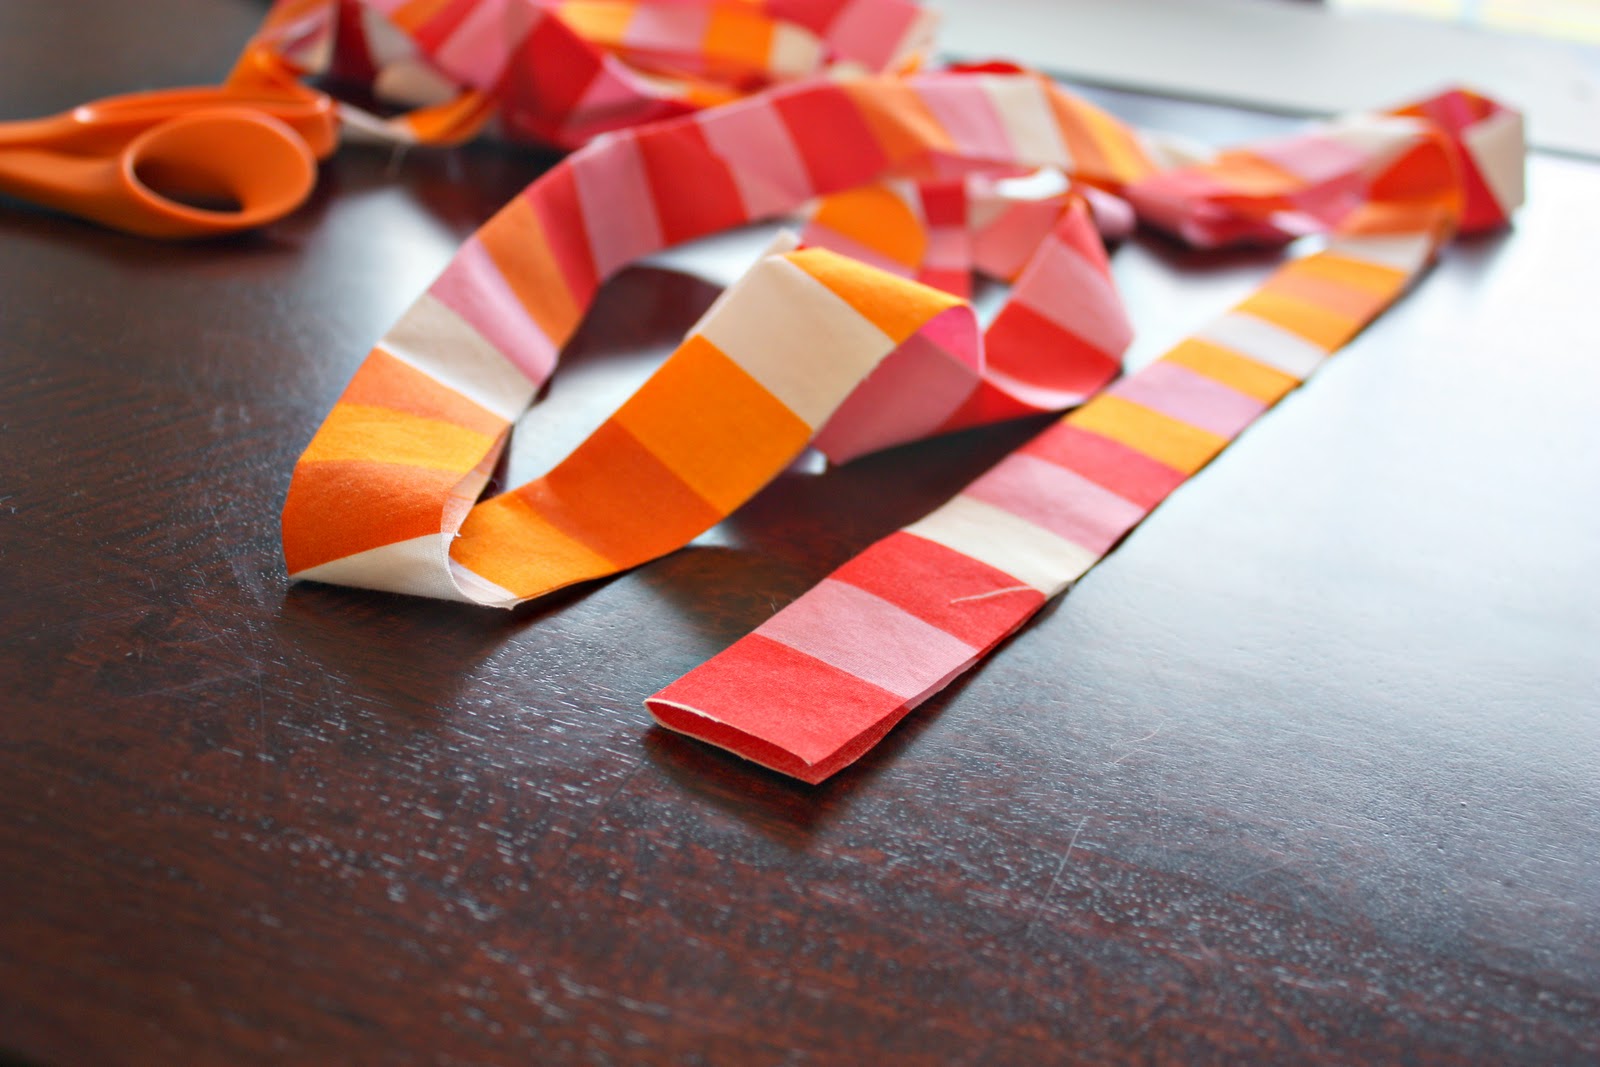
Keep piecing your little strips together, end to end, until you have one long strip…..long enough to go around the entire quilt, plus 8 or so extra inches.
Now, fold your strip in half lengthwise, with wrong sides together……and iron flat.
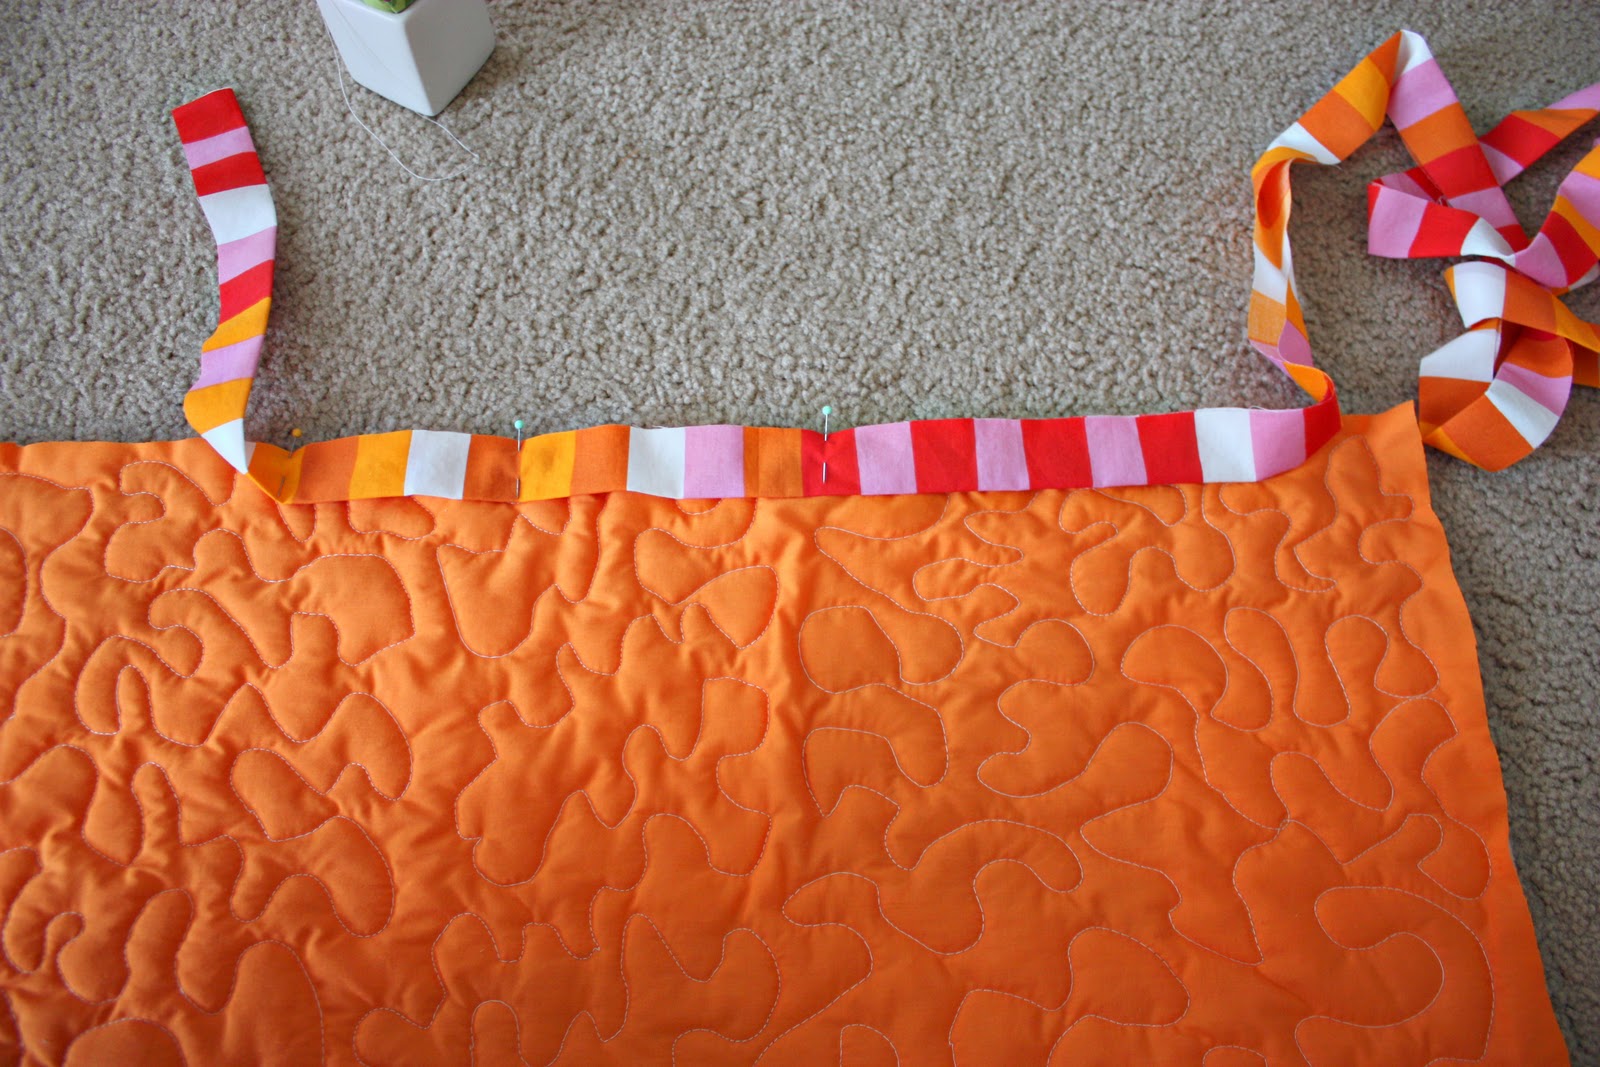
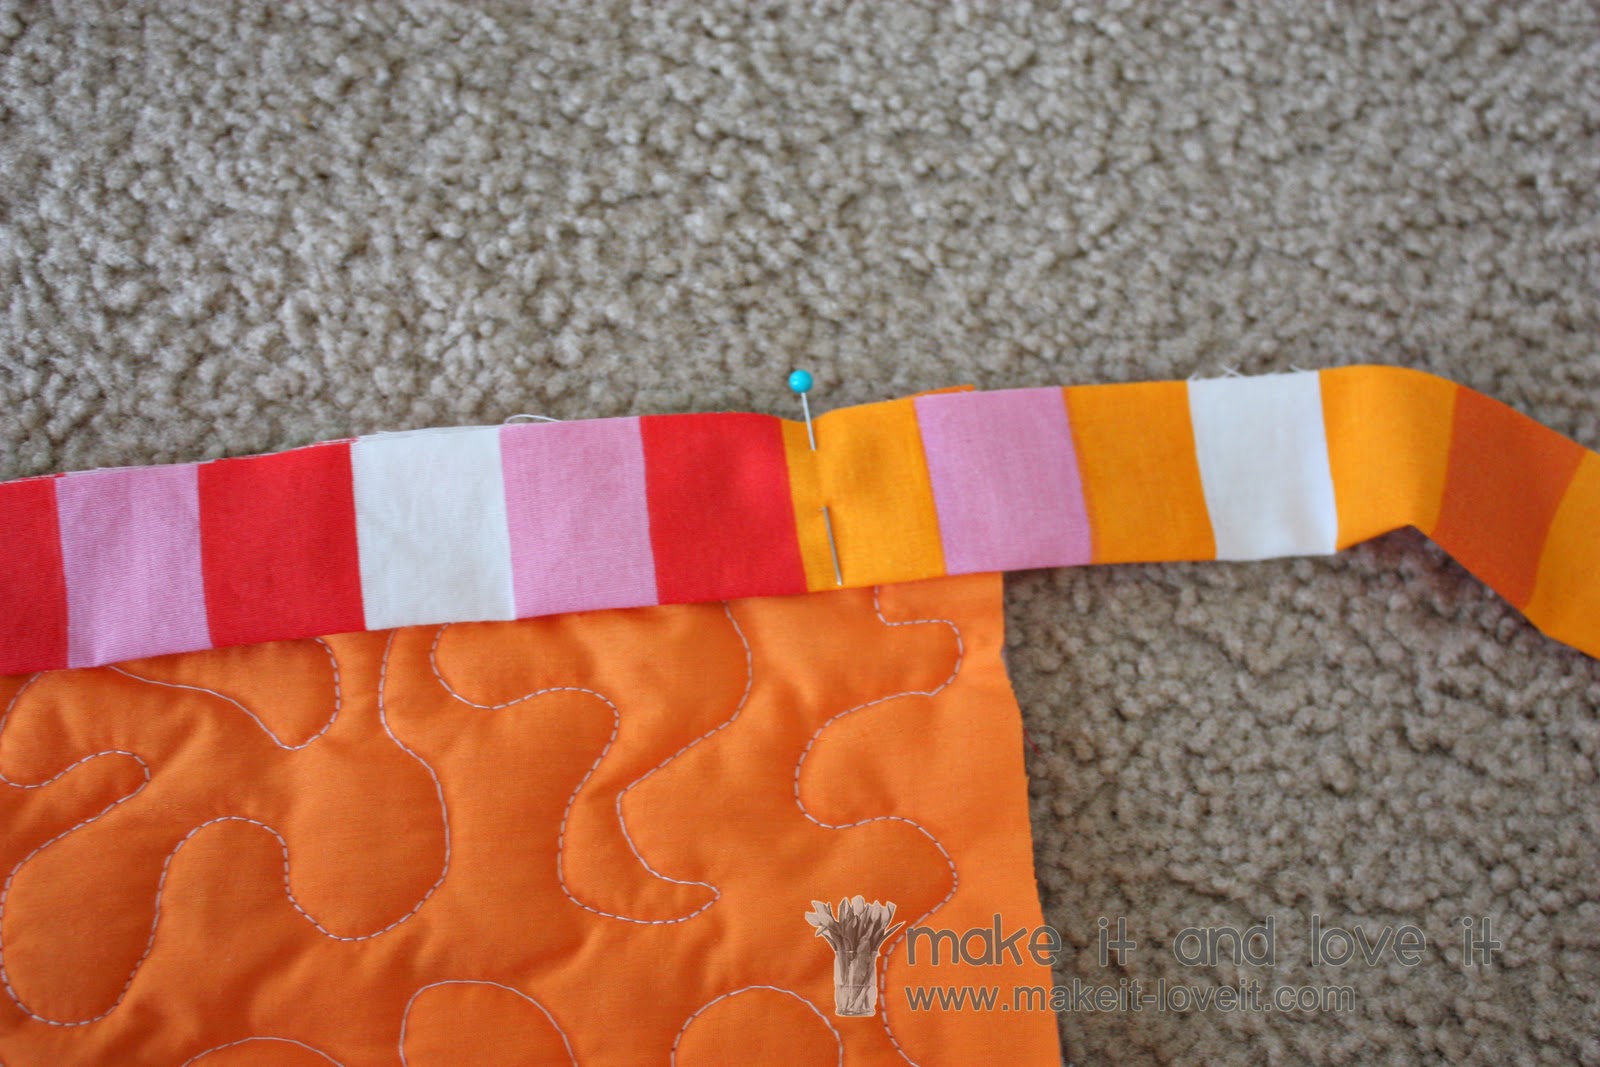
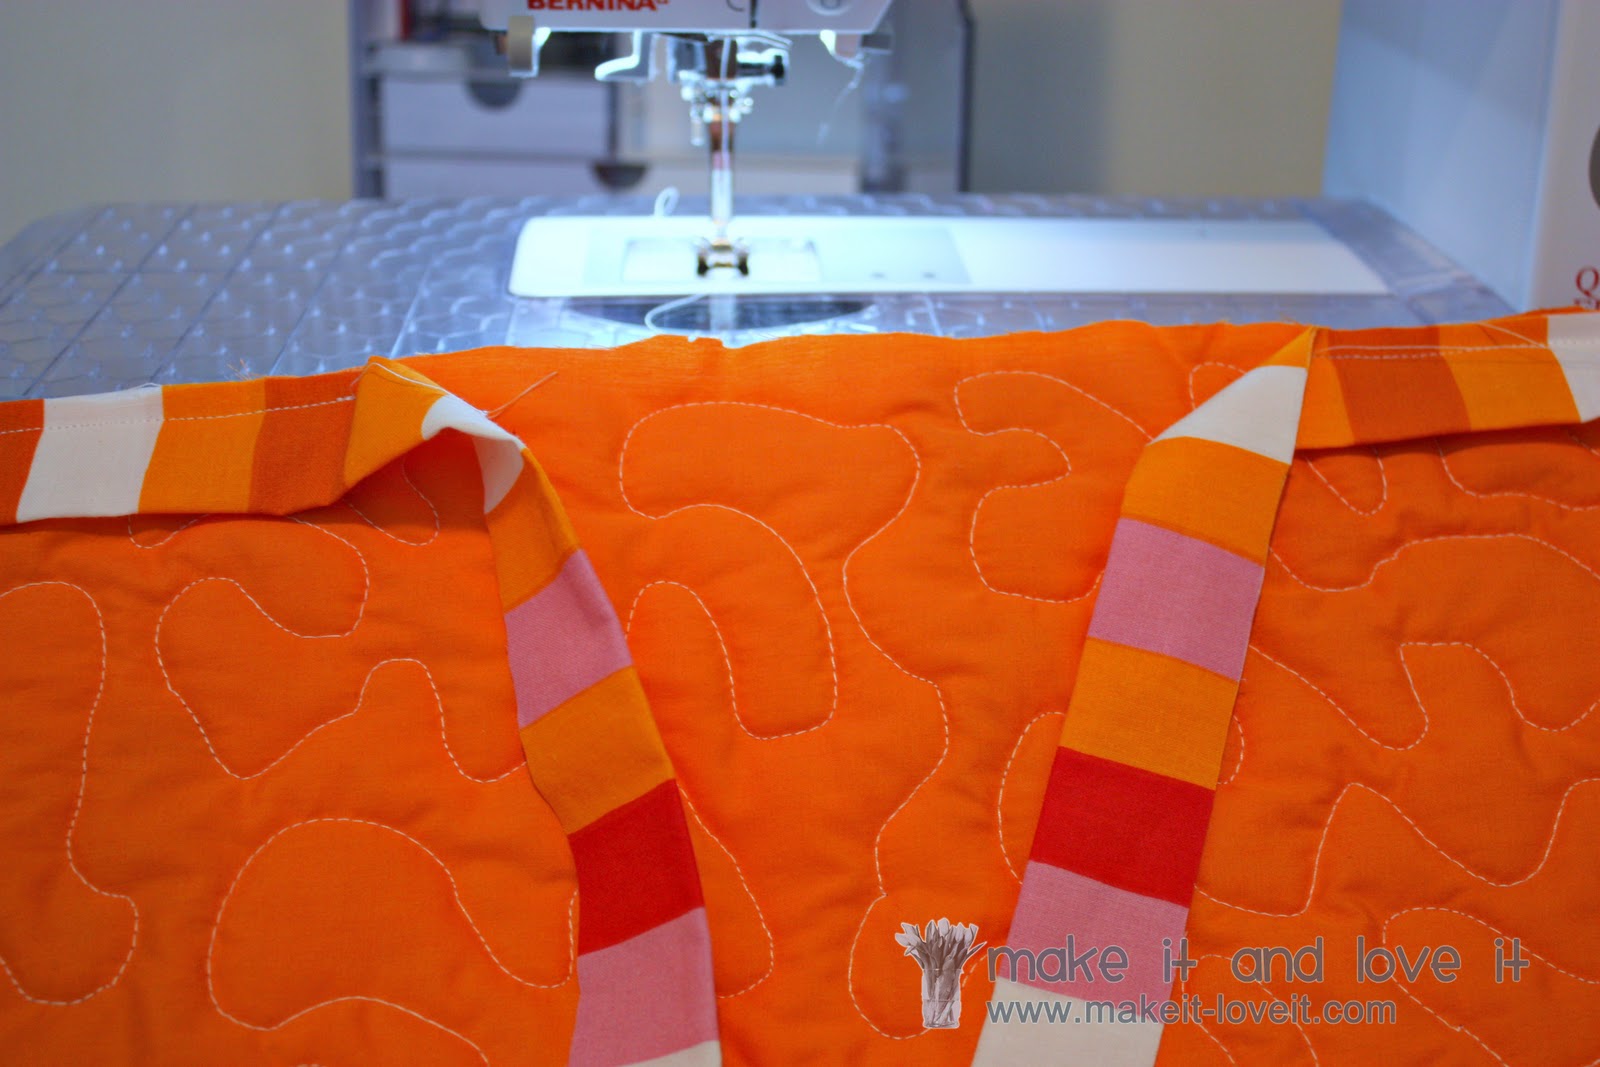
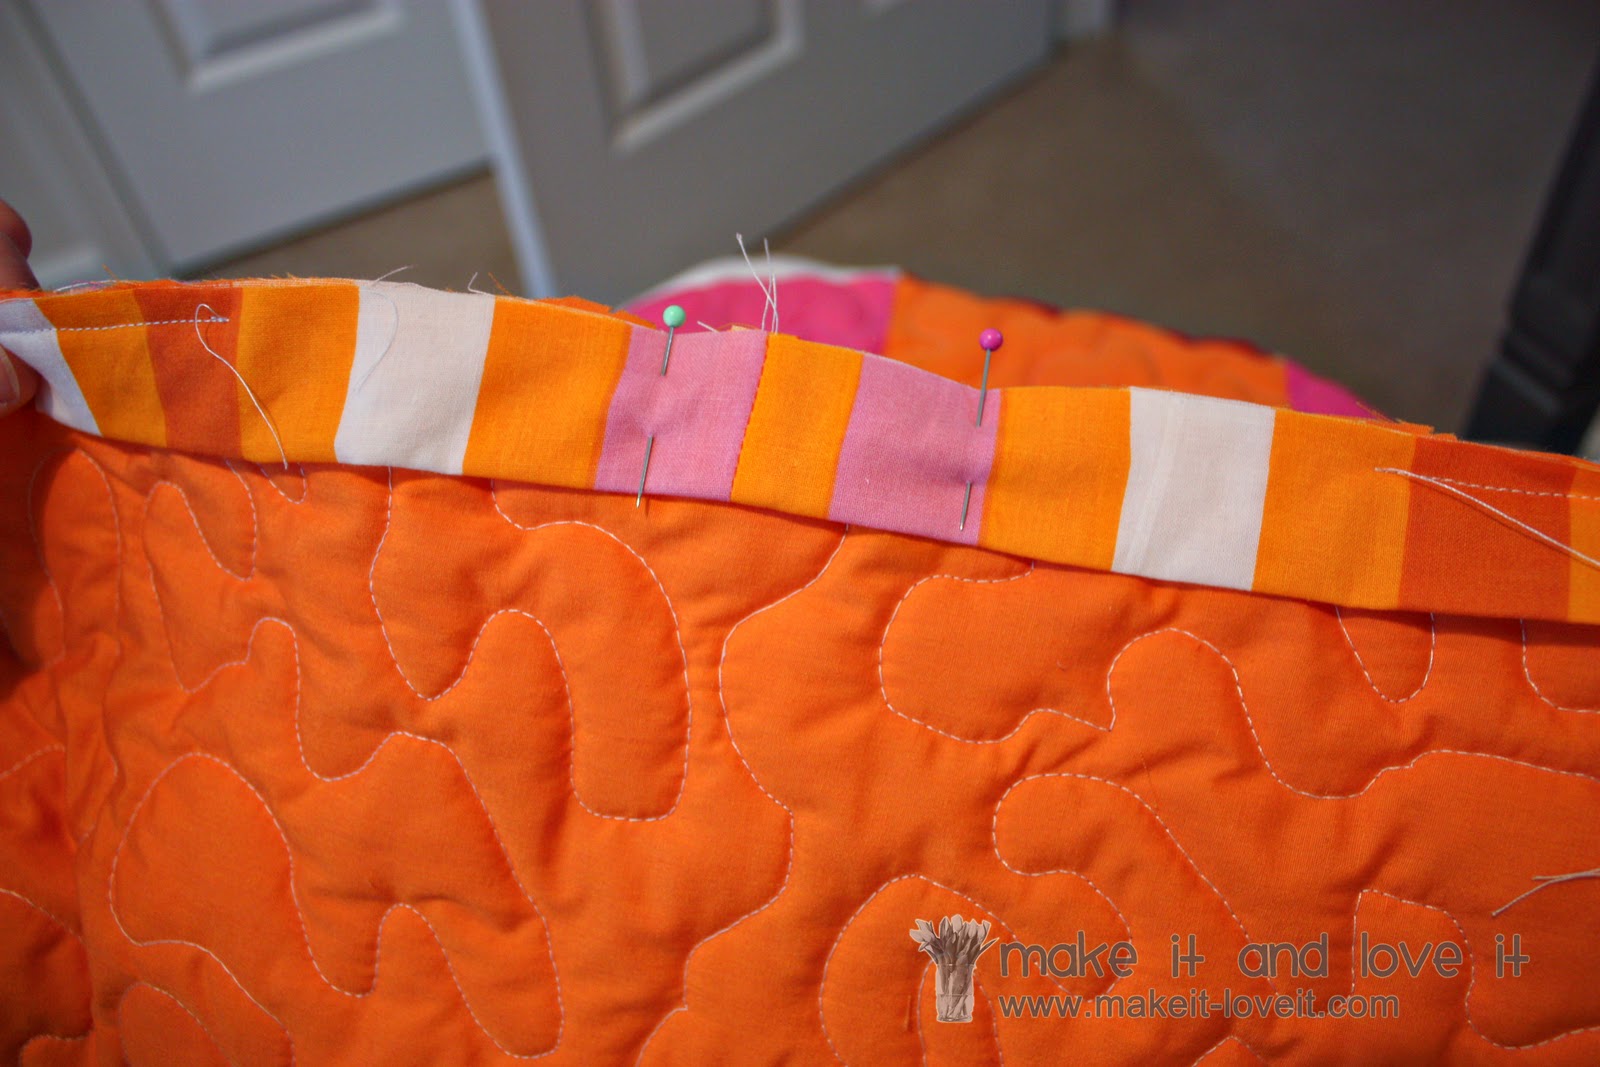
Next, place your quilt face down. Starting in the middle of one side of the quilt, start pinning the raw edges of the binding even with the raw edges of the quilt. Leave a few inches free at one end (shown on the left below), that we’ll join together with the other end later.
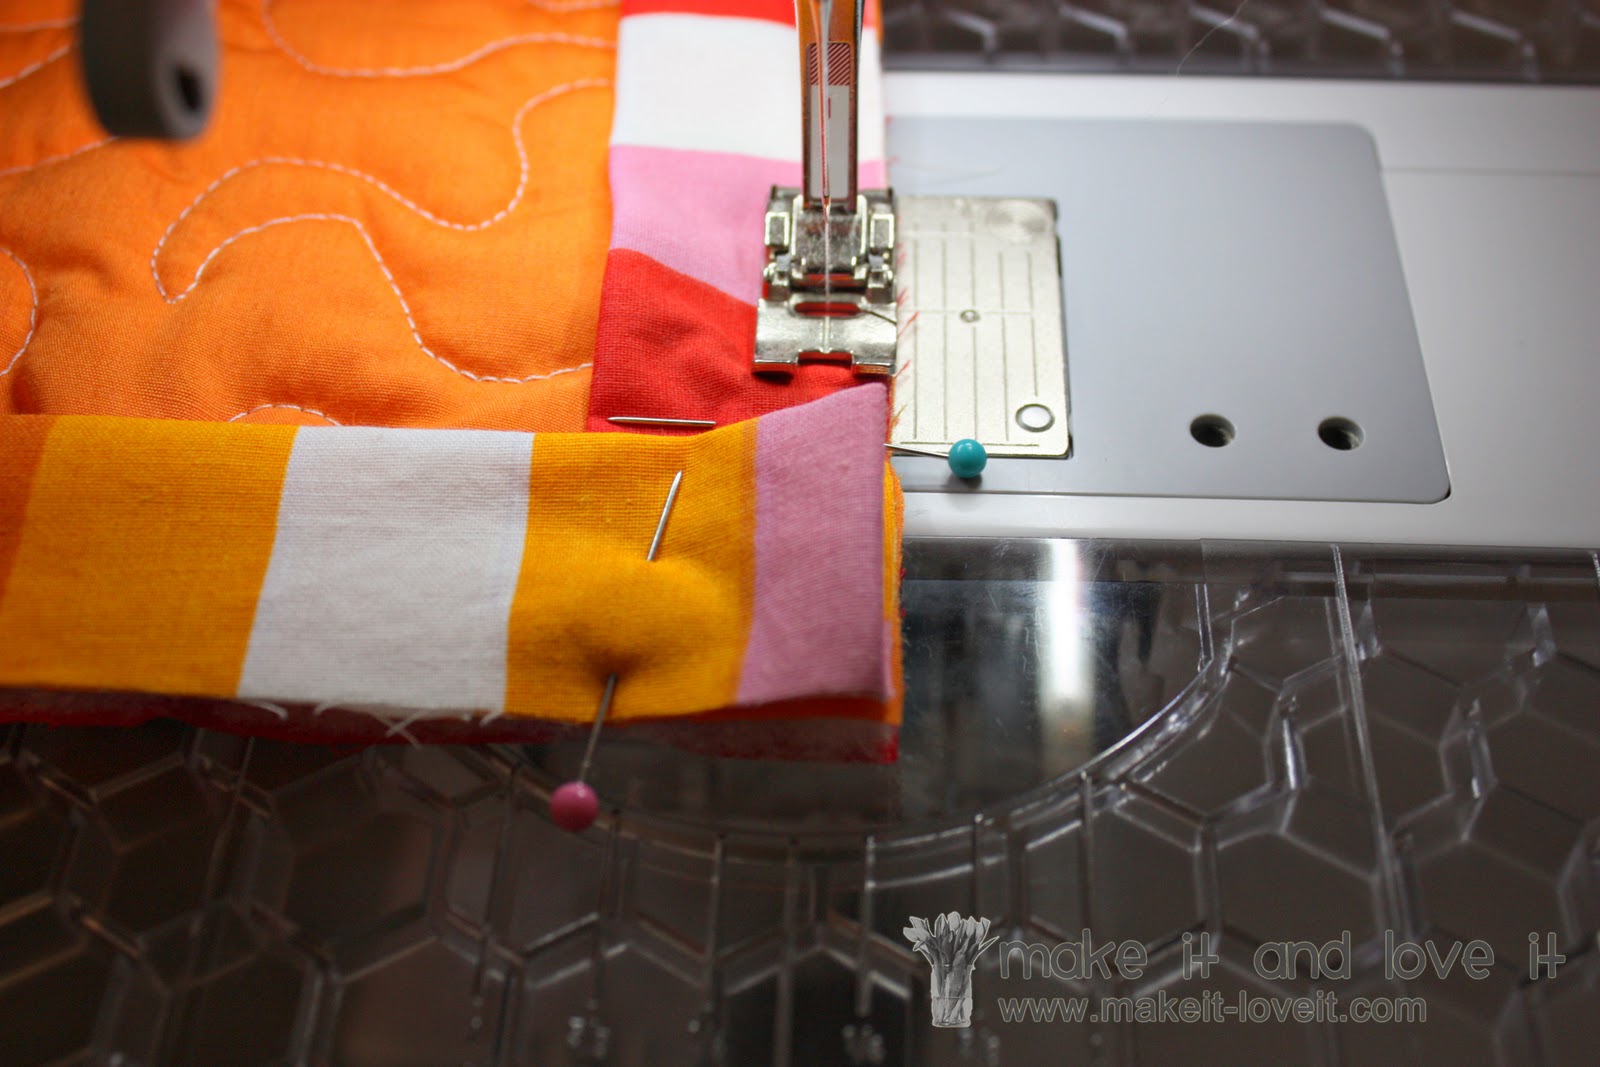
Once you reach the corner, place a pin to about an inch from the end to keep the binding in place……
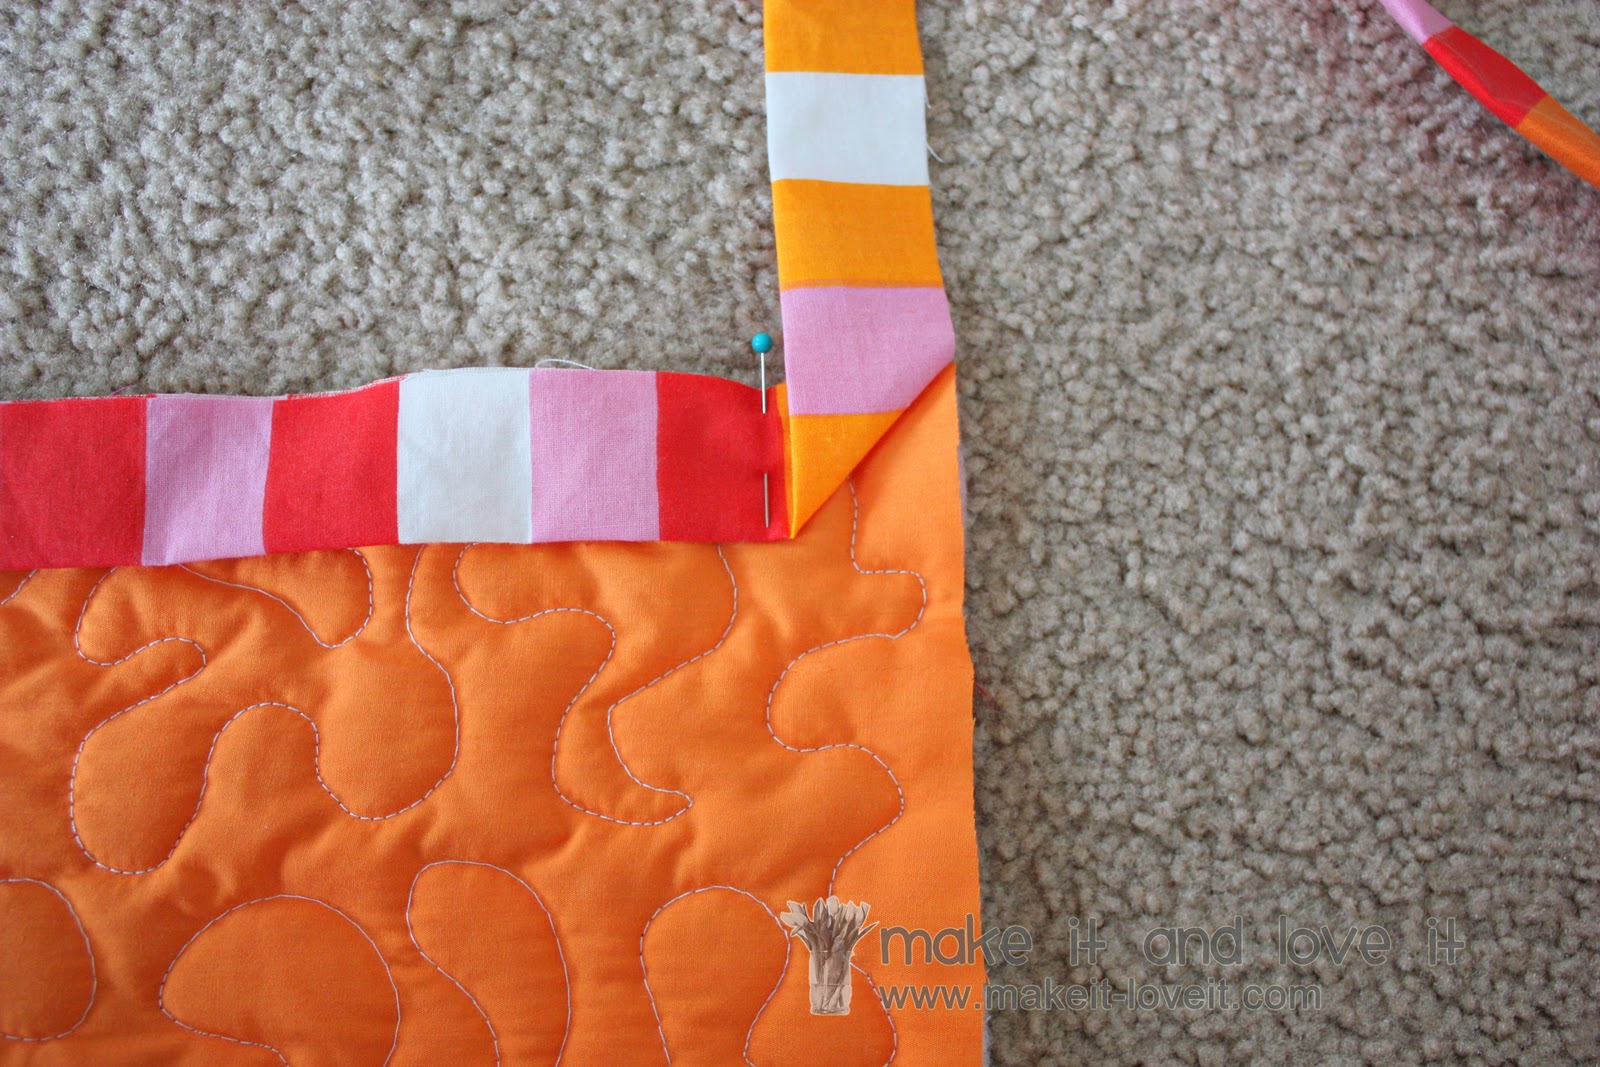
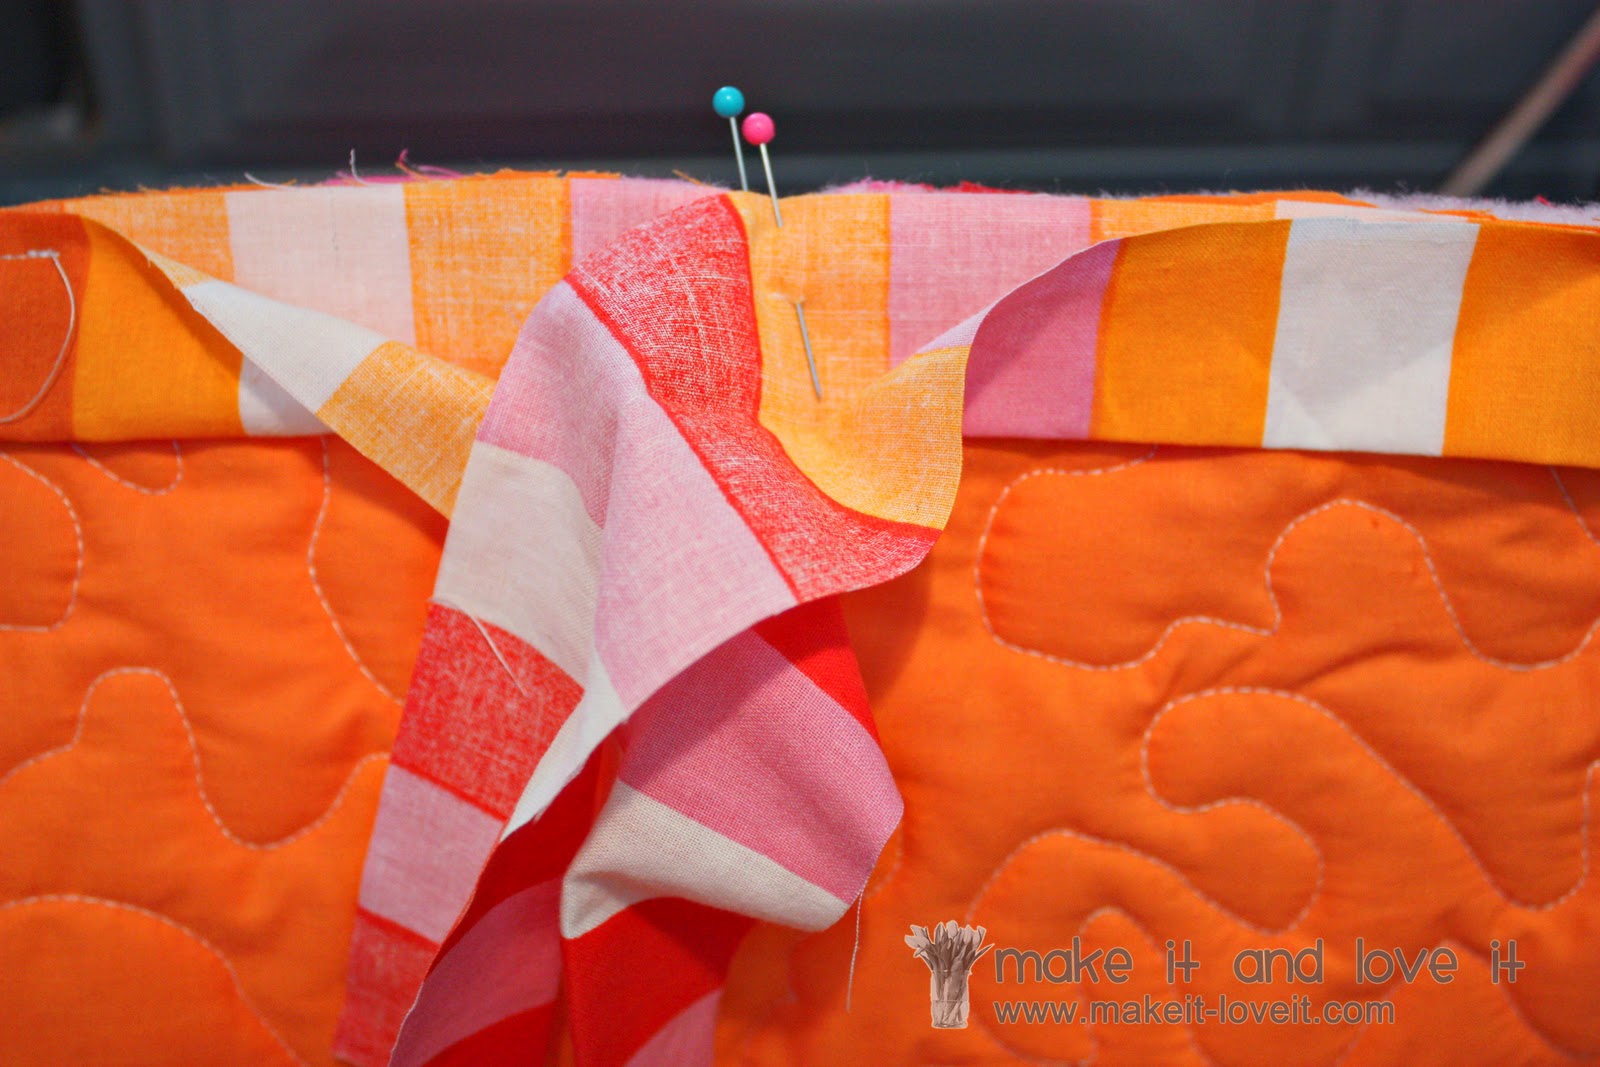
Then, flip the binding up, making a 45 degree angle with the binding. Keep the right side edge of the quilt even with the right side edge of the binding. See how it’s one continuous line on the right?
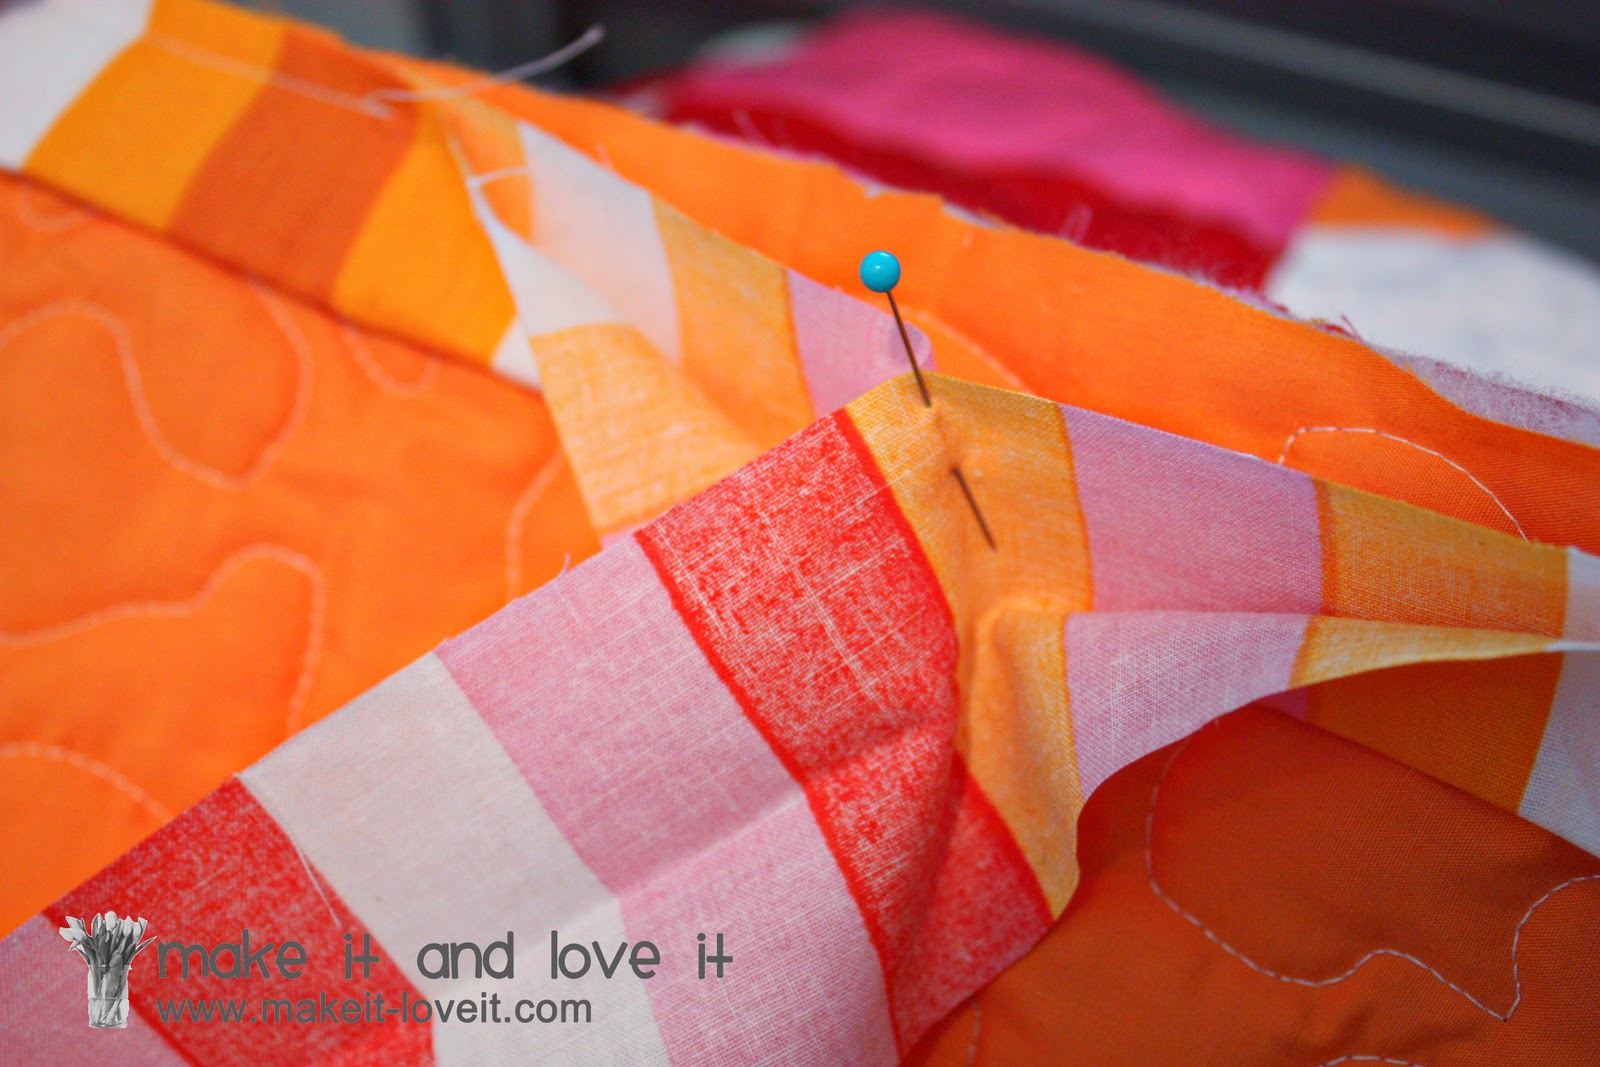
Keeping that 45 degree angle in place, flip the binding down, keeping the top edge of the binding even with the top edge of the quilt. Now it’s a square. Pin it in place.
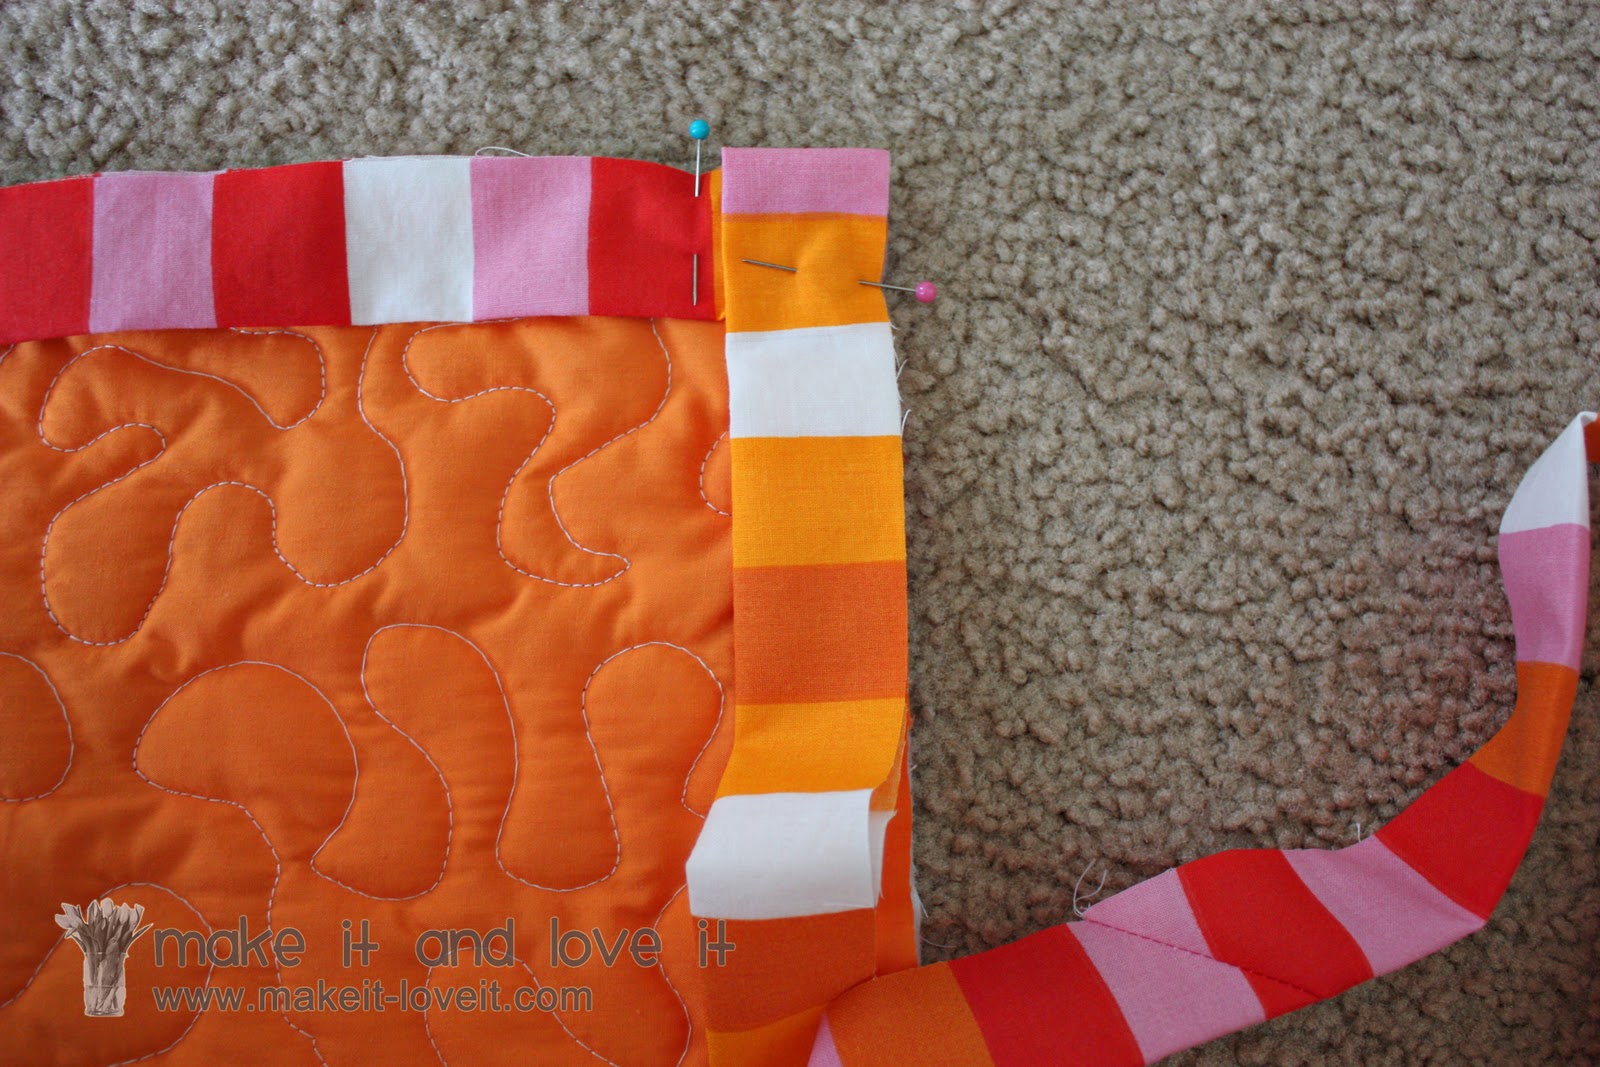
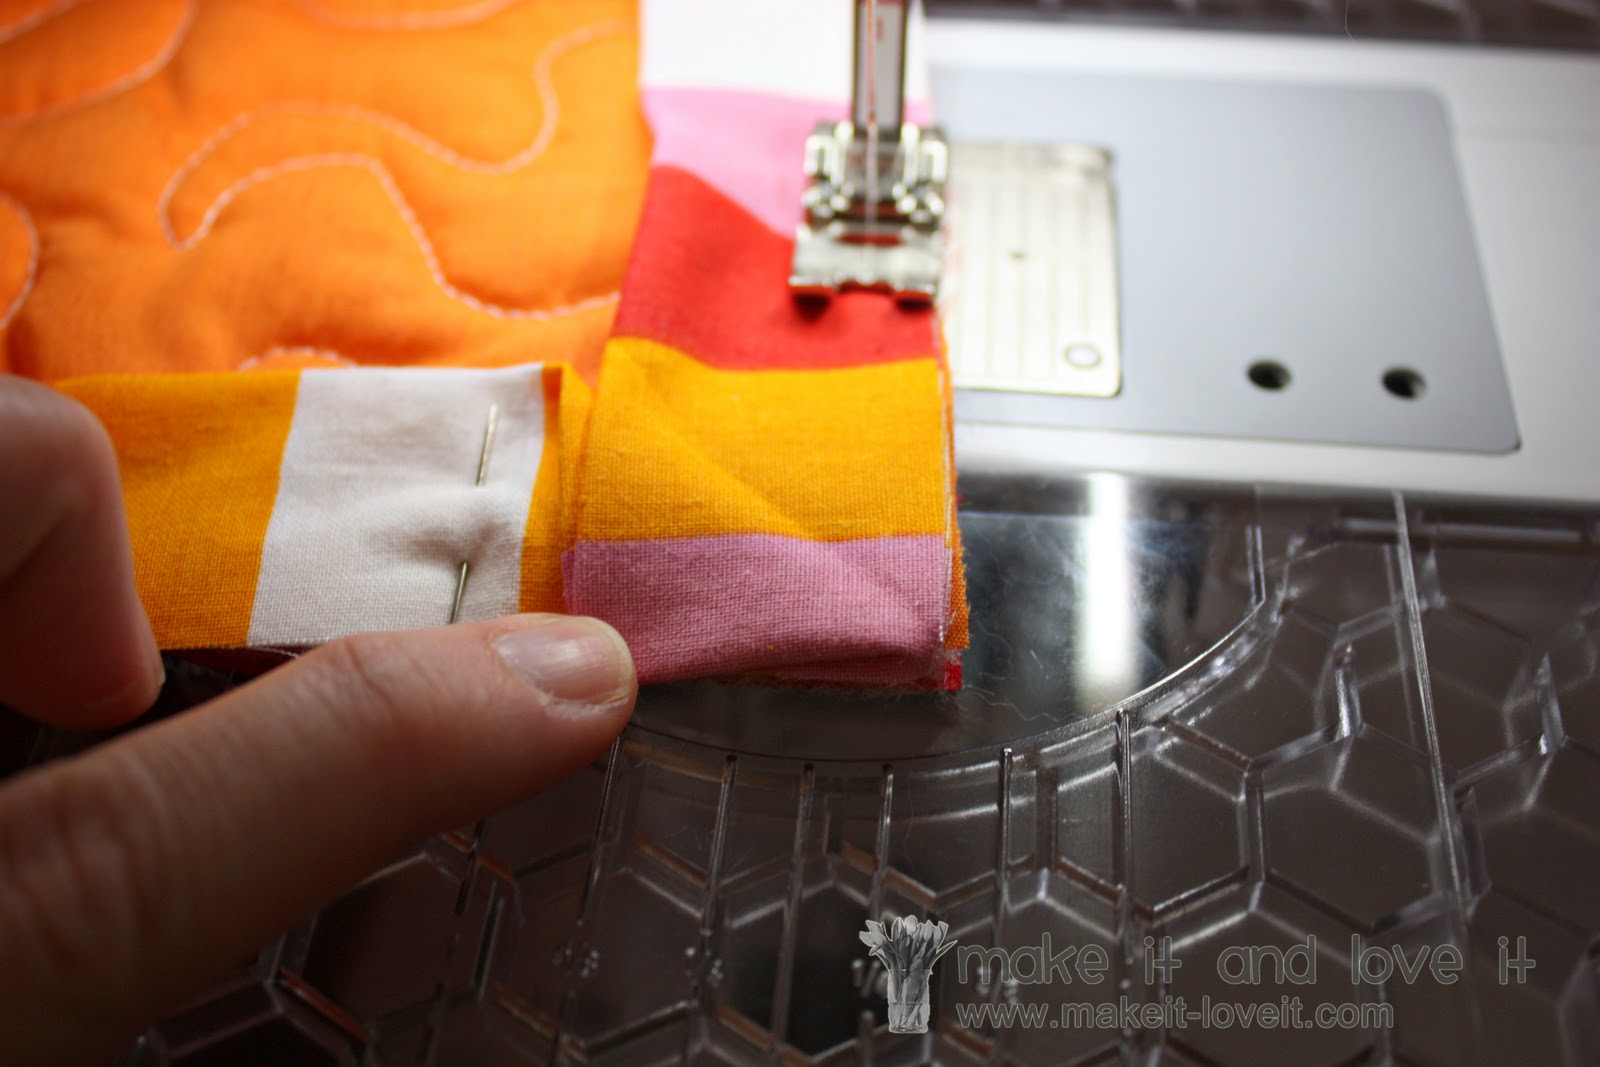
Then continue pinning your raw edges along the raw edge of the quilt.
Continue pinning all the way around the quilt the same way. Leave a few inch tail at the other end too and we’ll deal with it later.
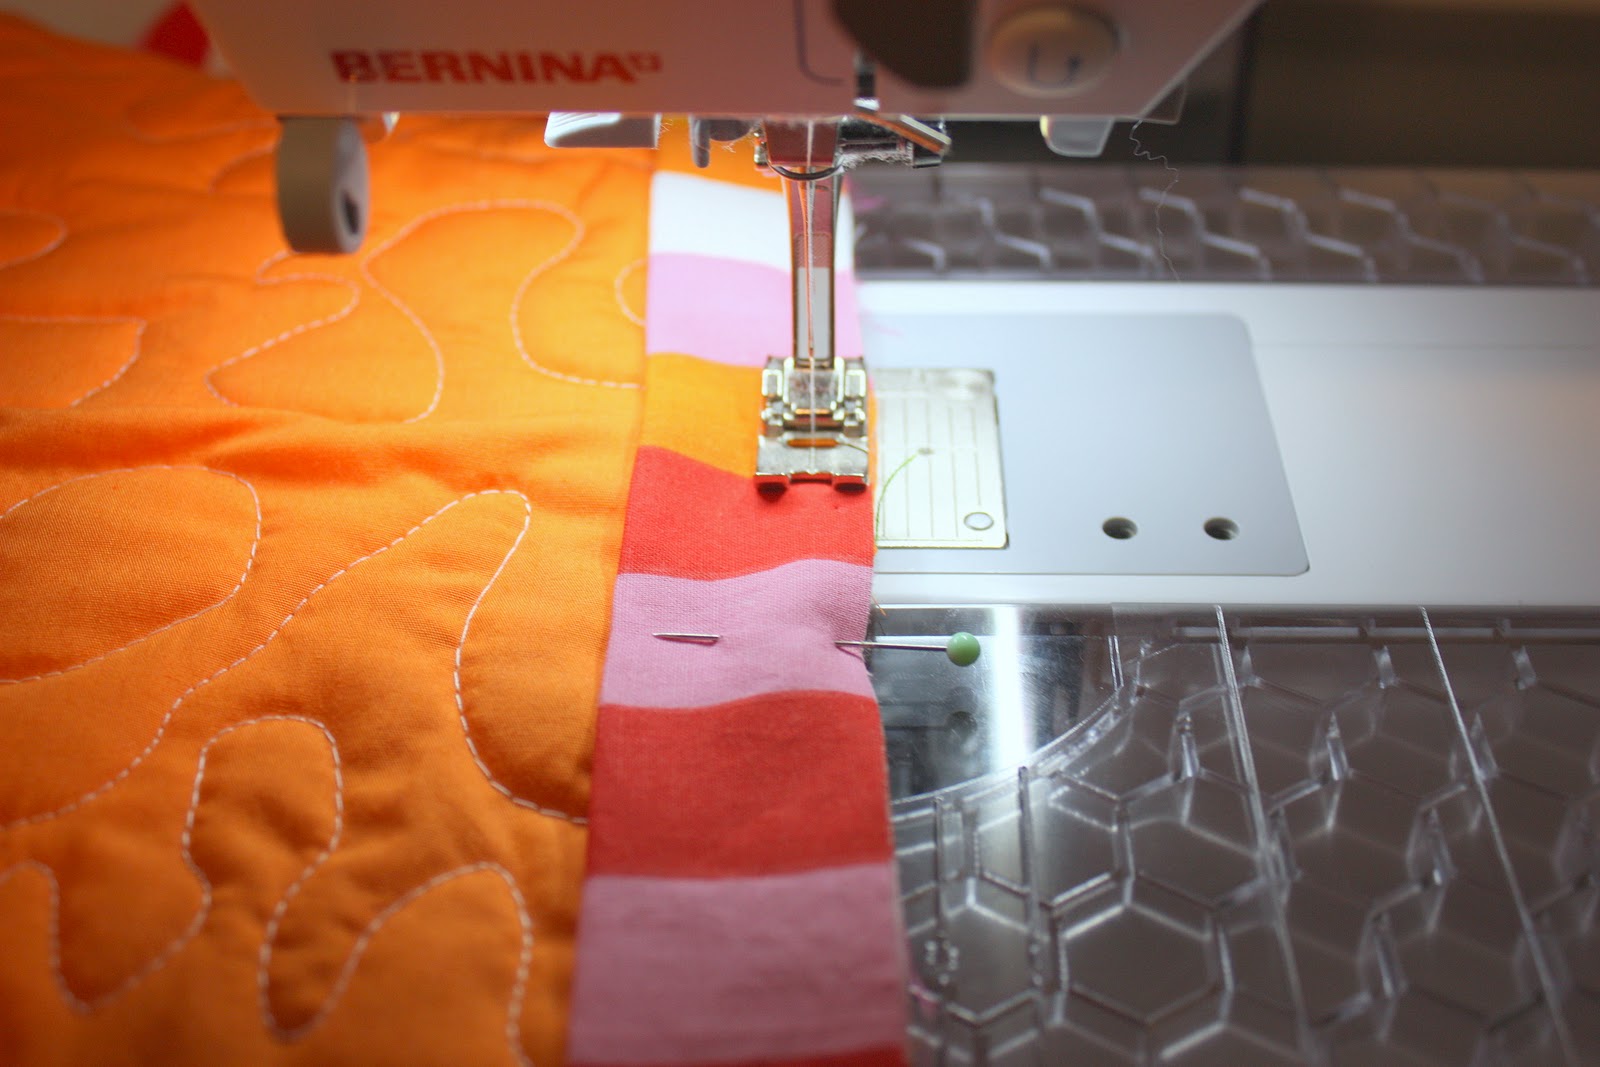
Begin sewing around your quilt very slowly, using a 1/4 inch seam allowance. (Start at one of the loose ends, with the free tail of binding.) I think the trick here is sewing slowly, and keeping those raw edges even.
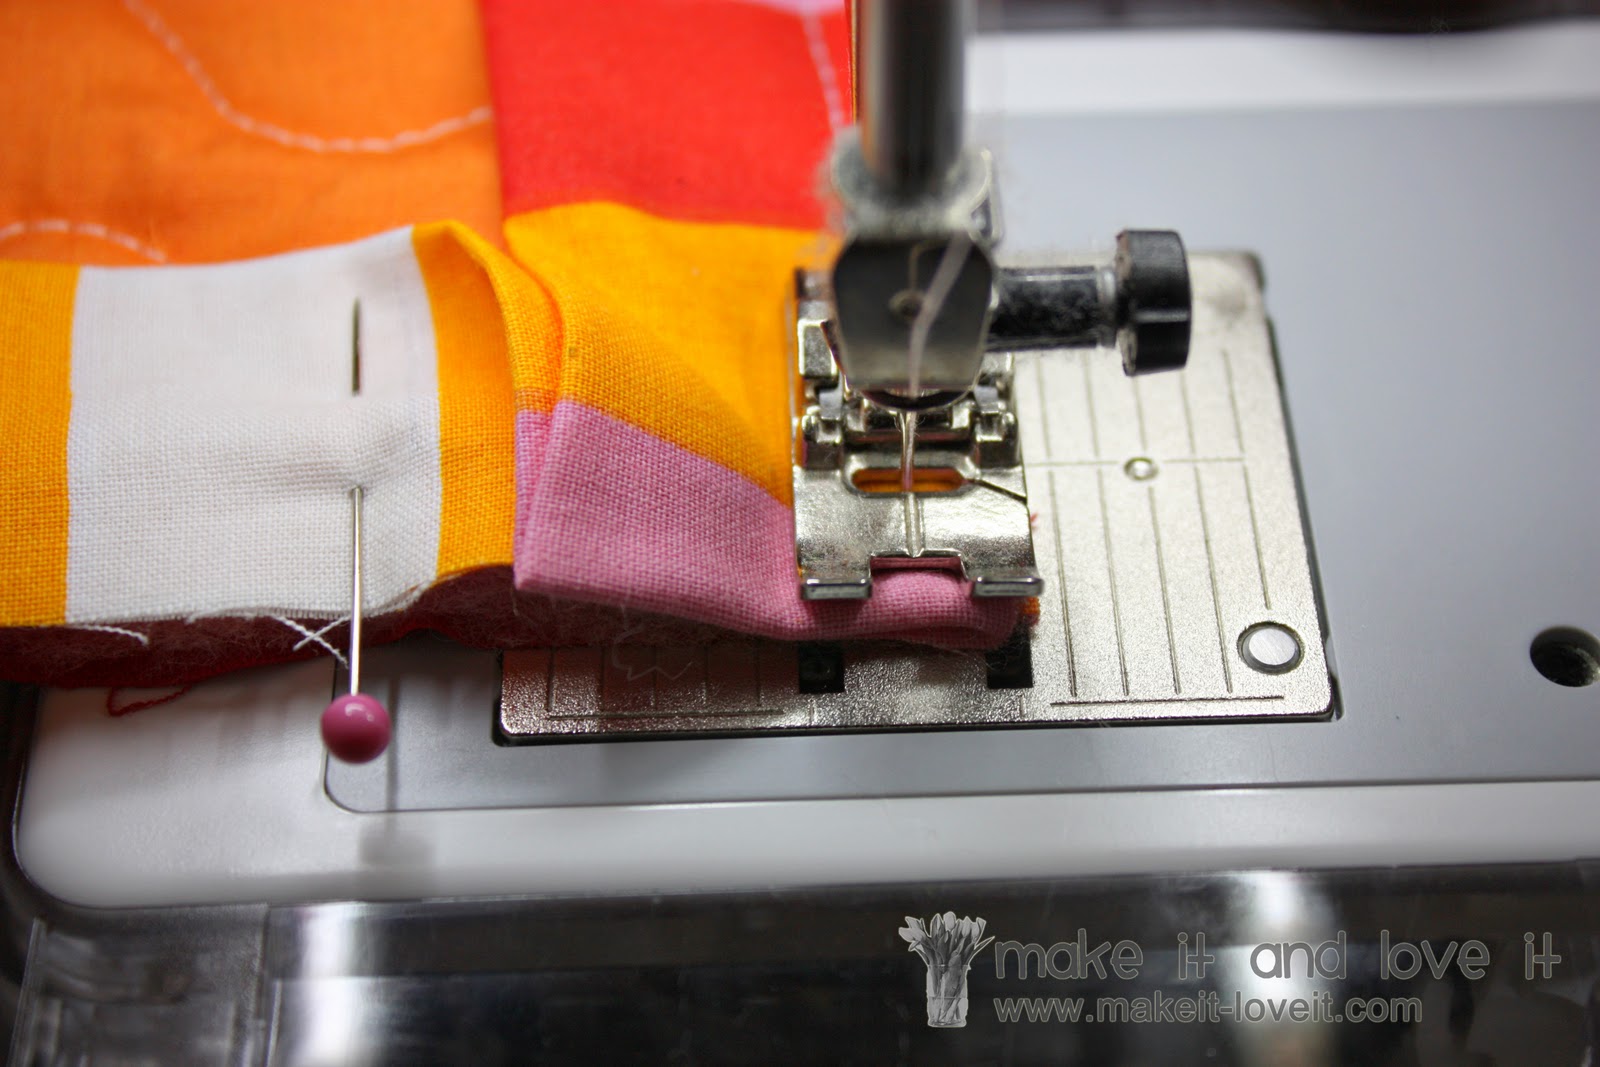
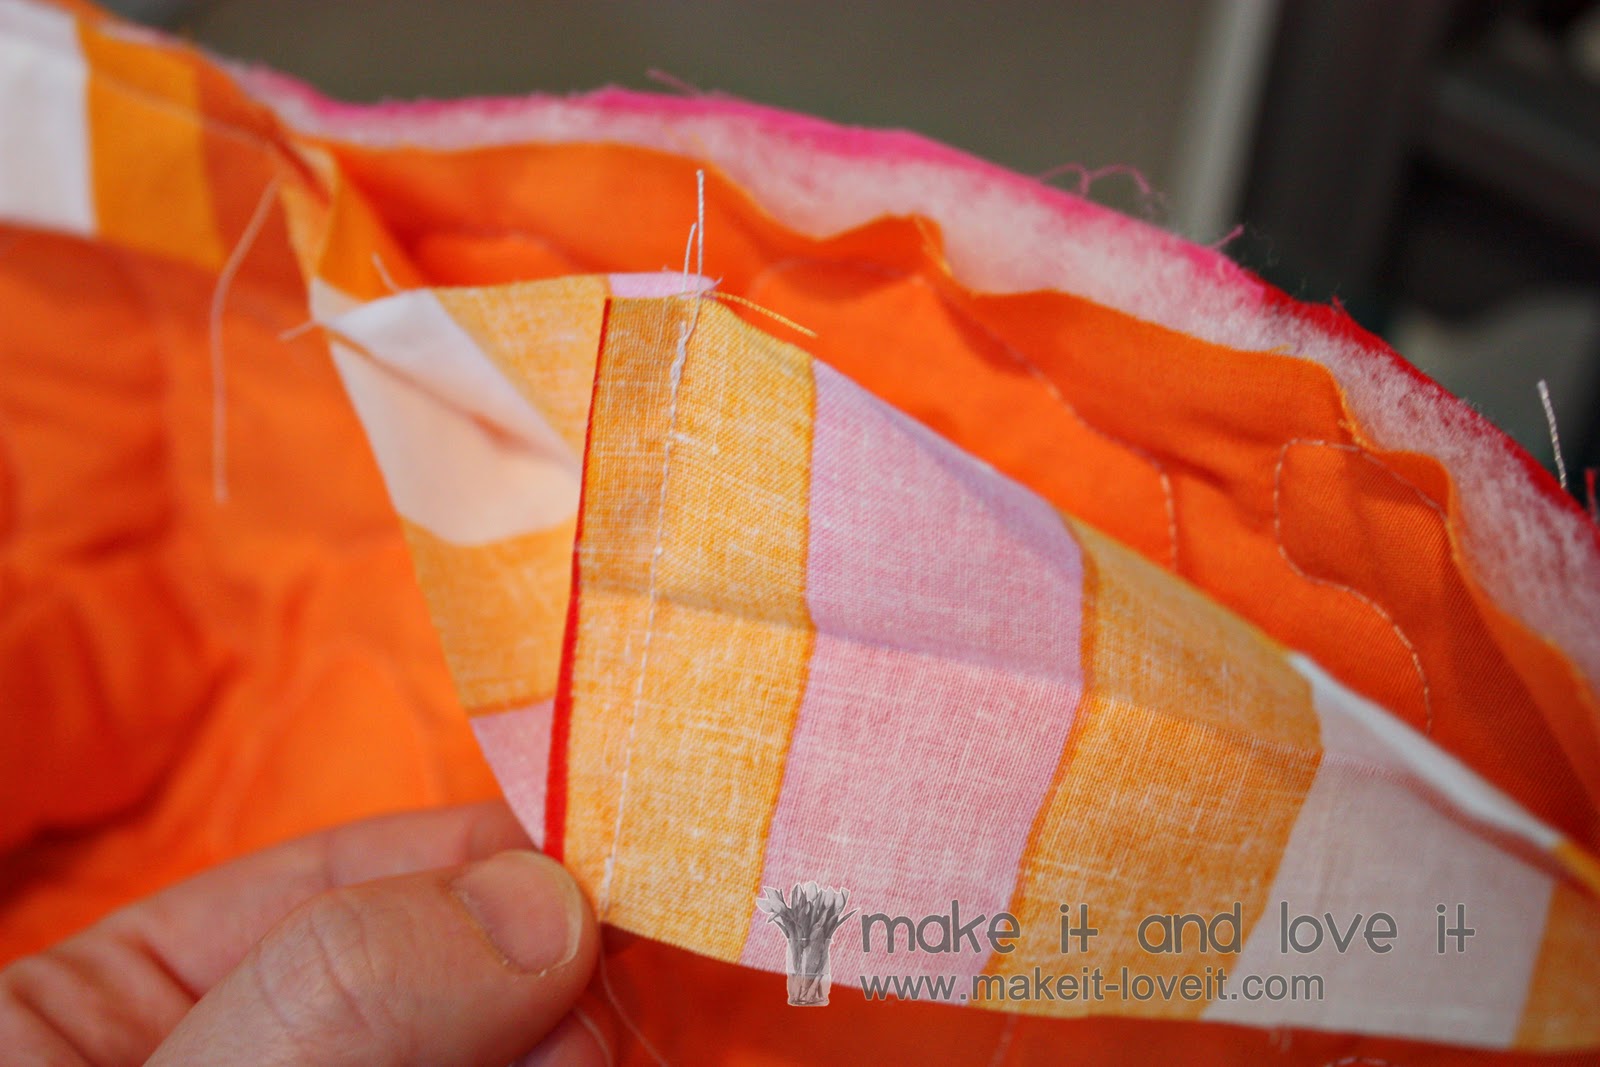
Once you reach a corner, move your little flap over, exposing the bottom lay of the binding, but don’t mess up your diagonal fold here.
Sew until you are 1/4 inch from the edge. Don’t sew any further……but backstitch a few times. (If you need to mark it with a pin or chalk so that you don’t pass a 1/4 inch, go ahead and do so.)
Here’s how it will look, with the seam 1/4 inch from the edge.
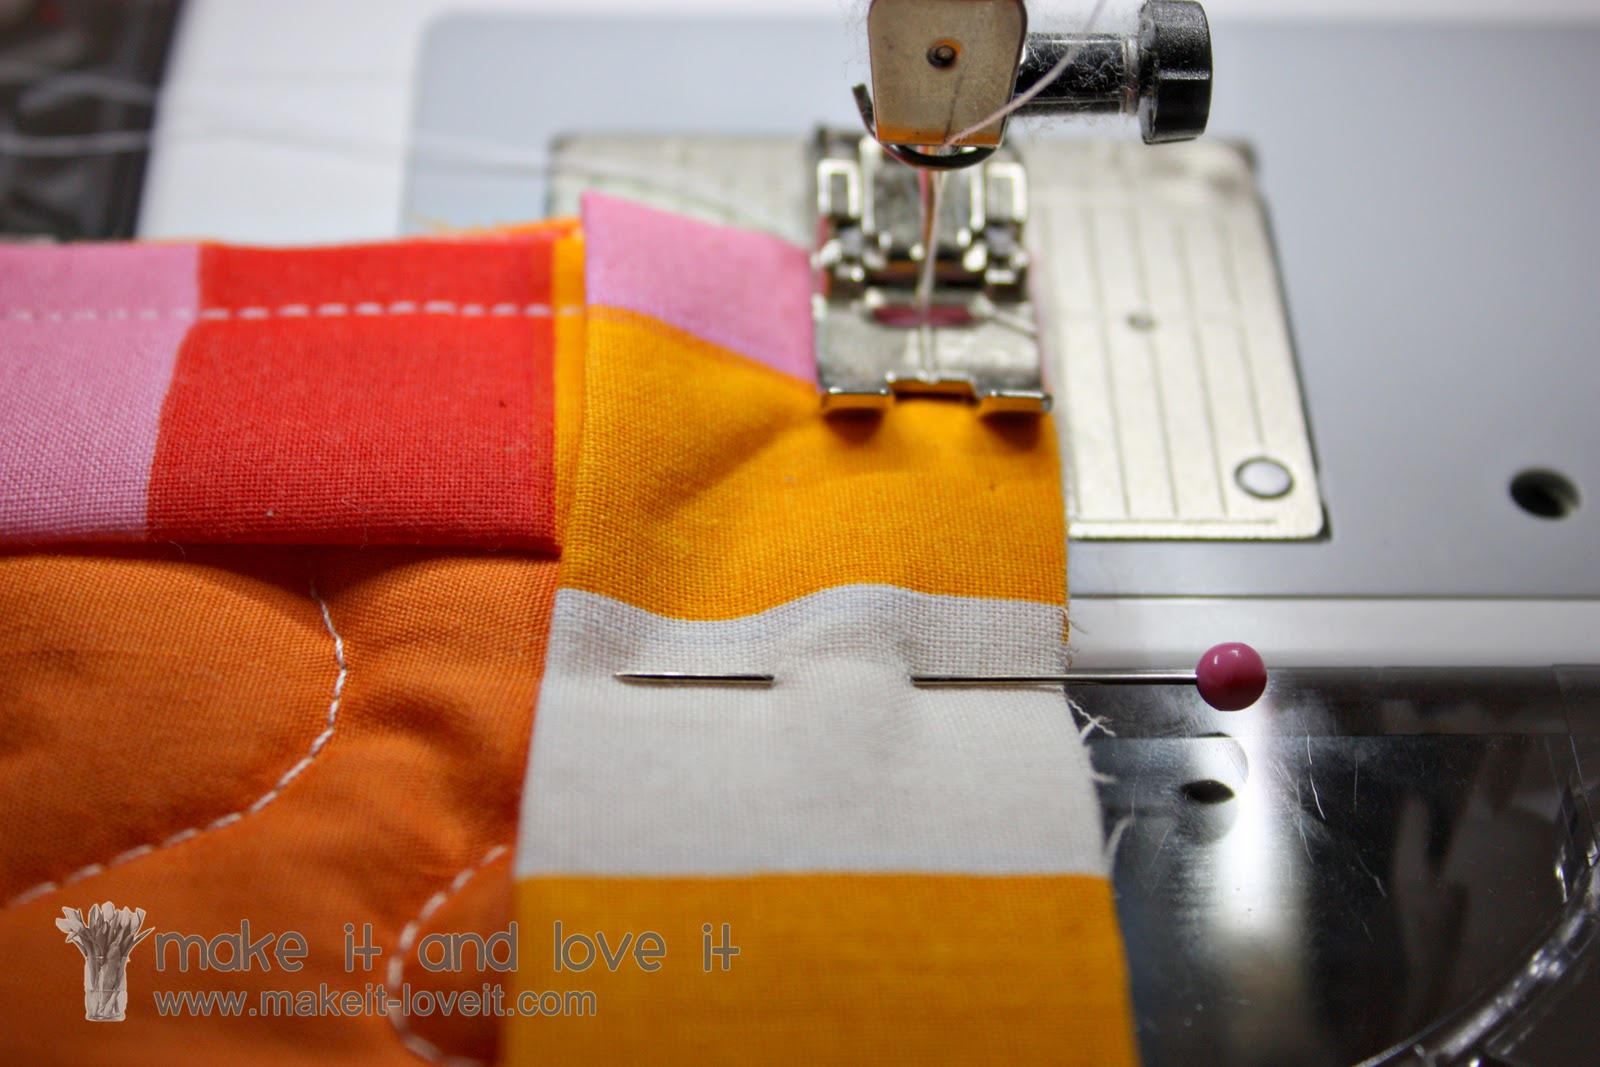
Then adjust your quilt so that you can sew down the next edge. Put your needle back down, but place it 1/4 inch from the top. Then continue down this edge until you reach the next corner. Repeat.
Once you have sewn all the way around, you will have these two tail ends of binding.
Open up the binding a bit and pin each end of binding in place, right up to the edge of the quilt.
Then pin the two ends together, making it one continuous piece of binding.
Then, right where those pins were, make a seam along the opened binding, then trim off the extra material.
Fold back in half, pin the binding along the edge of the quilt, then sew in place.
Okay……halfway done with the binding.
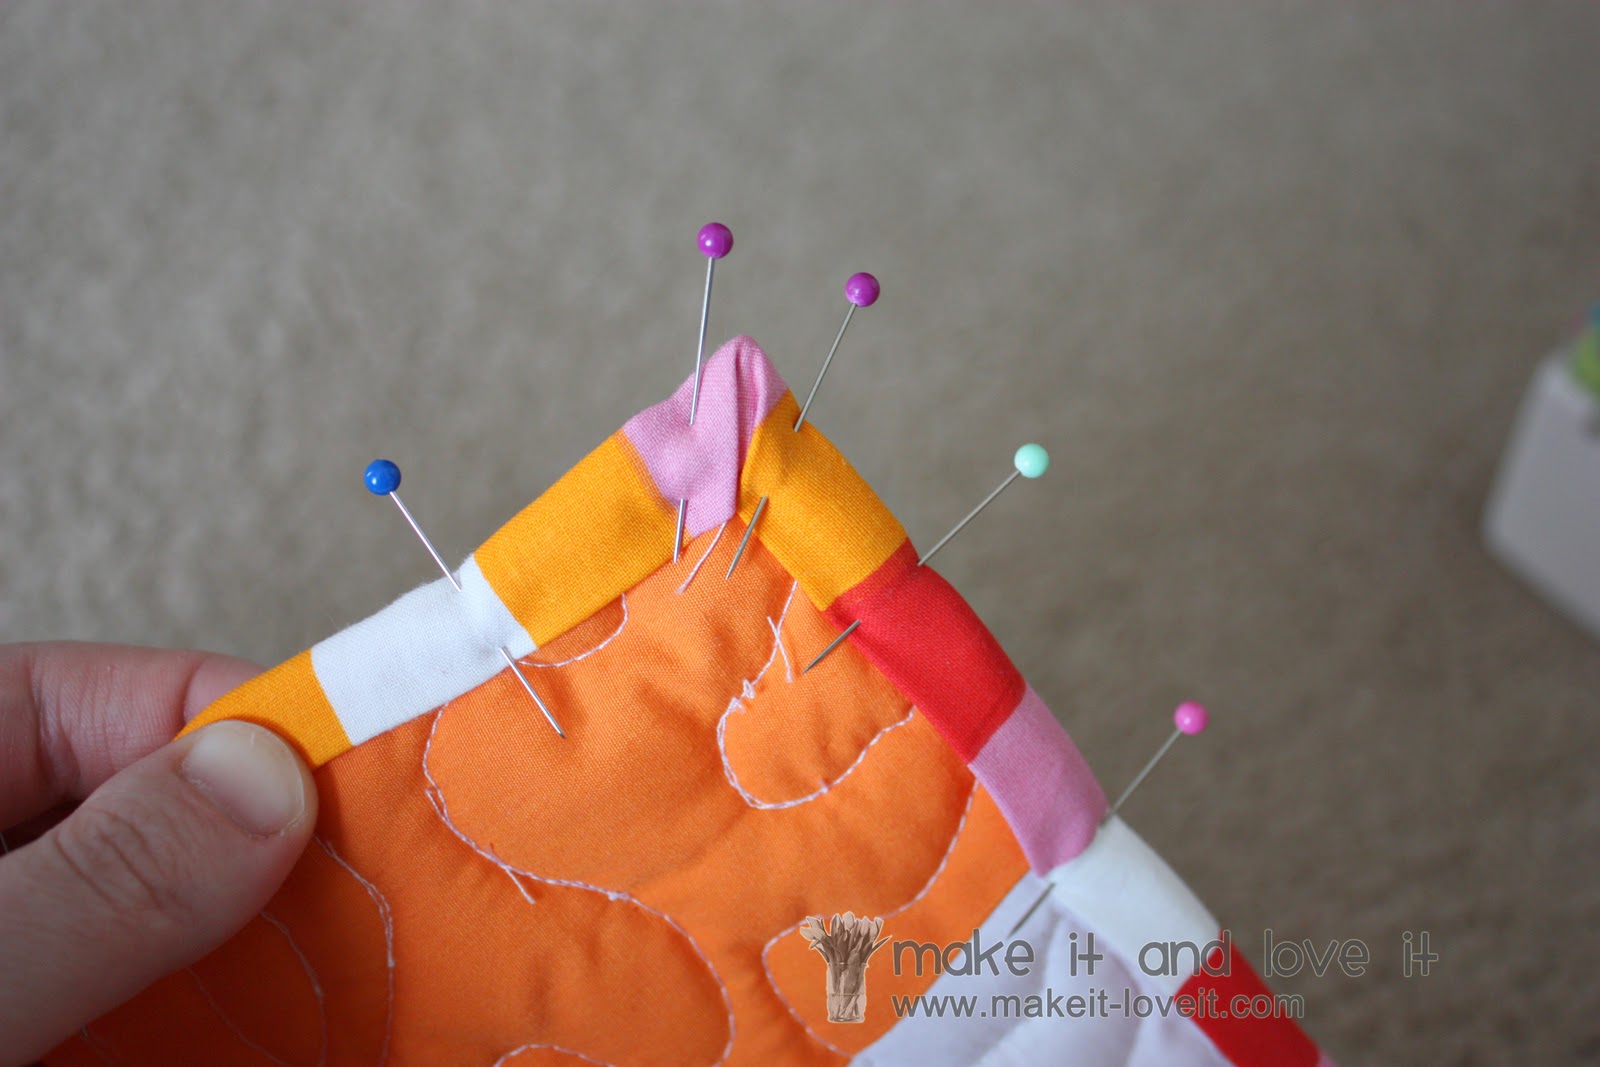
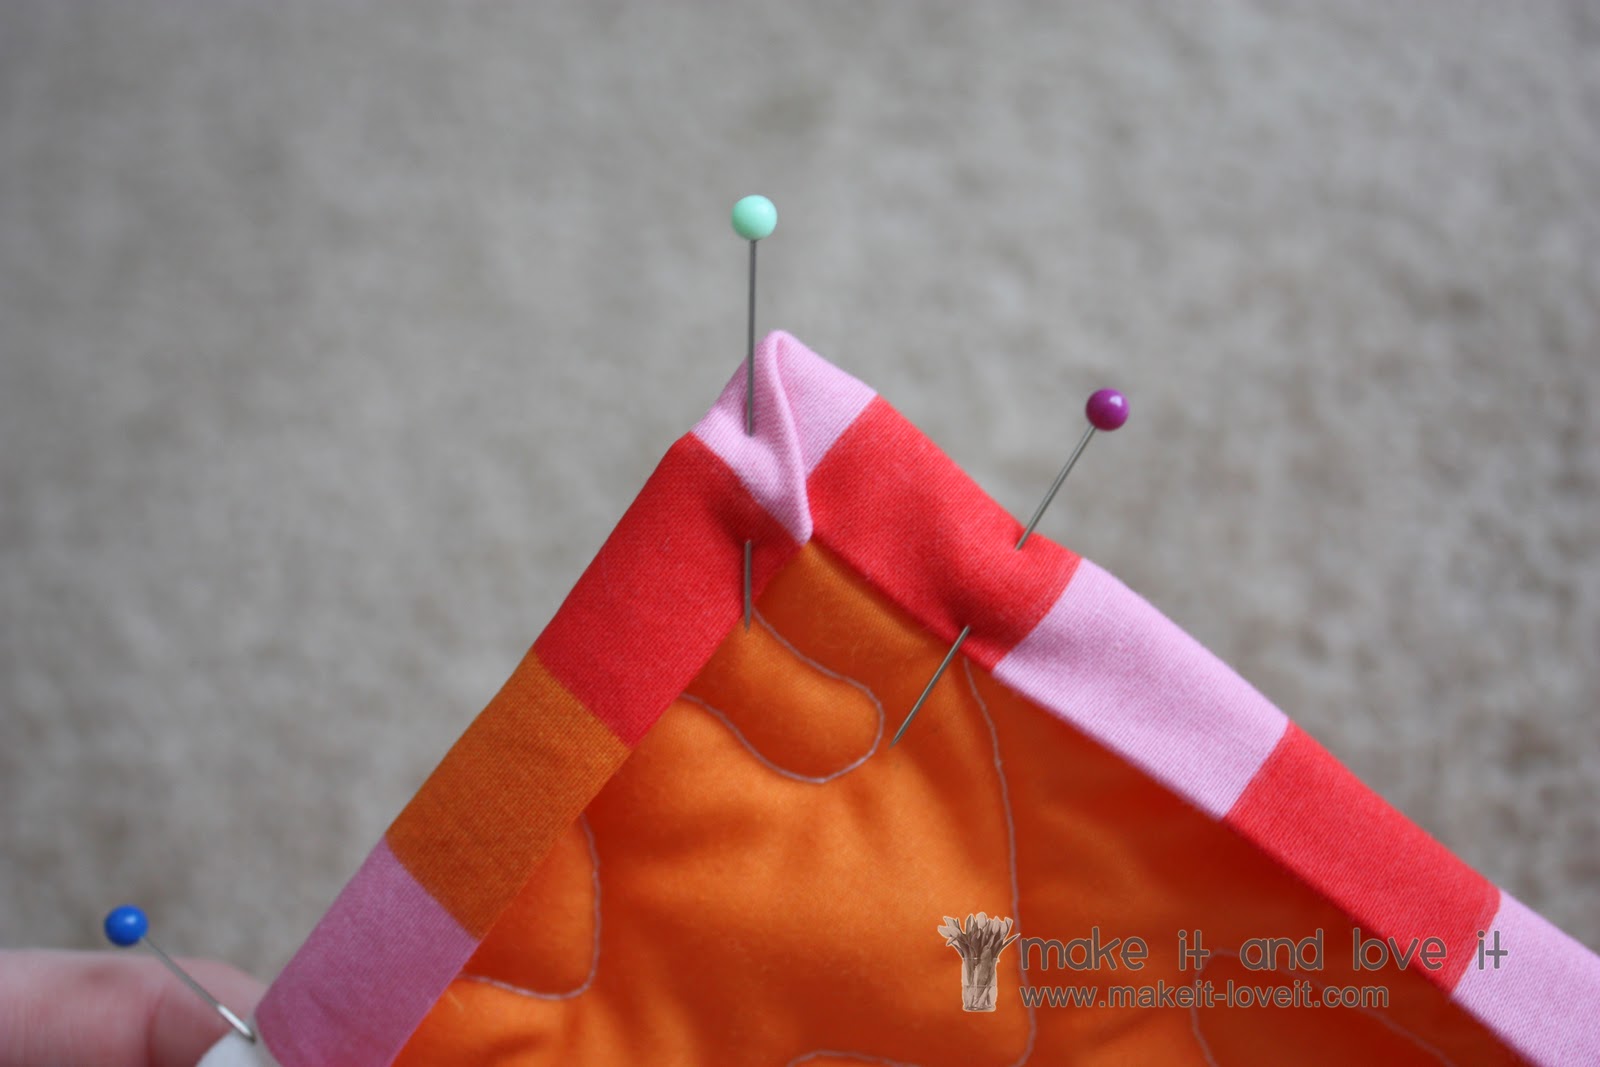
Now, fold the binding over to the front of your quilt. Pin all of the edges in place, nice and snug.
As for the corners, they should fold over from the back very nicely……and if you look at the back, it makes a fold for you automatically. As for the front, you have to help it along. You can either tuck the corner into itself like this…….(takes a bit of coaxing)……..
Or you can fold over one edge…….
Then fold down the other…….creating a nice diagonal fold. Whatever you like best.
Then pin it in place.
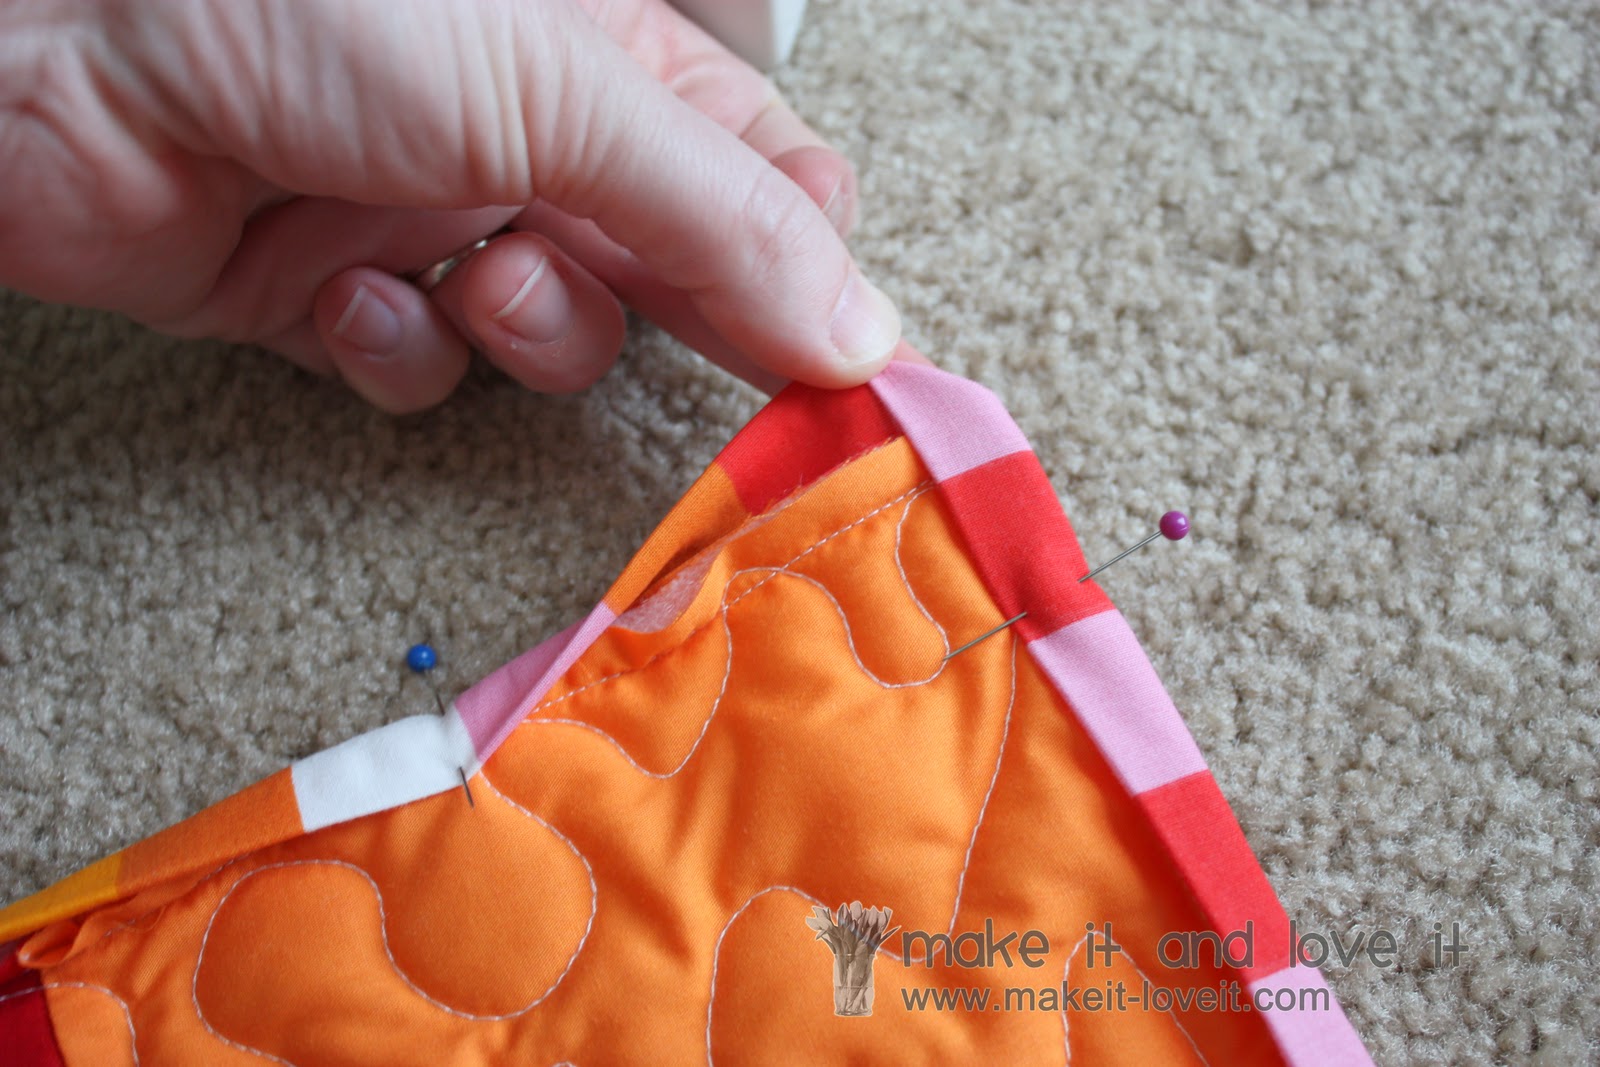
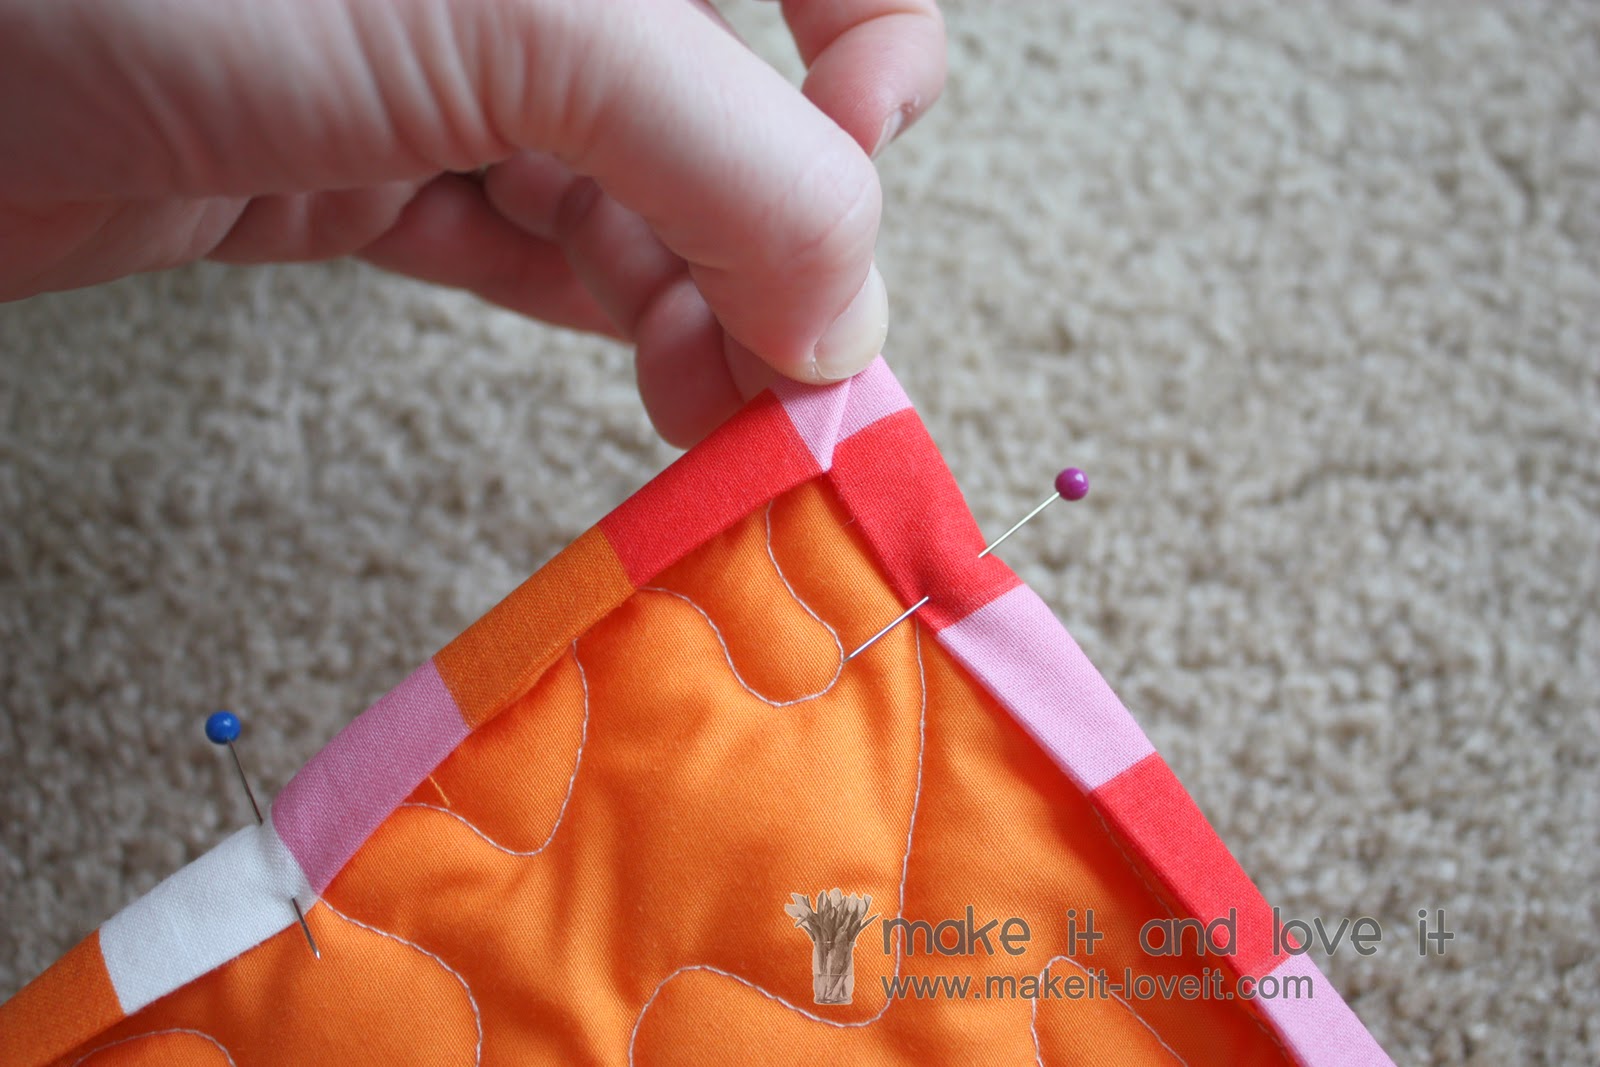
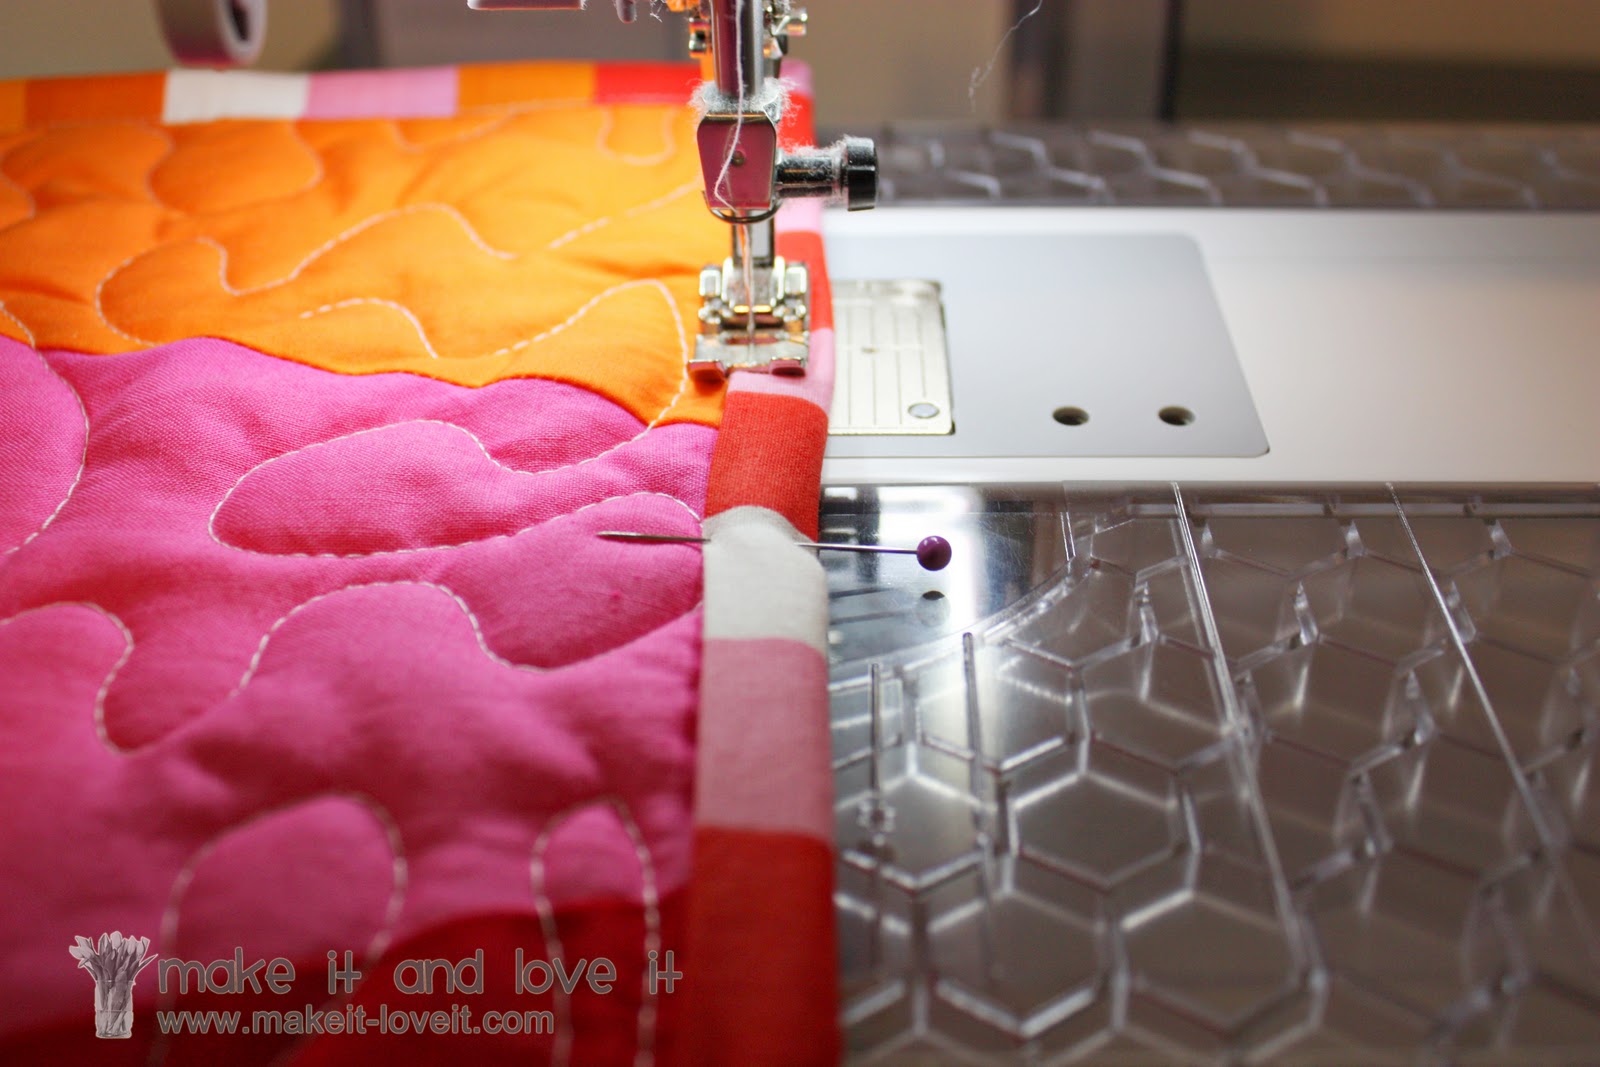
Now you’re going to sew along the top of the quilt…….right along the inner edge of the binding. Just think s-l-o-w and you’ll be fine.
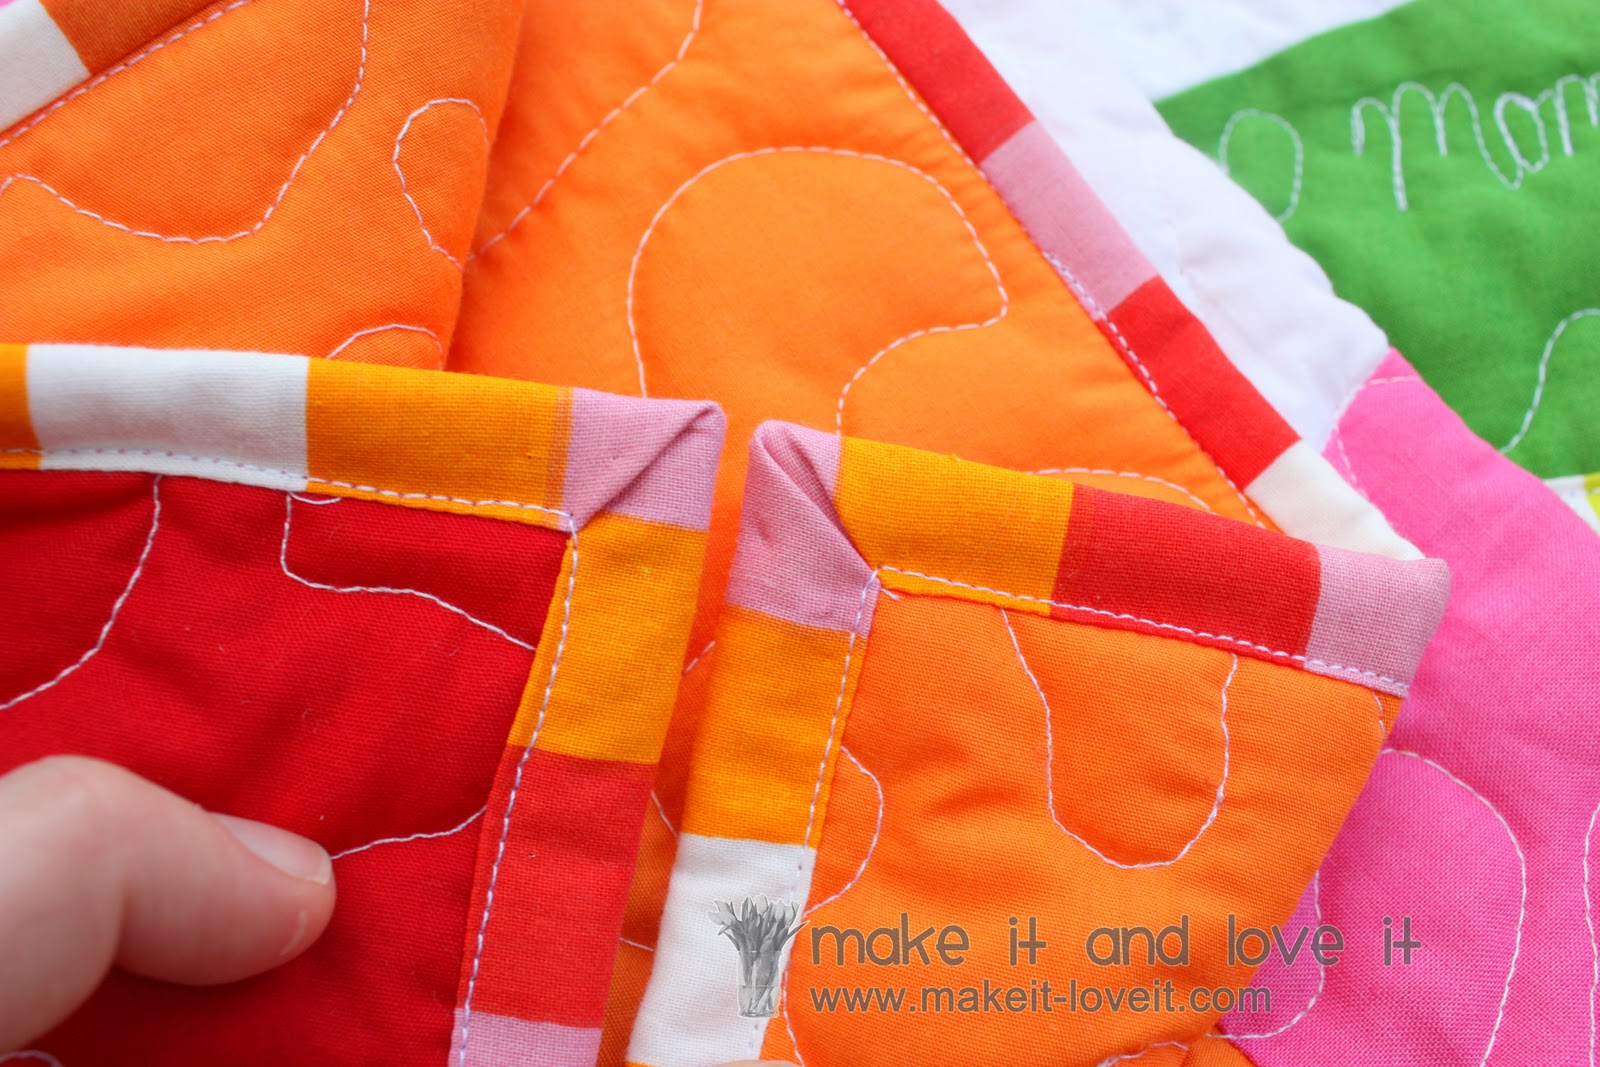
And just for a side-by-side comparison…….here is the one corner vs. the other.
Depends on what you like.
Oh, and one more thing……..you know that little BSR attachment for free-hand stitching that I showed you above? Well, in one little corner, I played around with cursive. It’s not perfect……but I just wanted to see how easy it would be to write something with that technique. Kinda fun.
And that’s it.
Quilting and binding do take a bit of time and patience……but I would say that the end result is very satisfying. And useful. (Keeps those little monkeys warm at night.)
So, give it a try.
Start a little quilting group with friends and try it out together. You may surprise yourself and enjoy it.