Home » DIY Tutorials » DIY Sewing » Sewing: Clothing » Baby Clothing » Re-purposing: Reversible Boy’s Vest from Old Trousers
Re-purposing: Reversible Boy’s Vest from Old Trousers
January 13, 2011 - By Ashley Johnston 79 Comments
.
I read all of your comments and questions regarding the sewing tips post (found here). I will be answering some of the questions in upcoming “sewing tips” posts and will try and leave a comment back at the post to answer some others. Love the eagerness to tackle those sewing machines. Eeeeh.
Oh, and some of you asked if I’d still be blogging here now that I use facebook and twitter. And the answer is yes, of course I will. This is my main hub. My safety net. My little comfort zone. No worries…….nothing will change here. :)
. . . . . . .
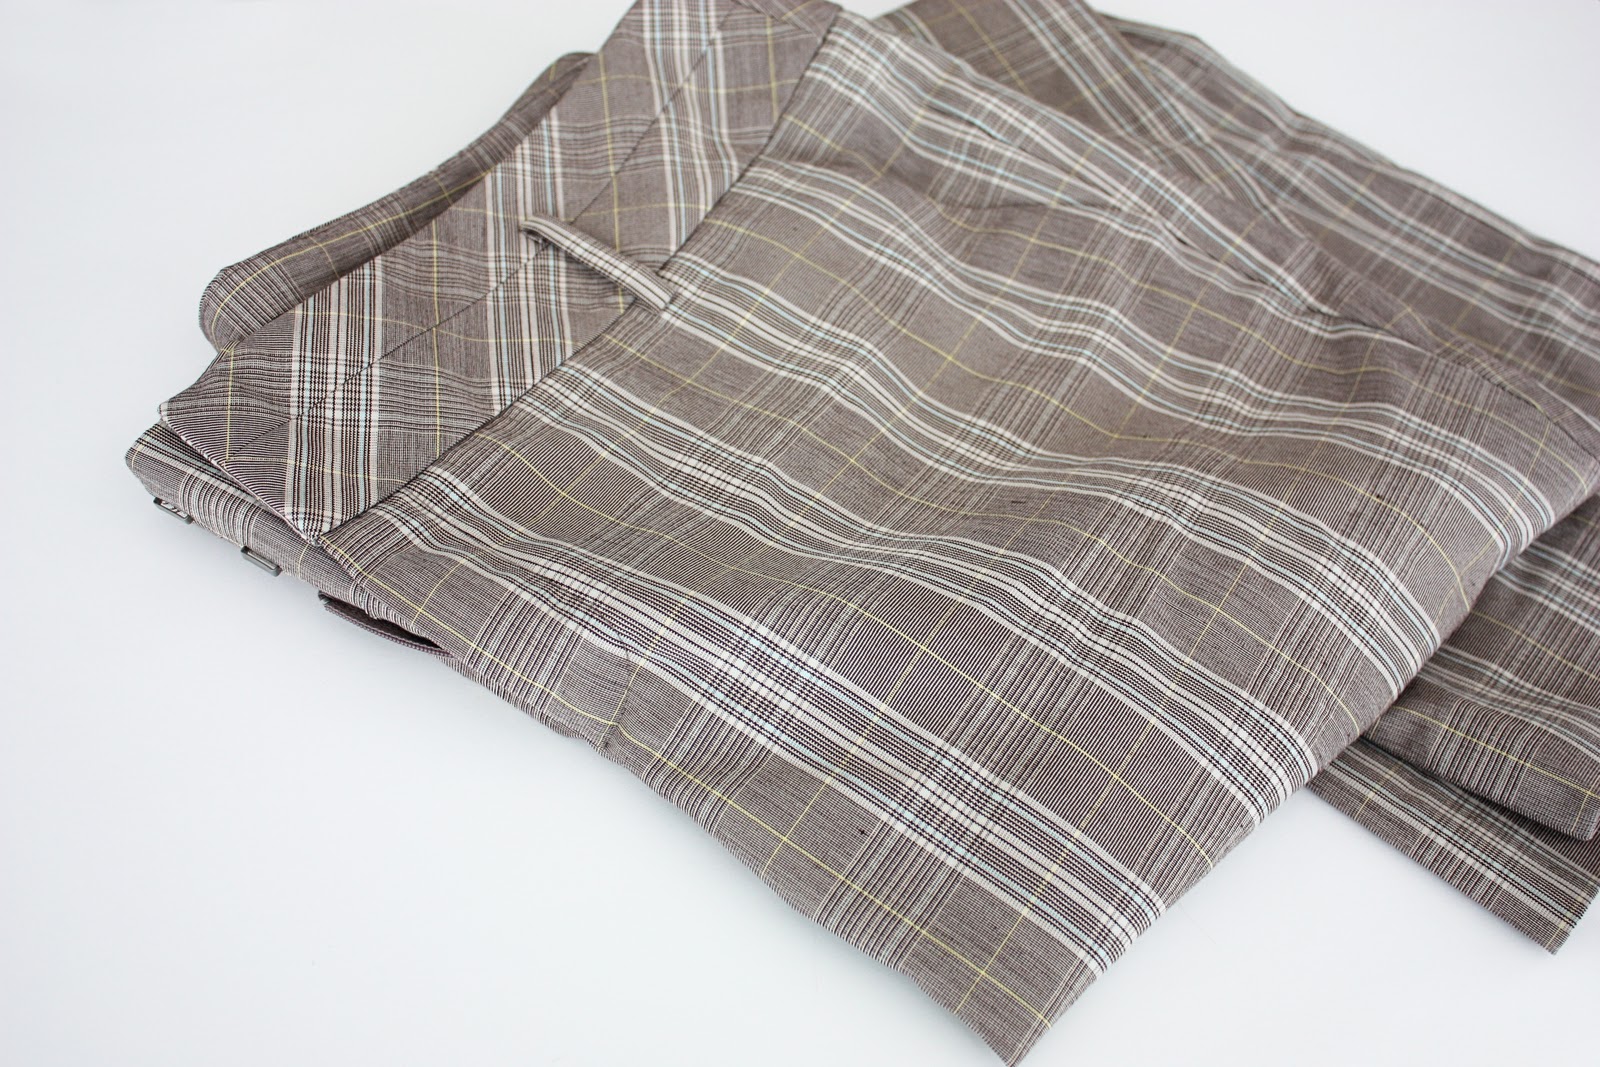
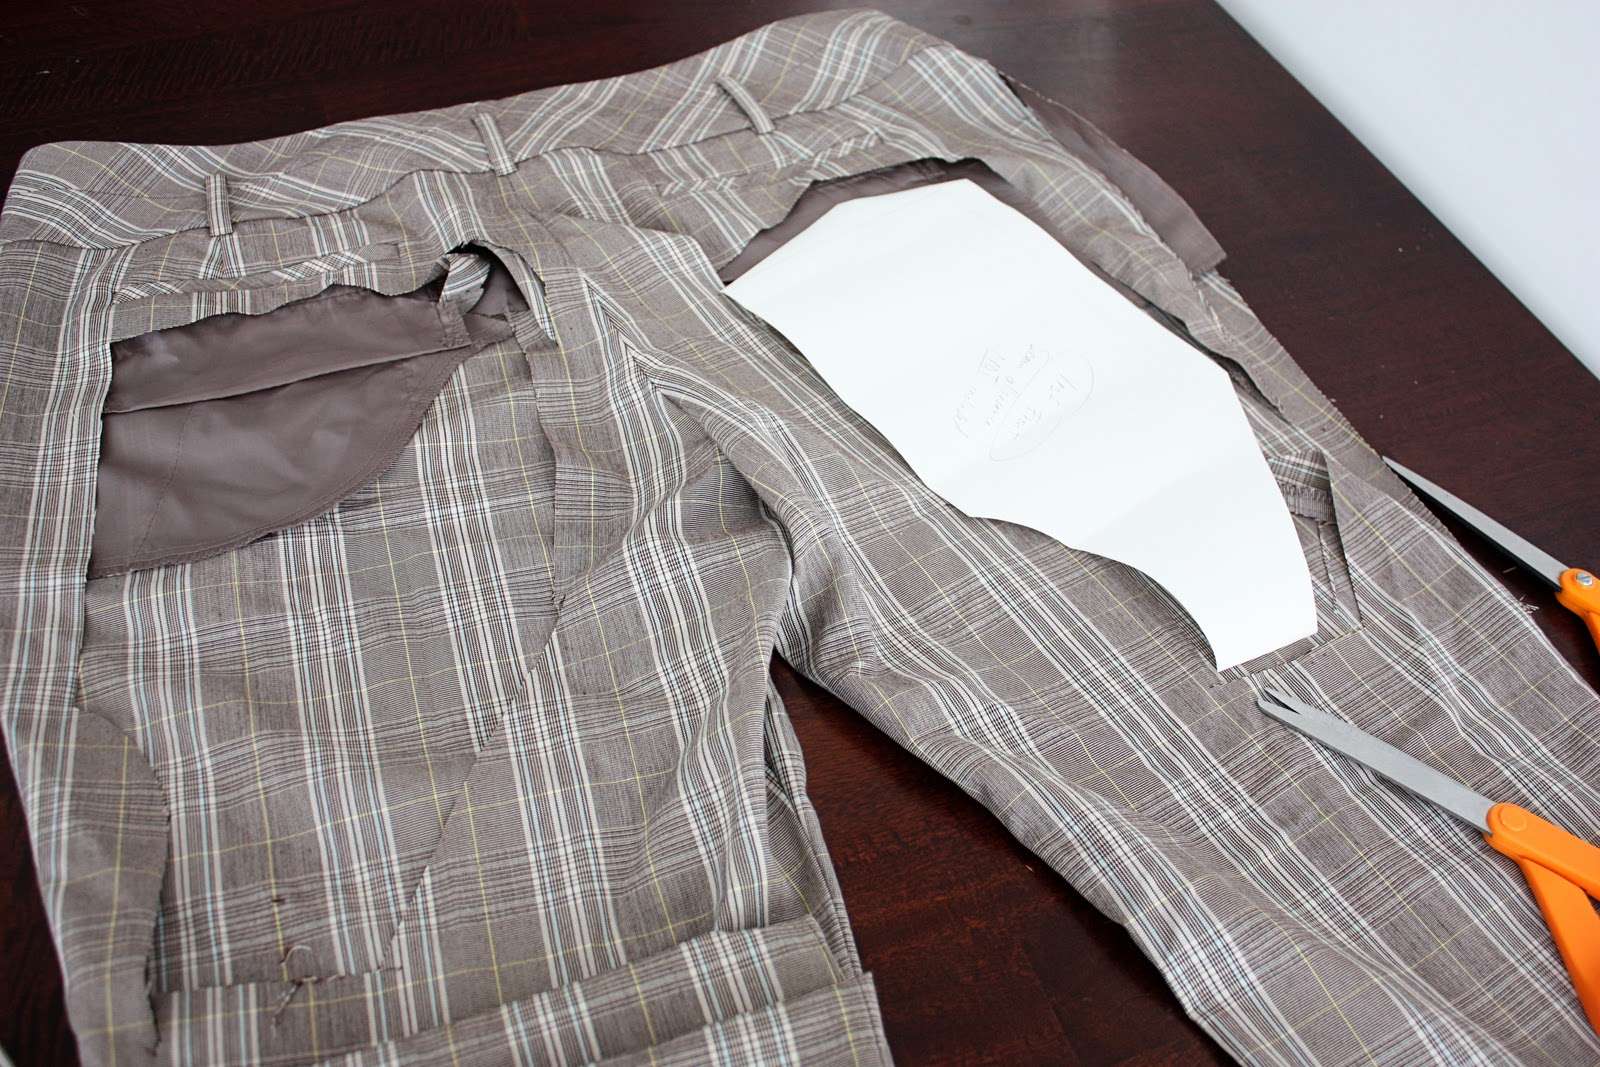
I found a pair of trousers at the thrift store more than a year ago (back when we lived in Idaho) that I wanted to use for this project.
My memory is a fragile little thing. It completely forgot that I wanted to make my little buddy a vest.
When I dug the trousers out of a stash the other day……..I dropped some other projects and got to work. Typical.
But oooooh, I’m so glad I did.
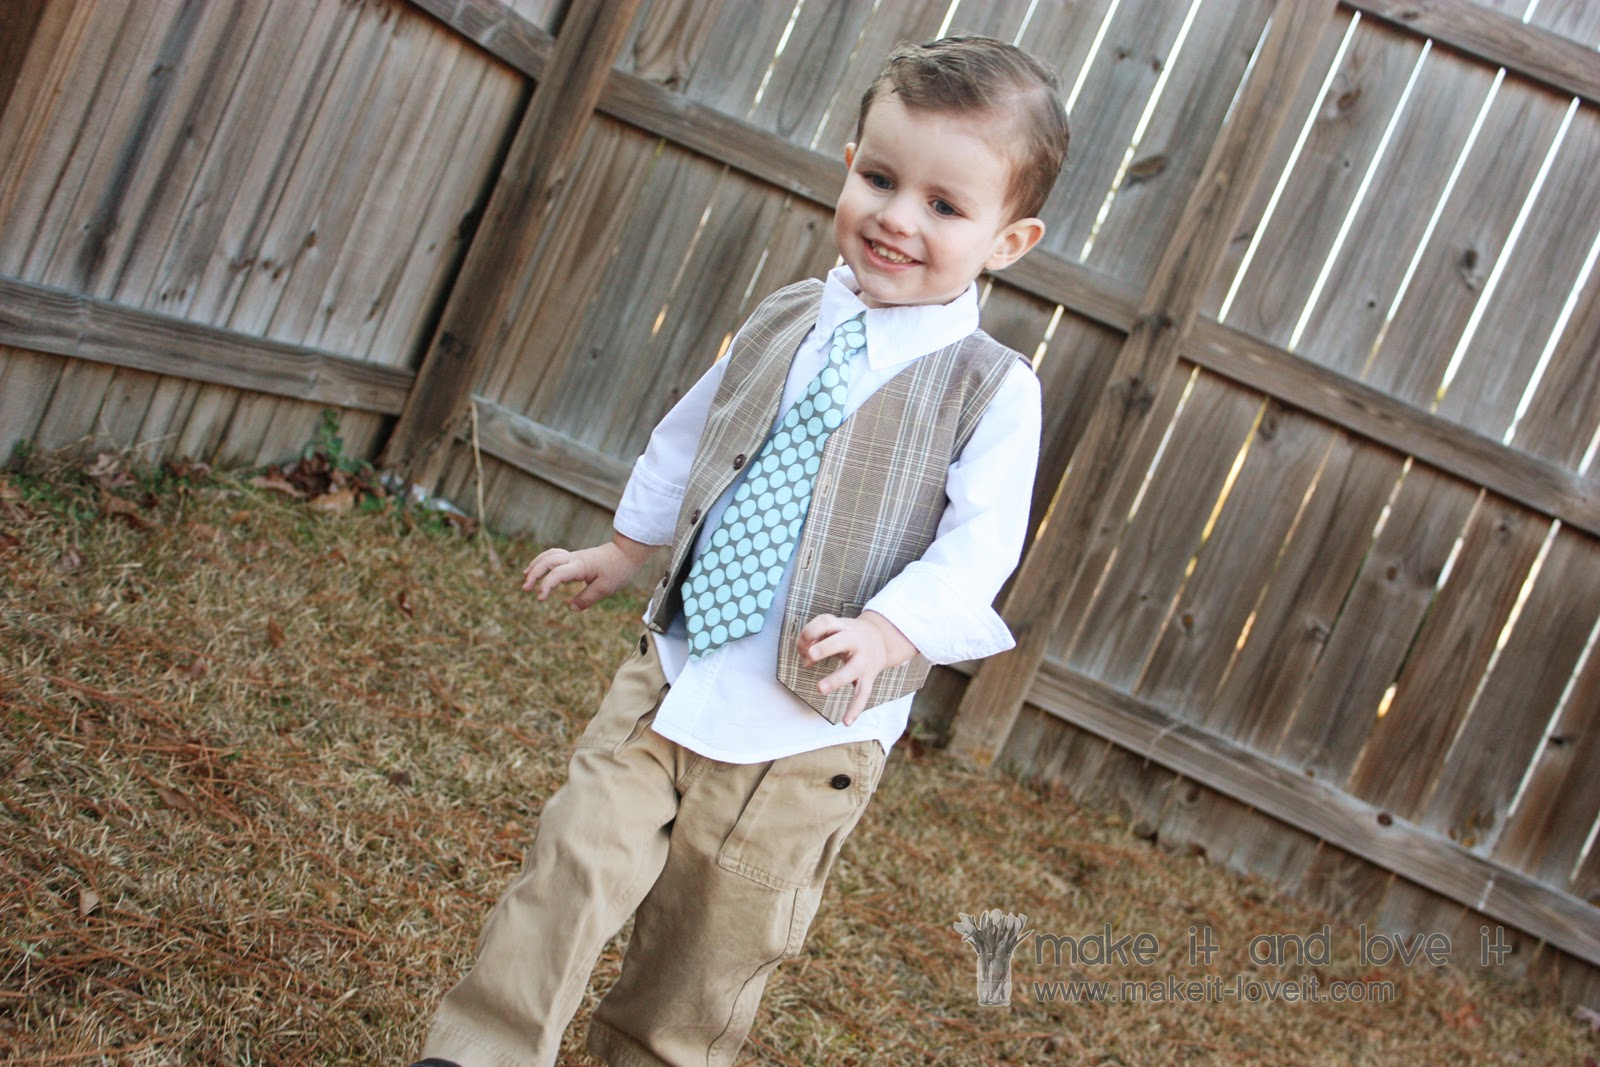
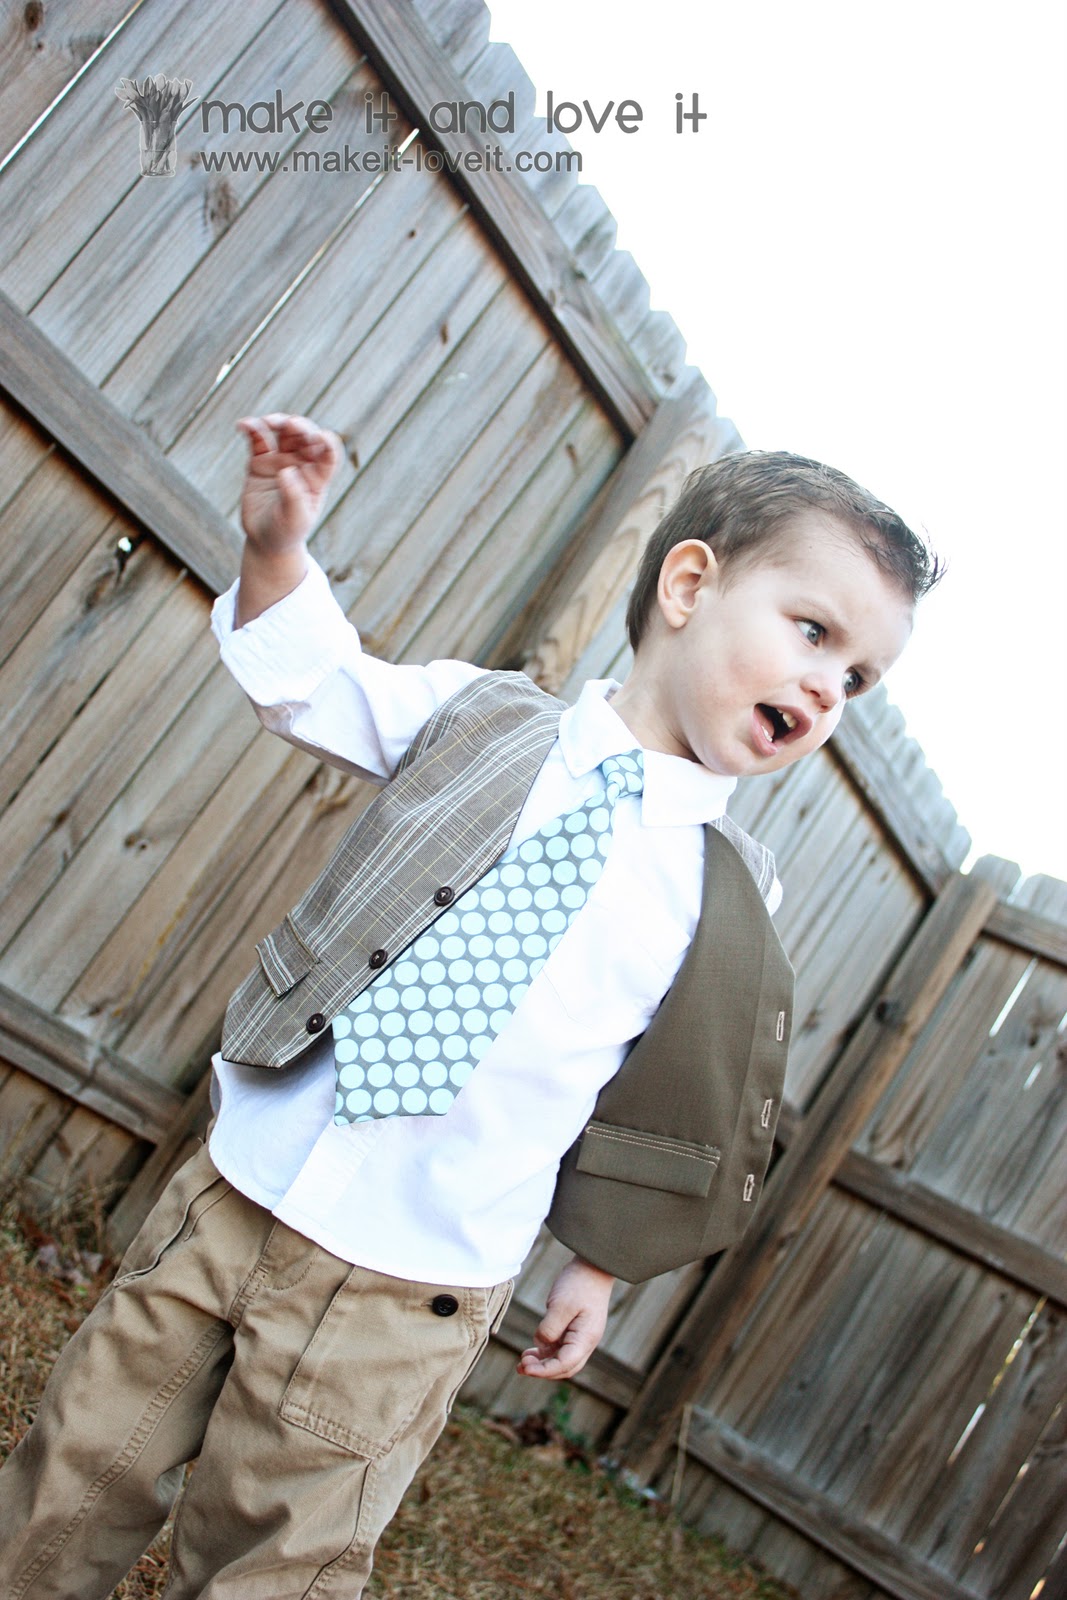
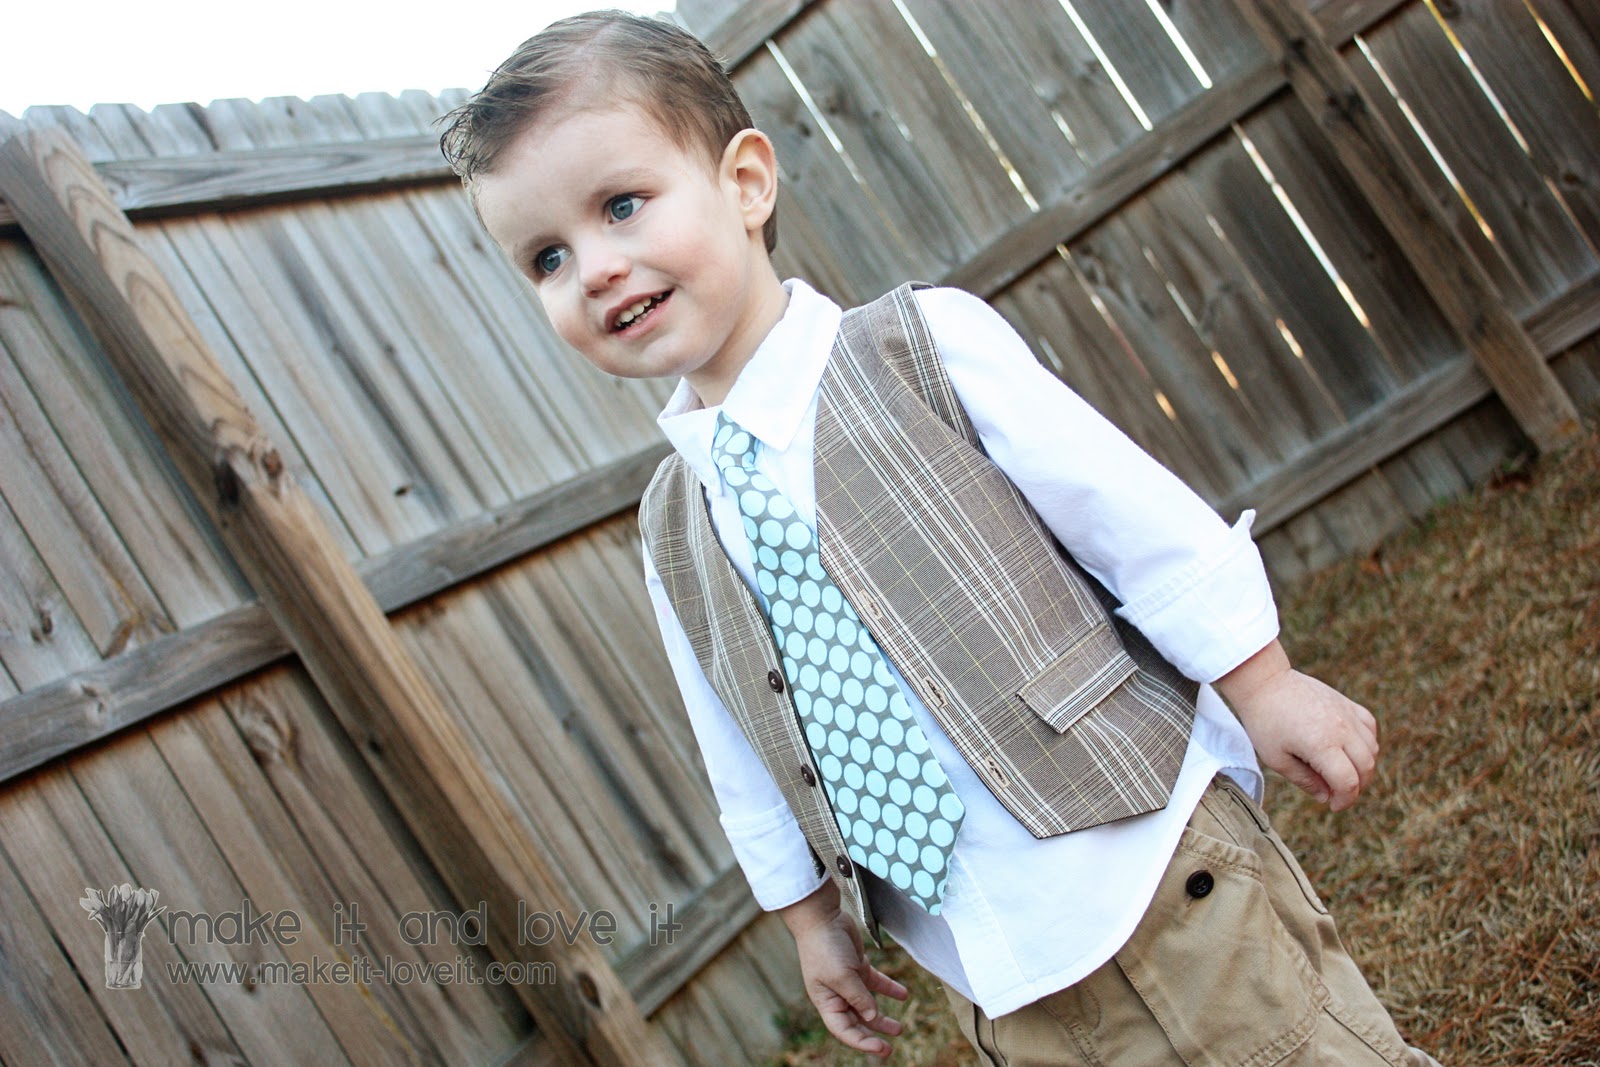
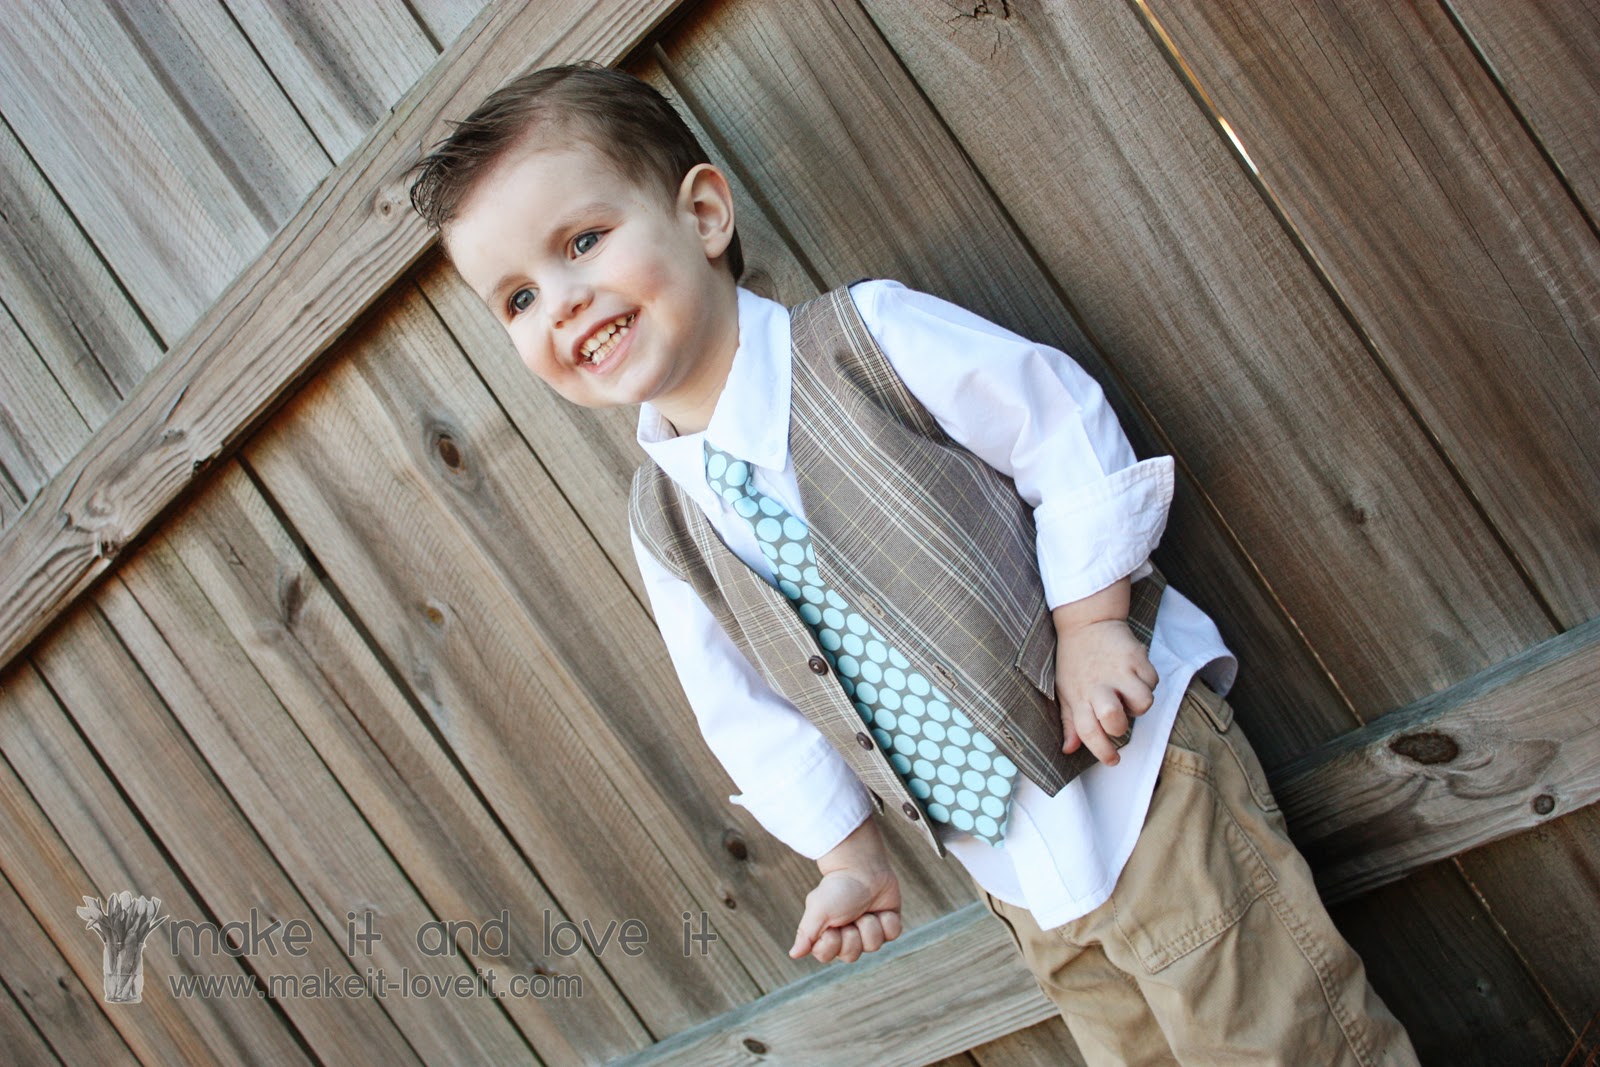
What could be more irresistible than a little fella in a dapper little vest…
Not even a scheduled massage at the local spa, I tell ya.
(Except I have that knot in my lower back that could really use some magic. Hmmmm.)
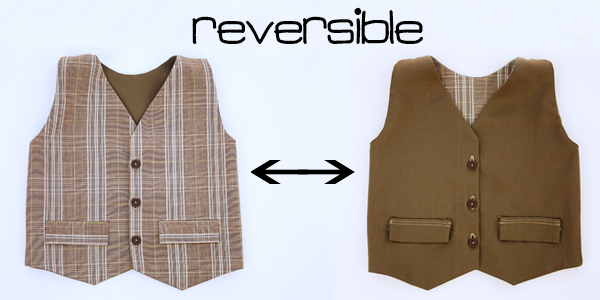
And since we’re going to the trouble……why not make it reversible?
2 vests in 1. Fantastic.
.
.
Ha…..look! He’s totally pumped to be wearing a new re-purposed vest…….or, well, maybe just happy to be outside running around. (Who am I kidding?)
And don’t be scared to tackle this one……..they’re only faux pockets.
.
The vest can be worn on either side, buttoned up or down, with a tie, or maybe a bowtie,………or nothing at all.
Whatever you choose……..
…….he’ll be as cute as ever.
And you’ll be so pleased to have used an old pair of trousers.
Or even use your favorite fabric…
Either way, you’ll be happy.
**The tie was made from the tie pattern available in my shop
here.
Ready to make your own reversible vest?
Here are the thrifted pants from my stash. Do you have some stored away?
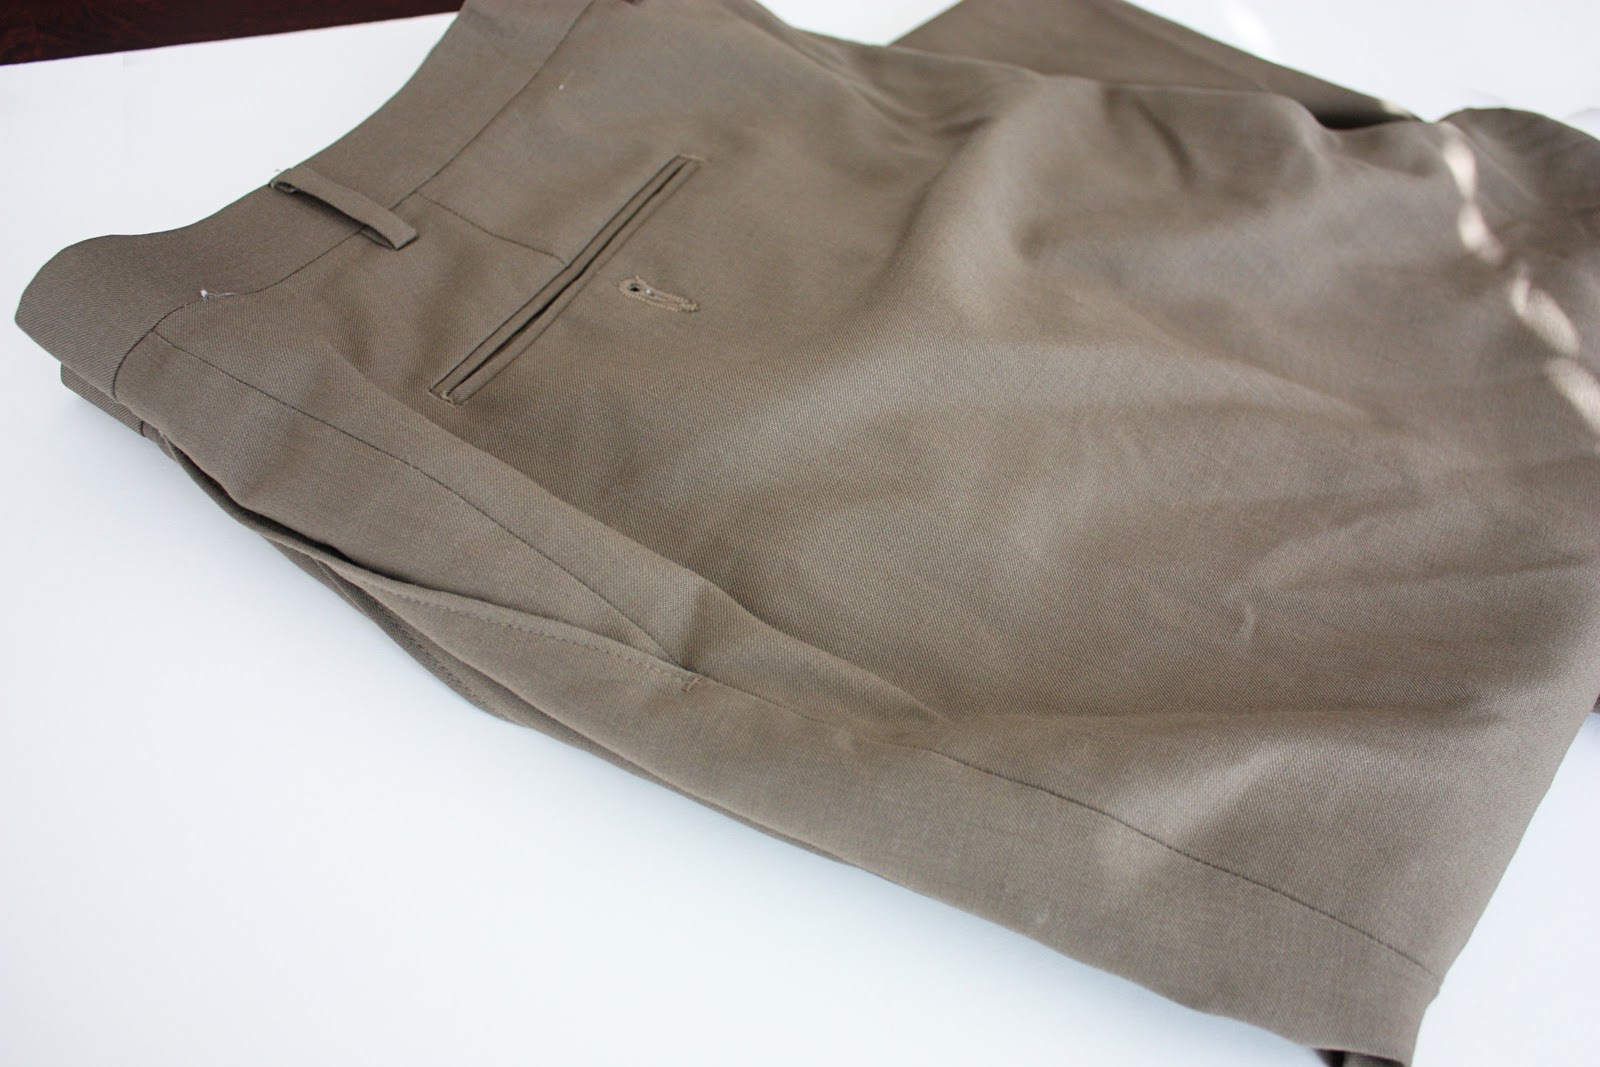
I also used an old pair of my husband’s dress pants for the inner vest material.
I love not spending a penny on fabric!
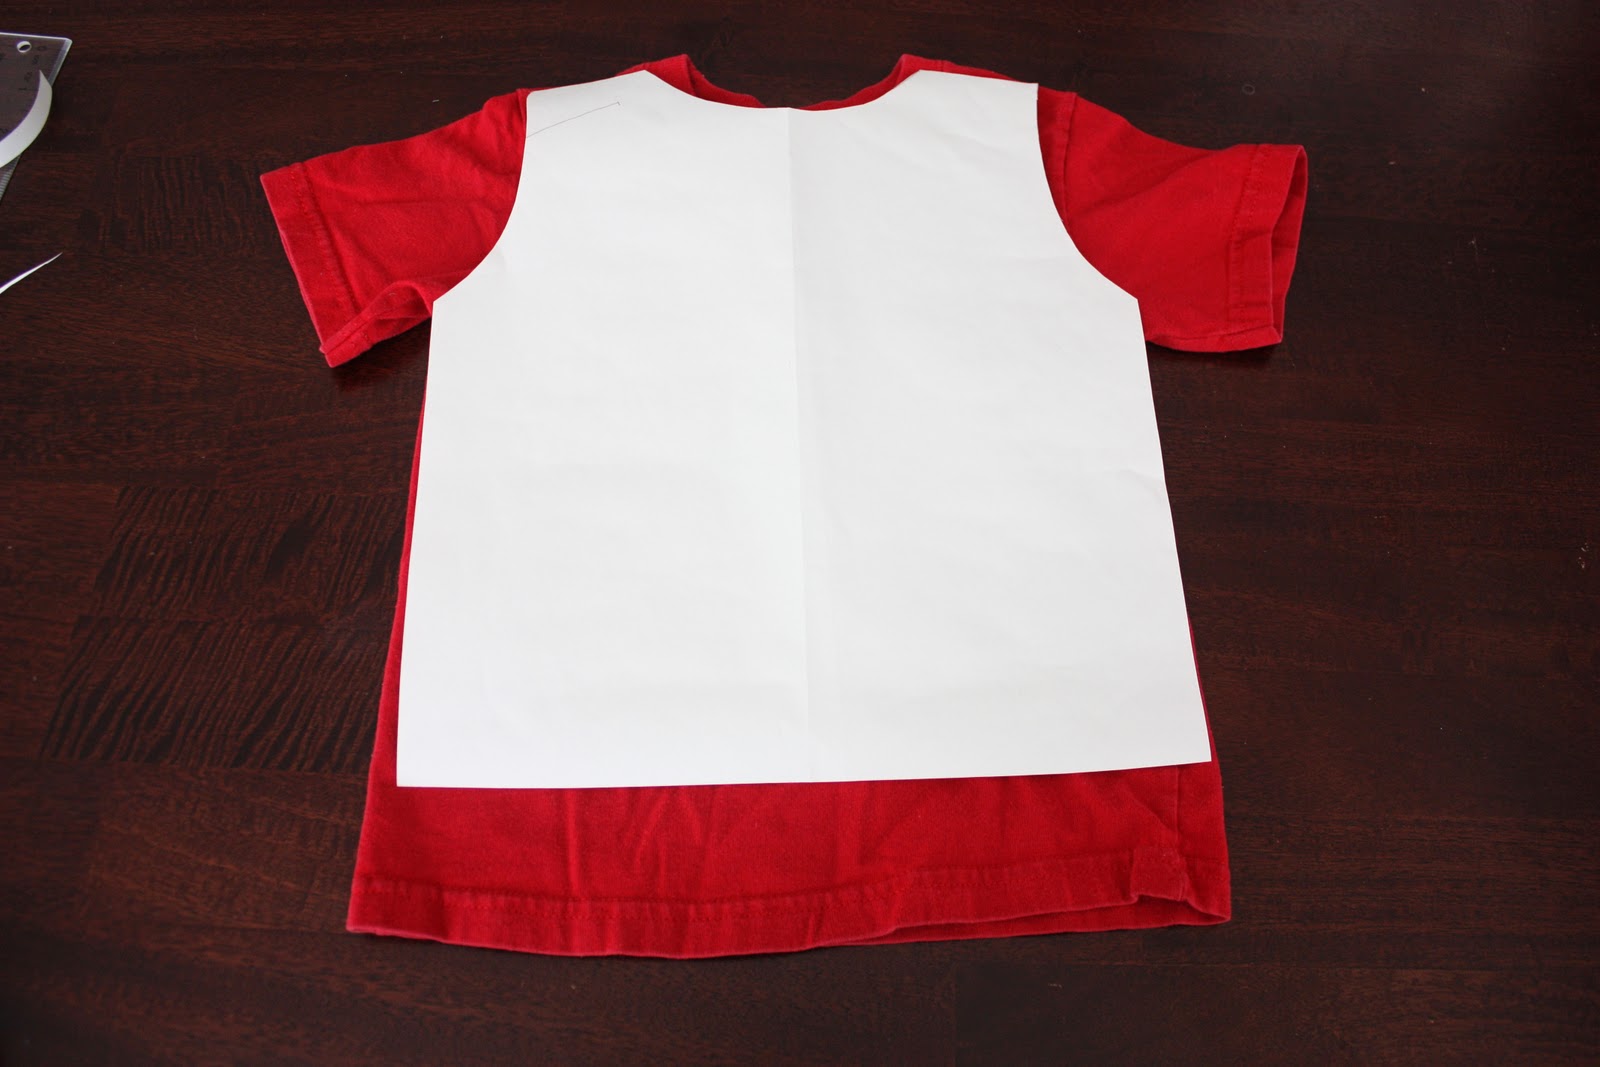
I started by creating a paper pattern piece to use for the back shape of the vest. I used a little Tshirt as a size guide and cut out 2 arm holes and a neck hole. (Make sure to not make your vest too small. Knits are sometimes harder to pattern after because they stretch and fit differently than a non-stretch material. So keep this in mind if using a Tshirt as a guide.)
I also measured my son’s torso and decided ahead of time that I wanted the vest to be about 12 inches long. So keep that in mind as you’re making the paper pattern.
Then fold this pattern piece in half and trace around the entire thing onto a new piece of paper. This will be used as a reference for your 2 front pieces.
Then onto creating the 2 front vest pieces.
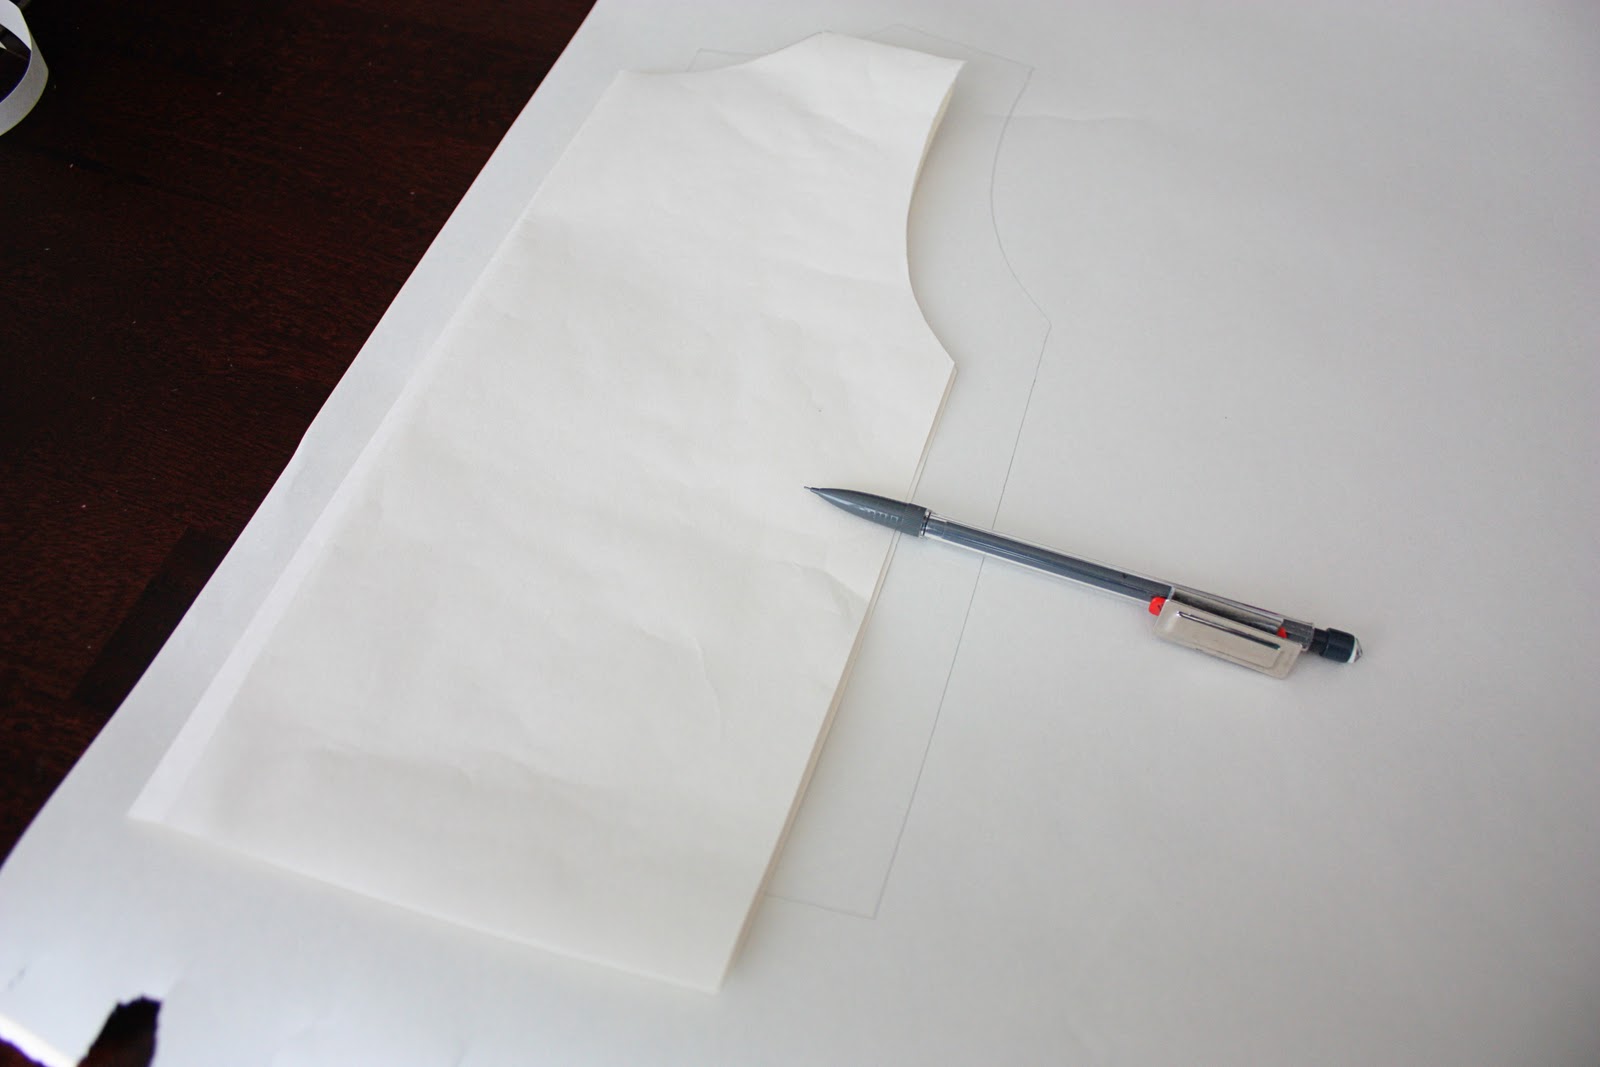
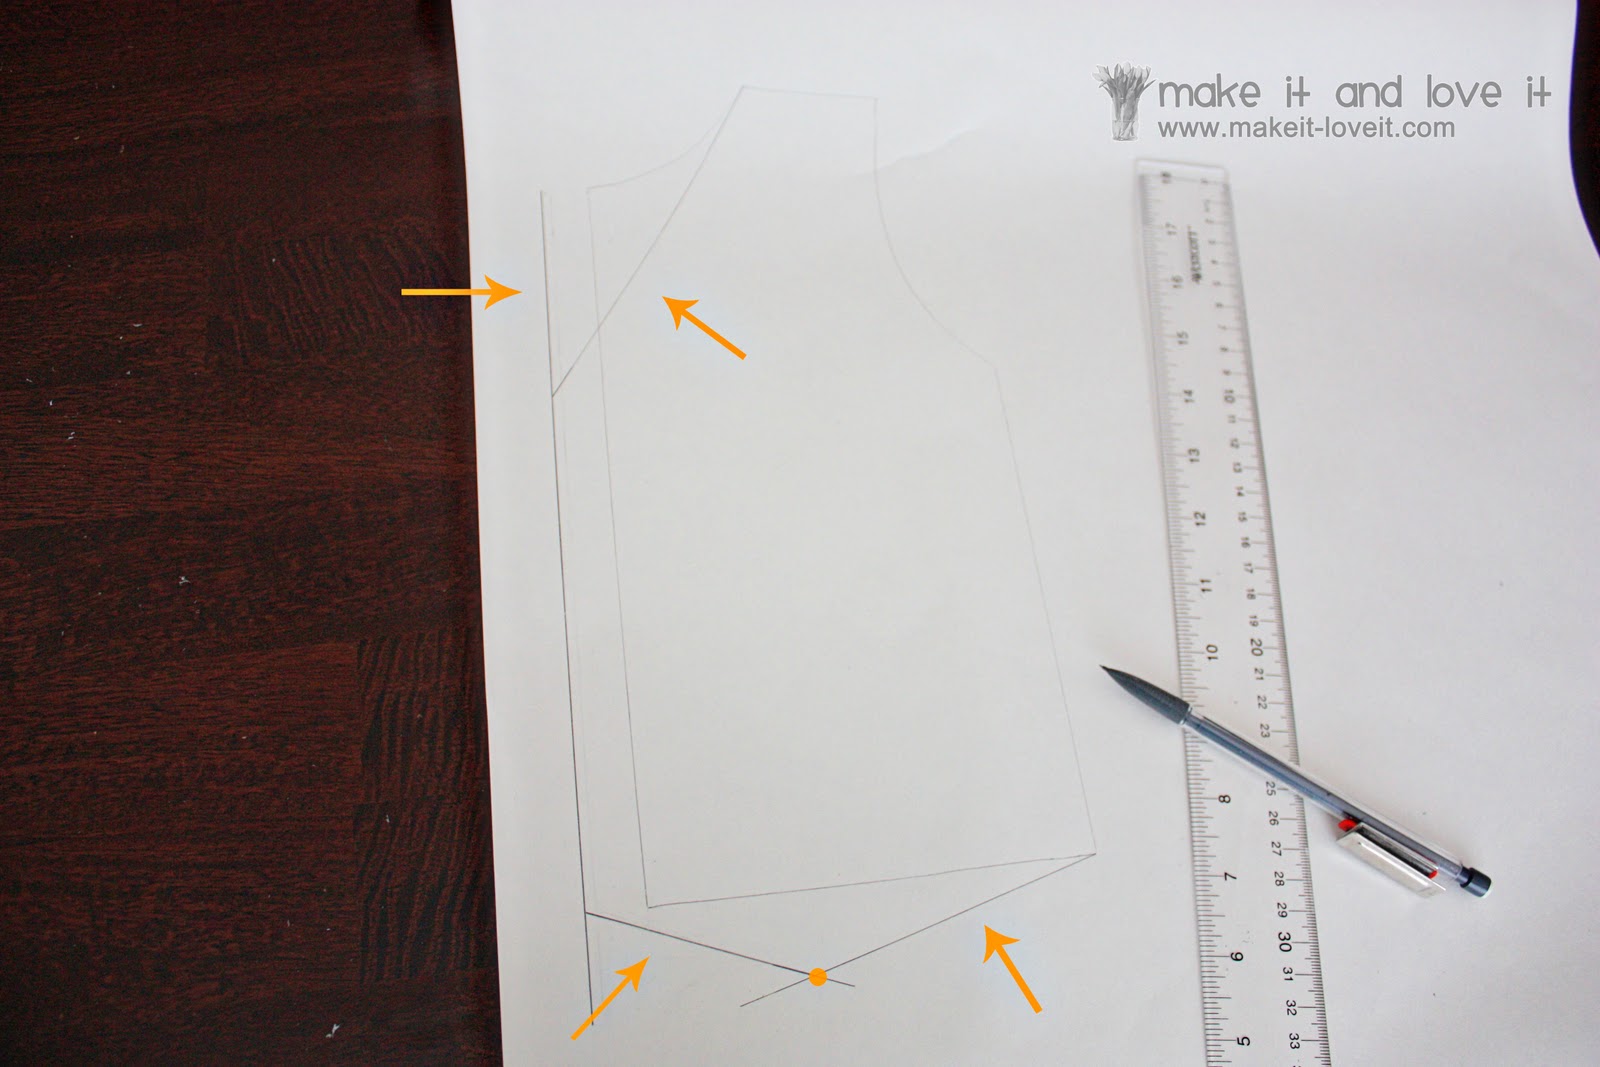
You can see my original shape in the photo below and then some new adjusted lines around it.
(you may have to click on the image to view it larger and see the lines better…….sorry the lines aren’t darker)
What I did was:
- extended the inner edge on the left out 3/4 of an inch to allow for an overlap for the buttons (upper arrow on left).
- measured on my son’s chest where I wanted the “V” to dip on his chest and measured down that far on my pattern, made a mark and then drew a straight line to create a new neck line (upper arrow on right).
- decided where I wanted the points along the bottom to go on the vest (off center, a little towards the center), measured down an inch from the bottom edge of the original drawing, and then placed a dot to mark my spot (orange circle below).
- drew 2 lines from each corner of the vest to meet the dot, creating a new bottom edge to the vest (2 lower arrows).
If you didn’t add a seam allowance to your pattern piece, make sure to eyeball a seam allowance very carefully as you’re cutting. You don’t want to forget that seam allowance!
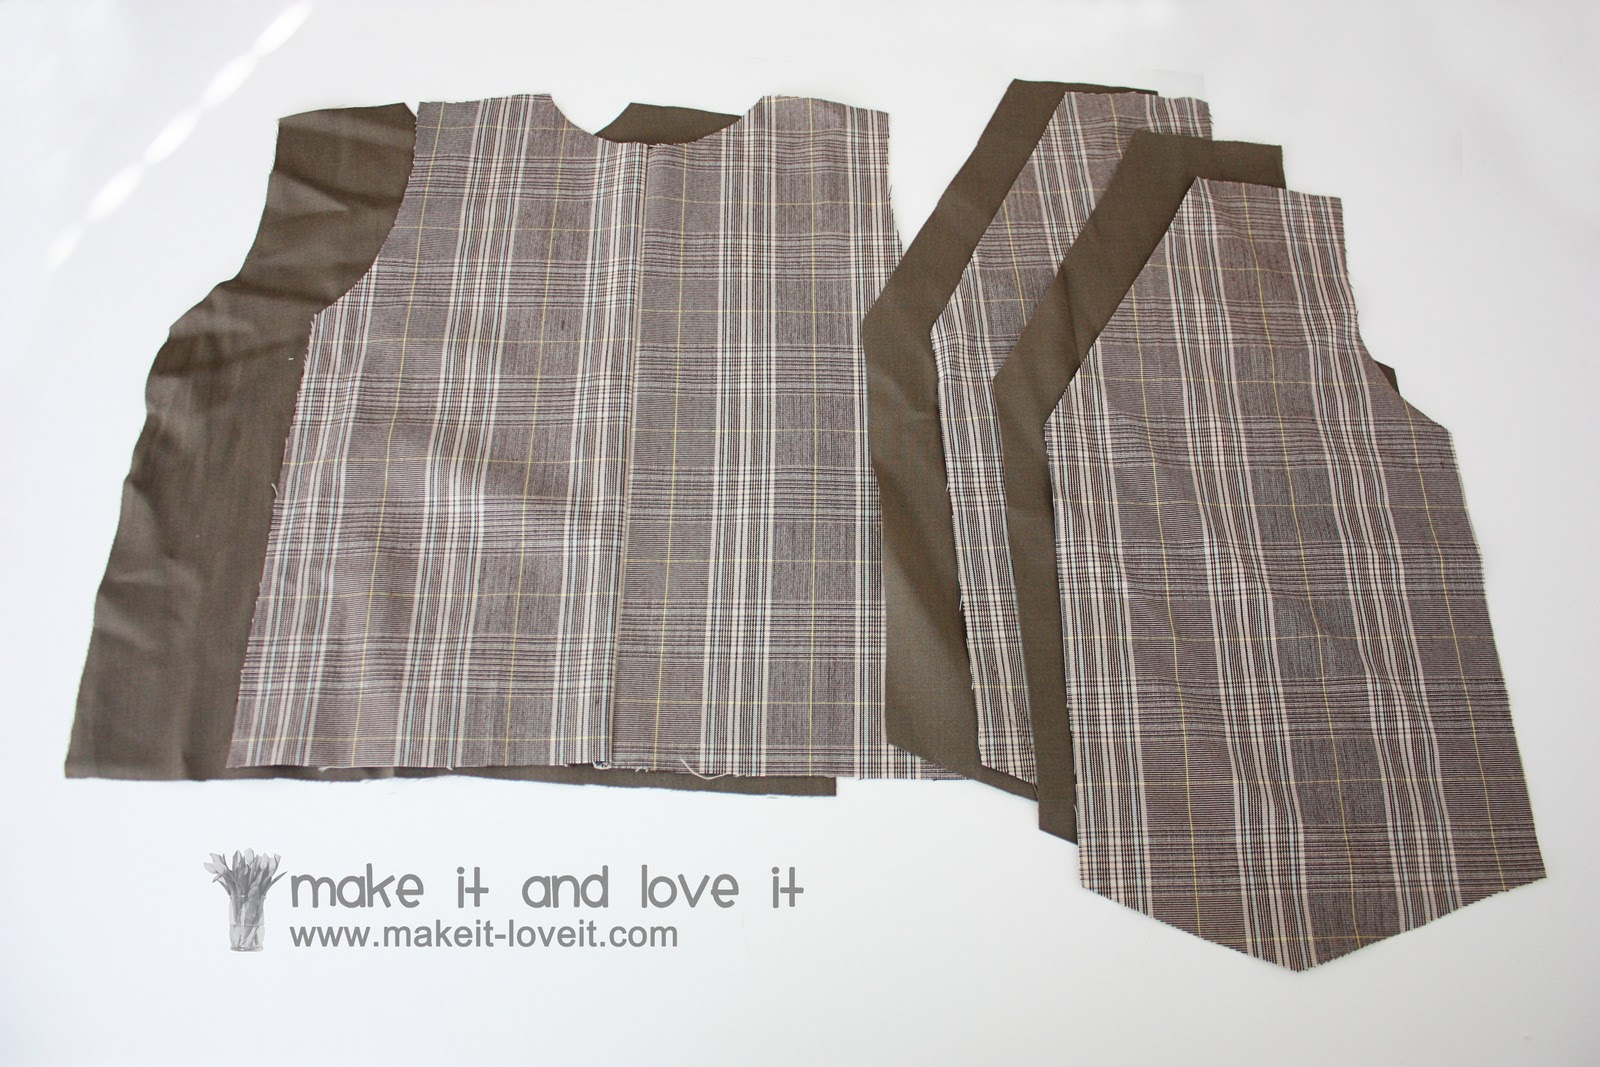
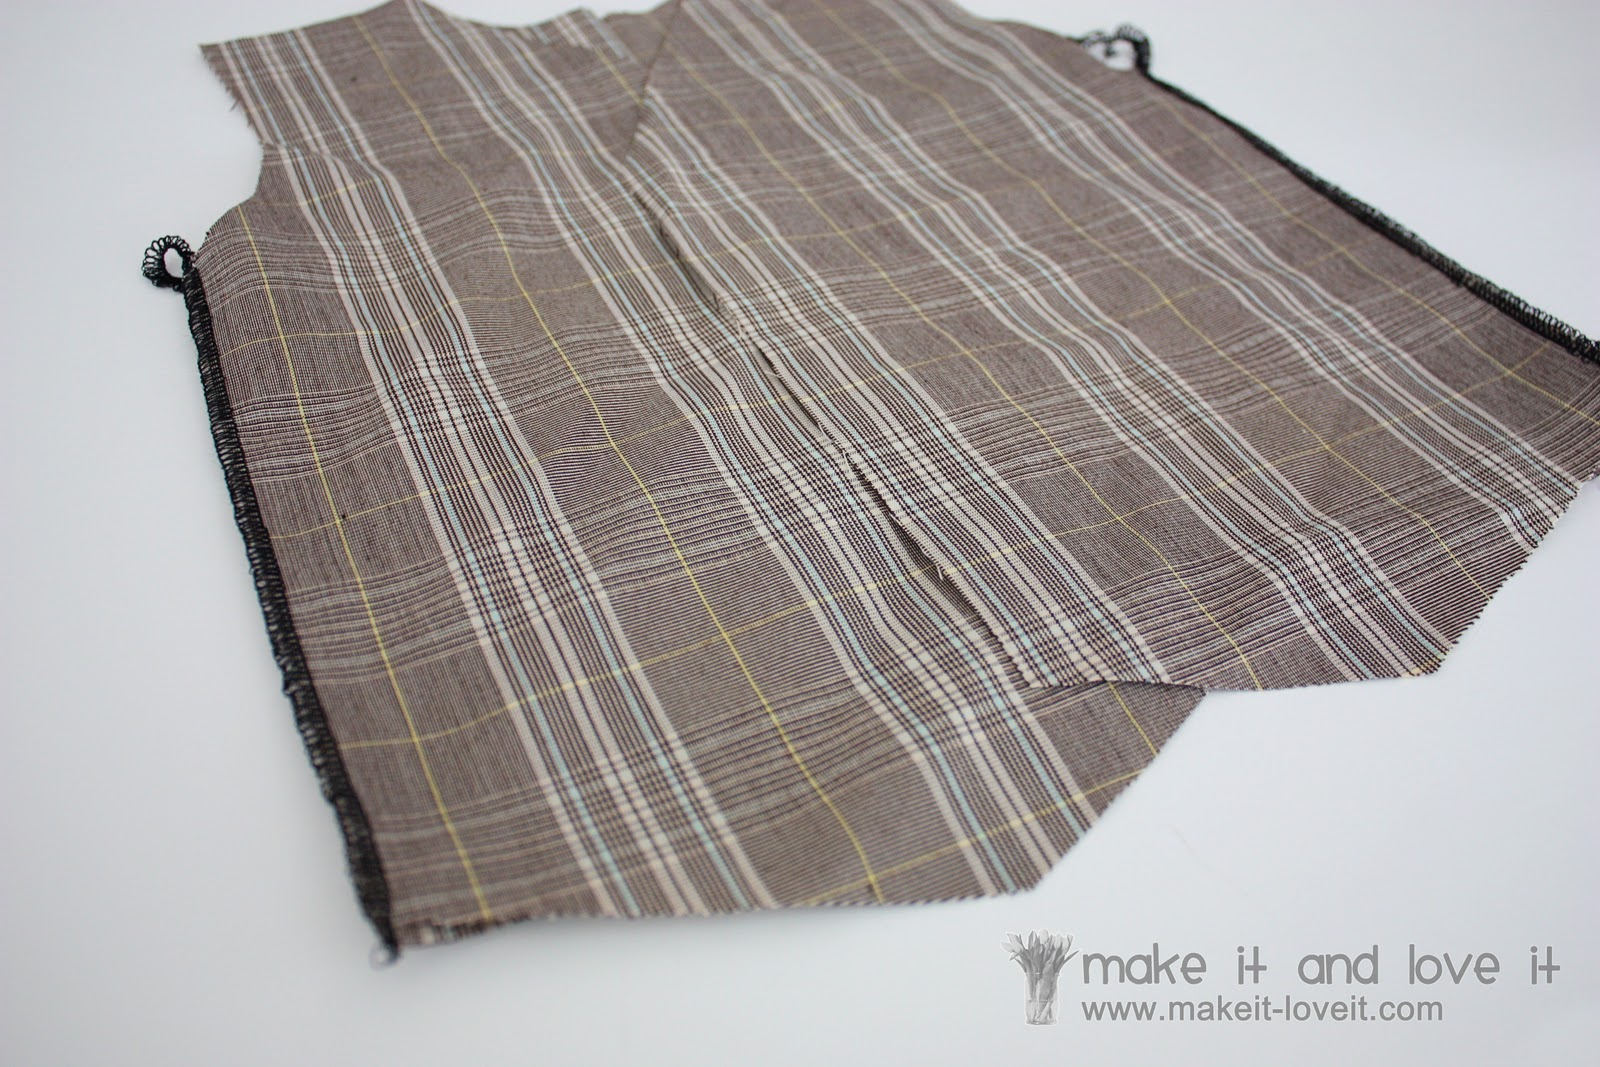
Then I cut 2 front pieces and 1 back piece out of one pair of pants and the same out of the other pair of pants. (Make sure if your fabric has a wrong and right side, that you flip the front pattern piece over before cutting your second piece.)
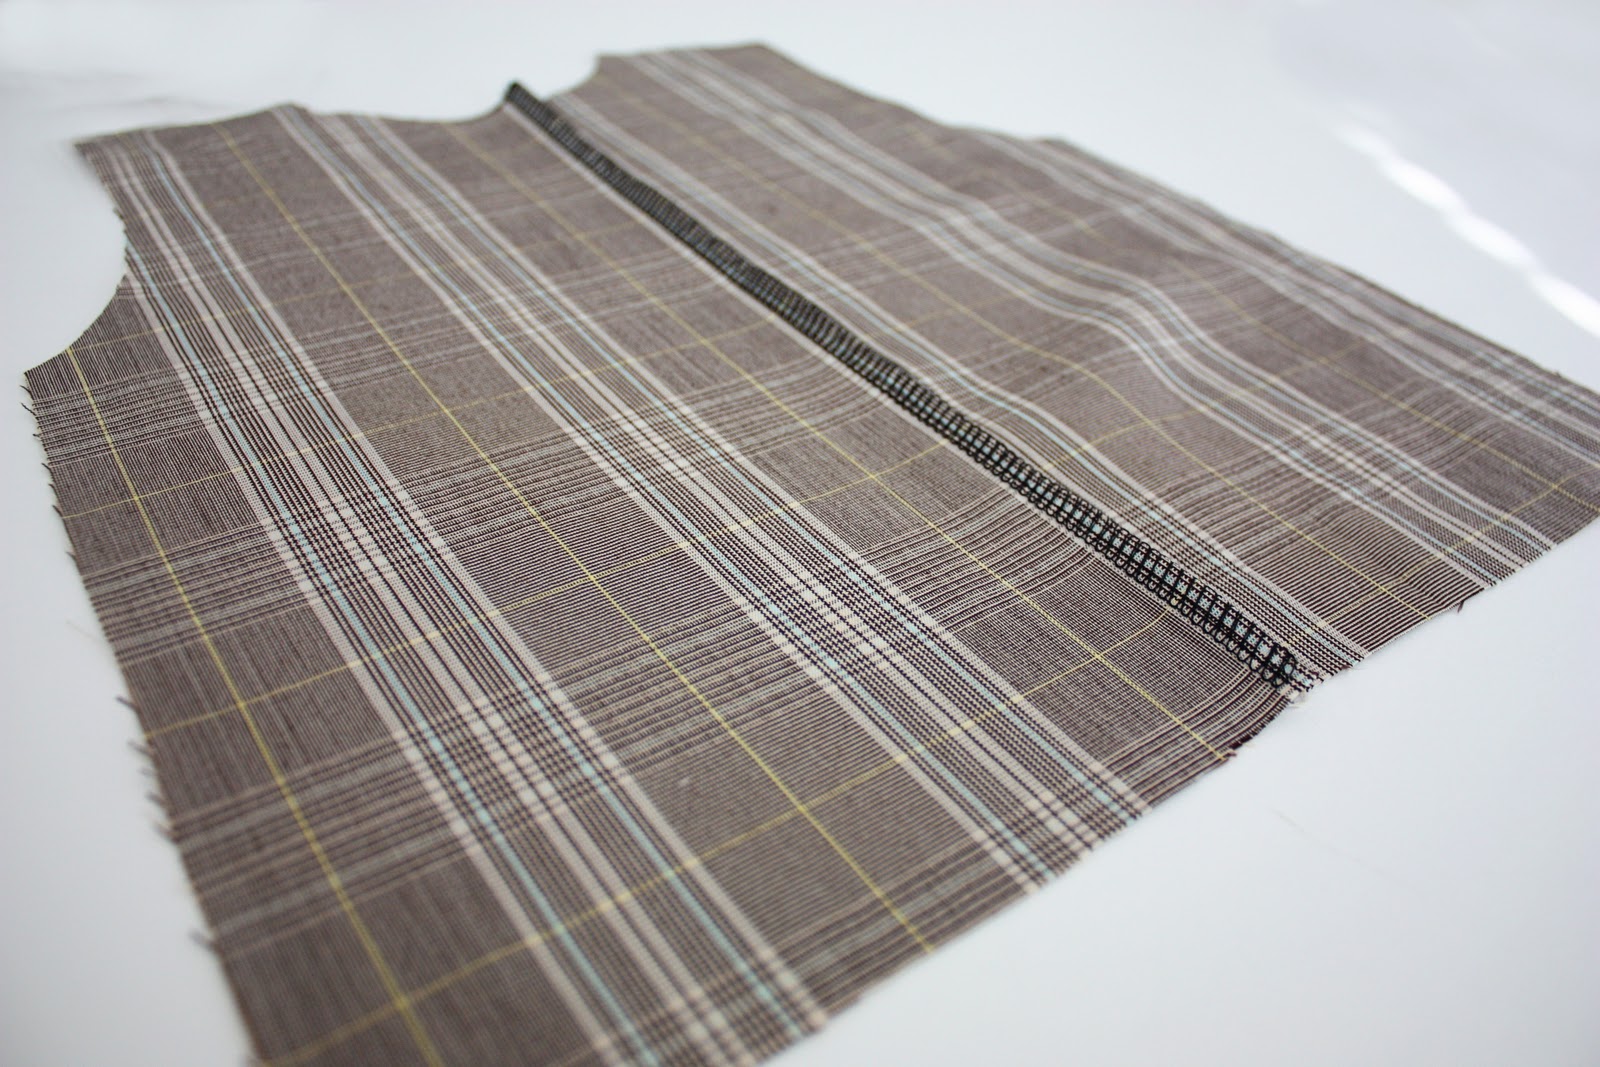
If you don’t have enough width on the trousers to create your vest back piece, fold the back vest pattern piece in half, and cut two back vest pieces and sew them together down the center. (Be sure to add a seam allowance along the center back, so that you can sew the two pieces together without making the back piece more narrow. Then sew together and then zig-zag to secure edges in place. Or serge it.)
You should now have 2 main back pieces and 4 front pieces.
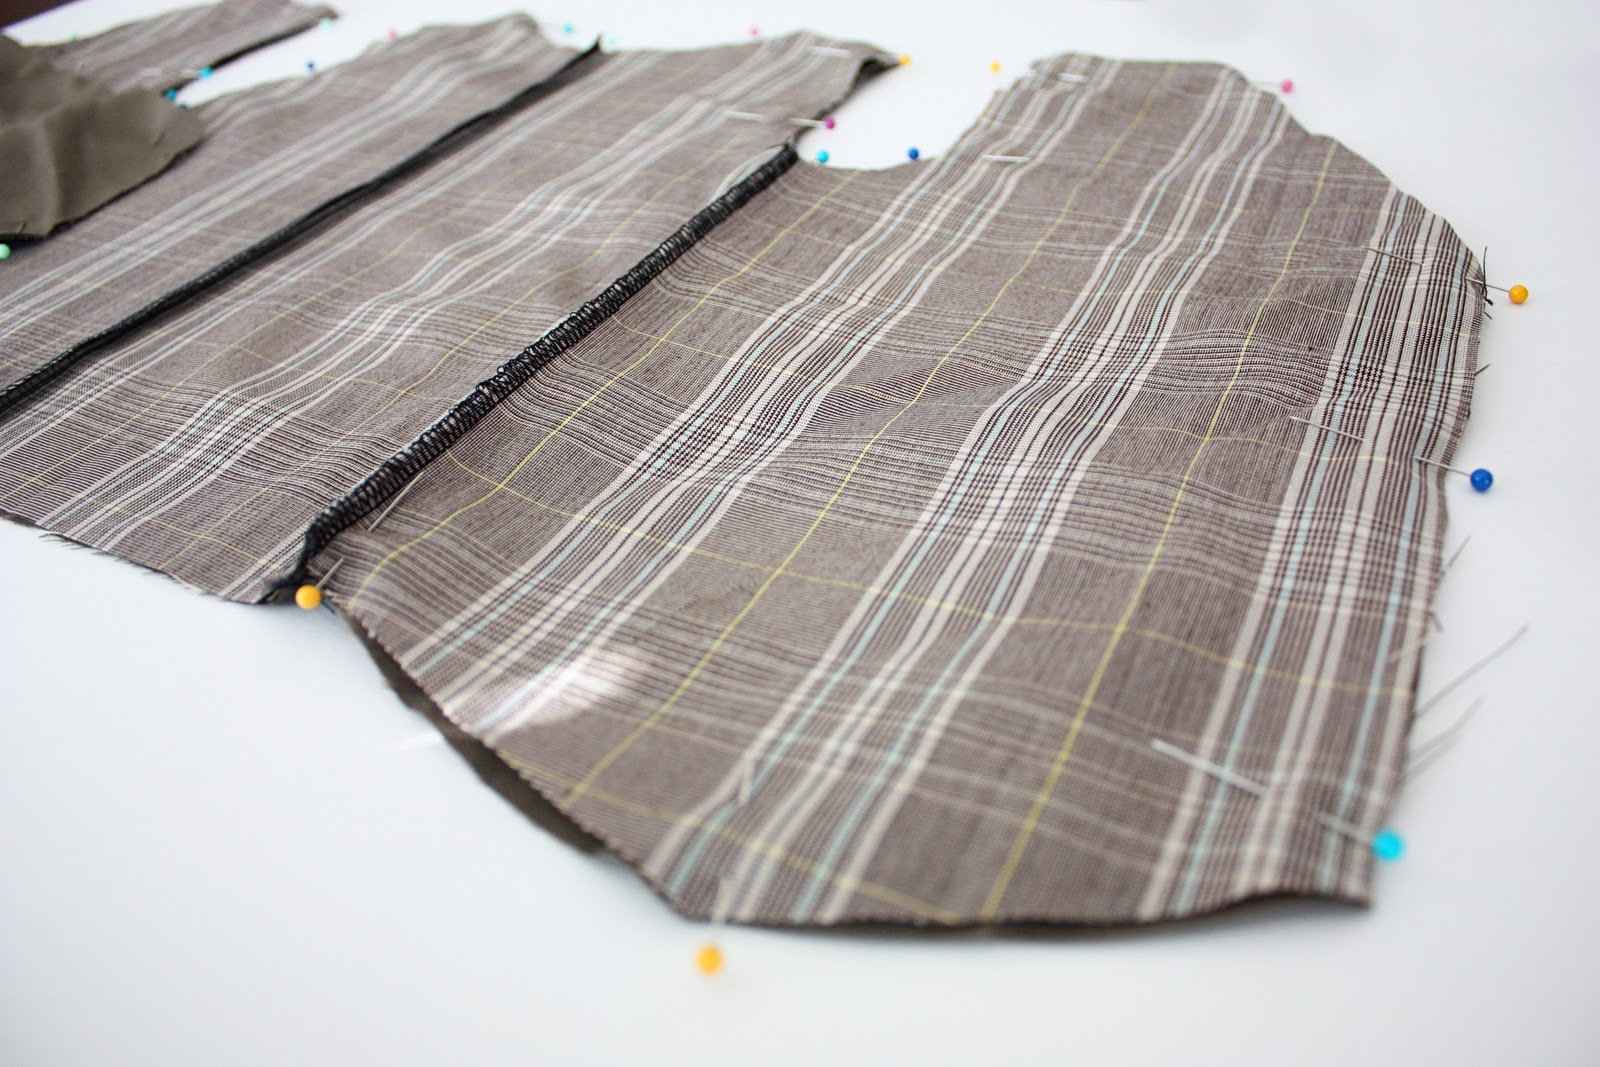
Next, lay your main back piece face up and then the 2 front pieces face down, line up the sides and sew along each side. Zig-zag or serge to finish off raw edges.
Do the same to the inner fabric.
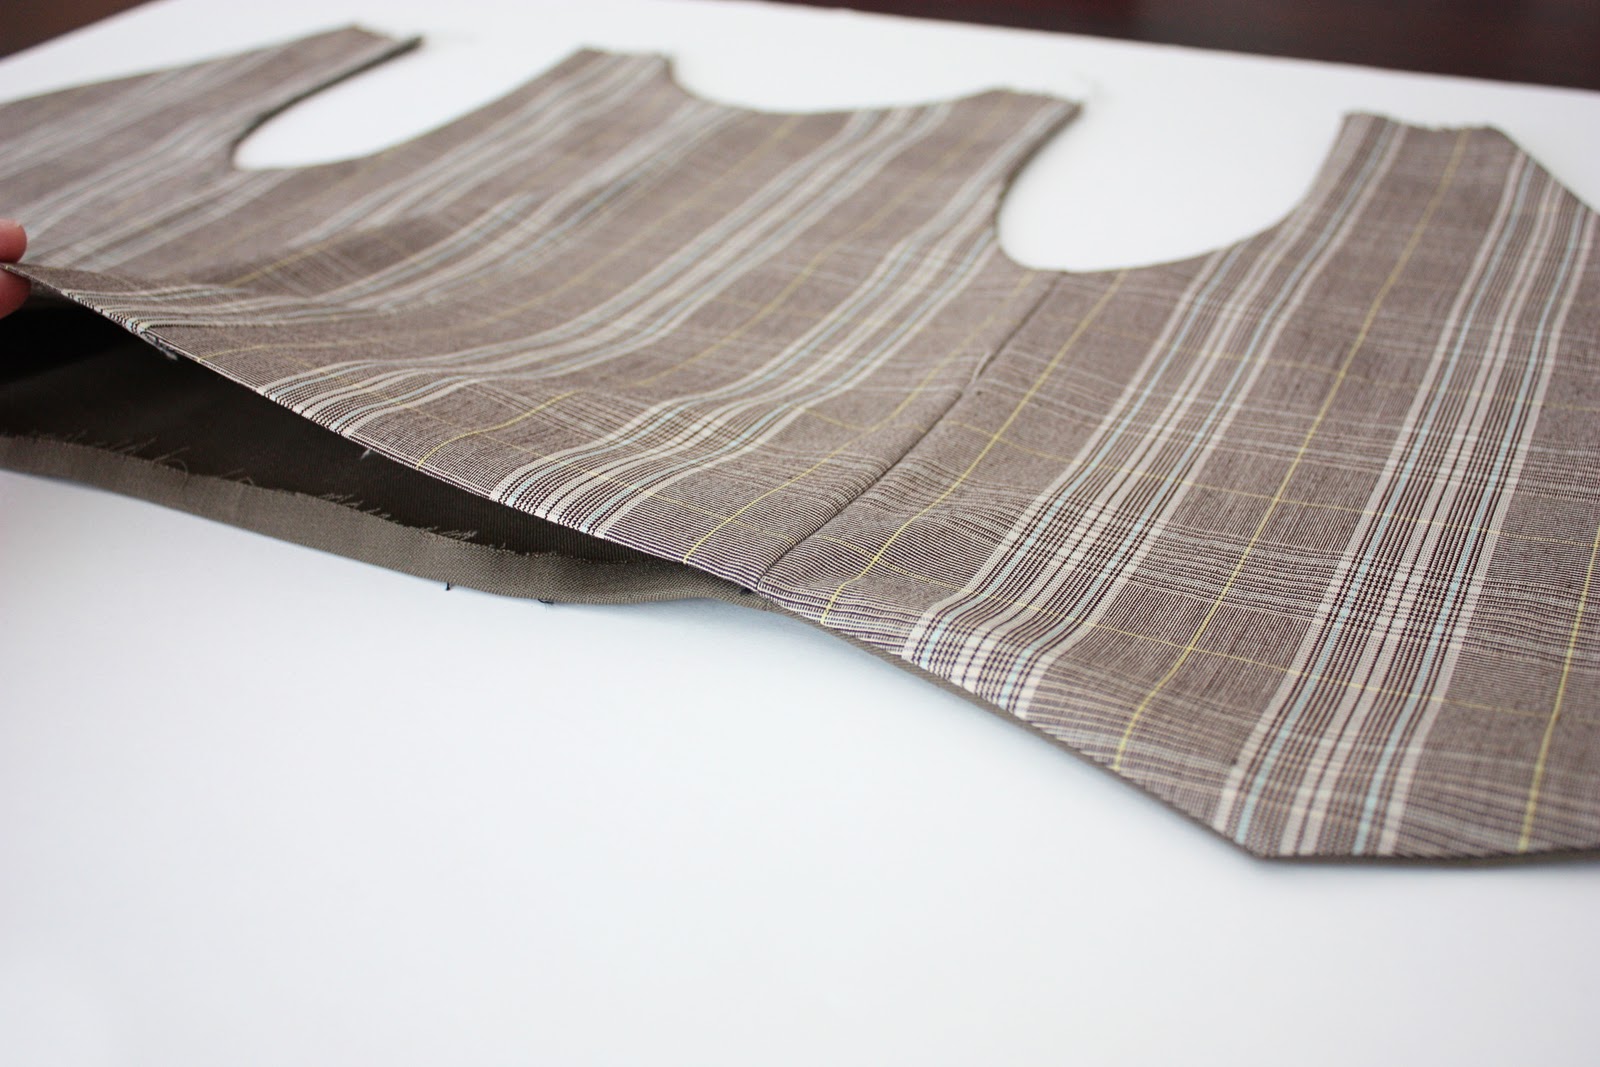
Now you have 2 separate pieces……….an outer vest fabric and an inner vest fabric. Lay the 2 section together, with right sides together and line up all the outer edges. Pin in place.
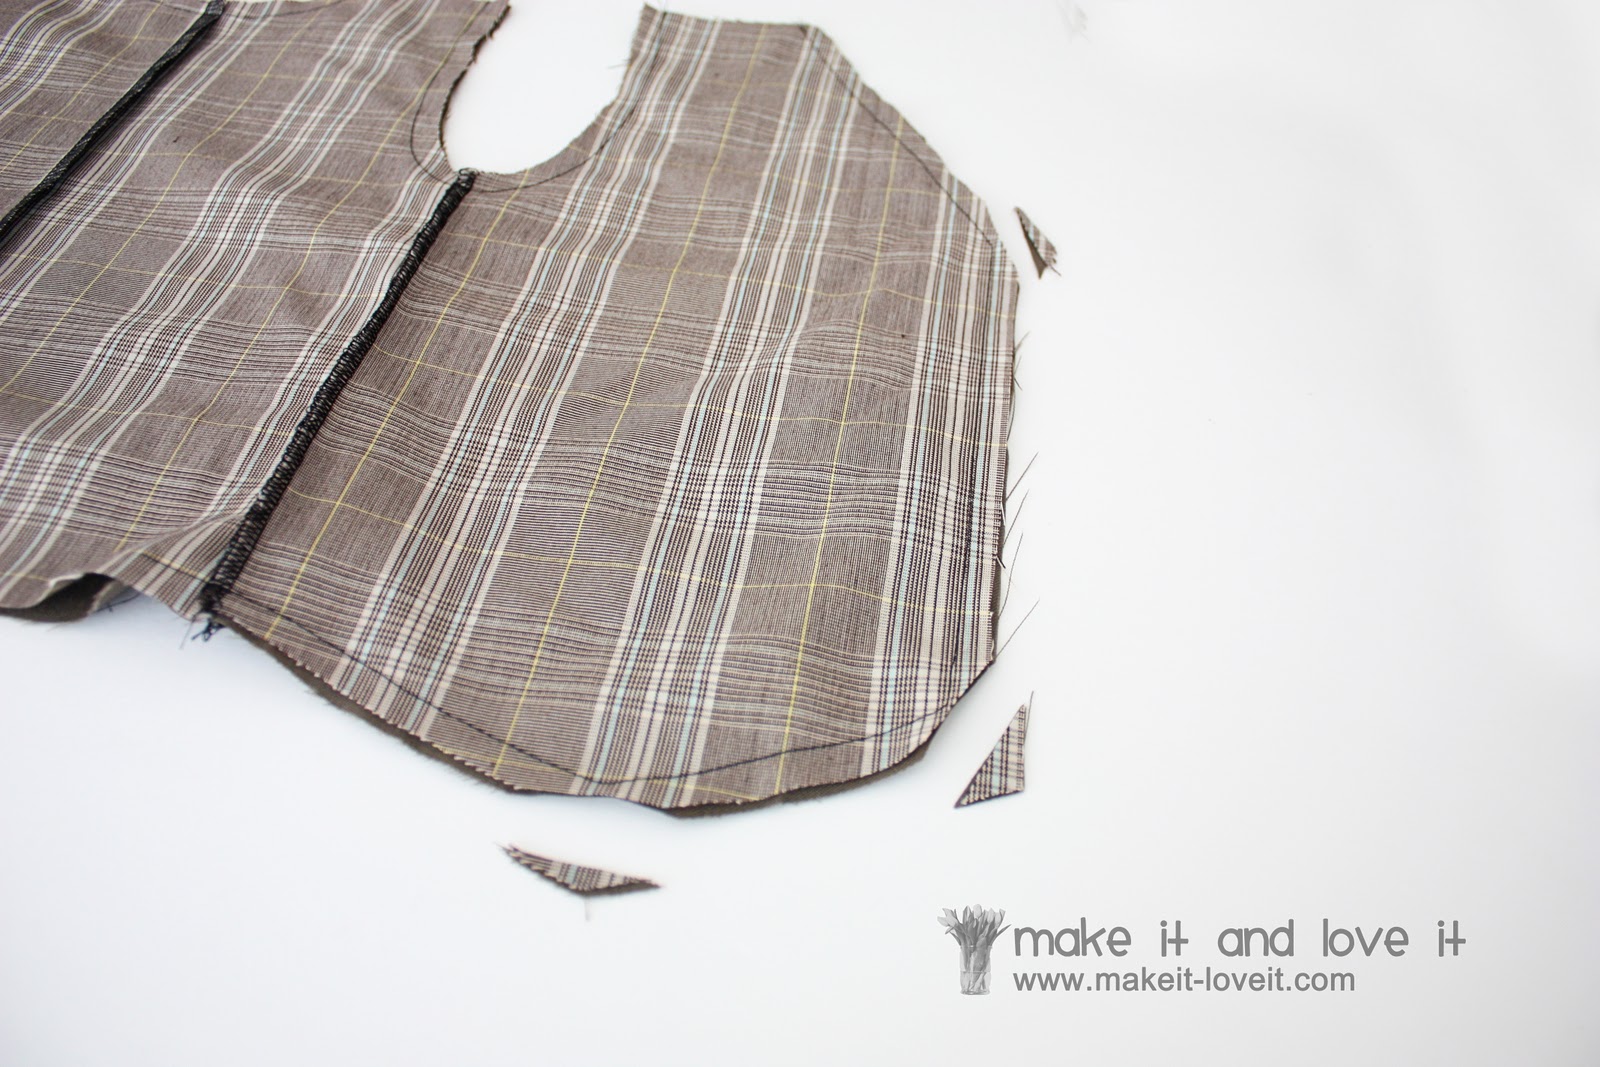
Then sew the 2 pieces together along the neck hole, the 2 arm holes, the 2 sides and then along the 2 pointed bottom edges. Leave the straight bottom edge and the 4 shoulder areas open.
Then trim off any pointy corners…
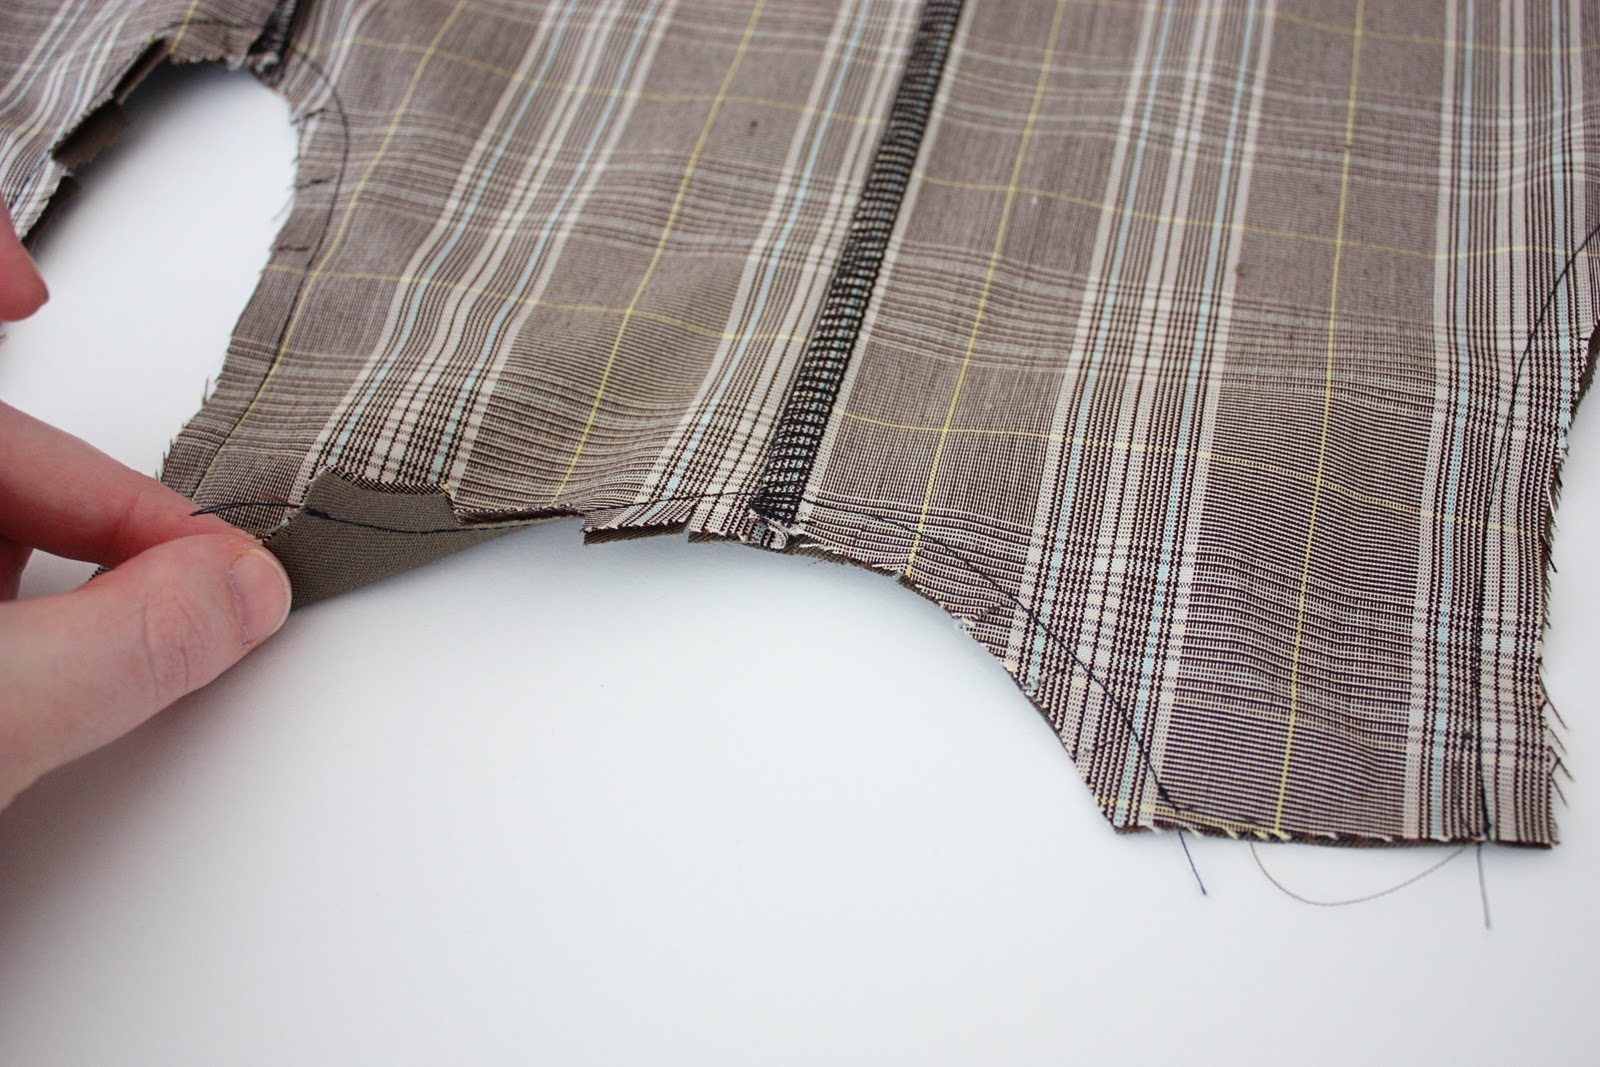
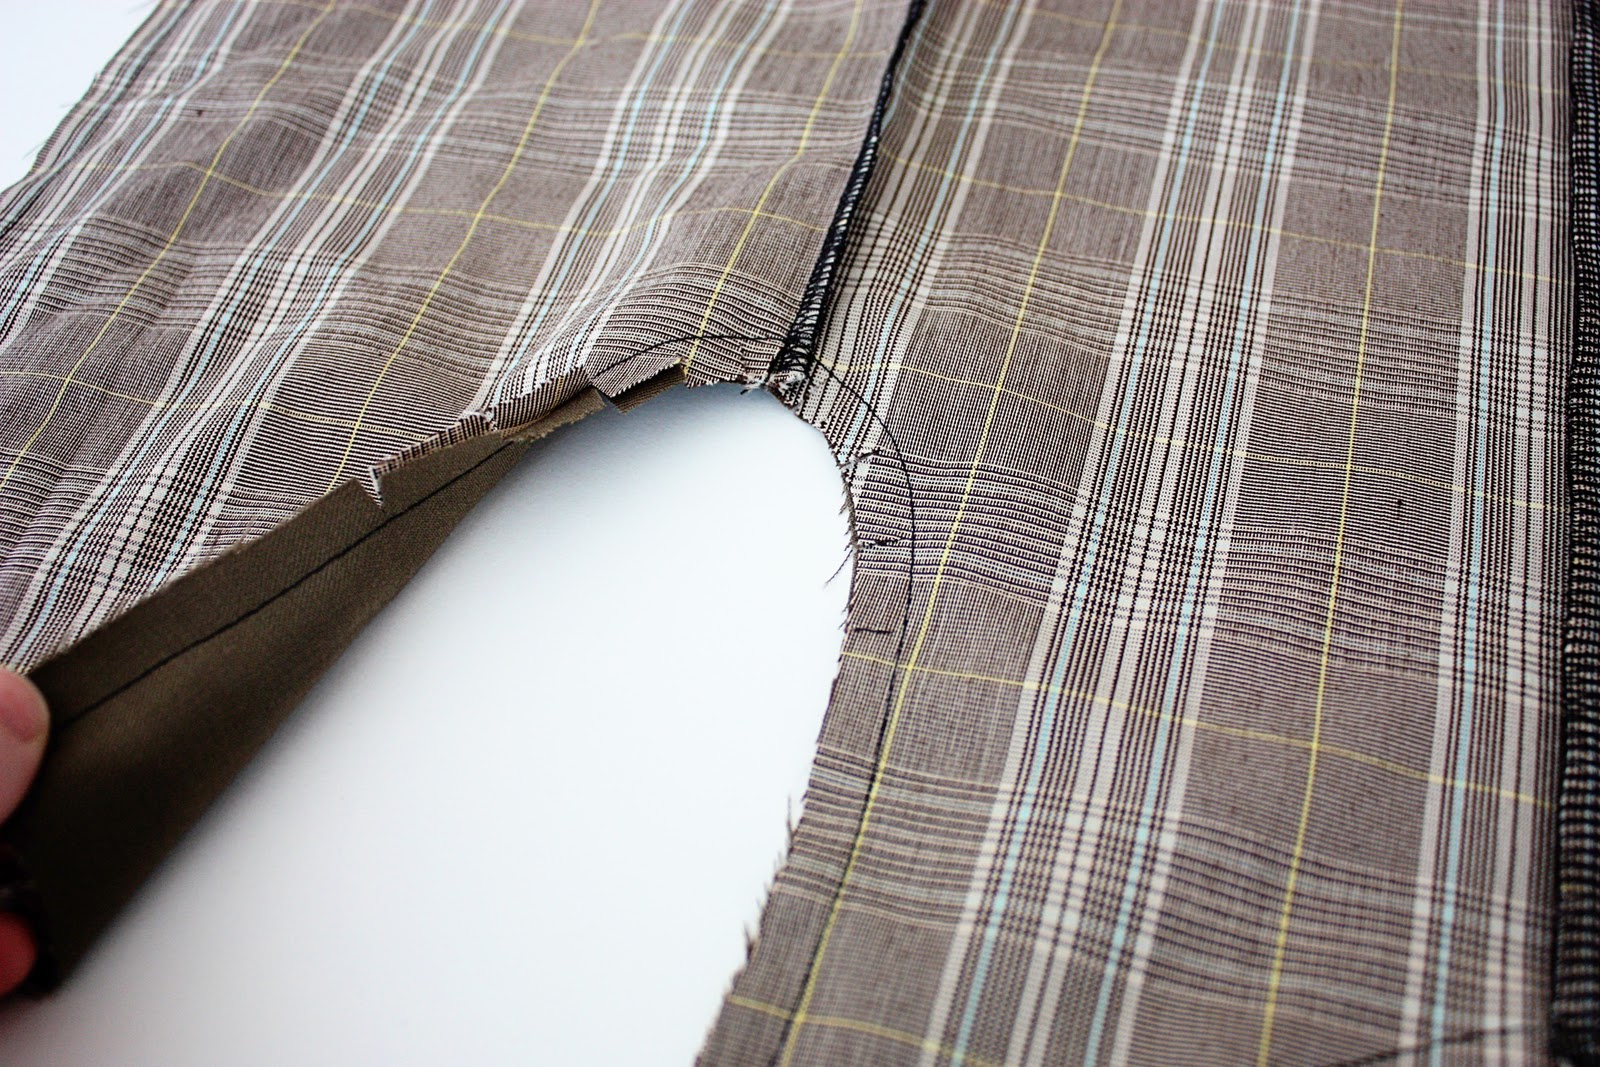
And clip the curve of the neck……..
And clip the curves of each arm hole…
**Unsure about why you need to trim corners and clip curves? Read this sewing tip here.
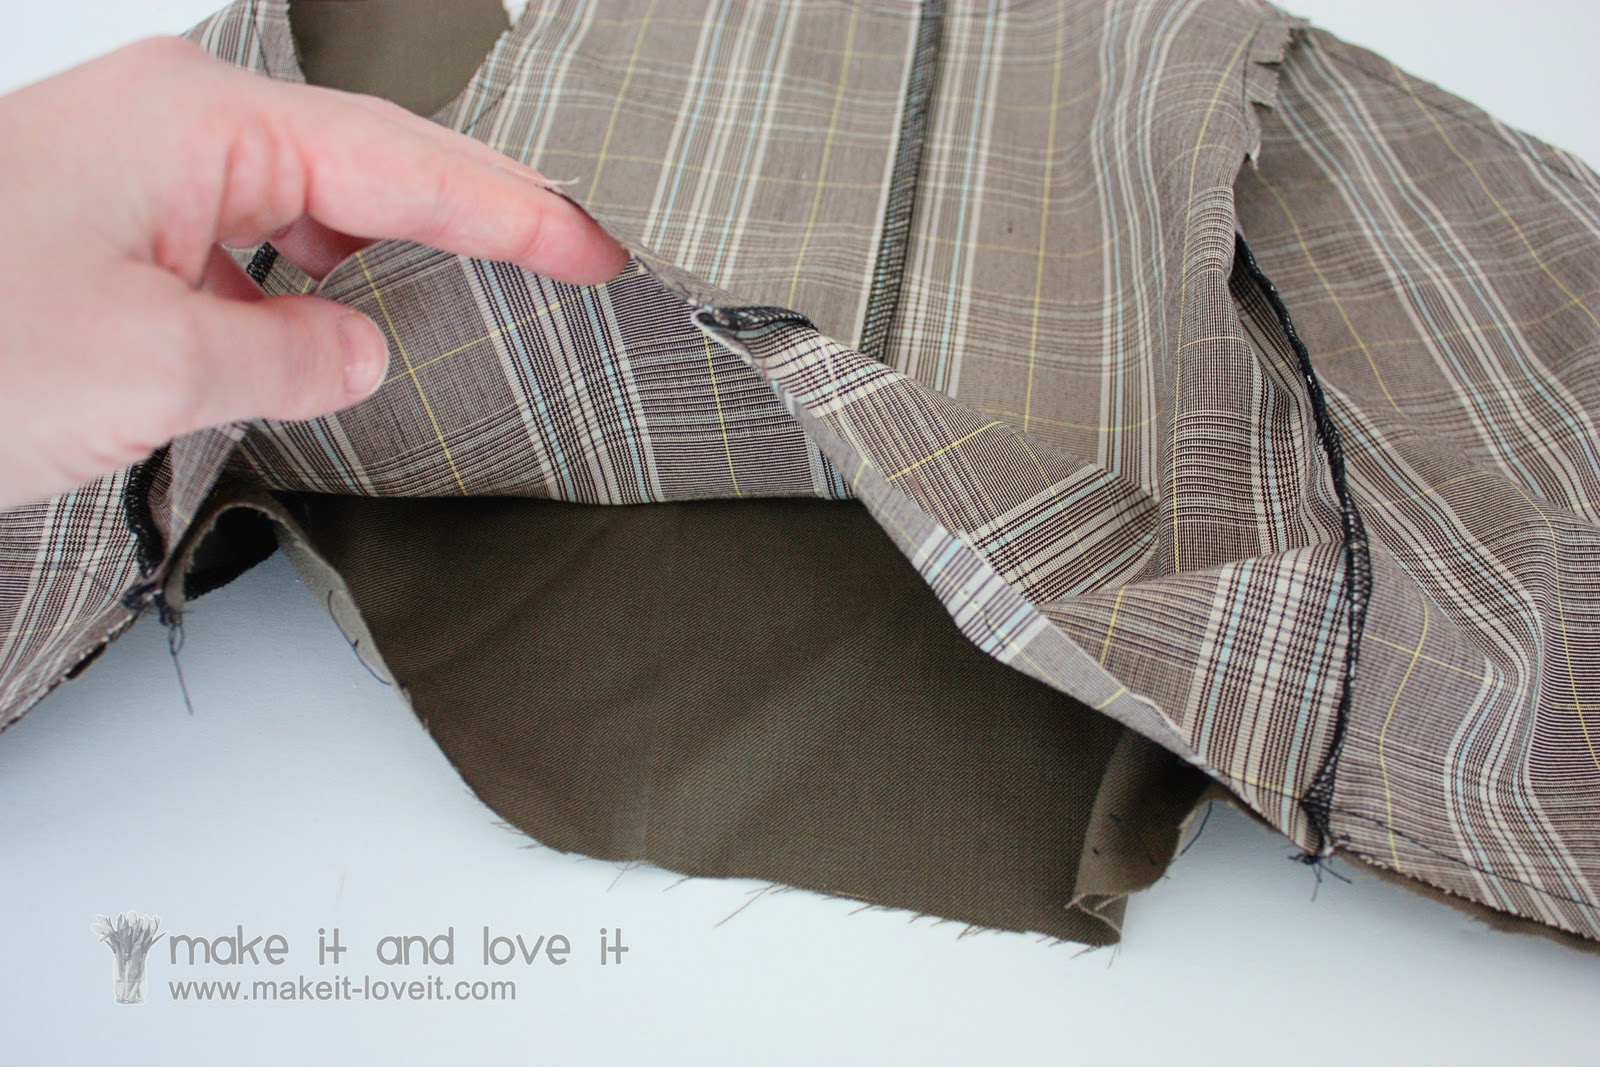
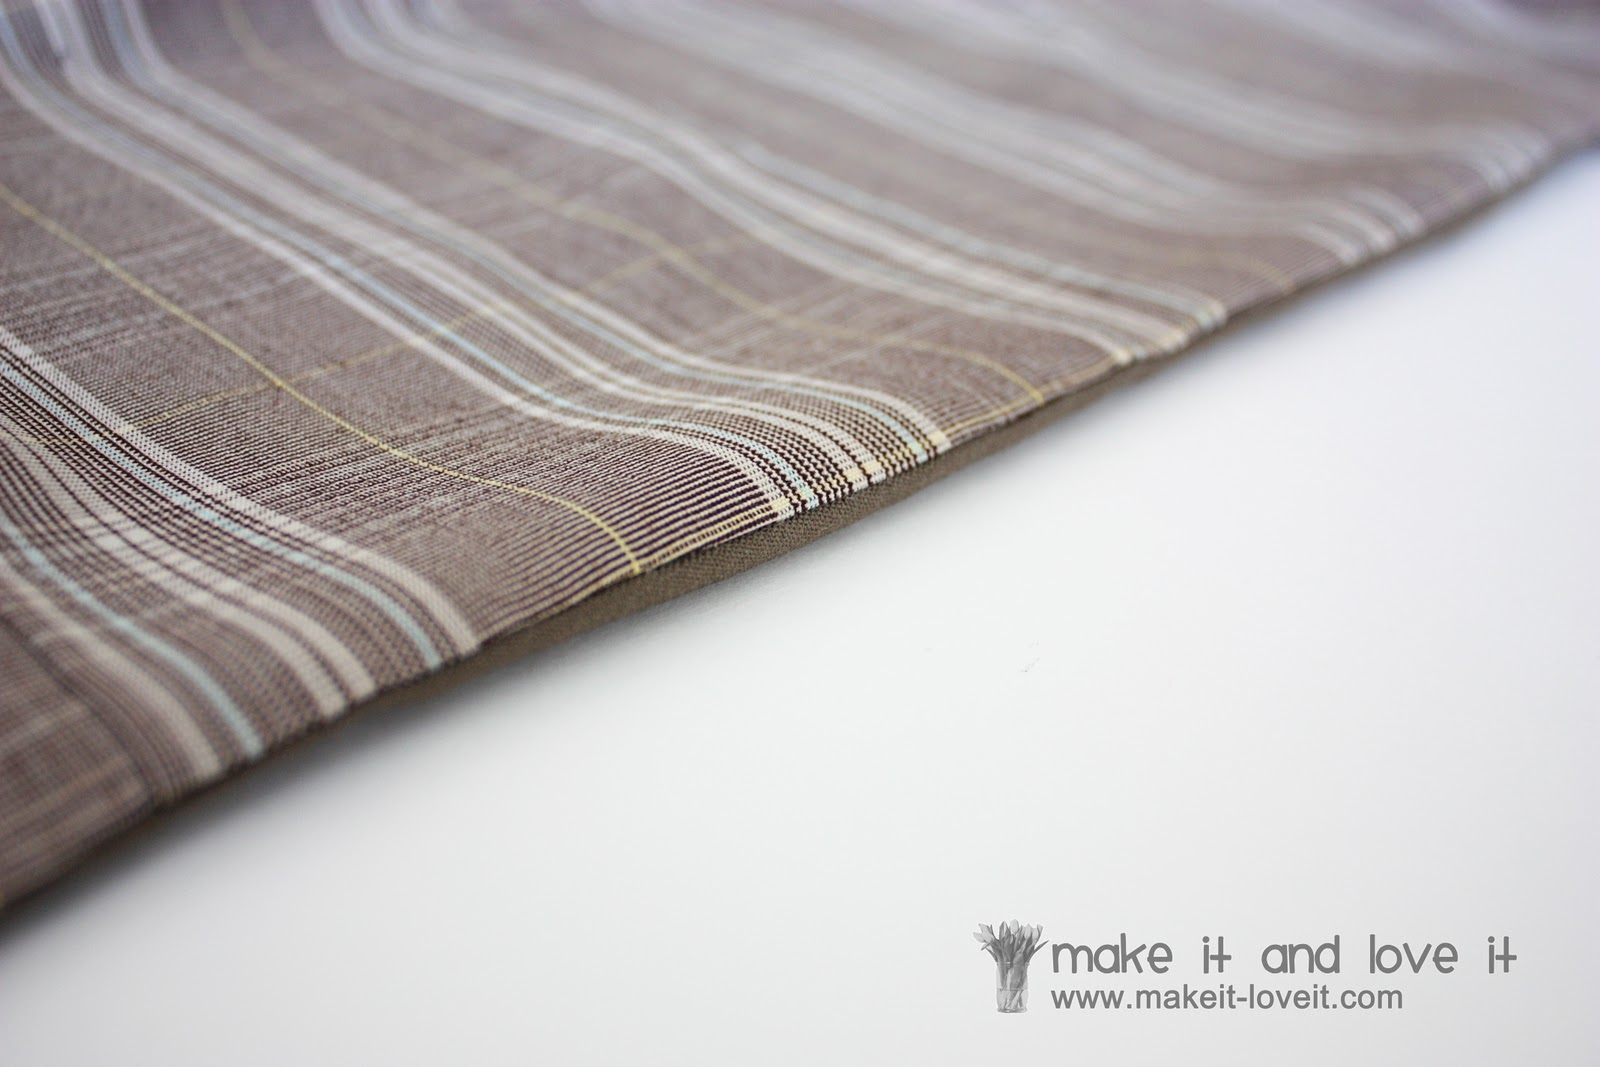
Then turn the vest right side out through the bottom opening.
Poke out any pointed corners and iron the vest flat, making sure to fold the raw edges of the bottom toward the inside.
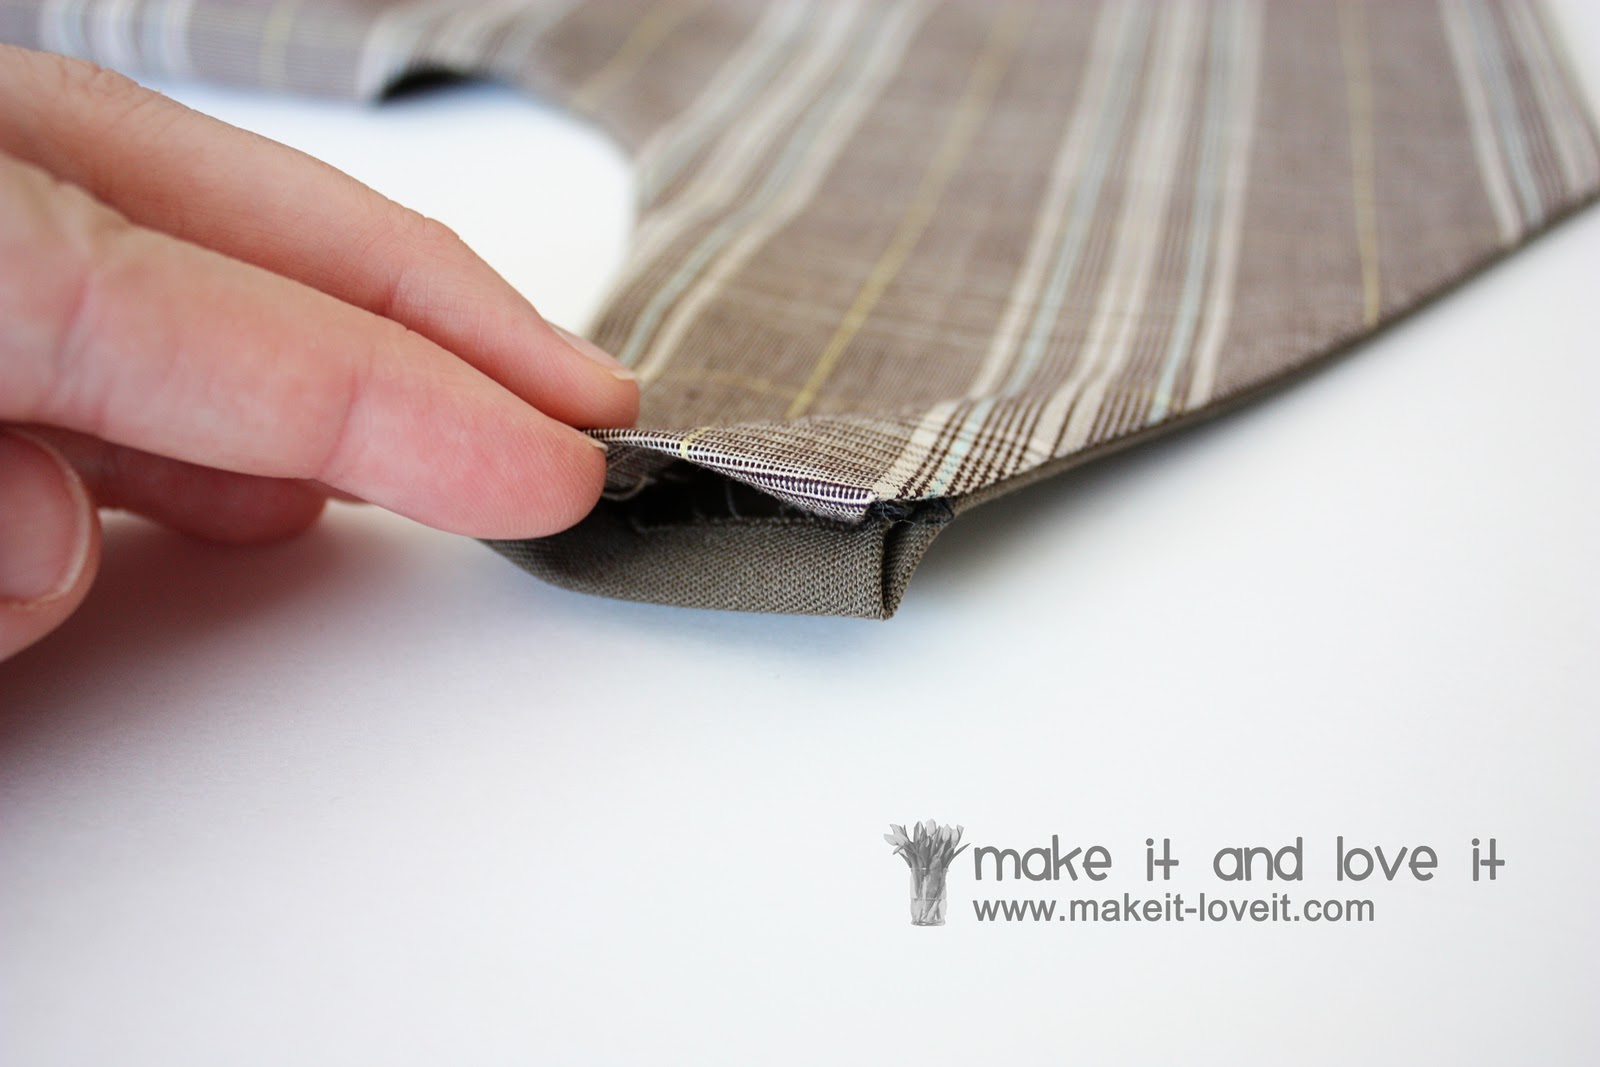
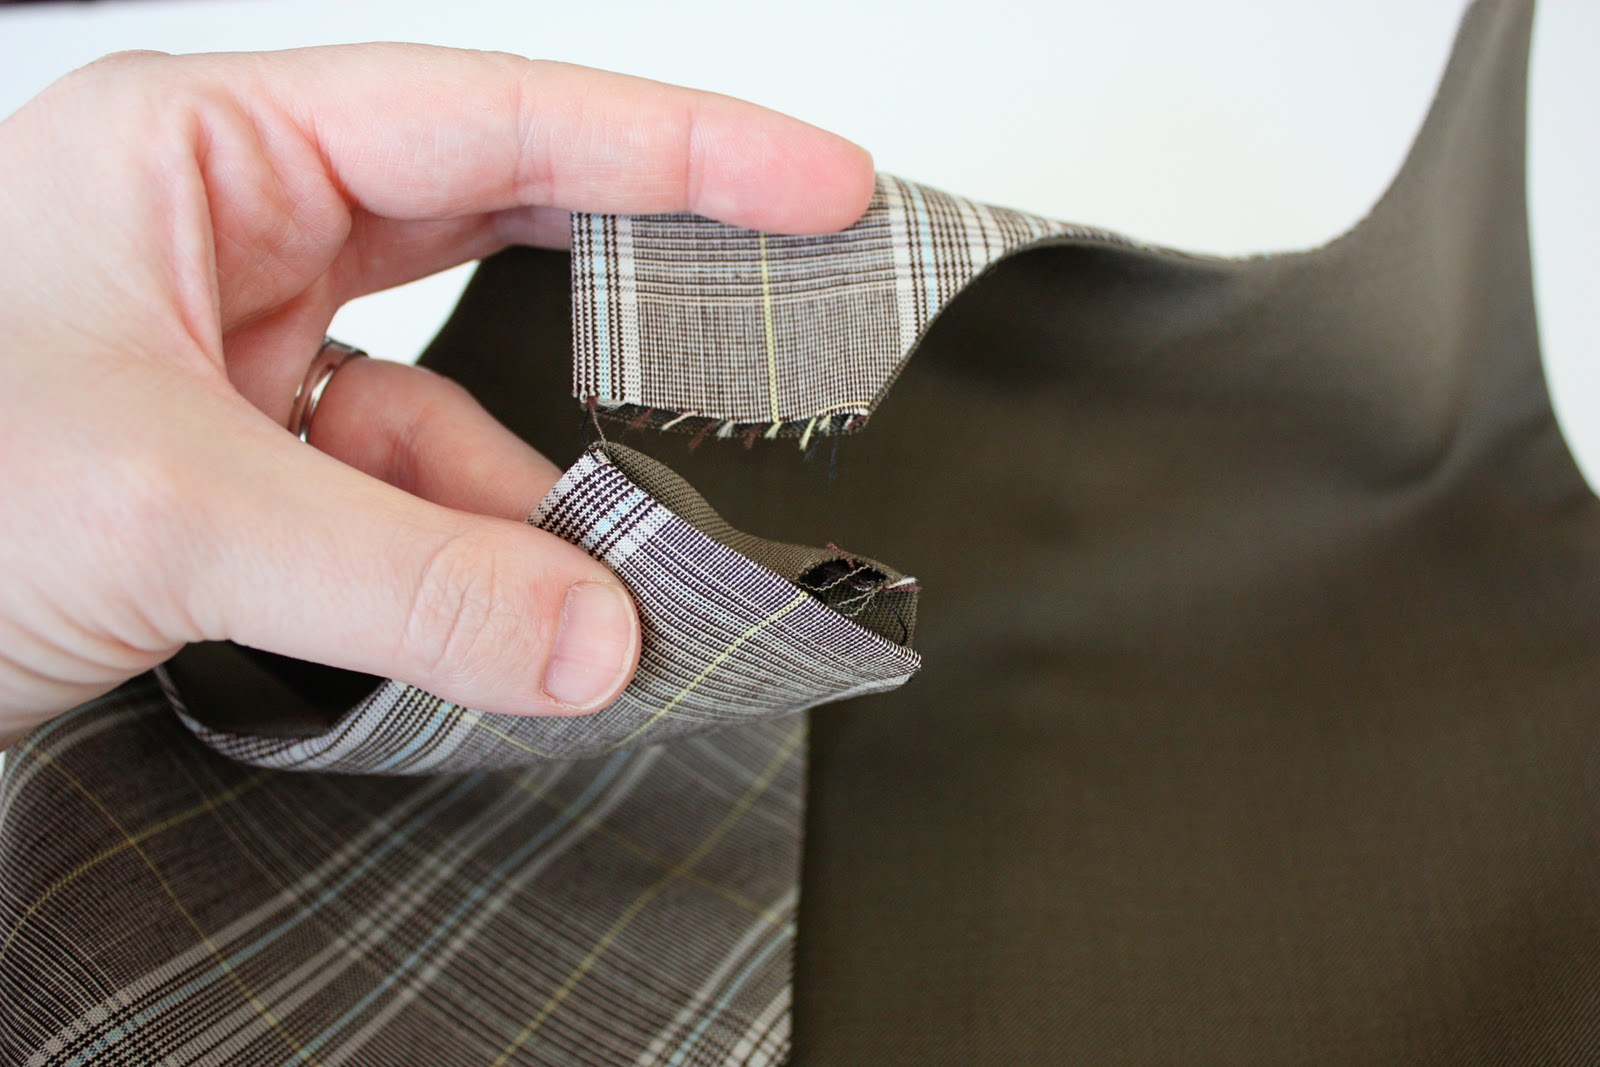
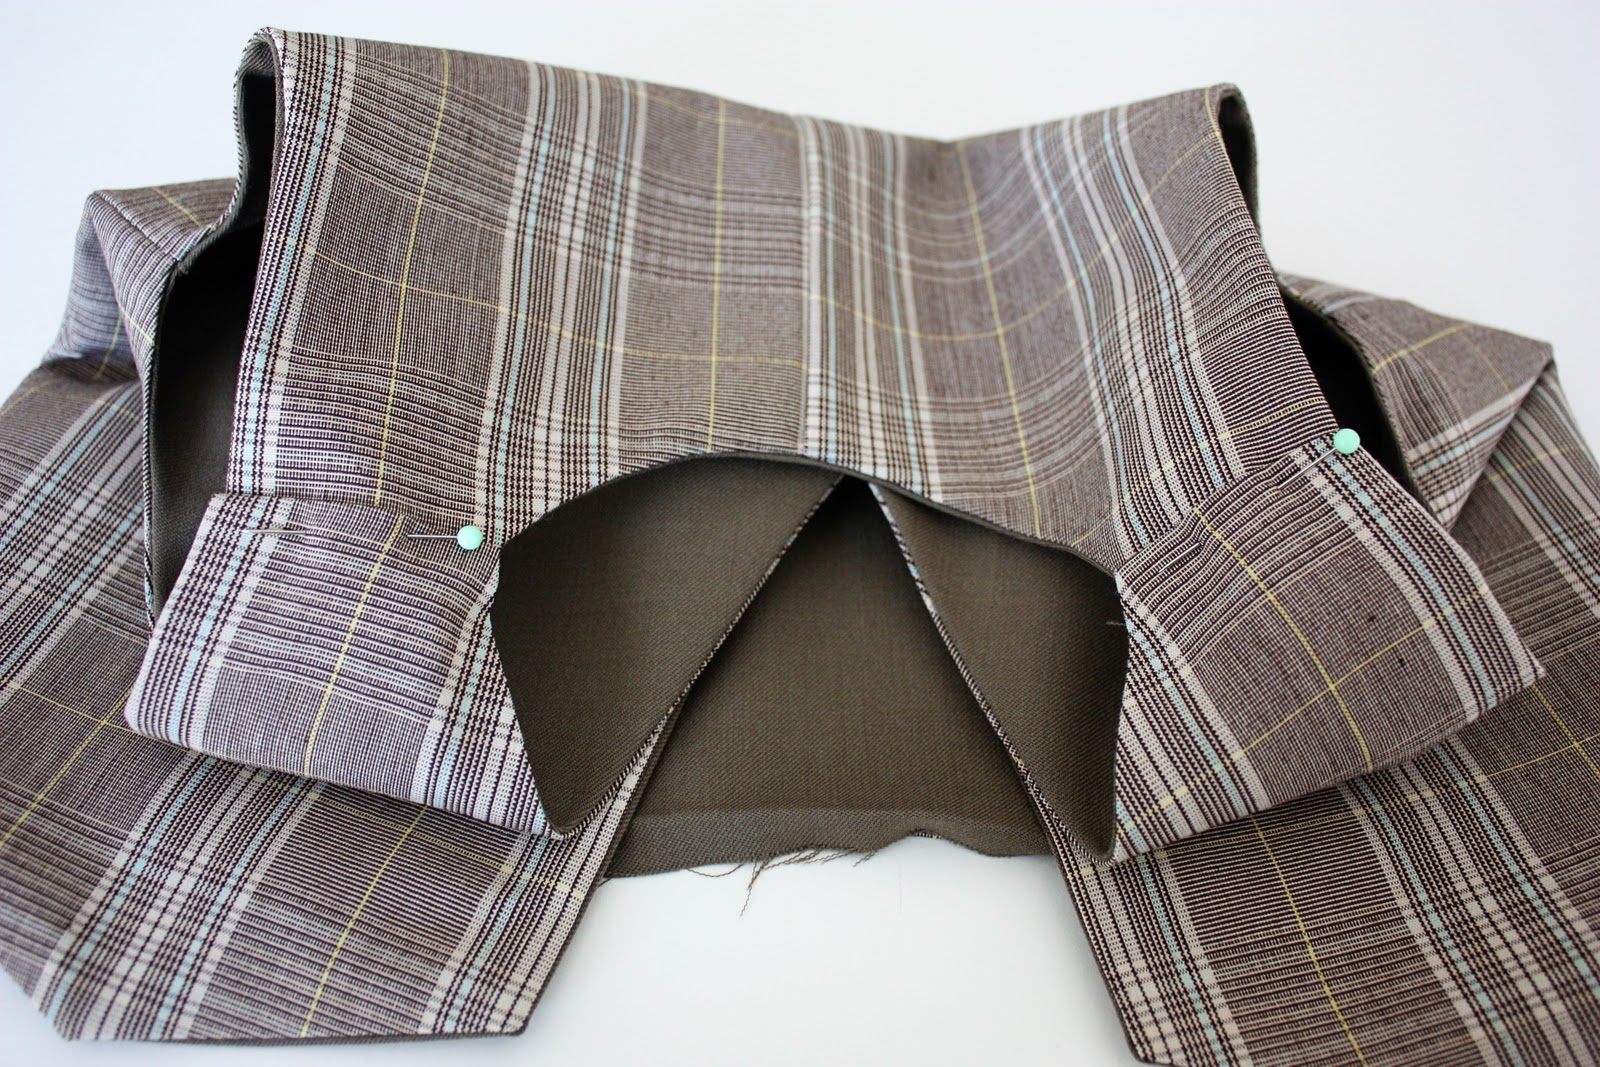
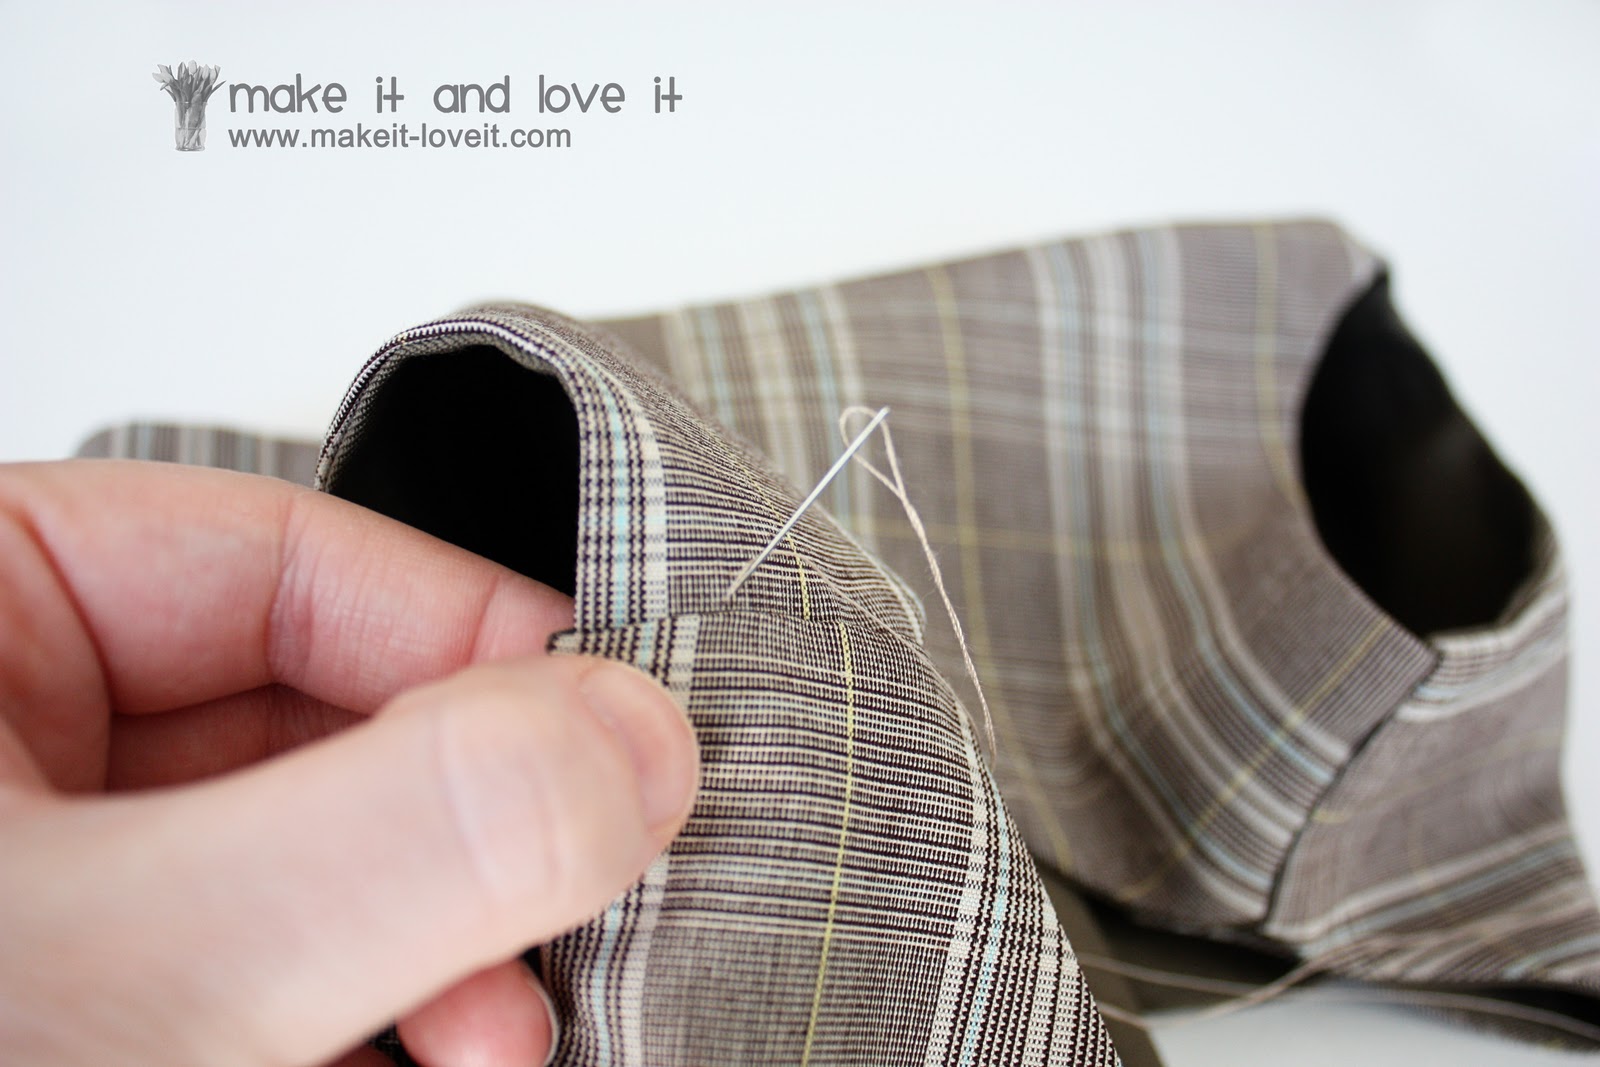
Now, we need to attach each shoulder piece to create the actual arm holes. If you’re looking at the vest from the front, grab the front shoulder piece on the right and unpick the very top of the seam on the left, a few stitches.
Then turn under these raw edges however much you’ve been using as a seam allowance (mine was 3/8 inch) and press edges towards the inside.
These images are now over on the left shoulder piece because I forgot to finish photographing the steps on the right shoulder piece (sorry if this confuses you). But slide the back shoulder piece inside of the front shoulder piece that has a nice folded under edge. (You’ll slide in the length of your seam allowance that you have been using.)
Pin in place and do to both sides.
Then hand-stitch the shoulder pieces in place, using a blind stitch. (Need help? Click
here.)
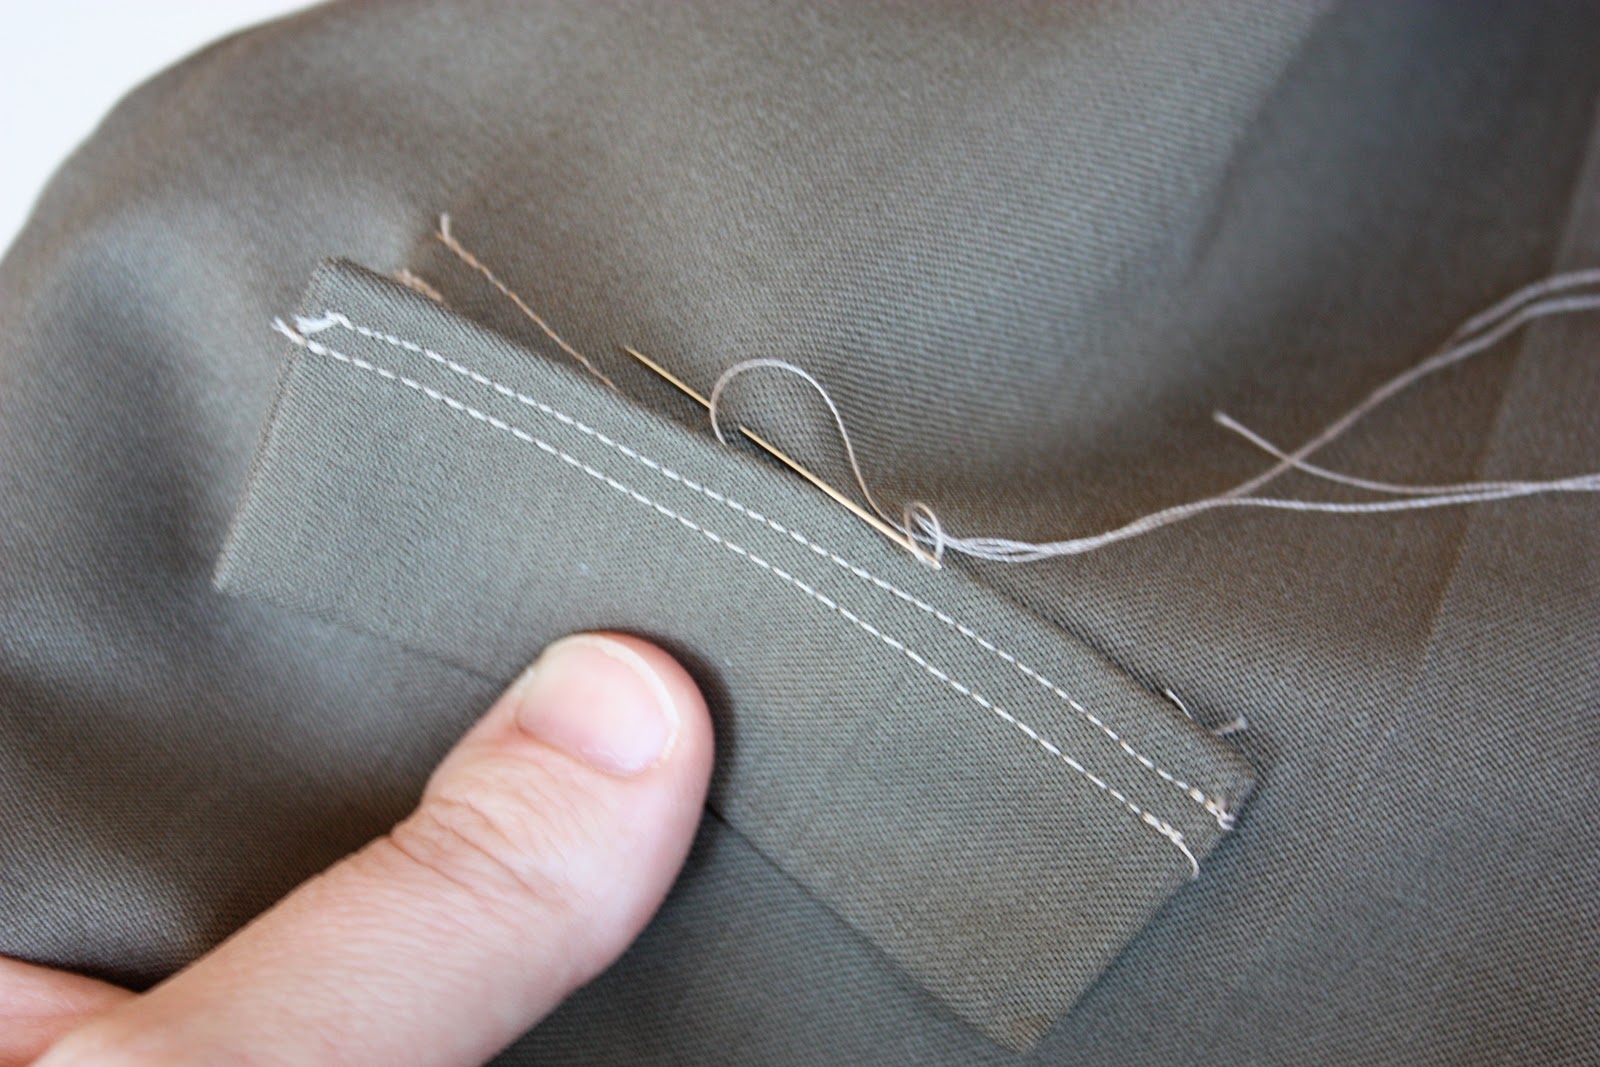
Then use the same blind-stitch to secure the bottom of the vest closed.
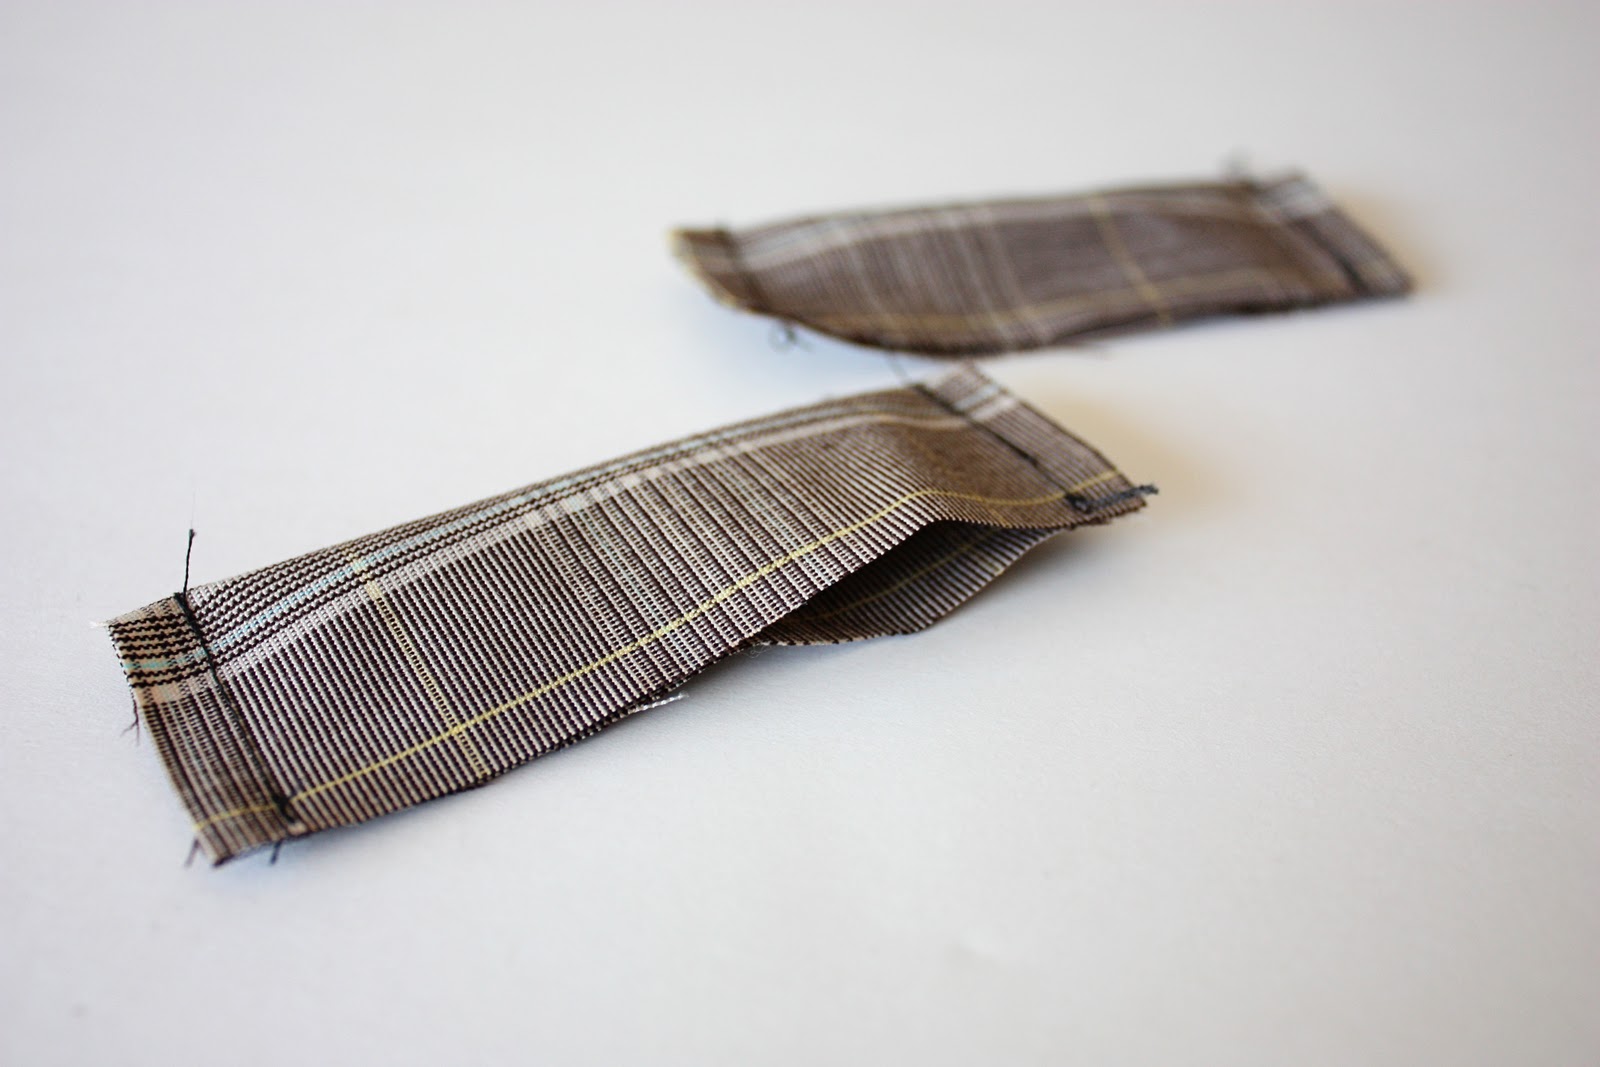
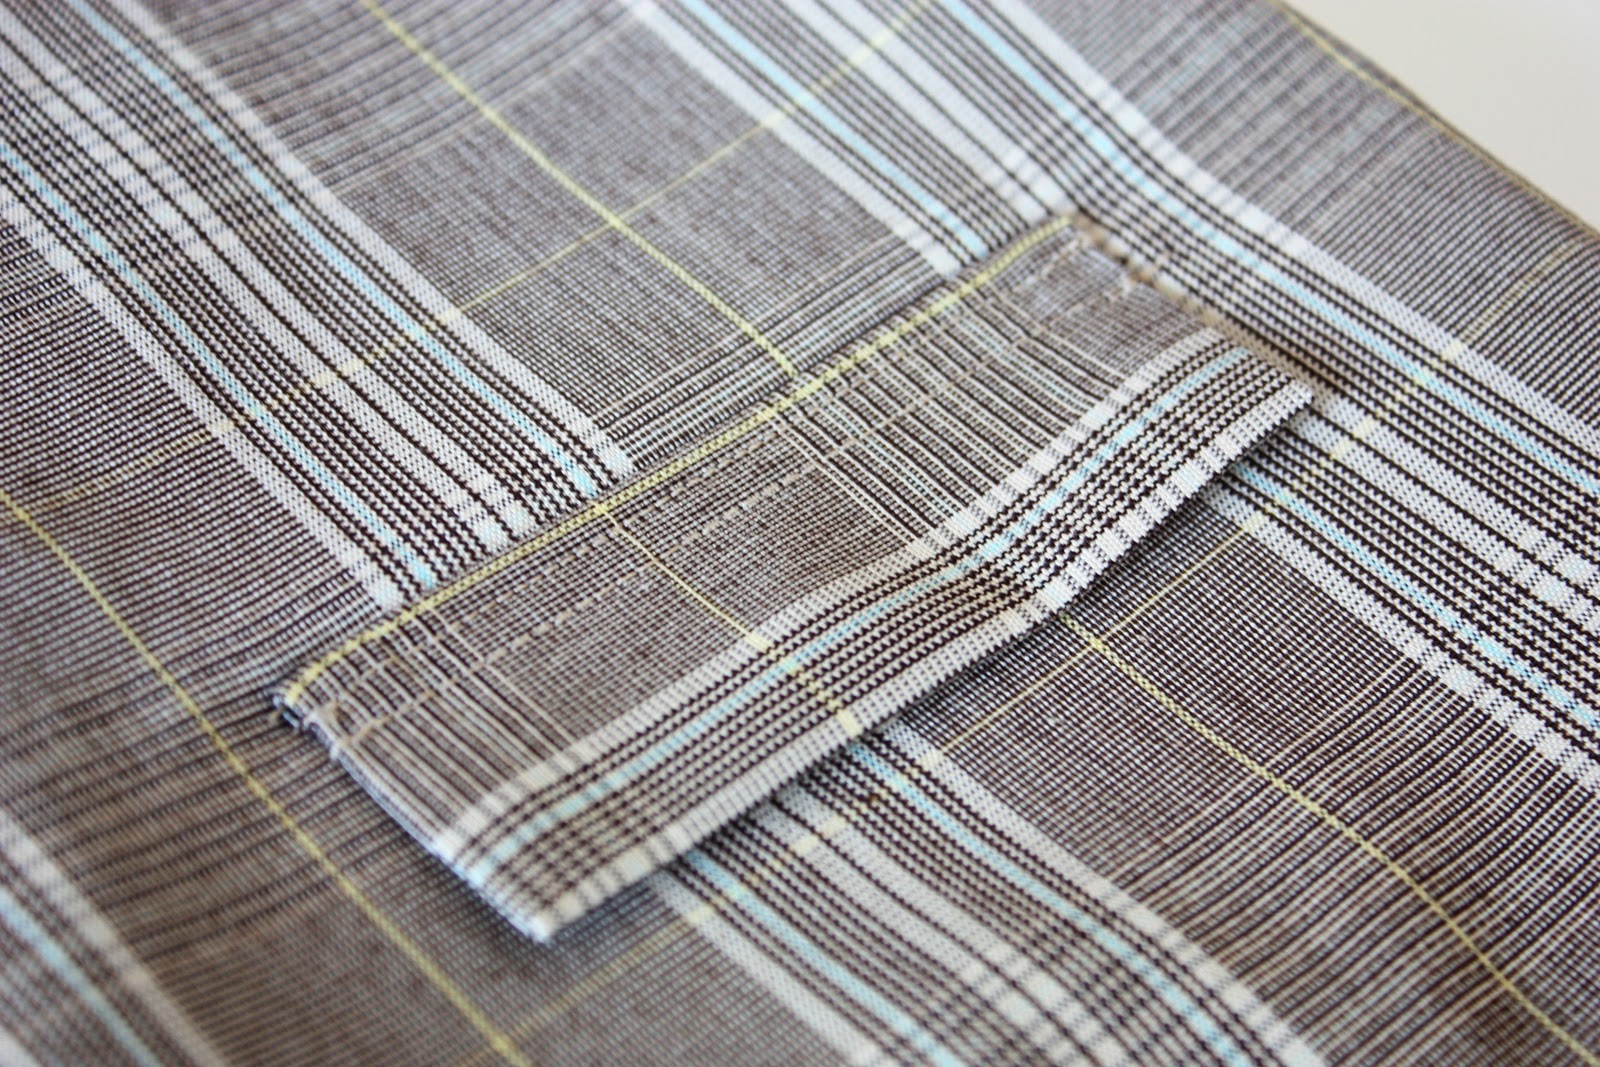
Onto the little faux pockets.
Cut out two rectangle pieces to be used for the little flaps. Mine were 4 inches wide by 3 inches tall.
Fold in half lengthwise and sew along each end (I used a 1/4 inch seam allowance).
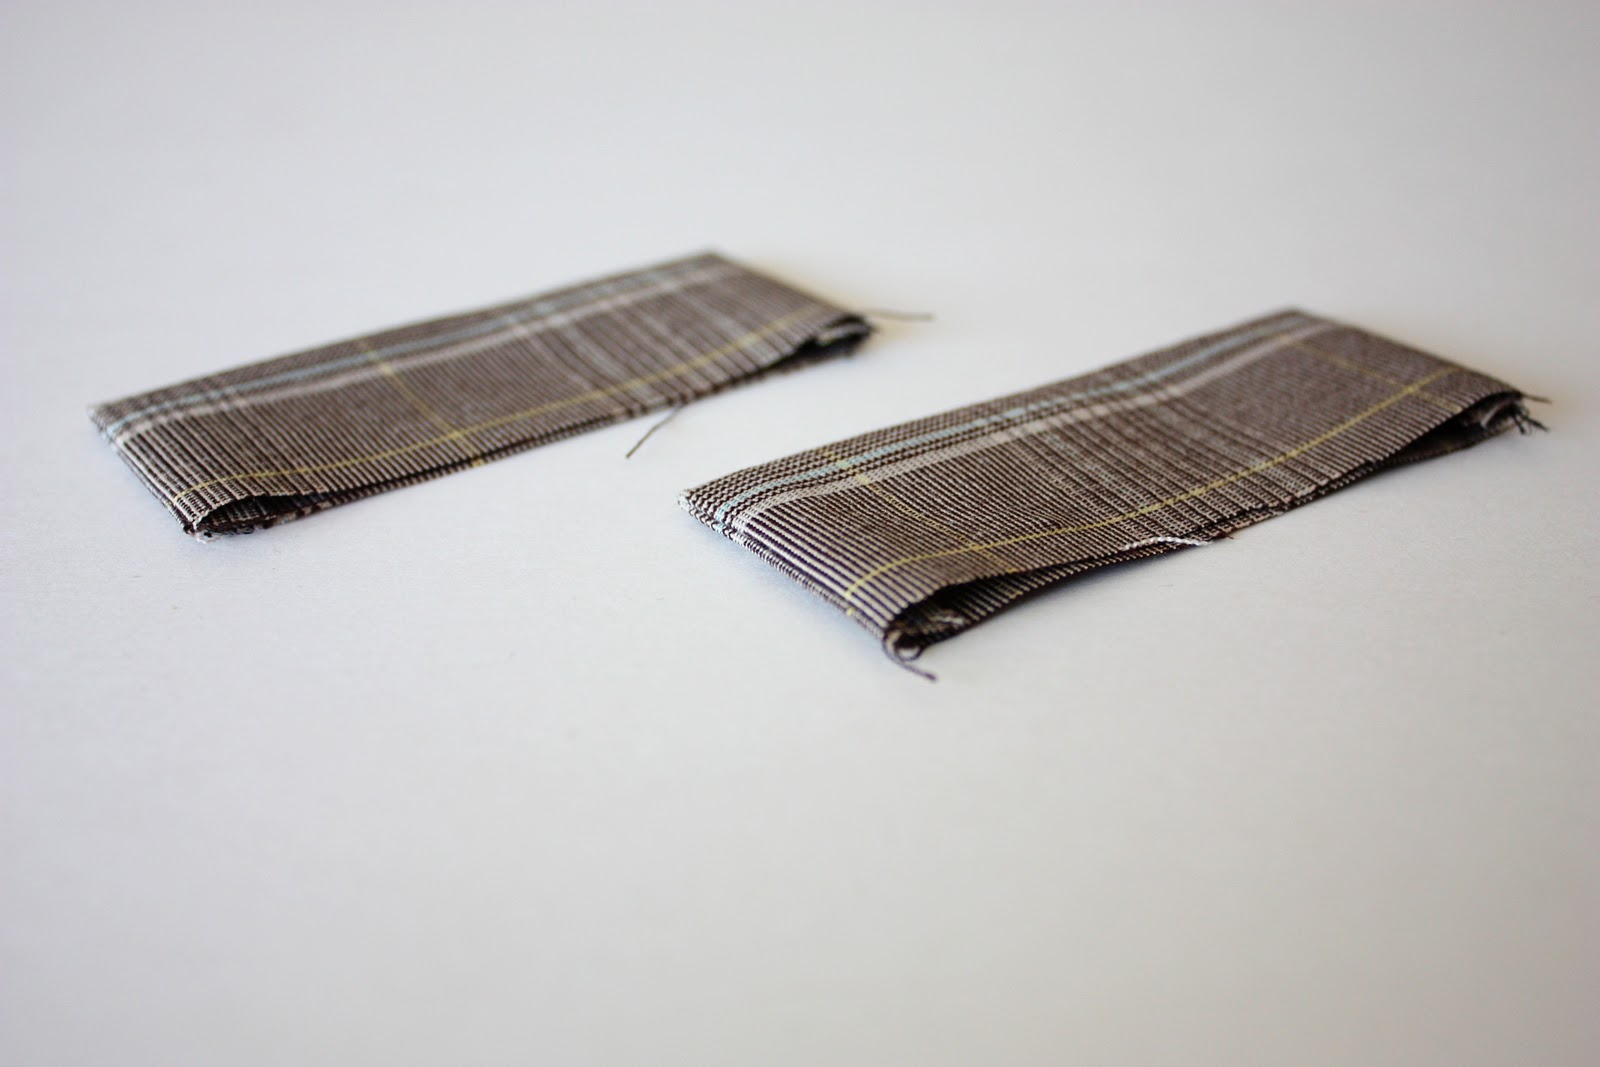
Then turn right side out, poke out corners and iron flat.
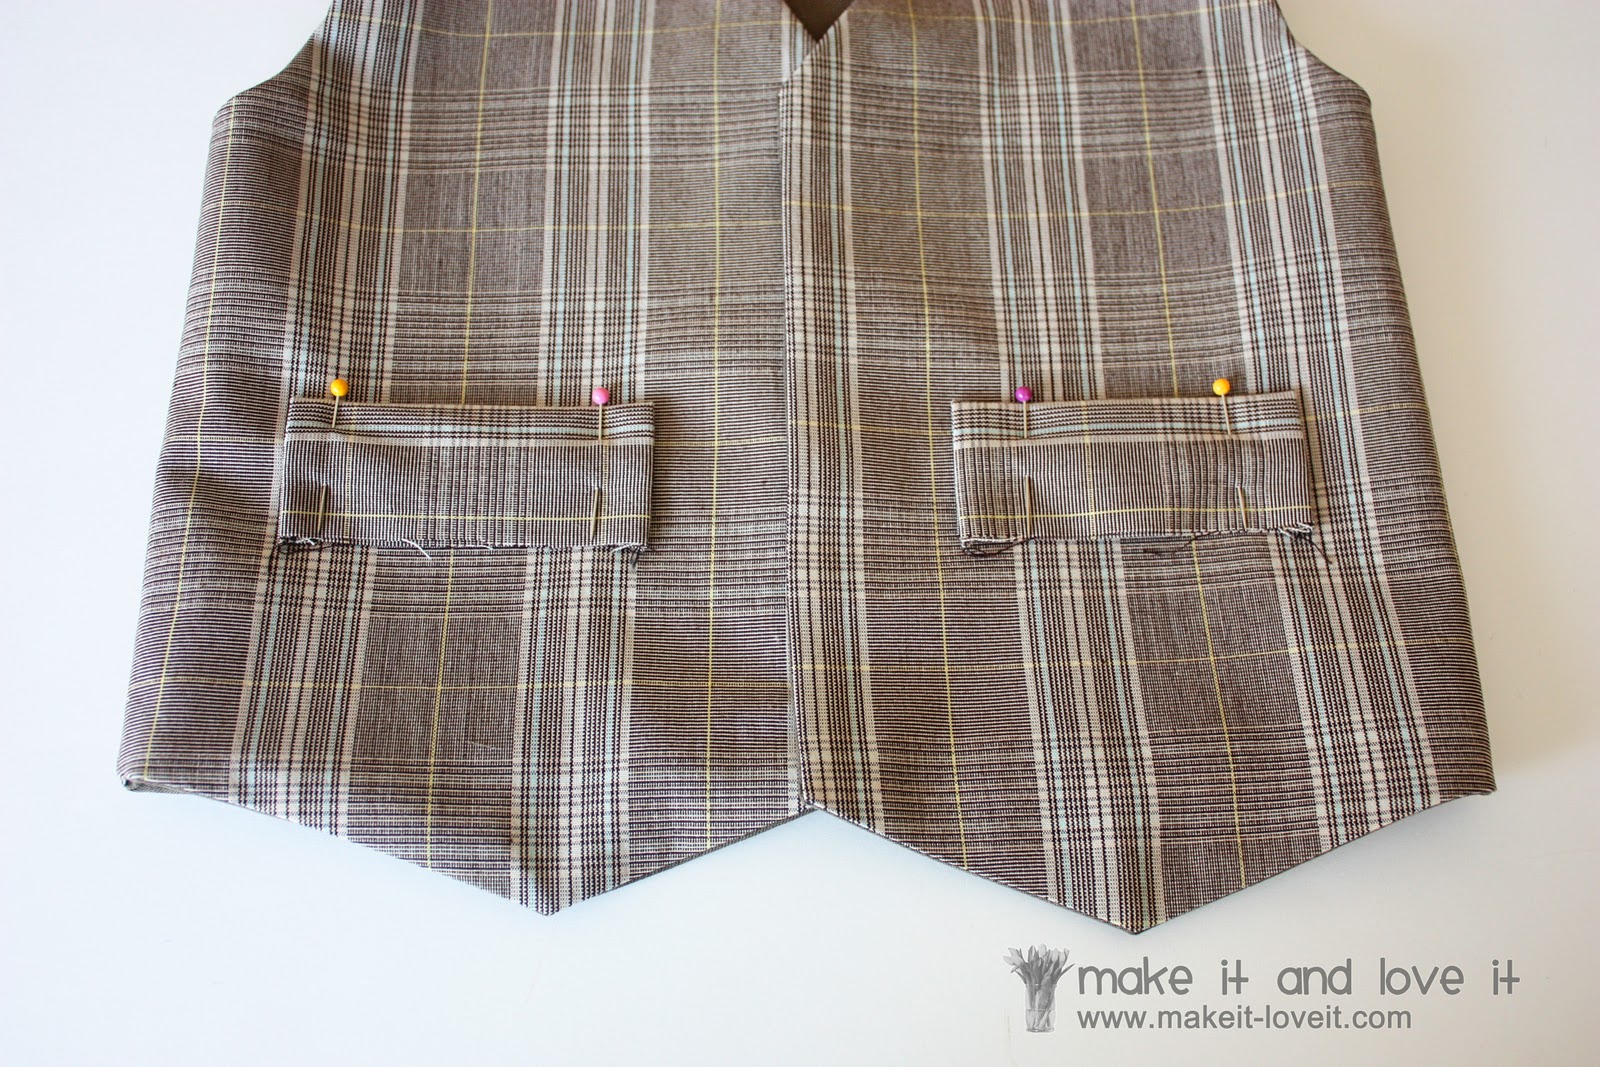
Then place the flaps along the front of the vest with the raw edges facing down. Pin in place.
Sew a stitch an 1/8 of an inch from the bottom raw edge……..
Then fold the flap over and sew 2 seams near the top, to keep the flap folded over in place.
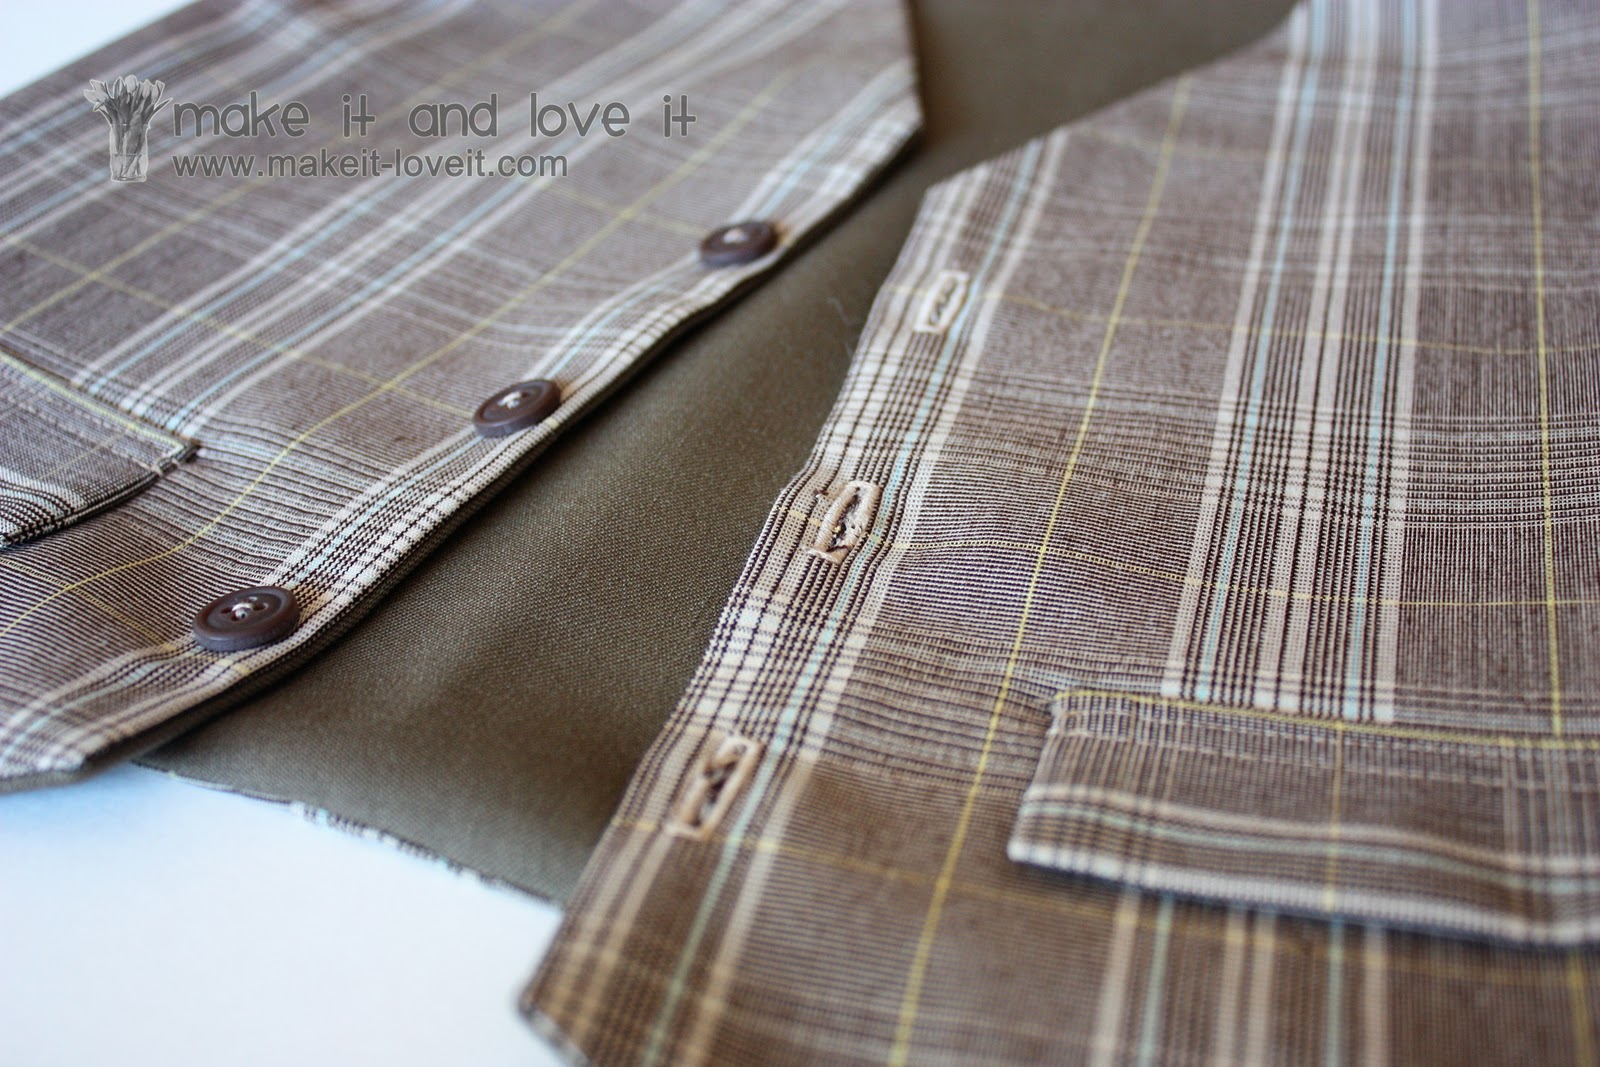
Then add your button holes and buttons.
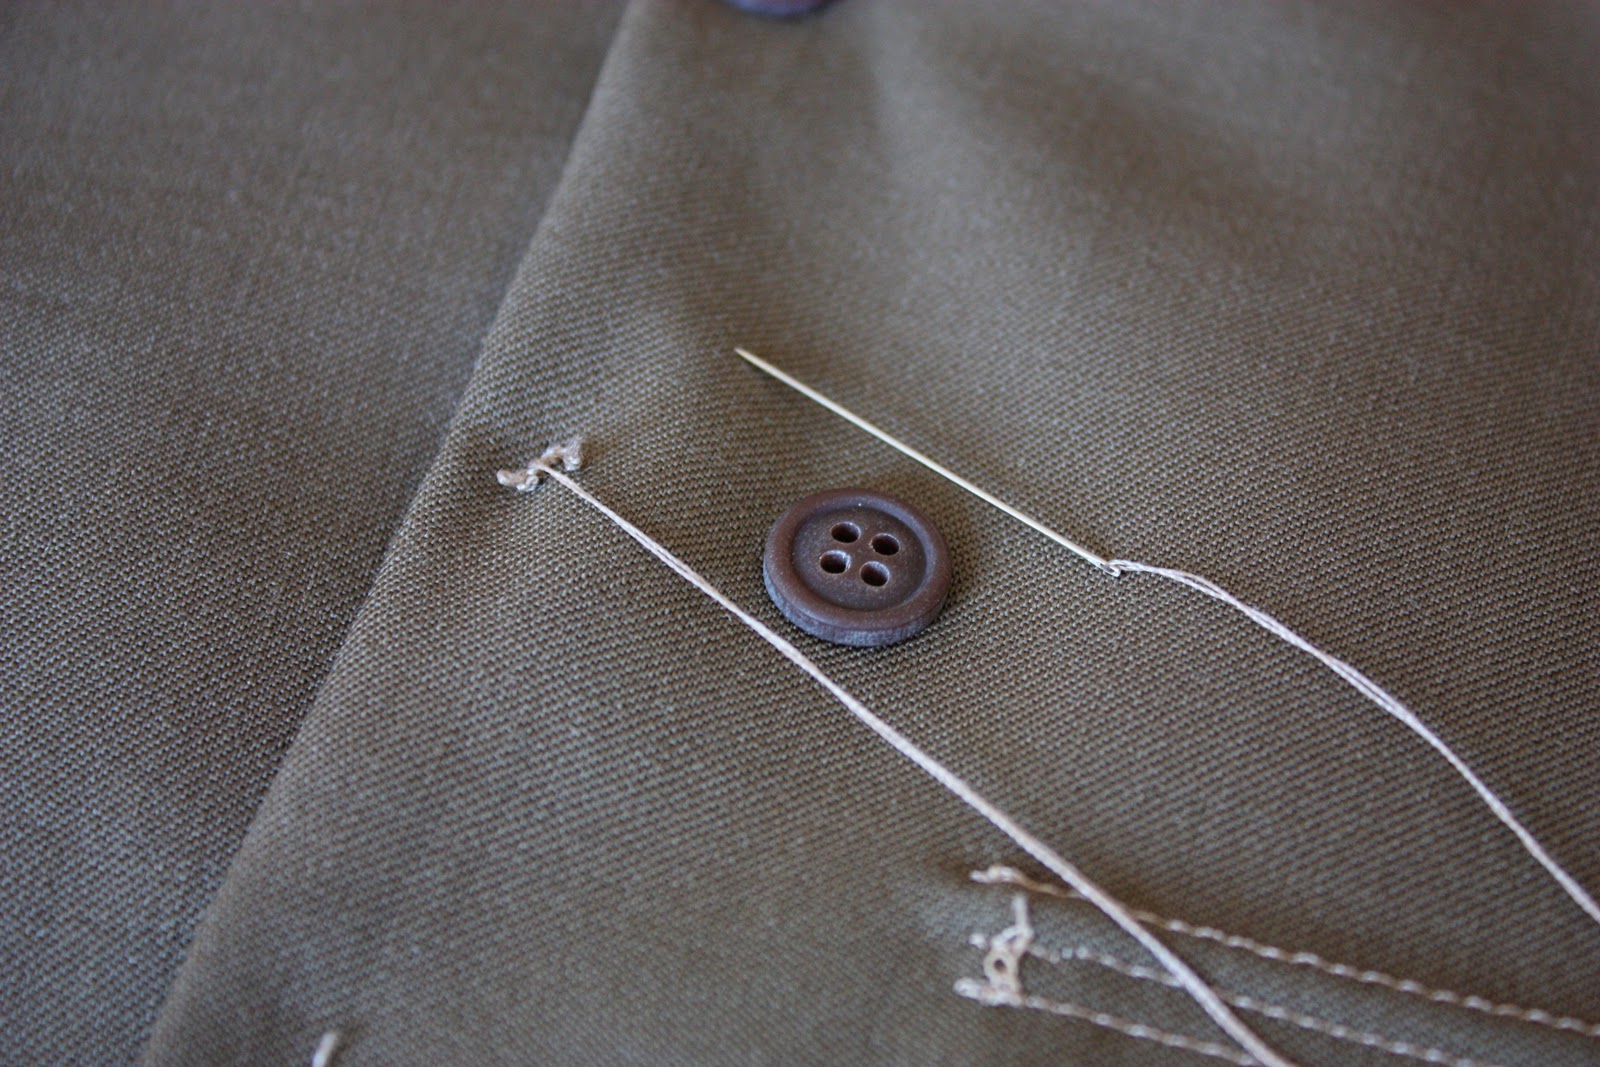
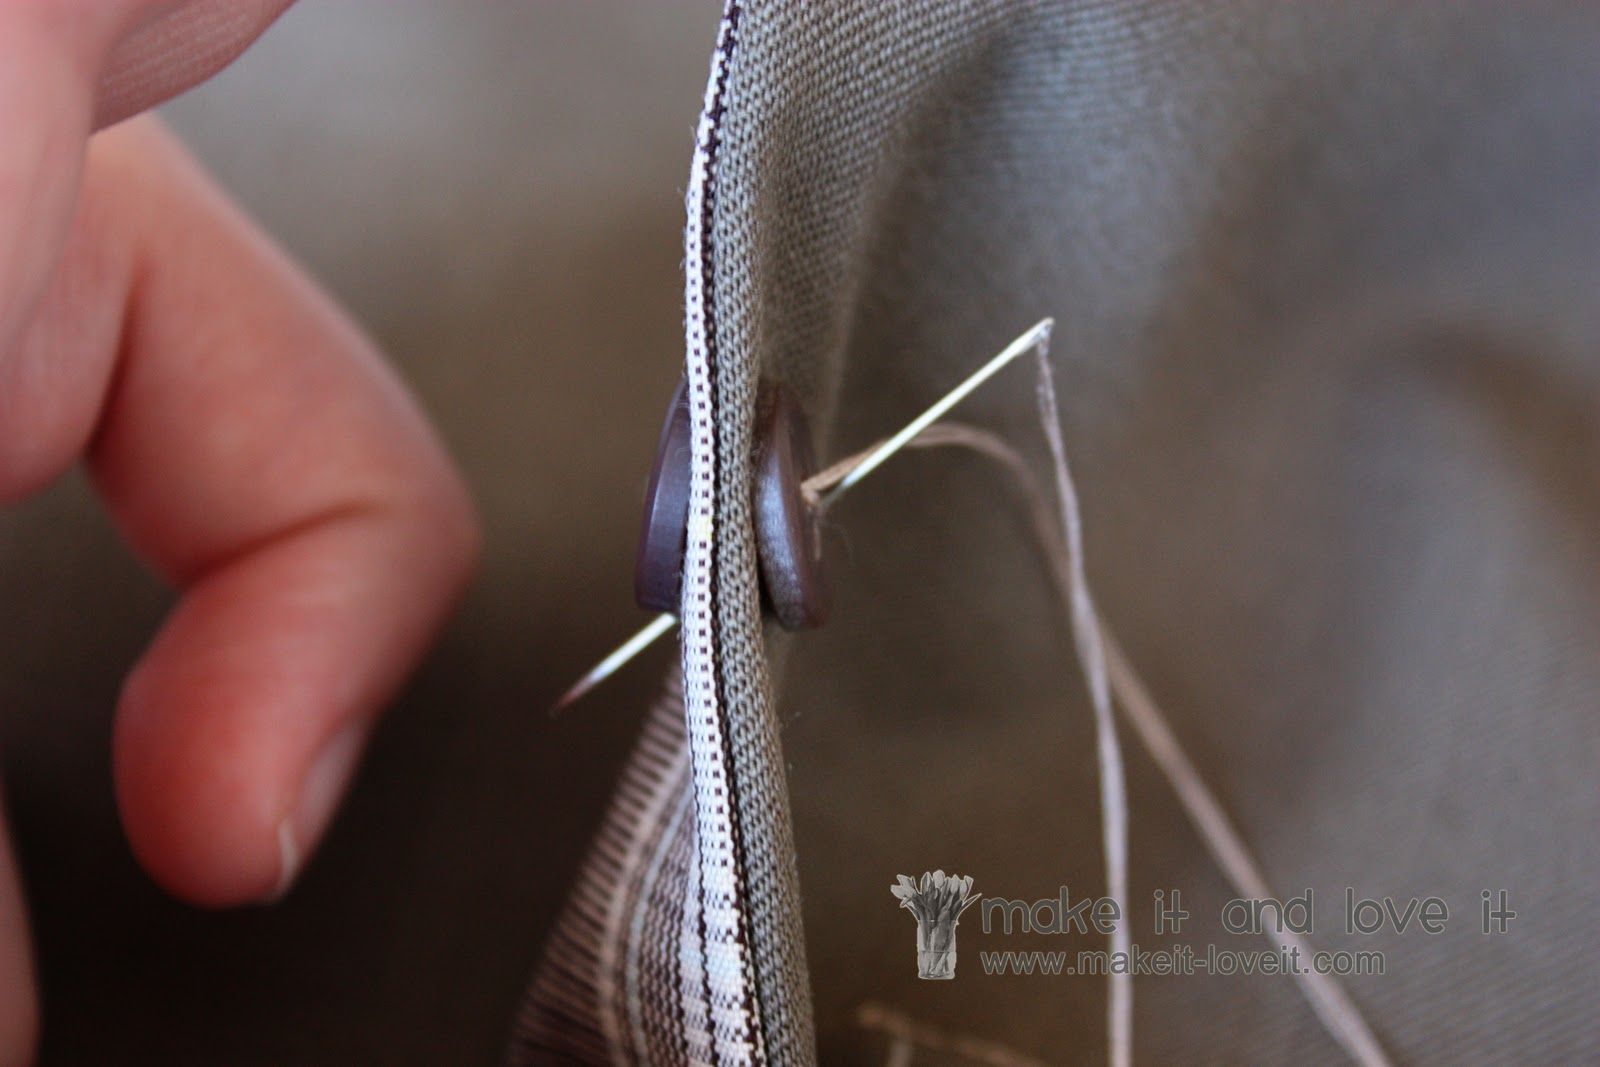
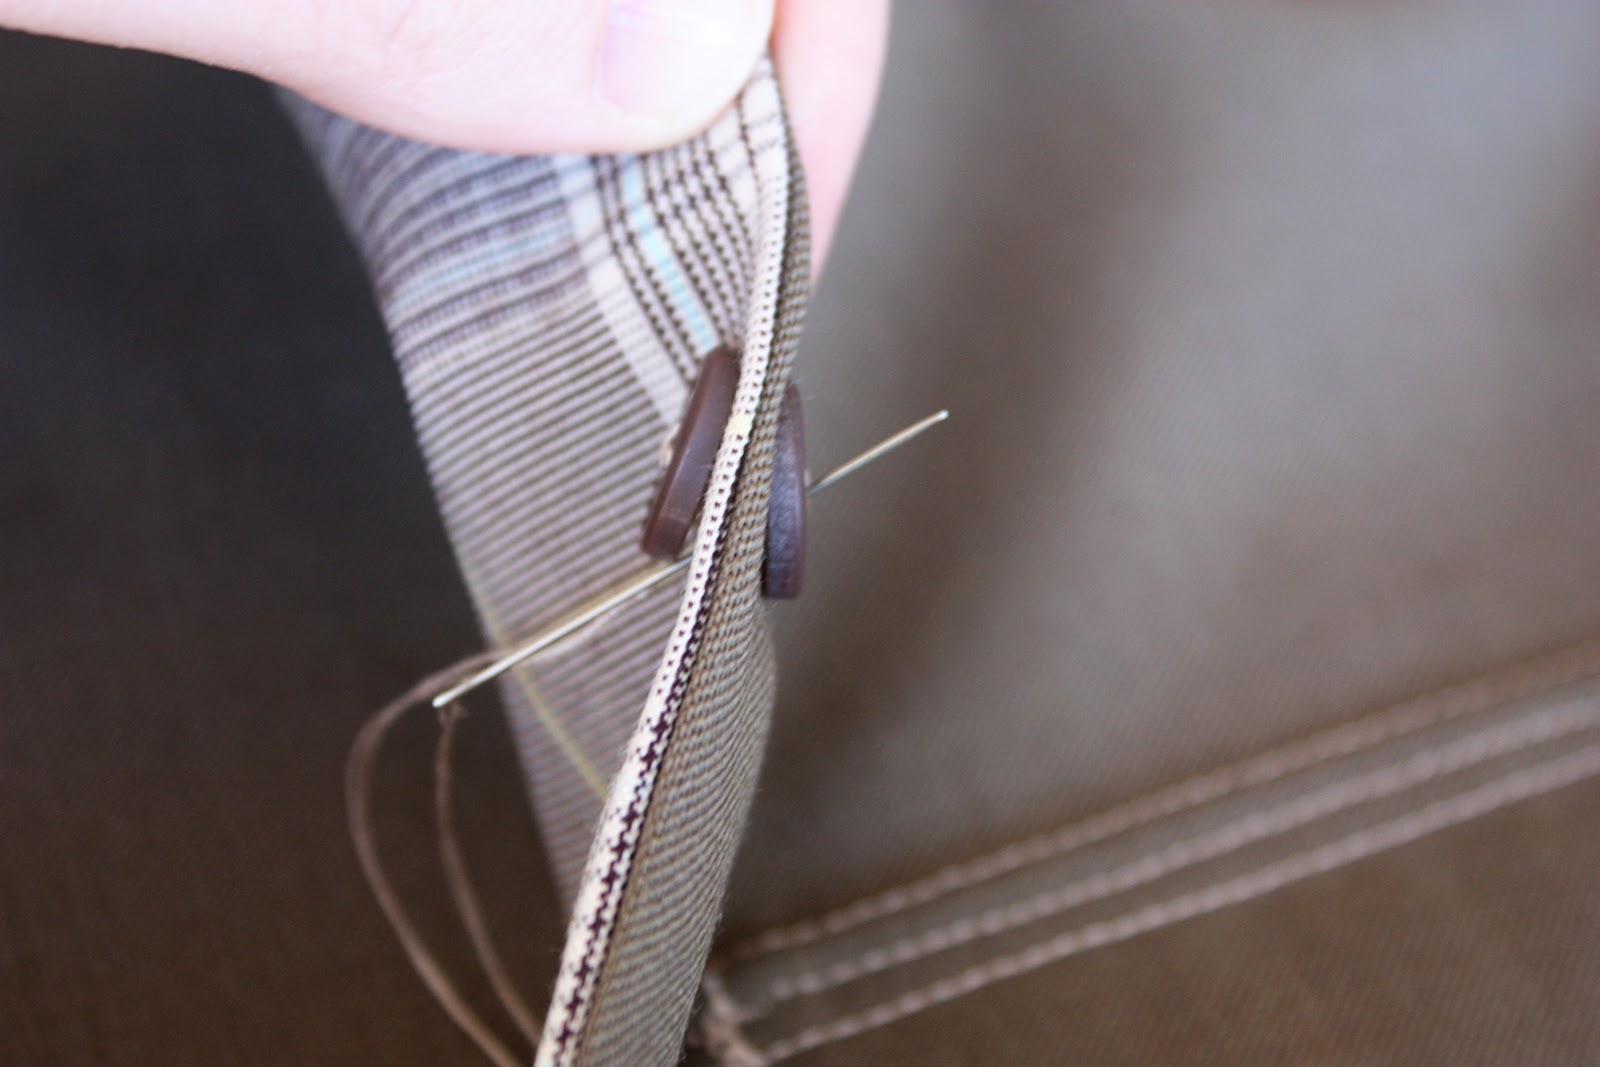
If you’re making this vest reversible…….you’ll need buttons along the other side too. There may be another way to get buttons along each side but here’s what I did. I put a knot in the end of my thread, began the needle at the knot that’s there from the button that’s on the other side, then slid my button on.
I stitched through the button like normal but angled the needle as it was coming out the other side, to avoid the button that was on the other side.
Then I pushed the needle back through, trying to keep the thread hidden behind the button on that other side, and came out one of the button holes again. I did this a few times until the button was secure.
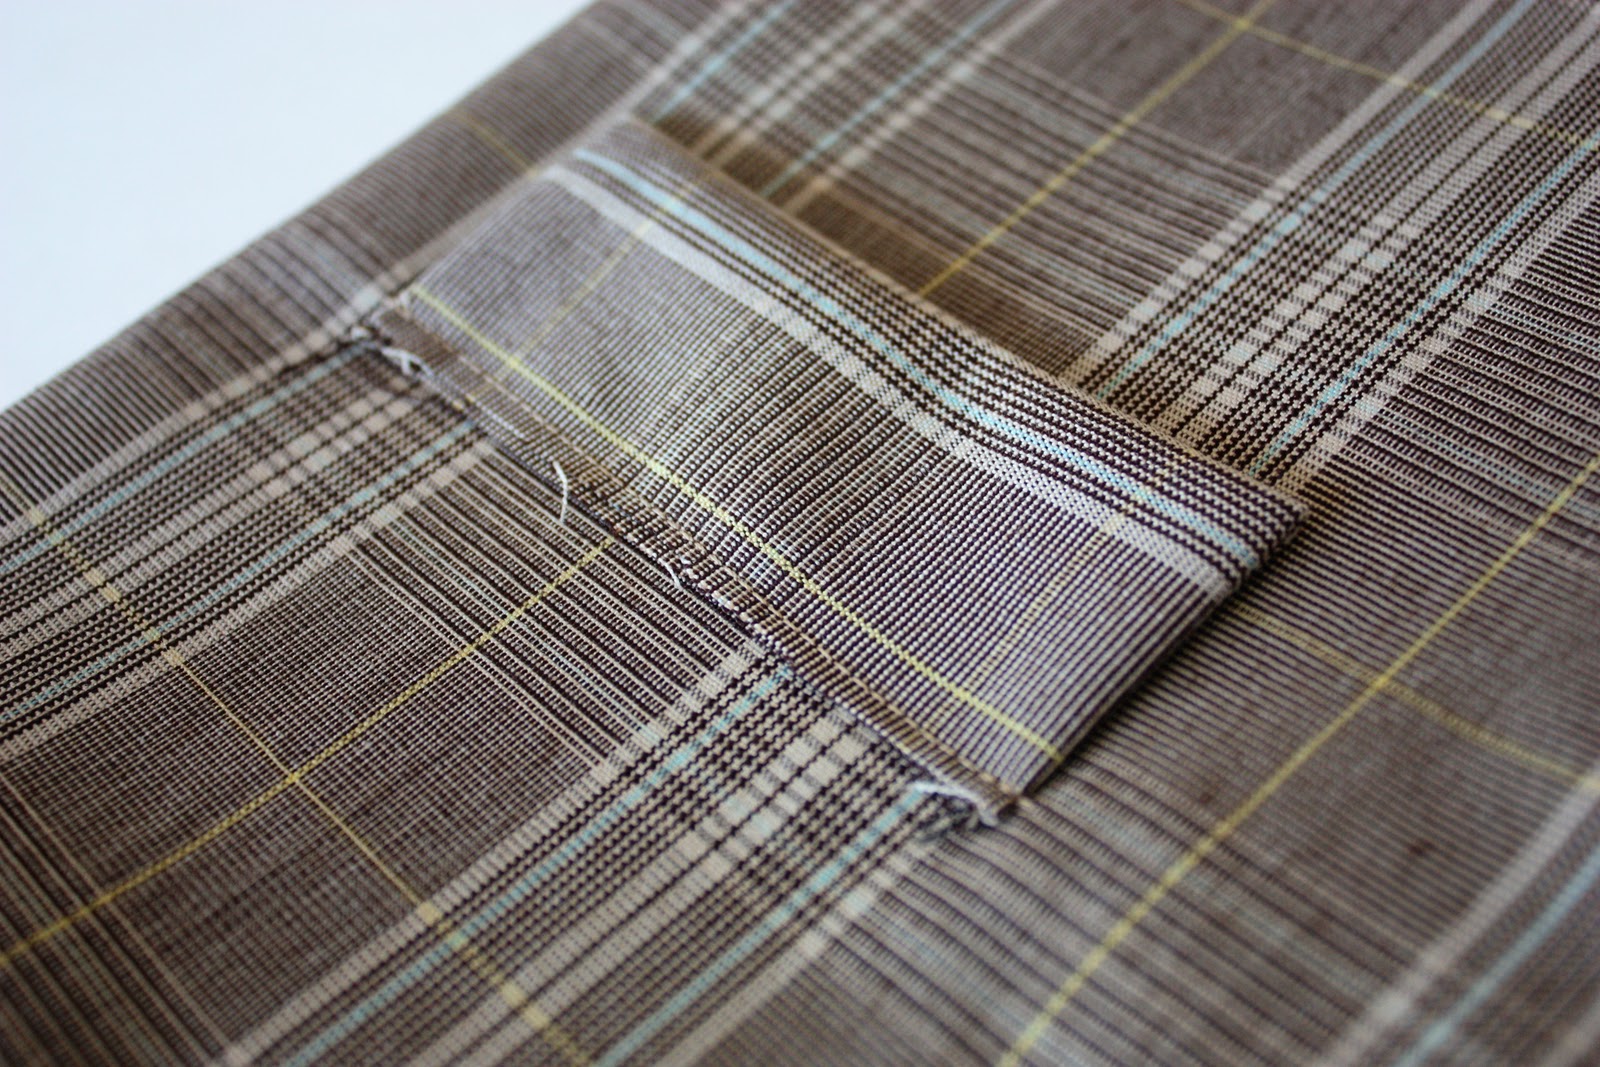
Then, my next predicament was attaching the flaps on this side.
I could have just skipped them but wanted to keep the vest uniform.
**But if you want them (and don’t want to hand sew…..) attach them to your vest pieces before sewing them together.**
But for me, I made the flaps the same size and the same way, but zig-zagged the top raw edges. Then I folded over the top edge and made the 2 stitches along the top of the flap to make them look like the flaps on the other side. Then I just hand stitched them to the vest, being careful not to go through all the way to the other side.
(If you sew the flaps to the vest, then you’ll sew through the original flaps from the other side. Make sense?)
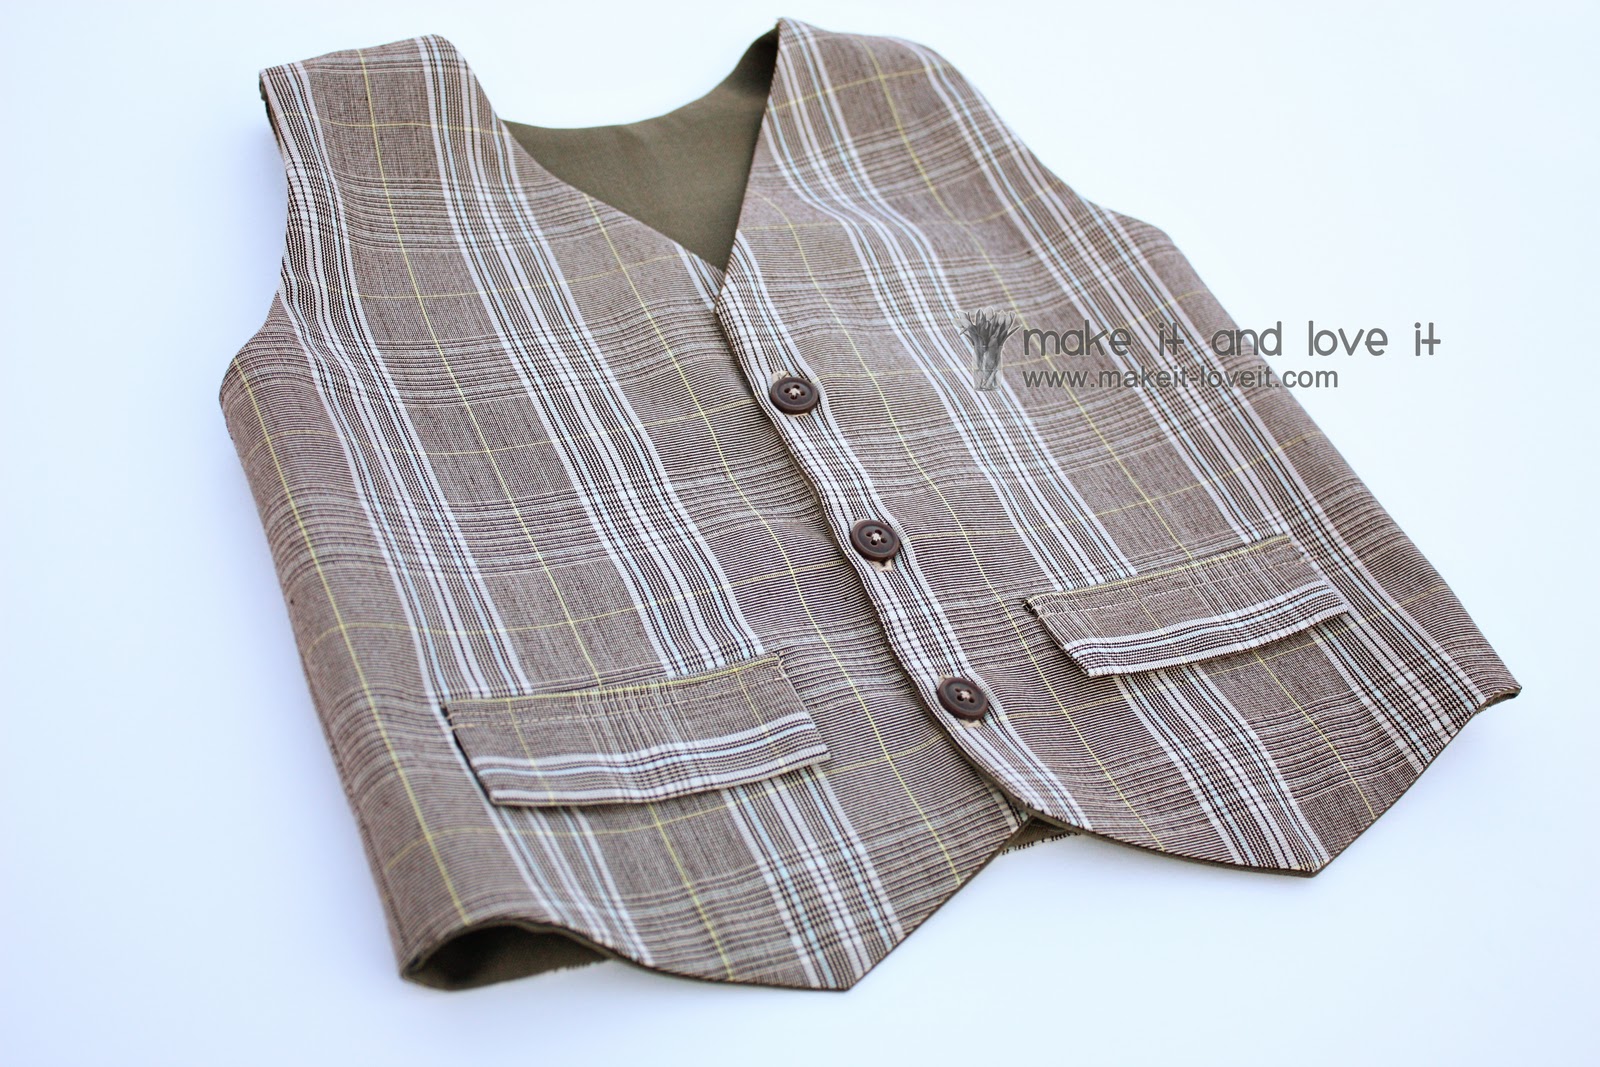
And that is it.
Your little vest is complete.
And can be worn on this side……..
Or the other……..
Something special for the little fellas.