Home » DIY Tutorials » DIY Sewing » Sewing: Clothing » Baby Clothing » Re-Purposing: T-shirt into Ruffly Dress
Re-Purposing: T-shirt into Ruffly Dress
January 24, 2011 - By Ashley Johnston 63 Comments
.
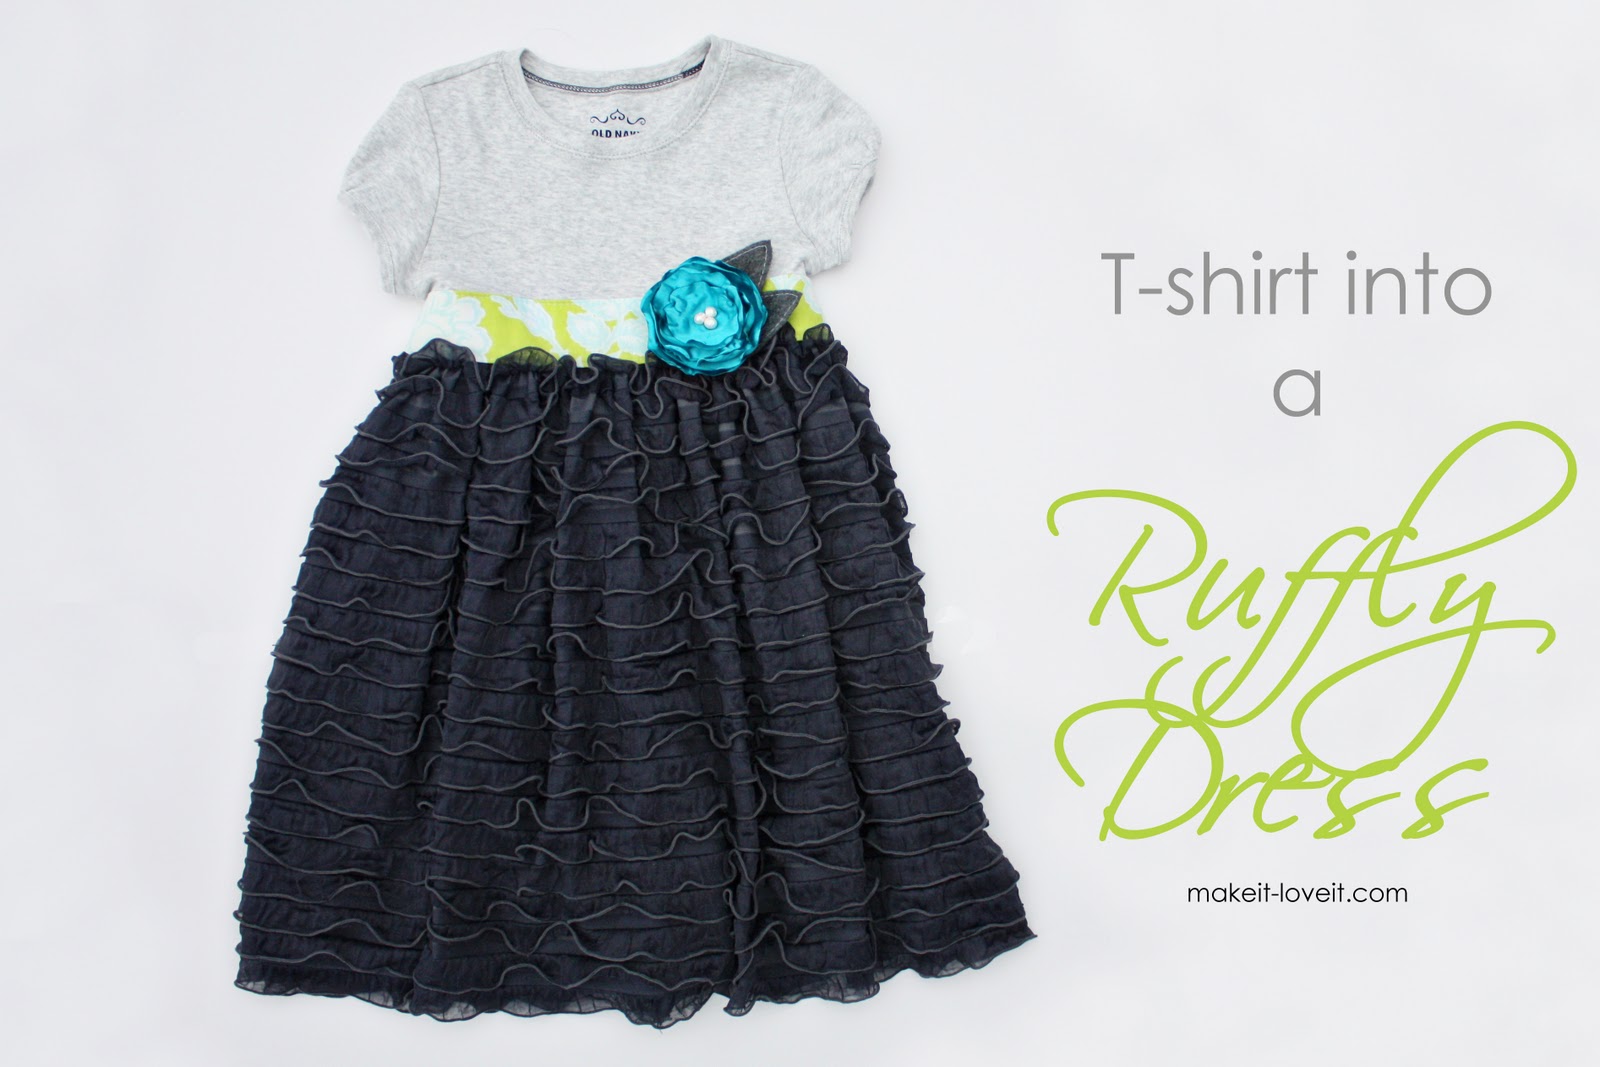
Oooh, oooh, oooh……ruffles, ruffles, and more ruffles.
I received several different colors of ruffle fabric a few weeks ago (from the
Ruffle Fabric shop, found
here). I ripped open that box and colorful ruffles came pouring out. I could hardly stand it. I was in love. Ahhh….
And for my first project, and to keep things nice and simple, I turned
a T-shirt into a ruffly dress…….based off my t-shirt into dress tutorial
here.
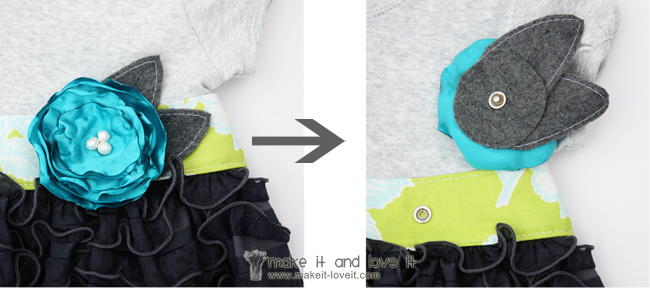
And to keep that satin flower nice and full……and from getting damaged in the wash……
……….it’s removable.
And don’t forget that big floppy bow, tied up in the back.
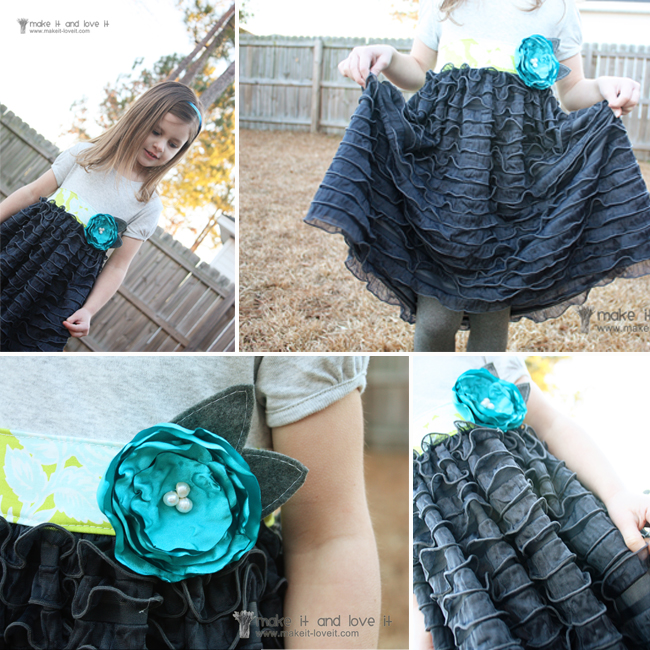
Such a fun and full little ruffly dress. And all those ruffles came just like that……..pre-ruffled. Yay.
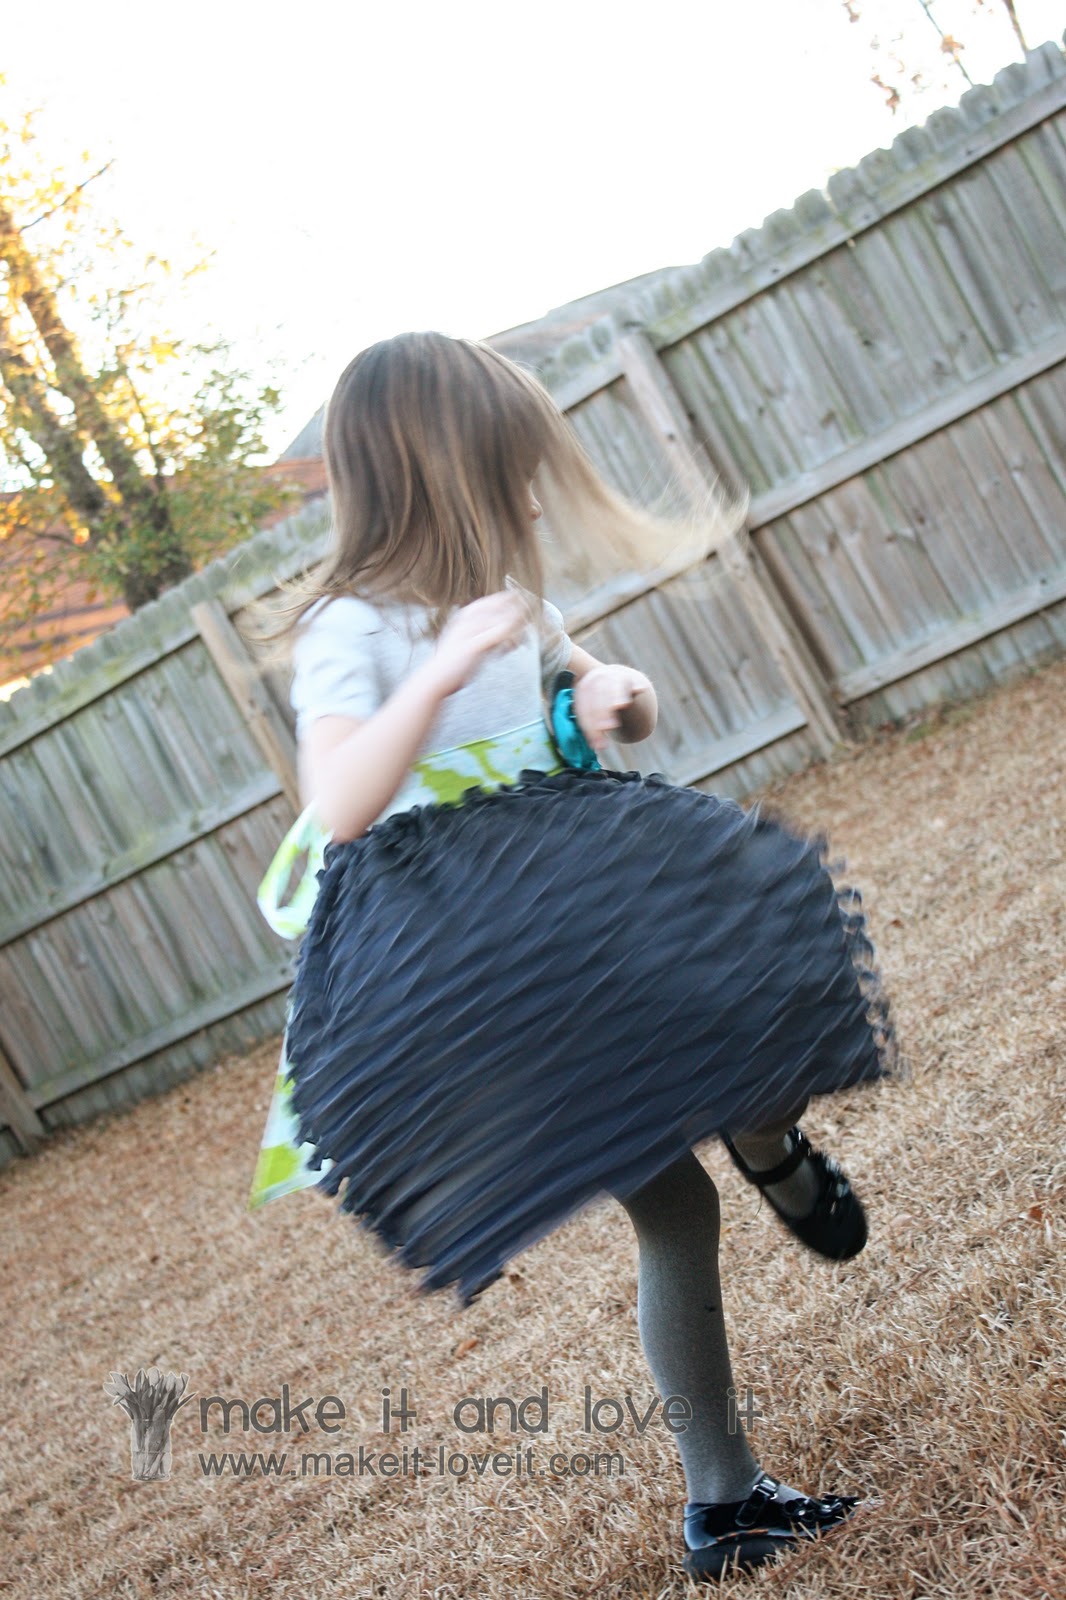
This girl wants everything to spin. Check. The dress does that too…
Sure to look sweet on any sized girl……..even you!.
Who doesn’t love ruffles?
What a great discovery…..this great
Ruffle Fabric shop.
(You should see all the colors and ruffle sizes they have over there.) Mmmmm. Love the possibilities.
I’ll be making more with my ruffles from the Ruffle Fabric Shop. So keep an eye out.
Would you like to make your own Ruffly Dress?
So the key to this project is, having your own ruffly fabric. (found
here) These ruffles are primarily polyester and are light and airy. Not a heavy fabric with all those ruffles at all. And
you don’t have to hem up the bottom at all…….once you cut between the rows of ruffles, your fabric is set and won’t fray. Love that.
And see? Each row is pre-ruffled, the perfect amount…
**Keep in mind, this fabric has a good amount of stretch to it. So while sewing with it, it acts a lot like knit. So if it’s pulling and stretching while sewing, increase your stitch length to help you guide the fabric under your needle a little easier. Using a zig-zag stitch can be very helpful too.
The rest of the tutorial is
very similar to this one, which I’ll be referencing often. So be sure to check that one out too!
First, I cut the little knit tee off where I thought I’d like the little empire waist line to hit my daughter. (I used a pin to mark the shirt while she had it on, and then added another 3/4 of an inch for a seam allowance.)
Then I decided how long I’d like the skirt portion on her. I cut a length of 18 inches and left the entire width of the fabric (50 inches) so that I could gather it in to give the skirt more fullness.
I folded my 18 inch long piece in half width wise, and placed each selvage edge together, trying my best to match up each row of ruffles.
Then I serged along that edge (but you can sew and then zig-zag), to create a tube of fabric. This seam will be placed along the back of the skirt.
Then I made a basting stitch along the top front section of the skirt and the top back section of the skirt, both about 1/2 inch from the top. (Need help with gathering? Click
here for help.)
(And if you look closely at the image below, there is a little bit of a strip of fabric above that top row of ruffle. This is where I made my basting stitch and also where I’ll be sewing the skirt section to the shirt.)
Then I found the center and sides of the shirt bottom and the skirt top…..and placed pins.
Next, I turned the skirt section inside out and placed the shirt upside down, down into the skirt section. Then I matched up the edges that will be sewn together, having both pieces of fabric together with right sides together.
Then I pulled on my basting stitches at the sides and gathered up the fabric to match the width of the shirt. Pin the skirt in place.
Then serge (or zig-zag) that raw edge. Be sure to keep checking that your ruffles are pointed down towards the bottom of the dress, and aren’t getting in the way as you’re sewing. You only want to include that top strip of fabric in this seam.
If your seam stretches and ruffles a bit after sewing……it’s okay. After you turn it right side out and add the belt……it will all be hidden.
Then turn it right side out. Perfectly attached.
Then just like in the tutorial above, you’ll make a belt to go around the dress.
But before attaching the belt, I made a flower (like the ones
here). But I added pearls to the center instead, with a needle and thread. I also held the flame under the satin more, to really ruffle up each petal. Just be careful not to burn yourself or melt through the fabric. Or blacken it. Play around with it to see what works for you.
And then I also cut out some felt leaves. And then stitched around the outer edge of each leaf.
Then I hot glued each leaf to the back of the flower.
And then I cut out a felt circle and attached a snap to it.
Then hot glued the circle with the snap, right to the back of the leaves.
Then I positioned the belt where it needed to go, then marked with a pin where I thought the flower should go, removed the belt, and hammered the snap into the belt only. Then I layed the belt back down, pinned it in place……..
……..and then sewed the belt in place, just like the dress tutorial referenced above. (Along the top and bottom of the belt and at each side of the dress.) Just be sure to keep your ruffles down as you’re sewing, so they down get mangled and twisted under your seam.
And that was it.
All ready for it’s ruffly debut.