Today’s contributor is Kim from The Sew Spot. All posts written by Kim for Make It and Love It can be found HERE.
. . . . .
Hi everyone, it’s Kim from The Sew Spot!
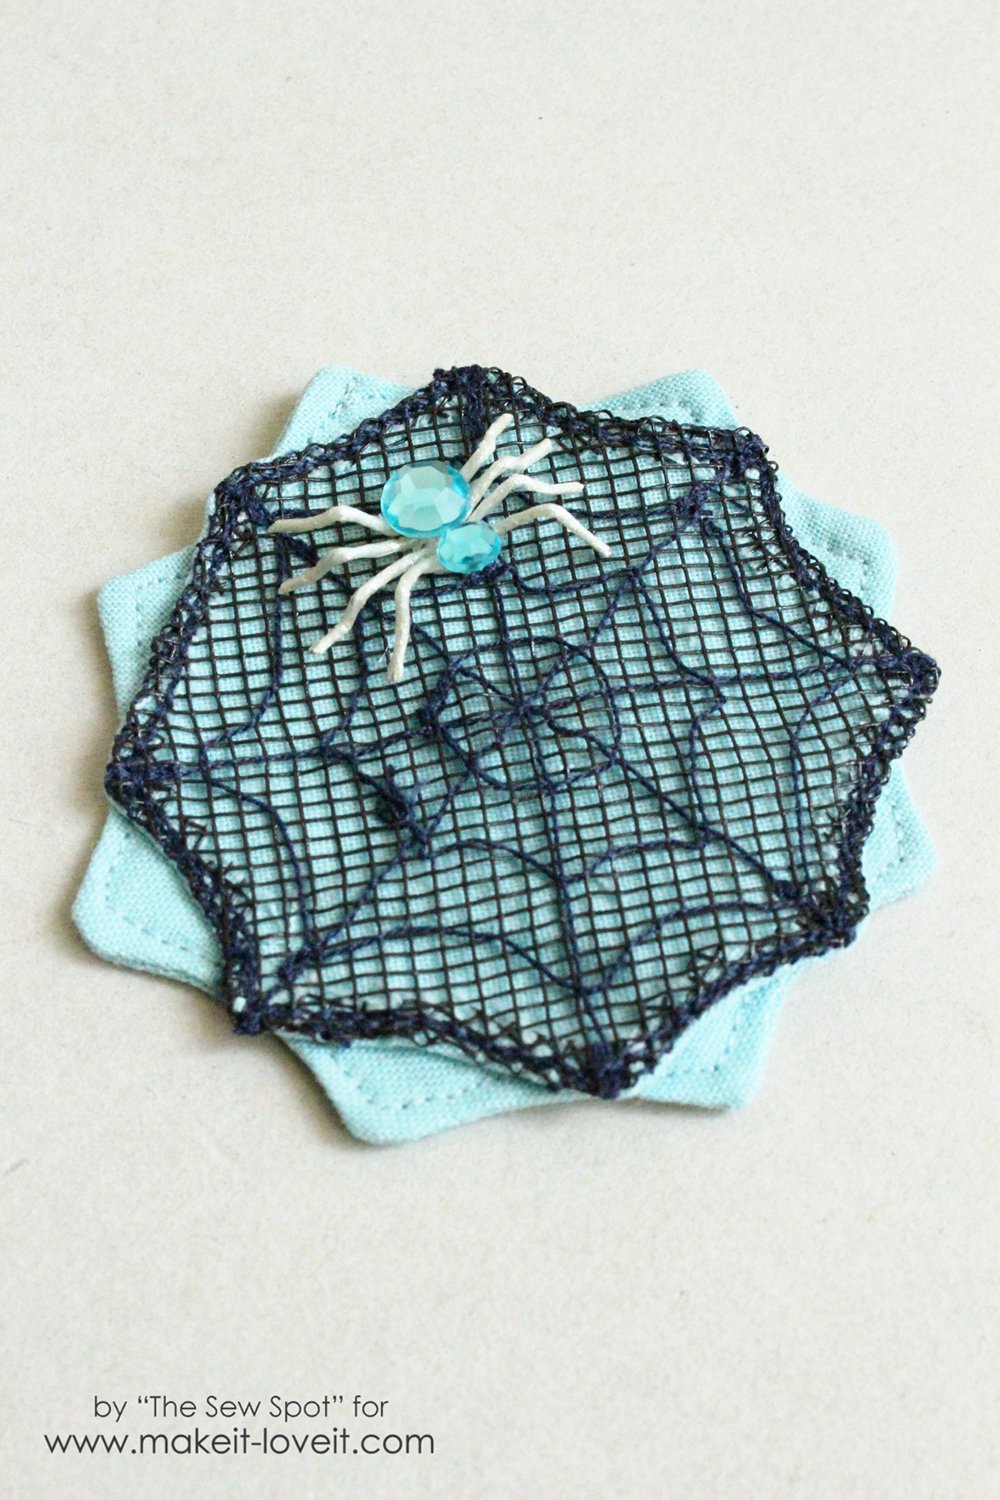
I’m sharing this spider web hair clip today, that can be worn on the days you aren’t dressing up in a costume but still want to show some Halloween spirit. You can make a few for the kids, friends, or for yourself. I’ll show you how to make one, including a few variations that may suit your individual sewing style. You don’t need very much fabric either, so go through that scrap pile and find some fabric you like to make this project!
You can mix and match fabric to make these dainty spider web hair clips in your favorite color, your child’s favorite color, or to go with a costume.
I like how this orange and black one turned out in Halloween colors.
The spiders can be made with your own personal touch, also. If you’d like to see how to make these rhinestone spiders, visit me at The Sew Spot for the tutorial.
Are you ready to make your own spider web hair clip?
Here are the Supplies:
If you’d like a review before getting started, you can see Sewing Terms 101.
Begin by making 2 circle templates. I traced a playdough lid and a children’s cup, that was slightly larger than the playdough lid, onto cardstock. Then cut both circles out. The diameter of the smaller circle is 2 3/4″, and the diameter of the slightly larger circle is 3 1/4″. You can make them however big or small you desire.
Pin the template onto the fabric and cut 1 small circle, and 2 larger circle.
Pin the smaller circle template onto the screen and cut 1 circle. This screen is from a home improvement store. We re-screened a sliding door and had some screen leftover so I decided to use it. If you don’t have any around the house and don’t want to buy the whole roll from the home Improvement store, you can find the material through an online fabric store. I actually saw screen material at a local fabric store in black, grey, and orange.
Material Variation: If you’re wondering if another type of mesh material besides the screen will work, I’d say give it a try, it probably will work. I wanted to see if I could make a spider web hair clip using red tulle, but I thought it would be too flimsy to sew. I was a little surprised that it was not as difficult to sew as I thought it was going to be. The tulle circle did shrink down with the thread tension, but I like the smaller size for myself.
Now, you should have the 4 circles cut out.
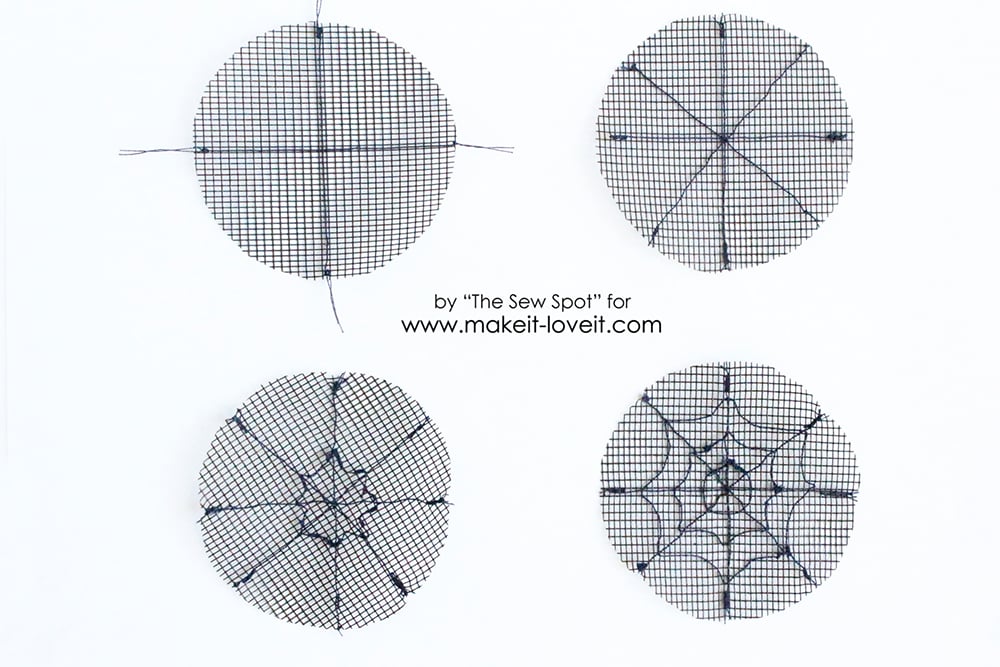
Sew a spider web onto the screen. Use a thread color that you can still see against the fabric you chose for the small circle. Anyone have metallic thread? That might look cool. Start by sewing a straight stitch down and then another line across. Then sew two diagonal lines in between. Sew the circular web shapes until you like how the spider web looks. It may help to decrease the stitch length 3 or 4 notches to sew the curves.
Pin the spider web to the fabric of the same size. The right side of the spiderweb should face the wrong side of the fabric.
Sew one more web shape circle around the outside. This will connect the screen to the fabric. Be sure to leave one section open.
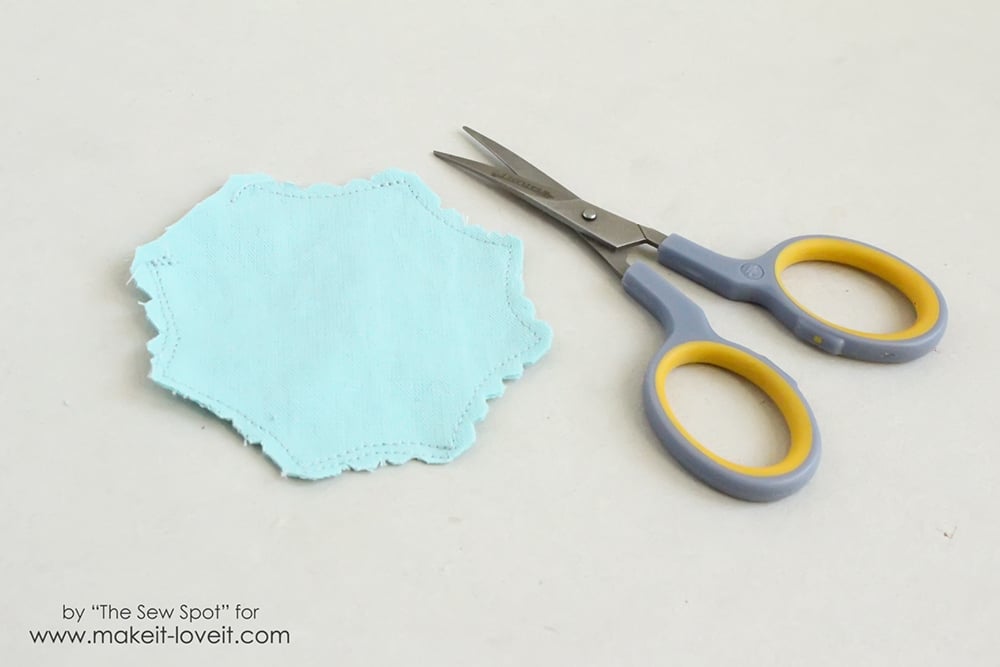
Trim around the spider web by following the outside edge that was just sewn. You can clip the corners and make “v” notches in the curved areas. (See this post for more details on Clipping Corners and Curves.)
Turn the fabric through the space that was left open.
After it is turned, push the corners out. I used one of my favorite sewing tools, this lollipop stick, to help form the corners into a point.
Fold the opening in and pin. Top stitch along the edge. I went around 2 times.
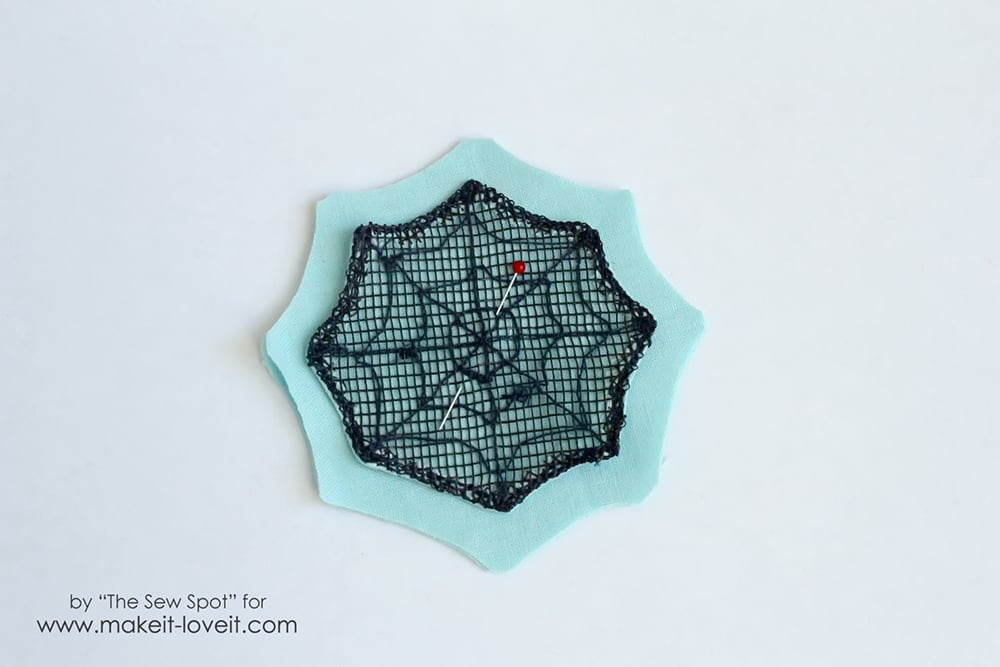
Pin the spider web onto the 2, slightly larger, circle pieces of fabric.
Use the spider web as a guide and clip the two larger circles in a similar shape leaving space to sew.
Put the spider web to the side as you complete the back portion. Pin the two pieces of fabric, that were just cut, right sides together. Remember to mark a spot (pink and gold pins) to leave open for turning.
Sew around the edge with 1/4″ seam allowance.
Clip the corners and make “v” clips in the curves before turning.
Turn the fabric right side out, push the corners to a point, fold the opening towards the inside, and pin.
Top stitch around the edge and press the seams.
Slight Variation: If you don’t want to topstitch, put a piece of hem tape or iron on adhesive in the opening and iron the opening closed. I didn’t topstitch the black and white one, because I couldn’t decide what color thread to use.
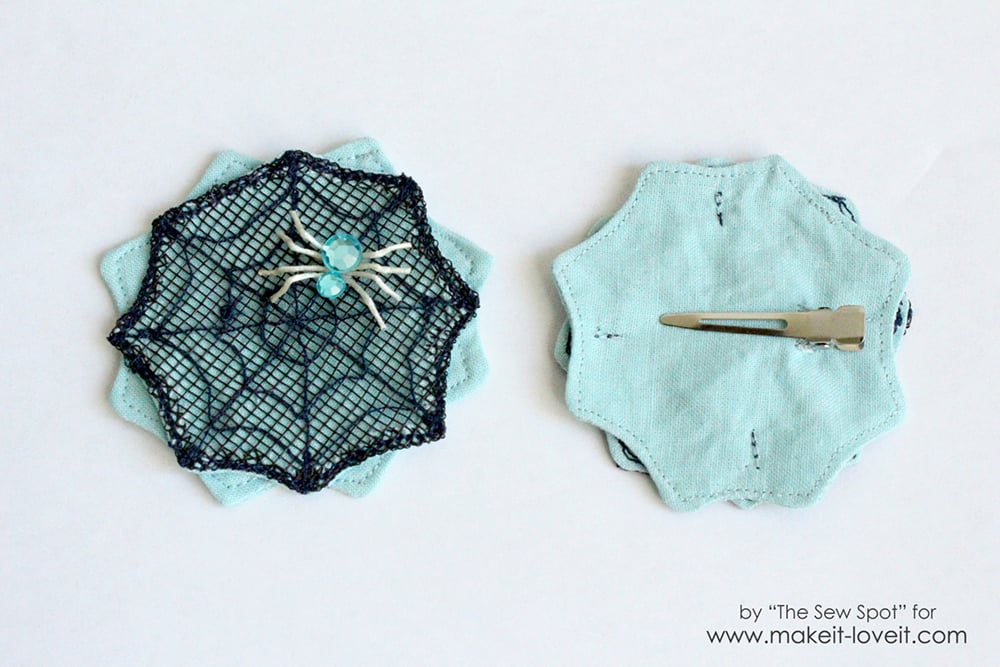
Sew a buttonhole on the back piece. It will go through both pieces of fabric that are sewn together. (See your sewing machine manual for specific buttonhole instructions.) This is where the alligator hair clip will slide in.
Another Variation: For the purple spider web hair clip, I used 1 layer of purple felt on the back. Felt is a quick option to use for the back, and you can just cut a slit on the back, instead of sewing the buttonhole, to put the alligator hair clip in. Also, I painted this screen with 2 coats of grey acrylic paint beforehand to give it a different look.
Now determine how you want the spider web to align on the back fabric piece. For the purple clip I liked how it looked directly aligned. For this one, I liked aligning it off center so it kind of looks like a flower. Pin and tack the two pieces together by straight stitching and backstitching a few times over the pinned areas.
Pick a spider and attach it with some transparent thread. I took the thread between the fabric layers, through the spider web, around the spider (between the rhinestones), back through the spider web, and tied it. You can go around the spider a few times to secure it.
Add the clip and it’s ready to wear.
Have you decided who to make one for?
If you’re ready to make the spider to go on top of your spider web hair clip, head over the The Sew Spot to see how.
Thank You!
-Kim

Hi, I’m Ashley—the DIY-enthusiast behind this crazy blog!