Want to join the Make It and Love It CREATIVE TEAM?? Tomorrow is the LAST DAY to sign up! Find out how you can share your project ideas right here, with readers from all over the world. More info HERE. -Ashley
. . . . .
My kids didn’t swim much last summer. I know, I know — summers are for swimming. But last summer I was either very pregnant or had a brand new baby. So, I was kinda lame and we didn’t go out much………so they aren’t great swimmers. Well, unless we are talking bathtub swimming — but I hear that doesn’t really count! ;)
Since moving to Oklahoma, I have realized that swimming is pretty much what kids do all summer to beat the intense heat here. So, I decided to put all 3 older kids in swimming lessons and get a head start on summer swimming. And they are having a BLAST!
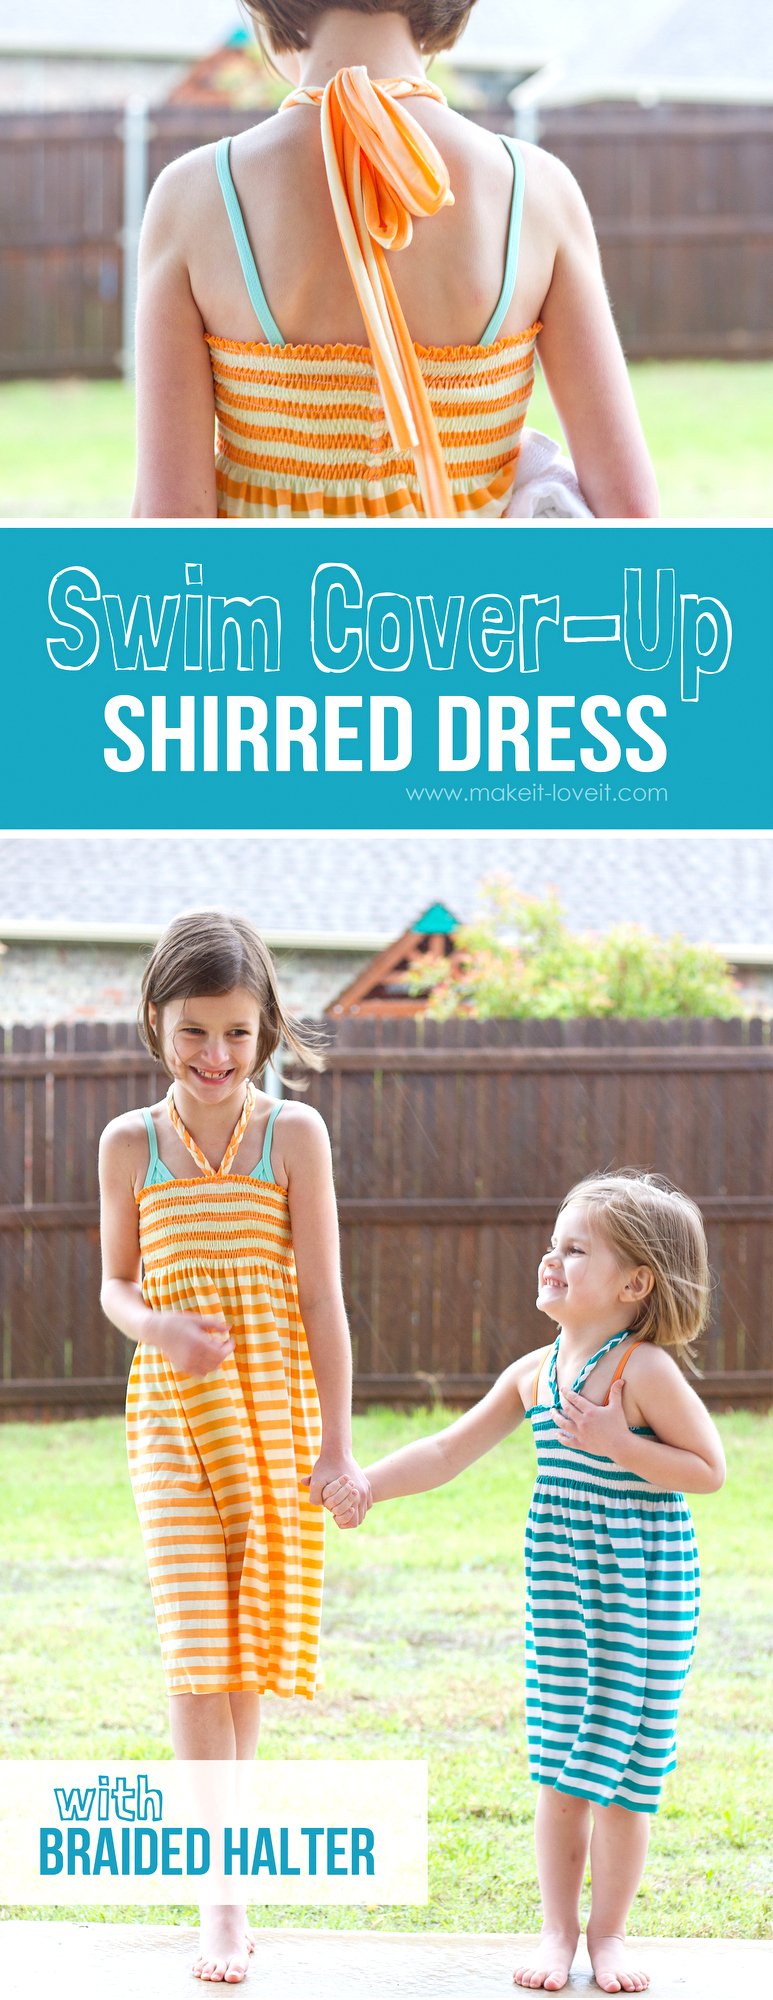
And since lessons will continue for about 4 more weeks and then I’m pretty sure we’ll be swimming all summer, I decided to whip up the girls a little Swim Cover-Up. You know, something to quickly throw on over your suit so you don’t feel super naked and then something that can be thrown on to come back home in. But this will also be handy for spending time at the lake or if we find time to take a trip to the ocean this summer. In fact, I’ll be making one for me too……so consider making one in all sizes!
If you’ve never shirred a thing in you’re life, it’s about time you started. This is such a cool technique that can turn fabric into lovely gathers in minutes. And because of that (and the fact that we’re using knit fabric that doesn’t fray), this whole dress comes together so QUICKLY.
And to keep the dress up and in place, I attached braided halter straps that tie behind the neck……and hang down the back.
This knit is nice and stretchy and pretty light……but gives Elli and Chloe a little coverage on our way to and from swimming lessons AND to whatever swimming holes we find this summer!
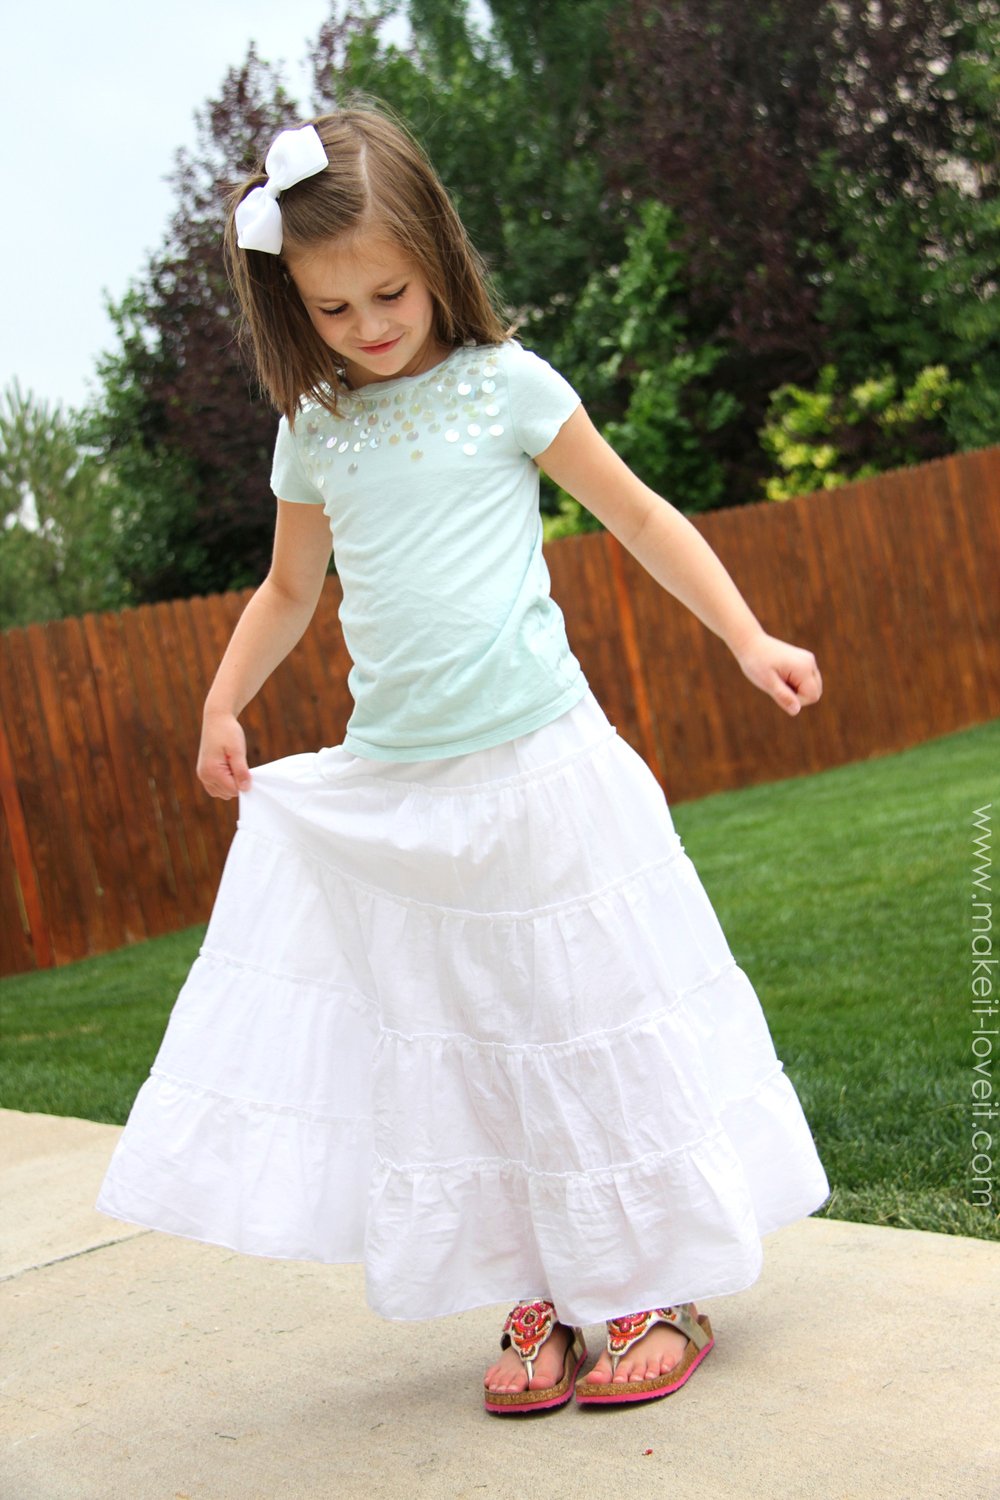
But really, you could use this idea as a nice and breezy summer dress as well. Or even make yours into a long summer maxi dress! Okay, that’s it….I’m making mine into a maxi. :)
I wasn’t even going to add the halter ties…..but am so glad I did. They stretch and aren’t too snug or restrictive around the neck — but give the right amount of security to the top of the dress, to keep it from slipping down.
We are so ready for summer (especially since it was raining in the background of these pictures…and was actually kinda chilly).
***Oh, and yes, I chopped Elli’s hair off too. She told me a few days ago, after a really warm day, that her hair is too hot on her neck. I asked her if she wanted me to cut it like Chloe’s….and she said yes! (I think it’s because Chloe’s turned out so cute and she has gotten so much attention. Ha!) So, we chopped her hair right off, just like we used to do when she was Chloe’s age.
Anyway, would you like to whip up a few Cover-Ups (or summer dresses) for you or some little girls you know??
Okay, let’s go…
SUPPLIES:
***Check out my Sewing Terms 101 post, for additional help.
***And be sure to check out the Shirring/Smocking tutorial if you’ve never used this technique.
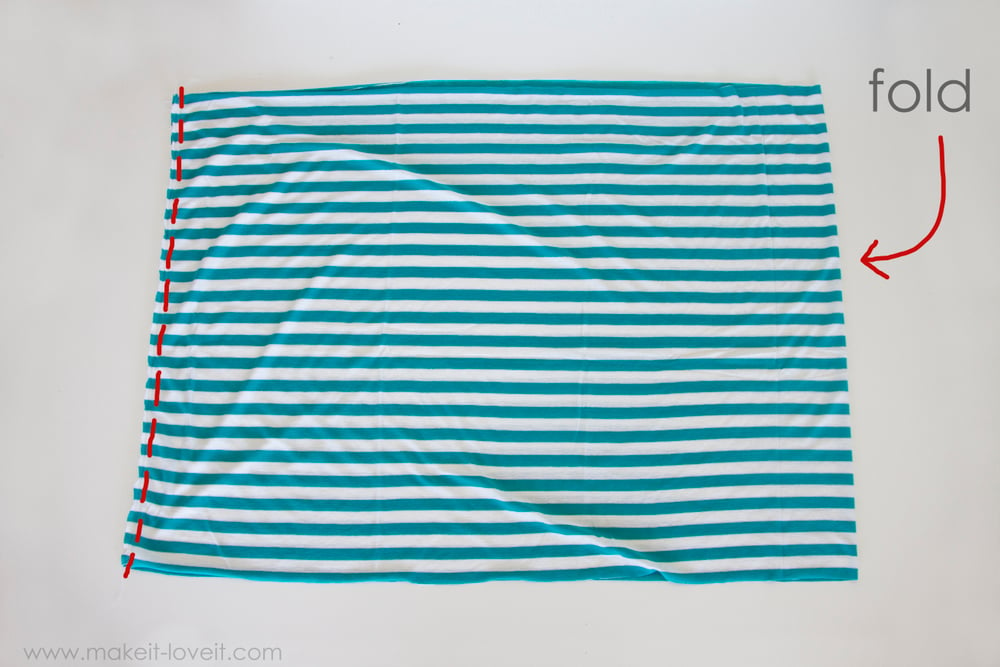
First of all, measure your subject (or yourself, if you’re making this for you) around the upper chest, level with the armpits. Multiply that number by 2 and that’s the width of your piece of fabric. Then measure from right at the armpit, down to the length you want and that’s the height of your piece of fabric.
***For example, my 4-year-old Chloe has an upper chest measures of 22 inches around and I wanted the dress to be 20 inches long. So I cut a piece of fabric that was 44 inches wide and 20 inches tall.
Now, fold your piece of fabric in half, width-wise, and right sides together. Sew the two ends together with a 1/2 inch seam allowance. And then sew another seam right next to the first, just for added stability.
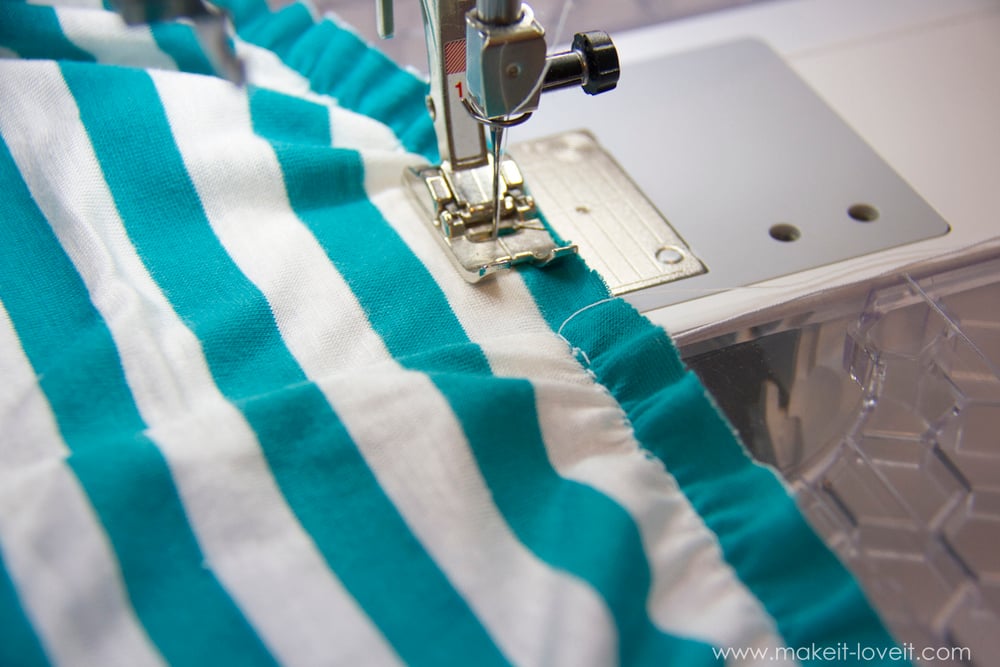
Now, if you have never shirred/smocked before…..check out my Shirring & Smocking tutorial and load up your bobbin with elastic thread. Then make sure your fabric is right side facing up and slide the top edge under your sewing machine. Starting at the side seam (that you sewed in the last step), back-stitch a few times and begin sewing 1/4 inch from the top edge of the dress.
Sew all the way around the top edge of the dress. Overlap the beginning of your seam and back-stitch a few more times.
Then, lift up your presser foot and slide your fabric over to the right, so that the seam you just created is now 1/4 inch from the needle. Back-stitch a few times to begin your next seam and then begin sewing your second seam. Keep the first seam 1/4 inch from the needle, so that you create an evenly spaced and straight second line. (I use the edge of the presser foot as my 1/4 inch guide…)
As you’re sewing, make sure and stretch the fabric flat, so that the elastic along the back side isn’t creating any gathers in the fabric. (I usually use my right hand to pull the fabric in front of the needle toward me and then I use my left hand to pull the fabric behind the needle away from me.) Then sew as far as the fabric isn’t gathered…..then stop, re-adjust, and then continue sewing.
Once you make a complete second circle, back-stitch again over the beginning of the second line. Then lift the presser foot and re-align your needle to create your 3rd seam, 1/4 inch from the 2nd.
And then repeat, repeat, and repeat again.
The more lines of shirred seams you have, the more your fabric will gather. Be sure you keep the fabric pulled and flat while you are sewing.
If you run out of elastic thread in the bobbin…..don’t worry! Just re-load the bobbin and then start sewing again right over the end of where the seam ended, back-stitch a few times to knot the elastic thread along the back, and then continue sewing.
Continue creating lines of shirred seams, until you have the height of shirred fabric that you want. (I created 4 inches worth of shirred seams for Chloe’s dress. And about 4 1/2 inches for Elli. If you’re making it for yourself or for someone with a chest, you’ll need enough rows to cover the entire chest section.)
Then, just like explained in the Shirring/Smocking tutorial, steam ironing your rows of shirring will help tighten up the elastic and will shrivel the fabric down even more. So, don’t skip this step!
Now, you have a cute little shirred dress.
Now, just take a minute to admire the magic of that elastic thread. So cool how that works, right?! :)
Now, you could always stop here. But, straps are a great way to keep the dress from pulling down. So here’s how to create some really quick and simple straps for your dress.
Cut two long strips of fabric, one for each tie. The length depends on how long you want the ties to hang in the back and the width depends how thick you want your braids and how bulky you want the bow in the back. For Chloe’s 4-year-old dress, I cut 2 pieces that were about 4 inches wide and 30 inches long…and it worked great!
And then at one end, I cut the ends into three equal pieces, so that I could braid the ends long enough to pull to the back of the neck….but no longer than that.
Then I braided the ends of each strip and sewed the very end of each braid shut.
Then, I crossed the two ends of each braid into a “V” shape and sewed those together.
Then, I found the very front center of the dress (directly opposite the seam down the back) and tucked the crossed ends of the braids down behind the shirred section about 1-1.5 inches. Then I sewed the straps right to the dress, with a few horizontal seams.
And that’s all it takes to make this little Cover-Up (or summer dress)! So, I made one for Elli too! And now they are both ready to swim lessons and summer swimming!
Enjoy!
-Ashley
. . . . .
If you’re wanting a few more simple clothing tutorials, here are a few darling ideas…
Like these Color Block Dresses from Old Tshirts
Or how about this sweet little Rainbow Bias Tape Skirt
Or maybe try your hand at these simple little Stretchy Baby Hats…with a Top Knot

Hi, I’m Ashley—the DIY-enthusiast behind this crazy blog!