Home » DIY Tutorials » DIY Sewing » Sewing: Clothing » Accessories » Hat from Sweater
Get one of those old sweaters out of your closet and say your goodbyes. You can do it. It’s just sitting up there all lonely anyway.
If you can’t part with one of your own……grab one of your husbands/roommates/parents/friends, or go to the thrift store and find one there. And then wash it really well. (I have a germ-a-phobic husband who wants to know EVERYTHING that has come in contact with his things.)
Anyway, you can use any type of sweater…..and I think a cable knit would look adorable but we didn’t have any to get rid of. The sweater I had, rolls up naturally at the bottom. Which is kind of annoying while wearing the sweater but turned out pretty cute for a hat brim.
You will be using the bottom of the sweater as the brim of your hat…..then you don’t have to hem your hat or finish it off in any way. And that’s a good thing because I don’t knit/crochet at all and wouldn’t be able to refinish it at all. Maybe one day I’ll take lessons……
Save
So lay out your sweater and measure a 9 inch by 9 inch square. (This is what I needed for my head…….but measure your own head and remember that your sweater stretches.) Make sure you are cutting through both layers of your sweater, as you will need two pieces.
Save
Then pin an arch at the top, where you will be rounding off your hat.
Save
Cut it…..and make sure it’s more rounded than pointy.
Save
Then sew a 1/4 inch seam around the edges, leaving the bottom open. Then make another seam right next to it (towards the outside) to reinforce the seam.
Turn it right side out and try on your new creation. If you have found that it is too tall or too wide, just cut it in a little closer and re-sew. And if you completely butcher it…….throw it away and try using another sweater. :o)
I had some sweater left so I measured my little guy’s head and made one for him. Too easy, too fun, and too cute!
Save
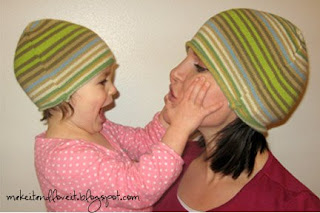
Once my little girl saw all the attention her brother was getting…..she wanted to try the hat on too. What a nut!
Save

Share via: