Hi Everyone! Its Sara from The Aqua House here again, and today I have a tutorial for you for the sweetest little baby mobile…from a branch!
After having four little boys we are finally expecting a girl (this month!!) and I couldn’t be more excited! I have had so much fun decorating her nursery and I knew that I didn’t want just any ordinary baby mobile. Hubby and I have put a lot of time into customizing every detail of her room, so why should her mobile be any different? Everything in her nursery has a very elegant look to it and I knew I wanted to break that up a little bit with something rustic…like a branch.
I love how the branch is the perfect contrast against the walls, and I’m just so in love with those little butterflies and flowers!
What little girl wouldn’t want to stare up at dancing butterflies and beautiful flowers as she falls asleep?
Those little butterflies add the perfect touch of whimsy and the flowers add a nice pop of color to the corner!
Are you ready to make your own Baby Mobile from a Branch?
For this project you will need:
The very first step in this project is to go find the right branch. Since I live in a neighborhood that is fairly new and only has small trees, I took my boys to a local nature park and we walked around looking for the perfect fallen branch. It took us a few tries to find just the right one. When selecting a branch, you do not want something too green that may leak sap onto your crib, bassinet, or baby. Also, you don’t want a branch that is too brittle and dried out because it will flake and chip easily. One of the first branches I selected was one that was very dried out and after further inspection I saw that underneath the bark were spider nests. Yuck! Be careful selecting your branch so you don’t bring home anything unwanted. (Also, a good tip is to bake your branch in the oven to kill unwanted critters, if it will fit. If it’s too large, try to “bake” it outside on a hot sunny day, in full sun.) While you are out finding your branch, grab a handful of twigs to make your butterfly bodies as well.
Once you get your branch home, wash it down and clean it up very well. Trim off any unwanted pieces until it looks just how you want it to. Make sure there is nothing left on the branch that could potentially fall onto baby and become a choking hazard.
Now set your branch aside, its time to start working on the flowers. We will be making the flowers out of tissue paper. There are (what seems like) a million different ways to make tissue paper flowers. This is method I used, but you can make your flowers any way you like!
You should have two different colors of tissue paper. One color is for the flowers and the other color is for the center of the flowers. Of course you can mix and match your tissue papers to make any combination of flower colors that you want!

First take your tissue paper for the flower and cut it into 4 inch squares. You will need 8- 4 inch squares per flower. I put 5 flowers on my branch so that was 40- 4 inch squares. Depending on your branch size and configuration, you may want to make more or less flowers. Then, for each flower center, cut a 1 1/2 inch square of the contrasting color.
Take your flower center and fold it in half. With your scissors, cut little slits into the open sides of the square, making sure not to cut through the fold. Set it aside.
Now take 8 of your 4 inch squares and stack them neatly together. Cut out a flower shape.
When you are done cutting, your tissue papers should look like this.
Take the flowers and arrange them so the petals overlap each other. It also helps to turn half of them about 180 degrees so if you didn’t cut your petals exactly even (which if you free handed it, probably not!) The longer or shorter petals will be scattered throughout the flower, making it look better.
Next, take your flower center, unfold it, and place it on top of the flower.
Staple through all layers of the flower.
Now it is time to fluff and shape the flower. Start by taking your flower center and gently pull it upward around the staple.
Then go layer by layer through your petals and pull them up to the center.
Keep going until all layers of the petals have been pulled forward.
Now open the flower up and shape it until it is how you like. Repeat these steps until you have made all the flowers for your mobile.
By now your branch should be dried out and ready to go. Grab your branch and plug in your glue gun so that you can start attaching the flowers.

The placement of your flowers it totally up to you! I tried to make my branch look like it was blooming and so I chose spots to glue on my flowers that would give this appearance.
Another item to consider is which direction your branch will be hanging. You want to make sure that those flowers will be visible to baby from below.
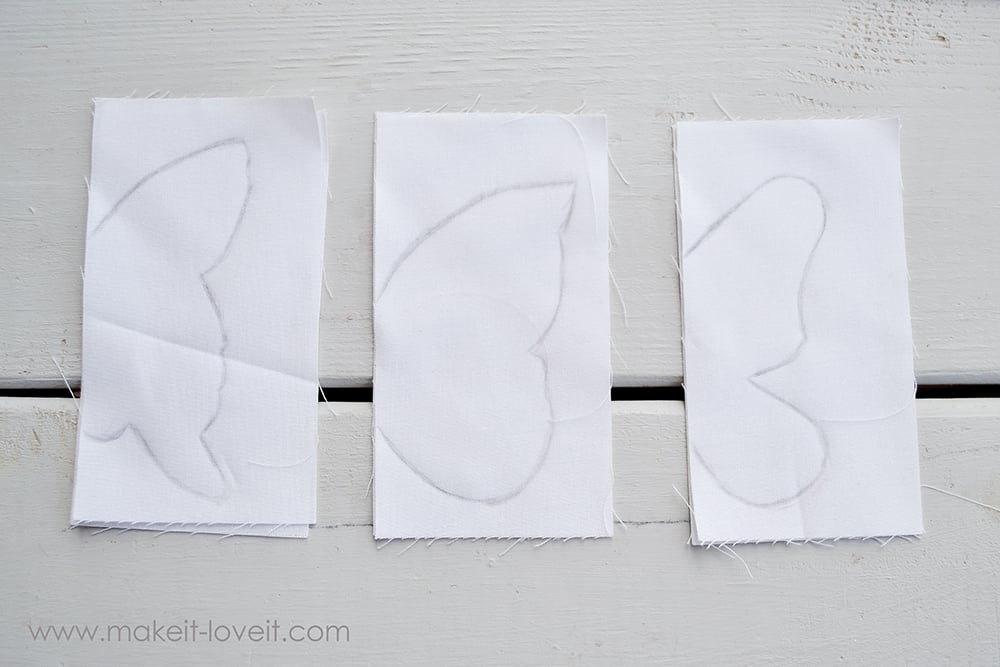
Now that your flowers are attached, it is time to make the butterflies! I pulled out some scrap fabric and cut it into 3 inch by 5 inch rectangles. You will need 2 pieces of fabric for each butterfly. To start out I stacked my fabric right sides together, and on one side I free-handed some butterfly wings. (I chose to use white fabric to keep it simple, but these butterflies would look super cute in a printed fabric.) I made three large butterflies.
Then, still using 3 inch by 5 inch rectangles, I free handed four smaller butterflies. The size and amount of butterflies you make is totally up to you! You may want more or less, or even bigger ones, depending on the look you are going for.

Next, cut out your butterfly wings, making sure to cut just inside your pencil line so you don’t have pencil markings on the wings. Lay your wings out on some butcher paper or old newspaper and spray with Aleene’s Stiffen Quick spray. Follow the directions on the bottle.

There are two methods to letting your fabric dry after spraying: wait one hour and let it air dry or microwave your fabric for 30 seconds. I opted to microwave my fabric and made sure to use an old plate. I did four coats of spray on my butterflies and made sure to rotate them so each side was sprayed twice.
Once your wings are stiffened, it is time to plug that glue gun back in and grab those twigs and garden pruners.
Trim your twigs down to the appropriate size for your butterfly wings.

Then use your glue gun to attach the wings to the twig. Run a small bead of glue along the twig and gently press the wing into it.
Continue assembling your butterflies, making sure to shape the wings so they look like they are flying.
When all of your butterflies are done, it is time to attach them to the mobile. To do this you will need some clear fishing line (cut into varying lengths) and your glue gun. On top of your butterfly, find the center where the butterfly will balance, and put a drop of glue. Then gently press your fishing line into the glue and do not disturb it until it is dry. Its kind of hard to see in this picture with clear fishing line and clear glue, but this how your butterfly should look.
The length of the fishing line will depend a lot upon how far down you want your butterflies to hang. My fishing line pieces were anywhere from 8 inches to 14 inches long but you will have to decide what lengths work for you. To attach the butterflies to the branch, tie them onto the branch where you like and secure them with a tiny drop of hot glue. We don’t want those butterflies slipping and falling onto baby!
Now it is time to hang your branch. To do this, I used 2- 1/4 inch screw-in eyelets that looked like this.
Place an eyelet on each end of the branch about 6 to 8 inches in from the outside edge. This part will take some time as you will need to determine where exactly to place the eyelets on your branch so it hangs evenly. It may take some trial and error! Once you find the appropriate place these can easily be screwed in with your fingers.
To hang my branch from the ceiling, I used the same type of eyelet, only in the 1/2 inch size. I painted my eyelets white to blend in and then screwed them by hand into the ceiling. With the clear fishing line it makes the branch look like it is floating in the air. In fact, my five year old asked me what kind of magic I used to make the mobile float, ha!!
This mobile would be perfect to place above a crib, bassinet, or rocking chair.
I can’t wait for baby girl to come enjoy her new mobile…
…and fall asleep under those flowers and butterflies!
Thanks for having me again as a guest contributor! For more home improvement projects, tutorials, and a full tour of baby girl’s nursery you can head on over to my blog or find me on Instagram @_theaquahouse!
-Sara
Check out Sara’s blog HERE, her Facebook page HERE, her Instagram account HERE, and her Pinterest Boards HERE.
. . . . .
We are so excited for your baby to make her arrival, Sara! For more nursery inspiration, check out these great ideas:

Hi, I’m Ashley—the DIY-enthusiast behind this crazy blog!