Home » DIY Tutorials » DIY Crafting » Crafting: No-Sew » Decorate My Home, Part 18 – Flower Wall Hanging
Decorate My Home, Part 18 – Flower Wall Hanging
May 28, 2010 - By Ashley Johnston 54 Comments
.
Have you noticed my newest sponsor Expressions Vinyl found here? You will be amazed at the low prices of their huge selection of vinyl. The perfect solution for those of you who cut and use your own vinyl for scrapbooking or home decorating. Both large rolls and single sheets (sized for cricut and sillhouette machines) are available at incredible prices. Hurry on over for your next project!
. . . . . . . . . . . . . . . . . . . . . . . . . .
I added more to the second bathroom.
(Did you see the first part of this bathroom here?)
I needed to spruce up the walls just a bit.
So I added a cheery yellow flower to the open space.
Right above the towel rack.
With lots of layers and gathers.
Fits in perfectly right where it’s at.
Want to make your own?
For your bathroom or any bare wall in the house?
Start by making your fabric wall hanging base like shown here.
Or just cover an art canvas if you’re short on time.
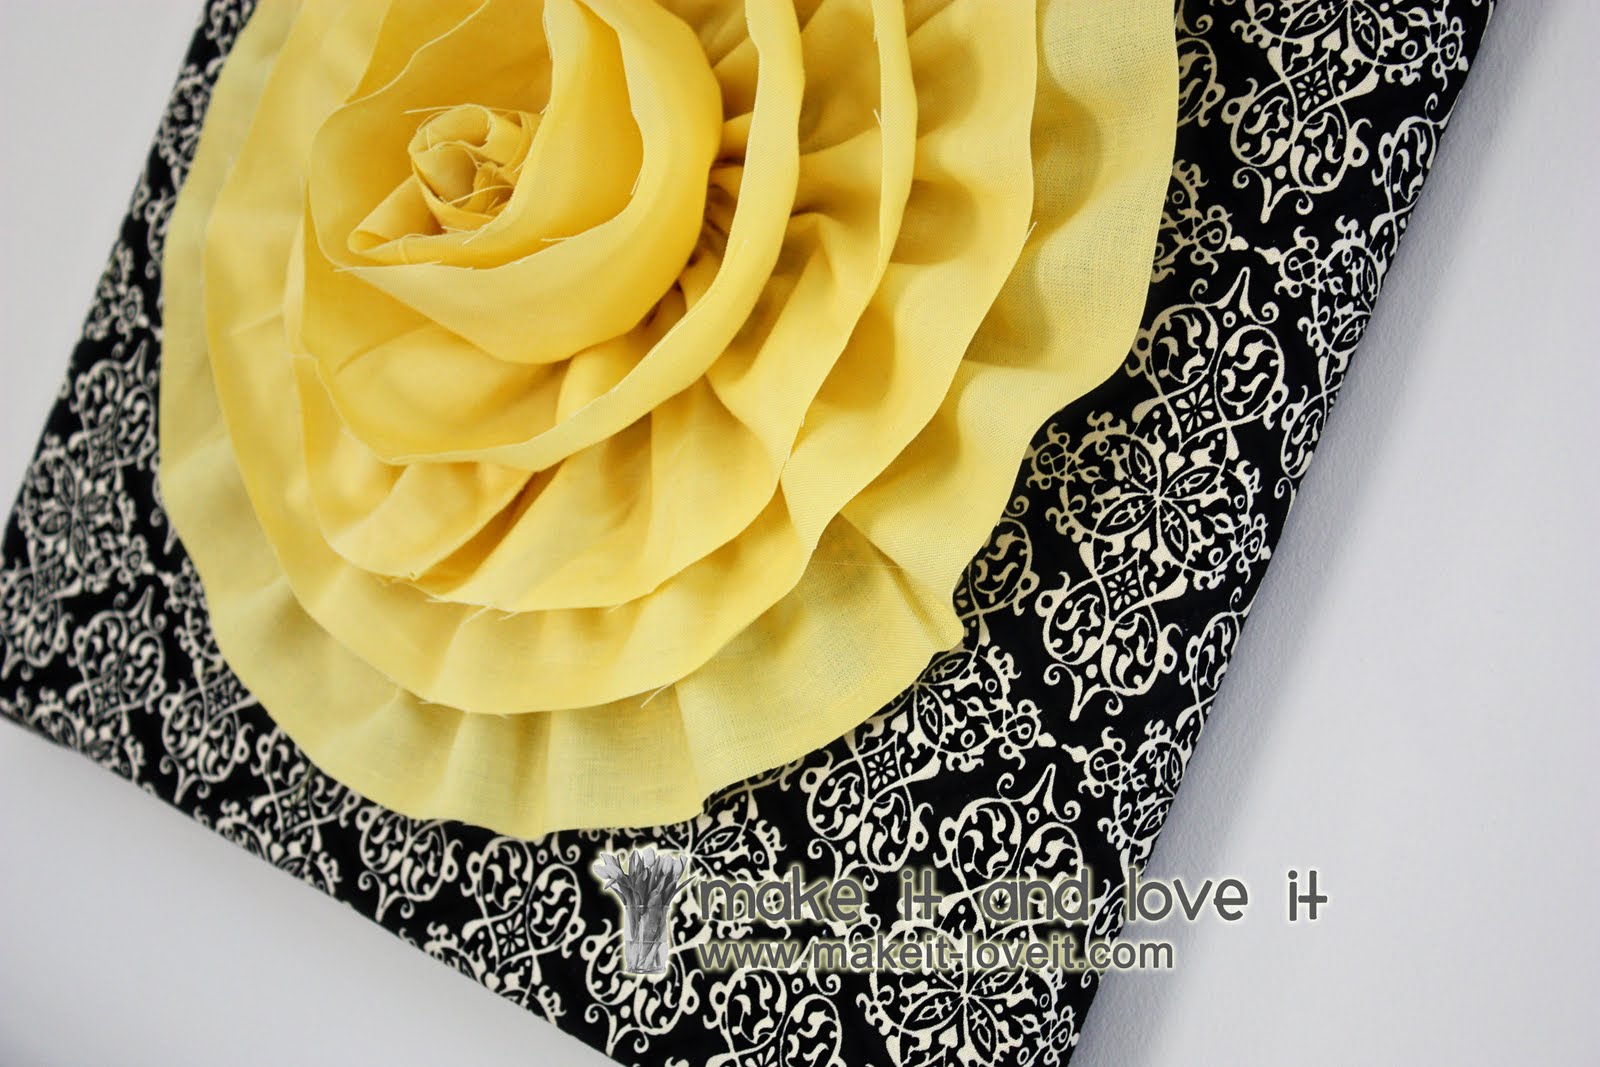
I made my wall hanging 14 x 14 inches.
Then covered it with the same fabric as my shower curtain here. (It’s just plain ‘ol cotton…..but you could really use anything.)
Next, I cut strips of fabric that were 2 3/4 inches wide and as long as the width of the fabric.
Then I made a basting stitch along one edge, about 1/4 inch away from the edge, to begin gathering the fabric. (Need help with gathering? Click
here for more info.)
Then I placed my gathered ruffle in a circle on top of the wall hanging. Position just how you’d like it, taking note of how much of the square wall hanging you want to show from behind it. (And be sure to cover the first end with the circular shape, hiding the raw edge.)
Then place some hot glue right behind the gathered edge, securing the ruffle to the wall hanging.
Fold under and glue the very edge of your ruffle…..
…..and then glue the end down. Then gather your next piece and tuck under the end as well.
Then glue it right over the end of the first piece. But I still only glued at the base, by the gathers.
Then glue the gathered piece around in a circle, making each circle more and more narrow……moving towards the center of the flower.
When you finally reach the center, tuck the end edge under and glue the end of the strip in place.
Then fold the very end over in a diagonal line…..and then set aside for a moment while we make the center piece.
I just wrapped some scraps around my finger…..
…..and ruffled it up a bit.
And glued it to the center of the flower, using plenty of glue underneath.
Then I hung that little beauty up on the wall.
What a nice big flower, in full bloom.
It sure cheers up the place.