Home » DIY Tutorials » DIY Sewing » Sewing: Clothing » Baby Clothing » Decorate My Home, Part 23 – 2D Clothes and Clothesline
Decorate My Home, Part 23 – 2D Clothes and Clothesline
September 3, 2010 - By Ashley Johnston 66 Comments
.
Looking for the Up To My Knees In Crafts giveaway? (Multiple winners will be chosen.)
Scroll down or click here.
. . . . . . . . . . . . . . . . . . . . . .
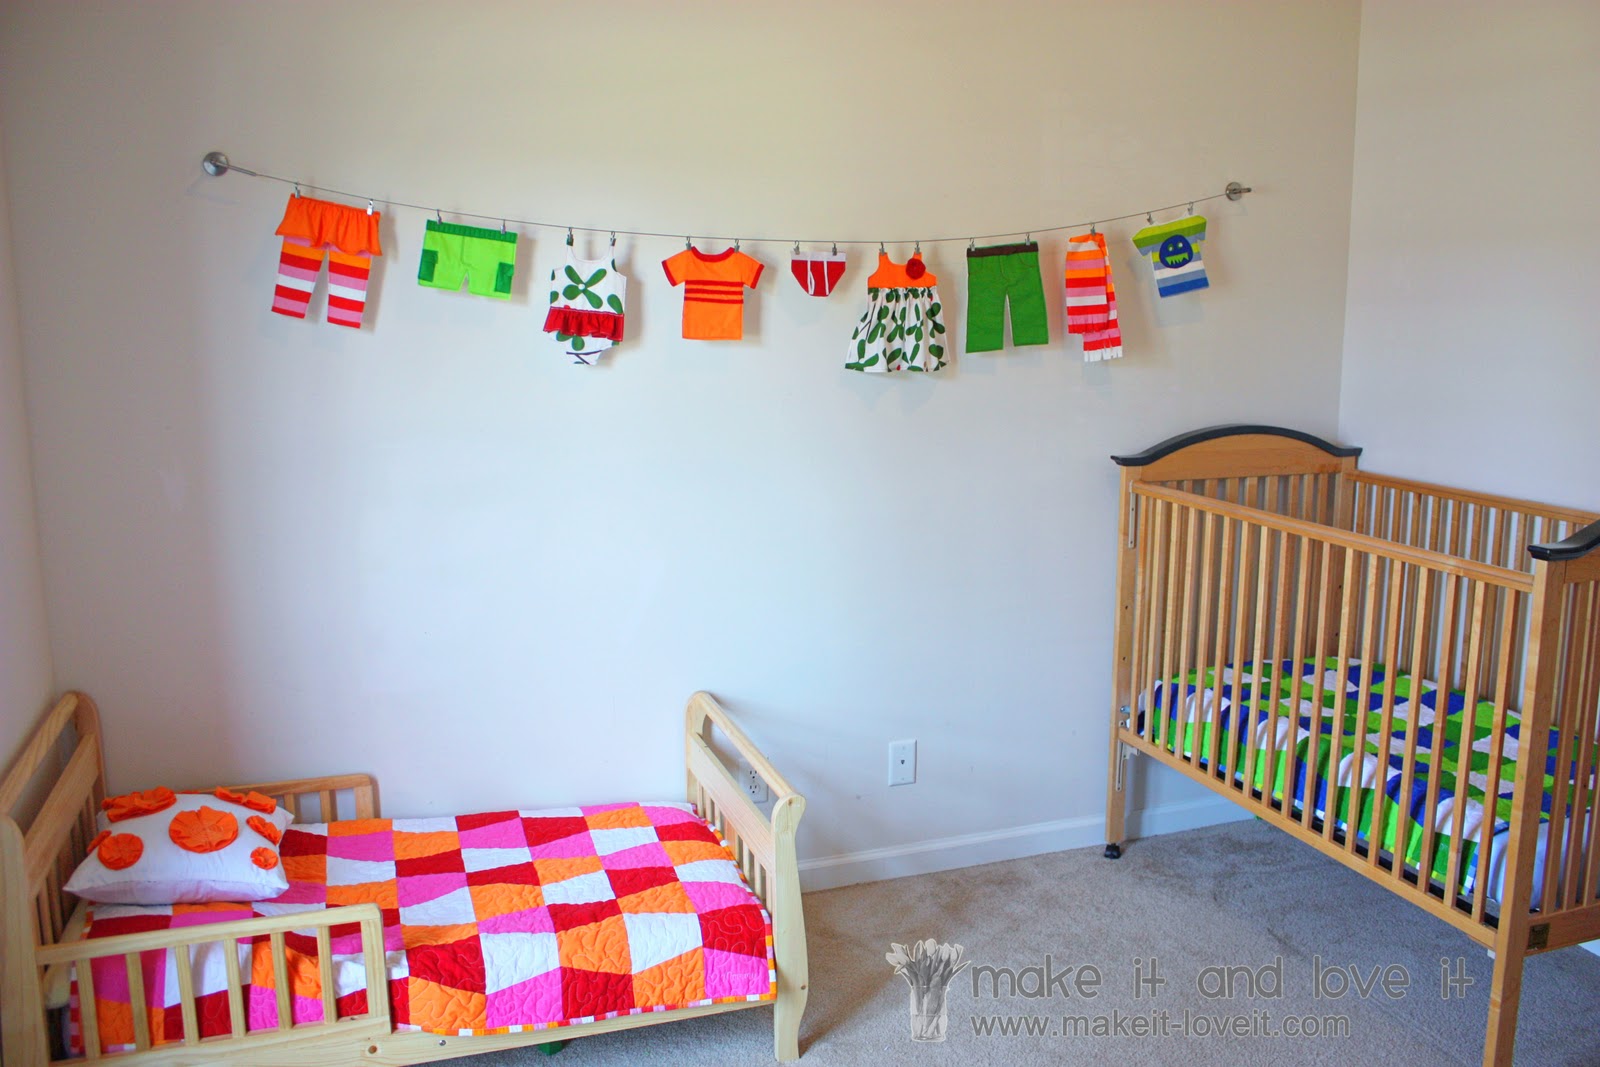
Okay, another addition to the boy/girl toddler room.
But this time……I started tackling the bare walls.
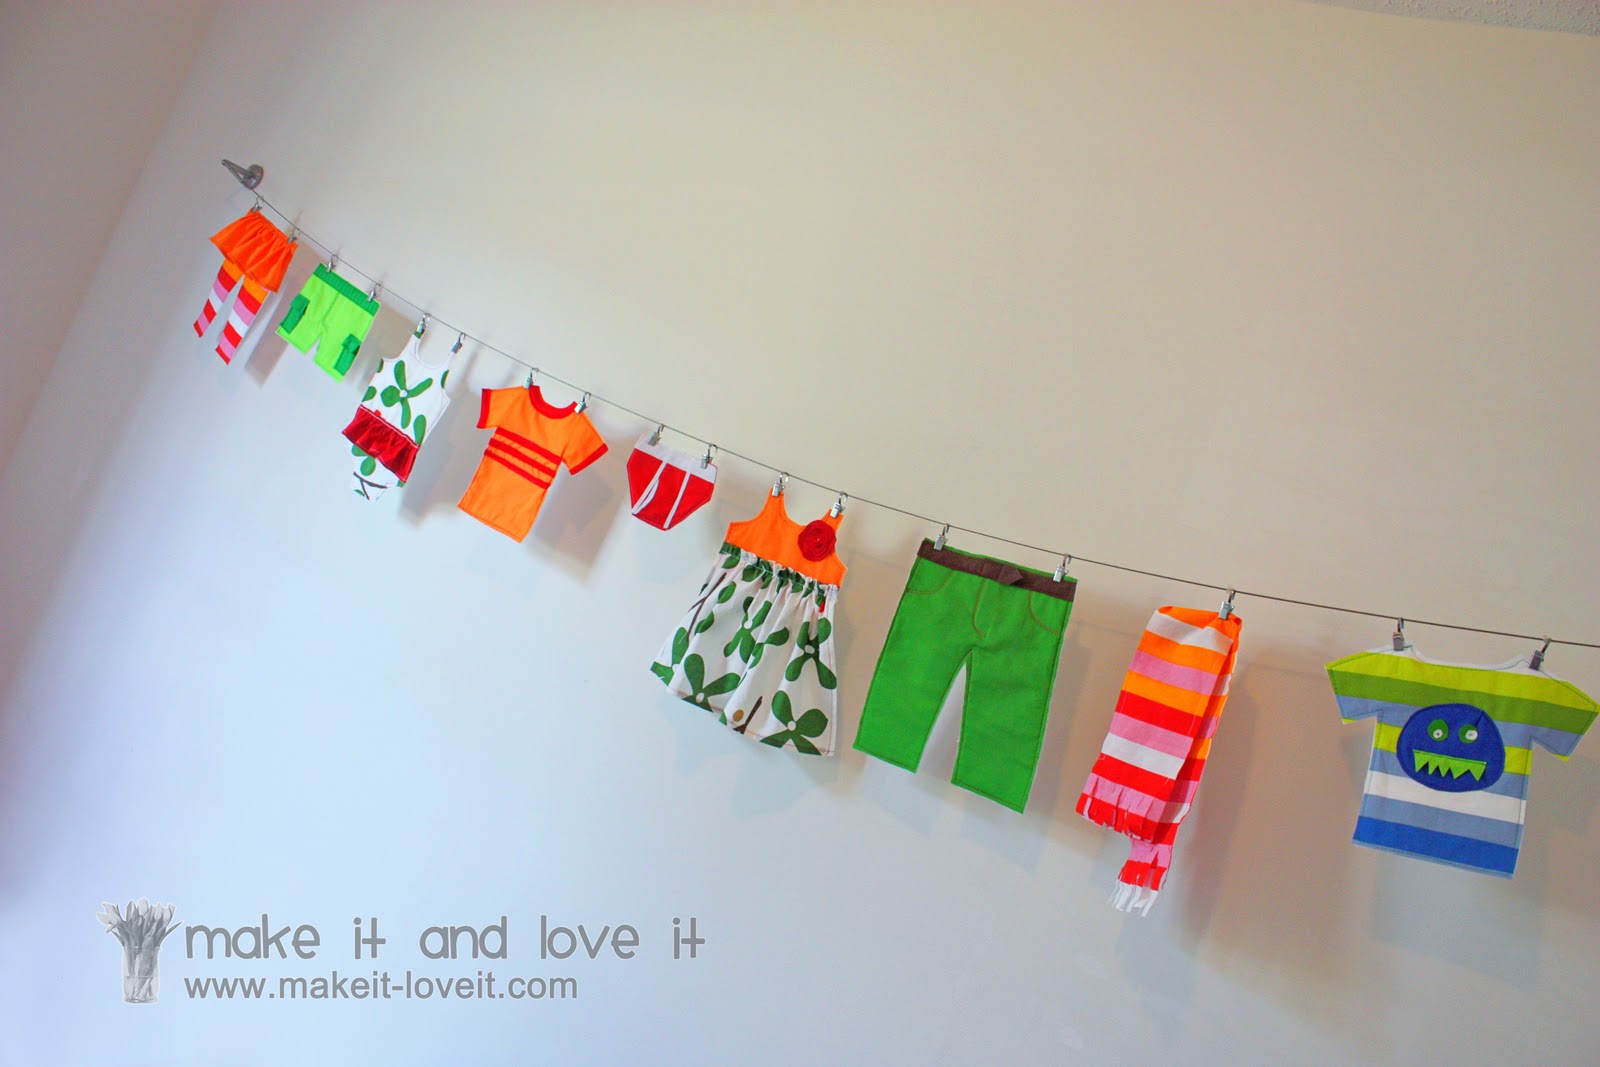
I created a “clothesline” full of boy and girl clothes.
.
And used all sorts of bright and vivid scraps, leftover from the other projects in the room.
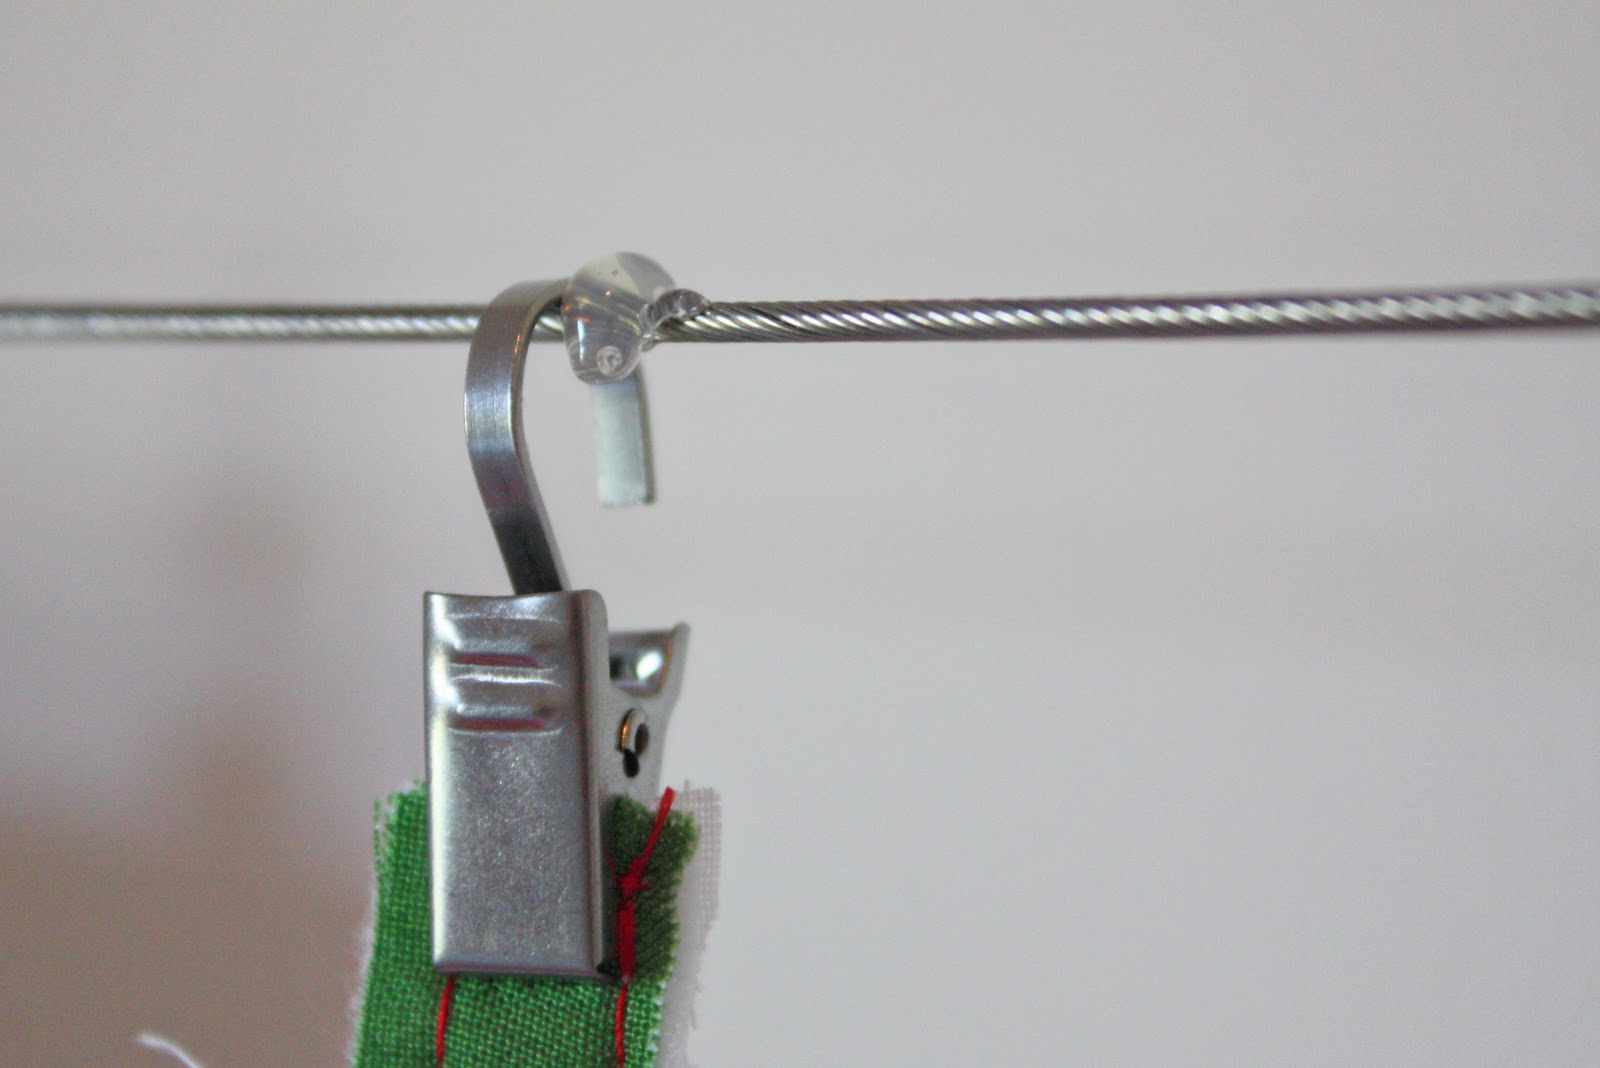
All neatly hung on a metal wire.
The clothes are 2D and can’t really be worn……..and are attached to the wire with little metal clips.
Kind of fun to have something new to look at on those plain white walls.
(And more will be added later on…..hooray.)
And because there is a slight slope to the wire, I added little balls of hot glue to the wire in some places, to keep the hooks from slipping down towards the middle. Worked perfectly.
Want to create your own little 2D pieces of clothing in just the right colors for a nursery/toddler room?
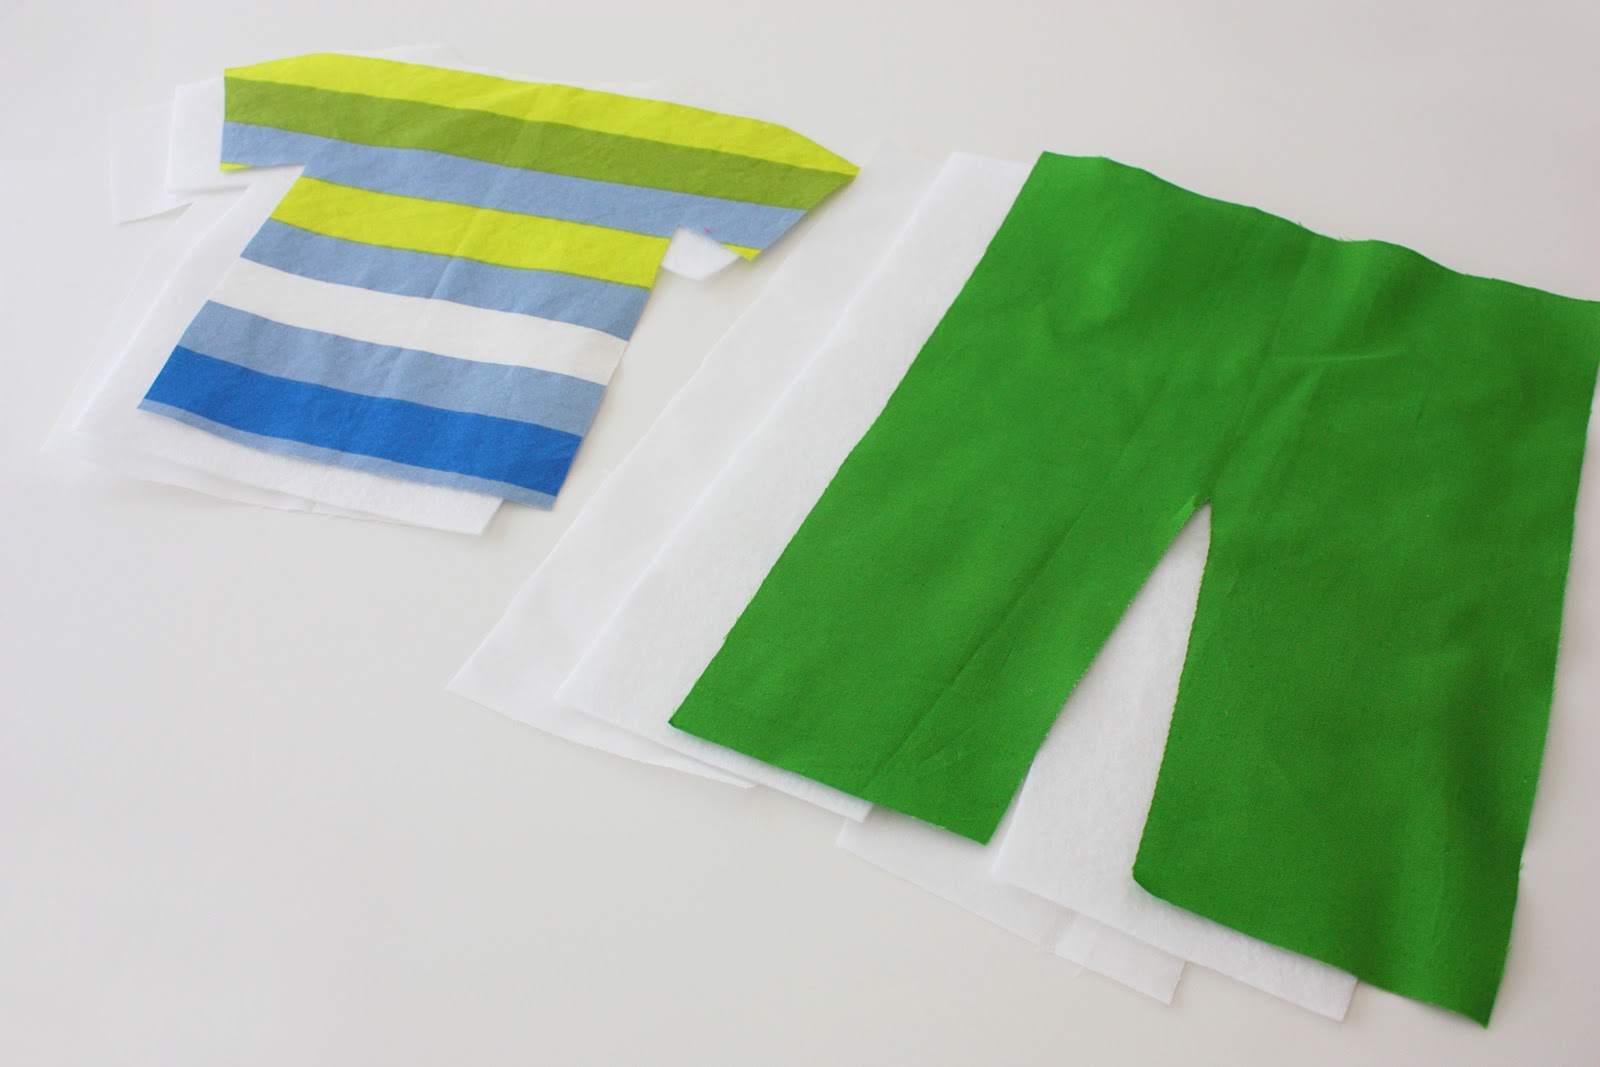
I first cut out all of the clothing shapes that I wanted to use, in the colors that I wanted them. I also cut out that same shape in a piece of felt for the center, and then in plain white cotton for the backing.
See the 3 pieces needed for each shape?
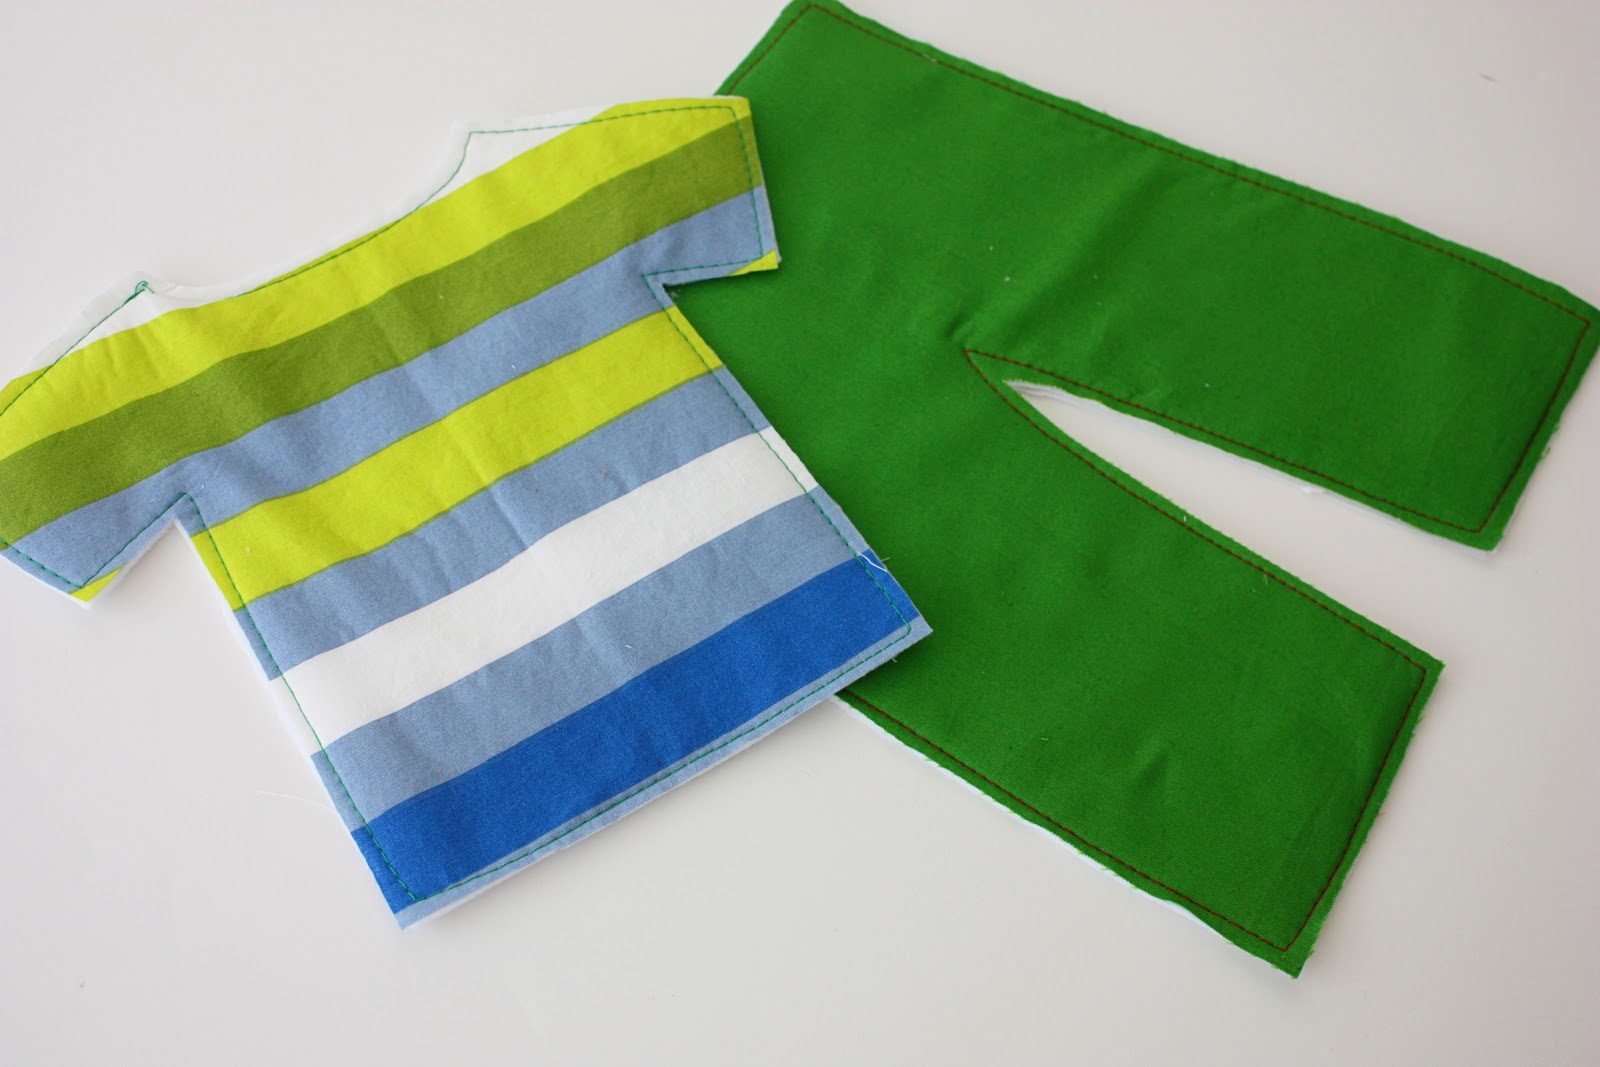
Then I stacked the 3 pieces and sewed all the way around them, and trimmed any un-even edges as needed.
**I did this with every single piece of clothing before going onto the next step (except for the scarf).**
Then I started adding little details and embellishments to each piece of clothing.
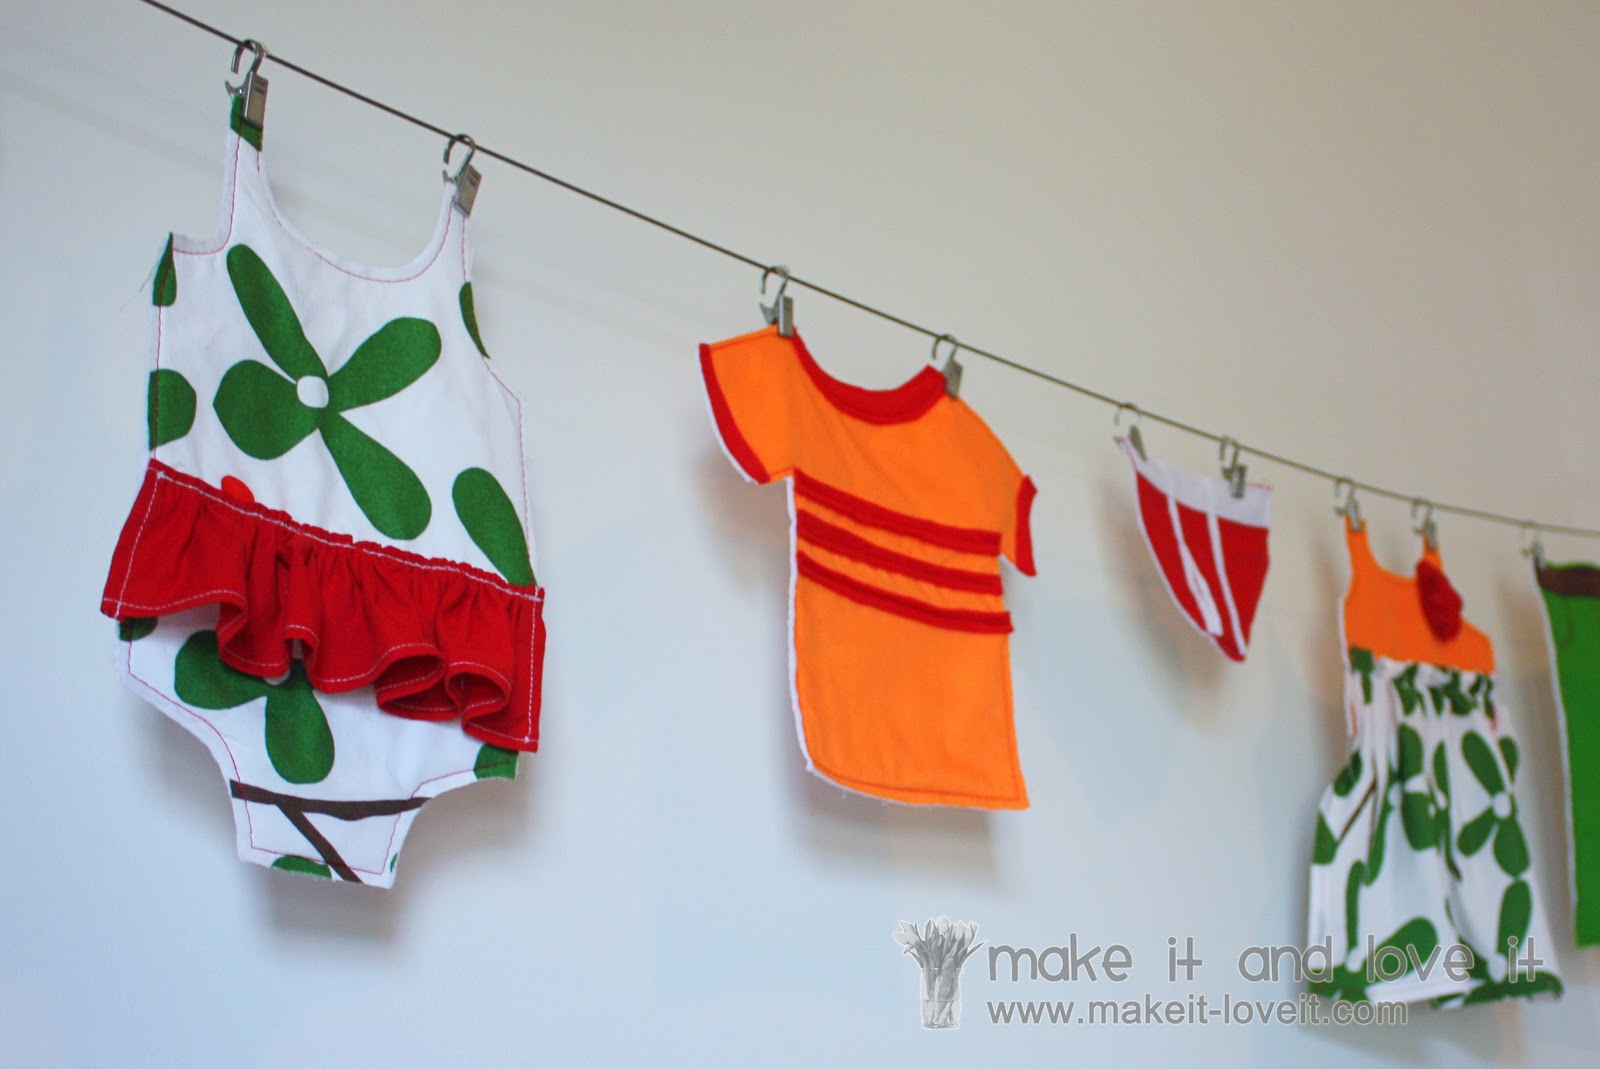
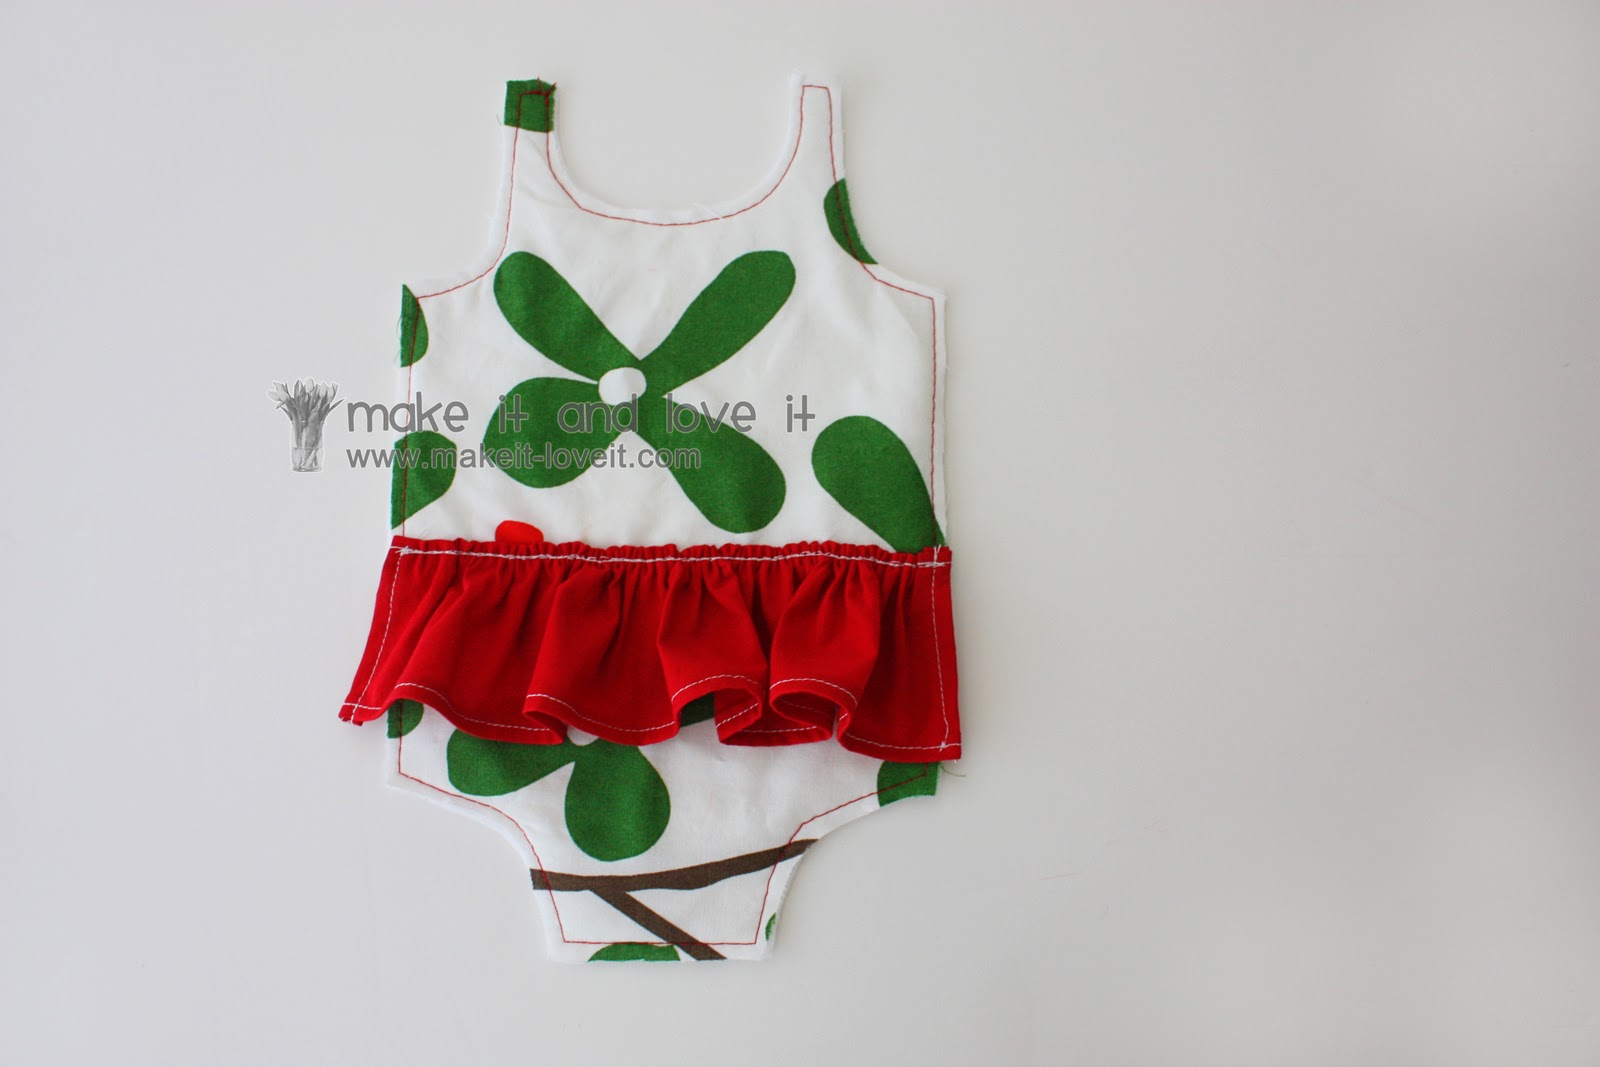
Here is the plain bathing suit shape…..
And then I cut a long skinny rectangle, hemmed each raw edge, gathered it up, and attached it to the waist of the bathing suit……making a nice simple ruffle.
(Need help with gathering/making ruffles? Click
here.)
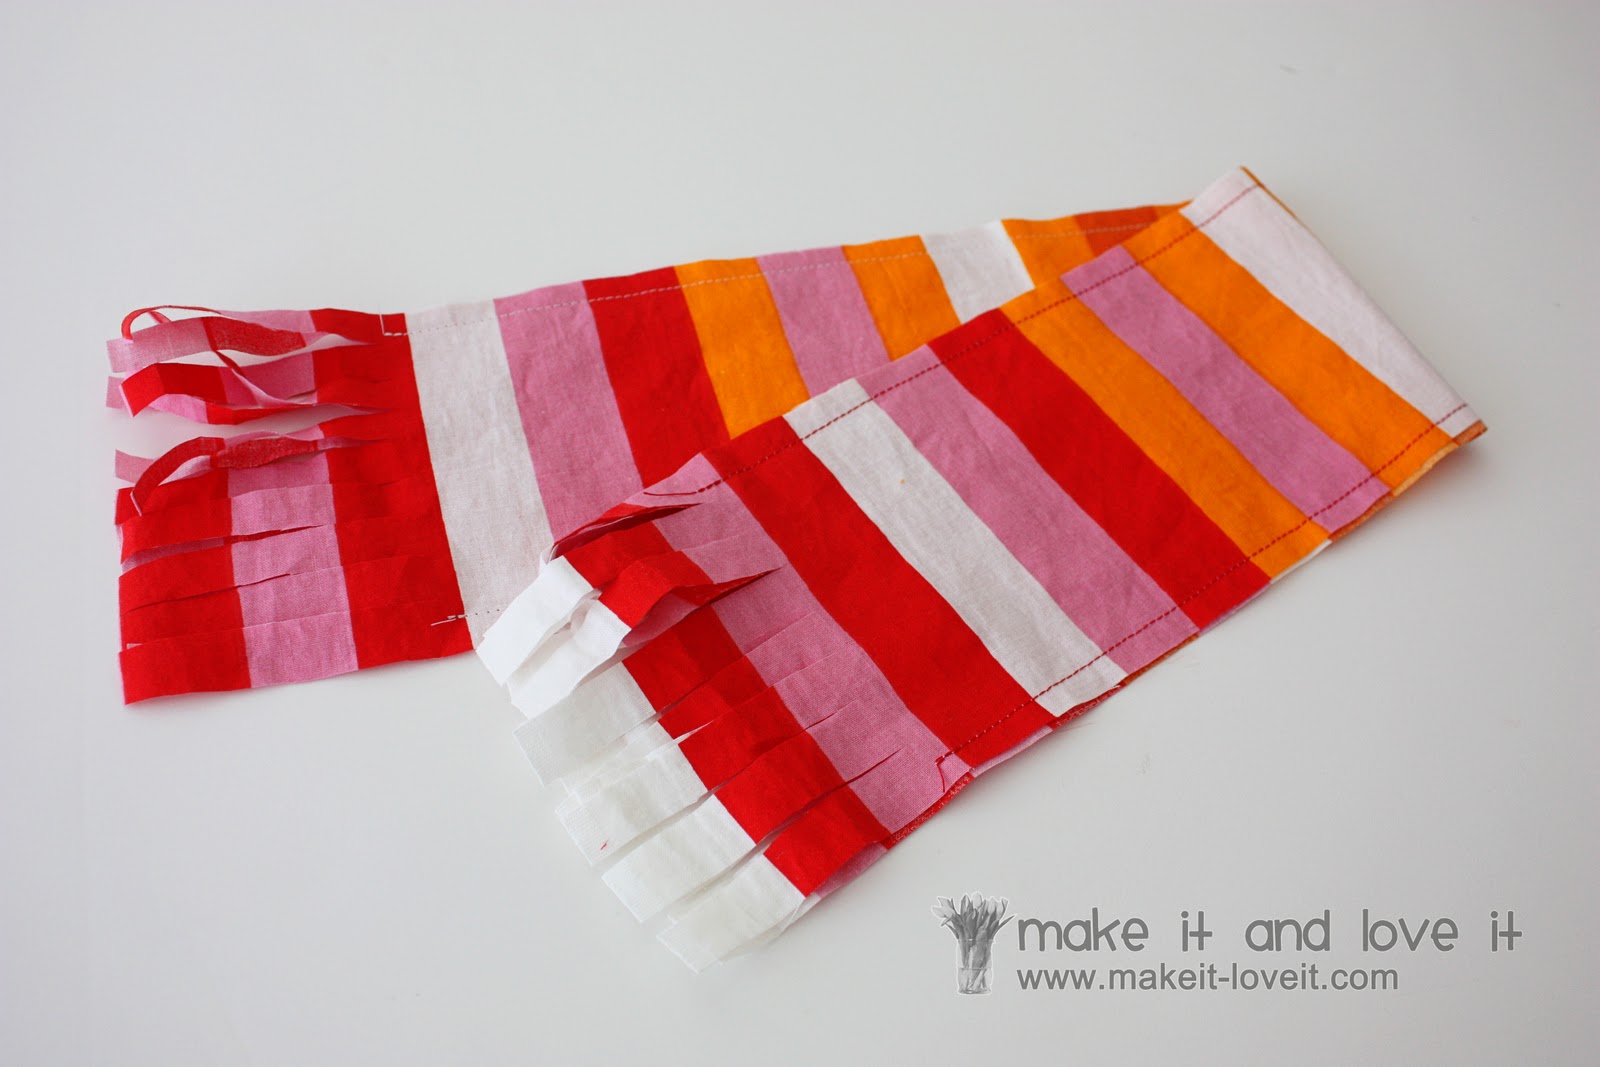
The scarf is just 2 pieces of cotton, sewn together along each long edge (with right sides out). Then I cut strips in each end, creating a fringe. (And nope, no felt in the middle.)
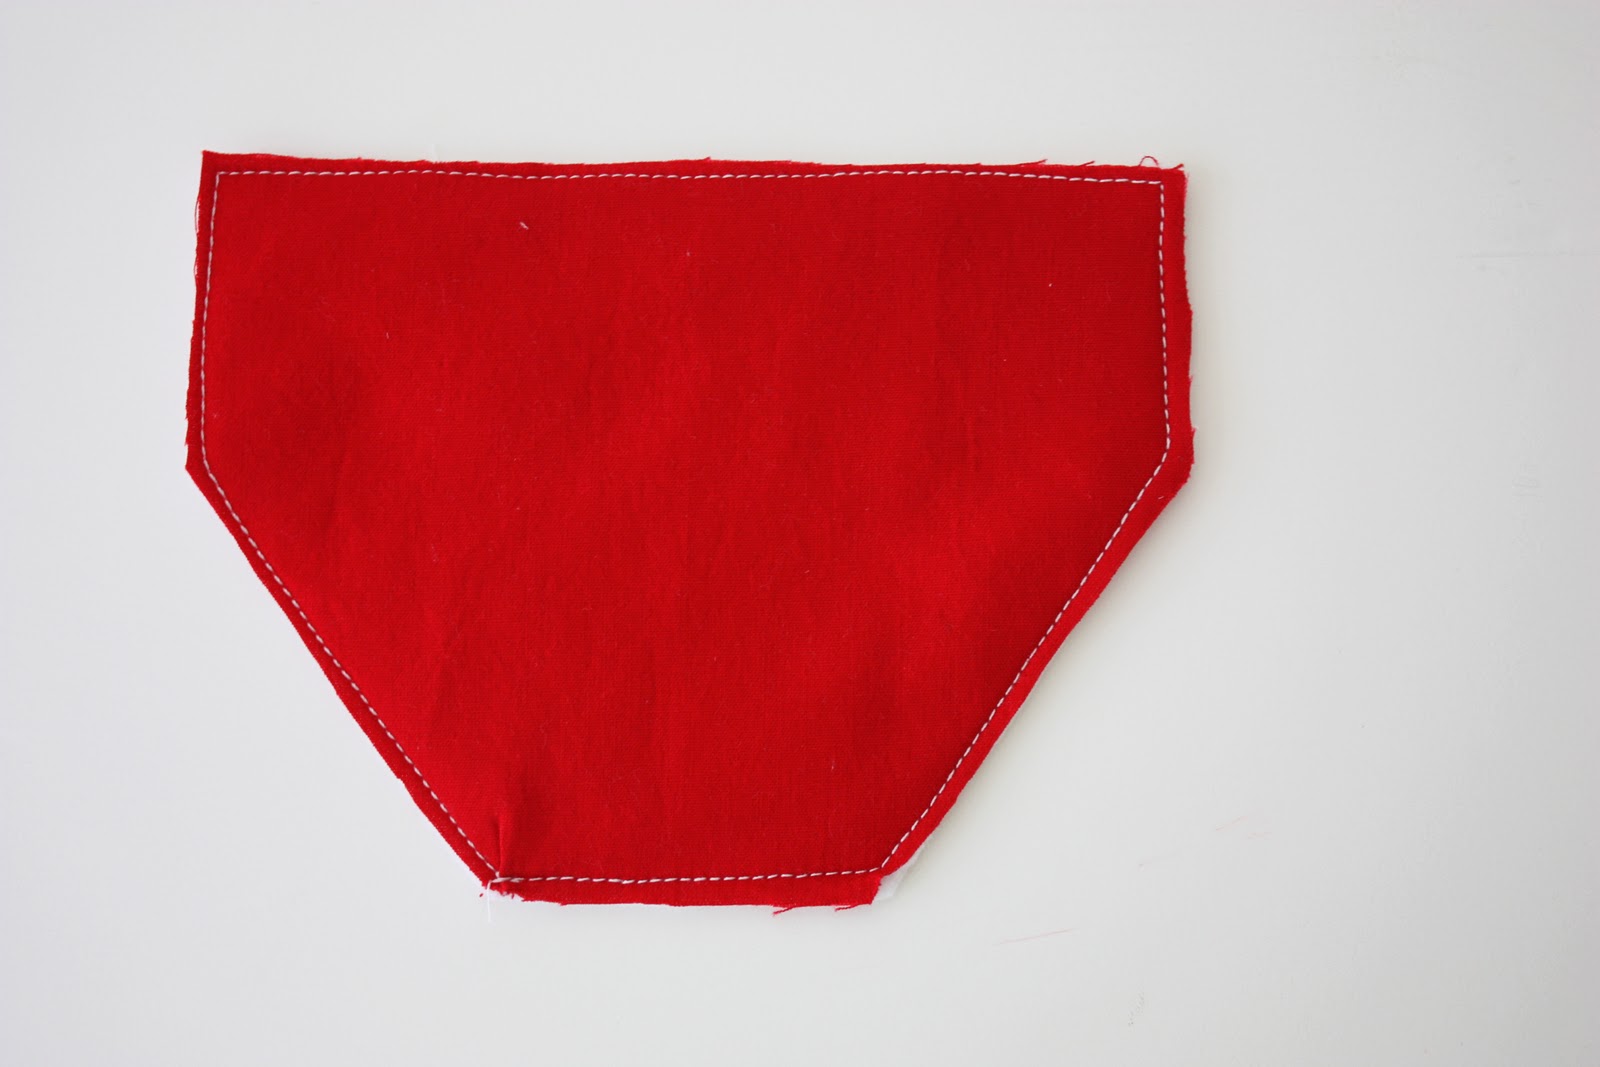
For the underwear, I cut a basic underwear shape…
Then I added a wide piece of felt as the waistband and then long skinny strips for the underwear detail. (This one cracks my husband up every time he sees it. I think it’s his favorite one.)
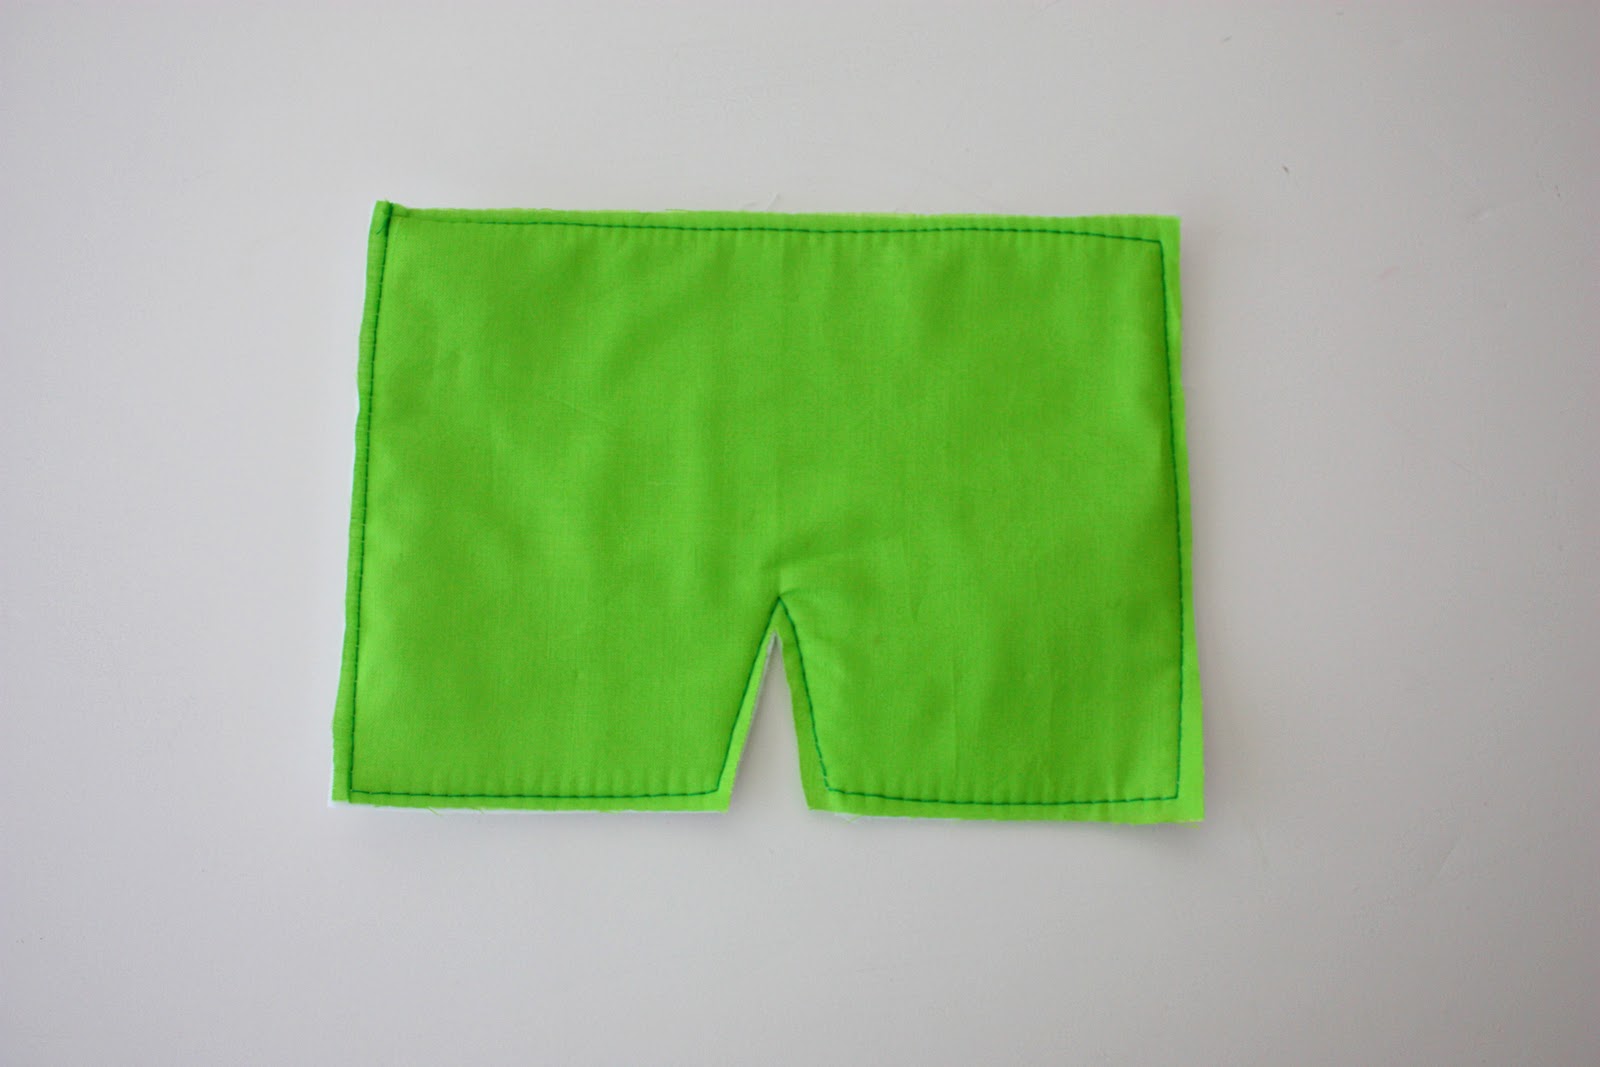
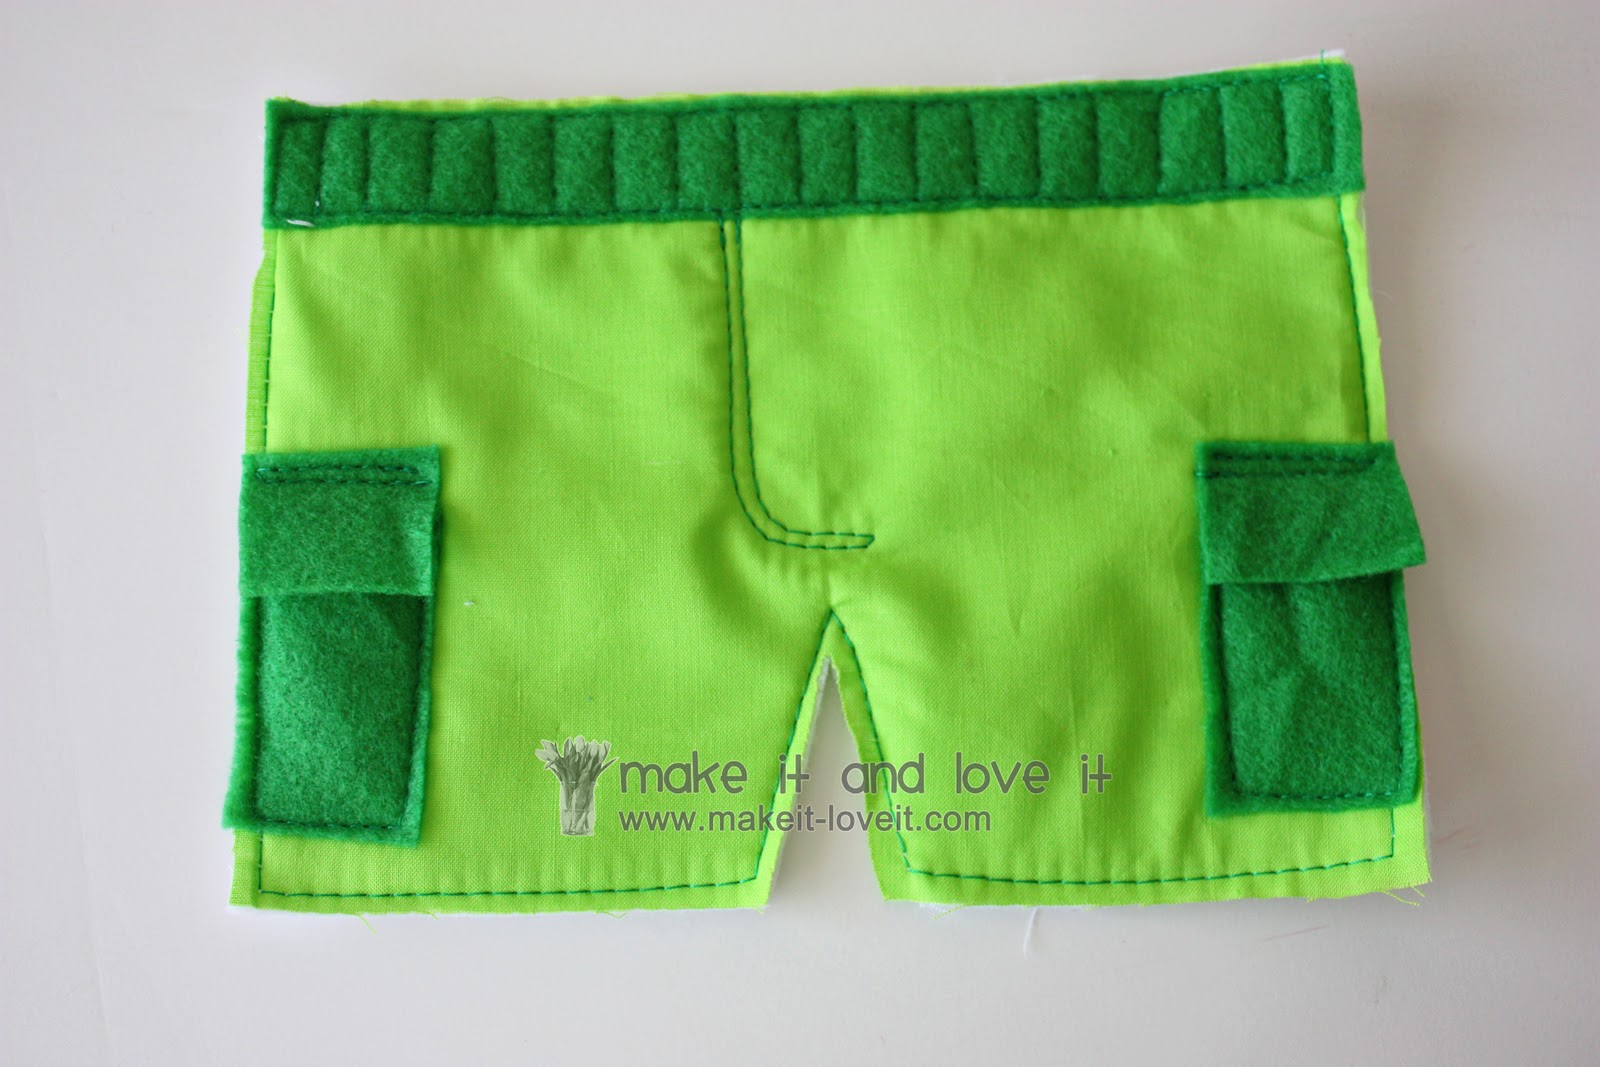
For the shorts, I started with a basic short shape…….
Then added a strip of felt to the waist band and sewed all the way around. Then I sewed little lines all the way down the waistband, to give it that “elastic waist band” type look. The pockets are to different rectangle shapes, attached to the sides……to look like cargo pockets.
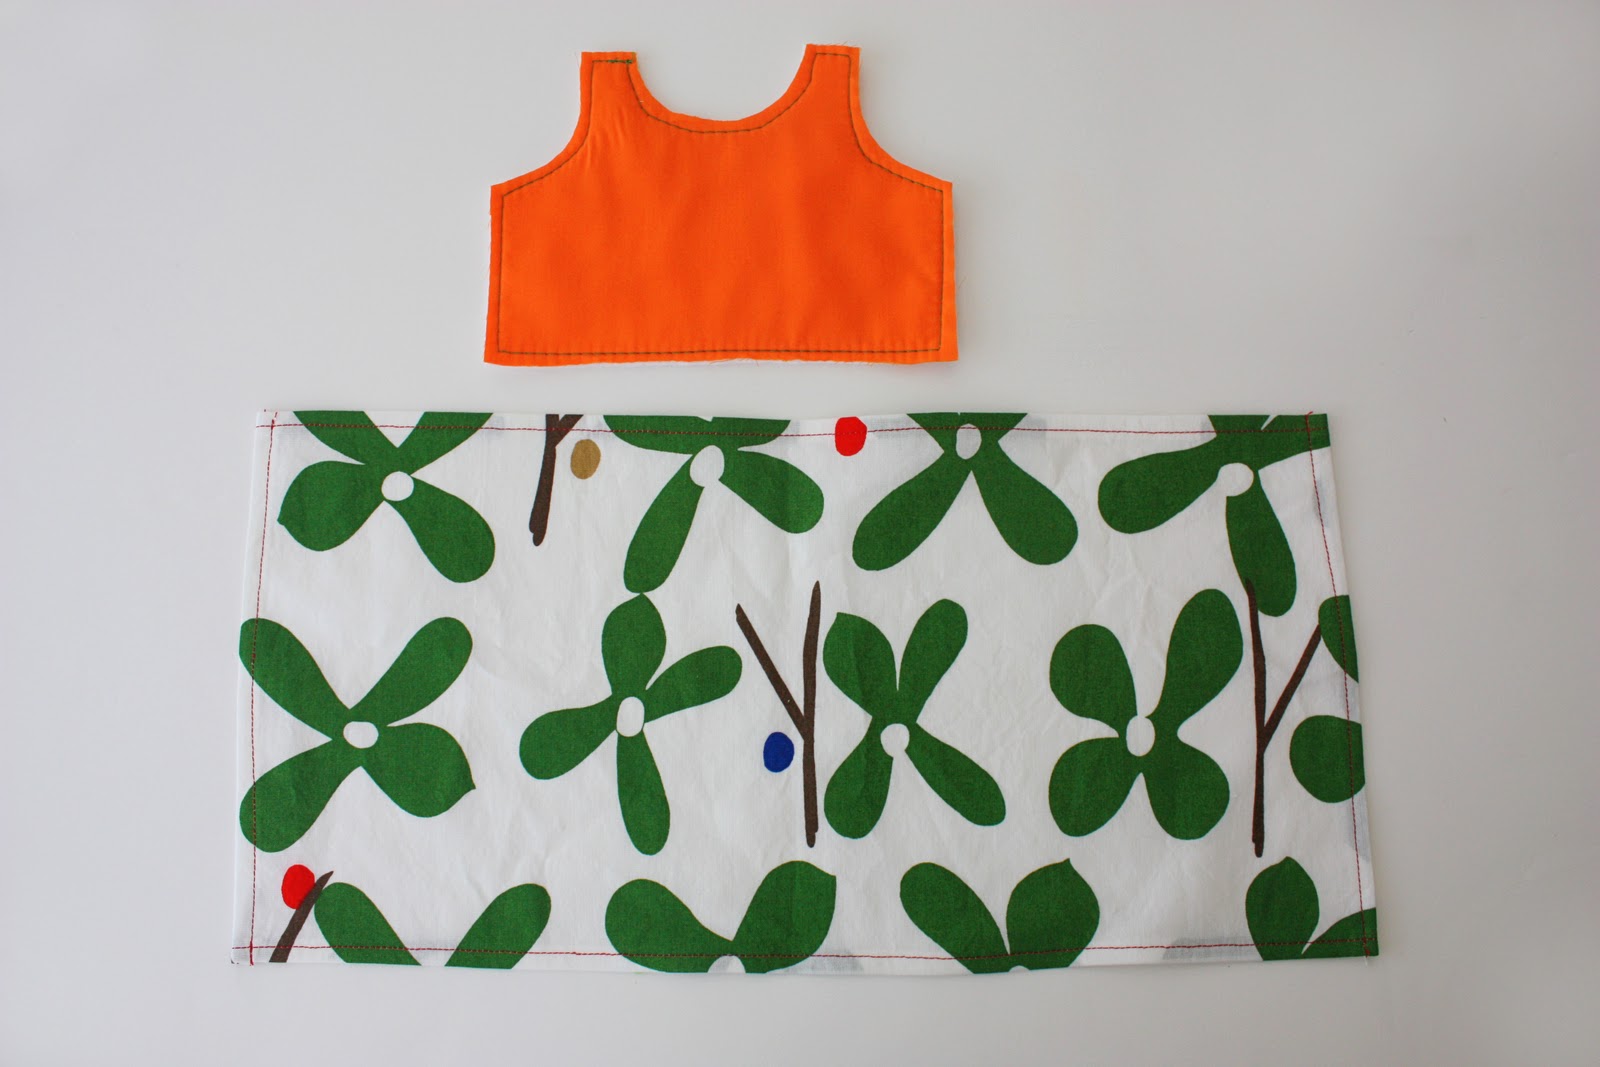
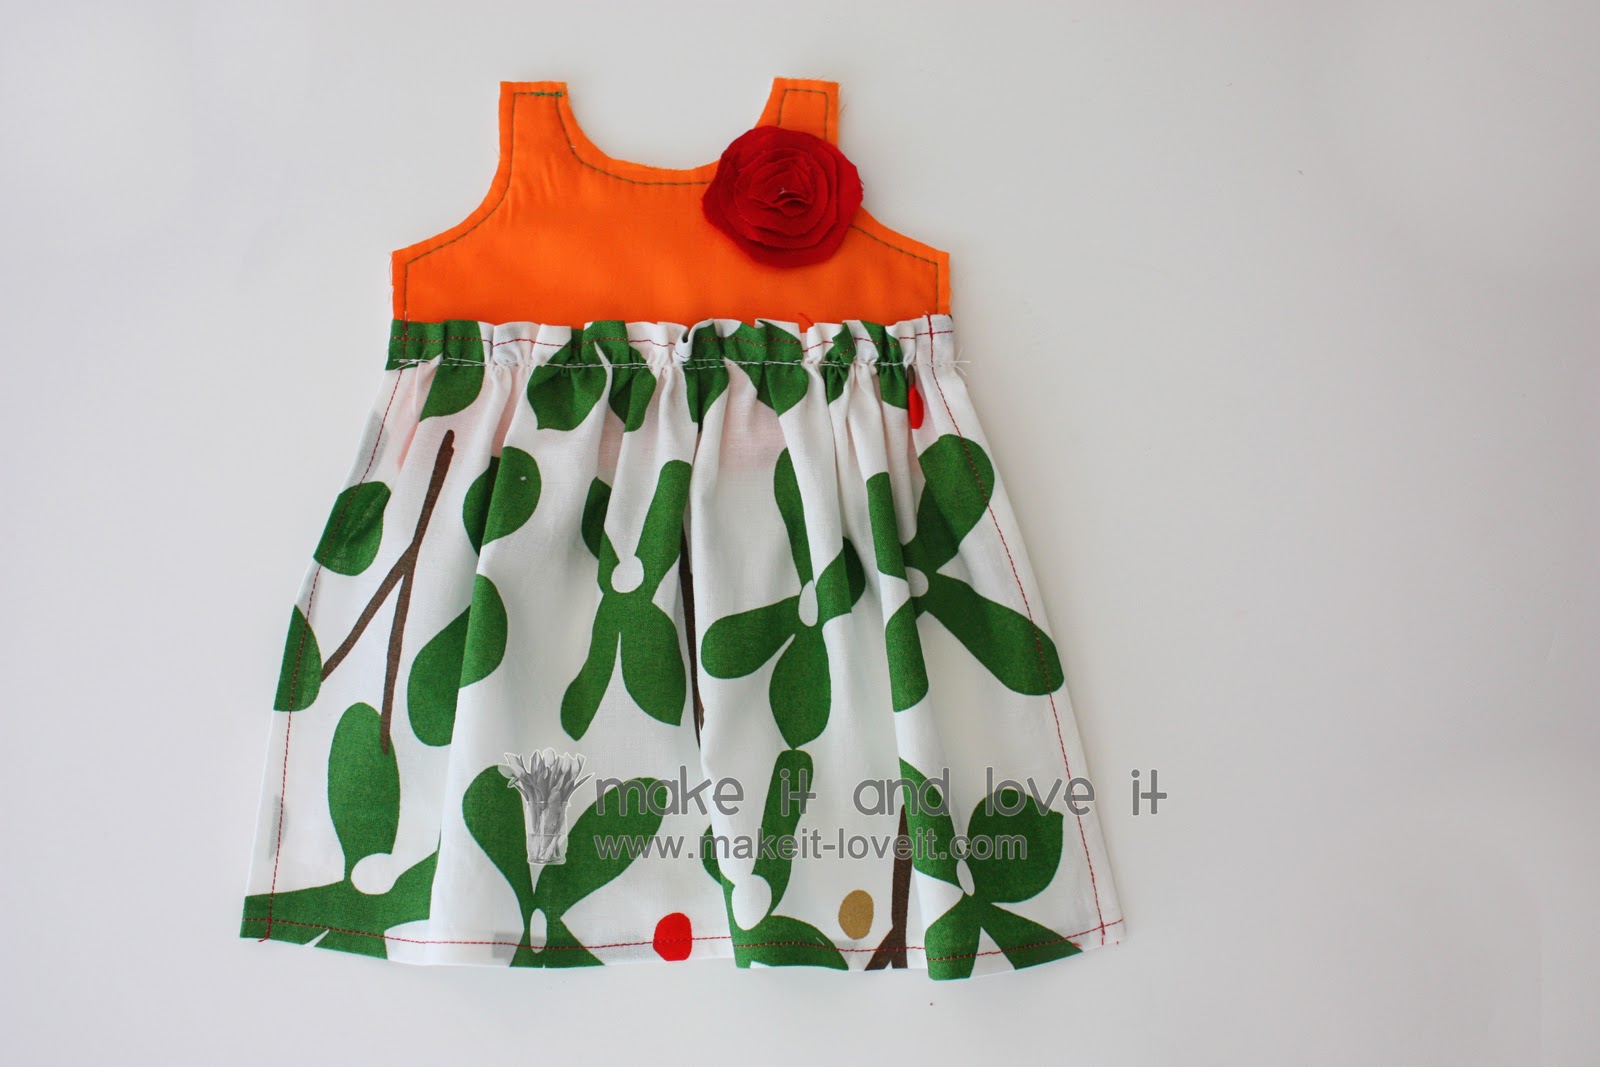
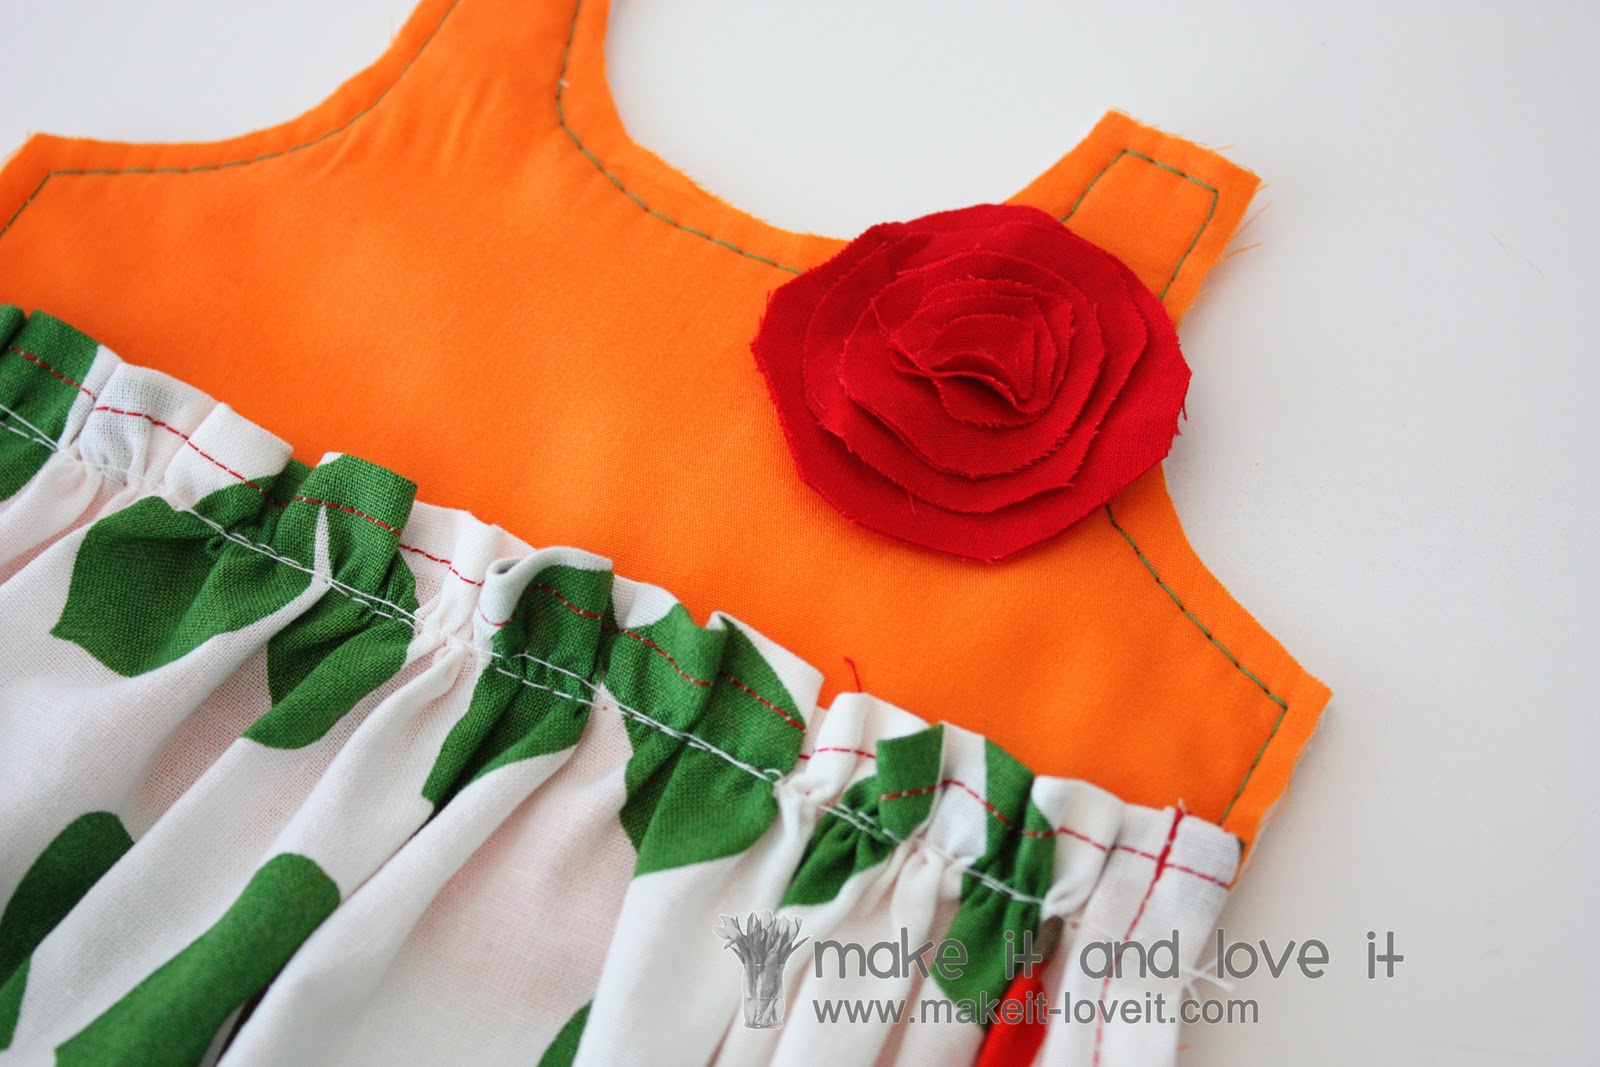
For the little dress, I only cut the top shape of the dress and sewed it together with felt. But for the bottom, I cut a large rectangle, hemmed under each raw edge……..
Then gathered it up and attached it to the top section.
(Need help with gathering/making ruffles? Click
here.)
And just for fun, I made a flower by cutting out some uneven circles, stacking them together, then sewing them right to the dress with a few stitches through the center of the flower. (Sorry, you can’t really see the center stitches.)
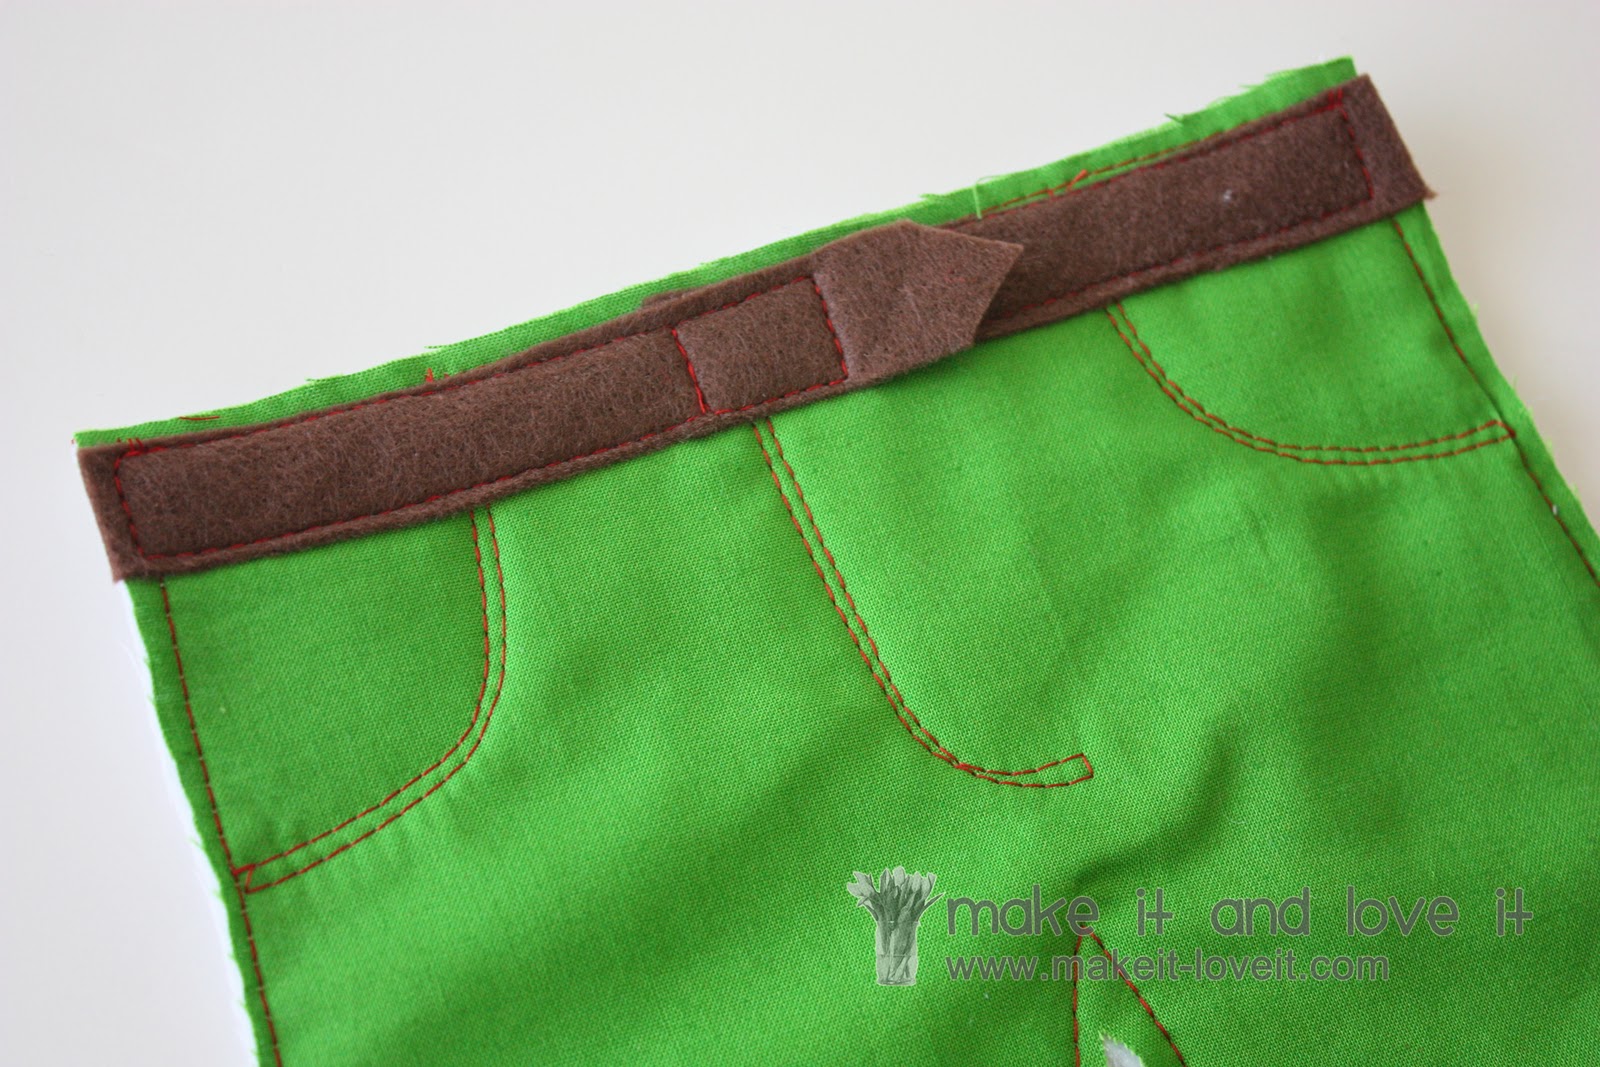
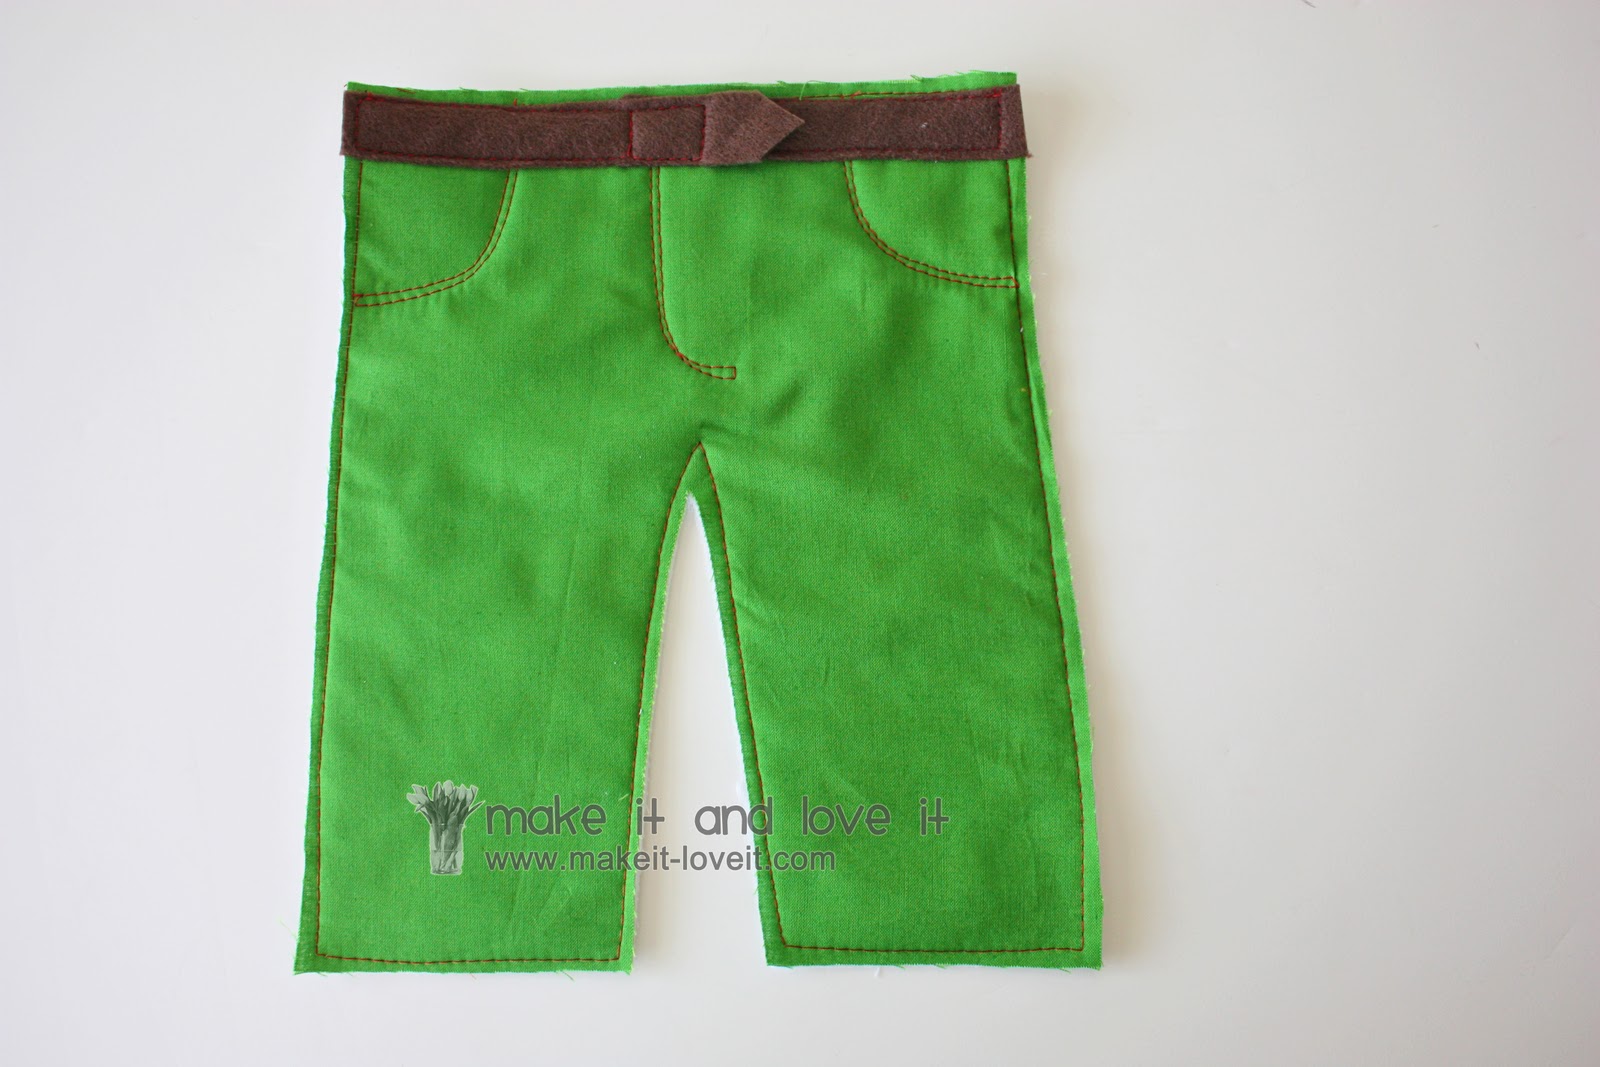
For the pants, I started with my basic shape…….
Then sewed in the pocket and zipper detail with contrasting thread. The belt is made from felt and is two different pieces, to look like it wraps around like a belt does…..with a little square (belt buckle?) sewn into the middle.
For the skirt/leggings, I started with a basic pant shape, then created a ruffle the same way as the ruffles above……..
Then attached the skirt to the leggings.
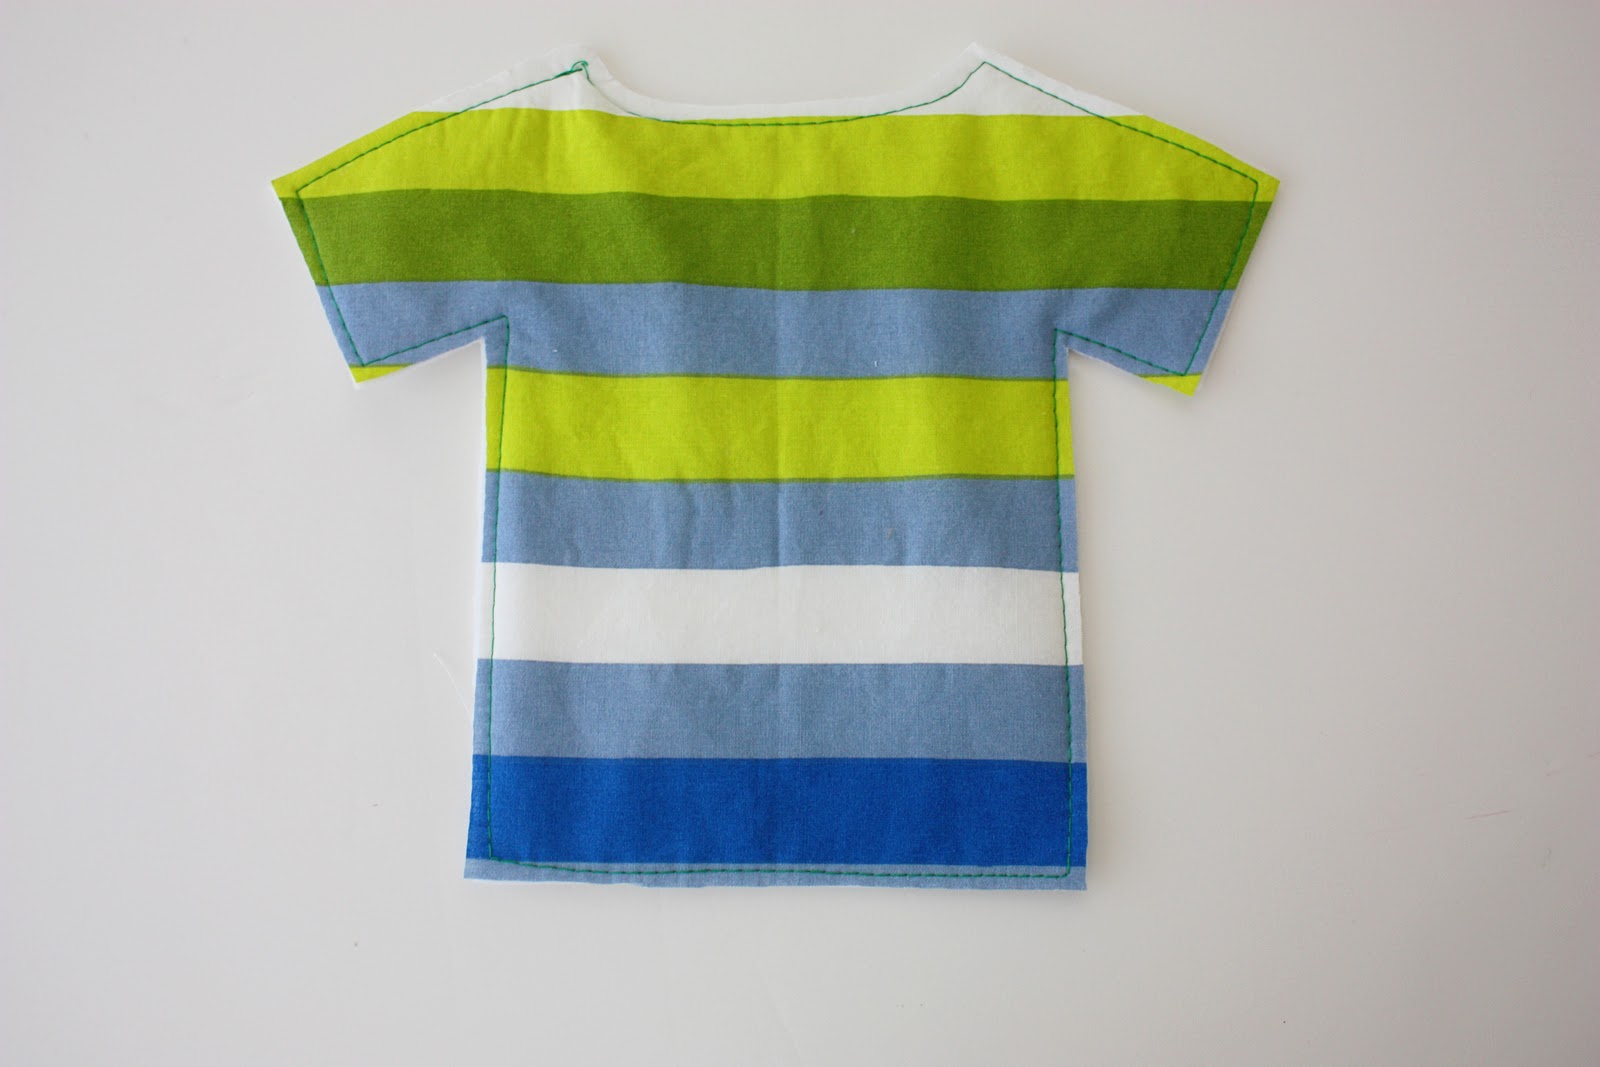
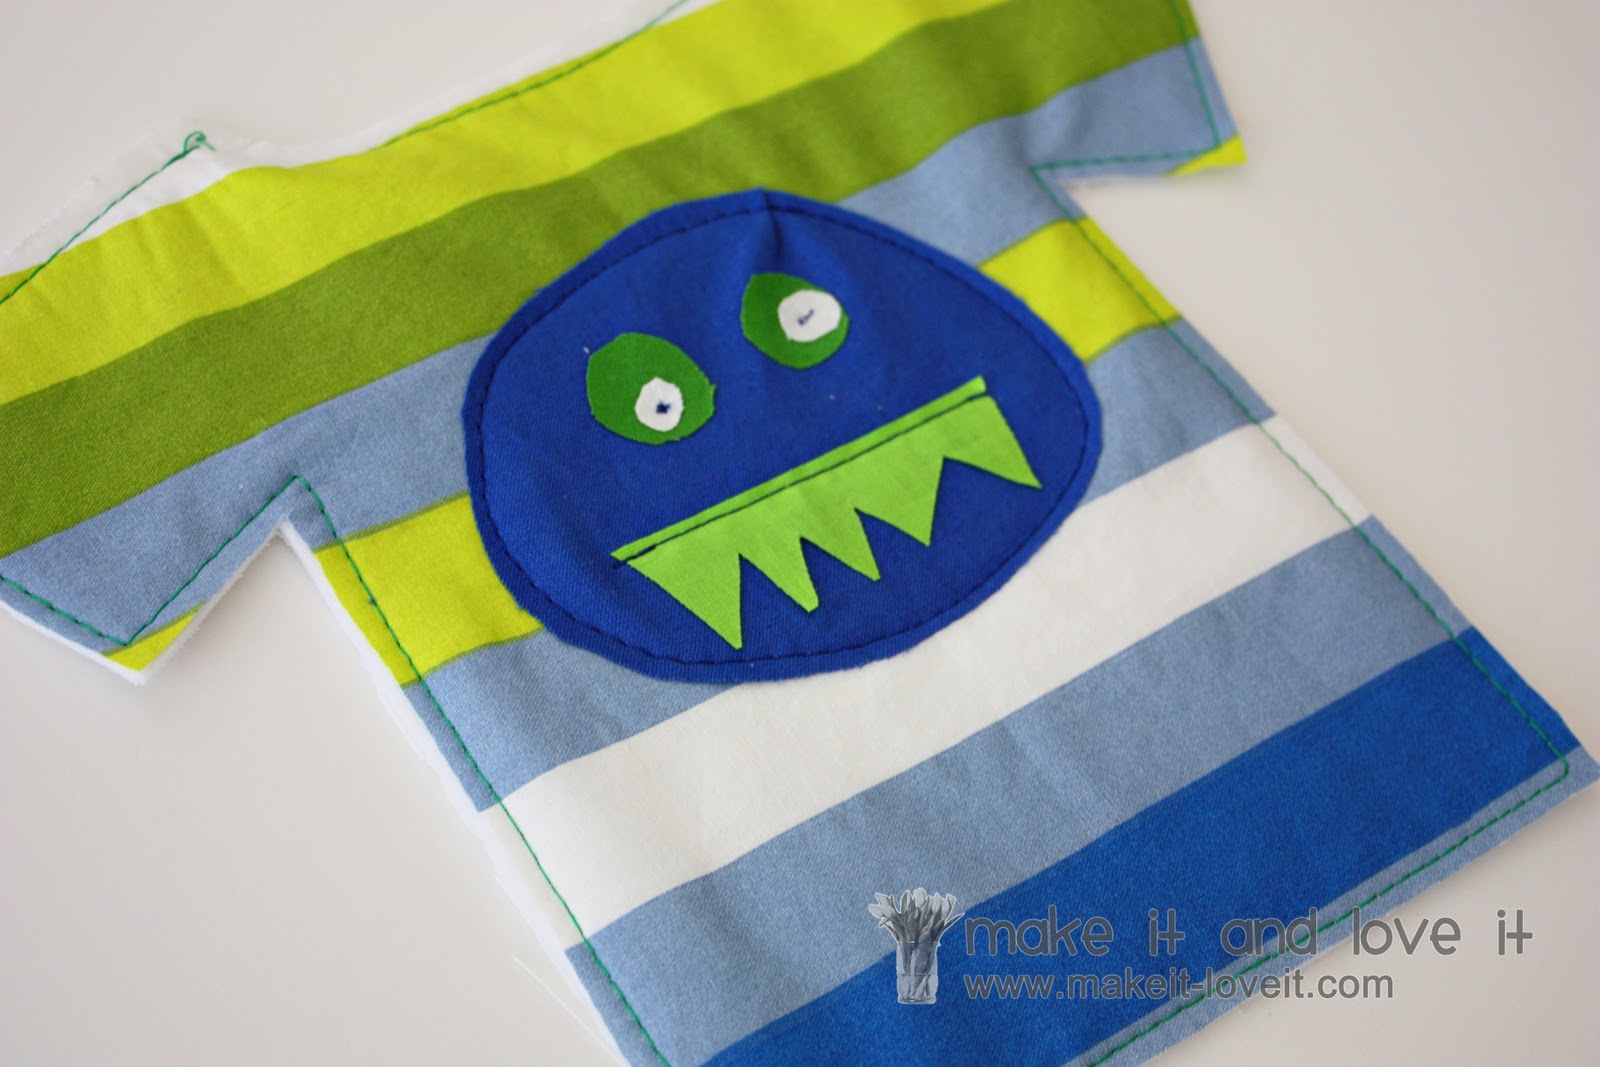
For the monster shirt, I began with the shirt shape…….
Then cut out a monster face from cotton scraps and sewed it right onto the shirt.
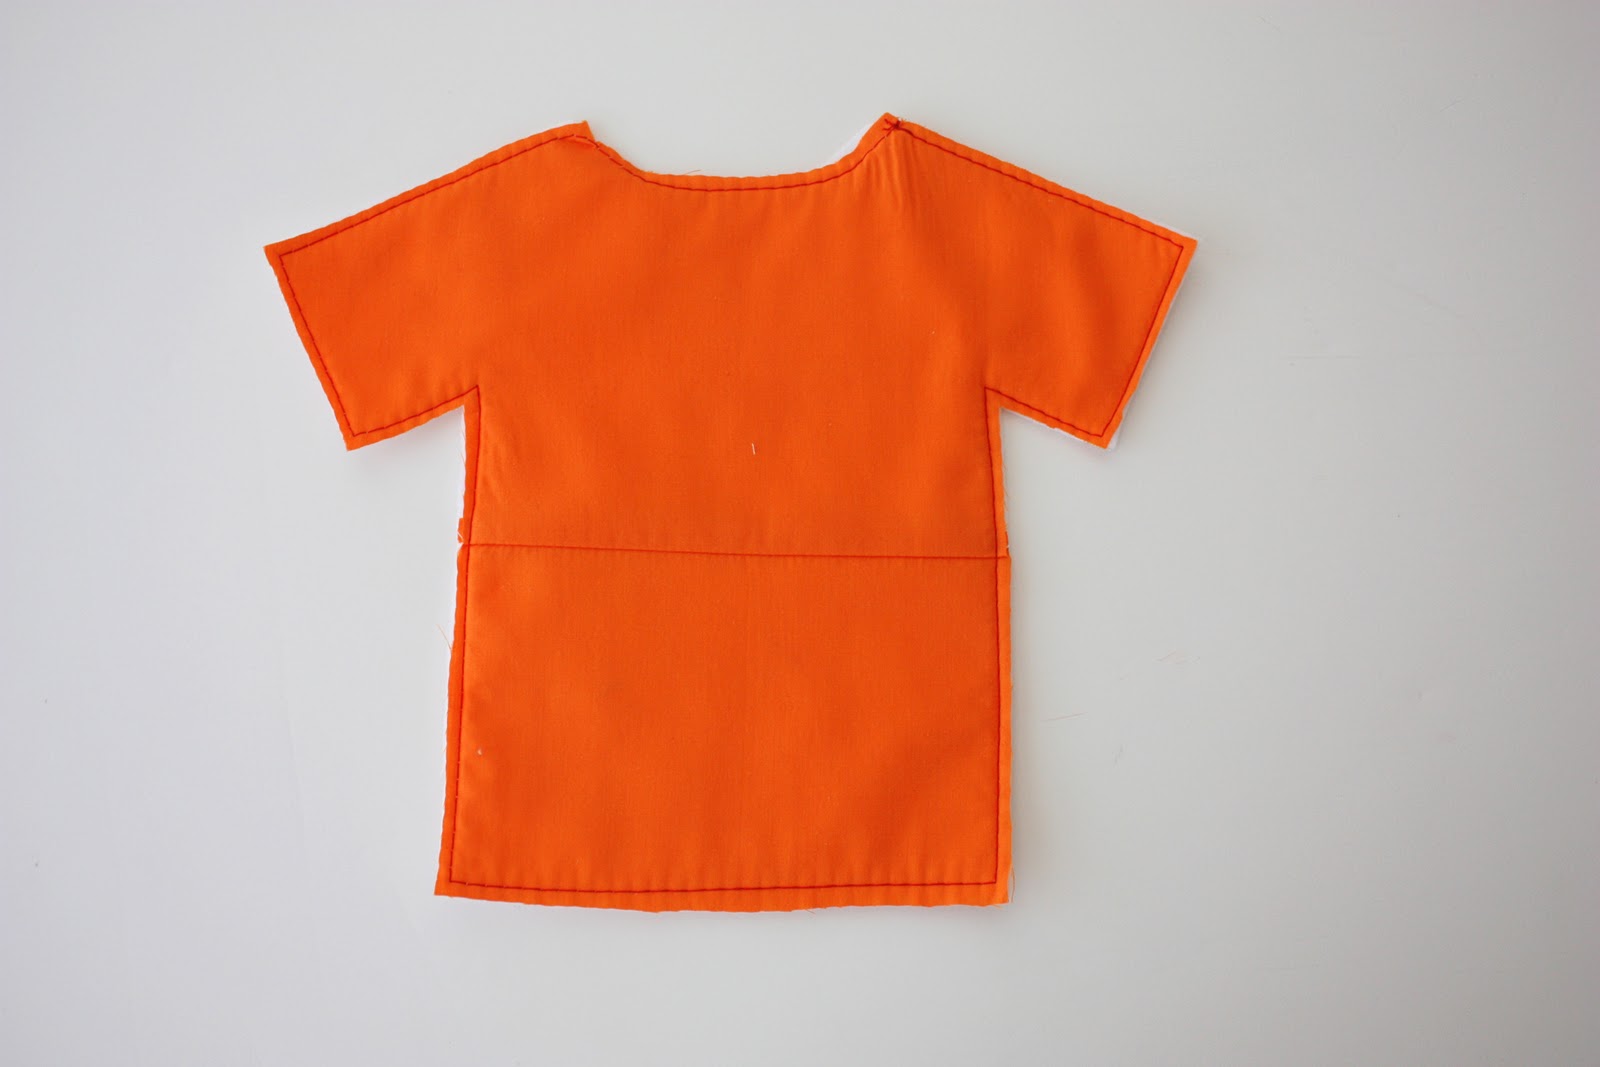
This shirt began the same way…….
But I just added strips of felt to the center of the shirt, the collar, and the ends of the sleeves.
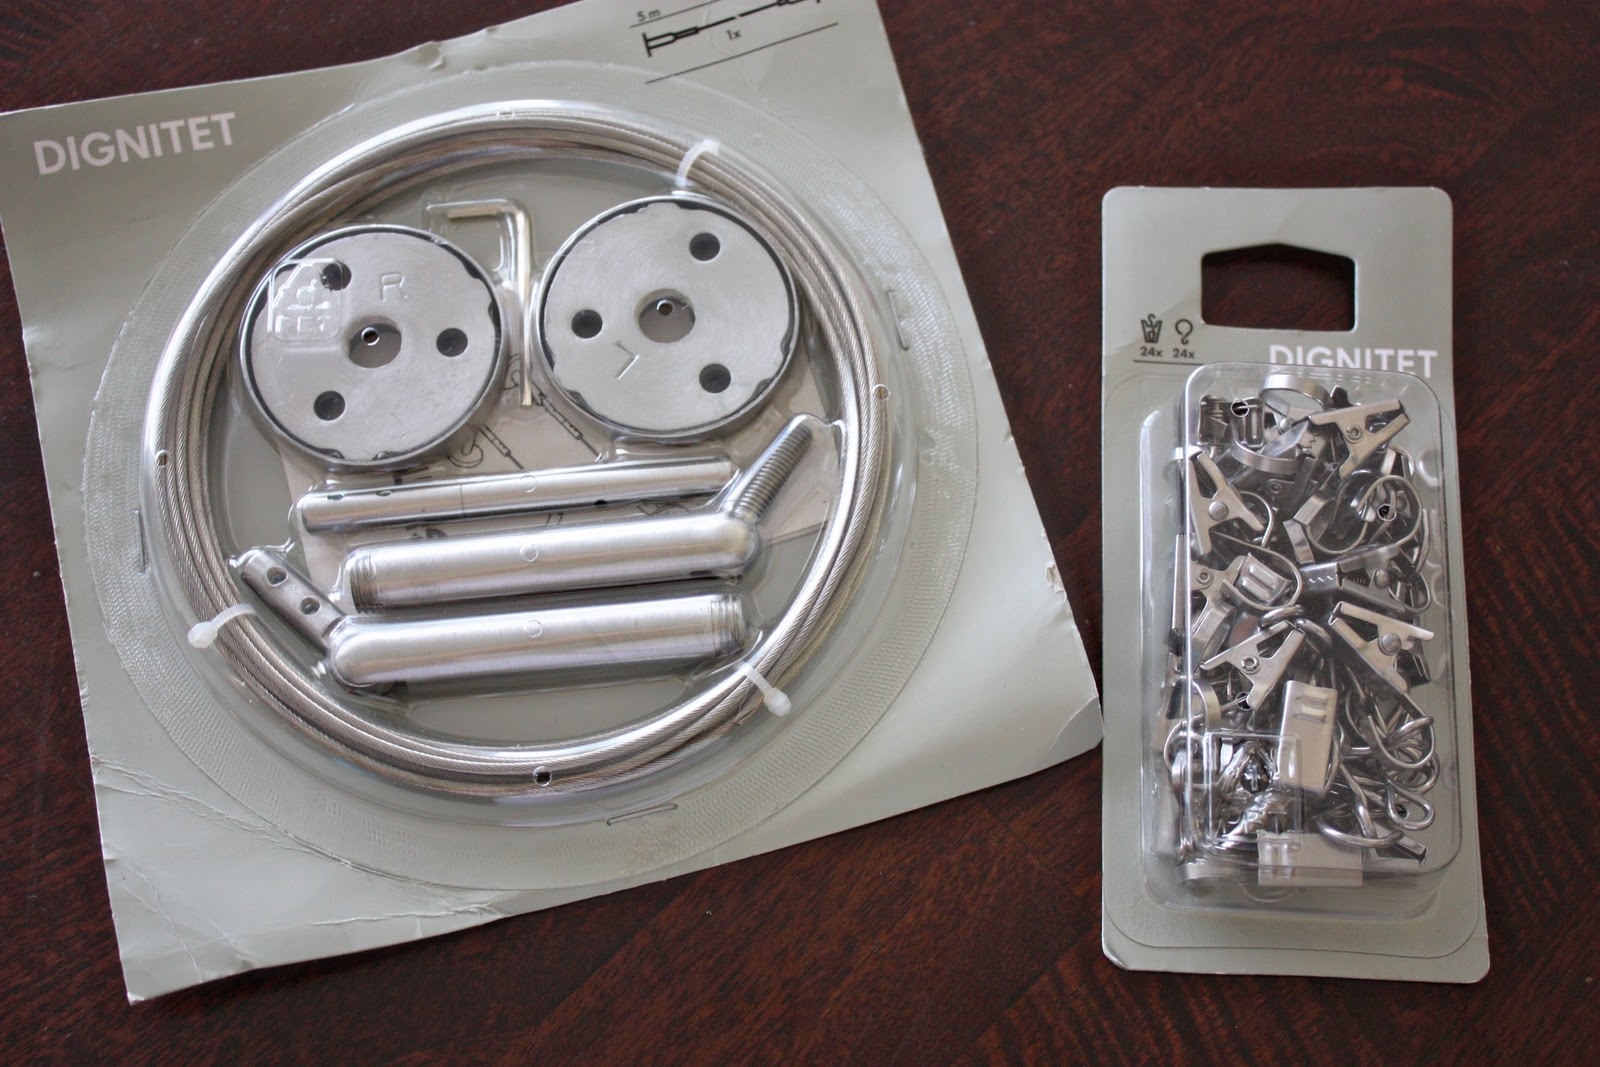
And in case you’re wondering, I got the wire and metal wall mount at Ikea.
Once the “clothesline” was hung……my little girl wondered if they were doll clothes that she could put on her baby. So we had to have a talk about the clothes only being decorations…..and not for playing with. She realized that there was no way to squeeze them over here baby’s head, so I think we’re good to go.
And my little guy, well, he could care less.
To see other projects in the Decorate My Home Series……click on the image below.