Hello Make It and Love It readers! It is Crystal, from Stitched by Crystal here, and it is so good to be back here to share a fun tutorial with you today!
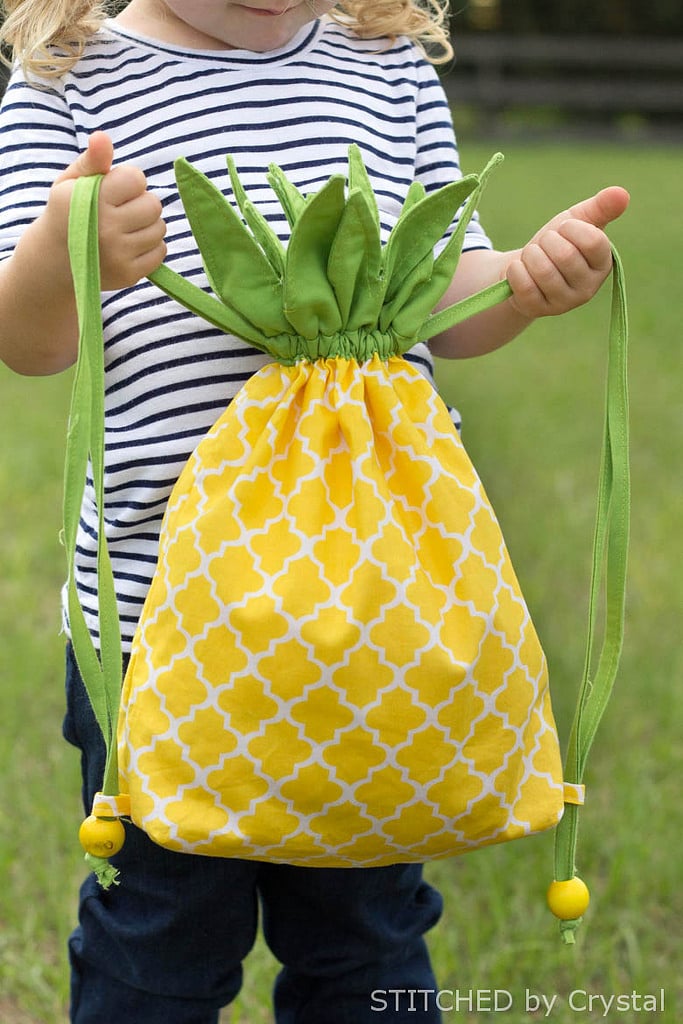
I love sewing little girl bags, and my two year old loves carrying them…so it really works out great! Last year I shared a fun little girl pleated purse with you guys and today I have a little drawstring backpack, that works for both little or big girls, inspired by my favorite fruit…..a pineapple!
This bag is really fun for little ones, but it really works for anyone. You could even make the straps longer and keep it for yourself! And it is so much fun to make! Wouldn’t a pineapple sack make a fun gift for giving too?
I am really itching for summer to get here and this sewing project really put me in a summery mood. It makes me think of someplace tropical and beach-y. Speaking of beach-y, this pineapple would be so fun to take with you on your next trip to the beach or pool…maybe even make one with a waterproof lining, like PUL, to keep all your stuff dry!
The bag construction is really easy. It’s a simple bag that cinches shut on the top when you pull the straps and it is fully lined. It is really easy to customize too. You could increase the dimensions a bit if you want a slightly bigger bag or sew some pockets into the lining if you are a pocket fan!
Want to make a pineapple backpack? Let me show you how!
To make a pineapple sack you will need:
Start by cutting rectangles for the bag. You will need two rectangles of your main fabric and two of your lining fabric that are 12″ wide x 13″ tall. Then cut 1.5″ squares from the bottom corners of all four of those rectangles like shown below.
Also from your main fabric color, cut a smaller rectangle that is 6″ x 1.5″. This will be used to make loops for the straps. Fold this rectangle in half lengthwise, with wrong sides together, lining up the long edges. Then open it up and fold the edges into the crease. Refold on the center crease and sew along the open side.
Cut the loop strip into two 3″ pieces. Fold both 3″ pieces in half and baste them near the bottom edge of one of your outer bag pieces like shown in the photo below. They need to be sewn 3/4″ above the corner cutouts and the raw edges should be lined up with the raw edge of the bag.
Next, cut two rectangles from your green fabric that are 2.75″ x 12″. These will be channels for the straps to go through at the top of the bag. Hem the short edges by folding them in towards the wrong side 3/8″ then another 3/8″ and then sewg along the folded edge. Then fold the bottom edge up 1/2″ towards the wrong side of the fabric.
Center one of the green strips along the top of one of your main bag pieces with the raw edges lined up. Sew along the folded edge to attach the strip to the main bag piece.
Repeat and sew the other green strip to the top of your second main bag piece, the same way as the first.
Place the two main bag pieces together, with right sides together. Sew along the bottom and sides, using a 1/2″ seam allowance. Do not sew the bottom corner cut outs.
Next, you will box out the corners. Do this by pinching the top corner of the cutouts on the front and back and pulling them apart, line up the side and bottom seams. The edges of your corner cut out should now be straight across, sew across the corner with a 1/2″ seam allowance.
Repeat with your other corner.
Next, place your lining pieces together, with right sides together. Sew along the sides and bottom, leaving a 3″ opening at the bottom of the lining, right at the center. Box out the corners the same way you did for the main bag pieces.
To make the leaves, you need four rectangles of green fabric that are 12″ x 5.5″.
Fuse interfacing to the back of two of the rectangles. Then place those two rectangles right sides together and sew them along one of short sides with a 1/2″ seam allowance. Press the seam open and lay the strip out in front of you, with the wrong side up. With a water soluble pen, draw a line across the strip 1.5″ from the bottom. Then draw a dot on the line that is 1/2″ from the edge on both sides. Draw your pineapple leaves on the line starting at one dot and ending at the other. The leaves don’t have to be perfect, after all no pineapple has perfect leaves!
Fold the strip right sides together on the center seam and sew the other side of the rectangles with a 1/2″ seam allowance, creating one continuous loop of fabric. Place the other 2 rectangles of fabric together, with right sides together, and sew the ends together the same way, So now you have 2 loops of green fabric, one with interfacing and leaves drawn on and the other without. With one green loop of fabric inside out and one right side out, slide the right side out one inside the other so that the two are right sides together. Line up the side seams and the raw edges of the two loops and pin them in a few places to keep them straight as you sew.
This part is a little tricky. You are going to sew the two loops together along the leaf line you drew. I find this is easiest if the side with interfacing and leaf lines are on the inside of the loop. Then you can sew along the lines working on the inside of the loop and it is easier to move your fabric around. Sew along the line until you get to the tip of a leaf, make sure your needle is down on the point, lift your presser foot, shift the fabric, and then continue sewing down the next edge of the leaf. Continue along the zig-zag leaf line, until you’ve sewn around the entire loop.
Now, trim the fabric above the leaves. Remember, you left 1.5″ below the leaves, you don’t want to trim that off. Trim straight across the top of the leaves close to your stitching and trim down into the “V” between the leaves as close as you can get without snipping your threads.
Turn the leaves right side out and use a chopstick or other small point to push out the tips of the leaves. Press the leaves with an iron and top stitch along the top.
Line up the raw edge of the leaves with the top of the main bag. Baste the leaves in place with a 1/2″ seam allowance.
With the lining inside out, place the main bag inside the lining and line up the top of the two bags. Sew all the way around the top with a 1/2″ seam allowance.
Turn the bag right side out through the hole you left in the bottom of the lining. Tuck the raw edge of the opening in and stitch it closed.
Tuck the lining down into the bag and press with an iron.
Now all you need are straps! For the straps, you can use either double fold bias tape or a thick string like a parachute cord (which you can get in the jewelry making section at most craft stores). If you are using store bought bias tape, you will want to sew it shut along the open side.
To make your own bias tape, cut your fabric into 1.5″ strips. For longer straps, you will need to sew two strips together. For toddler sized straps, the width of your fabric will work (about 44″) for the length of your straps. Fold and sew the strips the same way you made the loops in the beginning (fold in half, then fold edges in to center crease, then refold in center and sew).
And real quick, for more on Bias Tape, check out this quick video…
Now, cut two straps to the length you want (44-50″ inches for toddler, 60″ for children and 70″ for adult), Attach a safety pin to the end of one strap and feed the strap through the channel at the top of the bag. When you get to the end of the channel bring the strap around to the other side of the bag and feed it through the channel on the other side of the bag.
Repeat with the other strap, starting on the opposite side.
Attach the straps to the loops on the bottom of the bag. To do this, feed one end of the strap through the loop and leave the other end out side the loop. Knot the two strap ends together.
Another option for attaching the straps is to use big wooden beads. Feed both ends of the strap through the loop, then through the wooden button, and then knot the ends of the strap.
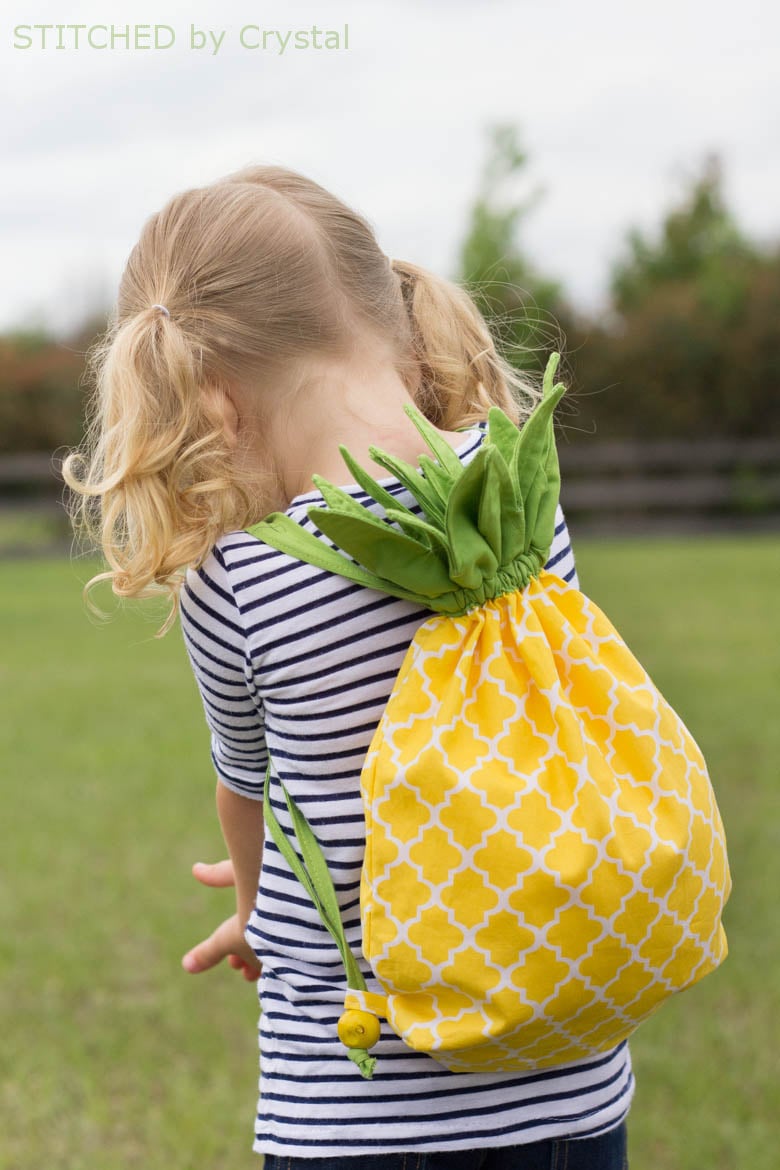
Your pineapple bag is DONE!
Now fill it up with all your favorite stuff, or give it to your little one to fill, and you are ready for some summer adventures!
Want more fruit bag inspiration? Check out these fun fruity zipper purses and pouches I made over on my blog!
See you next time!
-Crystal
Check out Crystal’s blog here. Her darling shop here. Follow her on Instagram here. And her Pinterest page here.

Hi, I’m Ashley—the DIY-enthusiast behind this crazy blog!