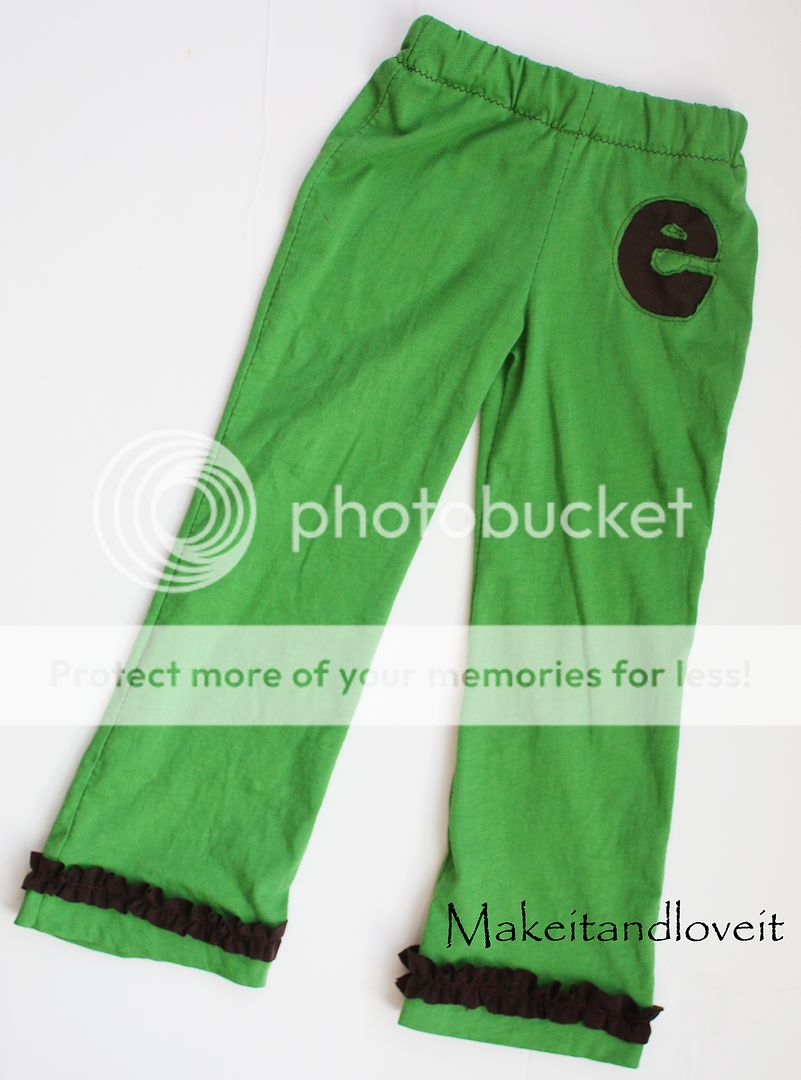
Free clothing…..nothing better.
All set to go, with a nice little initial “e” for my little lady.
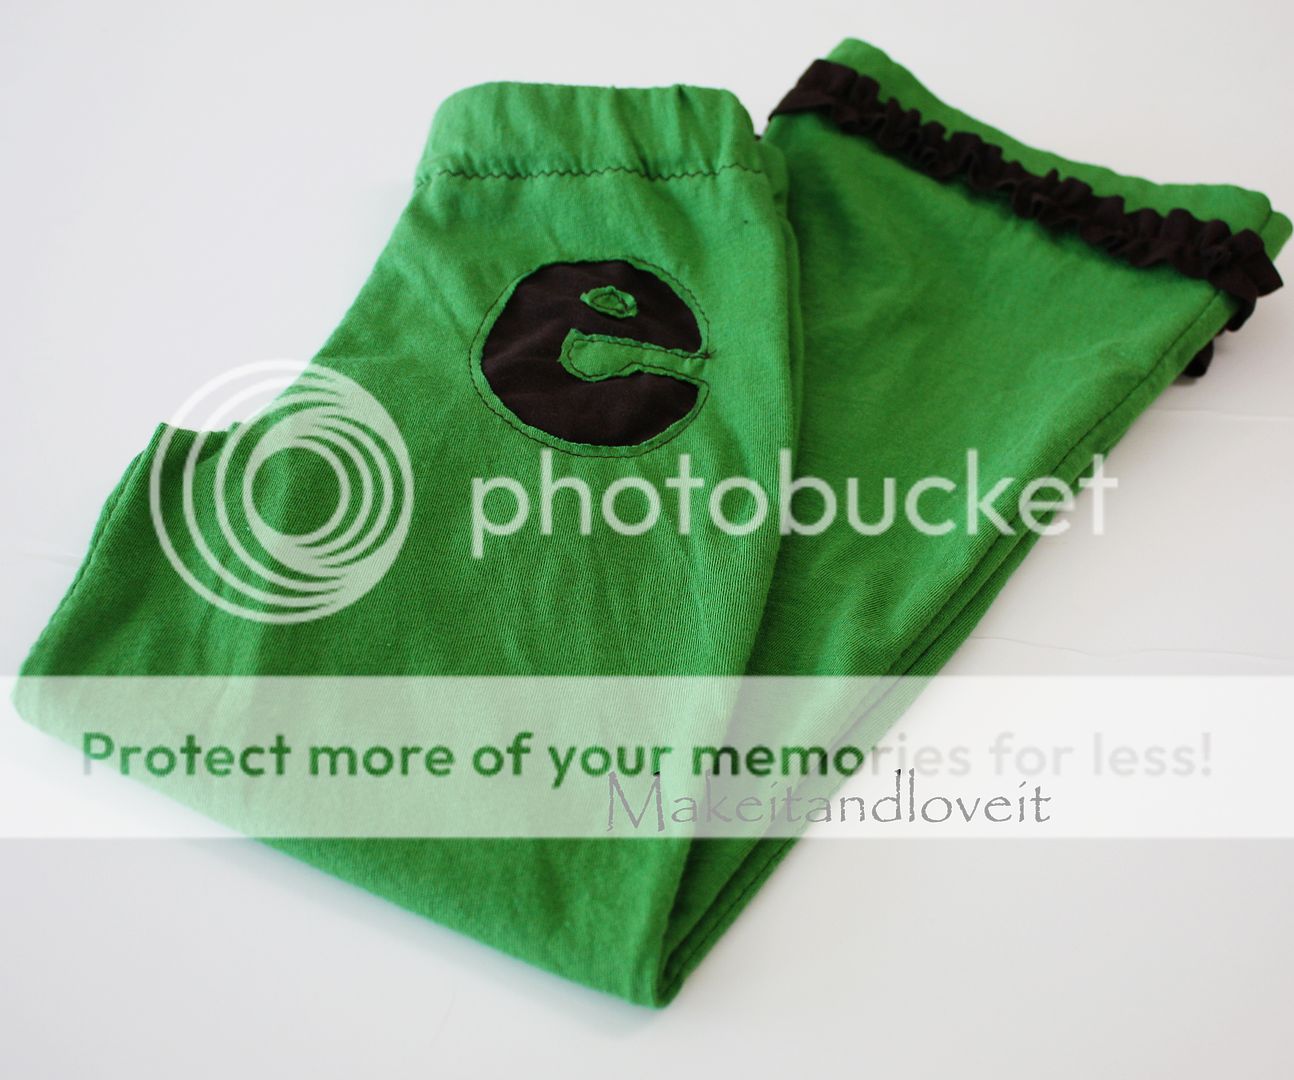
And a sweet ruffle……oh, just because.
Here’s How:
I will go ahead and show pants from start to finish……….the way that works best for me.
First, find an old shirt that you thought you’d love but never fit you right. That’s what I found. Still makes me mad that the dang shirt never looked good on me. Wasted money. :)
(Or choose any other old shirt or pants.)
I first found a pair of knit pants that fit my little girl and turned them inside out to use as a pattern. I cut the front pieces and the back pieces at the same time, from the two layers of the shirt. (If it helps, trace your already made pants onto some paper first, that you will then use as a pattern on your new fabric. Depends on what you’re comfortable with.)

Now you’ll have two front pieces and two back pieces. (Mine are stacked on top of each other.) Make sure they are the same length……to help you with putting both together more easily later on. And also make sure to add enough at the top to make a casing for the elastic and enough at the bottom for a hem.

Now, if you’re going to do something similar to what I did, now is the time to do it. I grabbed one of the front leg pieces and made the letter “e” with paper and then laid it on top of the fabric. I positioned it a little above where the crotch section is, so that it would sit a little lower than the hip when finished. You just need to visualize where you’d like it.

Then I carefully cut it out and added a little chunk for the inside of the “e”, just to help the shape a bit.

Then, I put some fabric behind the “e” and carefully and slowly stitched around the entire letter. Don’t get frustrated at this point. Sometimes the fabric may seem to bunch up, but just turn your wheel (on the side of your machine) with your hand to manually move your needle around those really hard turns or curves. You’ll get it.

This is the view from the back.

Now, if your skipping the letter, join in again here. You’re going to sew your two front pieces together with right sides together. You’re just going to sew from the top of the two front pieces, down the curve. Then stop.

Do the same to the back pieces. Here’s what both the front and the back look like from the front.

Now, you’re going to place the front and back pieces together with right sides together. Sew from the center of the crotch and down one leg. The turn it the other way and sew from the crotch down the other leg. This will help ensure that your crotch seams line up. Then sew along both sides.

Turned right side out, here’s what you have so far.

I used 1 inch wide elastic for the waist, inside my casing. So I folded down the top 1/4 inch and then another 1 1/4 inch and sewed all the way around, leaving a one inch gap.

Then I measured the length of elastic that I needed around my little girl’s waist and added an inch for overlap. Then I put a safety pin in one end of the elastic and threaded it through my casing. Then I overlapped the elastic one inch and sewed it into place.

Then I sewed the casing closed.

Now, I cut some one inch wide strips of knit, to make my ruffles. As a good guide, measure the length of the bottom of your pants all the way around…..and then double that length to make a good ruffle. So if your pants are 14 inches all the way around the leg, make a strip of fabric that is 28 inches long by 1 inch wide. Make sense? If you double the length, it will give you plenty of ruffle.

Then sew a basting stitch (really long stitch length) along he center of your strip of fabric. Leave long tails of thread. Then pull on the top thread to gather your fabric.

Then evenly distribute the ruffles and pin all along the bottom of the pant legs.

Then return your sewing machine to a normal stitch length and sew right on top of the center seam, attaching your ruffle to your pants. Remember, with knit, you don’t have to hem the ruffle or turn under the edges. It won’t fray.

And now……..you’re done.

Hi, I’m Ashley—the DIY-enthusiast behind this crazy blog!


