So happy to have Crystal from Stitched By Crystal here with us again today! Her project today has me excited to dig through my fabric scraps…..and even more so to attach one of these darling Bow Bookmarks to a new book I’ve been wanting to dig into! My 8-year-old Elli is going to want one too….I just know it. :) Such a pretty page saver—thanks Crystal!
. . . . .
I am Crystal, from Stitched By Crystal, and I have a really quick sewing project that will be great for back to school!
It seems like summer just started and it is already time for back to school! I think the school supplies have been in stores now for over a month, that always makes summer feel so much shorter!
These cute bow bookmarks would be a great gift to help your older kid finish up their summer sewing before school starts! Or they would make perfect teacher gifts, or great gifts for any book lover! I think I will be keeping a couple for me too, we have got a beach vacation coming up and I can’t wait to squeeze in some reading!
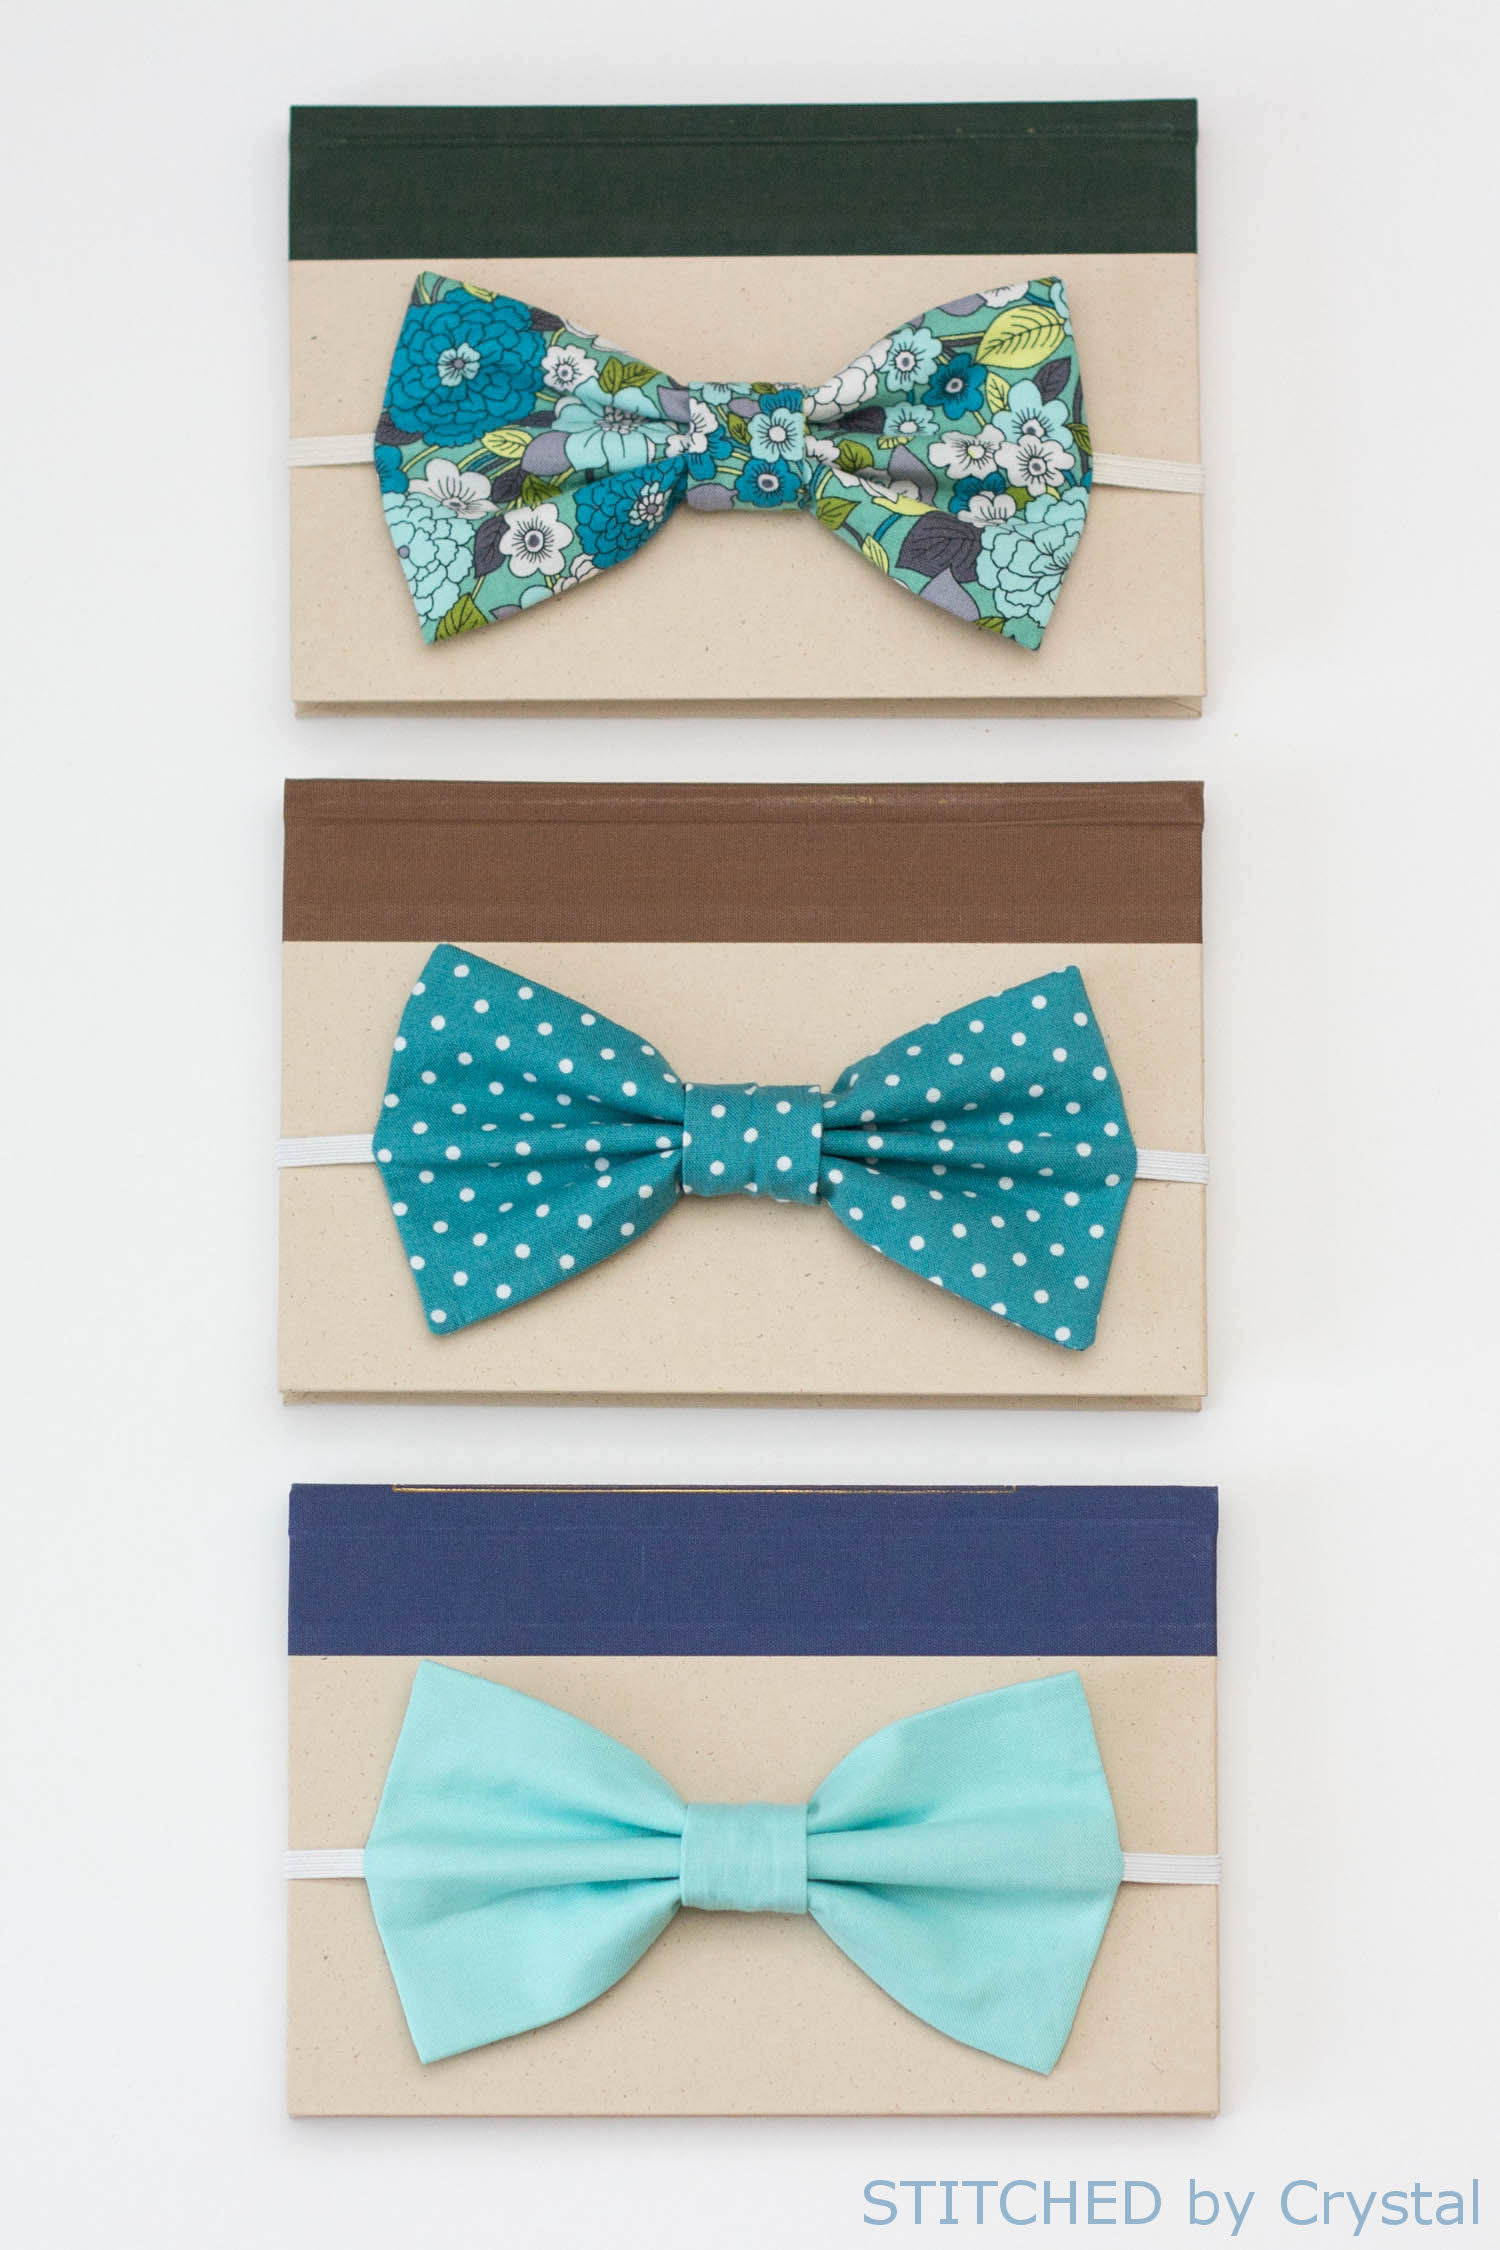
The bookmarks are an oversized fabric bow with a small piece of elastic attached. When you need to hold your spot, simply stretch the elastic around the pages. The elastic keeps your spot in the book, and the bow looks really cute on the front!
Want to make a big bow bookmark? Great!
You will need….
***Also, take a look at this Sewing Terms 101 post, for additional help.
Cut your fabric into one 8”x 7” rectangle and two 2” x 4” rectangles. Cut your elastic to 10”, I find this is a good size for most average sized novels; you may want to cut it bigger if you plan to use it on large books. Cut your interfacing into a 7” x 6” rectangle and fuse it to the middle of the wrong side of your fabric, there will be ½” of fabric on all sides around your interfacing.
Fold your rectangle in half, right sides together, matching the 7” sides. Sew from one end of the 7” side with a ½” seam allowance, stop sewing and backstitch before you get to the middle. Sew again from the other side and stop about 1.5” from your other stitches. This will leave a hole for turning your bow. Adjust the bow so the seam is in the center and press the bow with the seam open, you will want to use a pressing cloth if your interfacing is not woven.
Feed one end of your elastic through your bow, line up the end of the elastic with the edge of the bow and pin it in place in line with the centered seam. Sew along the edge with a ½” seam allowance, making sure to catch the elastic when you sew.
Push the other end of the elastic down inside the bow and line up the end of the elastic with the edge of the bow and pin it in place in line with the centered seam. Sew along the edge with a ½” seam allowance again, catching the elastic when you sew.
Turn your bow right side out through the small hole you left open. Use a chopstick or small tool to press the corners out. Press the bow then hand sew the opening closed with a ladder stitch. (More hand stitching tips here.)
Take the two smaller rectangles and place them right sides together. Sew along three sides with a ½” seam allowance as shown below. Trim the seam allowance and clip the corners. Turn the rectangle inside out and press.
Fold the small rectangle around the elastic of the bow and sew the short ends together. Turn so that the raw seam is on the inside.
Pull the bow through the loop you just made. It’s easiest to start with one corner. Center the loop on the bow and adjust the bow until you like the look. It should stay in place pretty well, but if you would like, you can secure the loop in place with a few hand stitches at the back.
Your bow bookmark is done! Stretch it around your book and get to reading. Or, my daughter thinks they make great hair bows (but I don’t trust her fashion judgment, she is only 3!)
Good luck!
-Crystal
Check out Crystal’s blog here. Her darling shop here. Follow her on Instagram here. And her Pinterest page here.
***ALL contributor posts by Crystal, can be found HERE.
. . . . .
Looking for more??
If the men/boys in your life would like something a little more plain,
try making one of these Stay Put Elastic Bookmarks.
And why not sew a cute bag to carry all of your favorite books (and whatever you’d like?):

Hi, I’m Ashley—the DIY-enthusiast behind this crazy blog!