Home » DIY Tutorials » DIY Crafting » Crafting: No-Sew » Autumn “FALL” Blocks
Autumn “FALL” Blocks
October 13, 2009 - By Ashley Johnston 36 Comments
Do you have an itch to make some
“fall” blocks?
How about making them
a little more 3-D?Kind of adds some
different texture to your autumn decor.
How?
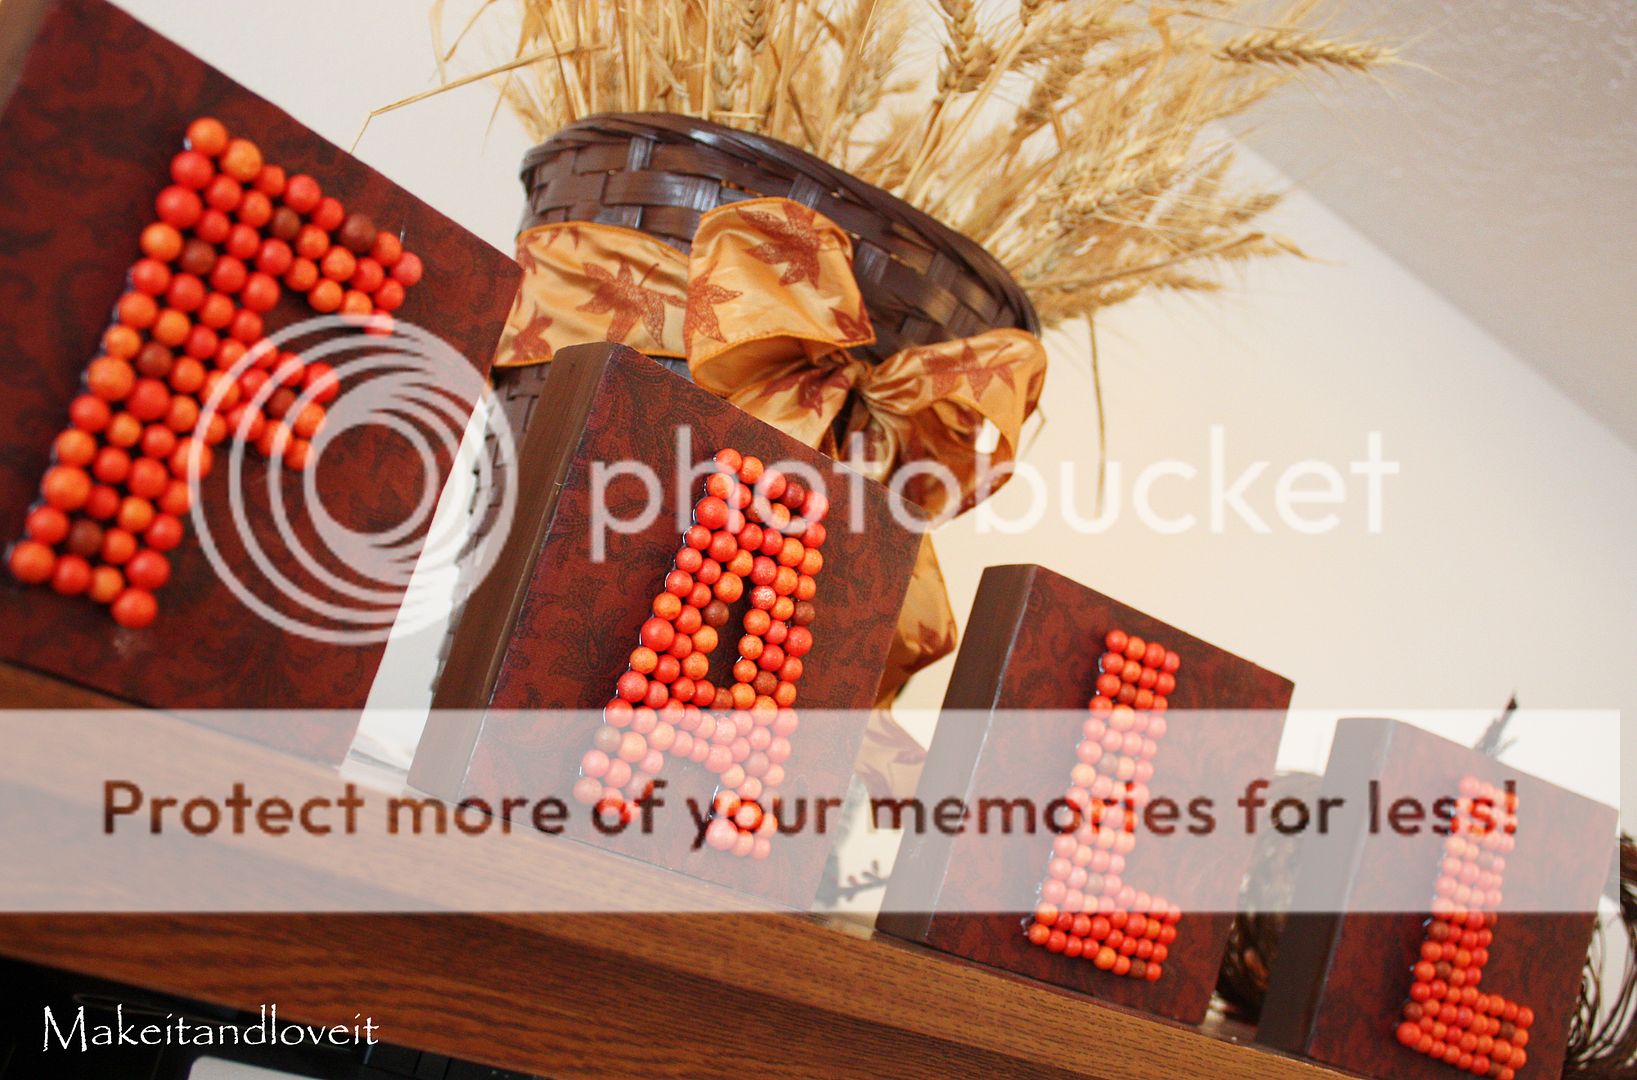
Gather 4 wooden blocks and sand them down, ridding yourself of any splinters or sharp edges.
Then paint them with a matching color to the fabric you have chosen. Allow to dry completely.
Then cut out four pieces of fabric just a bit bigger than the actual blocks. Then apply a layer of Mod Podge directly to the blocks……
…..and then lay your piece of fabric on top. Press firmly and smooth out any wrinkles.
Then trim around your edges and then add another layer of Mod Podge on top. Make sure to use plenty…..and have it really soak in to the fabric, hardening it in place.
After it dries completely, lay some letters down (I printed some out on the computer) and trace around them with a pencil.
Then start applying decorative balls, sequins, seeds, itty bitty pinecones, or small objects of any kind to your blocks with hot glue. Try to stay inside your traced lines, to give smooth edges to your letters.
And that’s it.You’re all set to add another item to your decor.
I need to start giving this stuff away. I am ending up with too many autumn projects that I just have to try. :)