It’s SEPTEMBER!!! Does that feel as weird for you to read as it is for me to write? Crazy. But, even the trees here in hot Oklahoma must know autumn is on its way because I have seen some leaves changing color. (Which, hello? The weather has still been blazin’ hot……how is that even possible?!!)
But since my calendar says it’s September, that means (in my head), that it’s time for Autumn decor! Which is perfect timing because as a Michaels Maker, our challenge for September was PUMPKINS! This was a fun challenge since pumpkins can be used for Autumn AND Halloween…..both of which I love!
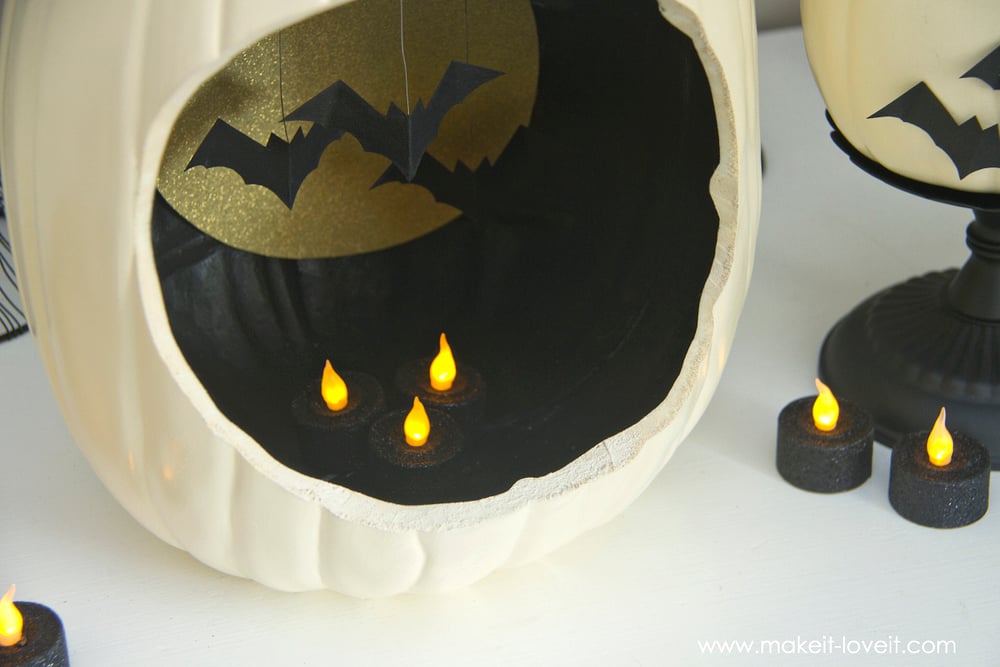
What I decided to do, was create a little nook in our new place for some pumpkin decor, which is a fun change of pace. And not only pumpkins……but I added BATS! Some hanging bats inside one pumpkin and some bats flying across another. Now we’re ready for September! :)
I placed some mini battery operated flickering lights inside the hollow pumpkin, so that the hanging bats would kind of glow and give a nice contrast against the glittery moon!
It’s especially cool at night, when everything glows!
Each of the bats are attached to some thin wire, and hang from the top of the inside of the pumpkin.
And those flying bats are folded (to appear like they’re flying) and attached to the outside of the other pumpkin.
Together, they make some fun decor to set out for a few autumn months!
Want to make some too??
SUPPLIES:
Draw a circle on the outside of your craft pumpkin, the size you want your opening to be. Use your utility knife to cut cut through your line and remove extra piece. (We used a wood burning tool that has a knife attachment….melted like butter!)
Paint the inside of the pumpkin with black acrylic paint.
Create a bat shape and cut out some bats from your black card stock. (You can always google “bat shape” or if you want my exact shape, I can scan it in….just let me know!) Then use a bowl to trace around for a circular moon and cut that out as well.
Fold the bat right down the center and then bend its wings down, creating the look of a flying bat.
Along the back of each bat, attach a piece of wire with some hot glue.
At the other end of each piece of wire, curl it around your finger to give the wire more surface area.
Then glue it down to the inside top of the pumpkin. Wait for it to dry, be sure it’s placed where you want it, add a bit more glue for security, and then let dry.
Then add some little lights to the inside of your pumpkin and watch your bats glow!
The bats that are on the surface of the pumpkin are attached with little dots of hot glue…..and were cut and folded the same way as the pumpkin above!
Place on your shelf/table/counter……and ENJOY!
-Ashley
Want to see a few other pumpkin decorating ideas??
 Loading InLinkz ...
Hi, I’m Ashley—the DIY-enthusiast behind this crazy blog!