I’m sharing today’s project over at Skip To My Lou, as part of their Summer Craft Series. A whole summer of different bloggers sharing different craft and recipe ideas……so be sure to stop by and check out all the fun and exciting ideas to try during your summer break!
. . . . .
My kiddos have been out of school, enjoying their summer break for about 3 weeks now. And at first, we were spending lots of time outside on bikes, at the park, in the backyard, etc. But it has really heated up, so I realized we needed more indoor activities to do during the hottest times of the day, because woweeee, this Oklahoma heat is really kicking in! :)
So, I gathered up some really simple craft supplies that I already had on hand and let them create these darling little harmonicas that I have seen in several places around the web….but tweaked them a bit. And let me tell you — these were a HIT! And maybe that’s because children like anything that makes noise…..haha! But actually, they’re not bad at all!
They only require a few supplies and decorating is completely optional……but that was my kiddos’ favorite part!
And then — the fun began. Blowing on their little harmonicas took a little trial and error to find the sweet spot….but once they found it, these little suckers actually WORKED! All 3 of my older kids (ages 4-8) were able to master it and had so much fun! You can blow hard and soft, which changes the pitch of the sound and you can squeeze the ends of the sticks, which also adds variation to the sound. Pretty cool concept!
And believe it or not…..it’s just two craft sticks, a toothpick, some rubber bands, and a strip of paper in between the two sticks, which helps to create the sound. HOWEVER, we ditched the paper idea (which is what most people were using around the web), because it would get slightly wet from saliva….and then the paper would rip. Bummer. So, I found a simple solution, which I’ll share down below.
And in case you’re doubting they actually work, just think — the concept is just like placing a blade of grass between your fingers and blowing. (Did you ever do that as a kid?? Same idea.) But they really do create sound…..and I was pleasantly surprised!
These harmonicas are such a great way to beat the heat in the hot afternoons this summer and create something that the kiddos will actually enjoy making. I know mine did!
Want to make a few with your kids this summer?
Of course you do! :)
SUPPLIES:
First of all, gather up your supplies.
However, after trying these with regular paper, we realized that inevitably, the paper would get slightly wet from little mouths blowing hot air at it……and the paper would get soggy and tear. Such a bummer for the kids.
So, I started thinking about what I could use that was waterproof but was also really thin and would vibrate really well with air being blown at it. Then, I unwrapped a granola bar and gave the thin wrapper a try. And YES, it worked REALLY WELL! :)
You can still make these with strips of paper, especially if you just want to give it a try……but if you want them to last, give the wrapper a try (or something similar).
Cut the wrapper into thin strips that were slightly more narrow than the width of the craft sticks. However, be sure that the strips are nice and flat. Don’t use pieces that are crumpled or bent or the air won’t be able to pass through it when you blow air through.
Then cut the strip so that it’s a bit shorter than the length of the craft stick.
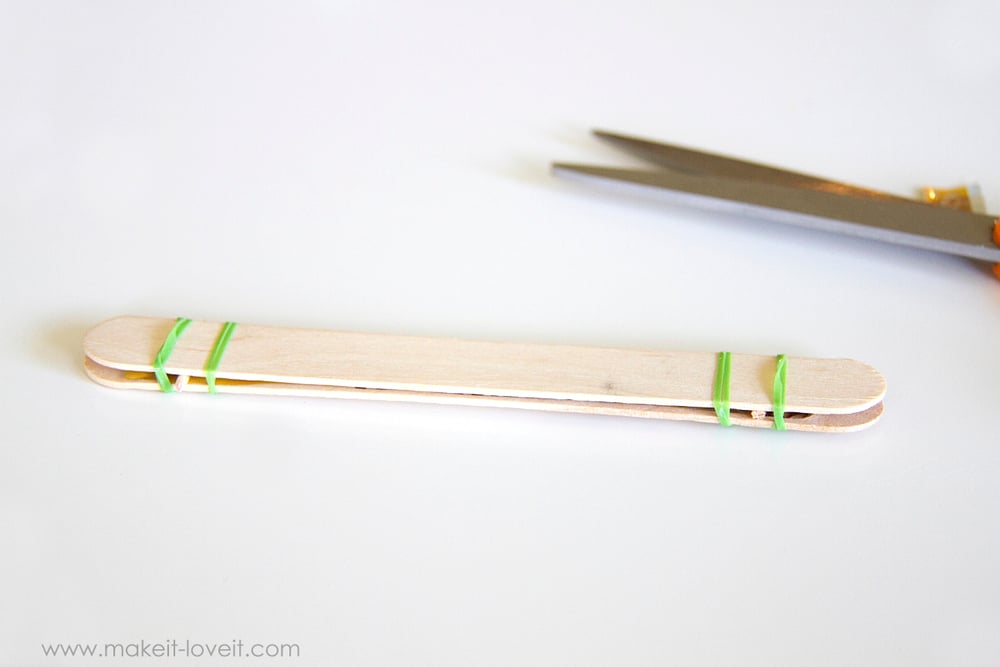
Cut your toothpick in half and place at the two ends of the stick, making sure to place the toothpick on top of each end of the strip of wrapper.
Place your other craft stick on top.
Then wrap a rubber band around each end, holding the toothpick in place and also keeping the sticks firmly together. I actually found the best spot to add the rubber band was equally on both sides of the toothpick.
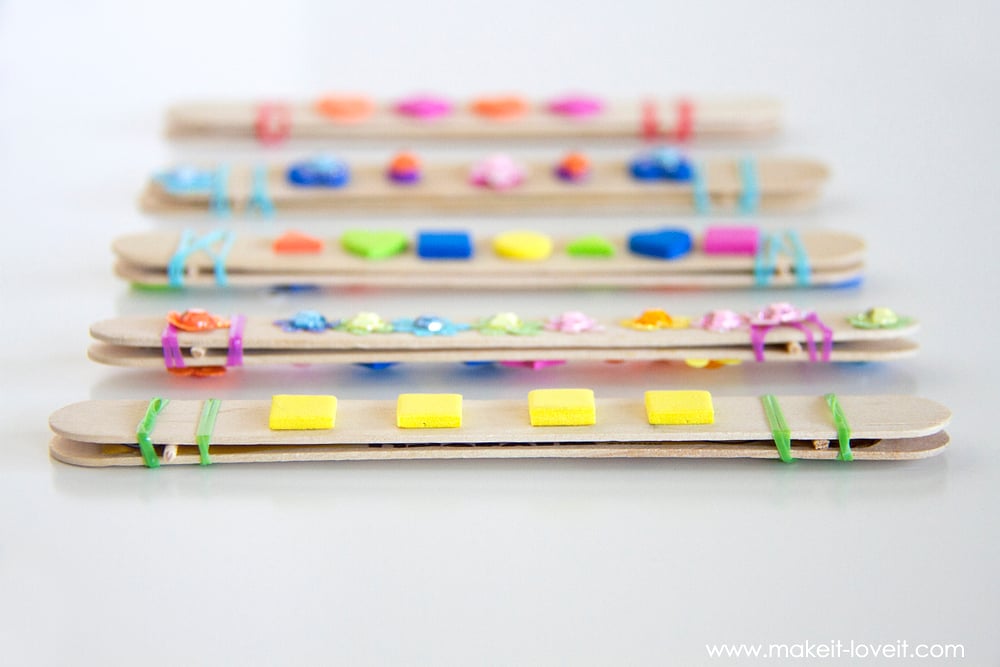
Now, you can either stop here….or you can let the kids have a little more fun with it and let them decorate their harmonicas.
And that’s it! Time to start experimenting with blowing through the sticks, where to put your mouth, and how to hold the harmonica.
Now, some sticks are a little uneven so they might be bowed and not let enough air between the two sticks. If that’s the case, pinch the ends of the sticks just slightly to let in a tiny bit more air. If you pinch too hard at the very ends of the sticks, your gap will be way too wide (like the image below). So just pinch it ever so slightly and experiment with it!
Or maybe the gap is too wide in the middle…..and if that’s the case, pinch on the inner side of the rubber bands to tighten the gap and blow to try it out.
Just play around with it and let the kiddos see if they can figure out what creates the sound, why it works, and how to change it up.
And enjoy!
-Ashley
. . . . .
Need some other craft ideas for this summer? Try a few of these simple ideas!

Hi, I’m Ashley—the DIY-enthusiast behind this crazy blog!