Make It and Love It

Free and Inspirational Do-It-Yourself Crafting/Sewing Tutorials

  • Home
  • Tutorials
    • Clothing
    • Home Decor
    • Children
    • Baby
    • Re-purposing
    • Accessory
    • Sewing Tips
    • Kid Craft
    • Holiday
    • Home Improvement
    • Gift Ideas
    • No Sew
    • Misc.
    • Round Ups
    • Make-A-Cake
    • Top Tutorials
  • Shop
  • Recipes
    • Appetizers
    • Beef
    • Beverages
    • Breakfast and Brunch
    • Chicken and Turkey
    • Desserts
    • Dinner
    • Eggs
    • Gluten Free
    • Pasta
    • Pork
    • Salad
    • Sandwiches and Burgers
    • Seafood
    • Side Dishes
    • Soups and Stews
    • Vegetables
  • My Book
  • FAQS
  • Archives
  • Contact
    • General
    • Advertise
    • Orders
    • HOI Friends
      • Ashley Johnston
      • Kim Byers
      • Lindi Haws
      • Mandy Beyeler
      • Mariah Leeson
      • Michelle Stewart
      • Randi Dukes
      • Tammy Mitchell
      • Tauni Everett
      • Toni Roberts
      • House of Ideas
  • About
Home » Crafts, Sewing, & Home Decor » Home Decor » Decorate My Home, Part 13 – Hemp Ball Accents

Decorate My Home, Part 13 – Hemp Ball Accents

March 8, 2010 by Ashley


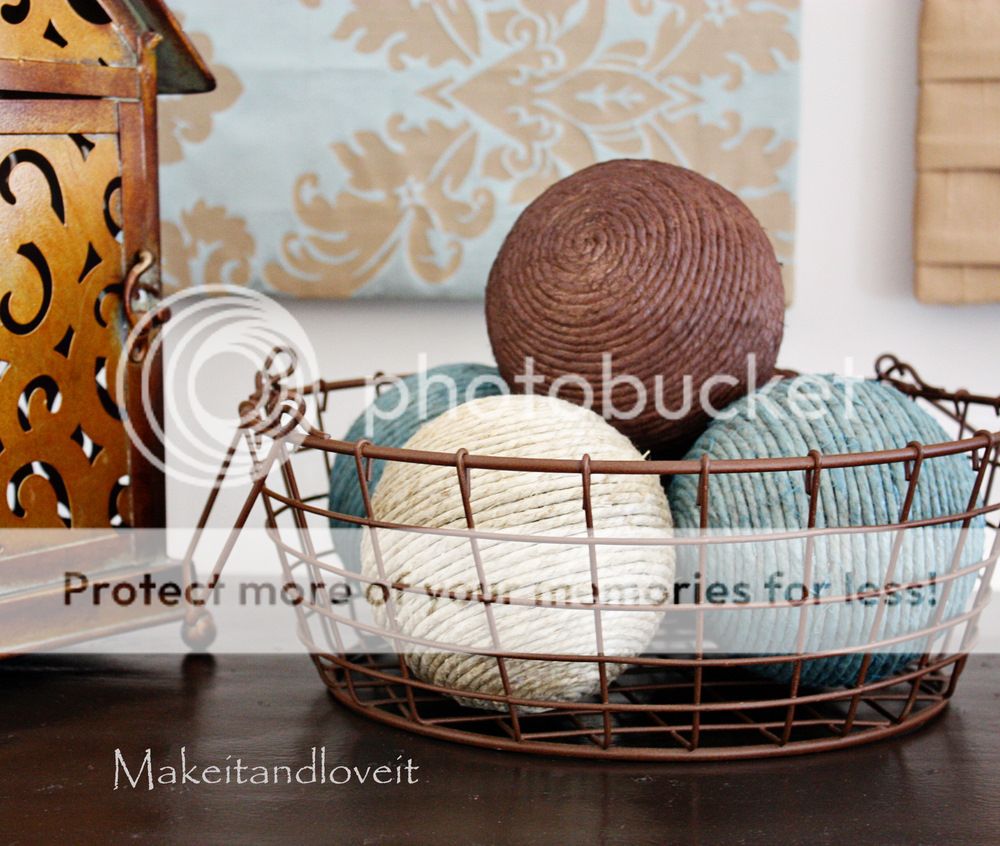
I finally added something to that wire basket on our entertainment center.
It was shouting at me to fill her up.

So I did.

With some hemp ball accents.

Nice and tightly wound with hemp cording.

All snug in one place.

How I did it?

I found some thick hemp cording at Wal-Mart in the craft section……or maybe it was with the jewelry supplies. I also found 4 inch styrofoam balls there as well.

I started by smashing one end of the cord into the styrofoam ball, nice and flush with the surface of the ball………..so that I wouldn’t have a lump after I started winding.

Do you see from the side that it’s pretty flat against the ball?

Anyway, then I used a hot glue gun to start winding the cord around itself.

Then added more glue as I went, and winded more and more cord, flush against the ball. (Place your glue right on the styrofoam ball, up against the edge of the cording.)

I kept winding, only using a little glue at a time (maybe 4 or 5 inch narrow line of glue on the ball, right next to the cording), and then pressed the cord nice and tight to the ball. Sometimes I had to smash what I had, against the ball, just to keep a nice contoured spherical shape…..
(See, how the first end of the cord is almost completely hidden on the right but there is no bump above from it being there?)

I kept winding, and kept it pretty tight. And made sure to keep the rows nice a close together.

And then at the end, I wound up the last little bit without glue to see how much I would need, then snipped off the end.

But make sure to have enough to tuck the little end piece under.

And then glue and wind the last bit down. Smoosh it firmly in place to keep a nice symmetrical shape.

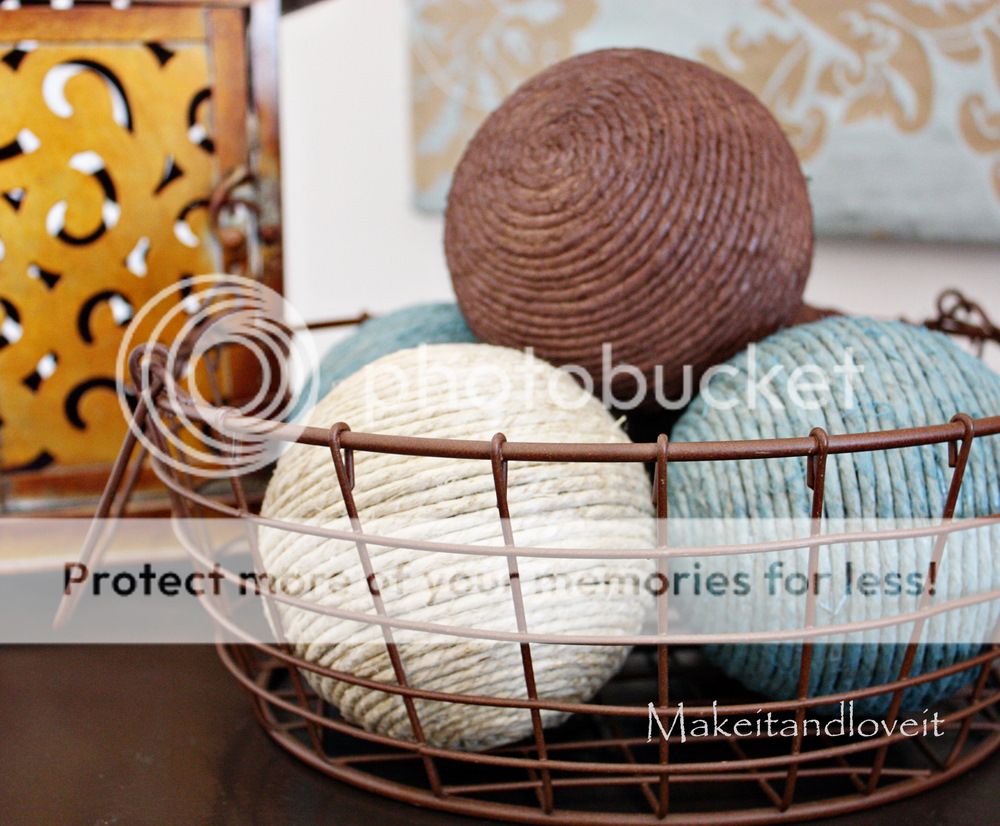
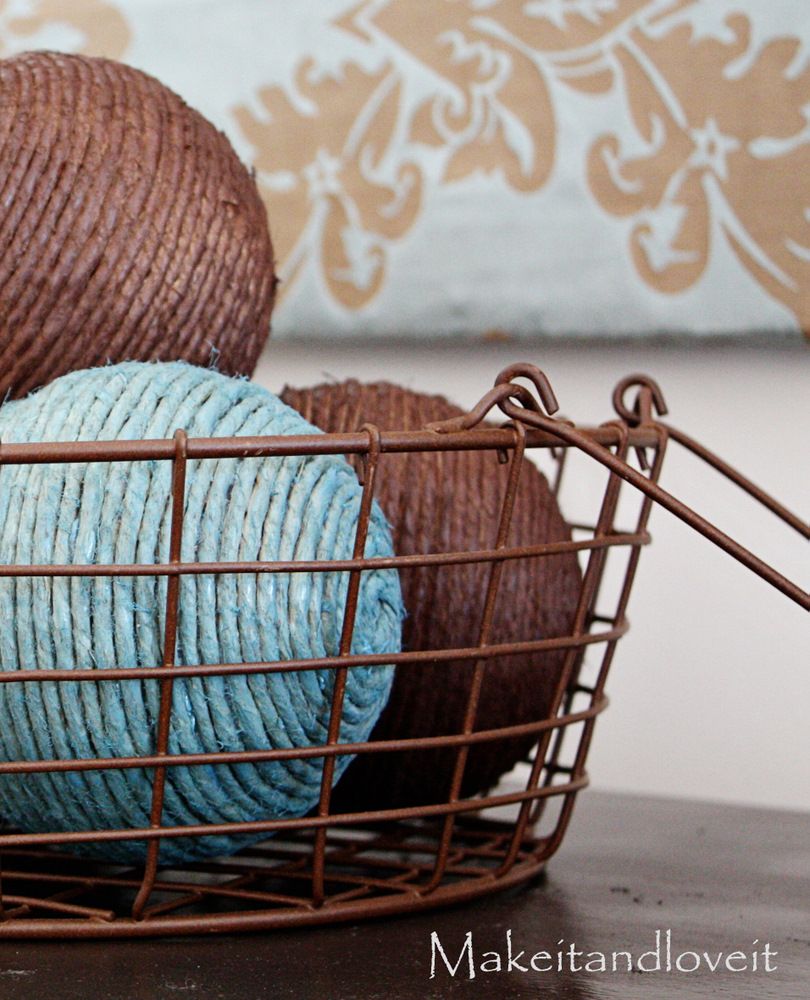
Then I used spray paint to customize the color of cording on some of them. This is a great way to match already existing decor.

And left one plain.

Then tossed them all into that wire basket up on my entertainment center. Now my eye isn’t always drawn to that empty basket.

Ahhhh…….

Share43
Pin7K
Tweet
Email
7K Shares

Related Posts

  • Decorate My Home Series

    Click on any of the images below........and you will be directed to the full tutorial.(Tutorials are listed from the most current, down to the very…

  • Decorate My Home, Part 12: Decorate with Plates

      I had a great idea to put plates on my wall......to finish off our bedroom. So I bought three of them. In a nice…

  • Decorate My Home, Part 11: Fireplace Mantel

            Sometimes it can seem overwhelming to decorate a mantel. It's such a big space. However, it's an easy thing to alter.....and…

  • Decorate My Home, Part 16 - Bathroom Decor

    . Remember the curtains I just made? That bathroom needed more to brighten it up. Those walls were painfully bare. And I was really diggin'…

Filed Under: Home Decor, Miscellaneous, No Sew

« Girl’s Knit Layered Skirt
Sewing Tips: Gathering and Sewing With Knits »

House of Ideas

Check out Ashley’s featured Disney Costume tutorials, baby costumes, DIY halloween crafts.

Comments

  1. Carol says

    March 8, 2010 at 4:38 pm

    Oh how awesome. I have bought various decorative balls for a bowl in our den. They have all, at some point or another, been picked up and dropped and smashed against the floor! Wouldn't hurt so much if I had made them myself so inexpensively! Thanks for a great tutorial!

  2. Serene is my name, not my life! says

    March 8, 2010 at 4:40 pm

    Oh I love this! I know exactly where to put them! Thanks!!

  3. Liz says

    March 8, 2010 at 4:41 pm

    Those are awesome! Thanks for the tutorial!! I love coming here and seeing what sort of project you've done. Great work!

    Liz
    Loving This Mom Stuff

  4. Flutterby says

    March 8, 2010 at 4:42 pm

    The colors you've chosen are beautiful! What is the blue color of spray paint you used?

  5. Leanne says

    March 8, 2010 at 4:47 pm

    They look great. I'm going to have to try these. I love the idea of spray painting them.

  6. Amber says

    March 8, 2010 at 4:47 pm

    Ok, I might be a little slow but I'm wondering when you were winding and glueing were you glueing to the styrofoam or to the hemp? Does that make sense? Or were you glueing to both?

  7. brandy says

    March 8, 2010 at 4:47 pm

    Once again a perfect and simple craft! Thanks! I saw on Living with Lindsay, directions for dying twine. Spray painting it for this project is SO MUCH easier! I have some black wire baskets above my refrigerator that NEED some of these balls!

  8. Lynn from For Love or Funny says

    March 8, 2010 at 4:52 pm

    I always feel happy when I read your posts! Thanks for inspiring me!!

  9. Angie @ The Country Chic Cottage says

    March 8, 2010 at 4:53 pm

    I love those!!! Great job!

  10. Ashley says

    March 8, 2010 at 4:58 pm

    Hey, Amber, I adjusted the directions to explain that a little better…..but you place a line of glue right on the ball, next to the cording. It will kind of ooze a little bit and will squish in between each line of cording as well. Just give it a try….and you'll see how that works. :)

  11. Mary Beth says

    March 8, 2010 at 5:15 pm

    I adore these balls! I have some hemp that is smaller in cording, I will see if I can do something similar! I am not using it for anything else! Awesome idea. Thank you for the inspiration!

  12. Ty and Whitty says

    March 8, 2010 at 5:18 pm

    I love this idea thank you so much for sharing I can't wait to try it

  13. Brianne says

    March 8, 2010 at 5:24 pm

    Thanks! I have been wanting some decorative balls for a glass hurricane I have on my dining room table but the ones in the store are so expensive. I love these ones and that you can paint them to match! I hope to make some soon!

  14. Ashley says

    March 8, 2010 at 5:32 pm

    Oh, and sorry flutterby, the blue is Bahama Sea by Krylon. Hope that helps!

    • Meliessa says

      March 3, 2013 at 3:31 pm

      Thanks for the name of the blue color. Do you remember the names of the other two? I’m just so in love with how the three look together. This is exactly the color scheme I want for my house! Thanks!!!

  15. Anissa says

    March 8, 2010 at 5:43 pm

    What a perfect idea. I was IMing with my sister about it and we thought you could even add embellishments to the balls to spice it up even more. Either to the outside of the finished ball or smashed into the ball as you wind, winding around them as you go. SO CUTE!

  16. ~*~ Stephanie ~*~ says

    March 8, 2010 at 5:46 pm

    Fantastic! I saw these somewhere else recently done in greens and oranges… the colors you have done are the colors I am planning for the living room… NOW I am definitely going to make the balls after seeing them in the same colors!

  17. Nori says

    March 8, 2010 at 5:56 pm

    those look beautiful! i love how you painted them. thanks for sharing the great tutorial!

  18. Angie says

    March 8, 2010 at 5:59 pm

    So pretty! I have an entire roll of hemp. I think I feel a project coming on….

  19. Anna, czyli Krulik says

    March 8, 2010 at 6:00 pm

    Great! I love them!

  20. Tif says

    March 8, 2010 at 6:05 pm

    These are great! I have an empty metal basket that is just waiting for these!

  21. Jeanette says

    March 8, 2010 at 6:08 pm

    Your creativity is AMAZING! Thanks for posting so I can copy:)

  22. Jessica says

    March 8, 2010 at 6:16 pm

    I love these! So easy and very fun. I have a flower basket that these would be perfect in. :)

    justenoughstyle.blogpspot.com

  23. Cassie says

    March 8, 2010 at 7:20 pm

    So cute….these balls are so expensive at the store. I wish I didn't have so many projects to do right now. I am going to remember this for later!
    Thanks for sharing.

  24. the thrifty ba says

    March 8, 2010 at 7:23 pm

    i amde some of these for christmas and you have took took at the photo of my back yard…http://baandtheboys.blogspot.com/2009/12/more-photos-of-my-balls.html

  25. The Neglected Nest says

    March 8, 2010 at 7:24 pm

    I've been looking for an easy project to fill a naked basket of mine. I think this is the winner!

  26. MelissaD says

    March 8, 2010 at 7:36 pm

    What a neat idea!!!

  27. Laura says

    March 8, 2010 at 8:08 pm

    LOVE this idea! I am going to make some this week for sure! Thank you!!

  28. Kris and Megan Wright says

    March 8, 2010 at 8:26 pm

    wow looks like something even i could do! love your blog!!

  29. The Jorgensen's says

    March 8, 2010 at 9:26 pm

    Oh Ashley! It was like you read my mind. This is exactly the project I have been needing. I have a beautiful silver bowl in my living room that needs something in it and these are PERFECT!!!! Thanks a ton!

  30. lajamison says

    March 8, 2010 at 9:49 pm

    Amazing project idea!

  31. Meet Virginia says

    March 8, 2010 at 9:51 pm

    To to to to cute! I just love them, thanks for the great tutorial!

    ~Morgan

    http://meetvirginiaandroo.blogspot.com/
    http://www.etsy.com/shop/MeetVirginiaShop

  32. Jessica says

    March 8, 2010 at 9:54 pm

    definitely going to have to try this. thanks for sharing!

  33. sandandstarfish says

    March 8, 2010 at 10:21 pm

    This is amazing! Great job and super easy instructions! I think me and the lil 18 month old I have will love putting these together. Mine with glue and hers with… I'm sure she'll just want to play with the balls! Thanks!

  34. Annette says

    March 8, 2010 at 10:40 pm

    What a lovely idea!!!

  35. jodi says

    March 8, 2010 at 10:43 pm

    I really like this. Maybe I'll even get around to doing it too. ;)

  36. Devin and Andrea Hatch says

    March 8, 2010 at 11:02 pm

    Those are so cute! I think I'll have to give those a try. Thanks for the tutorials!

  37. Andrea and Casey says

    March 8, 2010 at 11:30 pm

    I made some just like these and love them! They really are so easy to make. For one of the balls, I braided the twine first and I love the look- too bad it took forever. haha

  38. The Short Mom says

    March 8, 2010 at 11:39 pm

    What a great idea and they look great! its amazing what spray paint can do

  39. Re says

    March 8, 2010 at 11:46 pm

    It looks really nice!
    Thanks!
    http://craftecoisinhas.blogspot.com

  40. jessica says

    March 9, 2010 at 12:26 am

    oh so nice. looks great nesting in the basket.

  41. My Everythings says

    March 9, 2010 at 1:18 am

    genius. love them.

  42. Hepworths says

    March 9, 2010 at 1:34 am

    Those are great! I was actually going to make one today (before I even saw your post!) but those balls were $5 each at Michael's. Are they cheaper at Walmart? Great idea to spray paint the hemp. I would have never thought of that.

    Allison @ http://www.houseofhepworths.com/

  43. Ashley says

    March 9, 2010 at 2:25 am

    Hepworths…..oh yes, walmart was much cheaper. I found the styrofoam balls there for $2-$3 for a package of 2. I saw them at Michaels too but couldn't bring myself to pay that much.

  44. Lanie Ree says

    March 9, 2010 at 5:11 am

    These are SO pretty! I was gonna comment on how darn expensive styrofoam balls are, but I just saw that a few people have beat me to it. I guess I'm heading to wal mart :)

  45. Helen190390 says

    March 9, 2010 at 1:10 pm

    whenever i saw those balls in craft shops, i always wondered what people used them for! now i know! they look so cute, wish i had the patience to do that many of them! they look great.

    Hollie-in-bloom.blogspot.com

  46. sneezerville says

    March 9, 2010 at 2:58 pm

    that's such a cool idea.

  47. Jana and Brett says

    March 9, 2010 at 3:26 pm

    These are amazing. We are looking to move and I'm a little nervous with all the empty spaces I will have, cause we have lived in an apartment for 6 years. :0) This will help! I love your creative style.
    My friend has a blog I think you will enjoy….
    http://mycreativestirrings.blogspot.com/
    check her out!

  48. eakuban says

    March 9, 2010 at 5:28 pm

    Love these balls! I would have never thought to spray paint them! God has given you such a gift fro being crafty (and thrifty too) !! I love that you enjoy sharing all your secrets! Thanks!

  49. Smith Family says

    March 9, 2010 at 9:28 pm

    How C.U.T.E!!!! Thanks for another cute project to add to my list! Must do this one soon!

  50. Jen Caputo says

    March 9, 2010 at 9:40 pm

    awesome! awesome! awesome! I am in love with these :)

  51. Midnight Rambler says

    March 10, 2010 at 12:39 am

    Very nice! I have done this before with styrofoam eggs and small pearls. I fashioned ribbon hangers for them and hung them on my Christmas tree, which at that time was Victorian themed. They were really pretty, but boy oh boy does that hot glue hurt when it connects with your fingers when pushing those little pearl strands into it!

  52. Kris {The Freestyle Mom} says

    March 10, 2010 at 6:06 am

    I've always been a little lerry of the decorative ball idea. But these, these I can get behind. Awesome!

  53. Sarah says

    March 10, 2010 at 10:25 pm

    I need to see pictures of your whole house!!! I love this! it makes me want to redo everything in my house!

  54. Kenton and Brittney Anderson says

    March 11, 2010 at 11:01 pm

    Adorable! I was wondering, how much hemp is required for each ball? I just want to know how much to buy!

  55. Paige says

    March 12, 2010 at 12:52 am

    I have an empty basket that I was going to do felted balls for…but these are dang cute too! I might have to finish it with clearcoat–I have kids that like to pick at things if they can….

  56. Ashley says

    March 12, 2010 at 1:37 am

    I bought a big ball of it, and the label said 64.5 yards. I used about 3/4 of it for the 5 balls. Hope that helps!
    Ashley

  57. Josh and Juli says

    March 12, 2010 at 9:54 pm

    I love this idea! And seriously, the colors are the exact colors of my living room – how'd you know? Thanks for the idea!

  58. Amy says

    March 27, 2010 at 4:22 am

    So gorgeous! I'm linking to my blog, I love it! :) You've got fantastic ideas, I can never wait to see what's next! Happy weekend! :)
    Amy
    emiliebean.blogspot.com

  59. Cami says

    April 3, 2010 at 4:58 am

    Let me join the others in saying how much I love this idea! If you are interested, I posted my take on them over at creatingbycami.blogspot.com.
    Thanks for all the inspiration!
    Cami

  60. Silent Princess says

    April 14, 2010 at 10:24 am

    i just went through all of ur home decorating posts and its so amazing!!! i mean u come up with such great ideas and everything look so beautiful and nice… luv ur blog ashley

  61. gaia in love says

    August 27, 2010 at 2:05 pm

    I really like it! I used this idea in my post and linked back to your home page and your tutorial.

    http://gaiainlove.blogspot.com/2010/08/dekoratif-toplar.html

  62. Anonymous says

    September 4, 2010 at 9:46 pm

    Want to try these hemp balls, they are so clever and so are you my dear lady

  63. Michelle says

    February 8, 2011 at 6:20 pm

    Ashley, it's been so long since I've come to your site but I'm glad I came and looked! So far I have made one of these and it turned out perfect! It's time consuming but very easy! Thank you for the idea!

  64. Caitlyn says

    September 7, 2011 at 11:34 am

    OMG!! So glad I found this link! I have been wondering how to make these! Thanks so much for the tutorial and when I make these I will be sure to credit you and link to your page! <3

  65. Sarah says

    November 20, 2011 at 5:01 pm

    Oh these are so cool! I love that you spray painted them to go with your decor. So pretty & so easy, love it!

  66. sarah indy says

    May 22, 2012 at 10:47 am

    Wow! These are great…I was going to buy some but couldn’t find the right colors – then I was going to make some but couldn’t find the colored cord. Thanks so much – your post saved the day :)

Subscribe

Sponsors

House of Ideas

Find more great DIY craft ideas and project tutorials as well as DIY Costumes on House of Ideas.

Copyright © 2019 · Privacy & Terms